

Acesonic PK-1290 User Manual
®
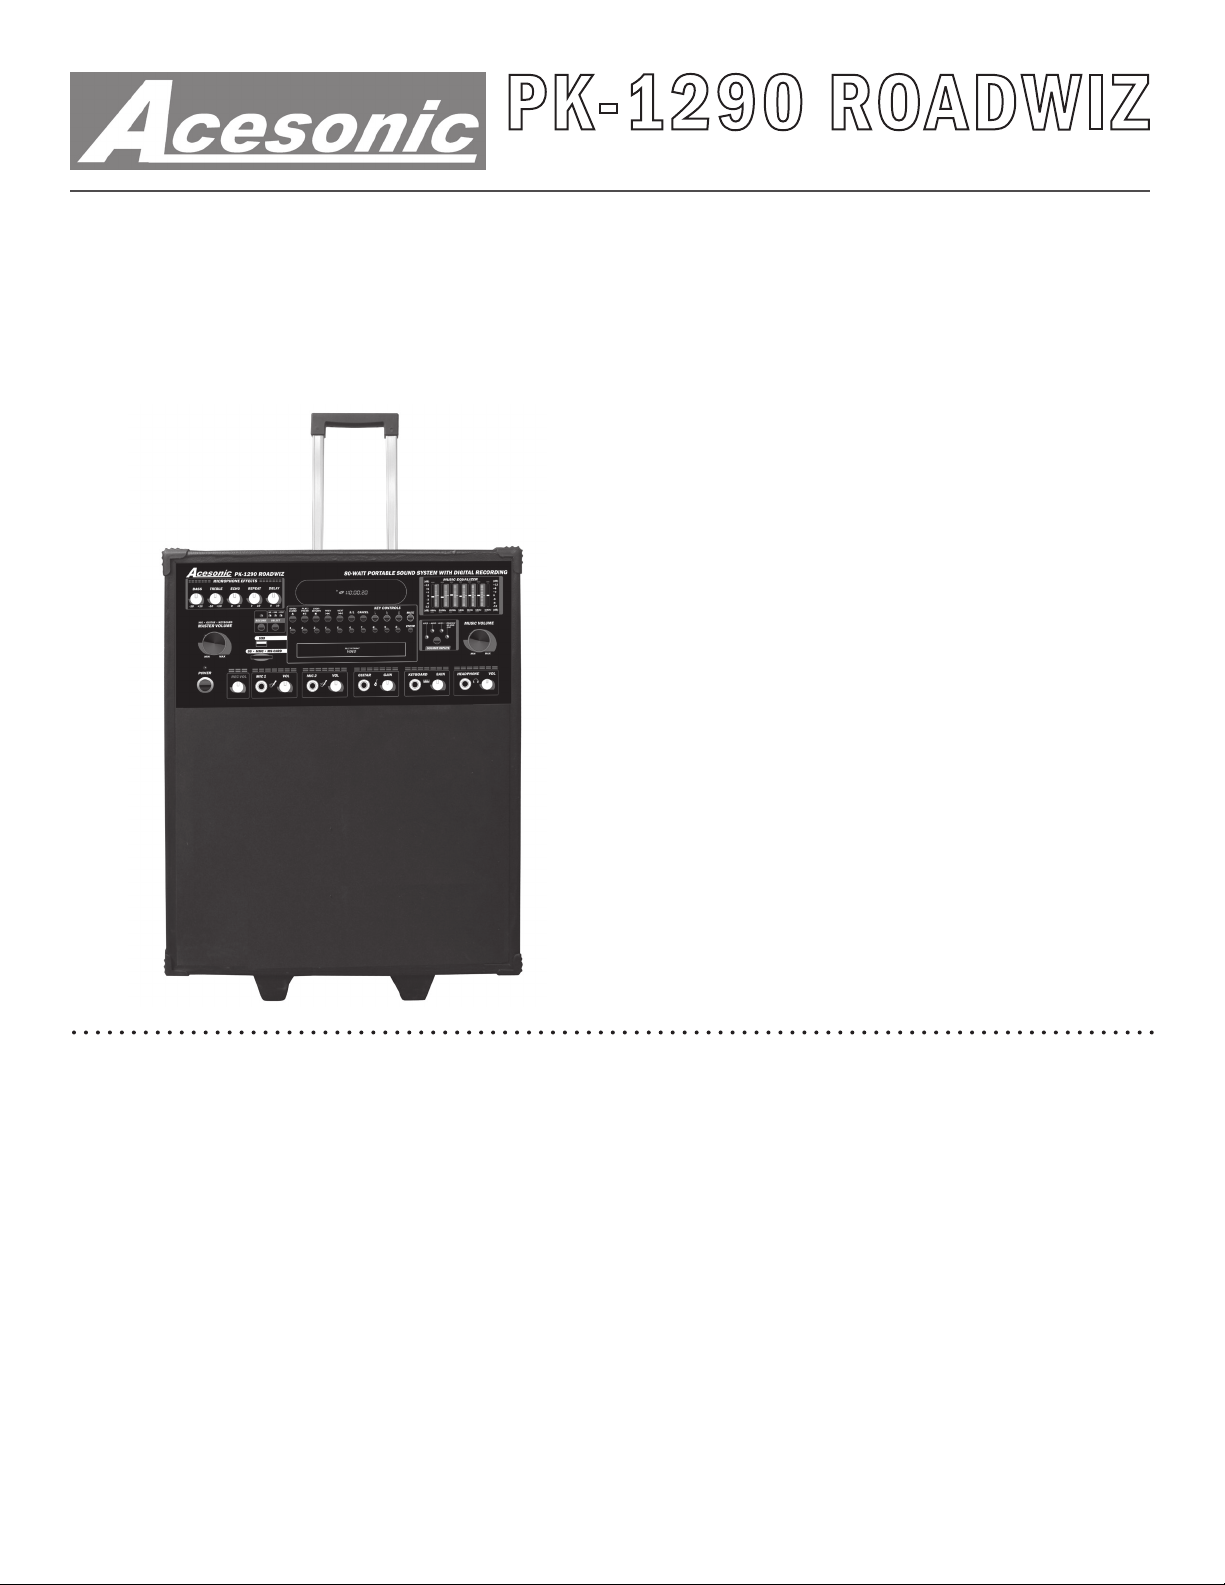
PK-1290 ROADWIZ
80-Watt Portable Sound System with Digital Recording
User Manual
NOTE: To ensure this system works safely and to its fullest potential, please read the User Manual carefully
before use, and keep it handy for future reference. See important Safety Information on pages 19-20.
ank you for purchasing Acesonic’s PK-1290 Roadwiz
80-Watt Portable Sound System with Digital Recording. Acesonic takes pride in providing its customers
with only the most advanced and highest quality products on the market. With proper care and use you will
get many years of satisfying use from your Acesonic
product.
Be sure to keep original packaging in case re-shipping
is required for returns or repairs.
Care and cleaning: Use a slightly damp cloth to clean
the front panel and other surfaces of the Roadwiz.
Do not use the device in areas that are wet or prone
to dampness. Always allow enough room below and
around the device to provide sucient air ow for cooling when it is being used.
Table of Contents
First ings First .................................................1
Important Information Before You Start .............2
Compatible Video Formats .................................3
Front Panel Operations .......................................4
Remote Control Functions ..................................6
Player Connections ..............................................7
Basic Operation: Playback ...................................9
Playback from USB and SD Cards......................9
Basic Operation: Karaoke ..................................10
First Things First
Included Accessories
Please check that you have all of the following accessories supplied to you. If anything is missing, please
> > continued on page 2 > >
Basic Operation: Language Setup .....................11
Basic Operation: Recording MP3+Gs ...............13
Basic Operation: MP3 Recording .....................14
Advanced Playback Operations .........................15
Other Advanced Operations .............................16
Troubleshooting Chart 1 ...................................17
Troubleshooting Chart 2 ...................................18
Technical Specications ....................................18
Safety, Warnings and Precautions ......................19
Basic Operation: System/TV Setup ..................10
Company Contact Information .........................20
1

FEATURES
Your Acesonic PK-1290 Roadwiz 80-Watt Portable Sound System with Digital Recording has everything you need
to make music, convert (“rip”) CD+G les to the MP3+G format and record digitally. e built-in amplier allows
you to connect keyboards, guitars and microphones to play through the 80-watt speaker. With numerous front- and
back-panel inputs, including three stereo RCA-jack AUX IN connections, you can connect any standard audio
equipment. If you are familiar with audio equipment, use the Quick Start Guide for setup.
> > continued from page 1 > >
contact your dealer immediately.
• RCA Composite (Yellow/Red/White) Audio/
Video Cable (1)
• Power Cable (1)
• Remote Control (1)
• User Manual (1)
• Quick Start Guide (1)
• Warranty Card (1)
About is Manual
e display window information and On Screen Display (OSD) items are all in UPPER CASE letters.
Precautions
• Select the correct voltage (see Figure C, page 9).
• Power Cord: When you are away on travel or
won’t use the Roadwiz for an extended period of
time, unplug the unit from the wall outlet.
• When unplugging the player from the wall outlet,
always pull the plug, not the cord.
• Do not handle the power cord with wet hands.
• Do not place the unit in a moist environment or
in area where there might be an excessive amount
of dust build up (e.g. near a fan).
• If water or any liquid should get into the unit,
turn o the power and unplug the unit from the
wall outlet immediately. Consult your dealer or an
authorized repair station. Using the unit in this
state may lead to re or electrical shock.
• Avoid: High temperatures, moisture, water, dust.
• Do not expose the front panel/player component
to direct sunlight or place near heating devices.
Notes on Usage
• Select a place where the unit will be level, dry, and
not too cold or hot.
• Do not use unit on its side or where subject to
vibrations (e.g., too close to other speakers).
• Leave sucient distance between the TV and unit.
• Do not leave heavy or liquid-lled objects on top
of the Roadwiz.
Prevent Unit Malfunction
• No parts in this unit are user-serviceable. If the
unit no longer functions, unplug it from the wall
outlet and contact your dealer for service options.
• Never block the various vents on the unit. ese
are used to circulate air and keep the temperature
of the device down. Blocking the vents may result
in damage to the Roadwiz.
Important Information Before You Start
Compatible Media and File Formats
is unit supports the following disc and le formats:
• DVD, AVI, Video CD, Video CD 2.0
• CD+Graphics, Audio CD, HDCD
• MP3, MP3+G, JPEG, MPEG
Above media is playable on the following discs:
• DVD±R, DVD±RW, DVD±R DL, DVD±RW
DL, CD-R/RW
Card reader compatible formats:
• SD, Mini SD, MMC (FAT32 format only).
Important Reminders
Any disc that is not listed above will cause the player
to display NO DISC in the Display Window. Future
media and disc formats may be supported with rmware upgrades, when available.
Encoding methods for some media formats may aect
the playback (unable to fast forward, long load time,
etc.) so ensure that the encoding process conforms to
the standards for that particular format.
Dirty, scratched, warped and defective discs may cause
a considerable time delay during the loading and
2

reading of data. In extreme cases, such conditions may
render the disc completely unreadable by the player.
Video Signal Formats
is player accommodates both NTSC and PAL systems, with automatic detection and override settings.
may render the disc unreadable.
• Store discs in a clean and dry environment. Storing CDs vertically will also help prevent warping.
• After use, insert CD into jacket or case to minimize wear and tear. Do not stack CDs on top of
one another.
Digital Audio Formats
is player accommodates stereo, analog and several
high-resolution digital audio signals.
Note: Depending on AUDIO SETUP > SPDIF settings, digital audio signals may not be output as they
are recorded on the disc.
Notes Regarding Discs
With some DVDs, the player starts the playback
automatically after inserting the disc, whether the
PLAYBACK CONTROL is on or o.
e image may be poor, noisy or grainy due to defects
on the actual disc, and some functions as described in
this manual may not be possible on all discs.
Maintenance of Discs
Handling
• When handling discs, always hold them from
their edges and/or by the circle in the center.
• NEVER write on the any surface of a disc as it
• Do not bend or press discs. Do not expose discs to
direct sunlight or any heat source.
Cleaning
• Wipe the discs from time to time using a soft
cloth. Always wipe from the center toward the
edges, not in circular motions.
• Do not clean with any cleaning solution unless it
is specically made for disc cleaning.
• CDs revolve at very high speeds inside of players.
Never attempt to play cracked or warped CDs,
since doing so may cause the disc to shatter or the
player to malfunction.
Power Cord
Handle the power cord only by its plug, and do not
unplug it by yanking. Touching the cord with wet
hands may lead to an electric shock or a short circuit.
If the cord becomes damaged or its wires become exposed, replace it as soon as possible in order to prevent
an electric re or shock. Check the power cord every
few months to ensure it is functioning properly.
Compatible Video Formats
USB/SD Card Disc
Type Supported? Supported?
DivX 4.12 (AVI) Yes Yes
DivX 5.02 (AVI) Yes Yes
DivX 5.20 (AVI) Yes Yes
DivX 5.21 (AVI) Yes Yes
XVID (AVI) Yes Yes
DivX 6.0 (AVI) Yes Yes
DivX 5.11 (AVI) Yes Yes
DivX 3.11 (AVI) No No
DivX 7.0 No No
MP4 Yes Yes
MPEG-1 Yes Yes
MPEG-2 Yes Yes
VOB No Yes
DAT Yes Yes
CD+G No Yes
MP3G Yes Yes
3
5
1
2
3
4
5
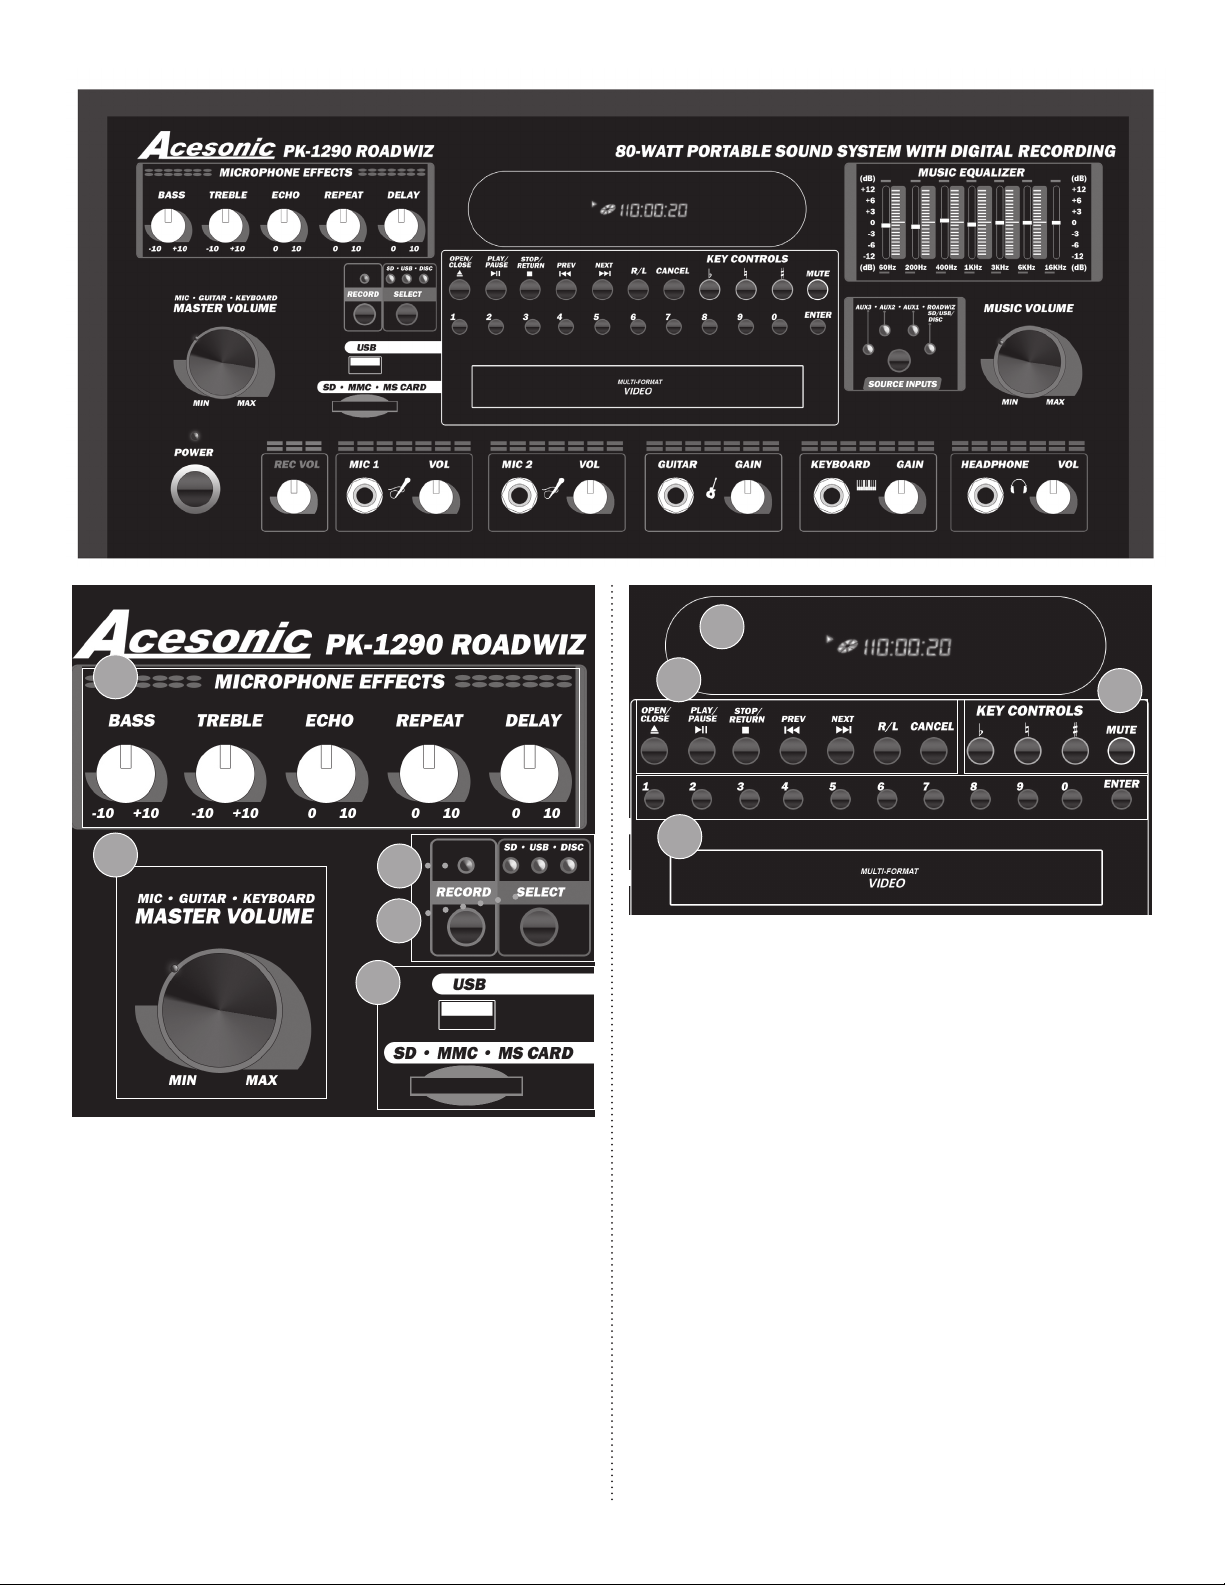
Front Panel Functions & Operations
Master Volume, Microphone Eects, Recording &
USB/Card Section (above)
1. MICROPHONE EFFECTS: ese controls allow
you to set tone, echo, repeat and delay eects for the
microphone inputs (both front panel and rear panel
inputs are aected).
2. MASTER VOLUME: Controls the volume of microphones, plus the front panels inputs where guitars
and keyboards can be connected.
3. RECORD: e RECORD button engages record-
6
7
8
ing to the destination selected in Item #4 below.
4. Selects USB, SD/MMC card or recordable disc in
the tray as recording destination. In Roadwiz mode,
switches among USB, disc and memory card inputs.
5. USB and SD/MMC/MS SLOTS: Play or record
MP3+G songs. We recommend high speed (class 4
or higher) SDHC (SecureDigital High Capacity)
cards for smooth recording and playback. With USB
ash drives, external hard drives, SD/MMC cards
and Sony MemorySticks, you can play MP3, VCD
and MP3+G les, as well as record in MP3 format.
Note: USB or SD/MMC/MS media must be FAT32
format.
Player Control Section (above)
5. DISPLAY WINDOW: Displays player status such
as time, disc format and song number. If no disc (or
an unsupported one) is in the tray, the display window
will display NO DISC. Detailed information will also
4
be shown on the TV screen if connected.
6. PLAYER CONTROLS: Here are your standard
disc player controls for open, start, stop, pause, etc.
7. KEY & MUTE CONTROLS: Control pitch by
halftones with sharp and at buttons, and return to
the original pitch with the natural symbol. MUTE
button will toggle between mute and normal output.
8. DISC TRAY & TRACK SELECT: Input oneand two-digit numbers and press ENTER. e
OPEN/CLOSE button (
) in Item #2 above
opens and closes disc tray.
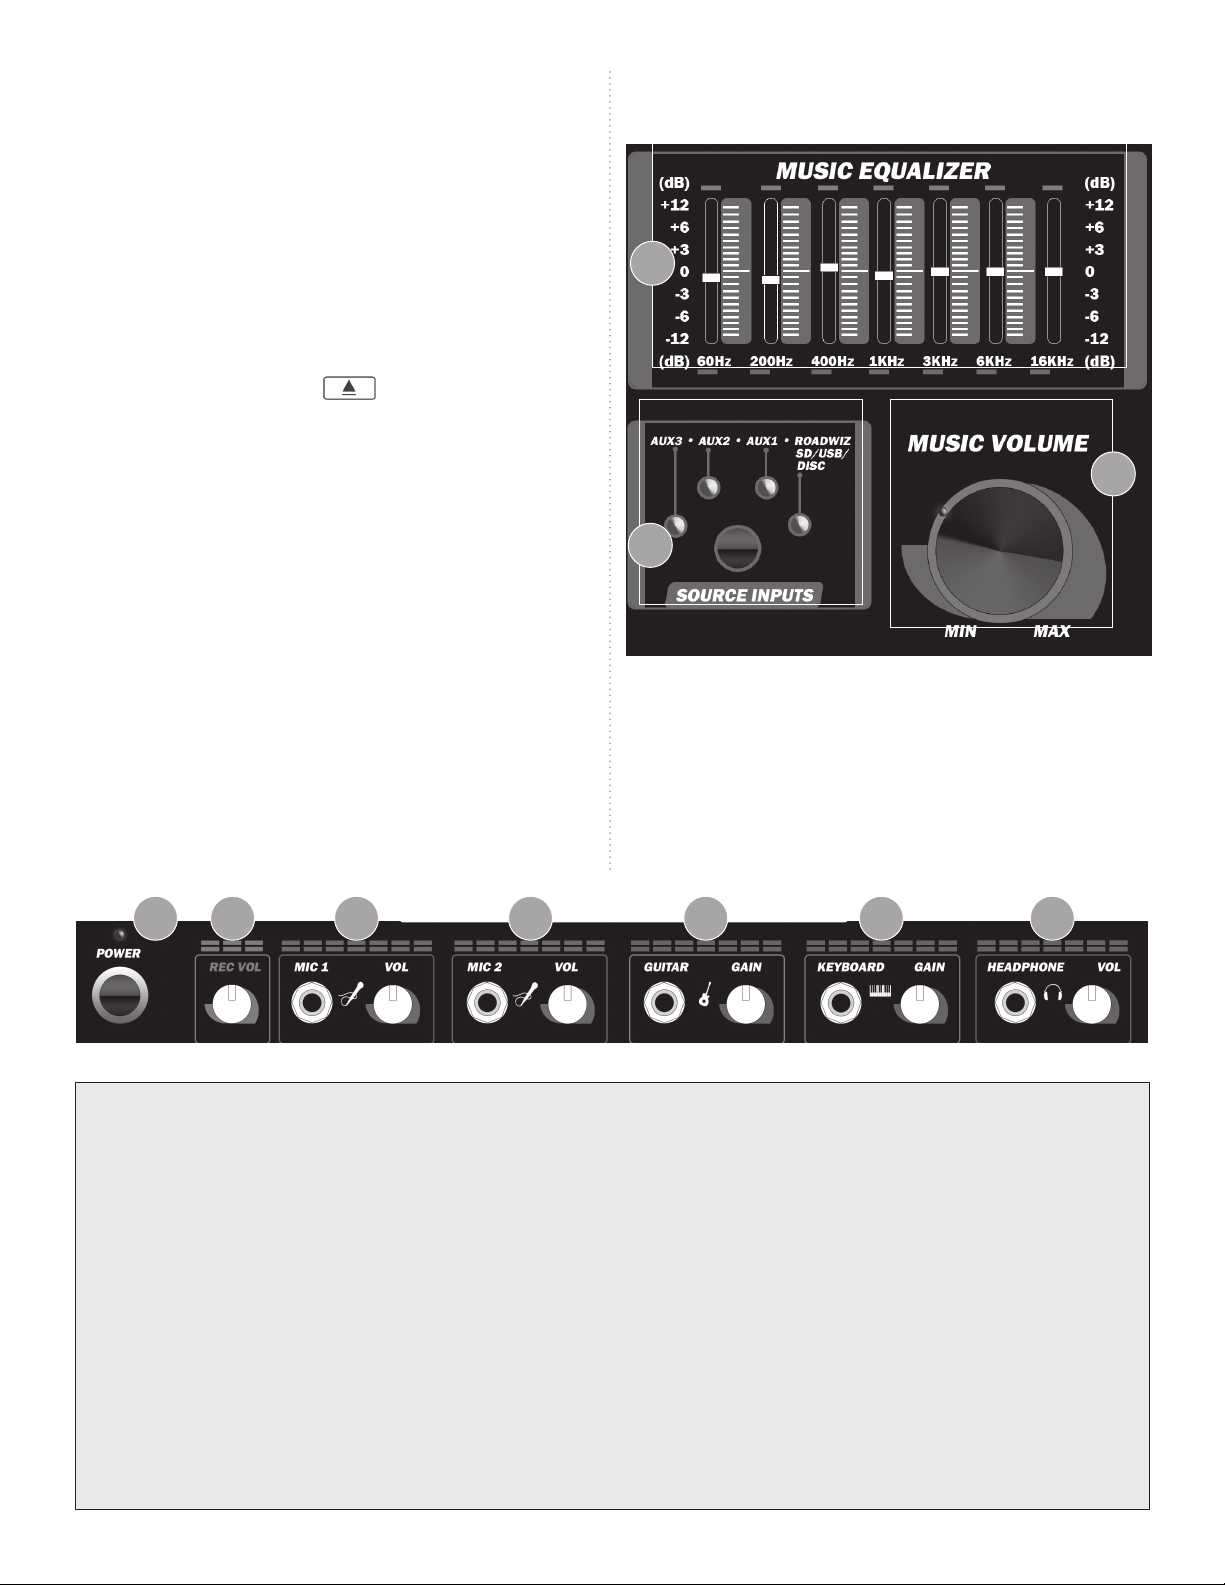
9
Music Equalizer, Source Inputs, Music Volume (right)
9. MUSIC EQUALIZER: Sliding controllers with
center detents for seven bands of EQ to tailor sound.
10. SOURCE INPUTS: Select the source for the
inputs that you wish to hear and/or record.
11. MUSIC VOLUME: Standard knob for manual
volume control in Roadwiz mode, not for inputs.
Power and Inputs Section (below)
12. POWER: Press button for on/o (indicator light
shows system power status).
13. MASTER REC VOLUME: Sets recording level.
12 13 14 15 16 17 18
11
10
14-15. MIC INPUTS: Plus volume control.
16-17. GUITAR AND KEYBOARD INPUTS: Plus
individual gain controls.
18. HEADPHONE JACK: Plus volume control.
You Are Not Alone
Acesonic is unique among audio and high-tech rms for offering Lifetime Tech Support to users of its equipment. We understand that entirely new groups of people are discovering the enjoyment of performing with karaoke equipment, and working with both analog and digital sound for recording, “ripping” discs, mixing different
sound sources and creating their own repertoires (even original music).
There is only so much that can be learned by reading, so we encourage you to explore your Roadwiz while going
through this User Manual (and/or the Quick Start Guide for more experienced users). As long as you are careful
to select the correct voltage on the rear panel (see Figure C at the top of page 9), there is little chance that you
will harm your equipment. Just proceed carefully, always plug appropriate devices in with the correct cables,
keep fresh batteries in the remote and use all functions as they are described in the User Manual and Quick
Start Guide. Do not open the unit or attempt any repairs or modications, as this will void your warranty.
If you need help, that’s what we’re here for. Call Acesonic Technical Support at (626) 820-0645.
5
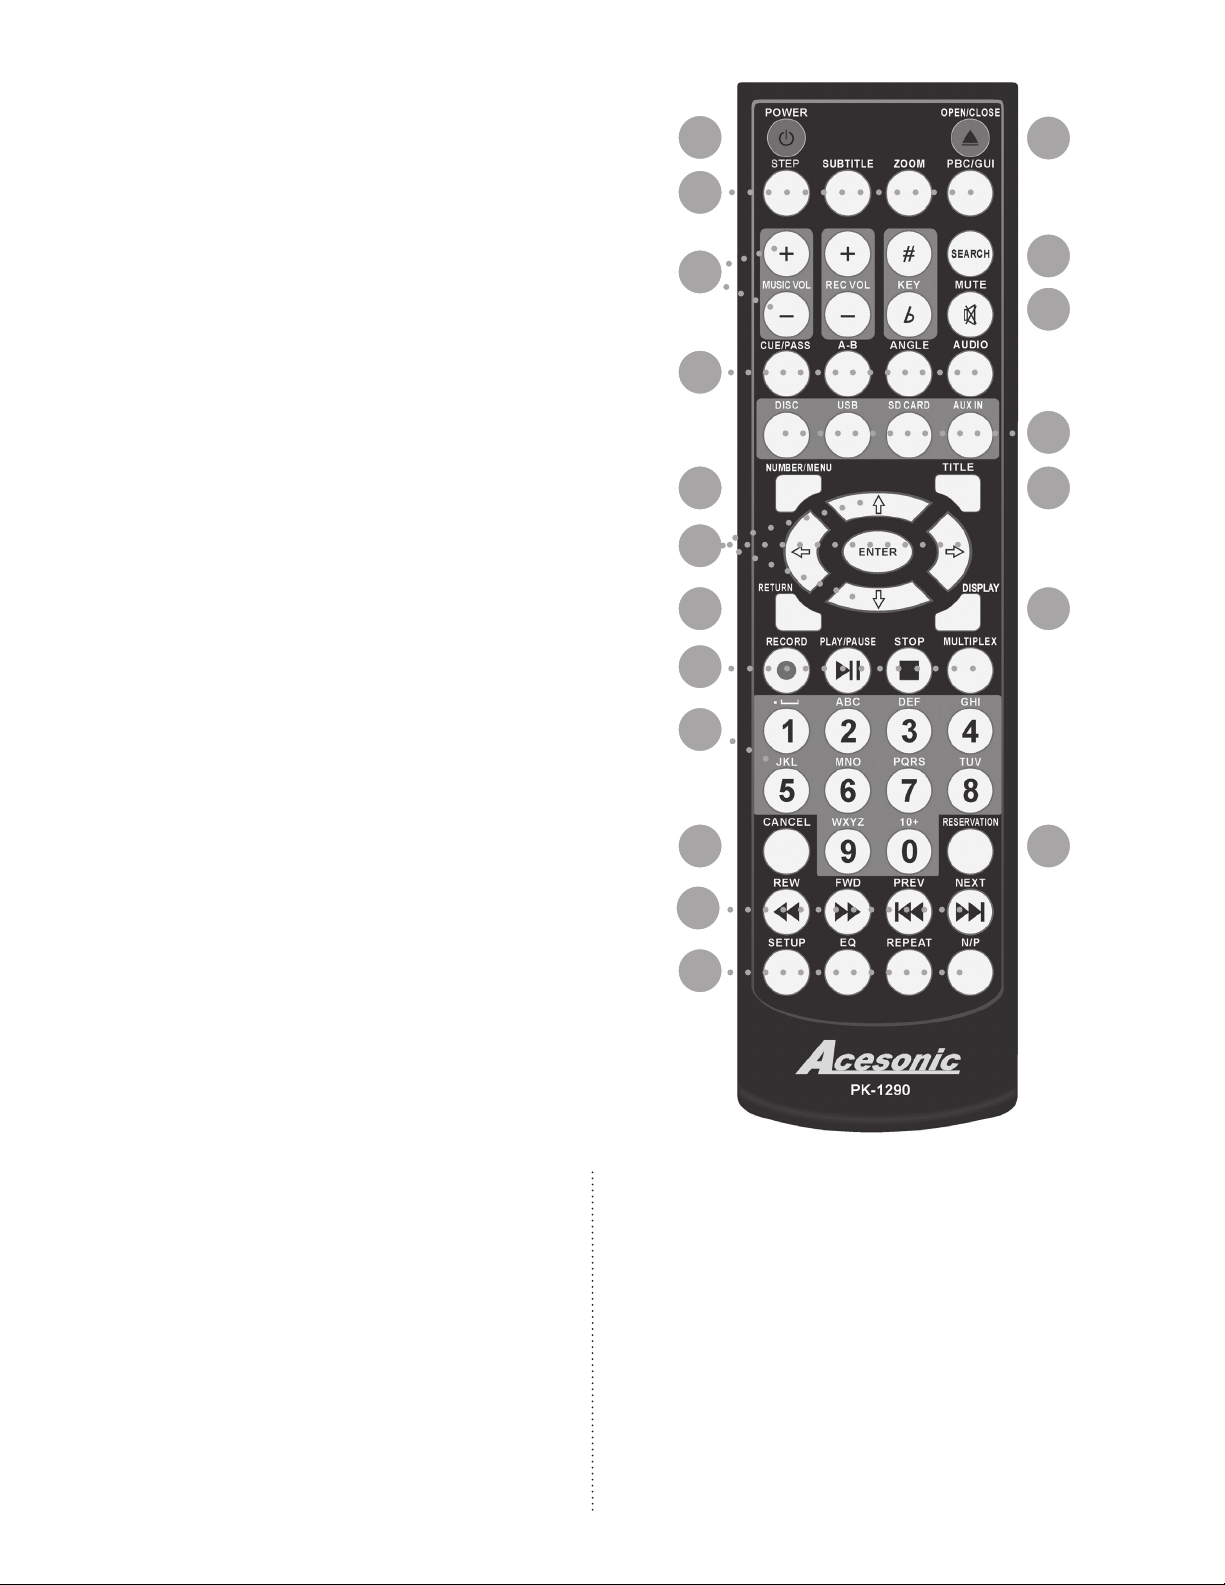
Remote Control Functions
1. POWER BUTTON: Turn the player on or o.
2. OPEN/CLOSE: Opens/closes disc tray.
3. STEP: Plays the video frames step by step. Press
the PLAY button to return to normal playback.
SUBTITLE: If disc supports it, turns titles on/o.
ZOOM: Enlarge a section of video or image currently being viewed.
PBC/GUI: In MP3+G mode, switch between
windows and playback display mode. e PBC
function is only available for Video CD (VCD)
version 2.0 or higher. e function of PBC may
dier with dierent discs. When PBC mode is
on, you can select items in the menu by using the
PREVIOUS/NEXT keys (see Item #18 below).
When PBC mode is o, you cannot select items
in the menu but can use the numeric keys directly
or the PREVIOUS/NEXT buttons.
4. MUSIC VOL: Up/down (+, -) for Music volume.
REC VOL: Same controls for Recording volume.
KEY: Go # or b in halftone steps.
1
3
4
7
11
14
15
2
5
6
8
109
1312
5. SEARCH: Directly enter a time to search a disc,
and the disc starts playing from that point.
6. MUTE: Turn the sound on or o.
7. CUE/PASS: Cue switches the mode between
Karaoke and DVD. In Karaoke mode, player will
be paused after one track has nished playing. In
DVD mode, all tracks will be played continuously.
Karaoke mode = Cue on; DVD mode = Cue o.
Pass: When playing a DVD disc, you can press
PASS to skip the menu and play the audio track
or movie directly.
A-B REPEAT: e A-B REPEAT function lets
you repeat a segment of a track until stopped. To
use: (a) Set starting point A. (b) Set end point B.
After making the settings, the unit plays from A
to B. (c) Press A-B button again until A-B disappears from display.
ANGLE: With DVDs, select multi-angle views.
AUDIO: Select audio soundtrack options when
playing DVD discs
16 17
18
19
9. NUMBER/MENU: Press this key once to return to
the root menu for DVDs. You can search by song
number using number keys in USB/SD mode.
10. TITLE: DVDs have numbers that make it easy to
identify and locate chapters. You can search by using
alphanumeric keys in USB/SD mode.
8. DISC: Selects disc as Music source.
USB: Selects USB-connected device for source.
SD CARD: Selects card slot as source.
AUX IN: Selects rear panel AUX IN sources as
Music source, use button to switch among them.
11. DIRECTION KEYS & ENTER (⬆⬇⬅ ➡): e
arrows let you navigate the menus, ENTER selects
or okays the choice.
12. RETURN: Works with the PCB function to return
6
 Loading...