

Acesonic PK-1248 User Manual

Acesonic PK-1248 Road Master Pro
W K a r a o k e / P A / G u i t a r P o r t a b l e S o u n d S y s t e m
1 2 0
With 7"LCD Touch Screen, Recording Function and Wireless Mic.
USER’S STARTING MANUAL
NOTE:
To ensure this com ponen t will wo rk safe ly and to
its ful lest po tenti al, ple ase rea d this us er ’s manu al
caref ully be fore op erati on and ke ep for fu ture
refer ence.
www.acesonic.com

Acesonic PK-1248
Thank you for purchasing Acesonic's PK-1248 Acesonic takes pride in
providing our customers with only the most advanced and highest
quality karaoke products on the market. Please read trough this USER’S
MANUAL before operation to ensure proper usage, and keep for future
reference. Enjoy!
Table of Contents
Table of Contents 1
Included Accessories 1
Front Panel Functions and Operation 2-5
MP3G Playback/Recording Module Operation 6-9
Microphone & Body Pack 10
General Operation 11
Specifications 12
Manufacturer information 12
Included Accessories
Please check to make sure all accessories are included. If anything
is missing, please contact your dealer immediately.
- 1 Remote Control
- 2 Wireless Microphone Handheld
- 2 Wireless Microphone Receiving Antenna
- 1 AC Power Adapter Cord
- User's Manual/Warranty Card
- USB Cable
- DVD Front Panel Cover
- AA Batteries
About this Manual
For easy reference, names of all functions and/or
components on the hardware and accessories are denoted
by upper-case letters.
1
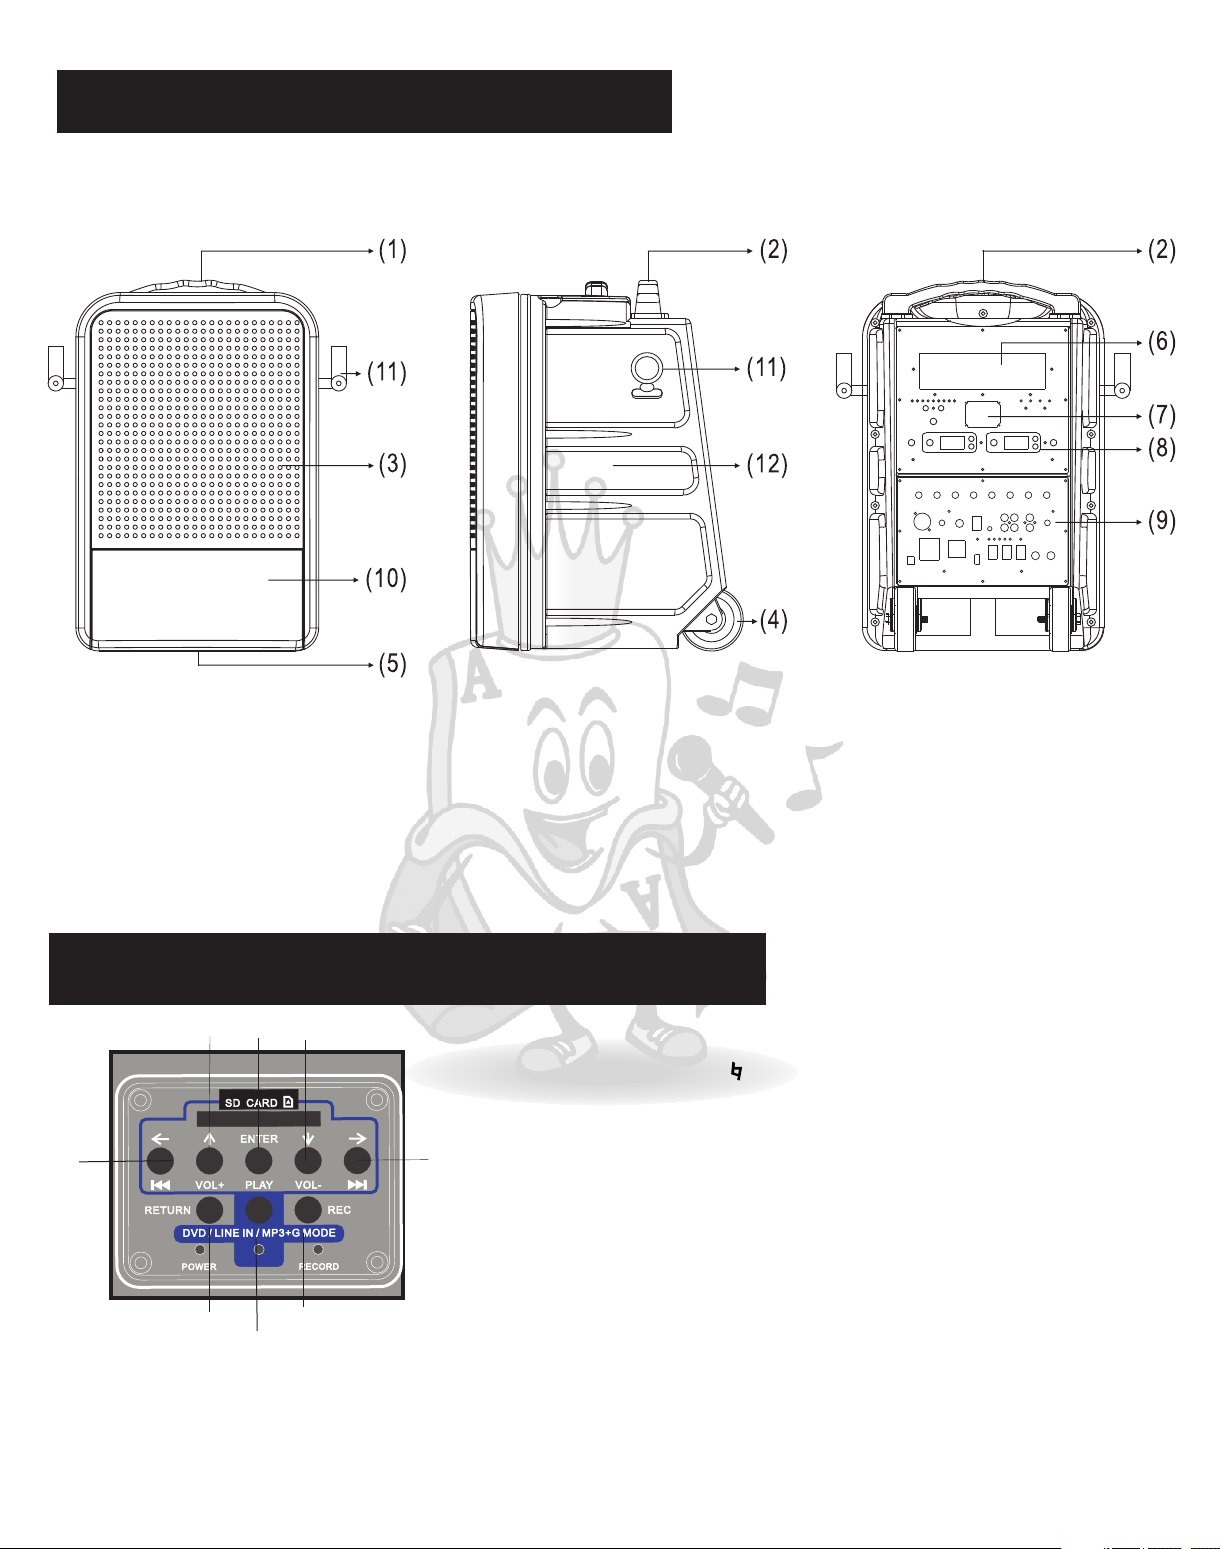
Front /Rear/Side View
Speaker View
(1) Extendible Carry Handle (2) Carry Handle
(3) Speaker Mask (4) Wheels
(5) Speaker Stand Hole (6) 7" LCD Touch Screen & Disc Player
(7) MP3G Playback/Recording Module (8)Wireless Microphone Receivers
(9)Control Panel (10)Batteries Cover
(11)Microphone Holder (12) Speaker Case
Side View
Extendible
Front View
Recording/MP3G Playback Unit
4
3
7
8
6
5
1
1.KEY CONTROL:
1. LOW button (b) - lowers music key by one half-tone.
2. NORMAL button ( ) - resets music to original key.
3. HIGH button (#) - raises music key by one half-tone.
2.ARROW KEY & FAST FORWARD BUTTON- This button is
using in RECORD MODE
2
3.PLAY/PAUSE BUTTON- This button is using in RECORD
MODE
4.ARROW KEY & VOLUME DOWN BUTTON- This button is
using in RECORD MODE
5.RECORDING BUTTON- This button uses to record the
singing and music from selected A/V input. The recording file
will be store on the SD card on the recording module, under
RECORDING folder.
6.RETURN BUTTON- This button is using in RECORD MODE
7.ARROW KEY & VOLUME UP BUTTON- This button is using
in RECORD MODE
8.ARROW KEY & BACK FORWARD BUTTON- This button is
using in RECORD MODE
2
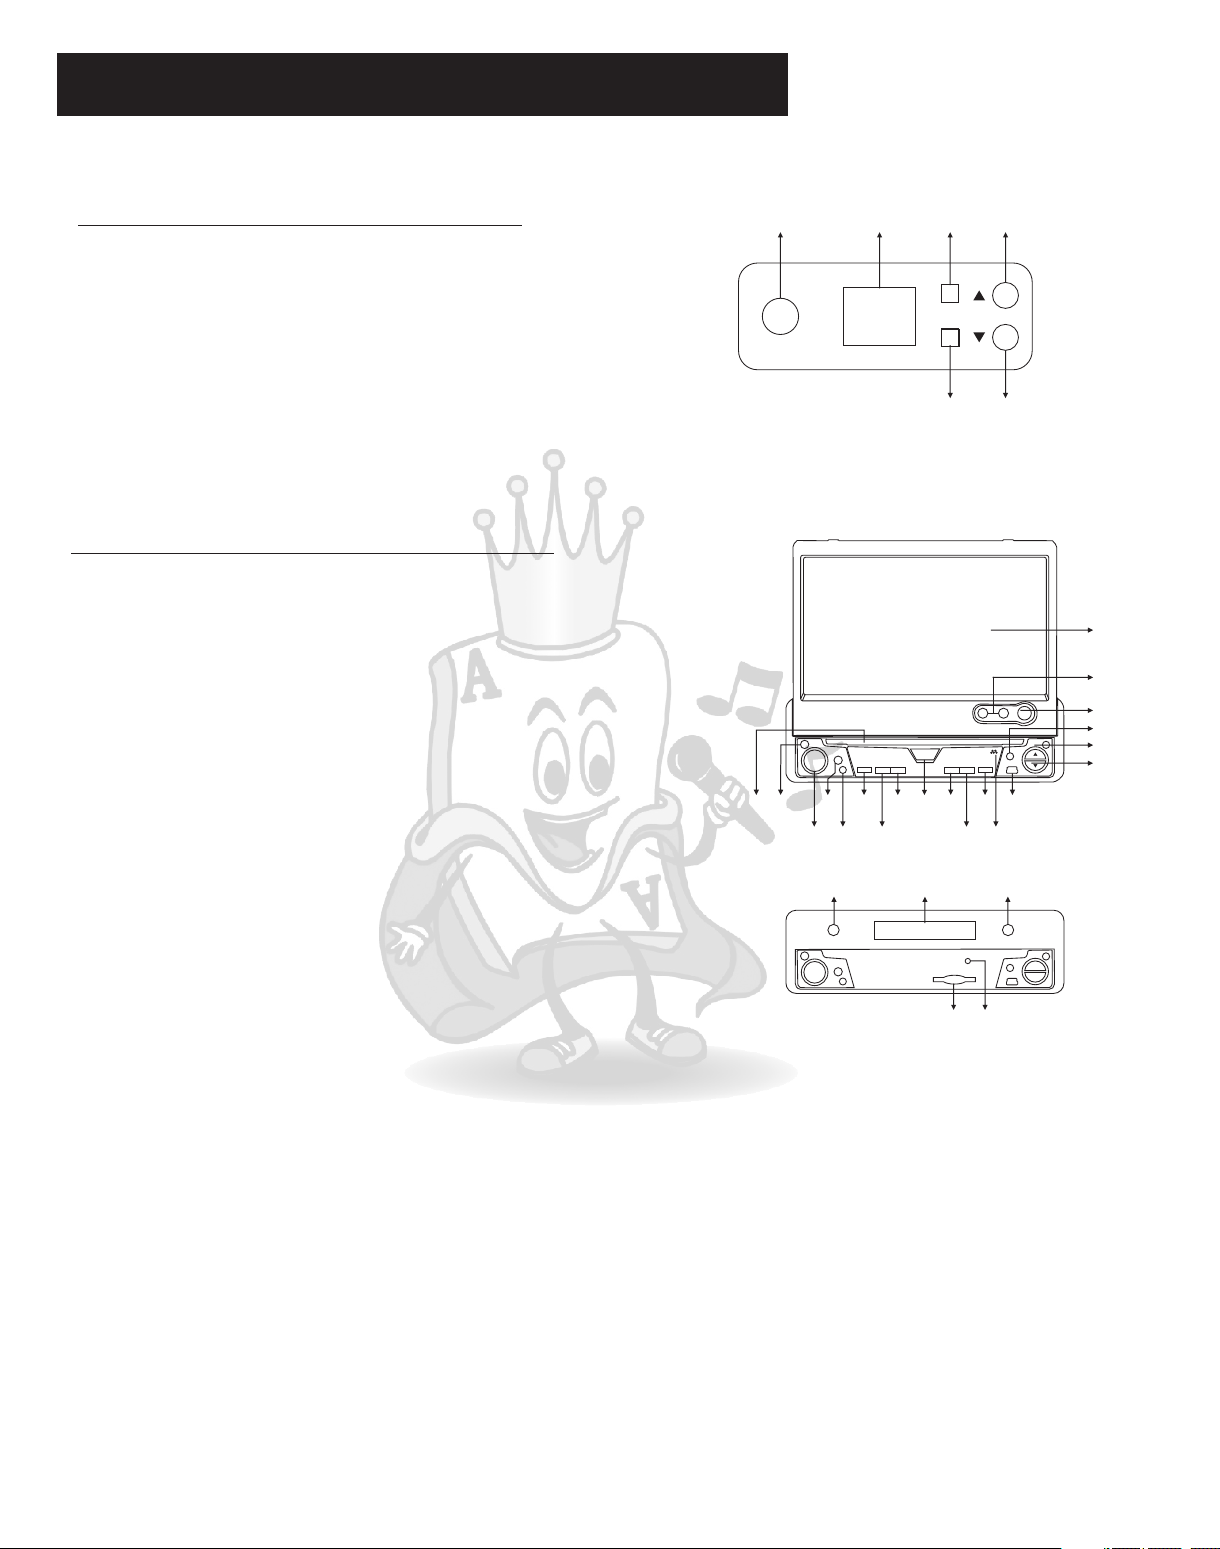
Microphone Panel &LCD/DVD player
Wireless microphone control panel:
1.Microphone vocal volume
2.Wireless microphone chanal display
3.IR signal launcher( only at #2 panel)
4.Chanal selecting button
5.Radio receiving indicator
6.Chanal selecting button
LCD monitor/DVD player control panel:
1. Auto Search/Programming radio station
2. LED information display
3. LCD open/close button
4. 7” color LCD monitor screen
5. LCD monitor angle adjustment buttons
6. DVD main menu button
7. Aux input
8. Connect
9. Previous/ Next/ Fast forward/ Fast backward
10.USB input
11.Microphone input for blue tooth function
12.Mode switching button
13.EQ selecting button
14.Band selecting button
15.front panel releasing button
16.Multiplex audio selecting button
17.Audio mute button
18.Power button of the DVD player
19.Play/Stop button
20.Remote sensor
21.Disc ejecting button
22.Main functions selection button
23.Disc tray
24.SD card slot
25.Player default setting
(1) (3) (4)(2)
8 8
(18)
(20)
(21)(23)
(17)
(19)
(22)
(5) (6)
(14)(15)(16)
(13)
(2)(1)
(24) (25)
(12)
+
(11)
-
(10)
(3)
(4)
(5)
(6)
(7)
(8)
(9)
3
 Loading...