

Acesonic DGX-210 User Manual
DGX -106
SD/MM C
MINI SD
USB
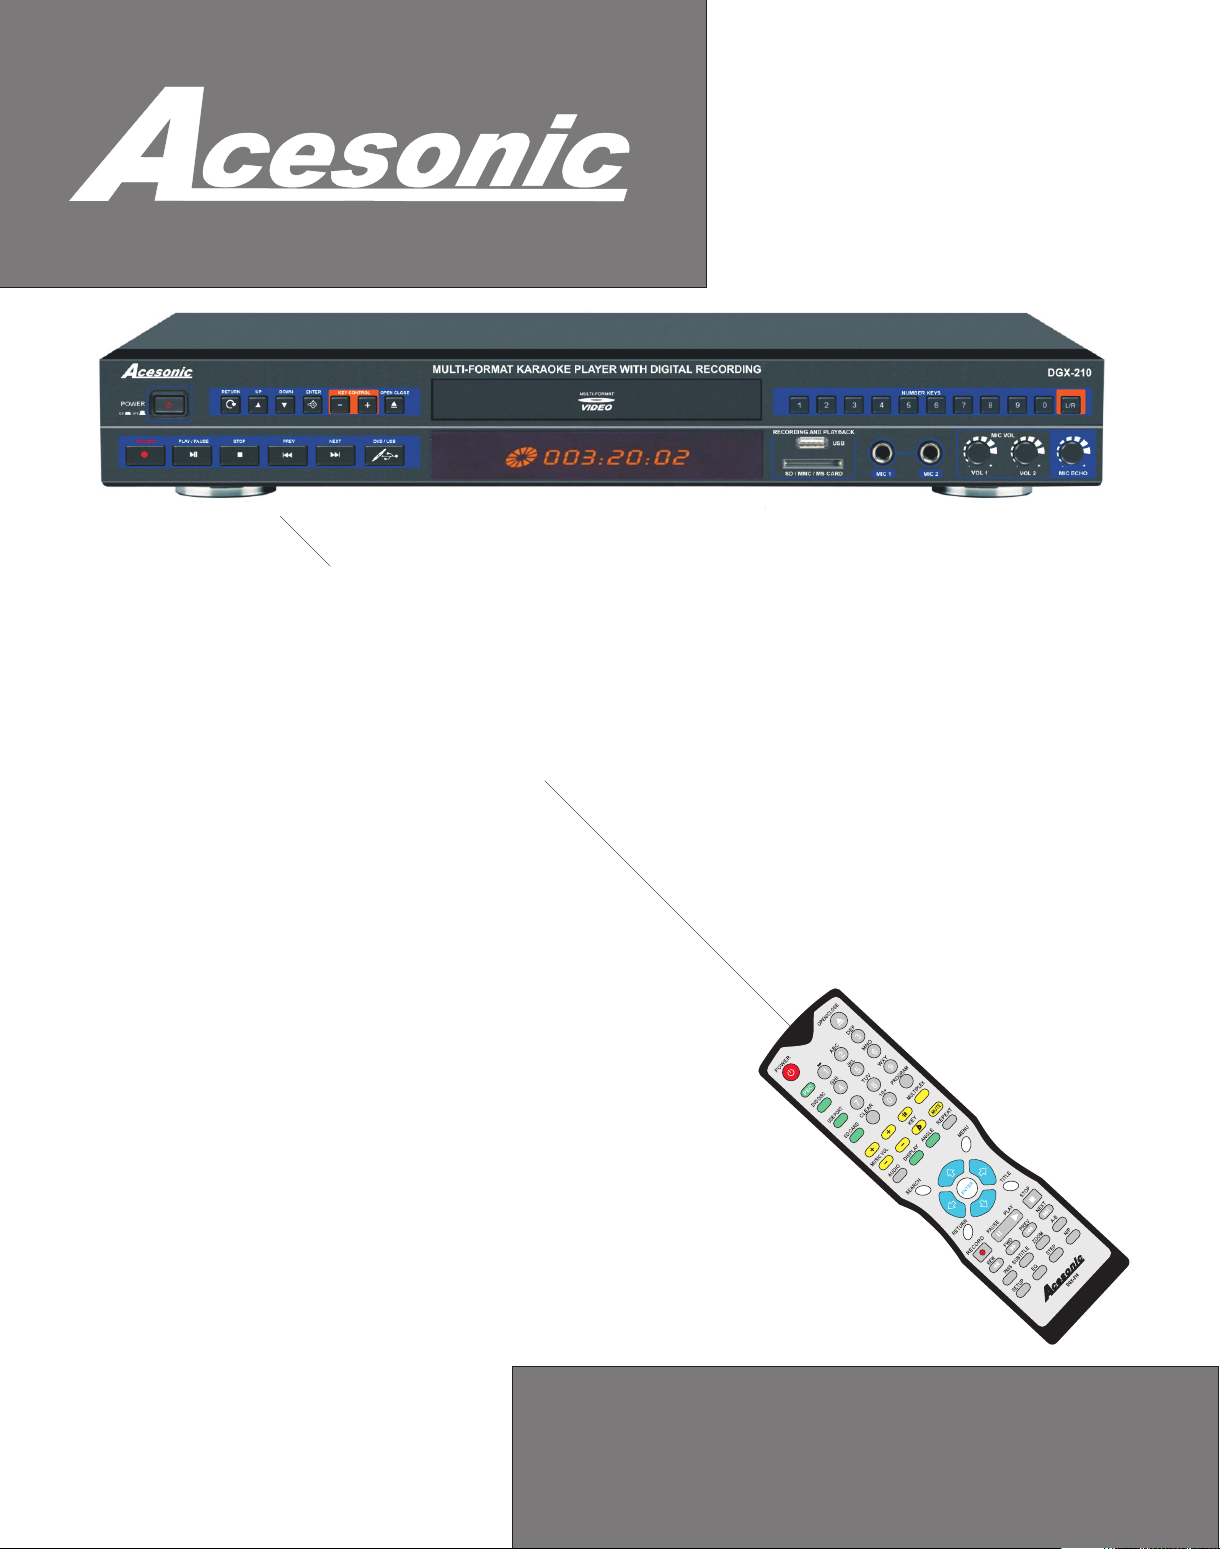
DGX-210
Multi-Function Karaoke Player
With Digital Recording & MP3G Ripping Function
USER’S MANUAL
V.3
CAUTION:
To assure t his pla yer wil l work at i ts best , pleas e
read th is user ’s m anual c arefu lly bef ore ope ratio n
and kee p for fut ure ref erenc e.
.
CH
T
I
W
GUI S
Z
RS
PQ
L
O
/
C V
RE
R
E
B
NUM
/
E
U
C
www.acesonic.com
Warnings, Cautions and Others
Mises en garde, precautions et indications diverses
CAUTION
RISK OF ELECTRIC SHOCK
DO NOT OPEN
CAUTIO N: TO RE DUC E THE RI SK OF E LECT RIC S HOC K.
DO NOT REM OVE CO VER ( OR BA CK).
NO USER SE RVIC EAB LE PART S INS IDE.
REFER SE RVIC ING TO Q UAL IFI ED SER VIC E PERS ONN EL.
The lig htnin g flash w ith arr owhea d symbo l, with in an
equilatera l trian gle is in tende d to aler t the use r to the
prese nce of un insul ated da ngero us volt age wit hin the
produ ct's en closu re that m ay be of su fficient magnitude
to cons titut e a risk of e lectr ic shoc k to pers ons.
The exc lamat ion poi nt with in an equ ilate ral tri angle i s
inten ded to al ert the u ser to th e prese nce of im porta nt
opera ting an d maint enanc e (serv icing ) instr uctio ns in
the lit eratu re acco mpany ing the a pplia nce.
CAUTION
To reduce the risk of electrical shocks, fire, etc:
1.Do not remove screws, screws, covers or cabinet.
2.Do not expose this appliance to rain or moisture.
FCC INFORMATION (U.S.A.)
1.This equipment has been tested and found to
comply with the limits for a Class B digital device,
pursuant to part 15 of the FCC Rules. These limits
are designed to provide reasonable protection
against harmful interference in a residential
installation.
This equipment generates, uses and can radiate
radio frequency energy and, if not installed and
used in accordance with the instructions, may
cause harmful interference to radio
communications. However, there is no guarantee
that interference will not occur in a particular
installation. If this equipment does cause harmful
interference to radio or television reception, which
can be determined by turning the equipment off and
on, the user is encouraged to try to correct the
interference by one or more of the following
measures:
Reorient or relocate the receiving antenna.
Increase the separation between the equipment
and receiver.
Connect the equipment into an outlet on a circuit
different from that to which the receiver is
connected. Consult the dealer or an experienced
radio/TV technician for help.
For Canada/Pour le Canada
CAUTION: TO PREVENT ELECTRIC SHOCK,
MATCH WIDE BLADE OF PLUG TO WIDE SLOT,AND
FULLY INSERT.
ATTENTION: POUR EVITER LES CHOCS
ELECTRIQUES, INTRODUIRE LA LAME LA PLUS
LARGE DE LA FICHE DANS LA BORNE
CORRESPONDANTE DE LA PRISE ET POUSSER
JUSQUAU FOND.
For Canada/Pour le Canada
THIS DIGITAL APPARATUS DOES NOT EXCEED
THE CLASS B LIMITS FOR RADIO NOISE
EMISSIONS FORM DIGITAL APPARATUS AS SET
" "
OUT IN THE INTERFERENCE-CAUSING
EQUIPMENT STANDARD ENTITLED DIGITAL
"
"
APPARATUS, ICES-003 OF THE DEPARTMENT OF
COMMUNICATIONS. CET APPAREIL NUMERIQUE
RESPECTE LES LIMITES DE BRUITS RADIO
ELECTRIQUES APPLICABLES AUX APPAREILS
NUMERIQUES DE CLASSE B PRESCRITES DANS
LA NORMESUR LE MATERIEL BROUILLEUR:
APPAREILS NUMERIQUES , NMB-003 EDICTEE
PAR LE MINISTRE DES COMMUNICATIONS.
Caution
Disconnect the electrical plug to shut off power
completely. The POWER on the unit is not off from the
electrical plug when the POWER button on the front
panel is not pressed in.
IMPORTANT FOR LASER PODUCTS
1. CLASS1 LASER PRODUCT
2. DANGER: Visible laser radiation when open and
interlock failed or defeated. Avoid direct exposure to
beam.
3. CATION: Do not open the top cover. There are no
user service able parts inside the unit. Leave all
servicing to qualified service personnel.
4. REPRODUCTION OF LABEL: CAUTION LABEL,
PLACED INSIDE THE UNIT.
2.IMPORTANT: When connecting this product to
accessories and/or another product use only high
quality shielded cables. Cable(s) supplied with this
product MUST be used. Follow all installation
instructions. Failure to follow instructions could
void your FCC authorization to use product in the
U. S. A.
A1
Important Safety instructions
1. Read The se Instruct ions.
2. Keep The se Instruct ions.
3. Heed All Warnings.
4. Follow All In structions.
5. Do not use thi s product near wa ter.
6. Clean only w ith dry cloth.
7. Do not block a ny ventilatio n openings.
8. Do not insta ll near any heat so urces such as r adiators, hea t
register, st oves, or other ap paratus (in cluding ampli fiers)
that produc e heat.
9. Do not defea t the safety purp ose of the pola rized or
grounding -type plug. A polar ized plug has two b lades with
one wider tha n the other. A groundi ng type plug has two
blades and th ird grounding p rong. The w ide blade or th e
third prong a re provided for y our safety. If the provid ed plug
does not fit in to your outlet, c onsult an ele ctrician for
replaceme nt of the obsolet e outlet.
10. Protect t he power cord fro m being walke d on or pinched
particula rly at plugs, con venience re ceptacles, an d the
point where t hey exit from the a pparatus.
11. Only use a ttachment s and accessori es specifie d by the
manufactu rer.
12. Use only wi th the cart, stan d, tripod,
bracket, or t able specifie d by the
manufactu rer, or sold with th e apparatus .
When a cart is us ed, use caution w hen
moving the ca rt.
13. Unplug th is apparatus du ring lightn ing storms or unu sed
for long peri od of time. Appar atus combin ation to avoid
injury from t ip-cover.
14. Refer all s ervicing to qua lified serv ice personnel .
Servicing i s required when t he apparatu s has been
damaged in an y way, such as p ower-supply c ord or plug is
damaged, li quid has been spi lled or objec ts have fallen in to
the apparat us, the apparat us has been exp osed to rain or
moisture, d oes not operate n ormally, or has been drop ped.
18. Overloa ding
Do not overlo ad wall outlets , extension c ords, or integr al
convenien ce receptacle s as this can res ult in a risk of fire
or electric s hock.
19. Object an d Liquid Entry
Never push ob jects of any kind i nto this prod uct through
openings as t hey may touch dan gerous volt age points or
short-out p arts that could r esult in a fire o r electric shock.
Never spill l iquid of any kind o n the product .
20. Replace ment Parts
When replac ement parts are r equired, be s ure the service
technicia n has used replac ement parts s pecified by the
manufactu rer or have the sam e character istics as the
original pa rt. Unauthori zed substit utions may resu lt in fire,
electric sh ock, or other haz ards.
21. Safety Ch eck
Upon comple tion of any servi ce or repairs t o this product,
ask the servi ce technician t o perform saf ety checks to
determine t hat the product i s in proper ope rating
condition .
22.Wall or Ceiling M ounting
The product s hould be mounte d to a wall or ceil ing only as
recommend ed by the manufac turer. Any moun ting of the
product sho uld follow the ma nufacture r instruction s, and
should use a mo unting access ory recomme nded by the
manufactu rer.
23. Wet loc ation marki ng
Apparatus s hall not be expos ed to drippin g or splashing
and no object s filled with liq uids, such as v ases, shall be
placed on the a pparatus.
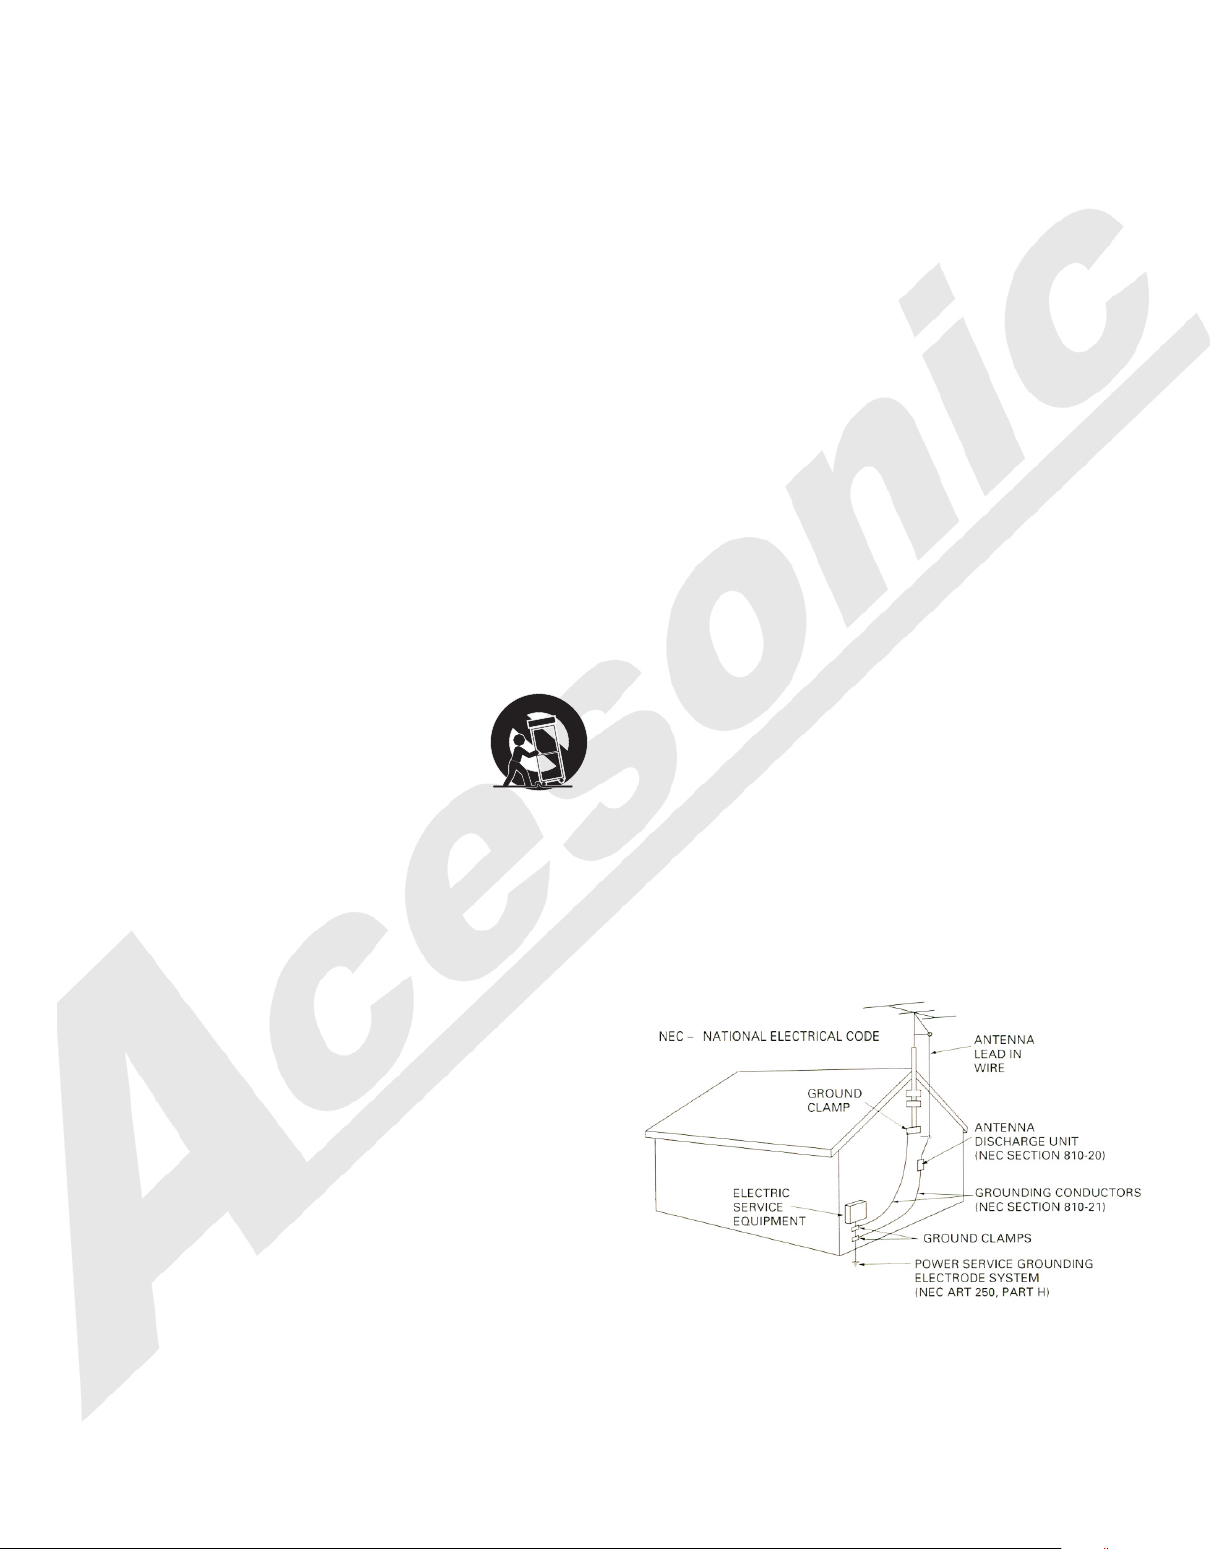
24. Outdoor Antenn a Grounding
If an outside a ntenna or cable s ystem is conn ected to the
product, be s ure the antenna o r cable syste m is grounded
so as to provid e some protecti on against vo ltage surges
and built-u p static charge s. Article 810 o f the National
Electrica l Code, ANSI/NFPA 70, provide s informati on with
regard to pro per grounding o f the mast and su pporting
structure , grounding of th e lead-in wir e to an antenna
discharge u nit, size of grou nding condu ctors, locati on of
antenna dis charge unit, co nnection to g rounding
electrode s, and requirem ents for the gr ounding elect rode.
See figure be low.
15. This prod uct should be ope rated only fr om the type of
power sourc e indicated on th e marking lab el. If you are not
sure of the typ e of power supply t o your home, co nsult your
product dea ler or local powe r company. For products
intended to o perate from bat tery power, or o ther sources,
refer to the op erating instr uctions.
16. Protect ive Att achment Plu g
The product i s equipped with a n attachmen t plug having
overload pr otection. This is a safety f eature. See
Instructi on Manual for rep lacement or r esetting of
protectiv e device. If repl acement of th e plug is require d, be
sure the serv ice technicia n has used a repl acement plug
specified b y the manufactu rer that has th e same overload
protectio n as the original p lug.
17. Power Lin es
An outside an tenna system sh ould not be loc ated in the
vicinity of o verhead power l ines or other e lectric light o r
power circu its, or where it ca n fall into suc h power lines or
circuits. W hen installin g an outside an tenna system,
extreme car e should be taken t o keep from tou ching such
power lines o r circuits as con tact with the m might be fatal.
25. Servici ng
If your produ ct is not operati ng correctl y or exhibits a
marked chan ge in performan ce and you are un able to
restore nor mal operation b y following t he detailed
procedure i n its operating i nstructio ns, do not attemp t to
service it yo urself as opera ting instru ctions, do not at tempt
to service it y ourself as open ing or removi ng covers may
expose you to d angerous volt age or other ha zards. Refer
all servici ng to qualified s ervice pers onal.
A2

Acesonic DGX-210
Table of Contents
Included Accessories
Please check that you have all of the following
accessories supplied to you. If anything is missing,
please contact your dealer immediately.
*RCA Audio/Video Cable (Yellow/Red/White)
*Power Cable
*Remote Control
*2 AAA Battery
*User's Manual
*Rack-Mount Kit
About this manual
The display window information and On Screen Display
(OSD) menu items are all in upper case letters.
Precautions
Notes on Power Cord
*When you are away on travel or otherwise for an extended
period of time, unplug the unit from the wall outlet.
*When unplugging the player from the wall outlet, always
pull the plug, not the cord.
*Do NOT handle the power cord with wet hands.
Avoid Moisture, Water and Dust
*Do not place the player in a moist environment or in area
where there might be an excessive amount of dust build up
(e.g. near a fan).
*If water or any liquid should get into the unit, turn off the
power and unplug the unit from the wall outlet immediately.
Consult your dealer or an authorized repair station. Using
the unit in this state may lead to fire or electrical shock.
Avoid High Temperatures
*Do not expose the player to direct sunlight or near any
heating device.
Notes on Installation
*Select a place where the unit will be level, dry, and not too
cold or hot.
*Do not use unit on its side or where subject to vibrations
(e.g. speakers).
*Leave sufficient distance between the TV and unit.
* Do not leave heavy objects on top of unit.
Before Operation
Playable Media 2
Handling and Cleaning of Discs 2
Front Panel Functions 3
Back Panel Functions 3
Remote Functions 4-5
Player Connections 6-7
Basic Operation
Basic Playback
Play back from USB and SD
USB port and Operation
SD, MMC and Mini SD slots
Karaoke Operation
System Setup
MP3G Recording Operation
Advanced Operations
Playing From a Specific Position
Repeating Tracks
A-B Repeat
Song Searching by Number
Waiting List
Song Searching by Title
Song Deleting
8
8
8
8
9
10-11
12-13
14
14
14
14
15
15
15
15
Additional Information 15
Troubleshooting
Su pported File F ormat
Specifications
16-17
17
19
Specification:
1 Year Manufacturer Warranty
Lifetime Technical Support
NTSC/PAL Worldwide Compatible
Universal Power Supply: AC100~240V
Player Dimension: 430(W)x225(D)x55(H)mm
Designed In U.S.A
2
8
Prevent Unit Malfunction
*No parts in this unit are user-serviceable. If the unit no
longer functions, unplug it from the wall outlet and contact
your dealer for service options.
*Never block the vents on the unit. Vents are used to
circulate air and keep the temperature of the player down.
Blocking the vents may result in damage of the unit.
1
Before Operation
Playable Media
This unit supports the following disc formats:
*DVD, AVI, Video CD, Video CD 2.0
*CD+Graphics, Audio CD, HDCD.
*MP3, MP3+G, JPEG, Kodak, MPEG
Above media is playable on the following discs:
*DVD±R, DVD±RW, DVD±R DL, DVD±RW DL, CD-R/RW
Card reader compatible format*: SD, Mini SD, MMC
*Only support FAT32 format
NO TE
*Any disc that is not listed above will cause the player to
display “NO DISC” in the DISPLAY WINDOW. Future media
and disc formats maybe supported with firmware upgrades,
when available.
*Encoding methods of some media formats may affect the
playback (e.g. Unable to fast forward or fast backward or
load time). Be sure that the encoding process conforms to
the standards for that particular format.
*Dirty, scratched, warped, and defective discs may cause a
considerable time delay during the loading and reading of
the disc. In extreme cases, this may render the disc
completely unreadable by the player.
Video Signal Formats
This player also accommodates NTSC and PAL color
systems, with automatic detection and override settings.
Digital Audio Formats
This player accommodates stereo, analog and few digital
Hi-Fi audio signals.
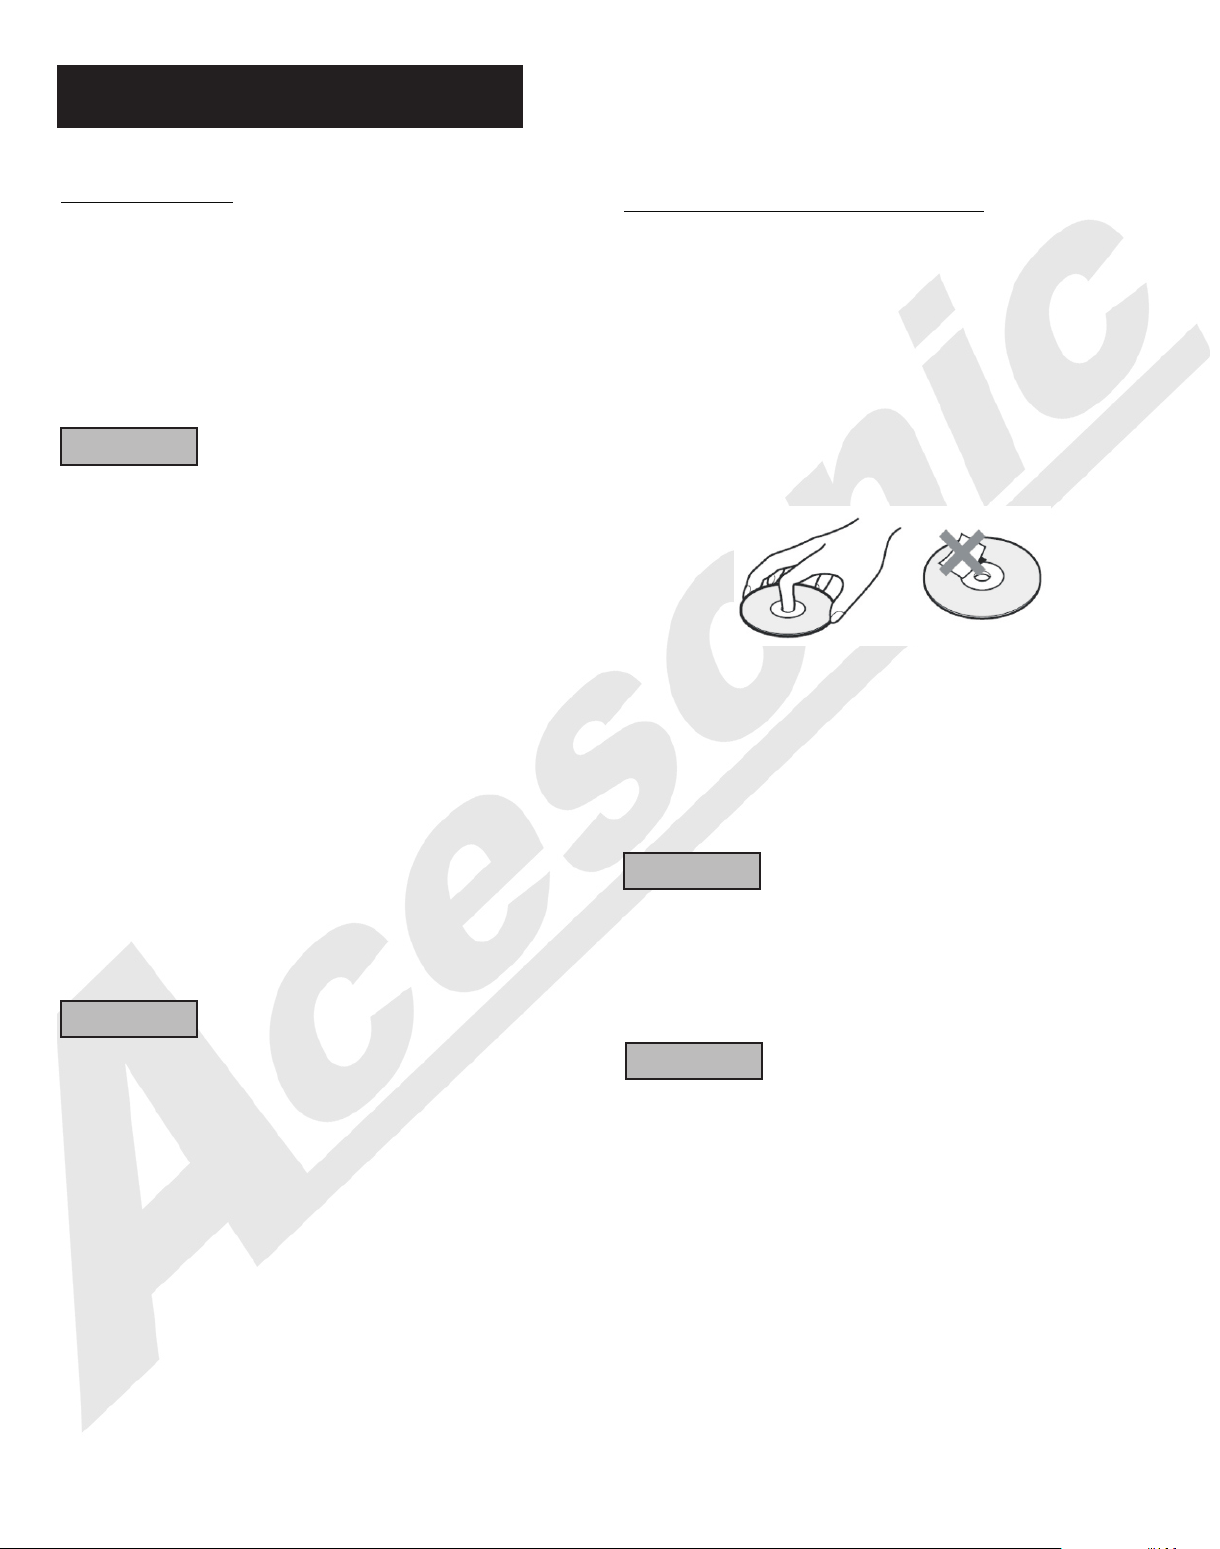
Handling and Cleaning of Discs
Handling
*At anytime, when handling discs, always hold them from
their edges and/or by the circle in the center.
*NEVER write on the any surface of the disc for it may
render the disc unreadable.
*Store discs in a clean and dry environment. Storing CD’s
vertically will also help prevent warping.
*After use, insert CD into jacket or case to minimize wear
and tear DO NOT stack CDs on top of one another.
*Do not bend or press the disc. Do not expose the disc to
direct sunlight or any heat source.
Cleaning
*Wipe the discs from time to time using a soft cloth. Always
wipe from the center towards the edges. NOT in circular
motions.
*DO NOT clean with any other cleaning solution, unless it is
specifically made for disc cleaning.
NO TE
CDs revolve at very high speeds inside of players. Never
attempt to play cracked or warped CDs; doing so may cause
the disc to shatter inside or the player to malfunction.
NO TE
*Depending on the AUDIO SETUP> SPDIF settings digital
audio signals may not be output as they are recorded on the
disc.
Notes Regarding Discs
*Some DVD's, the player starts playback automatically after
inserting the disc, regardless whether or not PLAY BACK
CONTROL is on or off.
*The image may be poor, noisy, or grainy due to actual
defects on the disc itself.
*Some functions may not be possible on all discs as
described in this manual.
CA UTION
Power-Cord
Handle the power cord only by its plug, do not unplug the
power cord by tugging or yanking on the cord. Touching or
unplugging the cord while your hands are wet may lead to
an electric shock or a short circuit. If the cord becomes
damaged or its wires become exposed, please replace the
cord as soon as possible in order to prevent an electric fire
or shock. Check the power cord every few months to ensure
it is functioning properly.
2

FRONT PANEL FUNCTIONS AND OPERATION:
16 19
20
14
13
1
15
11
10
1. POWE R - Press t he butt on to tur n the uni t on or off.
2. MIC 1 & 2 IN PUT jac ks - Conn ects mi croph ones wi th 1/4 in ch plug .
3. MIC 1 & 2 VO L knob - Us ed to control the volume output from MIC
CHANN EL 1& 2 .
4. ECHO k nob - Use d to cont rol the a mount o f ECHO ap plied t o MIC
CHANN ELS 1 & 2.
5. CARD R EADER - u se this c ard rea der to pl ay or rec ord MP3 +G
songs . We woul d recom mend us ing hig h speed ( class 4 or higher)
HDSC ca rds for s mooth ly reco rding a nd play back . * Su pport FAT32
forma t only
6. USB IN TERFAC E - Use thi s inter face to c onnec t USB dev ices
such as f lash dr ives or e xtern al hard d rives . You can pla y MP3, VC D,
MP3G au dio/f iles. * s uppor t FAT32 format only
7. REMO TE SENS OR wind ow- Rec eive si gnals f rom rem ote con trol.
8. DISP LAY WINDO W - Displ ays pla yer sta tus suc h as time , disc
forma t, and so ng numb er. If no di sc is in th e tray, the display window
will display N O DISC. D etail ed info rmati on will a lso be sh own on th e
TV scre en.
9.DIS C TRAY - Press to open tray. Press or to close the
tray, it w ill pla y the dis c automatically.
10. STOP - Stops pl aying o r recor ding.
11. PLAY/PAUSE - Sta rt to pla y the dis c or temp orari ly
suspe nds pla ying.
12
21
9
7
5
8
12. PREV or NE XT - Press to go to the previous or next track
13. OPEN/ CLOSE - U sed to op en and cl ose dis c tray.
14. KEY C ONTRO L But tons-
- butto n: used t o flatt en by a hal f tone.
+butt on: use d to shar pen by a ha lf tone .
15. REC ORD But ton - Pre ss this b utton t o start r ecord ing sin ging
(audi o MP3 fil e only) f rom VCD o r CD disc s, or rec ord MP3 +G(A/ V
files ) from CD G or MP3G d isc fil es.
16. RET URN - Use d to retu rn to pre vious l evel of t he menu .
17. NUMERIC KEYS 0-9: Used to input track selections or programming
purposes. Note: In the Play Back Control (PBC) function operation, the
number keys are additionally utilized for the selection of menu items.
18. L/R - Selec ts Left /Righ t, MONO , and Ste reo aud io outp ut for CD s
and audio trac k for DVD s.
19. UP/ DOWN - Us ed to the s elect ion of th e MP3G fi les.
20. ENT ER - Used t o confi rm the se lecti on.
21. DVD /USB - Us ed to the s witch b etwee n DVD mod e, USB mo de
and CAR D mode.
6
2
17
3
18
4
BACK PANEL FUNCTIONS AND OPERATION:
8
7
1.ELE CTRIC P LUG - Con necti on to aut o-det ect AC pow er supp ly
(100- 240V,50-6 0 Hz).
2.OPT ICAL OU TPUT - Optical output for connection with a digital
ampli fier or r eceiv er for Do bly Dig ital or D TS soun d. Plea se chan ge
setti ngs in th e SETUP m enu bef ore using it. *Karaoke does not
work wh ile usi ng OPTI CAL output.
SETUP > AUDIO SE TUP> SP DIF OUT PUT>S PDIF/ RAM OR
SPDIF /PCM
3. S-VI DEO OUT PUT - Out put for u se in S-V IDEO in put.
4. RCA VIDEO O UTPUT - Yello w RCA outp uts for u se in TVs with
compo site in puts.
5.COA XIAL OU TPUT - Co axial d igital output to connect with a digital
ampli fier or r eceiv er for Do lby Dig ital or D TS soun d. Plea se chan ge
in the SE TUP men u befor e using i t. *Kar aoke does not work while
using C OAXIA L output.
SETUP > AUDIO SE TUP> SP DIF OUT PUT> SP DIF/R AM OR
SPDIF /PCM
5
6
4
2
3
6. SCORING - Support scoring function from outside audio inputs like
amplifiers or receivers. Please change the setting in the SETUP
menu before use.
SETUP> AUDIO SETUP> SCORE> ON
7. 5.1 CHANNEL AUDIO OUTPUT - RCA outputs for analog 5.1digital
output. To use 5.1 channels, press 5.1CH on the remote or change
settings in the SETUP menu before using 5.1 channels. See below.
SETUP> SPEAKER SETUP> DOWNMIX> OFF
SUBWOOFER>ON
8.MIXED AUDIO OUTPUT - Red and white RCA outputs for mixed
vocals and music audio output.
1
3
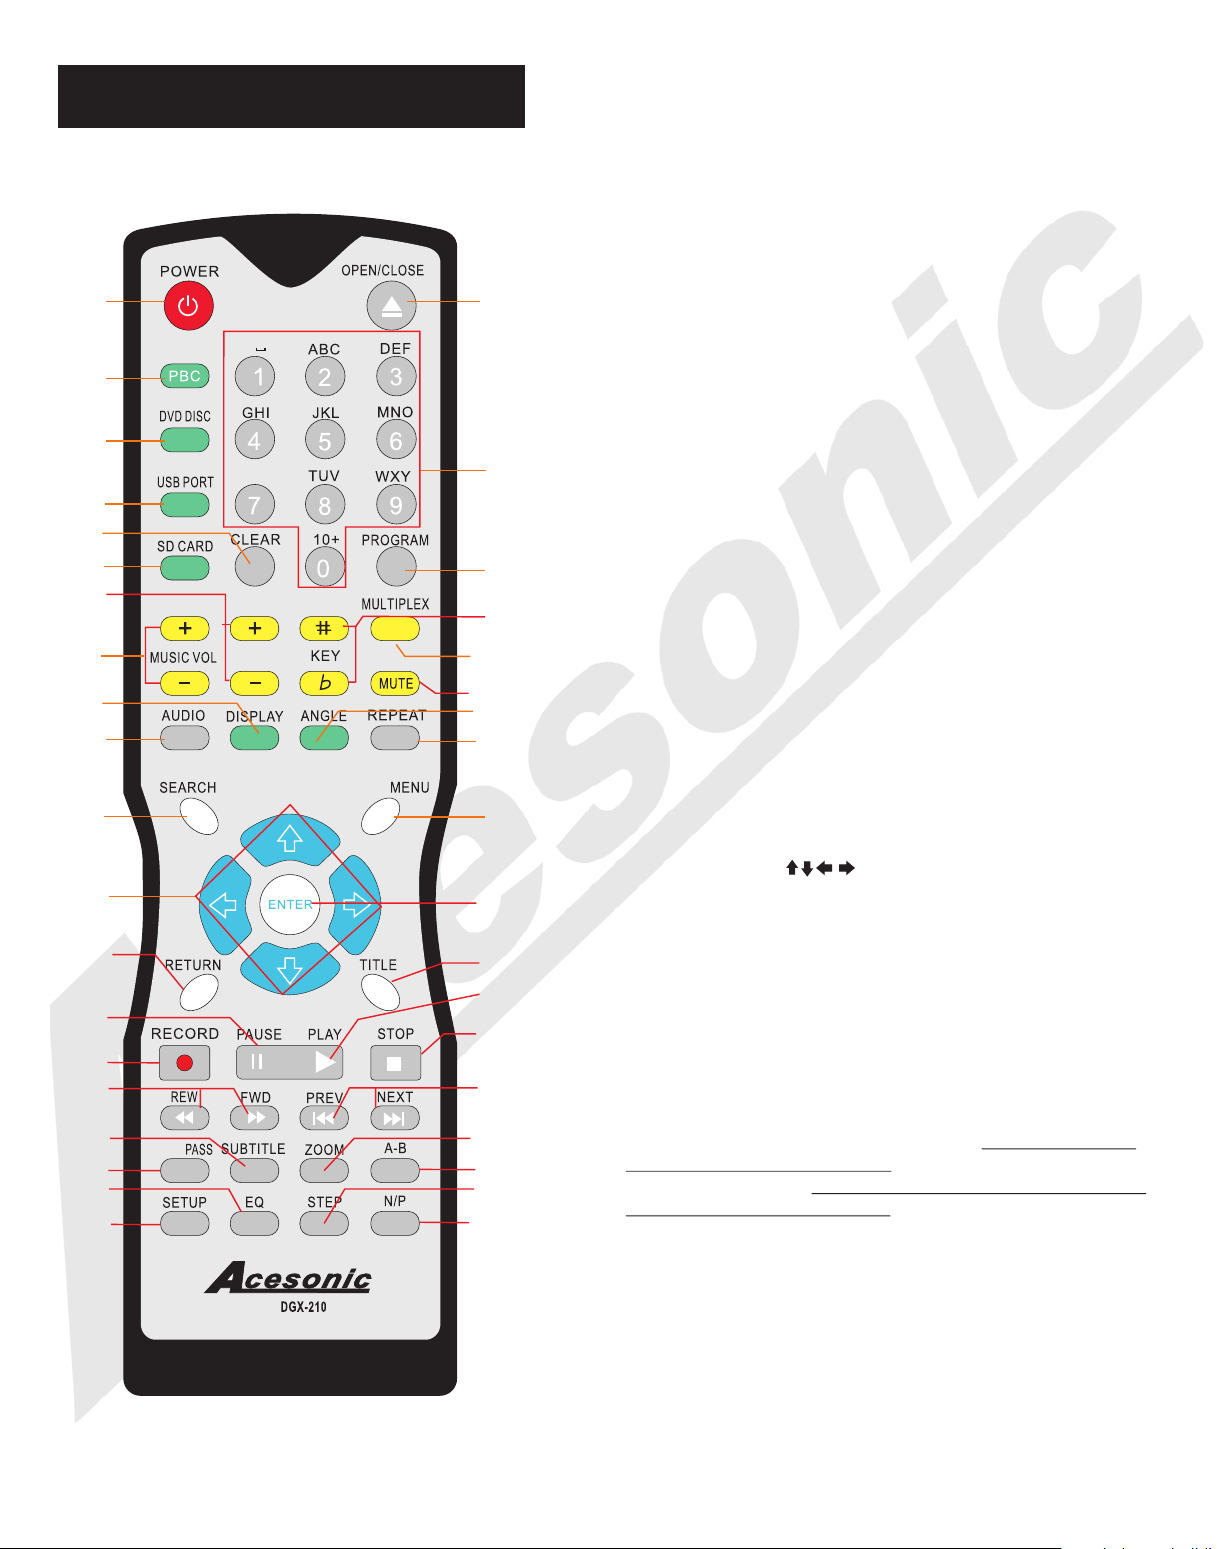
Remote Functions
1
.
PQRS
REC VOL
NUMBE R/
2
3
4
6
5
7
8
9
10
11
12
13
14
15
16
17
18
20
19
GUI SWI TCH
CUE/
1. POWER BUTTON - Turns the player on or off.
2. GUI SWITCH/PCB BUTTON - In MP3G mode, press
the button to switch between windows and playback
display mode. PBC: this function is only available for
22
Z
23
24
25
26
27
28
29
30
21
31
32
33
34
35
36
37
38
video-cd version 2.0 or higher.
The function of PBC may differ by different discs. When
PBC mode is on, users can select items in the menu by
using the PREVIOUS/NEXT keys. When PBC mode is
off, users can not select items in the menu, but you can
use the numeral keys directly or the PREVIOUS/NEXT
keys.
3. DVD DISC - Press to change to the disc mode.
4. USB PORT - Press to change to USB mode if USB
devices is connected.
5. SD CARD - Press to change to SD card mode.
6. CLEAR BUTTON - Used to delete all programmed
tracks you have entered.
7. REC VOL - To adjust the vocal volume while
recording singing.
8. MUSIC VOL - To adjust the volume of music audio
output.
9. DISPLAY BUTTON - Show the elapsed or remaining
time for single track or the total disc.
10. AUDIO BUTTON - Press to select an audio sound
track option for DVD discs.
11. SEARCH BUTTON - You may directly enter a time
to search for a disc; the disc plays from that point.
12. DIRECTION( ) - Used for navigation in the
selection menu.
13. RETURN - Used for operation with the PCB
function. This button is used to return to a menu screen
while playing.
14. PAUSE BUTTON- Press the button while the disc is
playing, to pause playback.
15. RECORD BUTTON - Press this button to start
recording singing (audio MP3 file only) from CD/VCD
discs or record MP3+G (A/V files)from CDG/MP3G
discs or files. Users can change the title of the recorded
files before beginning to recording. * Ripping a single
file from CDG or MP3G disc, simply press REC button
to start recording.* Ripping whole CDG or MP3G discs
to MP3G files, please press REPEAT button until the
screen shows REC ALL and then press the record
button. The title of the songs cannot be modified
while ripping whole disc.
16. FWD>> << REW BUTTONS - Press FWD button to
shift the playing location forward quickly. Press REW
button to shift the playing location backwards quickly.
17. SUBTITLE BUTTON - From DVD discs, press
SUBTITLE repeatedly until the desired language is
selected.
4
 Loading...