

Page 1

No.8085
3-axis
Flybarless System
Introduction / Security
The GT-5 is a high performance electric stabilizing 3-axis gyro, which was
designed for flying helicopters flybarless.
The GT-5 can be used with a bride variety of receivers on the market. If you use
Spektrum you can just use the satelites without the need of an additional
receiver. We remind you that nor Spektrum neither we can guarantee the full
range and funcionality if you use it only with the satelites.
Because of the variety of electronic manufacturers on the market we can give
no guarantee for failures and consequentional damage, if an direct malfunction
of the GT-5 cannot be detected.
We didn´t test the GT-5 in combination with turbine powered helicopters. For
this reason we can give no clearance for using the GT-5 in turbines. If you want
to use it with turbines anyway, the usage will be on your own risk.
We remind you, that the GT-5 is made for use in RC helicopters and for this
reason it´s not a toy. Flying a helicopter has to be realized always on special,
approved places with the usual security precautions in order not to harm
yourself or property of other persons.
Any liability due to the mentioned notes in the upper part is disclaimed by the
manufacturer, THUNDER TIGER EUROPE and the seller.
Very precise electric 3 axis stabilizing system
OLED Display with Icon based User Interface
„Touch-Pad“ for easy handling without the need of additional hardware
Supports normal PPM receivers, Spektrum & JR
satelite-receivers, Futaba S-Bus receivers and many more…
Suitable for Futaba and JR Servo- & RC-plugsystems
Compact size and lightweight
High-qualitative Aluminium Case for optimal heat sink
Spezifications
Display Screen
Input
CPU
Sensor-Speed
Tail-Impulse
Tail-Frequency
Swashplate-Frequency
Swashplate-Types
Dimensions
Weight
96 x 64 pixels OLED
Touch Pad
32-Bit High Speed Processor
MEMS mir ± 500°/sek for X-Y-Z Axis
1500us/970us/760us
50Hz – 333Hz
50Hz – 200Hz
90°, 120°, 135° (140°)
29,5 x 32 x 16mm
15g
1-3 RC-Cable
Pads
Manual
GT5
Note: The pads are very hard, but normally suited for all kinds of
helicopters. For some Nitro helis or helicopters with a lot of vibrations
you can use softer pads. Be careful with those soft pads, because they
can cause malfunctions with the GT-5. Allways use booth pads!
Imp2
Term
Imp1
Ail-r
Ele
Ail-l
Tail
Throt
8
7
6
5
4
3
2
1
Connectors
Included in Package
- Normal receiver / or channel 5 output
- Normal receiver
- S.Bus / Normal receiver
- Aileron right
- Elevator
- Aileron left
- Tail
- Throttle or ESC
+
GND-
Pulse
Connectors for 2,4GHz Spektrum
Satellite Receiver
Note: If you use satelite mode
you always must connect 2
satelites!
Note: The connector No.7 (Term) is a
3 Ch connector. It can be used with
the 1-3 cable for usage with normal
receivers for example.
Settings
The GT5 has to be fixed perpendicular on the gyro
plate of your helicopter!
1
Starting the device
After the system has booted, a
cursor will appear at the left
side depending where you touch
the reactive part of the case of
the GT5.
General handling
if you move the cursor upwards to the ACE-RC Logo
and hold it there for 3 seconds, you will enter the main
menu of the GT5. You can choose a menu entry with a
double tap. You can exit a menu entry with a tap on
the „exit“ symbol or the icon which displays an arrow
pointing upwards.
Choosing Nitro- or Electric-Helicopter:
In the swashplate menu (which you can recognize due to the swashplate icon
on the left side) you should at first choose the type of helicopter (Nitro or
electric).
One example:
- Hold the ACE Logo 3 seconds
- Search the swashplate menu (use
your finger to scroll up and down)
- Double tap on the swashplate icon
- Choose icon - Heli and text „type“
- Double tap
- Choose Nitro or Electric (use your
finger to scroll up & down)
- Double tap for accepting
Swashplate - Setup:
Here you have to choose the kind of swashplate which
is needed for your helicopter. More hints you will find
on the back of this manual.
Servo-Frequency Setup:
Set the Servo-Frequency and speed. Please check which
maximum values can be used for your servos. If one
servo is built for 166Hz and you use it with a higher
frequency setting (e.g. 200Hz) it could damage the
servo.
Center impulse of the tail servo:
For most tail servos the standard is
1500us (for 1520 also choose 1500).
For narrow-band servos you can set
760. Please refer to the manual of
your servo.
Servospeed:
For tail and
swashplate servos the
performance can be set
individually. If you don´t know
what to set, choose 0,70.
If you choose too high values it could damage the servos. Some manufacturers
display the servo speed for 60°, please calculate it for 45° yourself.
The GT5 supports three different kinds of receivers. Standard-receivers,
Spektrum Satellites and Futaba S-Bus. If you use Spektrum-Satellites, you have
to set this in the receiver menu (see graphic) to SPEKTRUM. Afterwrards you
choose the menu with the „shaking hands“ and accept this with a double tap.
Now the LEDs on both satelites have to flash. Afterwards press the Bind Button
on your Spektrum transmitter while switching it on. After the binding procedure
the LEDs on the satelites have to shine permanently. For checking if all functions
are doing fine, switch both GT5 and transmitter off and turn it on again.
If you want to use a standard
receiver or S-Bus you have to
connect it with all the connected
wires to the GT5 and select the
receiver type in the menu.
Setup „Auto EXIT“:
Before each flight you have to go back into the main menu of the
GT5. If not, the heli would be controlled without stabilizing.
For security reasons we integrated an configurable Timer.
After a certain time (choosable between 3 and 250 seconds)
the GT5 will automatically go back to the main menu if you
don´t use it.
We´ve seen that a value of 25 seconds is suitable for most
of the pilots, because normally between leaving the heli and
starting the engine there pass 25 seconds.
here you have to adjust the direction of the 3 servos, so that
all are going into the same direction while giving pitch
positive or negative. If you give pitch positive control, the
swashplate has to go either up or down. If one servo goes
into the wrong direction you have to reverse it in the menu
(Rev.). The right direction of pitch, aileron and elevator
controls will be set afterwards in the transmitter, using the
„servo reverse“ function.
4
6
5
7
2
3
8
ElectronicNitro
Setup gain direction of swashplate controls:
If the nose of the heli is pushed down, the swashplate
has to move in the other direction and stay horizontally.
If the heli is rolled to the left the swashplate has to move
automatically to the right and stay horizontally. If this
doesn´t happen the gain direction of the function which
goes wrong has to be reversed in this menu.
if the direction of the aileron sensor is going in the wrong
direction, you have to reverse the sensor function „Ail“
in the menu. If the sensor direction for elevator is going
wrong, you have to reverse the function „Elv“ in the
menu.
Setup gain direction of tail control:
If the tail of the heli is pushed to the right, the
tailrotor has to be controlled to the right by the GT5
(so that the tailrotor would blow to the right in order
to set the tail again to the left). This you may never
try with running blades, because there is too much
danger of hurting yourself!
Setup pirouetting correction:
In the sensor menu you can choose the pirouetting
correction named „Pir“. If you enter with a double tap
the test mode will be activated. Now the swashplate of
the heli will be pushed into one direction. If you rotate
the heli now in a circle, the swashplate should remain
pushed into one direction. If the swashplate will change
the direction during moving the tail, the pirouette
correction has to be reversed by scrolling up/down with
your finger. For safety reasons, please enter one more
time this menu and repeat the test.
If you notice that your flown pirouettes are changing
location, the value of this setting is not perfect. Please
change the value and try it again until the pirouttes run
perfectly on the same spot.
Setting the servo center point:
If you have 0° Pitch the servo
horns should be going vertically
(Doing a 90° angle to the rods).
Is this then rotor head If you
don´t have 0° Pitch with
centered servo horns, you have
to change the rods of your
rotorhead.
The tail servo should also have
an 90° angle from the horn to
the rods. These trims you must
not set in the transmitter but
only in the GT5.
Tail-stick dynamic (stick-dynamic):
Stick dynamic has influence on the reaction speed
between the control given until the reaction of the tail.
For extreme reactions (3D flying) the value should be
set to 50. Scale pilots can get a „softer“ tail if they set
this value to 25. The exact value has to be experienced
by every pilot himself.
Servo Tavel - complete travel
First you have to set a value to all three servos, so
that the swashplate will not bind mechanically while
giving full controls. With this travel setting all
controls for elevator, aileron and pitch will be
reduced. You can adjust the pitch itself in an extra
swashplate menu. You´ll find more hints on the back
of this manual.
Servo limit
swashplate
Normally it´s not necessary to change this
values. But if the swashplate is binding
while giving full aileron or elevator controls,
although in the servo-travel menu the
servos 1,2 and 3 were set to their minimum,
you can reduce here the travel equally until
there´s no more binding (check this in the
main menu with the bars at 100% gain).
The travel of the pitch will not be influenced
by this setup.
Pitch travel & agility:
In the swashplate menu you can find the „Pit“ Mix, here
you can set the maximum travel of pitch. You should
have a pitchcurve from -100 to +100 set in your
transmitter. Now give full collective pitch and check the
angle with a pitch gauge. Now you put this into the GT5.
The pitch can be set later according to the idle up´s in
your transmitter.
For the values aileron and elevator you will not
set the minimum and maximum travel but the
maximum agility. As a good starting point you
can set it to 100. More hints for this setting
you´ll find on the back of this manual.
Servo limit tailrotor - VERY IMPORTANT !
This adjustement is very
important for saving the
tailrotor servo from damage.
After selecting this menu you
can adjust both traveling
directions of the servo.
Before connecting the servo the first time please remove the horn from the
servo in order to avoid mecanical binding caused by too much travel. Please
activate with by double clicking the tailrotor limiter (A) and give full tail
control in one direction. If you change now the value you have to see how
the servo is changing its travel endpoint. If you don´t see anything try giving
control to the other direction. After doing this, adjust the travelling endpoint
for (B). If you reduce the value you´ll reduce the endpoint, with higher
values you´ll maximize the endpoint. When your setup is finished, the servo
must not bind mecanically, equally in which direction you are giving tail
control.
9
15
16
17
13
14
12
10
11
First Settings
Spektrum/JR Satellite Receiver or Futaba S-Bus
Satellite
Receiver
dsmdsm
SERVO SERVOSERVOSERVO
ESC / BEC
S- bus
Receiver
Channel 5 output. For
example: Speed governor
for Nitroheli
Spektrum Satellite receiver can be directly connected with the GT5. The favor
is a very easy installation in which the GT5 is working as the main-unit at which
you just have to connect the servos (please read the security note for using the
GT5 without external receiver). You can also use the GT5 with Futaba S-Bus.
here you just have to connect the S-Bus wire to the Ch6 of GT5. Because the
tecnology with S-Bus and satelites change all the time we cannot give a
guarantee of 100% compatibilty. For this reason the operation is at your own
risk.
Connecting with Receiver/ Satelites
For saving the servos of damage, the GT5 should be connected just
with a receiver battery before you connect the servos and do the
servo setup (next column, step 4). If you have an electric heli, also
the ESC/BEC has to be configured and set correctly before you
connect the GT5.
!
!
Standard receiver
Display
Aileron
Rudder
Gain
Pitch
Elevator
This pin could be connected to battery
Throttle
SERVO SERVO SERVO SERVO
(for Nitro)
SERVO
ESC
Receiver
Connecting battery / BEC
ESC
BATTERY
If you use the GT5 or S-Bus with an electric helicopter and you have a speed
controller with integrated BEC, its not obligatory that you use an external
receiver battery. With some BEC the volatge during hard flight can crash down.
So we recommend paying attention to the manual of the ESC manufacturer. If
you are not sure what to do you can always use an external battery for feeling
more secure. The voltage of the external battery should be equal to the voltage
of the BEC feed-in.
Pitch
Aileron
Elevator
Rudder
If the GT5 is working correctly,
you can check the functionality
of the sensors via the graphical
bars in the display.
If you move the helicopter
manually around its 3 axis, the
connected bar should move
upwards or downwards.
If the bars don´t remain at the
center position after finishing
the test it´s not a malfunction.
If you move the sticks at your
transmitter, the bars also have
to move.
If not you have to check your
receiver in order for receiving
failures.
Total gain for swashplate and tail:
This function is for quick raising and reducing of
the gyro gain for swashplate and tail. While flying
there should be ideally displayed 100% gain. If
you´ve set too much gain it doesnt matter if the
heli is swinging up on swashplate or tail. You can
push one switch for getting it to a pre-configured
gain (e.g. 60%). Now the swinging on all axis
should stop and the helicopter can be landed
safely. Afterwards you can reduce the gain in the
setup. For this reason we recommend to lift of
with the lower gain and switch to 100% when the
heli has a safety hight, if you´re flying with a
new setup or changed gain. If the helicopter
doesn´t swing up, the gain isn´t too high.
Voltage Check:
Upper value:
Center value:
Lower value:
Highest voltage during flight
Voltage actually
Lowest voltage(break-in)during flight
Important settings for the transmitter:
All swashplate mixing is done by the GT5. In your transmitter you
have to choose as swashplate type „mechanical or 1 servo for each
function“. So you MUST NOT choose in your transmitter a
swashplate type like 120° or 140°. Also all servo travellings (ATV)
should be set at -100 and +100 (Standard configuration for all
transmitters). All servo centers should be at 0 and must not be
trimmed at the transmitter. The pitch curve should be set from -100
to + 100 for configuration. After the configuration of the GT5 is
finished you can set different pitch curves in your transmitter.
!
!
Menu: P/I Setup
Submenu of P/I Setup: Setup swashplate:
This value should remain at 100 because then
it´s perfect for fast travelling maneuver. More
hints for I-D-stick you´ll find on the back of
this page in the swashplate category.
I will lead to a constant rolling/flipping. Please
try first tiny values (30%) and increase it until
you get a constant roll/flip-rates. Do not
increase it more after getting this result.
It has direct influence on the stopping behavior
of the swashplate. If the heli is seesawing a bit
after stopping it over elevator you should at
first increase this parameter. Please increase
this value in intervals of 5 and test the
stopping behavior afterwards. More hints for
finding the optimum swashplate adjustements
you´ll find on the back of this page.
The „directness“ for the heli´s reaction on the
given stick controls of the pilot. 3D pilots
should try values about 80 until 95. If the value
is too high, the heli will end in seesawing after
stopping over elevator.
I-D-Stick and I-Sens are giving direct influence to the stopping
behavior. Depending on your personal style you can adjust this
values as you like. Normally you don´t have to change
anything. Depending on the helicopters size, weight and the
kind of rotorhead it´s possible that you´ll notice a seesawing
effect after hard stopping over elevator. This effect is
removable if you find the perfect adjustements of both values.
The adjustement of the tail stopping behaviour is working in the
same style.
If you use Spektrum satelites, Channel 7 is used for the total
gain. if you use an external receiver, the center pin of the
„term“ connector of the GT5 is used for the total gain (center
pin of the 1 in 3 cable)
Is used for constant pirouettes. Start with 30%
and increase the value until the pirouettes are
constant during travelling figures. Value is too
low = unconstant pirouettes. value too high =
slow swinging tail
If the tail is not stopping fast enough you can
optimize it here. Normally it should not be
necessary to change this value.
If the tail is swinging during hovering, you can
eliminate this effect here (deadband), but just
if there´s no other value adjusted wrong or a
mechanical problem with the tail.
Tiny value - tiny deadband
If you stop the tail and you can see that it´s
stopping crispy in one direction but slow in the
other you can optimize this here. please adjust
the value until you have the same stop
behaviour on both sides. Normally the result
will be that the stopping behaviour on the one
side is getting better and on the other worse.
Now you can try with changing P and/or
D-Sense to reduce/remove the after bouncing.
If you wish you can also try the smooth stop
function if you don´t reach a satisfying result.
Normally there should not be any need to
change the Tail-Symmetric values.
This value controls the reaction speed from
the pilot´s input to the tail. 3D pilots should
try a value of 50. Pilots who want to have a
„smooth“ tail (scale), should try a value of
25. if you adjust values more than 50, it´s
possible that the tail will begin to swing
It can be used for even harder stopping
behavior. Normally you should not change this
value. Under some circumstances it may
overload the servo.
Menu: P/I Setup
Submenu of P/I Setup: Setup tailrotor:
P
I
I-D-stick
D-sense
Feed forward
I-lim
Hovering
smooth-stop
P
I
D-Sense
Tail-D-DB
Tail-symmetric
DMA-pitch
Tail
Stick-dynamic
DMA-cyclic
Adjustements
P is for the crispier stopping of the swashplate.
Higher values result in a quicker stopping
behaviour.
Too high values lead to swinging.
If the heli is not staying in one direction/height
during flying forward and seems to fly a
wave-line you can increase the l-Lim until the
heli is flying straight forward. Normally you
should not have to change this value.
Controls how “stable” the helicopter is
controlled by the GT5 during hovering.
More stability = higher value.
Our pilots used a value of 3-4.
Higher value - quicker stopping at the tail and
more stable when flying hard manovers. If the
value is too high the tail will begin to swing. If
it´s too low the tail will be very unstable
These two functions are working perfect is
they are adjusted together. If the tail is
moving sideways during pitch pumps, the
DMA pitch can be increased until the tail will
stay at the same position. If you need to
adjust it to + or - depends on the heli/servo.
You can control it before flight by giving pitch
or cyclic controls when this function is
activated. Now the tail should control versus
the torque. The value of DMA cyclic is normally
about 1/3 less than DMA pitch (e.g.DMA pitch:
30; DMA cyclic: 20)
Features
Receiver Setup:
Setup swashplate
Servo-directions:
Page 2
Aautomatically go
back to main menu
Tail - Sensor
calibration
calibration
Elevator - Sensor
calibration
If you don´t use the GT5 for some
seconds and you are in a sub menu, it
will jump automatically back to the
main menu.
Expo for the tail rotor
Sensor deadband Sets the wideness of the area where the
sensors don´t regulate. The smaller the value, the smaller the
deadband. Normally you don´t need to change this value.
If the GT5 is installed with the display to the upper side, please
set REV. If its installed in the other way, please set NORM.
Move tail by hand to the right
Checking the rudder sensor
Move the helicopter in a circle, e.g. to the right. Now the GT5
has to control the rudder as if it would be controlling in the
other direction (here to the left, as if the tailrotor would blow
to the right).
Rud=
rudder
Stick Menu
Servo - center:
Servo- reverse (reverse servo travel direction)
It´s recommended that you always use the perfect size of the servo
horns . In the best case, the servotravel will be 100%. If this isn´t
possible, you can adjust the travels in the GT5.
!
!
Hints for Adjusting the Swashplate
Servo Menu
!
Expo – rudder
Expo – swash plate
Swashplate stick dynamic
Tail stick dynamic
Stick- calibration- tool
If you have an electric helicopter please be
sure that the motor cannot start running
accidently and harm you or the helicopter itself.
In order to avoid this you can:
- Disconnect the wires between motor and ESC
- Connect the GT5 to a external battery
without connecting the flight battery
- Move the pinion away from the main gear so
in case of running motor the pinion will not
reach the gear.
Hint: Some ESC´s with an built in BEC can run
the GT5 so you don´t need an external
bettery. Nomally this isn´t a problem for the
GT5 as long as the voltage feed to the GT5
remains always stable. We think this is a great
risk because if the voltage goes down of any
case you cannot control the helicopter any
more. If you use a external battery the GT5 will
be feeded with voltage and at least you can
autorotate the helicopter in this emergency
case. If you want to use a additional battery is
your own choice and should be selected
depending of the manual of the ESC and your
own decision of having this additional security
or not.
Aileron - Sensor
Ail-scale-sensor
Elev-scale-sensor
Rud-scale-sensor
Auto exit
Type
Pitch
Aileron
Elevator
Here you can adjust the direction of the servos. Adjust them until
all servos go into one direction if you are controlling pitch. The
„right“ direction of aileron and elevator functions can be set in
the transmitter afterwards. You just have to change the direction
of the function´s channel. If pitch and aileron is travelling right
but elevator reversed, you just reverse the direction of the
elevator servo in your transmitter.
Please Note
Basics for Pitch adjustments (collective):
For beginning the adjustments of pitch in the GT5, you should at
first be sure you have a pitch curve from -100 to +100 set in your
transmitter. With this you can adjust the maximum and minimum
pitch in the swashplate menu of the GT5 and control it using a
pitch gauge. How much pitch you can adjust depends on the size,
weight and the power of your helicopter. If you´re not sure try
+/- 10/11° as a beginning.
If you adjust for example +/- 12° pitch as the maximum to reach,
you can later set different flight phases where you can reduce the
pitch, reducing the pitch curve in this phase. This is normally done
for starting/landing where you normally should have a minimum of
-3/4° pitch in order for not pressing the helicopter too much into
the ground while giving negative pitch.
Basics for aileron and elevator (cyclic):
If you give maximum cyclic controls the swashplate may never be
binding mechanically. This is the only basic rule you should
follow for not damaging anything. How agile the heli will fly is
adjustable in the transmitter and depends on your flight style.
First you can leave the value for aileron and elevator with 100 in
the swashplate menu. Now fly the helicopter and test if it´s agile
enough. If the heli is to quick or too slow over one axis you can
adjust this by changing the servo travel in the transmitter and
the depending channel aileron or elevator. Higher values in the
transmitter will lead more agility. If you reach the maximum
value in your transmitter you can increase the value for aileron or
elevator in the GT5 by adjusting more than 100.
Some pilots measure the cyclic agility by using a pitch gauge. Note
that the collective pitch has to be 0° while doing this. Now give
cyclic control and measure the pitch. As a starting point you should
at least have about 6°. This is just an advice and normally not
necessary that you measure it this way.
You can imagine the agility of aileron and elevator like the
pirouetting rate of the tail. If you increase the servo travel in your
transmitter the pirouetting speed of aileron or elevator will be also
increased. If the helicopter is standing on the ground you will not
see any changes while changing the values. You´ll just notice it
while the helicopter is airborne.
If you are adjusting the maximum pitch and you don´t have 0°
while the stick is centered, please adjust the linkages of your rotor
head and do not trim that in your transmitter.
The servorhorn of the tail servo should have an 90° angle
to the tail linkage. Try to reach this mechanically and
just do the fine trim at the GT5
The swashplate should be as horizonbtal as possible.
Please adjust it first mechanically as good as you can
and then adjust the 3 servos
perfectly in the menu. You
can get perfect adjustments if you hover the heli
and watch in which direction the heli drifts while
hovering. Now adjust the depending servos 1-3 until the
heli stays at one point. This procedure is not necessary
and just for optimizing.
You can adjust Expo in the transmitter or in the GT5. There is some expo by
default in the GT5 in order to have not such aggressive controls transmission.
Low values = aggressive reaction. High values = smooth reactions.
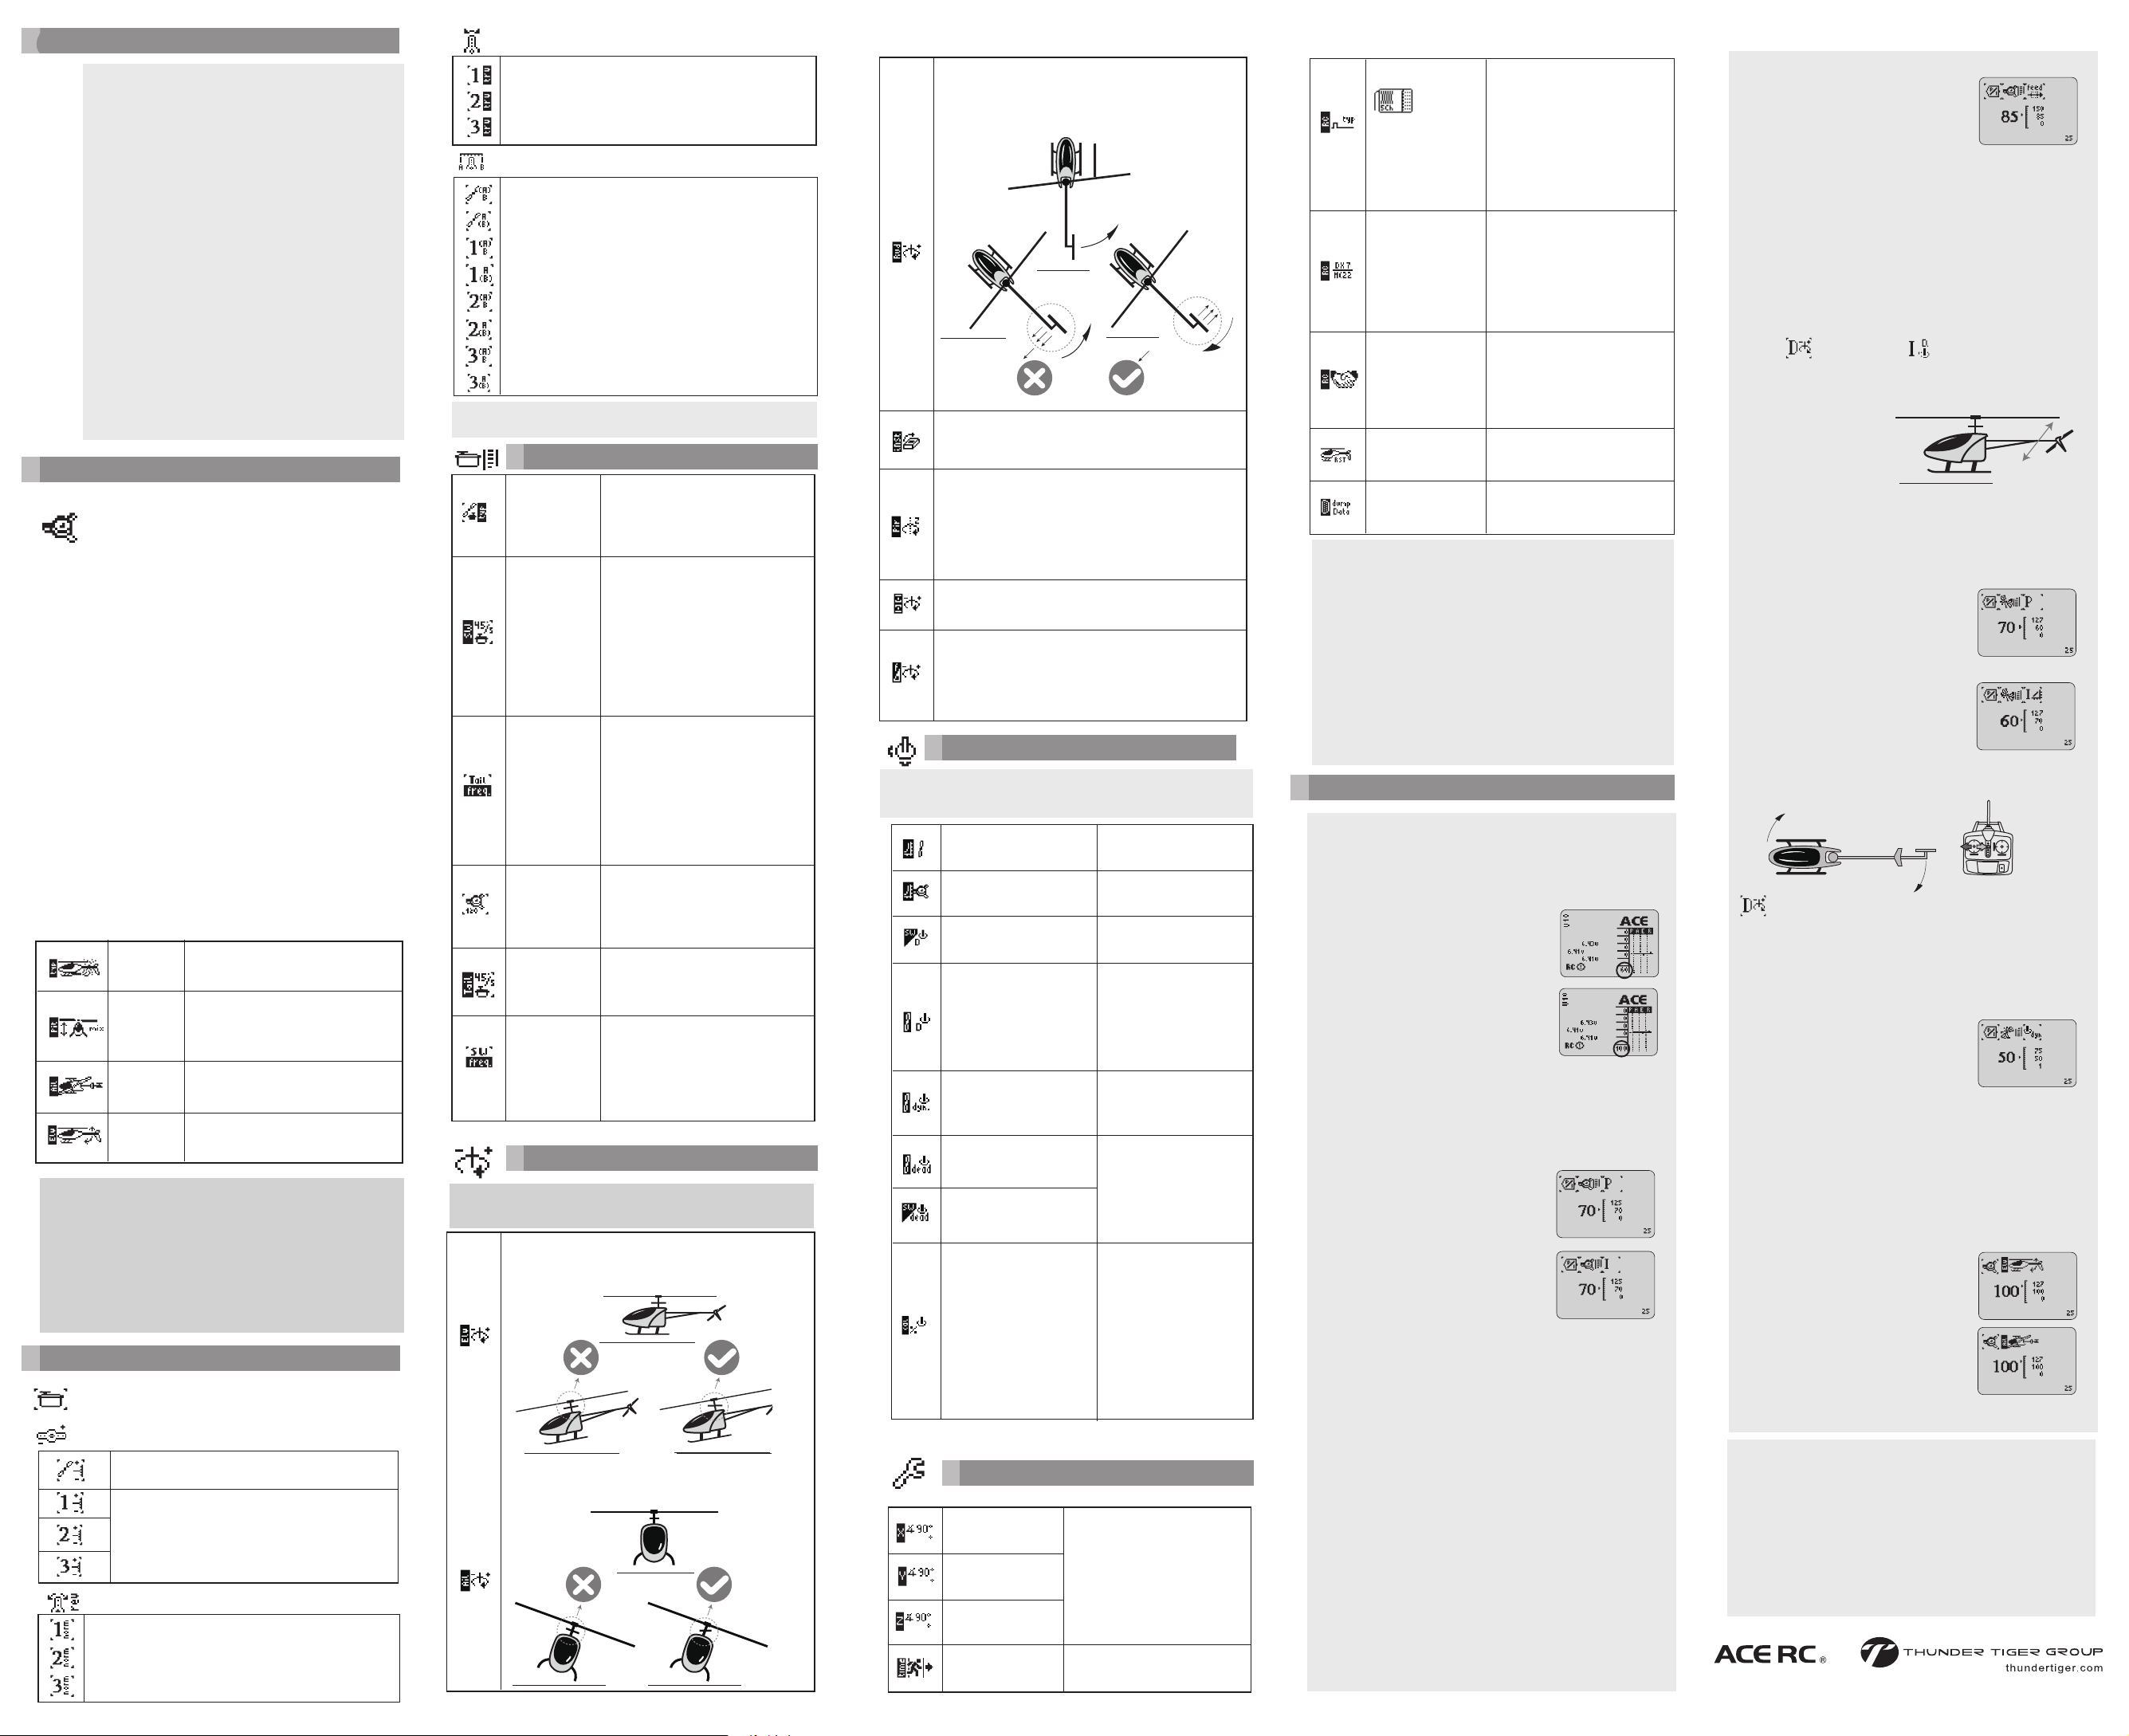
Tailrotor blows
to the left and
would move the
tail to the right
= WRONG
Tailrotor blows to
the right and
would move the
tail back to the left
= RIGHT
Tools Menu
Inst = Installation direction of the GT5
Pirouette optimizer :
Activate the menupoint. Now the swashplate points at one side
downwards. if you rotate the helicopter the swashplate has to
stay leading in one direction. If the swashplate is pointing down
to the left and you rotate the heli 90°, the swashplate has to
keep pointing to down left.
If this is not adjusted right you may notice it by unstable
pirouettes while hovering.
Intensity of filter versus vibrations Normally you don´t
need to change this value (2). The smaller the value, the less
vibrations will reach the sensors (max. filterstrength = 0). A
value of 5 means no filter. All vibrations can reach directly the
sensors and the system will try to balance them (the servos will
move a lot, more power consuption, more servo load.
Attention: Servo damage possible!)
Servo - Travel - Maximum travel
Servo -Limit
Checking the aileron sensor
Lean the helicopter to the right. The swashplate has to stay
horizontal.If this doesn´t happen, or it goes into the other
direction, go into the sensor menu Ail and reverse the function
Elv
Ail
Checking the elevator sensor
If you push the helicopter with the nose downwards the
swashplate tries to stay horizontal. If this doesn´t happen, or
the swashplate moves into the other direction, go to the sensor
menu Elv and reverse the direction. Afterwards check the
sensor again!
If you want to check the sensor directions you have to
be in the GT5 main menu (with the bars). It´s
obilgatory to check elevator, aileron and tail sensors!
Tail type
Swashplate
Servo speed
Tail servo Speed
Tail servo
frequency
Swash plate
type
Swash plate
frequency
Elv
Please adjust all values equally so the swashplate will not bind
(test with full cyclic and collective controls). Because this
setting has influence to all functions, also pitch will be reduced.
But it can be set aside in the swashplate menu. Just in case that
there is not enough travel for pitch you have to use the menu
„servo limit“.
Please adjust the maximum travel of both
directions of the tailrotor. It must not bind!
This adjustments are just needed if your heli with perfect
adjusted servo travels (means that the swashplate never binds
with full controls) doesn´t reach in the swashplate menu the
needed maximum pitch.
In this case you can increase here the maximum travels and
reduce the travels for aileron and elevator in the servo limit
menu for not binding at full controls (the servo limit function
will not have influence on pitch, but the servo travel function
will reduce it).
Normally you should just use the servo travel function, because
you should get enough pitch with 99% of all heli mechanics).
Setting the center impulse of the tail servo.
Standard is 1500us (also for 1520ys).
Narrowband- Servos can be set to 760.
This value has to be looked up in the servo
manual.
The servo speed is set according to 45°.
Please take not which voltage the servo
uses. With a higher voltage the servo will
be working faster. Please refer to your
servo´s manual for perfect setting. Some
manufacturers just offer the speed for
60°. In this case you have to calculate the
speed for 45°.
e.g. speed for 60° = 0,08sec
0,08 / 60 = 0,0013 * 45= 0,06 for 45°
So you set in GT5: 0,060
Set here the frequency of the tail servo.
Most of the digital servos for 500, 50 and
90 size helicopters can be used with
minimum 166Hz. If you are not sure take
this as a start point (at your own risk).
Analog and tiny servos. 3-D are only
available for high performance tail servos.
Please refer to your servo´as manual
for finding the best settings.
Adjust here the swashplate type.
Helicopters with 140° have to bet set
to 135°. For mechanical mixing just
like the Raptor 50 or the Raptor 90/SE
you have to adjust 90°.
Please refer to the tail servo speed
description above. Use the same procedure
for the swashplate servos.
Adjustment of the swashplate servos
frequency. Most of the digital servos can
be used with 166Hz. Please refer to the
servos manual. Swashplate servos can be
used up to 200Hz. The higher the
frequency, the more performance you get.
Sensor Menu
Servo Setup
Wrong
Right
Wrong
Right
This values should not be
changed. here you could
adjust a deadband for
swashplate and/or tailrotor,
where the helicopter will not
react to your given controls
Same function as in the P/I
menu of the tail rotor. 3D pilots
should test a value about 50,
scale pilots a number under 50.
It is comparable to negative
Expo and is just used by
some 3D pilots. Normally it´s
not necessary to change this
value.
This value should not be
changed. The GT5 will
calibrate itself to the different
transmitters. Under some
circumstances it could happen
that with very old transmitters
you´ll need this menu item for
calibrations.
In 99% of the cases it should
not be necessary!
Same function as in
the swashplate P/I menu
Expo for swashplate
!
!
!
Hints for Adjustement
!
Normal receiver
Transfer Data
Transmitter setting
Binding
Reset to default
FUTABA
SBus
SPEKTRUM
Compatible
Calibrating elevator, aileron and tail sensors:
the calibration is done by factory and should not be changed!
If there is any cause of changing this values or if the values have
been changed accidentally without writing down the factory values
you can do the calibration here. Deinstall the GT5 from the
helicopter, connect it with an external battery and switch it on. Now
you can select the 3 different menu items of the sensors. First do
a double tap to activate the menu item. Do another double tap to
set the value to 0. Now rotate the GT5 around the given axis and
you can see how the 0 changes it´s value. The value in the display
has to change from 0 to 89 if you rotate it over 90°. If a higher
number is played (e.g. 92) the value of the axis has to be
adjusted. Do a double tap to activate the menu and change the
value about 3, then save it by double tapping. After this procedure
check the axis one more time to be sure everything is calibrated
perfectly.
For the first test hover P and I should be set about 30-40% for
swashplate and tail. Depending on your helicopter and your servos you
can now increase this value step by step. If one P value is set too high
you can see that
with a fast seesawing tail or swashplate. If I is set too
high the seesawing is acting more slowly.
For security reasons we invented the total gain
feature. As you can see on the drawing, you
can set the total gain to 100% or 60% for
example (you can select a switch or a
potentiometer for this). If you have Spektrum
the total gain is Ch7 and with external receivers
it´s the center pin of the 1in3 cable „Term“ at
the GT5 .
If the stopping behaviour works fine with 100% total gain you can
adjust I. I is for constantly pirouette rates for tail and constantly
flipping and rolling over elevator and aileron. Don´t set I too high, this
is an error a lot of pilots do.
You should adjust I until elevator, aileron and
tail are working fine. If you are an advanced
pilot you can test the pirouettes during fowrad
flight for setting the optimum value. Beginner
just can leave 40 or set it about 10 points under
the P value. If P is for example 75%, adjust the
I to 65%. If the tail or the swashplate begins to
seesaw slowly, the I value has to be reduced.
If the heli should begin too swing up during flight, please
remember that with the selected swith or potentiometer you
can reduce all the sensor functions to a reduced value. Now
the seesawing should stop.
Please remind that with the total gain also
the maximum
travel of the servos will be reduced. For this reason always
leave 100% total gain if you are adjusting servo travels,
swashplate etc. For this reason the heli feels a lot smoother
if you change from 100% to 60%.
The faster the servos for swashplate and tail are, the higher
you can adjust the performance (the stopping behaviour).
Also the power of the swashplate servos are playing an
important role, so please select good powerful servos. A
servo for the 50/90class should at least have a power of
6kg. For hard 3D flying select servos which have at least
10kg. The more powerful they are, the better.
Now you can hover the heli with a total gain
of for example 60%. The heli will feel a bit
slow and unstable. If there´s no
seesawing in swashplate or tail you can flight
in safety height and switch to 100% total gain.
If neither the swashplate nor the tail seesawing you can land and
increase just P until the heli is stopping crispy. If it´s beginning to
seesaw you have to reduce P a bit.
This is just possible in connection
with the use of Spektrum satelites.
If the throttle/pitch is not working
fine, you can change here between
DX7 and MC22 (with Spektrum
module).
Here you have to choose the type of
receiver. S-Bus, Spektrum
(Satelites) or a normal, external
receiver.
Just with Spektrum satelites:
Activate the menu item and both
satelites will flash - the binding is
active. Now keep the binding button
on your Tx pushed and turn on the
Tx. Binding should be complete now.
Factory setting. Recovers the
standard adjustements
This menu item has not a
function yet and may not be used.
D-Sens: Optimizing the tail´s stopping behaviour
Give full tail
control for
testing the
constancy of
the pirouettes.
Elevator seesawing after hard stopps:
D-Sens and I-D-Stick :
!
!
Hint: Agility of aileron and elevator
Hint: Pirouette speed
This value has to be tried out on the flying field in order to feel the
difference and to find your own preferences.
If this value is set too high the heli may be swinging or
seesawing after hard stopps over the elevator axis.
Seesawing or
swinging after hard
elevator stopps
I = Constant pirouettes
JC6276V2
If the heli is seesawing or swinging after (and in case that the
rotorhead and/or the mechanics are not causing this problem) you
can try to increase the D-Sens value in steps of 5 until the
stopping behaviour is perfect (until 60-70%).
If the seesawing still remains a
bit, the I-D Stick function can be
reduced a bit. For fast forward
manovers a I-D-Stick value of
100% will be working better. If
all this does not help, another
problem causes this effect. If you
have a small helicopter it can be
possible that you have to reduce the I-D-Stick from 100 to
60-80%. For bigger helicopters it´s normally not necessary.
Tailrotor Parameter basics:
P is used for the stopping behaviour and
holds the tail in it´s place if hard manovers
are flown. If P is set too high, the tail will
begin to swing/seesaw. If P is set too low, the
tail will not stay in it´s position and it will not
feel crispy but a bit unstable.
I means the consistency of the pirouettes. If
you found the perfect P value, you can set
I.Here you have to fly manovers which will
need a lot of power for the tail (fast forward
manovers). Advanced pilots can try this
without 3D: Simply let the heli fly forward
and rotate the tail. You should increase I step
by step until the pirouettes are constantly. If
you don´t want to test this, you can set a test
value, which is 10 points lower than P. If the
tail is seesawing reduce I until it´s stable.
In the
swashplate menu you´ll find the settings
for Elv = elevator and Ail =
aileron.Thesevalues should remain at 100.
Just as the tail pirouetting rate you can
adjust the elevator and aileron speed over
the maximum servo travel in your transmitter. If you reduce the servo travel for elevator
from 100 to 70 in your Tx, the speed in which
the heli does flips over eleveator is slowing
down. If you want to increase the agility you
have to increase the servo travel in your Tx
(you can adjust it over 100% if it´s needed). If
the maximum travel in your Tx is not enough,
you can adjust more than 100% in the GT5
The GT5 has a lot of adjustment possibilities. At the
beginning it may seem a bit complicated, but it will be possible
to reach the perfect settings for your personal flight style.
Further you can reach a very high performance which is not
possible with other systems (or systems which have „rigid“
setups). For this reason we created a very flexible and high
performance system especially for you.
If you change any settings in the GT5, please just change one
setting at once. If you do this, you can „feel“ the effect“ and
decide if you like the changes. If you change too much settings it
may result a bit confusing and you won´t find your personal
perfect setup.
The maximum pirouetting speed is set directly in the servo
travel menu in your transmitter. Just select the depending
servo channel (normally Ch4). The higher the value, the
faster the tail rotates.
I-dyn: Tail-Stick reaction
Here you can adjust with the parameter
I-dyn how quick the tailrotor will respond
to the given controls of the pilot. 3D
pilots will set a value between 45 and 50.
Scale pilots will need values from 20-30.
If the tail will not stop crispy with full P value, you can
optimize the stopping behaviour with D-Sens. Normally
D-Sens is the half the P value. If P is 70%, you should start
testing a D-Sens value with about 35%.
Swashplate - feed forward:
The secret of a direct and quick responding
swashplate. If P and I for the swashplate are set,
you can set the menu item „feed“ (feed forward)
This function controls how much given controls of the stick are passed
directly to the swashplate without regulation. 3D pilots should set
about 80-99. Set like this the heli will respond very quick to the given
controls which is giving a very direct, crispy control feeling,
comparable with a flybar rotorhead.
Here you can set if the GT5 is used in
a Nitro or an electric helicopter.
Here you can set the maximum
and minimum pitch, while having a pitch
curve from -100 to +100 in your
transmitter. Test the maximum reached
angle by using a pitch gauge.
Aileron = agility for the aileron axis. Leave
it at first with 100. Just in case that you
need
more agility and yet have reached the
maximum in the transmitter, set it here.
Elevator = agility for the elevator axis.
Leave the value at 100. If you want to
change it, follow the instructions of aileron
settings
Attention: All parameters in the following servo setup have to fit to
the tecnical specifications of the servos. If you set higher values in the
GT5 the servos can be damaged.
D - Tail Stick
Tail Stick - Deadband
Swashplate Stick Deadband
Please do not change this values,
because this represents the
calibration of the 3 axis. After
explication of all system symbols the
adjustments will be explained
in a grey hintbox. The best would be
if you write down the start values,
so you don´t need to demontate the
GT5 for recalibration if you have
changed the values accidentally.
 Loading...