

Page 1

Universal USB 2.0 Docking
Station
User’s Manual
Page 2

© 2012. All Rights Reserved.
Universal USB 2.0 Docking Station User’s Manual
This revision: 07/2012
Model number: __________________________________
Serial number: ___________________________________
Date of purchase: ________________________________
Place of purchase: ________________________________
Page 3

Before starting... 1
Safety information 1
Introduction 2
Features 2
Package contents 2
System requirements 2
Product overview 3
Front view 3
Rear view 4
Connections 5
Installing the driver 5
Installing the driver under Windows 7 or Windows Vista 6
Installing the driver under Windows XP 7
Verifying the driver install 7
Configuring your displays 8
Menu options and settings 9
Multi-monitor configuration 9
Supported resolutions 10
Uninstalling the driver 11
Regulatory compliance 11
Specifications 12
Frequently asked questions 13
Contents
Page 4

1
English
Before starting...
Before connecting or using this product, please read through this User’s
Manual.
Note: The illustrations in this guide are only for reference. Your
product may differ.
Safety information
• Keep this User’s Manual for future reference
• Store the product in a warm, dry environment
• Refer to an authorized technician if the product:
• Has been exposed to moisture.
• Has been dropped or damaged in any way.
• Shows obvious signs of breakage.
• Is not working well and you can’t fix it by following the advice in
the User’s Manual.
Page 5

English
Introduction
This docking station enables you to expand your notebook’s connectivity.
It allows you to add extra USB peripherals and connect to a LAN while
occupying only one USB port on your computer. The docking station
supports the USB 2.0 specification.
The docking station also supports video output through a DVI connection.
The extra display device can be configured to mirror your primary screen or
extend the Windows desktop.
The docking station is ergonomically designed with most peripherals
plugged in from the rear and a USB port and on the front. It also features
an industry-standard security lock.
Features
• USB 2.0 compliance.
• External display resolution up to 1920 x 1080 resolution.
• Ethernet connectivity.
Package contents
• Mini docking station
• USB 2.0 cable
• Power adapter
• CD containing the User’s Manual and drivers
• Quick Guide
• DVI-to-VGA adapter (only for selected models)
2
System requirements
• PC with dual-core CPU at 2.0 GHz or higher.
• 1 GB of RAM
• USB 2.0 port
• 30 MB of available disk space
• Microsoft
or Windows
®
Windows® 2000 SP4, Windows® XP SP2, Windows Vista®
®
7
Page 6
3
English
1
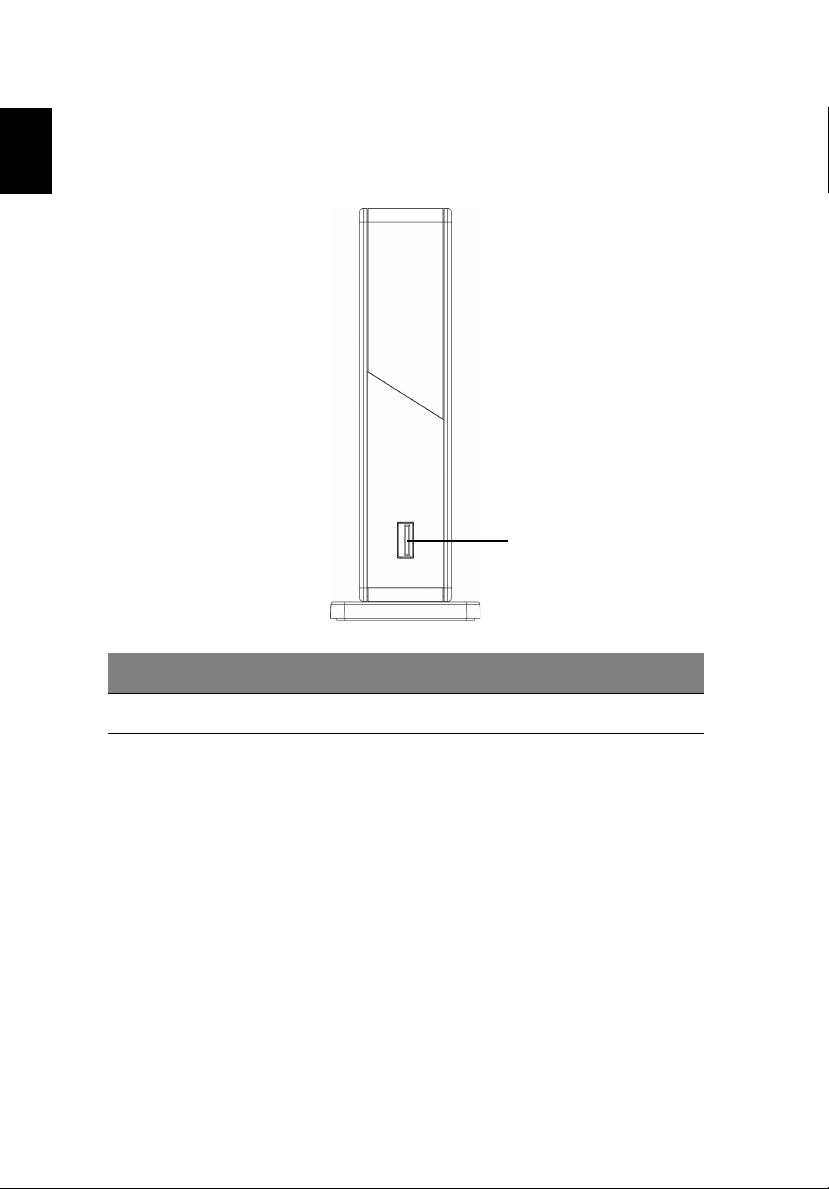
Product overview
Front view
# Item Description
1 USB 2.0 port Connects to USB devices
Page 7

English
Rear view
2
3
4
5
6
# Item Description
4
2 USB 2.0 ports Connect to USB devices.
3 LAN (RJ-45) port Connects to a LAN.
4 DVI connector Connects to a DVI display or projector.
5 Type B USB 2.0 port Connects your docking station to your computer.
6 Power jack Connects to the power adapter. The mini
docking station always needs external power to
operate, it is not USB-powered.
Page 8

5
English
Connections
The illustrations below show how various peripherals may be connected to
your docking station.
Installing the driver
Important: Make sure you have installed the appropriate driver from
the supplied CD before connecting the docking station to your PC.
Note: The screen captures below are for reference only and may
differ from the dialog boxes you see.
Page 9

English
Installing the driver under Windows 7 or Windows Vista
1 Insert the supplied CD into your computer’s optical disc drive.
2 Click Run Setup.exe to start the installation.
Note: If autorun is disabled on your computer, use the file browser to
open your optical drive and double-click Setup.exe to start the
installation.
6
3 Enter the administrator password and click Yes if the User Account
Control dialog box appears.
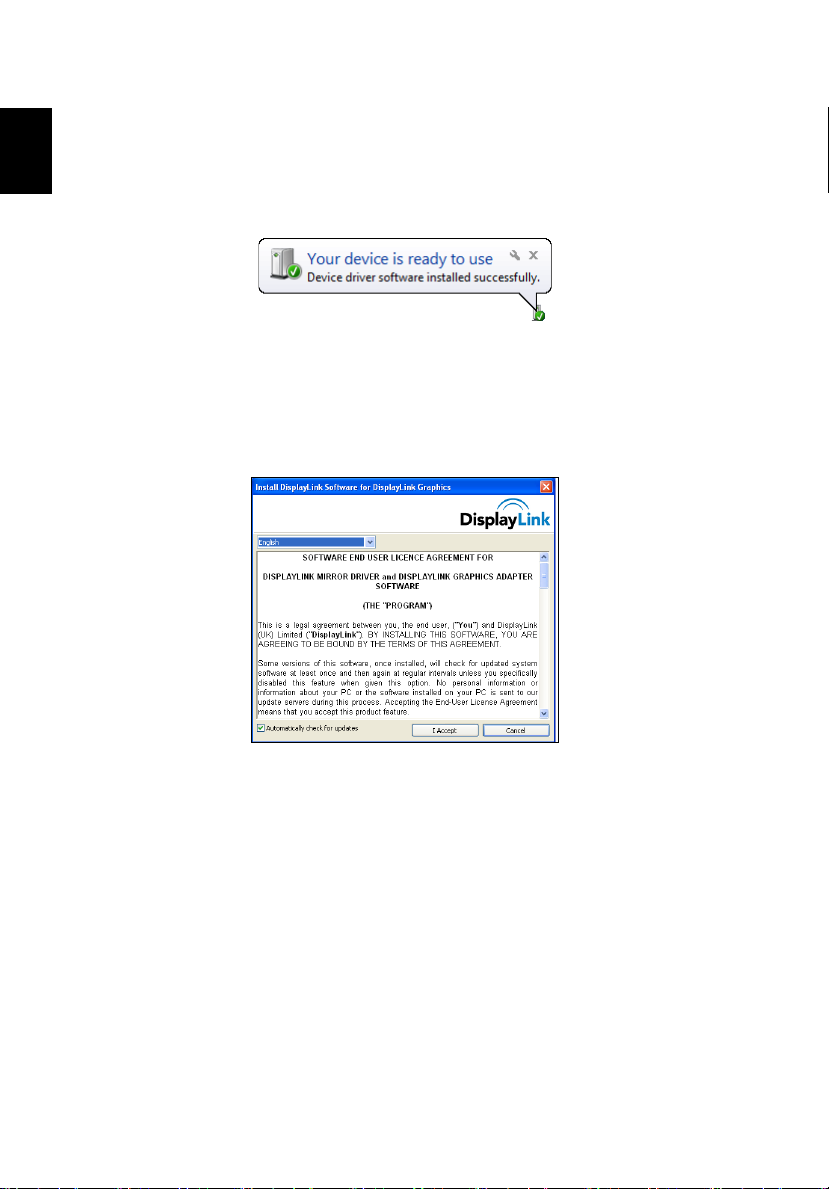
4 Read through the EULA and click I Accept to continue installing.
Page 10
7
English
5 The installation will proceed and may take a few minutes. During the
installation, your screen may flash or temporarily go black.
6 Plug your docking station into your computer once the driver is
installed. Your system will display a message in the icon tray informing
you that the docking station is ready to be used.
Installing the driver under Windows XP
1 Insert the supplied CD into your computer’s optical disc drive.
2 Read through the EULA and click I Accept to continue installing.
3 The installation will proceed and may take a few minutes. During the
installation, your screen may flash or temporarily go black.
4 If you are prompted to restart your computer, please do so before
plugging in the docking station.
Verifying the driver install
You can verify that the driver is correctly installed from the Control Panel >
Device Manager.
Page 11

English
In the Device Manager, you should see a DisplayLink device listed.
If there is a yellow icon next to any item, the driver has not been installed
correctly: In which case, you should remove the driver, unplug the docking
station and reinstall the driver.
Configuring your displays
The supplied utility allows you to configure the display, screen rotation,
resolution and physical arrangement.
1 Click the utility icon in the icon tray.
2 Select the item you wish to change from the menu that appears.
8
Page 12

9
English
Menu options and settings
Option Description
DisplayLink Manager Open Windows screen resolution settings.
Screen Resolution Select an available resolution.
Note: This function is unavailable in mirror mode, as
the resolution is defined as the resolution of the
primary monitor.
Color Quality Select the desired color depth.
Screen rotation Set the screen rotation as needed.
Extend to Extend the screen to the desired display.
Set as Main Monitor Set the selected display as the main monitor.
Notebook Monitor Off Set the external display as the main display and turn
off the notebook’s screen.
Note: This function works only when an external
display is connected, and will only appear when the
utility is installed on a notebook computer.
Mirror Set the external display to duplicate the main display.
Off Turn the external display off.
Multi-monitor configuration
You can connect an additional monitor to your computer through the DVI
port in addition to a monitor connected to your computer’s VGA port.
The external monitor can be configured as the main display, to mirror the
main display or for an extended Windows desktop. To configure the
displays, right-click on the Windows desktop and select Screen resolution
Page 13

English
(Windows 7), Personalize > Display Settings (Windows Vista), or
Properties > Settings (Windows XP) and adjust the settings as required.
Alternatively, if your computer is running Windows 7, you can press the
Windows key < >and <P> to configure the displays.
Supported resolutions
10
Resolution
640 x 480 VGA 60 / 72 / 75 / 85 60 / 72 / 75 / 85
800 x 600 SVGA 56 / 60 / 72 / 75 / 85 56 / 60 / 72 / 75 / 85
1024 x 768 XGA 60 / 72 / 75 / 85 60 / 72 / 75 / 85
1280 x 768 WXGA+ 60 / 70 / 75 / 85 60 / 70 / 75 / 85
1280 x 960 SXGA- 60 / 85 60 / 85
1280 x 1024 SXGA 60 / 75 60 / 75
1366 x 768 WXGA+ 60 60
1400 x 1050 SXGA+ 60 / 75 / 85 60 / 75 / 85
1600 x 1200 UXGA 60 60
1680 x 1050 WSXGA+ 60 60
Refresh rate: 16-bit
color depth (MHz)
Refresh rate: 32-bit
color depth (MHz)
Page 14

11
English
Resolution
1920 x 1080 1080p 60 / 50 60 / 50
Refresh rate: 16-bit
color depth (MHz)
Refresh rate: 32-bit
color depth (MHz)
Uninstalling the driver
If you need to uninstall the driver, go to the Control Panel > Programs >
Programs and Features and select DisplayLink Graphics. Click on
Uninstall or change the program.
Confirm that you wish to delete the driver.
You may be asked to reboot your computer to complete the uninstall.
Regulatory compliance
FCC conditions
This equipment has been tested and found to comply with Part 15 Class B
of the FCC Rules. Operation is subject to the following two conditions:
1 This device may not cause harmful interference.
2 This device must accept any interference received and include
interference that may cause undesired operation.
CE
This equipment is in compliance with the requirements of the following
regulations: EN 55 022: CLASS B
WEEE
For users in the European Union: According to the WEEE
(Waste electrical and electronic equipment) Directive, do
not dispose of this product as household waste or
commercial waste. Waste electrical and electronic
equipment should be appropriately collected and
recycled as required by practices established for your
country. For information on recycling of this product,
please contact your local authorities, your household
waste disposal service or the shop where you purchased
the product.
Page 15

English
Specifications
Host interface USB 2.0
Connectors Video out DVI
Host upstream link Type B USB
Hub downstream link Type A USB
Network RJ-45 (Ethernet)
Power DC-in
Video Maximum resolution 1920 x 1080
Color depth 16- and 32-bit
Power Mode Self-powered
Adapter Input: AC 100 - 240 V
Output: DC 5 V, 4 A
12
Dimensions 145 x 75.5 x 34 mm (without
stand)
Weight 293 g
Environment Operating temp 10 to 40 degrees C
Storage temp -10 to 80 degrees C
Compliance CE, FCC
Page 16

13
English
Frequently asked questions
How do I get the drivers I need?
Go to www.acer.com and select your country/region. Click Support >
Drivers & Downloads > Notebook > Travelmate and then your computer
model. Select the operating system from the drop-down menu and click the
Drivers tab.
Download and open the USB docking station driver file.
Once the file you’ve downloaded is open, extract the folder to your
computer and double-click autorun.exe to start the installation process.
My connected devices are not functioning.
This could be caused by the following:
• The docking station power adapter is not plugged in properly. Please
make sure the power adapter is plugged in properly to the power outlet
and the docking station.
• The drivers are not correctly installed. To resolve this issue, please
make sure you have the correct device drivers and that the docking
station driver is correctly installed.
• A power surge may have disabled the connected port. To recover the
port functionality, turn off the docking station then reconnect the power
after a few minutes.
My external display does not work after I plugged in the
docking station.
This could be caused by following:
• The docking station power adapter is not plugged in properly. Please
make sure the power adapter is plugged in properly to the power outlet
and the docking station.
• The display cable (VGA/DVI/HDMI) is not correctly connected. Ensure
the cable is correctly connected.
• The display settings may be incorrect. Make sure the display mode is
set to Extended.
• The drivers are not correctly installed. Please install the driver from the
Driver CD and reboot your system before reconnecting your external
display.
Page 17

14
English
The LAN port (RJ-45) on the docking station does not work
after I plugged in the docking station.
This could be caused by following:
• The docking station power adapter is not plugged in properly. Please
make sure the power adapter is plugged in properly to the power outlet
and the docking station.
• The LAN cable is not correctly connected. Please ensure the LAN (RJ-
45) cable is plugged in properly.
• The drivers are not correctly installed. Please install the driver from the
Driver CD and reboot your system before reconnecting your LAN
cable.
What graphics interface that USB docking station support?
The provided docking station driver includes a software-based graphics
driver. Not all hardware acceleration methods are available to applications.
The table below provides more support information.
Interface Windows XP Windows Vista / Windows 7*
DirectX 10 No Yes, if supported by the primary graphics card.
DirectX 9 No Yes, but full screen mode is not available. It
displays only in window mode.
DirectX VA No Yes, if supported by the primary graphics card.
Direct 3D No Yes, but not available when the docking station
is set as the primary display.
DirectDraw Yes Yes
OpenGL No Yes, but full screen mode is not available. It
displays only in window mode.
GDI+ No Yes, but full screen mode is not available. It
displays only in window mode.
* With Windows Aero enabled.
Page 18

15
English
When the display output is set to Full screen, the right-click
menus or newly opened applications are corrupted or unclear.
This may occur when the resolution is set to higher than the display
capabilities, and the computer is incapable of rendering the screen at full
quality.
To improve display quality, please try the following:
• Close unnecessary programs.
• Set the power plan to High performance when using a notebook.
• Play any video content on the notebook screen instead of using the
external display.
• Select a lower screen resolution.
The screen is blank when playing protected content.
Many factors may cause this issue, such as:
• Playing back protected contents over a USB connection.
• You may need to download additional CODECs for your viewing
program.
• Your system may not have the encode/decode capabilities. Please
check with the vendor to confirm the support and capabilities.
I encounter slow performance and the image lags or freezes
when playing videos on external displays.
• The CPU may be overloaded. Reduce the screen resolution or close
unnecessary programs.
• Ensure you have not set the display resolution too high. For details of
the supported display resolutions, please refer to "Supported
resolutions" on page 10.
 Loading...