

Acer Multi-Functional
7-in-1 VideoCam
Model: SV-200
User’s Guide
i

ii

PCSafety Precautions
PCSafety Precautions
Dear Users,
Please read this manual thoroughly before you start to use your SV200(“SV2“ for short). In addition, please keep this manual properly, if
there is any question about SV2 in the future, please help yourself to find
the answer within. However, if you are still unclear about the answers
obtained, please contact your retail for further assistance.
Important Notices
User should be responsible on any substantial damages caused by not
complying with the instruction of the manual or using any component/
part which is not genuine from the manufacturer.
The product provides high image and recording quality, however, poor
performance due to improper use or poor maintenance are not
warranted by the manufacturer.
The manufacturer takes no responsibility on any content damage and
substantial lost due to the malfunction or damage of SV2 and its
accessories.
Warranty will be immediately expired if the SV2 is substantial damages
to the user not comply with the instruction of the manual or disassemble
the product by him/herself.
The actual operations, controls, and menu items might be different from
this manual. The manufacturer holds no responsibility to update the
manual immediately.
Other company's product names or trademarks are used herein for
identification purpose only and belong to their respective companies.
iii

Introduction
Introduction
The Acer Multi-Functional 7-in-1 VideoCam integrated the functions of
video recording (MPEG4 format), photo shotting, audio recording, MP3
playback, PC camera, and USB Storage Drive, SD/MMC card reader into
a popular seven-in-one product. Its light weight, outstanding power
efficiency, simple operation, long usage time, and high resolution
provides the best companion and tool to the business person, students,
and travelers.
Its versatile features not only fulfill for business requirements, but also
satisfy entertainment needs. It can support your work from all aspects,
and provide the most of funs to your life. We appreciate your selection
to our product and wish it can provide you a brand new life style and
experience.
iv
1

PCTable of Contents
PCTable of Contents
Safety Precautions ..................................................................... iii
Introduction ............................................................................... iv
T.O.C ............................................................................................ v
1 Preparations
1-1 Accessories ............................................................................ 1
SV2 / Power adaptor / Battery . . . . . . . . . . . . . . . . . . . . . . . . . . . . . . . . . 1
SD memory card(optional) / A/V cable . . . . . . . . . . . . . . . . . . . . . . . . . . . 1
USB cable / Stereo headphone / Hand strap / Companion CD . . . . . . . . . 2
1-2 Using AC power adaptor ..................................................... 3
1-3 Using Battery ........................................................................ 4
Battery installation . . . . . . . . . . . . . . . . . . . . . . . . . . . . . . . . . . . . . . . . . 4
Battery removal . . . . . . . . . . . . . . . . . . . . . . . . . . . . . . . . . . . . . . . . . . . 5
1-4 Installing SD Memory Card(Optional) ................................. 5
1-5 Installing the Hand Strap ..................................................... 6
2 Touring Your SV2
2-1 Knowing your SV2 ................................................................ 7
2-2 Operation .............................................................................. 8
Power button / Mode switch . . . . . . . . . . . . . . . . . . . . . . . . . . . . . . . . . . 8
Control button / Jog dial switch . . . . . . . . . . . . . . . . . . . . . . . . . . . . . . . 9
2-3 Headphone ......................................................................... 10
2-4 Video/Audio Output ........................................................... 10
2-5 Menu Items ......................................................................... 11
Recording function menu . . . . . . . . . . . . . . . . . . . . . . . . . . . . . . . . . . . 11
Playback function menu . . . . . . . . . . . . . . . . . . . . . . . . . . . . . . . . . . . 13
Setup . . . . . . . . . . . . . . . . . . . . . . . . . . . . . . . . . . . . . . . . . . . . . . . . . 15
2-6 Screen Indications ............................................................... 16
2-7 Setup for All Modes ........................................................... 17
Set Clock / 50/60 HZ . . . . . . . . . . . . . . . . . . . . . . . . . . . . . . . . . . . . . . . 17
v

PCTable of Contents
Video System / Media Format . . . . . . . . . . . . . . . . . . . . . . . . . . . . . . . . 18
Auto Power Off / Storage Select / Set to default . . . . . . . . . . . . . . . . . . 19
2-8 Battery Recharge ................................................................ 20
3 Using Your SV2
3-1 Video Recording ................................................................. 21
Recording / Settings . . . . . . . . . . . . . . . . . . . . . . . . . . . . . . . . . . . . . . . 21
Playback / Settings . . . . . . . . . . . . . . . . . . . . . . . . . . . . . . . . . . . . . . . . 24
3-2 Photo Shooting ................................................................... 27
How to take a photo / Settings . . . . . . . . . . . . . . . . . . . . . . . . . . . . . . . 27
Playback / Settings . . . . . . . . . . . . . . . . . . . . . . . . . . . . . . . . . . . . . . . . 30
3-3 MP3 Playback....................................................................... 33
Playback MP3 / Settings . . . . . . . . . . . . . . . . . . . . . . . . . . . . . . . . . . . . 36
3-4 Audio Recording ................................................................. 38
Recording . . . . . . . . . . . . . . . . . . . . . . . . . . . . . . . . . . . . . . . . . . . . . . . 38
Playback / Settings . . . . . . . . . . . . . . . . . . . . . . . . . . . . . . . . . . . . . . . . 39
3-5 PC Camera ........................................................................... 41
3-6 USB Storage Drive .............................................................. 42
4 Miscellaneous
4-1 Taking Care of Your SV2.................................................... 43
About SV2 / About the AC Adapter . . . . . . . . . . . . . . . . . . . . . . . . . . . 43
About the battery . . . . . . . . . . . . . . . . . . . . . . . . . . . . . . . . . . . . . . . . . 44
4-2 Write Protection and File Structure of SD Memory Card 44
4-3 Software Installation and Use .......................................... 44
Using CD to install . . . . . . . . . . . . . . . . . . . . . . . . . . . . . . . . . . . . . . . . 45
Installing via connecting SV2 to PC . . . . . . . . . . . . . . . . . . . . . . . . . . . . 48
Using PC Camera . . . . . . . . . . . . . . . . . . . . . . . . . . . . . . . . . . . . . . . . . 57
4-4 Memory Space Consumption of Each Mode ..................... 58
Recording Still Pictures (DSC Mode). . . . . . . . . . . . . . . . . . . . . . . . . . 58
Recording Motion Pictures (MPEG4) / Voice Recording Mode . . . . . . 59
4-5 Message List......................................................................... 60
4-6 Specification ....................................................................... 61
vi
PC1 Preparations
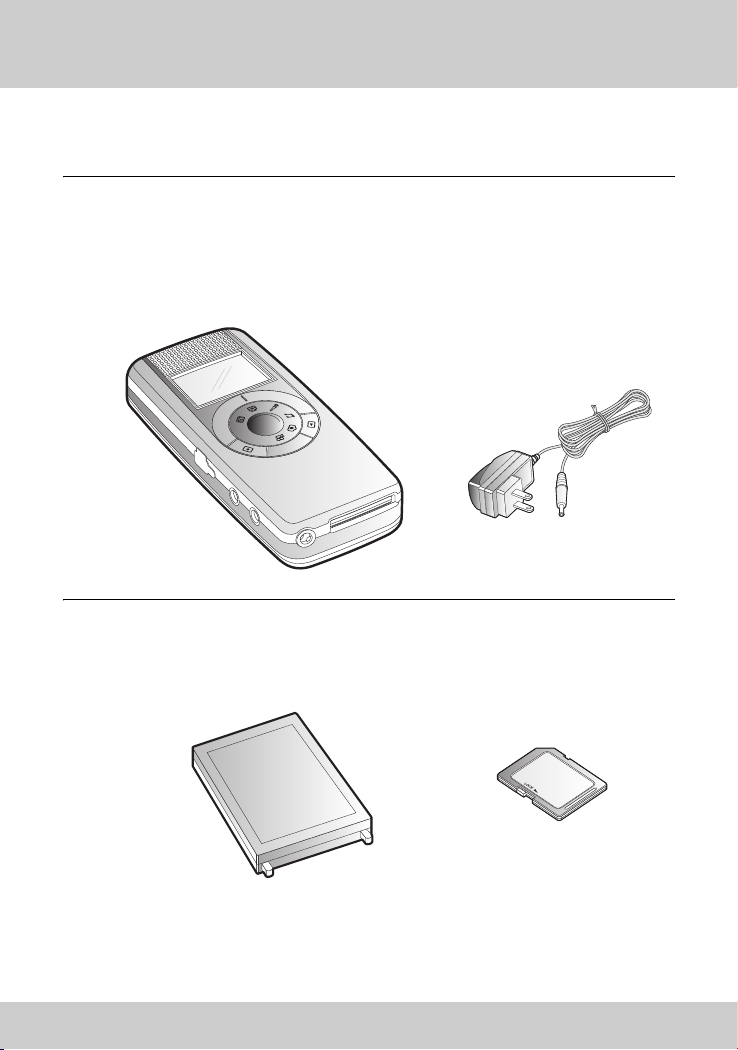
1-1 Accessories
SV2 Power adaptor
Battery SD memory card
(Optional)
1-1 Accessories
1
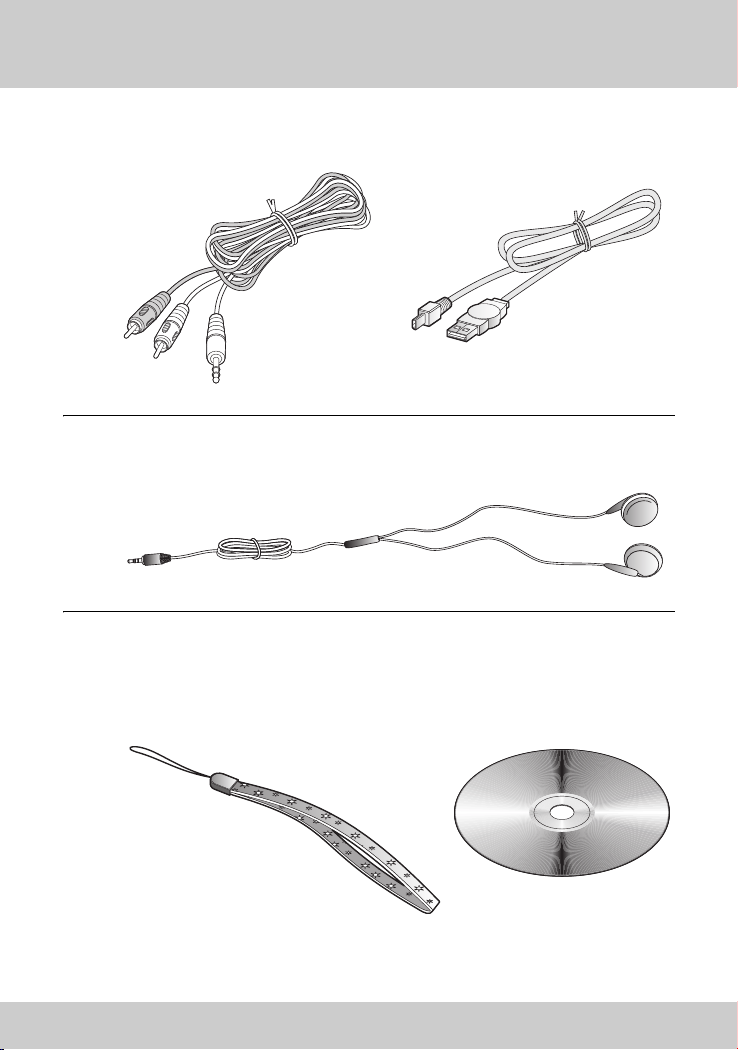
1-1 Accessories
A/V able USB
C
able
C
Stereo eadphone
Hand trap Companion CD
2
H
S
1-2 Using AC adaptor
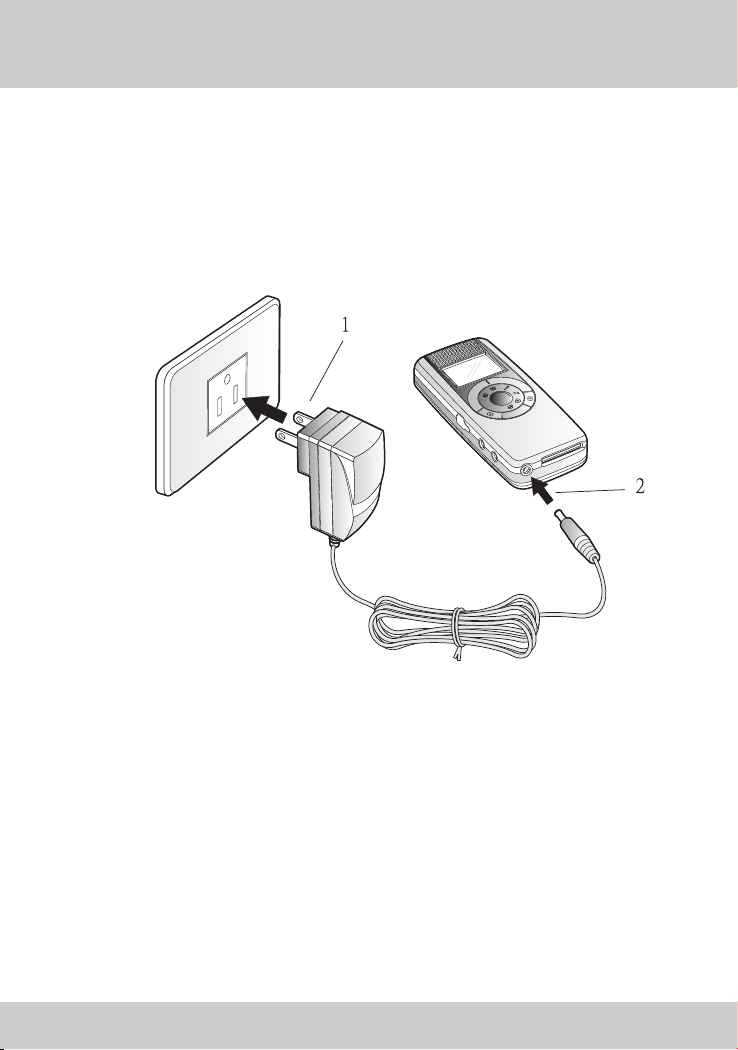
1-2 Using AC power adaptor
AC Adapter can provide necessary power to , it can also re-
charge the
Plug the AC end of the adaptor to the wall(1), and plug the DC end of the
adaptor to the DC-in jack of the SV2 (2).
battery.
this
prod
uct
3
1-3 Using Battery
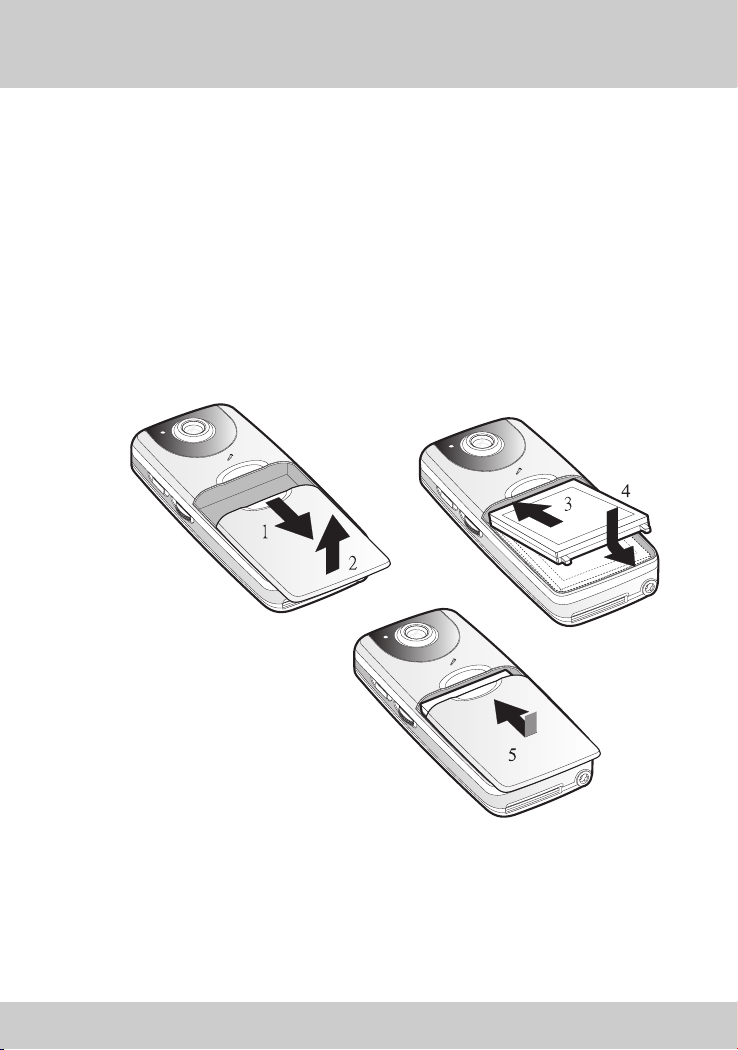
1-3 Using Battery
Battery installation:
Put SV2 on a desk, front face down. Gently push battery cover toward the
bottom of the SV2 to remove it. (1,2) Put the metal contact end of the
battery align with the metal battery contact within SV2. Slide the battery
into the bay with 45° slant angle. (3) Then, push the entire battery into the
bay. (4) When confirming the battery is in its proper position, replace the
cover, and push the cover toward the direction of the top of the SV2 until
the cover is fully closed. (5)
4

1-4 Installing SD Memory Card(Optional)
Battery removal:
Put SV2 on a desk, front face down. Gently push battery cover toward the
bottom of the SV2 to remove it. (1,2) Lift bottom end of the battery, about
45° (3) and take the battery out of the bay. When done, replace the cover,
and push the cover toward the direction of the top of the SV2 until the cover
is fully closed.
Note: Please be aware of the direction and angle of inserting/removing battery to
avoid breaking the plastic stop of the bay.
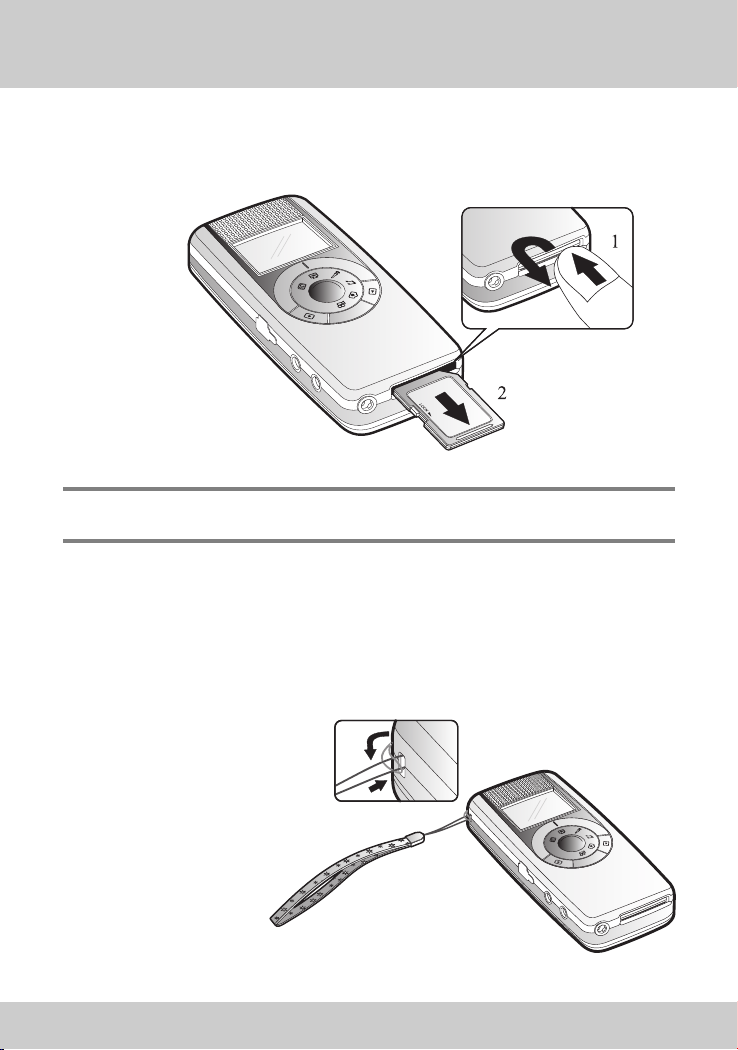
1-4 Installing SD Memory Card(Optional)
Put the slant corner of the
SD card toward upper right,
and push the card into the SD
card slot at the bottom of
SV2.
5
1-5 Installing the Hand Strap
To remove the card, push the card firmly into the slot, then release. The
card will be ejected from the slot. You can remove the card at that time.
Note: When inserting and removing the SD memory card, please be sure you turned
the power off.
1-5 Installing the Hand Strap
1. Put the thin end of the strap through the strap eyelet.
2. Put the longer end of the strap through the loop of the thinner
end. Gently pull the longer end to tight up the strap to the eyelet.
6
2
2-1 Knowing your SV2
PC2 Touring Your SV2
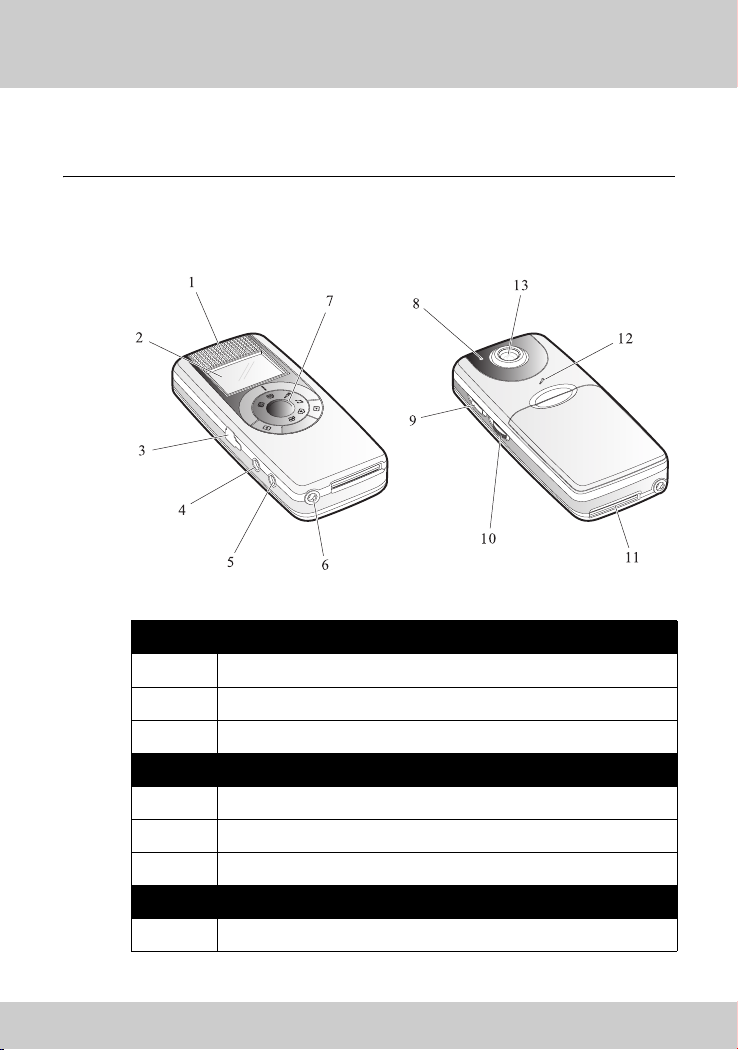
2-1 Knowing your SV2
Front panel
1 Speaker
2 Screen
7
3USB port
4 A/V output
5 Headphone jack
9 Power button
Mode switch
Left hand side
Right hand side
7
2-2 Operation
10 Jog dial switch
Rear panel
8 Status LED
13 Lens
12 Microphone
Bottom
6 DC-in jack
11 SD memory card slot
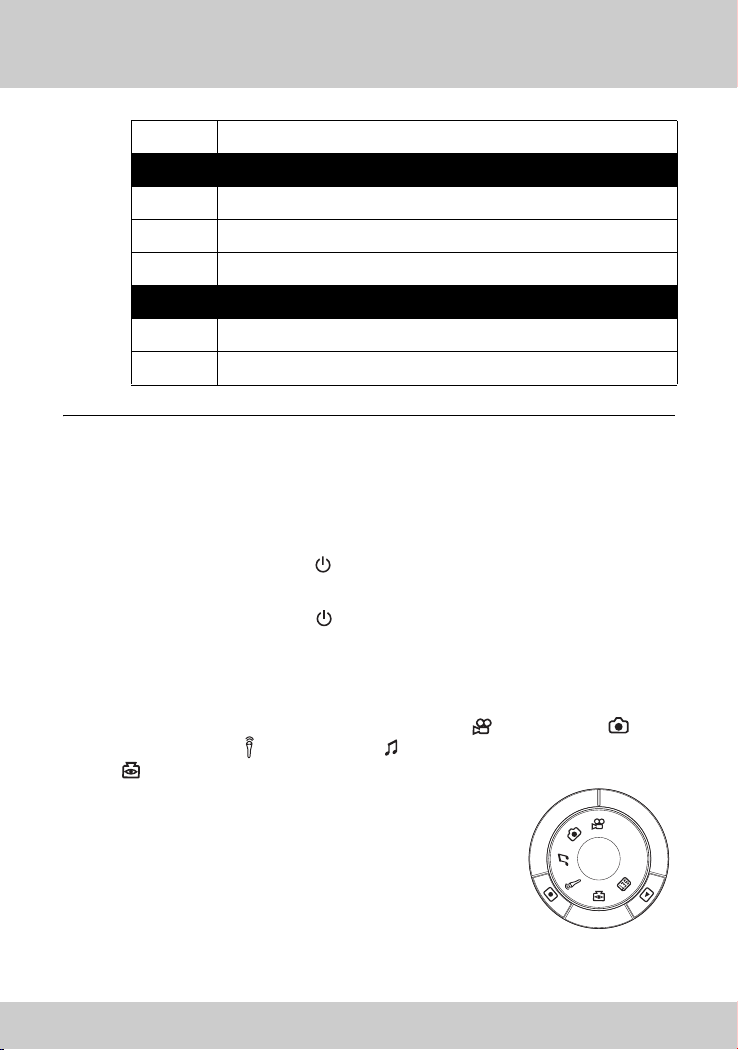
2-2 Operation
Power button:
When turning on, press button at the right hand side of SV2 until
screen goes live.
When turning off, press button at the right hand side of SV2 for about
three seconds until the screen shuts off. Then the SV2 is turned off.
Mode switch:
Switching between modes of video recording , photo taking ,
audio recording , MP3 playback , PC camera
. The mode switch can be rotated in clockwise
or counterclockwise direction. When individual icon
is aligned with the mark at outer ring, that particular
mode is enabled and operate-able.
8

Control button:
button can start/stop recoding/
playback
button can switch the SV2 between
recording and playback function or back
to upper level of menu items. Γ
Note: The function of these two buttons varies with different modes.
Jog dial switch:
Located at right hand side of the SV2,
under the power button, you can dial it
upward, downward, or push it.
The function of this switch include
execute, focus change, volume change, fast
forward, browsing, and so on.
2-2 Operation
Note: The function of the switch varies with different modes.
9
2-3 Headphone
2-3 Headphone
When using headphone, simply plug it into the audio jack located at the
left hand side of the unit. When the headphone is plugged in, stereo audio
output switches to the headphone automatically. There will be no output
from the built-in speaker of SV2.
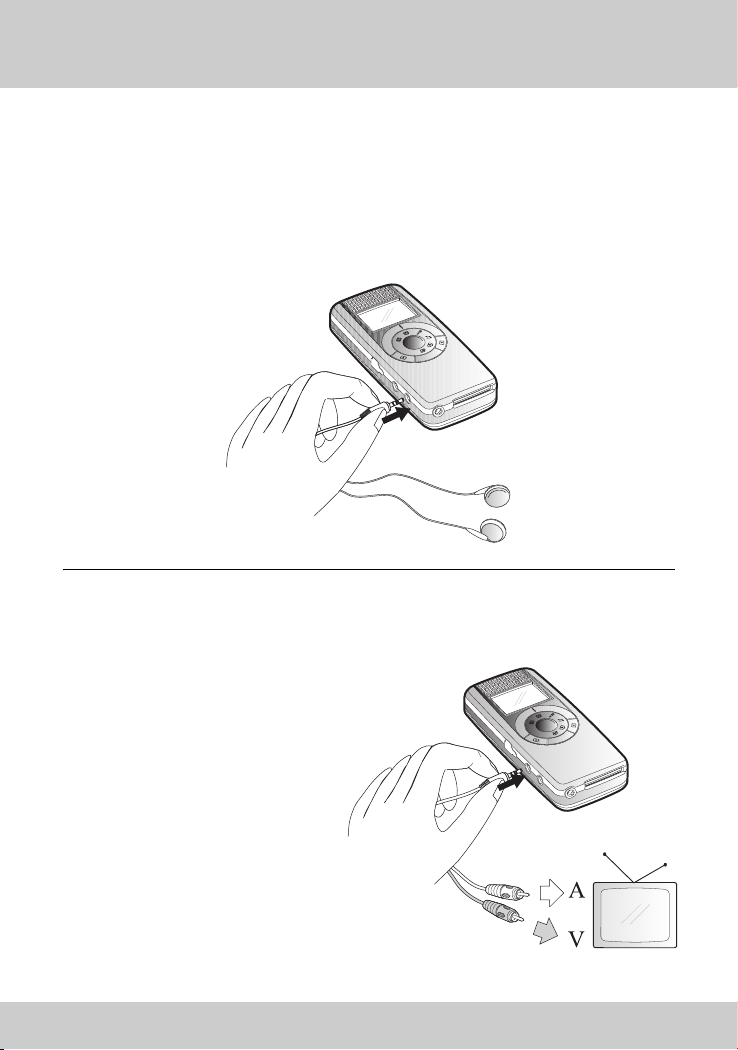
2-4 Video/Audio Output
All the video, photo, MP3,
and audio recording of SV2
can be output to TV via its
AV port. However, the
audio output will be mono.
When using TV, please
plug the black end of AV
cable into the AV jack at the
left hand side of the SV2.
Meanwhile, plug the yellow
line to “Video in” plug and
the white line to “Audio in”
plug at the rear of the TV.
10

2-5 Menu Items
Recording function menu
Exposure Value
White Balance
Video Quality
Audio Quality
Exit
2-5 Menu Items
Video recording
Photo taking
Exposure Value
White Balance
Picture Quality
Self Timer
11
2-5 Menu Items
Date Stamp
Exit
Audio recording
Audio Quality
Exit
12
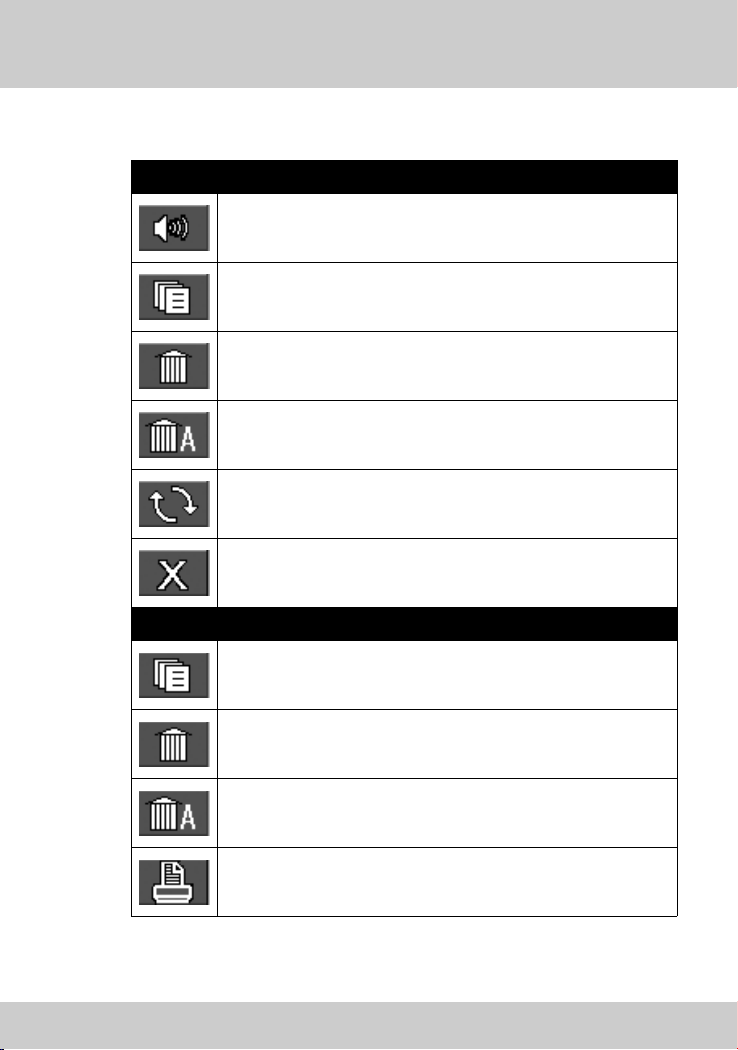
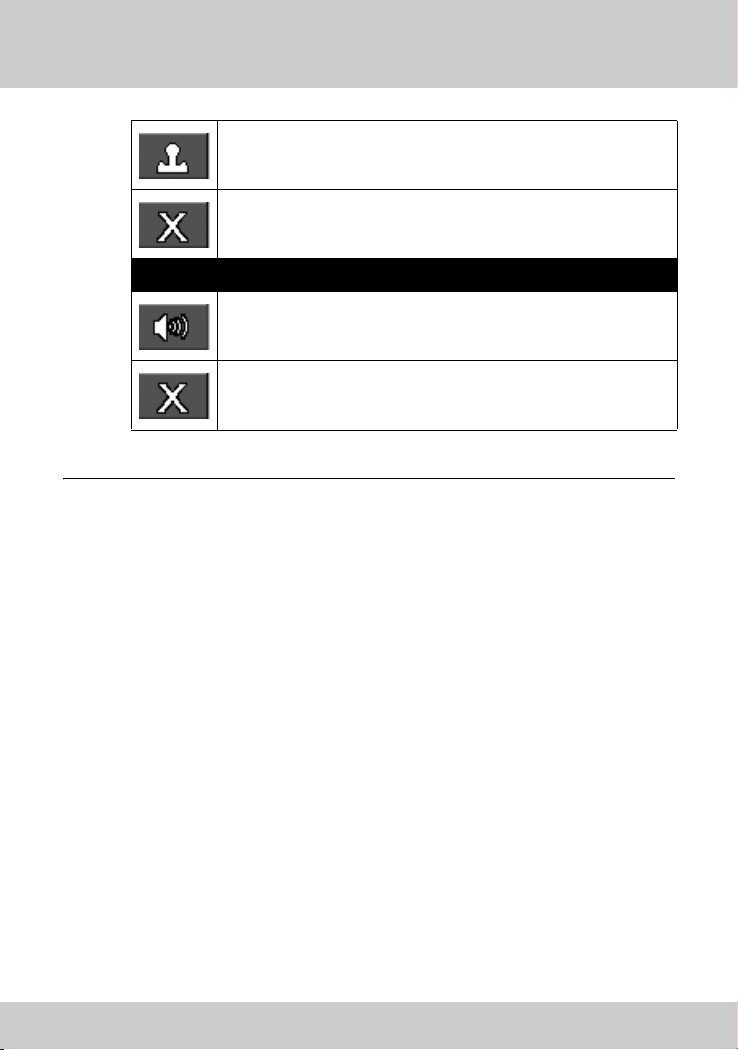
Playback function menu
Video mode
Volume Control
File List
Delete Current
Delete All
Playback Repeat
Exit
Photo mode
2-5 Menu Items
File List
Delete Current
Delete All
DPOF Print
13
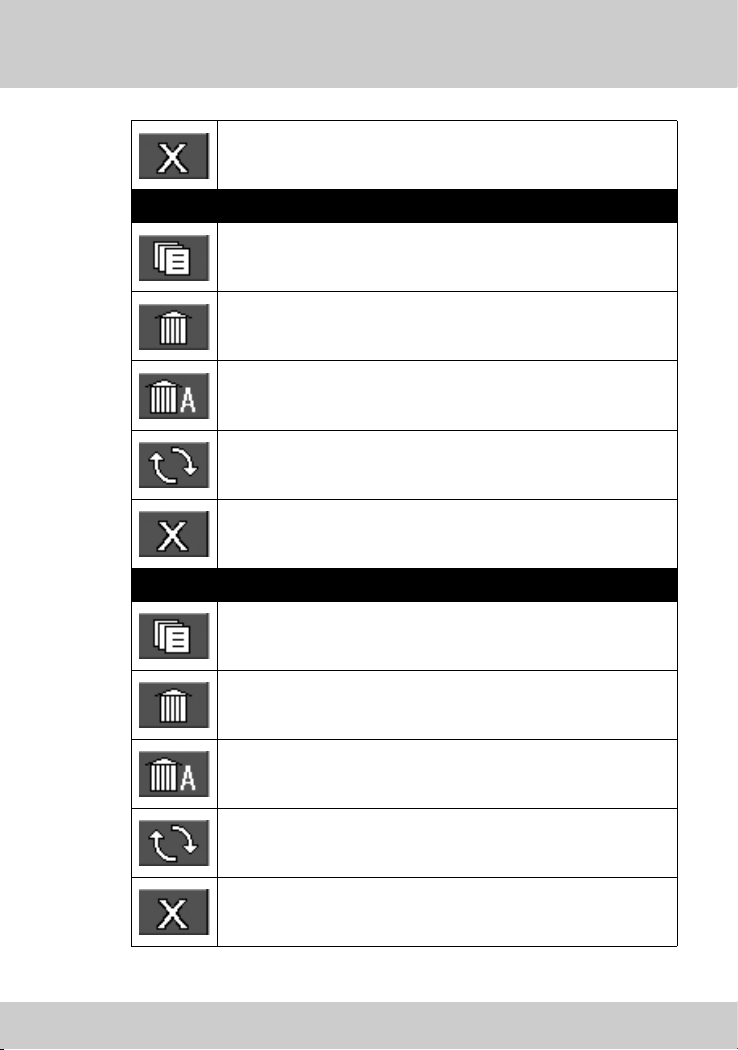
2-5 Menu Items
Exit
MP3
File List
Delete Current
Delete All
Playback Repeat
Exit
Audio
File List
14
Delete Current
Delete All
Playback Repeat
Exit
Setup
2-5 Menu Items
Set Clock
Set Clock
50/60 HZ
Video System
Media Format
Auto Power Off
Storage Select
Set to default
15

2-6 Screen Indications
2-6 Screen Indications
No Description
a. SD card remaining space: showing SD card available memory
space in percentage form. Multiply SD card total memory
space by shown percentage will get available memory.
b. Zoom indication: Applied in video recording and photo
1
2
3
taking modes. SV2 can zoom in the image 4 times bigger
with smooth digital zoom.
c. Enabled memory: Either built-in memory or SD memory card.
d. Current image number/total images.
Mode Switch: showing current mode in using.
Status indicator: current status, such as video
recording, playing back, etc.
16
Battery life indicator: Three steps indication, full is in three,
4
represent 100% battery capacity is full. Subsequently
represent 70%, 30%, and 0%.
Recording/Playing time: in the form of Hour : Minute : Second
and accumulate from 00:00:00.
5
or
Date of picture taken.
Messages: Important messages such as battery running out,
no SD card,...will be shown at the middle of the screen in a
6
significant way. Please refer to 4-5 for descriptions and
explanations of the messages.

2-7 Setup for All Modes
Switch the mode switch to , and start all pre-operation setups. Dial
the jog dial switch up and down can switch between modes.
Set Clock:
If date and time shown is incorrect,
please push the jog dial switch and hence
both of them can be adjusted
accordingly.
The screen shows in the sequence of
hour: minute: second month: date:
year.White letter indicates the item being
chosen currently. You can push the
switch to change the item. To change
numbers, dial upward or downward.
When setup is finished, push the switch until the setup screen disappears.
Then the settings are successfully stored.
50/60 HZ:
Switching between [50HZ] and [60HZ],
default value is 60HZ.
If you need change it, push the jog dial
switch (items become white color with
black background), then dial the switch
upward or downward to intended item.
Push the switch again, and the setting is
changed.
You can apply the same way to all of the following setups.
2-7 Setup for All Modes
Note: Incorrect setting will reduce image quality such as results in horizontal lines on
your images.
17
2-7 Setup for All Modes
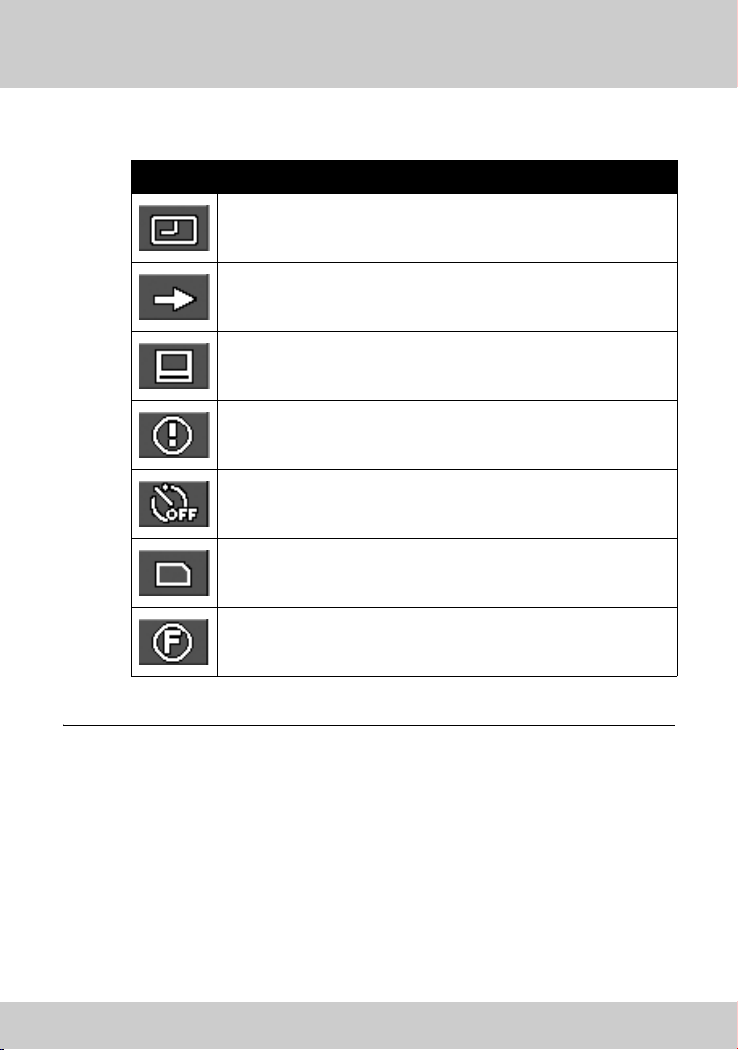
Video System:
Switching between [NTSC] and [ PAL].
Default is NTSC.
When setting is in [NTSC], the
standard output resolution is
QVGA(320x240), when setting is in
[PAL], the standard output resolution is
CIF (352 x 288).
NTSC standard TV output is using in
Taiwan, United States, and Japan, while
PAL is using in most European countries,
South America, and most Asian countries.
Media Format:
Media format will thoroughly erase
data stored in built-in memory or SD
card and re-initialize it. So these
memory space will be more suitable
for data in SV2 format.
Note: If you wish to use SD card which has been used in other devices, it is suggested
to format it before you use it. Thus, format incompatibility situation can be
avoided.
18
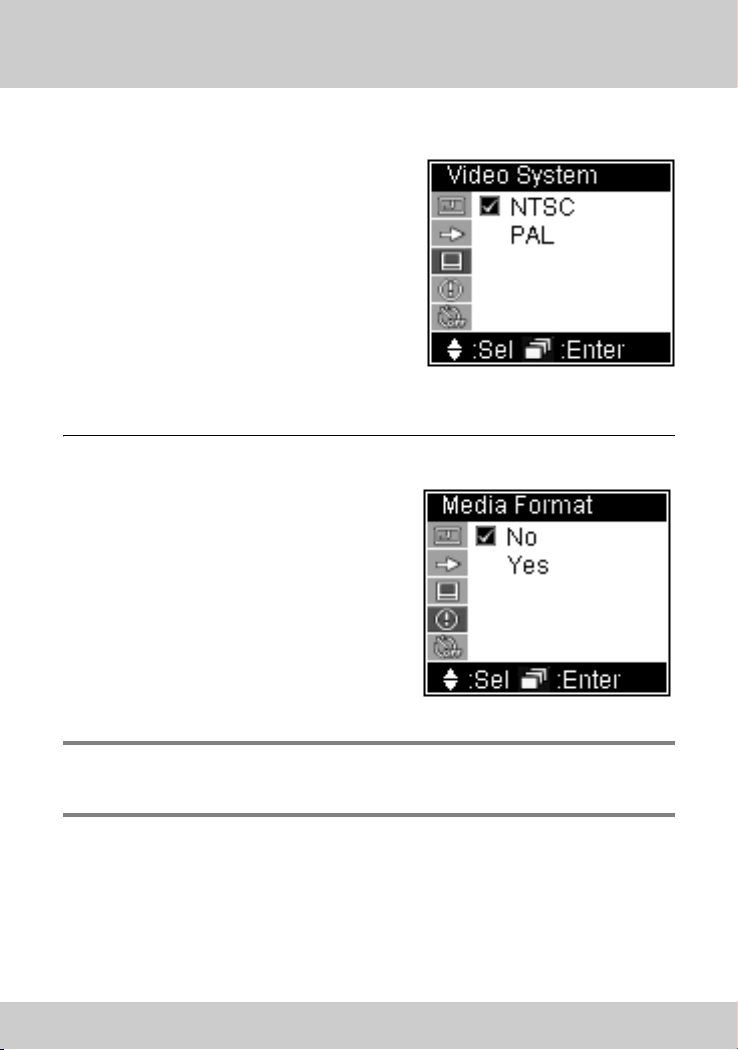
Auto Power Off:
In order to save battery power, you
can set SV2 to automatically power off
after 1,3,5,10 minutes without any
operation move. If [Disable] is
selected, SV2 will not execute
automatic power off.
Storage Select:
You can select to storing data to
either 16MB built-in memory [internal]
or SD memory card [SD Card].
2-7 Setup for All Modes
Set to default:
After change settings many times,
you can use this function to reset SV2
to factory default settings. Please
select [Yes] to do so.
19

2-8 Battery Recharge
2-8 Battery Recharge
If you notice the battery life remains one slot only (as shown ), that is,
your SV2 has remaining battery life below 30%. Please recharge your SV2
now. When recharging, the battery life indicator on the screen will flash,
and the LED at the rear of LED flash red light simultaneously.
If the battery is totally used up, there will be a red message in the middle
of the screen displaying “BATTERY LOW!”/!Several seconds later, SV2 will
shut down automatically. Unless you recharge it, you will not be able to use
SV2 anymore.
Note: A totally used up battery needs about 4 hours to recharge. Actually time taken
may vary due to capacity and battery life difference.
20
3-1 Video Recording
PC3 Using Your SV2
You can use to switch between Recording/Taking and Play function of
video recording, photo taking, and audio recording functions. MP3 has play
function only.
This chapter will introduce all functions clockwisely according to the
sequence on them on the mode switch.
Note: When switching to video, photo, and audio mode, the default function is
recording/taking.
3-1 Video Recording
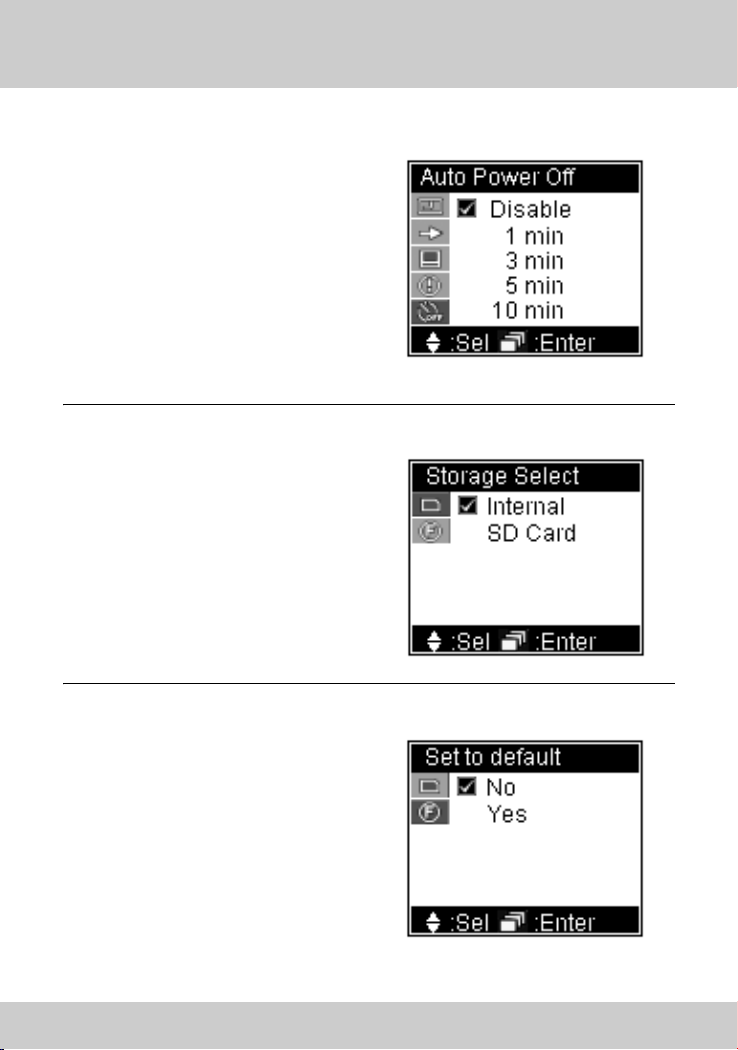
Recording (Video and Audio):
1. Rotate the mode switch to ʳ.
2. If you need to set video quality,
press the jog dial switch to activate
setup menu. Dial the switch
downward and select Video Quality.
When finish, press
confirm and exit menu display.
to
jog dial switch
21
3-1 Video Recording
3. Pressʳ button to start recording.
Note: 1. If you wish to change focus, you can dial the jog dial switch upward or
downward any time during recording.
2. When
storage. Otherwise, if
3. Lower right corner of the screen displays the recording time.
4. The LED beside of the lens lights up in during recording.
shows on screen, it is indicating SD card in use as your data
shows, you are using internal memory.
blue
4. Press button once more to stop recording.
Settings
You can conduct some setting changes
before you start recording, so as to obtain
better recording quality.
Press the jog dial switch once, you can
start to change the following settings:
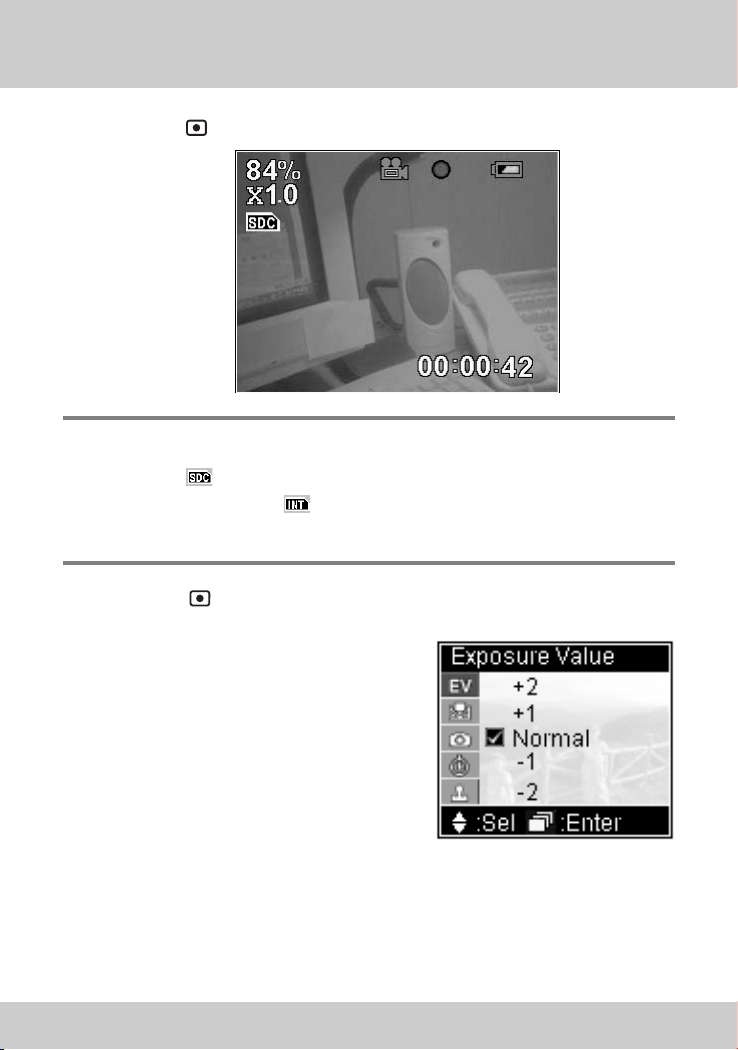
Exposure Value:
In addition to Normal, you can increase two levels up and decrease two levels
down. Increasing Exposure Value will cause the image brighter whereas
decreasing Exposure Value will get a darker image. You can make use the
brightness change of the screen to gauge your adjustment.
22
3-1 Video Recording
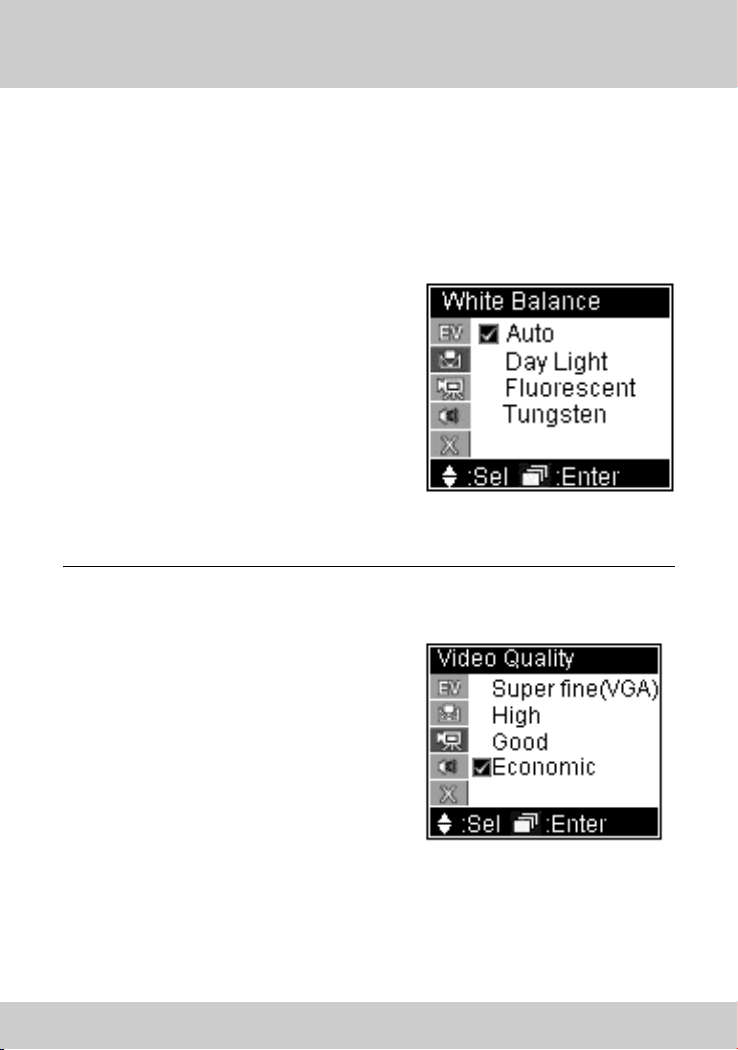
White Balance:
White objects may looks extremely white under sun shine, but may not be so
white in other lighting conditions. In order to compensate the color change
due to various lighting conditions, you can use [White Balance] to adjust.
SV2 has four White Balance settings
[Auto]: Automatic detect
[Day Light]: Reduce sun light intensity
and avoid over exposure
due
to strong sun light.
[Fluorescent]:Reduce green light within
fluorescent light, avoid
greenish image taken under
fluorescent light.
[Tungsten]: Reduce orange light within
tungsten light, avoid orange
image taken under tungsten light.
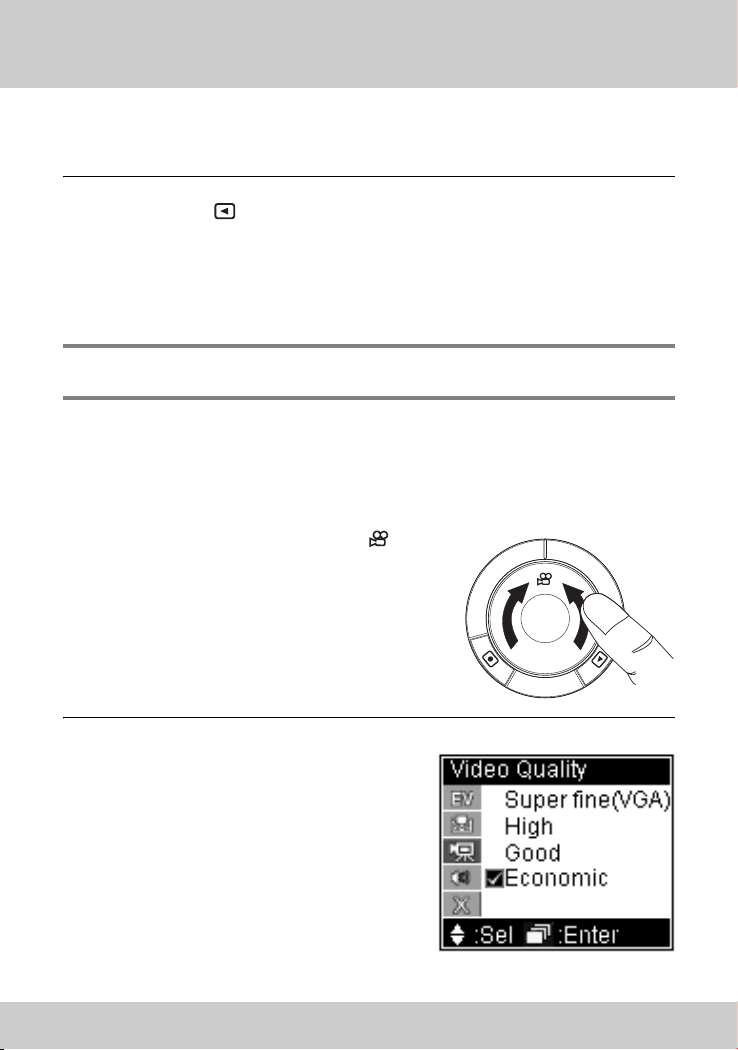
Video Quality:
[High]: Recording in the highest
image quality.
[Good]: Recording in normal high
image quality.
[Economic]: Recording in space saving
image quality.
The higher image quality recorded, the
more memory space will be taken.
Please refer 4-4 for details of memory
space taken by each mode.
23
3-1 Video Recording
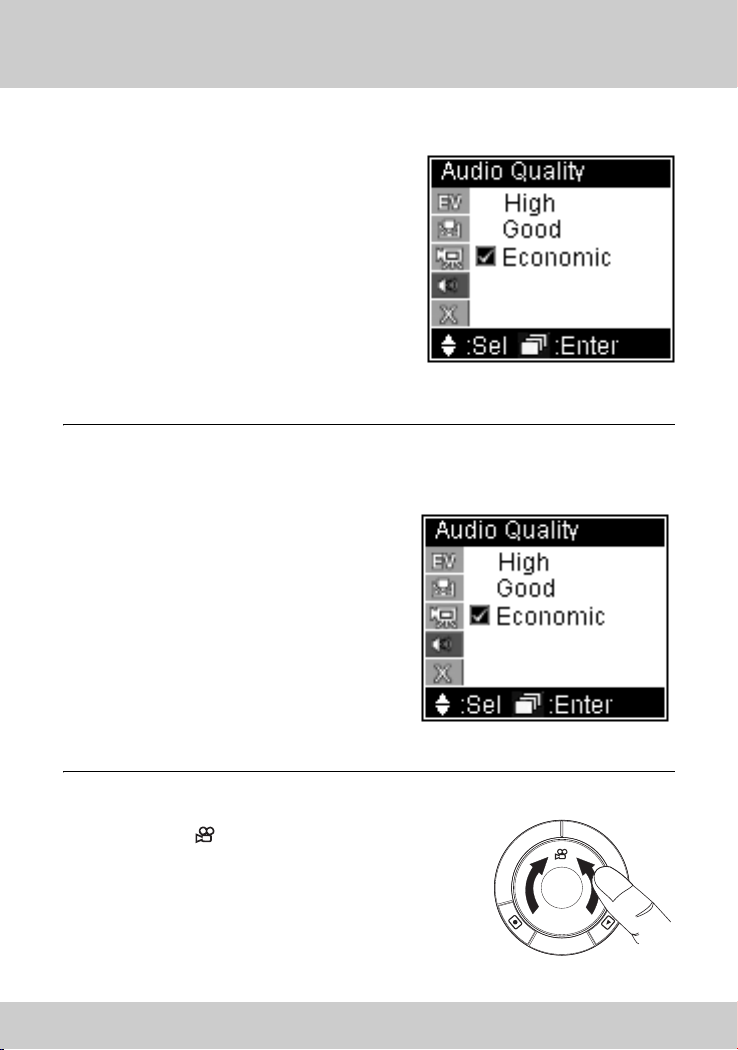
Audio Quality:
[High]: Recording in the best audio
quality.
[Good]: Recording in ordinary good
audio quality.
[Economic]: Recording in space saving
audio quality.
The better audio quality recorded, the
more memory space will be taken.
Please refer 4-4 for details of memory space taken by each mode.
Playback (both Video and Audio)
[High]: Recording in the best audio
quality.
[Good]: Recording in ordinary good
audio quality.
[Economic]: Recording in space saving
audio quality.
The better audio quality recorded, the
more memory space will be taken.
Please refer 4-4 for details of memory
space taken by each mode.
Playback (both Video and Audio)
1. Select ʳon mode switch,
24

3-1 Video Recording
2. And press ʳbutton to
switch to playback
function.
Note: 1. When button is pressed, SV2 will playback your latest recording
automatically. During playback, you can push the jog dial switch upward and
downward to conduct fast forward and backward.
2. The current file number/total file number is shown at the upper left corner
of the screen.
3.The playback duration is shown at the lower right corner of the screen
3. press ʳbutton to stop playback,
press ʳbutton to pause
playback.
Note: You can push the jog dial switch upward and downward to conduct fast
forward and backward. When playback is stopped, if you dial the jog dial
switch upward and downward, you will be able to jump to next or previous
recording available to play.
Settings
You can select the video to be played,
delete it, and set up a repeated play.
Press the jog dial switch, you can start
the following settings:
Volume Control:
Press the jog dial switch, dial the switch
upward or downward to increase or
decrease audio volume.
25

3-1 Video Recording
File List:
Displays all video files recorded. File
names in red are files previously selected
or currently playing. The name in white
represents file being selected now. Press
the jog dial switch to start playing this
file.
Delete Current:
Select [Yes] to delete current file.
Delete All:
Select [Yes] to delete all files.
Note: There will be no further warning or confirmation message after you selected
[Yes] in both “Delete Current” and “Delete All”. Please be careful on using
these commands.
26

Playback Repeat:
There are three options:
[Off]: Stop when finishes playing
selected file. That is, the
selected file will be played
once only.
[Current]: Play currently selected file
repeatedly.
[Sequential]: Play all files in sequence,
repeatedly.
3-2 Photo Shooting
How to take a photo:
1. Select ʳon mode switch
3-2 Photo Shooting
2. If you need to set picture quality,
please press jog dial switch to get
menu. Then dial the switch
downward, and select “Picture
Quality”. When selected, press
jog dial switch to exit menu.
27

3-2 Photo Shooting
3. If you wish to change focus, you can dial the jog dial switch
upward (zoom in) or downward (zoom out).
4. Aim the target and press shutter button .
Note: When shutter button is depressed, #Processing#!message will be shown on the
screen for about one second. Please
quality.
keep the device steady to ensure picture
Settings
You can change some settings before taking the picture to get a better
photo result.
Press the jog dial switch, and you can change the following settings:
Exposure Value:
In addition to normal, you can
increase/decrease two more steps.
Increasing Exposure Value will let you
obtain a brighter image and decrease
the value will get a darker on. You can
visualize the brightness variation on the
screen while you are adjusting.
28

3-2 Photo Shooting
White Balance:
White objects may looks extremely
white under sun shine, but may not be
so white in other lighting conditions. In
order to compensate the color change
due to various lighting conditions, you
can use “White Balance” to adjust.
SV2 has four White Balance settings¢w
[Auto]: Automatic detect
[Day Light]: Reduce sun light intensity and avoid over exposure due to strong
sun light.
[Fluorescent]:Reduce green light within fluorescent light, avoid greenish
image taken unde fluorescent light.
[Tungsten]:Reduce orange light within tungsten light, avoid orange image
taken under tungsten light.
Picture Quality:
[High]: Taking picture in the highest
image quality.
(4 mega pixels
resolution)
[Good]: Taking picture in a normal
image quality.(3 mega pixels
resolution)
[Economic]: Taking picture in a space
saving image quality.
(2 mega pixels resolution)
The higher image quality taken, the more memory space will be needed.
Please refer 4-4 for details of memory space taken by each mode.
29

3-2 Photo Shooting
Self Timer:
[Disable]: Self timer disabled.
[Enable]: Photo will be taken 10seconds
later.
When using self timer, the LED at the rear
of the SV2 will flash
blue.
Date Stamp:
[Disable]: no date stamp on photo.
[Enable]: Imprint date at lower left
corner of the photo with blue
font.
Playback:
1. Select on mode switch
2. Press button to switch to
playback mode.
30

3-2 Photo Shooting
Note: 1. When icon button is pressed, SV2 will display latest picture taken
automatically.
2. The current photo number/total photo number is shown at the upper left
corner of the screen.
3.The date of picture taken will be displayed at the lower right corner of the
screen.
4.If time stamp is set, the date of that specific photo being taking will be
displayed or printed at lower left corner in blue fonts.
If you wish to browsing other photos, you can dial the jog dial switch to
move forward or backward with the photos to view next or previous photo.
Settings
You can select picture, delete picture and set DPOF (Digital Printer Order
Format, which can allow you to print photos directly from any printer that
supports this protocol) for selected photo.
Press jog dial switch once to change the following settings:
File List:
Displays all file names of photo taken.
File names in red are the photos previous
or current in display. White file name
represents file being selected now. Press
the jog dial switch to start viewing this
photo.
Delete Current:
Select [Yes] to delete currently selected
file.
31

3-2 Photo Shooting
Delete All:
Select [Yes] to delete all files.
Note: There will be no further warning or confirmation message after you selected
[Yes] in both “Delete Current” and “Delete All”. Please be careful on using
these commands.
DPOF Print:
If [On] is selected means this photo can
be printed from any printer that
supports this protocol/
32

3-3 MP3 Playback
3-3 MP3 Playback
Download MP3 files from you PC:
1. Use the USB cable in the package and plug it into the Mini USB
port
2. If you are using Windows
system, your PC will detect SV2 automatically. However, if you are
using other version of Windows
contains in the companion CD. So your PC will recognize SV2.
Regarding how to use CD and conduct USB driver installations,
please refer to 4-3 for instructions.
3. Duplicate MP3 files to designated folder in DC. For example, if
your PC recognizes SV2 as F drive, then you need to copy the MP3
files to F:\DCIM\100MEDIA/
located at the left hand side of SV2.
®
XP or Windows® 2000 operating
®
, you will need to install the driver
33

3-3 MP3 Playback
The way of MP3 files duplication ;
Select the files you wish to duplicate, and hold the right key of your mouse.
Right click “Copy” in the menu shown.
Click on the designated folder (G:\DCIM\100MEDIA, for example), Right
click, select “Paste” in the menu shown.
34

3-3 MP3 Playback
Note: You can either repeat the above process several times to copy individual files or
you can select multiple files and copy them at once. Detail about how to Copy
and Paste, please refer to user’s manual of your operating system.
4. After finishing copy and paste process, execute “Remove
Hardware” and stop SV2.
5. Remove USB cable from your PC and SV2. Keep it properly.
Note: Regarding how to remove hardware from your PC, please refer to your PC or
operating system user’s manual.
35

3-3 MP3 Playback
Playback MP3:
1. Select ʳon mode switch.
2. Within File List, you dial the jog
dial switch upward or downward
to browse the MP3 files stored in
the SV2. When selected, press the
switch to play.
3. When MP3 playback starts, SV2 will turn off the screen to save
battery power. Press or the jog dial switch will resume screen
display.
During playback, you can dial jog dial switch upward or downward to
change volume.
36

Settings
Delete Current:
Select [Yes] to delete current file.
Delete All:
Select [Yes] to delete all files.
3-3 MP3 Playback
Note: There will be no further warning or confirmation message after you selected
[Yes] in both “Delete Current” and “Delete All”. Please be careful on using
these commands.
37

3-4 Audio Recording
Playback Repeat:
There are three choices,
[Off]: Stop when playback finishes.
Selected MP3 plays once only.
[Current]: Playback current MP3
repeatedly.
[Sequential]: Playback all MP3 files in
sequence, repeatedly.
3-4 Audio Recording
Recording:
1. Select on mode switch.
2. If you need to change recording
quality, please press the jog dial
switch to activate Audio Quality
menu.
38

3-4 Audio Recording
[High]: Recording in the best audio quality.
[Good]: Recording in ordinary good audio quality.
[Economic]: Recording in space saving audio quality.
The better audio quality recorded, the more memory space will be taken.
Please refer 4-4 for details of memory space taken by each mode
3. Press button to start recording, press once more to stop.
Playback:
1. Select on mode switch.
2. Press button to switch to playback function. The SV2 will
start to playback your latest recording. If you need to adjust
volume, dial the jog dial switch upward (increase volume) or
downward (reduce volume).
Settings
You can select specific file to playback, to delete, or set up different ways to
playback.
Press the jog dial switch once, you can change
the following settings:
File List:
Displays all files recorded. Red file names are files
previously played or currently playing. White file
name represents the currently selected file. Press
the jog dial switch once to start playing.
39

3-4 Audio Recording
Delete Current:
Select [Yes] to delete current file.
Delete All:
Select [Yes] to delete all files.
Note: There will be no further warning or confirmation message after you selected
[Yes] in both “Delete Current” and “Delete All”. Please be careful on using
these commands.
Playback Repeat:
There are three choices,
[Off]: Stop playing when finishes.
Selected file will be played
only once.
[Current]: Playback currently selected
file repeatedly.
[Sequential]: Play all files in sequence,
repeatedly.
40

3-5 PC Camera
3-5 PC Camera
1. Plug the USB cable packaged with SV2 into the Mini USB port
ʳlocated at the left hand side of SV2.
Note: When USB cable is plugged in, the screen display will disappear. The display
will resume when USB cable is removed.
2. Please use the companion CD to install PC camera driver of SV2.
Thus, your PC will be able to recognize your SV2 as a PC camera.
Note: If you have not installed USB driver, please install it before you install PC camera
driver. Please refer to 4-3 for the instruction to install USB and PC camera
drivers.
3. You can use Windows® Movie Maker to record video or use
Microsoft
®
NetMeeting to conduct a video conference. Please
refer to respective software’s user’s manual for instructions about
using individual software.
PC camera does not have playback function. It has no need to change
settings either.
41

3-6 USB Storage Drive
3-6 USB Storage Drive
Except when using SV2 as a PC camera, all the rest modes allows you to
connect SV2 with your PC via USB cable, and use SV2 as an USB removable
disk.
1. Plug the USB cable packaged with SV2 into the Mini USB port
ʳlocated at the left hand side of SV2.
When the USB cable is plugged in, the screen shows “USB STORAGE” first,
and turns off immediately. The screen display will resume when USB cable is
unplugged.
2. If your PC is using Windows® XP or Windows® 2000 operating
system, then the PC will recognize SV2 automatically. If you are
using other operating system, then you need to install driver
within the companion CD to allow your PC to recognize your SV2.
42

4-1 Taking Care of Your SV2
PC4 Miscellaneous
4-1 Taking Care of Your SV2
About SV2:
Be aware of where you store your SV2. Keep SV2 and its accessories out of
children’s reach.
Keep SV2 dry--rain and moisture may damage the electronic parts within
SV2. If there is water splashes onto the body of SV2, please use dry soft
cloth to wipe water drops away. If SV2 is wetted by seawater, please use
wet soft cloth to wipe seawater away. Then use dry soft cloth to wipe it dry.
If water has already leaked into the body of SV2, please bring the SV2 to
authorized maintenance center for repair. Do not open up the machine by
yourself. Open up/disassemble the SV2 improperly may cause severe
damage to the electrical parts. Your warranty will also be expired
immediately with such a move.
Clean the SV2-- Except lens, you can use wet soft cloth to clean the body. Be
sure the wet cloth has been twisted to dry enough. Then use dry cloth to
wipe the body once more. Never use liquid contains any chemical
substances to wipe the machine.
Clean the Lens -- Whenever there is dust on the lens, please use an air
blower to blow the dust away. You can use professional lens cleaning paper
to wipe the lens as well.
About the AC Adapter:
Please use genuine AC adaptor packaged with the SV2. Other AC adaptor
may result in damage in SV2 due to different electrical characteristics.
Be aware of the place to plug your AC adaptor. Do not plug it onto the wall
across a walkway. People may be tripped and SV2 may also be damaged
due to someone tripping on the power cord. Please remember to bring your
adaptor along when traveling. Otherwise, you may run out of battery and
can not recharge your SV2.
43

4-2 Write Protection and File Structure of SD Memory Card(Optional)
About the battery
Please use certified battery. Please refer to 4-6 for battery specifications.
Duration of operation - Temperature may affect the duration of battery
operation. Higher temperature or lower temperature may both shorten the
duration of operation. Battery life may also influence the duration of
operation. A battery nearly to the end of its life cycle or a poor quality life
may have shorter duration of operation. Be aware of short circuit - When
battery is removed from SV2, please be aware of not to touch the metal
contact with metal objects or conductive substances. Short circuit the
battery may cause fire. Battery disposal - Please recycle used up battery. Do
not throw the battery into the fire. There may be a risk of explosion.
4-2 Write Protection and File Structure of SD
Memory Card(Optional)
There is a write protection switch on the SD card. Switch
it to LOCK can prevent data stored in SD card being
erased unexpectedly.
The file structure of SV2 stored in
memory is
shown as below:
4-3 Software Installation and Use
You will need to install software (drivers) to enable the PC camera and USB
drive modes of the SV2. There are two ways to install software. One is using
the companion CD to start installation program and to execute installation.
The installation software will guide users throughout the installation process
reduces difficulty a lot. Another way is to connect your SV2 with PC and
hence initiate the installation software. This method is more complicate in
process, therefore method #1 is recommended.
We will introduce both ways in this section. If you want to choose method
#1, please refer to "Using CD to install", otherwise, please refer to
"Installing via connecting SV2 to PC".
44

4-3 Software Installation and Use
Using CD to install
There are two major steps: Step 1, insert companion CD into your PC CD
drive. Do not connect your SV2 to PC for now. Step 2, connect your SV2 to
PC and,
If your PC uses Windows® 98
operating system,
1. The PC will initiate
InstallShield Wizard. Click "USB
Driver" in menu.
2. In both dialog boxes showing
"Welcome to the InstallShield
Wizard for Digital Camera" and
"Information", click on the
"Next" button.
3. The installation will then
start. When finishs, please click
on the "Finish" button.
45

4-3 Software Installation and Use
4. Connect your SV2 to PC.
The PC will detect the new
hardware. Then "Insert
Disk" message shows, click
"OK" button.
5. The "Insert Disk"
warning message will
show up again for
consecutively three
times. Click "Skip" in
all occasions. Then
you can finish the
installation.
Note: Sometimes the OS will request for Windows® 98 Installation CD, please make
sure the Windows® 98 CD is handy for use.
If your PC uses Windows® XP
operating system,
1. Insert SV2companion CD,
the PC will initiate
InstallShield Wizard. Click
"USB Driver" in menu.
46

2. In both dialog boxes
showing "Welcome to the
InstallShield Wizard for
Digital Camera" and
"Information", click on the
"Next" button.
3. The driver installation will
then start and proceed
automatically.
4-3 Software Installation and Use
4. In the following
two "Hardware
Installation"
dialog windows,
please select
"Continue
Anyway" to
continue the
installation.
47

4-3 Software Installation and Use
5. When installation
completes, click on "Finish"
to finish installation process.
6. Remove companion CD
from optical drive and
connect your SV2 to PC.
When PC detects it, the
"Hardware Installation"
dialog windows will
appear twice. Select
"Continue Anyway" in
both occasions, and you
will be able to finish the
driver installation for PC camera
and USB removable drive modes.
Installing via connecting SV2 to PC
Installing USB driver
Except using user Windows® XP Windows® 2000 operating system, all other
operating systems require to install driver for SV2 to use. The procedure of
installing driver under Windows
Please connect SV2 to your PC via USB cable, and dial the mode switch to
any mode but PC camera, then turn on the power of SV2.
48
®
98 is shown below:

1. Your PC will detect a
new device automatically.
An “Add New Hardware
Wizard” will appear.
Click on the “Next”
button.
2. Select “Search for the
best driver for your
device. (Recommended)”,
and click on the “Next”
button.
3. In the next window,
Windows
®
will search for
new drivers in its driver
database on your hard
drive, and in any of the
following selected
locations”. Select
“Specify a location” and
then click on the “Next”
button.
49

4. Windows® will find the
SV2’s USB driver in the
companion CD. Click on
the “Next” button to
start installation. When
completes, click on the
“Finish” button to finish
the driver installation.
5. When driver installation
completes, restart your PC.
You will see two removable
drives in the Explorer. That
is, you have installed the
driver successfully. Then you
can start to use SV2 and
conduct file access works.
Installing PC Camera driver
Before you start PC camera installation, please connect your SV2 with your
PC via USB cable. Dial the mode switch to PC Camera, and turn on your
SV2.
50

Using Windows® 98 operating system
1. Your PC will detect your
SV2 and pop up an “Add
New Hardware Wizard”.
Click on the “Next” button.
2. Please select “Display a list
of all...” .
3. The system will find an
unknown USB composite
device for installation.
Please select “Have Disk”.
51

4. Please insert your
companion CD into
the CD-ROM drive,
then select the CDROM drive as the
source . Click on
“OK”.
5. When system finds
the hardware to be
installed, please click
on the “Next”
button.
6. Click on Next to
start installation.
When completes,
click on “Finish” to
exit.
52

7. Another installation
window will appear,
click on “Next” button.
8. Select “Search for the
best driver for your
device.
(Recommended)”, and
click on the “Next”
button.
9. Select ”Specify a
location” and finds the
drivers path, click on
the “Next” button.
53

10. Click on the Next button to start installation. When
installation completes, click on the “Finish” button.
11. Last step of installation is exactly the same as step 7 through
10. When finishes, restart PC and you will be able to use SV2 as a
PC camera.
Note: During the installation process, if a dialogue box shows up and requesting a
Windows
®
98 CD-ROM, please insert a Windows® 98 CD-ROM and click OK to
continue installation.
54

Using Windows® XP operating system:
1. Your PC will detect SV2
automatically, please select
“ Install from a list or
specific location
(Advanced)” and click on
“Next” button.
2. Insert the companion CD
into CD-ROM drive and click
on “Search removable
media” and click on Next”
button.
3. When the hardware
installation window as show
right appears, please click on
“Continue Anyway”.
55

4. The file duplication
will then start. When
completes, the following
dialog box will appear.
Click on “Finish” and
start the next step of
installation.
5. The second step of
installation is the same as
the first step. Please
select “Install from a list
or specific location
(Advanced)” and click on
“Next”.
6. When the dialog box
as show below appears,
click on “Continue
Anyway”.
56

7. The file duplication will
then start. When
completes, the following
dialog box will appear.
Click on “Finish” and finish
the installation.
Using PC Camera
When driver is installed, you can start use your SV2 as a PC camera. There
are many software can be used on a PC camera, such as Windows
Maker NetMeeting...etc. We hereby use Windows
®
Movie Make as an
example to explain the operation of PC camera. For other software, please
refer to the user’s manual or Help files of corresponding software.
Using Windows
®
Movie Maker (Windows® XP accessory) to record video.
1. Activate: From “Start --> Accessories-->Windows Movie Maker”
to activate Movie Maker. Click on “Record” on the menu.
2. In Record window, click either “Video only” or “Video and
Audio” in Record
pull down menu.
3. Click on the
Record button to
start video
recording.
More details about
Windows
®
Movie
Maker can be found in
related user’s manual
or Help files.
®
Movie
57

4-4 Memory Space Consumption of Each Mode
4-4 Memory Space Consumption of Each Mode
Each mode will consume different size of memory due to their corresponding
quality settings. The higher the quality set, the more memory space will be
taken. The following chart shows a reference value of various scenarios. The
first column is the memory capacity, and other cells are corresponding
values.
Recording Still Pictures (DSC Mode)
High
4 Mega Pixels
(2,304 x 1,704)
16 MB 47 55 82
32 MB 94 110 164
64 MB 188 220 328
128 MB 376 440 656
256 MB 752 880 1312
512 MB 1504 1760 2624
Good
3 Mega Pixels
(2,048 x 1,536)
* The numbers shown in the above table are approximate and may vary
depend on the picture contents
Recording Motion Pictures (MPEG4)
High
VBR
16 MB 3 min 5 min 7 min
32 MB 5 min 9 min 15 min
64 MB 11 min 17 min 29 min
128 MB 22 min 35 min 58 min
256 MB 44 min 1 h 10 min 1 h 57 min.
512 MB 1 h 17 min. 2 h 20 min. 3 h 53 min
* The times Shown in the above table are approximate.
** When select in High mode during record MPEG4 motion pictures
due to it's VBR (Variable Bit Rates) which the recording time may be variable
58
depend on the recording movie contents
Normal
CBR(500k)
Economic
2 Mega Pixels
(1,600 x 1,200)
Economic
CBR(300k)

Voice Recording Mode
4-5 Message List
High
(22k/s)
16 MB 12 min 17 min 23 min
32 MB 25 min 34 min 46 min
64 MB 50 min 1 h 8 min 1 h 31 min
128 MB 1 h 39 min 2 h 17 min 3 h 2 min
256 MB 3 h 19 min 4 h 33 min 6 h 5 min
512 MB 6 h 37 min 9 h 6 min 12 h 8 min.
* The times listed in the above table are approximations.
4-5 Message List
Message Explain
NO FILE When No file can playback in all playback mode.
NO DISK Execution record/snap function when no storage exist.
DISK FULL Execution record/snap function when no more space to
USB STORAGE When USB cable plug in to active USB Storage function.
CARD LOCK Execution record/snap function when SD Card Lock
BATTERY LOW! Battery is totally used up.
Processing
FORMAT ERROR
store.
Enable.(SD card is optional)
Execution Still Image function to tell user system in
proces
sing.
When browse still image but current picture format can
not support.
Normal
(16k/s)
Economic
(12k/s)
59

4-6 Specification
4-6 Specification
Resolution
Video Sensor CMOS Sensor (2 Mega Pixel resolution)
Display Panel 1.5 inch Color TFT LCD (280x220 color resolution)
Expansion Memory SD/MMC Card(Optional)
I/O Port Mini USB (Support USB1.1 connect to computer), AV (Support
Main Memory Build-in 16MB NAND Flash, support external SD card storage
Auto Focus
Digital Still Photo Build-in 16MB NAND Flash can storage 82 pcs (1600x1200 2M
Motion Picture With external SD card 32MB can be recorded 15 mins, (MPEG4
Voice Recording With build-in 16MB NAND Flash can be record 25 mins(with
Internal Microphone Yes
Internal Speaker Yes
Motion Picture
Resolution
Video Lens Focus Auto:1.5m~Infinity
Brightness Control Auto Brightness & White Balance
Auto Shot Setting 10 seconds auto shot setting (user control)
Power Saving Mode After 60 seconds no use,system will auto enter suspend
Battery Rechargeable 780mAh Li-Ion battery with battery charger
Size 116x50x21mm (26mm at CMOS Lens portion)
Weight 100g(with battery)
4 Mega Pixel (Using Software Interpolation resolution)
NTSC/PAL connect to TV), SD card slot, Headphono jack
(Maximin 512MB)
4X
Pixel), also can be stored in SD card(Optional)
File Format) 64MB can be record 30 mins, 128MB can be
record 55~60 mins, depend on the image color and sound
external SD card can be record more depend on the SD card
capacity)
320x240/30fps,640x480/10fps
mode,LCD display will auto turn off
60


Acer Multi-Functional
7-in-1 Video-Cam
ࠣ⚦ŘSV-200
ᮢ⦦ᆙሬ
i

ii

મҚדᘜาʶㅮ
⤃᱿ᮢŘ
߱෨ᮢ SV2 ԊŊ⦼҅⦀₳〇⩊༆ҩŊʏ⦼ۧΎએ༆ҩȯദരŊ
ᯍ෨ଃᅠ SV2 ሷ˶ᯝۊŊʬ⦼҅⠗≒〇ȯኞଃᅠ༆ҩ᱿⦦ᆙ˜ʃ
ᆙᵂŊ⦼⎞෨᱿⺨ۄ⊓↙˫ଁᖣ֠Հȯ
⸅⣬ʶㅮŘ
ʃⴃભ༆ҩ྆ḻႽᮢ׆ೇⶪ˴≟⎐ SV2 ᕇံŊҢံ᮫ᮢ
⎊⠗⪭⪸ȯ
ᮟٴרဏ㋧₪⫨᱿ഛЭȮ⻞ㅠٴ⫨ŊڱʃΎ⨢ߌᣅᮢ≛⥑હʃ⏦Ȯ
ℋ⩂ʃ⏦≟ⳍໞഛЭȮ⻞ㅠٴ⫨᱿がȯ
᮫ᅠ SV2 דҢⶪ˴ SD ֦ᄑゃ≟⎐᱿ѲએҙૌʎŊҝʃ⪭˶
⪸˶ȯ
Ȣ
ʃⴃભᮢ⣳˶าབྷ⤟ᑨ㋤ⶪ˴Ŋҝʃ⪭Ύߗ⪸˶ȯ
Ȣ
෨᱿ SV2 ૪もႽӼȮᯉㄇⴆㅮ⥓ሳ⎞༆ҩሷʃȯ
Ȣ
༆ҩʑ⥆ⰶʠሷۄᐻדҢ⥘ҩۄᐻࠀ଼ᅠ׳Ң˟଼ҝȯ
મҚדᘜาʶㅮ
iii

˛
˛
ᮟٴ ( ˫ʁ ờ SV2) ゝᄲჶഛ (MPEG4 ጁೣՒ๗ഛЭ )ȮཞᤫȮ
⻞ㅠȮMP3 ႩᄍȮℐ⭰ჶഛᑨȮら⯿⎞ SD/MMC ⩊֦ᑨᾀԼ⋱ŊᣅᲿ
ԊԼ⋱ሱᣅ㕑Ј᱿ɼɺᑨࠣŊҢⱀణȮヅȮႽ ᆞȮᆹ⿵ཞჶȮ
㋧ᯉ₪⽷ㆊᾀѭ⏦᧚ඖŊሩᣅۄՖːȮણᮝȮᅧⳤ≛᱿ሱら⯿డңȯ
ㄇ᱿Լ⋱ŊʃХ⳺ۄՖᮢŊᆹҥңাᐪᄓኞŊ⋱ʵడ҂
ӠᄄိŊⴒʃൡᮝᙙᐪ⬶ȯ⨀෨᱿ᮢŊʬశቃᮟٴŊ⋱෨Қᅘ
᱿డᅞೣ⎞ᮝᙙ㋤㊹ȯ
1
iv

Ჿ⻞
મҚדᘜาʶㅮ iii
˛ iv
1 Ј
1-1 ⶪ˴ᛤ㔄 ................................................................................ 1
SV2 ʙᑨ / ヅⶪݽ / ヅᖷ / SD ֦ . . . . . . . . . . . . . . . . . . . . . . . . . .
A/V ℬ / USB ℬ / Ἴ㋤⊖≸ᑨ / ༆↗ / મ⡶҆ . . . . . . . . . . . . . . . . 2
1-2 ᮢヅⶪݽ...................................................................... 3
1-3 ᮢヅᖷ ................................................................................ 4
ヅᖷમ⡶ᅞೣ . . . . . . . . . . . . . . . . . . . . . . . . . . . . . . . . . . . . . . . . . . . 4
ヅᖷחʁᅞೣ . . . . . . . . . . . . . . . . . . . . . . . . . . . . . . . . . . . . . . . . . . . 5
1-4 SD ֦મ⡶............................................................................... 5
1-5 ༆↗મ⡶............................................................................. 6
2 ᮢҘ
2-1 ׳ⵒԼ⋱ờ...................................................................... 7
2-2 Ⴝᅞೣ ................................................................................ 8
ヅྈ⸹ / Լ⋱ⱧᲷ . . . . . . . . . . . . . . . . . . . . . . . . . . . . . . . . . . . . . . 8
Ӽྈ⼫ / Ւ〦 . . . . . . . . . . . . . . . . . . . . . . . . . . . . . . . . . . . . . . 9
2-3 ≸ᑨ᱿ᮢ........................................................................... 10
2-4 ⣶⤻ / ㅠ⤻ⱚӛ.................................................................... 10
2-5 ⴆ܈Լ⋱ ˛ ....................................................................... 11
⻞⢌ᑁೣⴆ܈ . . . . . . . . . . . . . . . . . . . . . . . . . . . . . . . . . . . . . . . . . . 11
Ⴉᄍᑁೣⴆ܈ . . . . . . . . . . . . . . . . . . . . . . . . . . . . . . . . . . . . . . . . . . 13
⥑હⴆ܈ . . . . . . . . . . . . . . . . . . . . . . . . . . . . . . . . . . . . . . . . . . . . . . 15
2-6 ➔ౡᯉㄇ˛₺ ....................................................................... 16
2-7 Ҡ⥑હㅮᲿ ....................................................................... 17
߱ᆹԀ⥑હ / ㆜હ㆒᪓⥑હ . . . . . . . . . . . . . . . . . . . . . . . . . . . . . . 17
ヅ⣶Ӽહᐻ⥑હ / Ѳએ㋤ጁೣջ . . . . . . . . . . . . . . . . . . . . . . . . . 18
Ჿ⻞
1
v

Ჿ⻞
⎊Ւ〦ᑨ⥑હ / Ѳએ⥆ຣ㋤ⴆႹ / ⴒ׆ᣅㅷ⥑ϊ . . . . . . . . . . . . . . . . 19
2-8 ヅᖷ҂ヅ .............................................................................. 20
3 Լ⋱Ⴝ
3-1 ഛЭ⻞⢌ .............................................................................. 21
⻞ഛ / Լ⋱⥑હ . . . . . . . . . . . . . . . . . . . . . . . . . . . . . . . . . . . . . . . . . 21
Ⴉᄍ / Լ⋱⥑હ . . . . . . . . . . . . . . . . . . . . . . . . . . . . . . . . . . . . . . . . . 24
3-2 ཞᤫ...................................................................................... 27
ཞჶ / Լ⋱⥑હ . . . . . . . . . . . . . . . . . . . . . . . . . . . . . . . . . . . . . . . . . 27
Ⴉᄍ / Լ⋱⥑હ . . . . . . . . . . . . . . . . . . . . . . . . . . . . . . . . . . . . . . . . . 30
3-3 MP3 Ⴉᄍ ............................................................................. 32
Ⴉᄍ / Լ⋱⥑હ . . . . . . . . . . . . . . . . . . . . . . . . . . . . . . . . . . . . . . . . . 34
3-4 ⻞ㅠ...................................................................................... 36
⻞ㅠ. . . . . . . . . . . . . . . . . . . . . . . . . . . . . . . . . . . . . . . . . . . . . . . . . . 36
Ⴉᄍ / Լ⋱⥑હ . . . . . . . . . . . . . . . . . . . . . . . . . . . . . . . . . . . . . . . . . 37
3-5 ℐ⭰ჶഛᑨ........................................................................... 39
3-6 ら⯿ .................................................................................. 40
4 Ң
4-1 ᮢᘜาʶㅮ ....................................................................... 41
〦ᅠ SV2 ᑨ / 〦ᅠヅⶪݽ / 〦ᅠヅᖷ . . . . . . . . . . . . . . . . . . . 41
4-2 SD ֦⫏ᅆ〾૯דᒆጊከᐉ ( ⴆ⫵ ) ....................................... 42
4-3 Ⱆ㋤મ⡶דᮢ.................................................................... 42
᮫҆ۓՒࡠ⠗મ⡶ . . . . . . . . . . . . . . . . . . . . . . . . . . . . . . . . . . . . . 42
᮫ SV2 Ⳑヅ〉≟ۓՒમ⡶ . . . . . . . . . . . . . . . . . . . . . . . . . . . . . . . 48
ۓՒℐ⭰ჶഛᑨ. . . . . . . . . . . . . . . . . . . . . . . . . . . . . . . . . . . . . . . . . 57
4-4 ׳Լ⋱Ѳએἇ⿵ᮢ⸇⠧......................................................... 58
๗ჶഛ (DSC Mode) / Ւ๗ഛЭ⻞⢌ (MPEG4). . . . . . . . . . . . . . . . 58
⻞ㅠ. . . . . . . . . . . . . . . . . . . . . . . . . . . . . . . . . . . . . . . . . . . . . . . . . . 58
4-5 ⤻ၪ⣬ .............................................................................. 59
4-6 ⣳ጁ...................................................................................... 60
vi

1 Ј
1-1 ⶪ˴ᛤ㔄
SV2 ʙᑨ ヅⶪݽ
1-1 ⶪ˴ᛤ㔄
ヅᖷ SD ֦ ( ⴆ⫵ )
1

1-1 ⶪ˴ᛤ㔄
A/V ℬ USBℬ
Ἴ㋤⊖≸ᑨ
༆↗ મ⡶҆
2

1-2 ᮢヅⶪݽ
ヅⶪݽ (AC Adapter) ぜʴະ SV2 ヅԻŊⴒרଃᅠ⡶⇦ҙ᱿ヅ
ᖷⳖ⠗҂ヅȯ
ലሽᄭ൷ᕴ ˔˖ ༺ᙰ༺Եሽᄭ༺ஆ ʻ˄ʼΖ٦ലԫጤ ˗˖ ༺ᙰ༺Ե ˦˩˅
˗˖ᙁԵ༺֞ʻ˅ʼΖ
1-2 ᮢヅⶪݽ
3

1-3 ᮢヅᖷ
1-3 ᮢヅᖷ
ヅᖷમ⡶ᅞೣŘ
૽ SV2 ᔌㄇቄʁŊʏቄᑨಎᅞⱀヅᖷ╾ʏחʁ╾ (1,2)ȯᤋര૽
ヅᖷ⸉଼㔄᱿ɺⴗଃ SV2 ᱿ヅᖷ㔄Ŋʏ˫ 45 ಙ⤑ᅈတⳖҘヅᖷᐥ
(3)ȯሱര૽ヅᖷʁҘᐥʑ (4)Ŋ⦓⳺⇦ҘരŊ૽ヅᖷ╾ቄᑨㅫ
ᅞⲶŊ᳅ӷરҚᣅᔋ (5)ȯ
4

1-4 SD ֦મ⡶ ( ⴆ⫵ )
ヅᖷחʁᅞೣŘ
૽ SV2 ᔌㄇቄʁŊʏቄᑨಎᅞⱀヅᖷ╾ʏחʁ╾ (1,2)ȯᤋര૽
ヅᖷㄅⲖᑨಎ᱿ɺⴗဏ⬚₎ 45 ಙ⤑ (3)Ŋʏחӛヅᖷȯሱര૽ヅᖷ╾
ቄᑨㅫᅞⲶŊ᳅ӷરҚᣅᔋȯ
ᘜาŘတҘヅᖷדחӛヅᖷՖൕᘜาᅞדㅯŊ؋ԅሳ૽ヅᖷ֦Ᏸ༿ᅜȯ
1-4 SD ֦મ⡶ ( ⴆ⫵ )
૽ SD ֦ԇ⤑᱿ɺⴗቄ
ŊᤋരҘ SV2 ಎⵒ᱿
SD ֦ᐥȯ
5

1-5 ༆↗મ⡶
חʁᅞೣ˫྆ଊ૽ SD ֦ሩᛖ᱿ҘŊʠഃӛ SD ֦ᐥŊҪ૽ʠདྷӛȯ
ᘜาŘတ֦דחʁ֦ԊŊ⦼〦 SV2 ヅȯ
1-5 ༆↗મ⡶
2
6
1. ૽༆
↗ⰱ₳ᵬ
᱿ɺⴗἊ
⳧↗ಚȯ
2. ૽༆
↗ⰱ᱿
ɺⴗἊ⳧
ⰱᵬ᱿
᭔ȯ

2 ᮢҘ
2-1 ׳ⵒԼ⋱ờ
2-1 ׳ⵒԼ⋱ờ
Ԋㄇኈ
1
2
7
3
4
5
ۨצ
➔ౡ
Լ⋱ⱧᲷ
ఢϳㄇኈ
USB တઋ
A/V ⱚӛ
≸ᑨတઋ
7

2-2 Ⴝᅞೣ
9
10
8
13
12
6
11
2-2 Ⴝᅞೣ
ϳㄇኈ
ヅྈ⸹
Ւᅩ⸹
⋍ㄇኈ
ᨊ๗ LED ᥨ
⽷ㆊ
㓤҇ㆺ
ಎⵒ
DC ⱚҘတઋ
SD ֦တᐥ
ヅྈ⸹Ř
ᑨᆹŊྈ SV2 ㄇኈϳ᱿ ྈ⸹Ŋ᳅ӷӛ➔ౡᣅᔋȯ
〦ᑨᆹŊྈ SV2 ㄇኈϳ᱿ ྈ⸹₎ 3 ấഩ➔ౡ〦രᄍŊ֯ר
〦ヅȯ
Լ⋱ⱧᲷŘ
ᮢᅠഛЭ⻞⢌ Ȯཞᤫ Ȯ⻞ㅠ Ȯ
MP3 Ȯℐ⭰ჶഛᑨ Լ⋱ӡဘȯרㅯᆹ
⸒ⲻᆹ⸒ⱧՒⱧᲷȯԼ⋱ߧḻଃ᭔᱿Ԁ
ಙ⠧ḻࡠ⠗⥿Լ⋱Ⴝȯ
8

Ӽྈ⼫Ř
ྈ⸹רӼ ⻞⢌ ( ཞჶ ) আ / ϟᔋȯ
ྈ⸹רӡဘ ⻞⢌ ( ཞჶ ) / Ⴉᄍ ᑁೣȮ
⥑હⴆ܈ᆹⲙߊʀɺଶ⼫ȯ
Γ
ဏḻŘⳆқΤӼྈ⸹ሳߌᣅ׳Լ⋱᱿ʃ≟⫥ʵʃᮢȯ
Ւ〦Ř
ᅠㄇኈϳ᱿ヅྈ⸹ʁᅞŊႽᆹ
רʀȮʁՒדྈʁȯ
Ւ〦Լ⋱ⅺŊծⳖ⠗ࡠ⠗Ȯ⩐ᤄȮ
ᄊ⩐ㅠ⸇Ȯ൬ⱧȮᡕ⤍ᾀႽȯ
2-2 Ⴝᅞೣ
ဏḻŘՒ〦ሳߌᣅ׳Լ⋱᱿ʃ≟⫥ʵʃᮢȯ
9

2-3 ≸ᑨ᱿ᮢ
2-3 ≸ᑨ᱿ᮢ
≸ᑨတҘരŊ⊖ㅠᄊ᮫≸ᑨ˫Ἴ㋤⊖ⱚӛŊ׆ SV2 ʀ᱿ۨצ૽ʃሳሷ⊖
ㅠⱚӛȯᮢ≸ᑨᆹŊ૽≸ᑨ᱿တㆊတҘ SV2 ㄇኈఢϳ᱿≸ᑨတઋ֯רȯ
2-4 ⣶⤻ / ㅠ⤻ⱚӛ
ף⣬ᆯ෨߱ SV2 ᳖വӷ
᱿ഛЭ ( ⻞ഛȮᤫᦸ ) ⊝
വ⣲᱿⊖ㅠ (MP3Ȯ⻞ㅠ )Ŋ
ᲀר᮫ AV ࡎⱚӛ⎏ヅ
⣶Ŋڱⱚӛ⎏ヅ⣶᱿⊖ㅠᣅ
܈⊖ⳬ ( ХሷɺΤۨצᱹӛ
⊖ㅠ )ȯ
Ⳑヅ⣶ⱚӛᆹŊ⦼૽
A/V ℬ᱿㓺⏨တㆊတҘ SV2
ㄇኈఢϳ᱿ A/V တઋȯנ
ɺὉတᅠヅ⣶ AV ὉઈŊ
㓳⏨Ὁヅ⣶⣶⤻ⱚҘ
(Video in)ŊנɺὉᱺ⏨Ὁ
⊖ㅠⱚҘ (Audio in)ȯ
10

2-5 ⴆ܈Լ⋱ ˛
⻞⢌ᑁೣⴆ܈
ሚ҆ϊ (Exposure Value)
ᱺ౹⠣ (White Balance)
⣶⤻ᯉ⫨ (Video Quality)
ㅠ⤻ㅠ⫨ (Audio Quality)
サԼ⋱ⴆ܈ (Exit)
2-5 ⴆ܈Լ⋱ ˛
Ւ๗ഛЭ⻞⢌
ཞᤫ
ሚ҆ϊ (Exposure Value)
ᱺ౹⠣ (White Balance)
ᤫᦸᯉ⫨ (Picture Quality)
ೖⴀ⎊ཞ (Self Timer)
11

2-5 ⴆ܈Լ⋱ ˛
ᅺቅ༌֬ (Date Stamp)
サԼ⋱ⴆ܈ (Exit)
⊖ㅠ⻞⢌
ㅠ⤻ㅠ⫨ (Audio Quality)
サԼ⋱ⴆ܈ (Exit)
12

Ⴉᄍᑁೣⴆ܈
ㅠ⸇Ӽ (Volume Control)
ᒆጊᛤ܈ (File List)
ӵぜᲿԊ᱿ᒆጊ (Delete Current)
ӵぜሷᒆጊ (Delete All)
⸅⢒Ⴉᄍ⥑હ (Playback Repeat)
サԼ⋱ⴆ܈ (Exit)
2-5 ⴆ܈Լ⋱ ˛
Ւ๗ഛЭ⻞⢌
ཞᤫ
ᒆጊᛤ܈ (File List)
ӵぜᲿԊ᱿ᒆጊ (Delete Current)
ӵぜሷᒆጊ (Delete All)
܈ᗢ֬ (DPOF Print)
13

2-5 ⴆ܈Լ⋱ ˛
サԼ⋱ⴆ܈ (Exit)
MP3
ᒆጊᛤ܈ (File List)
ӵぜᲿԊ᱿ᒆጊ (Delete Current)
ӵぜሷᒆጊ (Delete All)
⸅⢒Ⴉᄍ⥑હ (Playback Repeat)
サԼ⋱ⴆ܈ (Exit)
⊖ㅠ⻞⢌
ᒆጊᛤ܈ (File List)
14
ӵぜᲿԊ᱿ᒆጊ (Delete Current)
ӵぜሷᒆጊ (Delete All)
⸅⢒Ⴉᄍ⥑હ (Playback Repeat)
サԼ⋱ⴆ܈ (Exit)

⥑હⴆ܈
2-5 ⴆ܈Լ⋱ ˛
⊖ㅠ⻞⢌
߱ᆹԀ⥑હ (Set Clock)
㆜હ㆒᪓⥑હ (50/60 HZ)
ヅ⣶Ӽહᐻ⥑હ (Video System)
Ѳએ㋤ጁೣջ (Media Format)
⎊Ւ〦ᑨ⥑હ (Auto Power Off)
Ѳએ㋤ⴆႹ (Storage Select)
ⴒ׆ᣅㅷ⥑ϊ (Set to default)
15

2-6 ➔ౡᯉㄇ˛₺
2-6 ➔ౡᯉㄇ˛₺
ℶ⚦ ߧḻᐻḻา∑
SD ֦רᮢ⸇྆ḻŘ˫ᱻӠᕗ⠧ḻ SD רᮢѲએἇ⿵ȯ˫ᔍᄲ
ϊʧ˫ SD ֦ⅶૌ⸇Ŋ֯רവᵧרᮢ⥆ຣ㋤ᄲ⸇ȯ
ᄲ⩐ᤄ
ΦŊᤀᕀೣᄲ⩐ᤄȯ
4
1
ࠌشխᚏژ᧯Κ᧩قؾছאփ৬ಖᖋ᧯ࢨʳ˦˗ ᚏژᇷ
றΖ
- ᲿԊႩᄍഛЭℶ⚦ / ⅶഛЭᄲ
2
Լ⋱ߧḻŘㆴḻᲿԊⳖ⠗Ⴝ᱿Լ⋱ߧḻȯ
ኪቹقΚ᧩قؾছၞ۩ᖙ܂Δڕإڇᐙቝᙕ፹Εإڇᐾ࣋
3
ˁˁ Ζ
ヅᖷᔬ⸇ㆴḻŘដጁᣅ 3 ጁŊ⠧ḻヅ⸇ 100%Ȯ70%Ȯ30%Ȯ
4
0%ȯ
⻞⢌ / Ⴉᄍᆹ⿵Ř ᆹŘӠŘấ ᅞೣㆴḻŊᆹ⿵ʀ⤺ᄲȯ
5
- -
ཞჶᅺቅᆹ⿵
⤻ㆴḻŘヅᖷヅԻ≩ᲵȮSD ֦ቍတҘ .... ᾀ⤻૽˫ⷙᲿ
6
᱿ᄽㆴḻᅠ➔ౡʑŊ〦ᅠ׳⤻דҢ⦦ᆙŊ⦼א≙ 4-5 ⤻
ၪ⣬ȯ
ΦᄲŘ⳺ᮢഛЭ⻞⢌ȮཞᤫᑁೣȯSV2 רⳭ
ᄲ⩐ᤄ
16

2-7 Ҡ⥑હㅮᲿ
૽Լ⋱ⱧᲷ⦲Ⴄ⎏ ⇦ŊⳖ⠗ሷႽԊ᱿⥑હȯʀȮʁႤՒ
Ւ〦רӡဘ⥑હᑁೣȯ
߱ᆹԀ⥑હ (Set Clock)Ř
ᆹ⿵ᅺቅʃଃŊ⦼ྈʁՒ〦Ŋ
Ⳗ⠗ᆹ⿵ᅺቅ᱿⦲ᄮȯ
➔ౡ˫ ᆹŘӠŘấ ሶŘᅺŘ౺ ㅯㆴ
ḻŊᱺ⏨⠧ḻᲿԊⴆહ᱿ㅮᲿŊרྈ
ʁՒ〦Ⳗ⠗ㅮᲿ᱿ӡဘŊ⣬ሩᄊᄲ
ϊŊ⦼ʀדʁႤՒՒ〦ȯ
રໞ⥑હരྈʁՒ〦Ŋ᳅ӷ⥑હᯉ
ㄇᚉŊ֯રໞѲએȯ
㆜હ㆒᪓⥑હ (50/60 HZ)Ř
[50HZ] ד [60HZ] ӡဘŊㅷ⥑ϊᣅ
60HZȯトሩᄊŊ⦼҅ྈɺʁՒ
〦 ( ㅮᲿᄊᱺ⏨Ŋʏ˫㓺ಎㆴḻ )Ŋ
ҪʀȮʁႤՒՒ〦Ŋ⎏ᓥⴆח᱿
ㅮᲿŊҪྈɺʁՒ〦Ŋ֯רሩᄊ⥑
હȯⳆᑂ᱿Ⴝ⳺ᮢᅠ˫ʁሷ᱿⥑
હȯ
2-7 Ҡ⥑હㅮᲿ
ᘜาŘ⼂⦡᱿⥑હŊሳがㆴḻٴ⫨Ŋᮟᮝᖛ౹グₕᾀ⩽ȯ
17

2-7 Ҡ⥑હㅮᲿ
ヅ⣶Ӽહᐻ⥑હ (Video System)Ř
NTSC ד PAL ӡဘŊㅷ⥑ϊᣅ
NTSCȯ
ᯍ⥑હᣅ [NTSC]ŊҢⱚӛᐻᣅ
QVGA(320x240)ř⥑હᣅ [PAL]ŊҢ
ⱚӛᐻᣅ CIF (352 x 288)ȯ
NTSC Ӽೣᆯᮢᅠשᢕ߸֒Ȯ⇾ߡُᅺ
ŊPAL Ӽԅᮢᅠᄲ᱿ᓿᙐȮ֡⇾ُ
ᄲˁᙐߡȯ
Ѳએ㋤ጁೣջ (Media Format)Ř
ጁೣջሳ૽ҙ᱿⥆ຣ㋤ᆯတ
᱿ SD ֦⫏ᅆᛤぜŊʏϝӮআ⥑હŊ
˫ⳆˀѲએ㋤ሩ⳺એᄍ SV2 ᱿
ጁೣ⫏ᅆȯ
ᘜาŘᓥᮢҢ⡶⇦એח⳧᱿ SD ֦Ŋ⩀҅૽ጁೣջҪᮢŊ˫ⴍ҉ጁೣʃ
ૌ᱿ഐᱹᮝȯ
18

⎊Ւ〦ᑨ⥑હ (Auto Power Off)Ř
ᣅⳭӷヅ᱿Ჿ᱿Ŋ෨ר˫⥑હ߱ 1Ȯ
3Ȯ5Ȯ10 Ӡ⾝ቍሷ˶᱿ႽŊ֯⎊Ւ
〦ヅȯⴆႹ [Disable]Ŋԅʃሳ⎊
Ւ〦ᑨȯ
Ѳએ⥆ຣ㋤ⴆႹ (Storage Select)Ř
רⴆႹѲએ⎏ҙ᱿ 16MB ⥆ຣ㋤
[internal] တ᱿ SD ֦ [SD Card]ȯ
2-7 Ҡ⥑હㅮᲿ
ⴒ׆ᣅㅷ⥑ϊ (Set to default)Ř
⥑હಂሩՒരŊบ⣬ߊᔖӷӛೇ
᱿ㅷ⥑ϊŊ⦼ⴆח [Yes]ȯ
19

2-8 ヅᖷ҂ヅ
2-8 ヅᖷ҂ヅ
ኞᱹヅᖷᔬ⸇྆ḻԘɺጁ ( )Ŋ⠧ḻ෨᱿ SV2 ХԘ 30% ˫ʁ
᱿ヅԻŊⳆᆹ⦼Ⳗ⠗҂ヅŊ҂ヅᆹ➔ౡ᱿ヅᖷᔬ⸇ߧḻᦗŊʏʈ SV2 ⋍
ㄇ᱿ LED ˌᥨʏᦗȯ
ኞヅᖷ≩ᔟᲵŊԅ➔ౡᔌʑ૽ㆴḻ Ƣ BATTERY LOW!Ƣ ⏨
ᑂŊ⳧ʴᄲấ SV2 ૽〦ヅŊኞ෨ቍҪ҂ヅԅ૽ᤀᘍᮢȯ
ဏḻŘヅ≩᱿ヅᖷŊҢ҂ヅトᆹ⿵₎4ଅᆹŊ૪も҂ヅᆹ⿵ߌᣅヅᖷૌ⸇ʃ
Ȯلʃ≟ሷʃȯ
20

3-1 ഛЭ⻞⢌
3 Լ⋱Ⴝ
ഛЭ⻞⢌ȮཞᤫȮ⻞ㅠԼ⋱׳ሷҢ ȵ⻞⢌ ( ཞჶ )ȶד ȵႩᄍȶᑁೣŊ
ᮢ ྈ⼫רʻӡဘȯMP3 Хሷ ȵႩᄍȶᑁೣȯ
ὁ૽ㅯ┮Լ⋱ⱧᲷŊ˫ ȵഛЭ⻞⢌ȶআŊㅯᆹ⸒ᅞ˛₺׳Լ⋱ȯ
ဏḻŘӡဘ⎏ഛЭ⻞⢌ȮཞᤫȮ⻞ㅠԼ⋱᱿Ӯআᨊ๗ᣅ ȵ⻞⢌ (ཞჶ)ȶᑁೣȯ
3-1 ഛЭ⻞⢌
⻞ഛ ( ᆹ⻞⢌ഛЭ⎞⊖ㅠ )Ř
1. ૽Լ⋱ⱧᲷ⦲Ⴄ⎏ ʳ⇦ȯ
2. ト⥑હ⻞ഛᯉ⫨Ŋ⦼ྈʁՒ
〦פӛ⥑હⴆ܈ŊʏʁႤՒՒ
〦ŊⴆႹ Video Quality ( ⥑હરໞ
Ҫ
ྈʁ
Ւ
Ŋ〦⥑હᯉㄇ )ȯ
〦
21

3-1 ഛЭ⻞⢌
3. ྈʁʳ ྈ⼫Ⳗ⠗⻞⢌ȯ
ဏḻŘ1.⣬ᄊ⩐ᤄ⭡Ŋרらᆹᅠ⻞⢌ᯍʑʀ(ᄍ)Ȯʁ(Ⅷଅ)ႤՒՒ
〦ȯ
2.
➔ౡㆴḻ
ҙ
ⵒ᱿⥆ຣ Ѳએ⫏ᅆȯ
3.
➔ౡʁ⤑ㆴḻ⻞⢌⳧ᆹ⿵ȯ
4.
⻞⢌Ⳗ⠗ʑŊ⽷ㆊᅣ᱿
⠧ḻᲿԊᮢSD֦Ѳએ⫏ᅆřㆴḻ
㋤
㋤
LED
☾
ᥨᣅ ᥨණˌȯ
⠧ḻᲿԊᮢ
4. Ҫྈɺᓝ ʳྈ⼫ϟᔋ⻞⢌ȯ
Լ⋱⥑હ
߱⻞⢌ԊרⳖ⠗ሩⳖɺᔎ᱿⥑હŊ˫᪀⎐ሩ᱿⻞ഛᄓኞȯ
ྈɺʁՒ〦ŊרⳖ⠗˫ʁ⥑હŘ
ሚ҆ϊ⥑હ (Exposure Value)Ř
ぜᔌϊŊⴒר࣑Խқ₤דᛧқ
₤Ŋሚ҆ϊ࣑Խሳཞჶᯉㄇ⩐ˌřᛧ
ଇሳཞჶᯉㄇ⩐ᇯŊ⦲ᄮᆹ֯ר⤐ૣ
➔ౡ᱿ˌಙ⩐ջȯ
22
 Loading...