

Page 1

Installing Acer Aspire One ZG5 Wireless Card
Installing Acer Aspire One ZG5 Wireless Card
Tools used in this guide
Phillips #0 Screwdriver (1)
You will have to remove several screws and a couple of cables on the bottom of the ZG5 to remove or
replace the wireless card.
© 2010 iFixit — CC BY-NC-SA www.iFixit.com Page 1 of 4
Page 2
Installing Acer Aspire One ZG5 Wireless Card
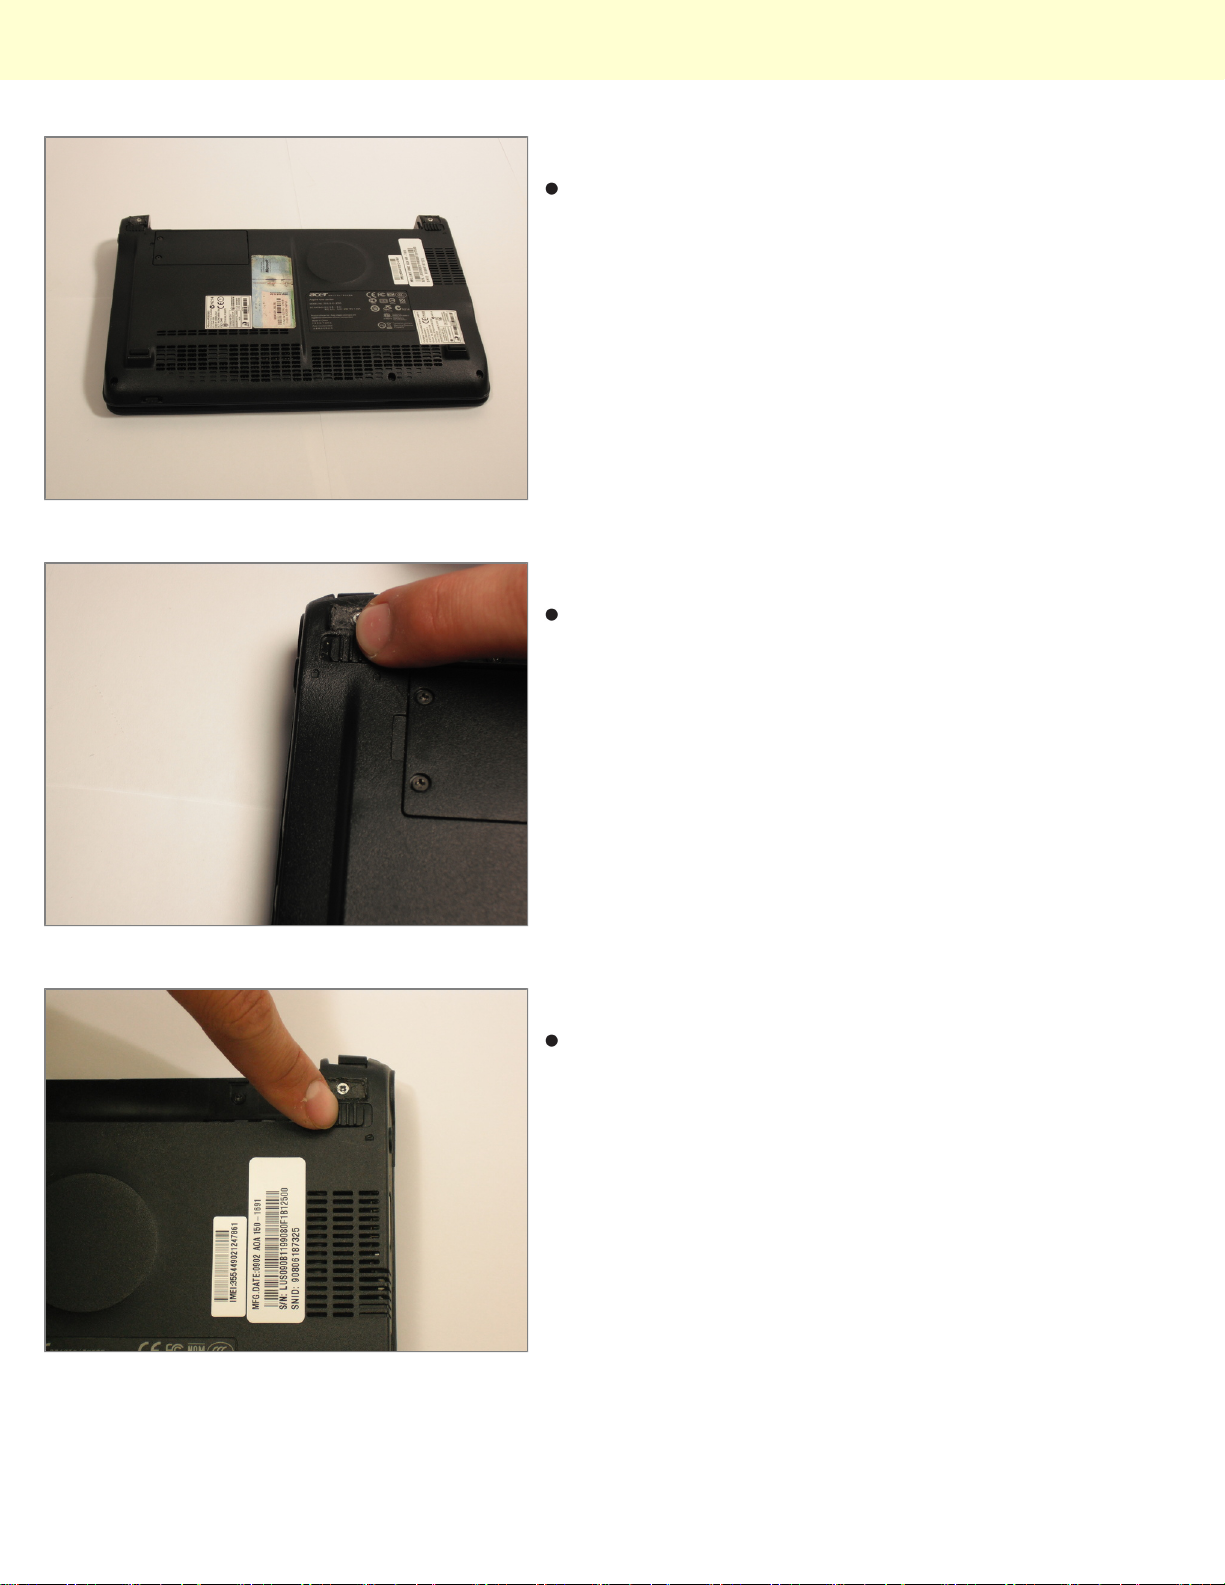
Step 1 - Battery
Turn the netbook upside down with the battery at the
top, away from you.
Step 2
Unlock the battery by sliding the switch located near the
left hinge to the left "unlocked" position.
Step 3
Slide the latch located on the opposite hinge from the
lock while pushing the battery up.
© 2010 iFixit — CC BY-NC-SA www.iFixit.com Page 2 of 4
Page 3
Installing Acer Aspire One ZG5 Wireless Card
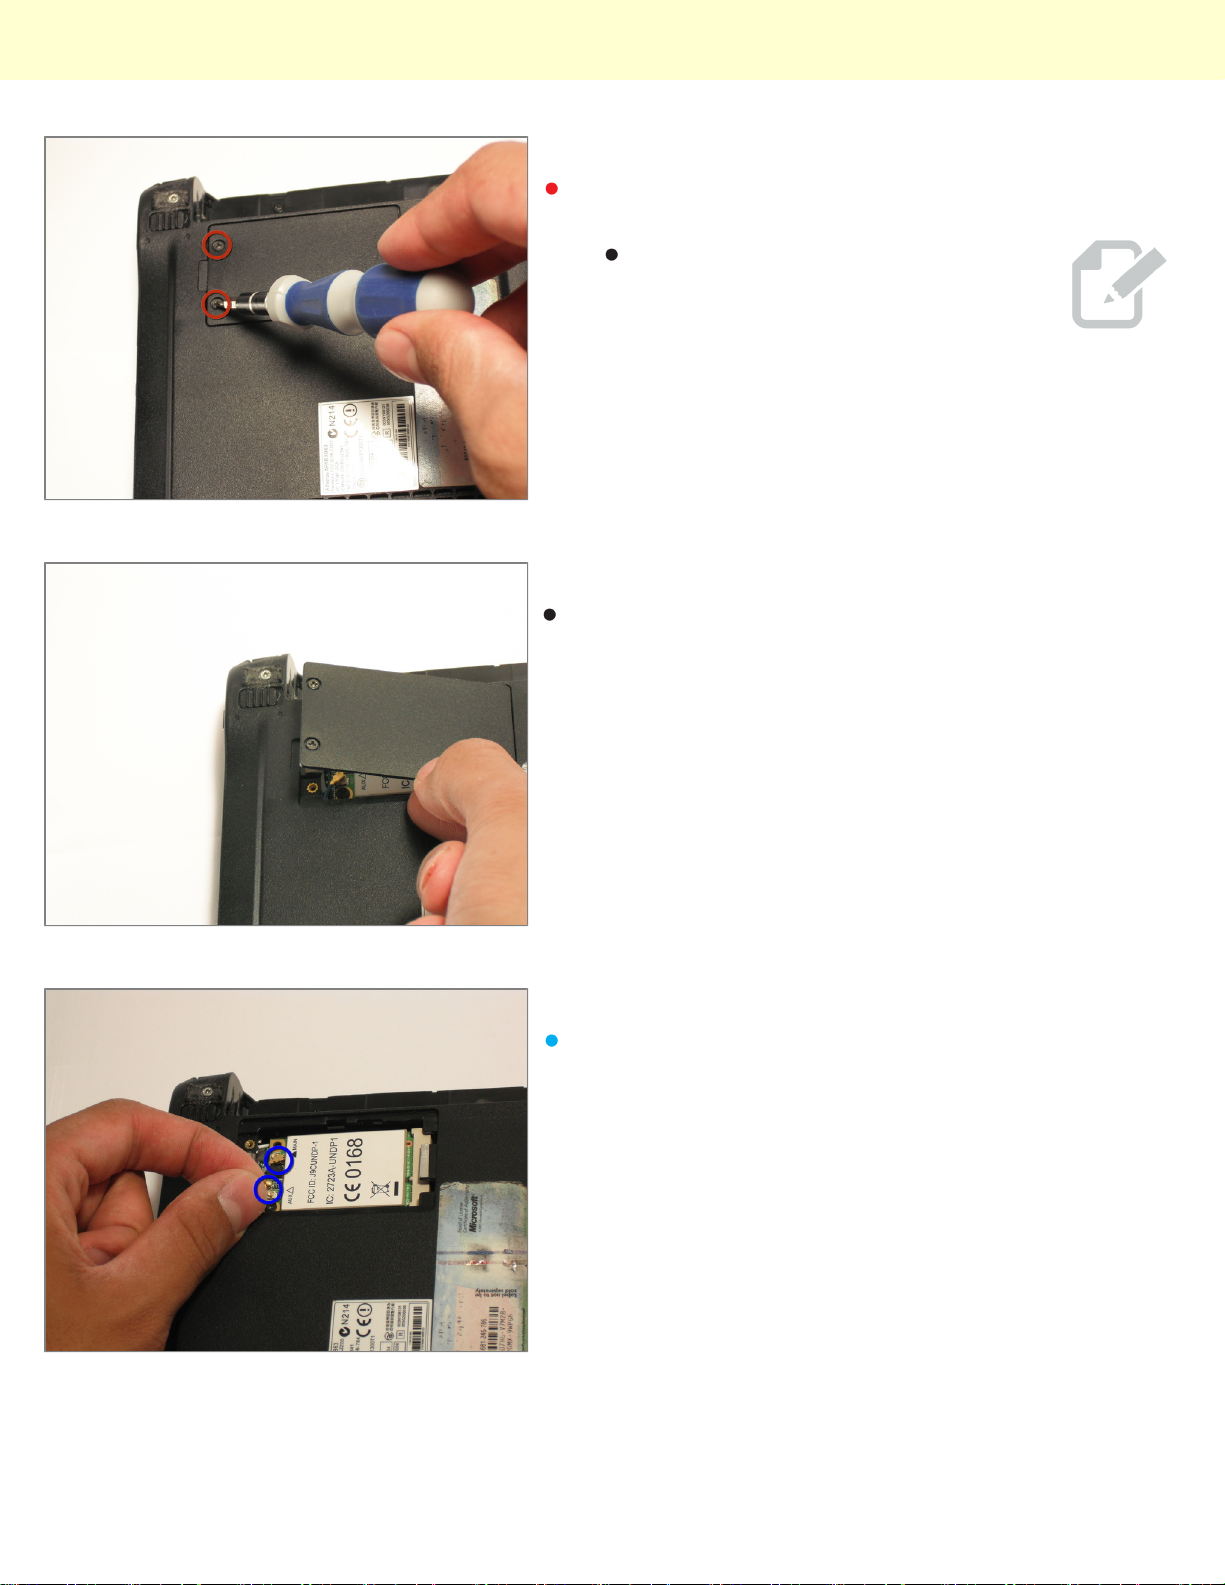
Step 4 - Wireless Card
Remove the two screws on the small panel towards the
top left of the netbook with the Phillips #0 screwdriver.
These screws are built into the panel
so they won't come out freely.
Step 5
Gently lift and remove the plate from the netbook.
Step 6
Disconnect the two antenna wires attached to the left
side of the wireless card.
© 2010 iFixit — CC BY-NC-SA www.iFixit.com Page 3 of 4
Page 4
Installing Acer Aspire One ZG5 Wireless Card
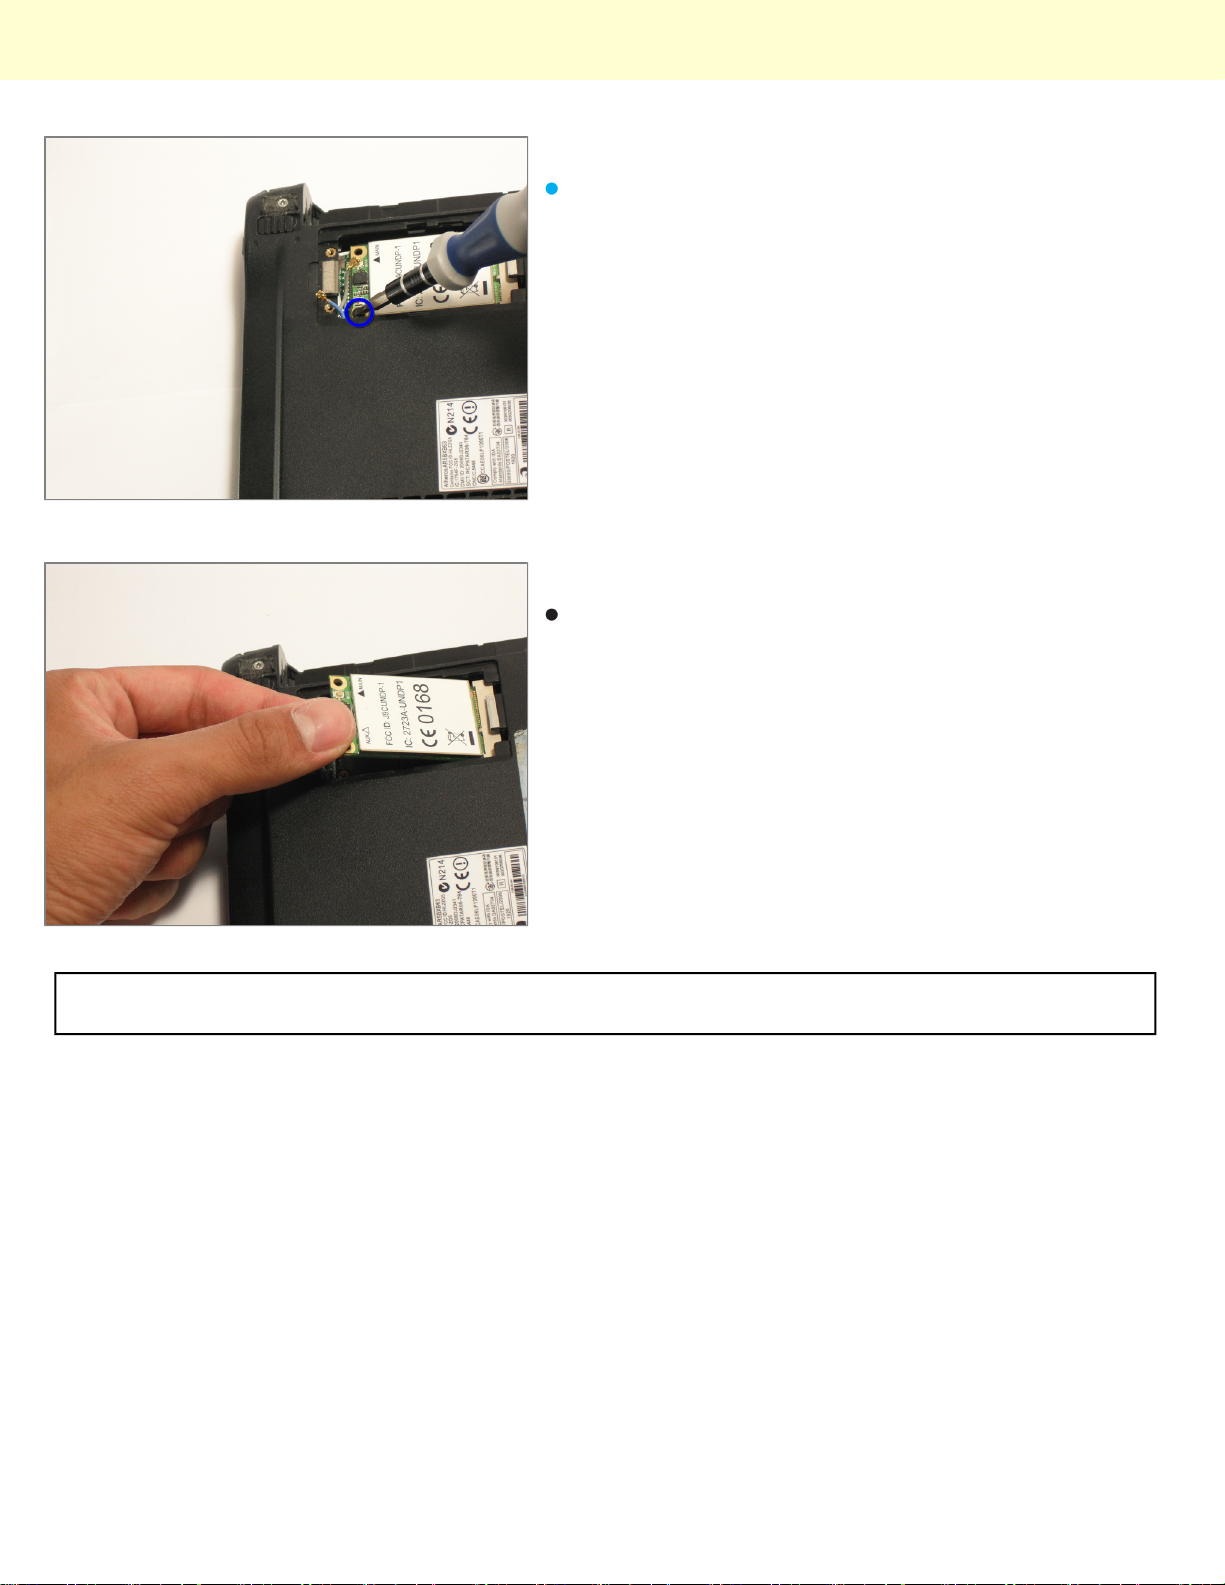
Step 7
Remove the 3.9mm screw located on the bottom left of
the wireless card with Phillips #1 screwdriver.
Step 8
Gently lift the wireless card from its housing starting
with the side where the antenna wires were.
To reassemble your device, follow these instructions in reverse order.
This document was last generated on Dec 15, 2010.
© 2010 iFixit — CC BY-NC-SA www.iFixit.com Page 4 of 4
 Loading...