

Page 1

Installing Acer Aspire One ZG5 Keyboard
Installing Acer Aspire One ZG5 Keyboard
Tools used in this guide
Spudger (1)
It is very straight-forward install a new keyboard; only three tabs and a cable hold it in place.
© 2010 iFixit — CC BY-NC-SA www.iFixit.com Page 1 of 5
Page 2
Installing Acer Aspire One ZG5 Keyboard
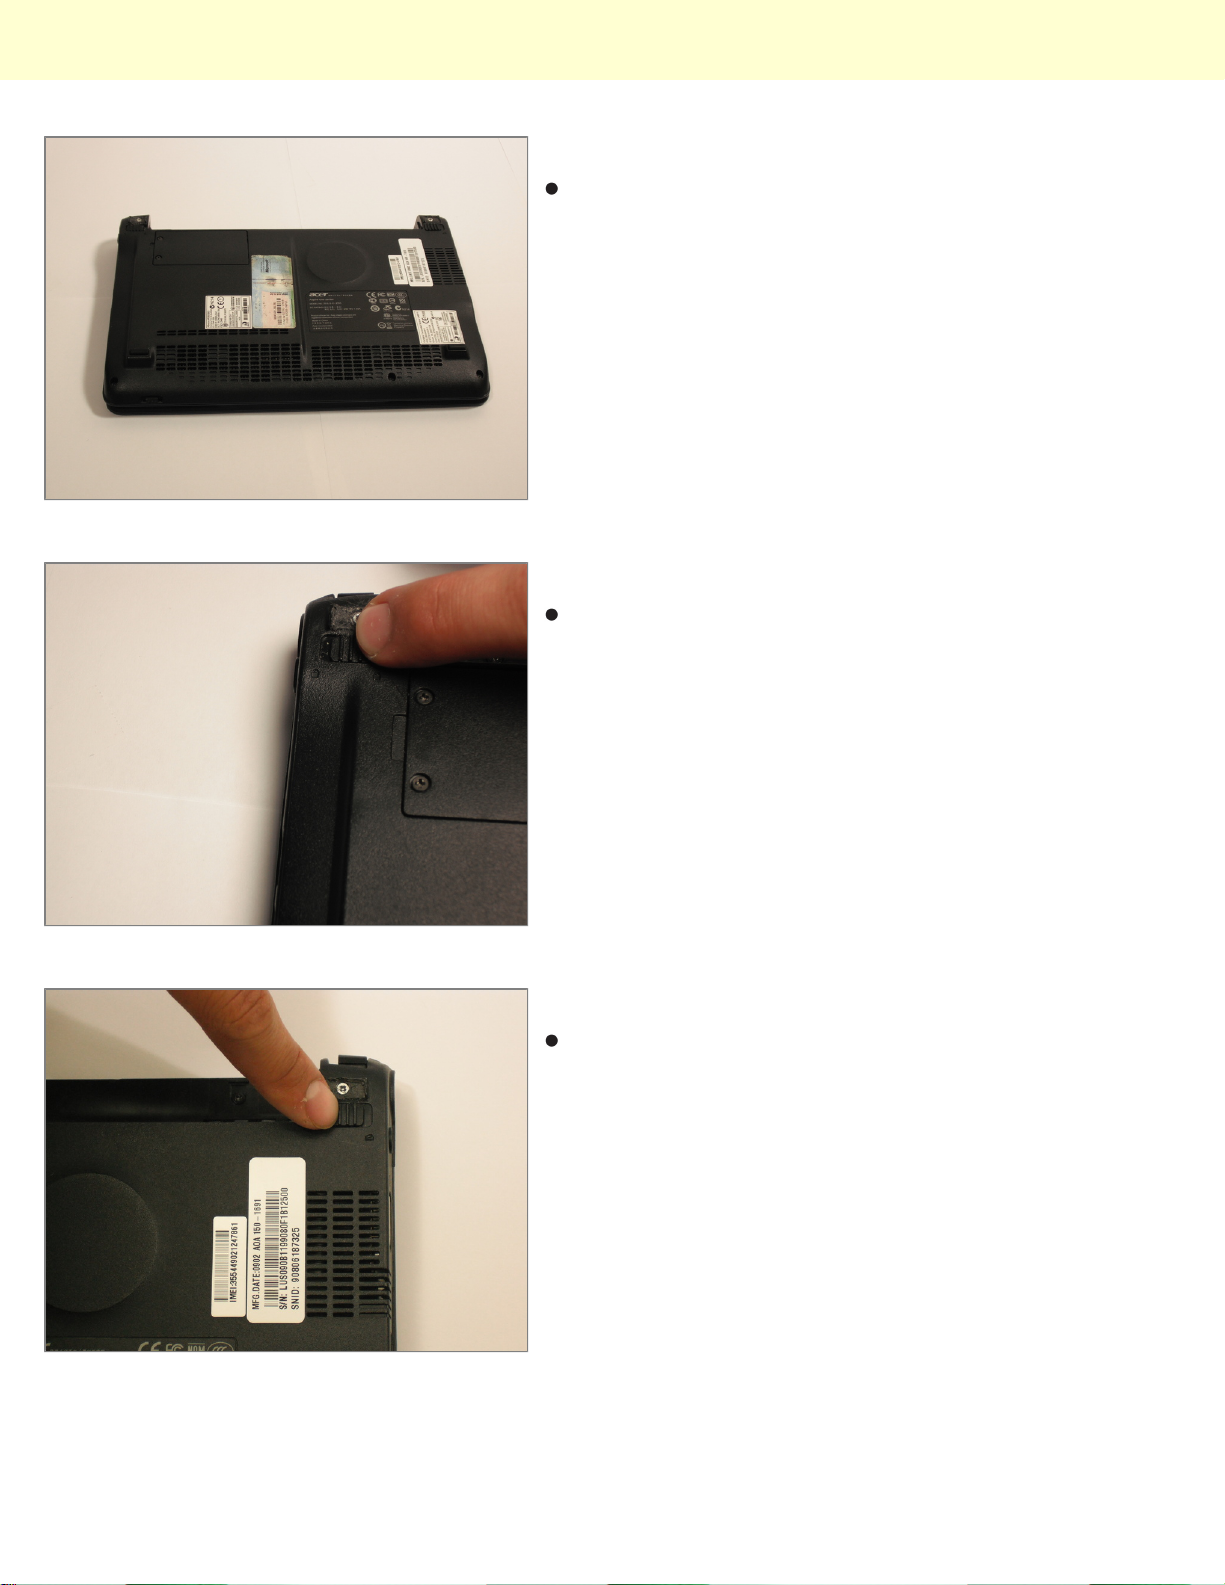
Step 1 - Battery
Turn the netbook upside down with the battery at the
top, away from you.
Step 2
Unlock the battery by sliding the switch located near the
left hinge to the left "unlocked" position.
Step 3
Slide the latch located on the opposite hinge from the
lock while pushing the battery up.
© 2010 iFixit — CC BY-NC-SA www.iFixit.com Page 2 of 5
Page 3
Installing Acer Aspire One ZG5 Keyboard
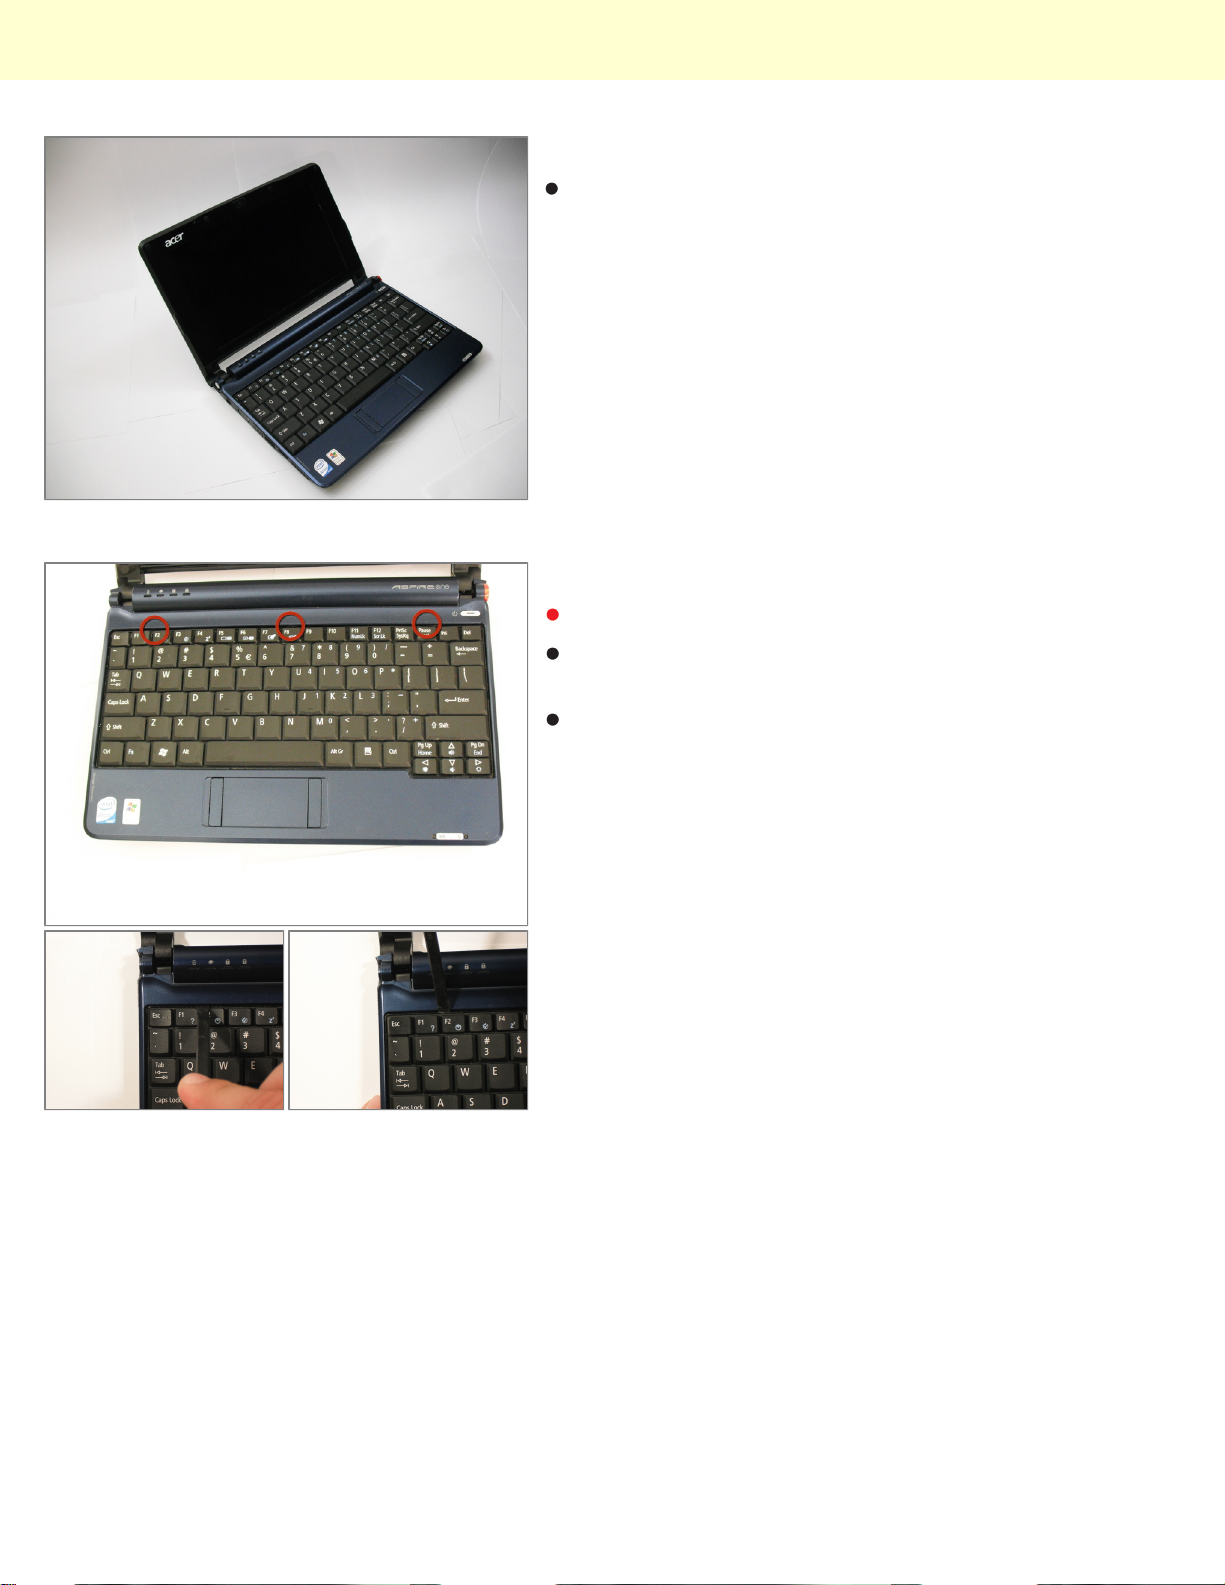
Step 4 - Keyboard
Turn the netbook over and open the display so that the
keyboard is facing you.
Step 5
There are three tabs located on the top of the keyboard.
Start with the spudger pointing towards the display and
pry up to push each tab off the keyboard.
As you move to the next tab, ensure the previous tab
doesn't reset itself.
© 2010 iFixit — CC BY-NC-SA www.iFixit.com Page 3 of 5
Page 4
Installing Acer Aspire One ZG5 Keyboard
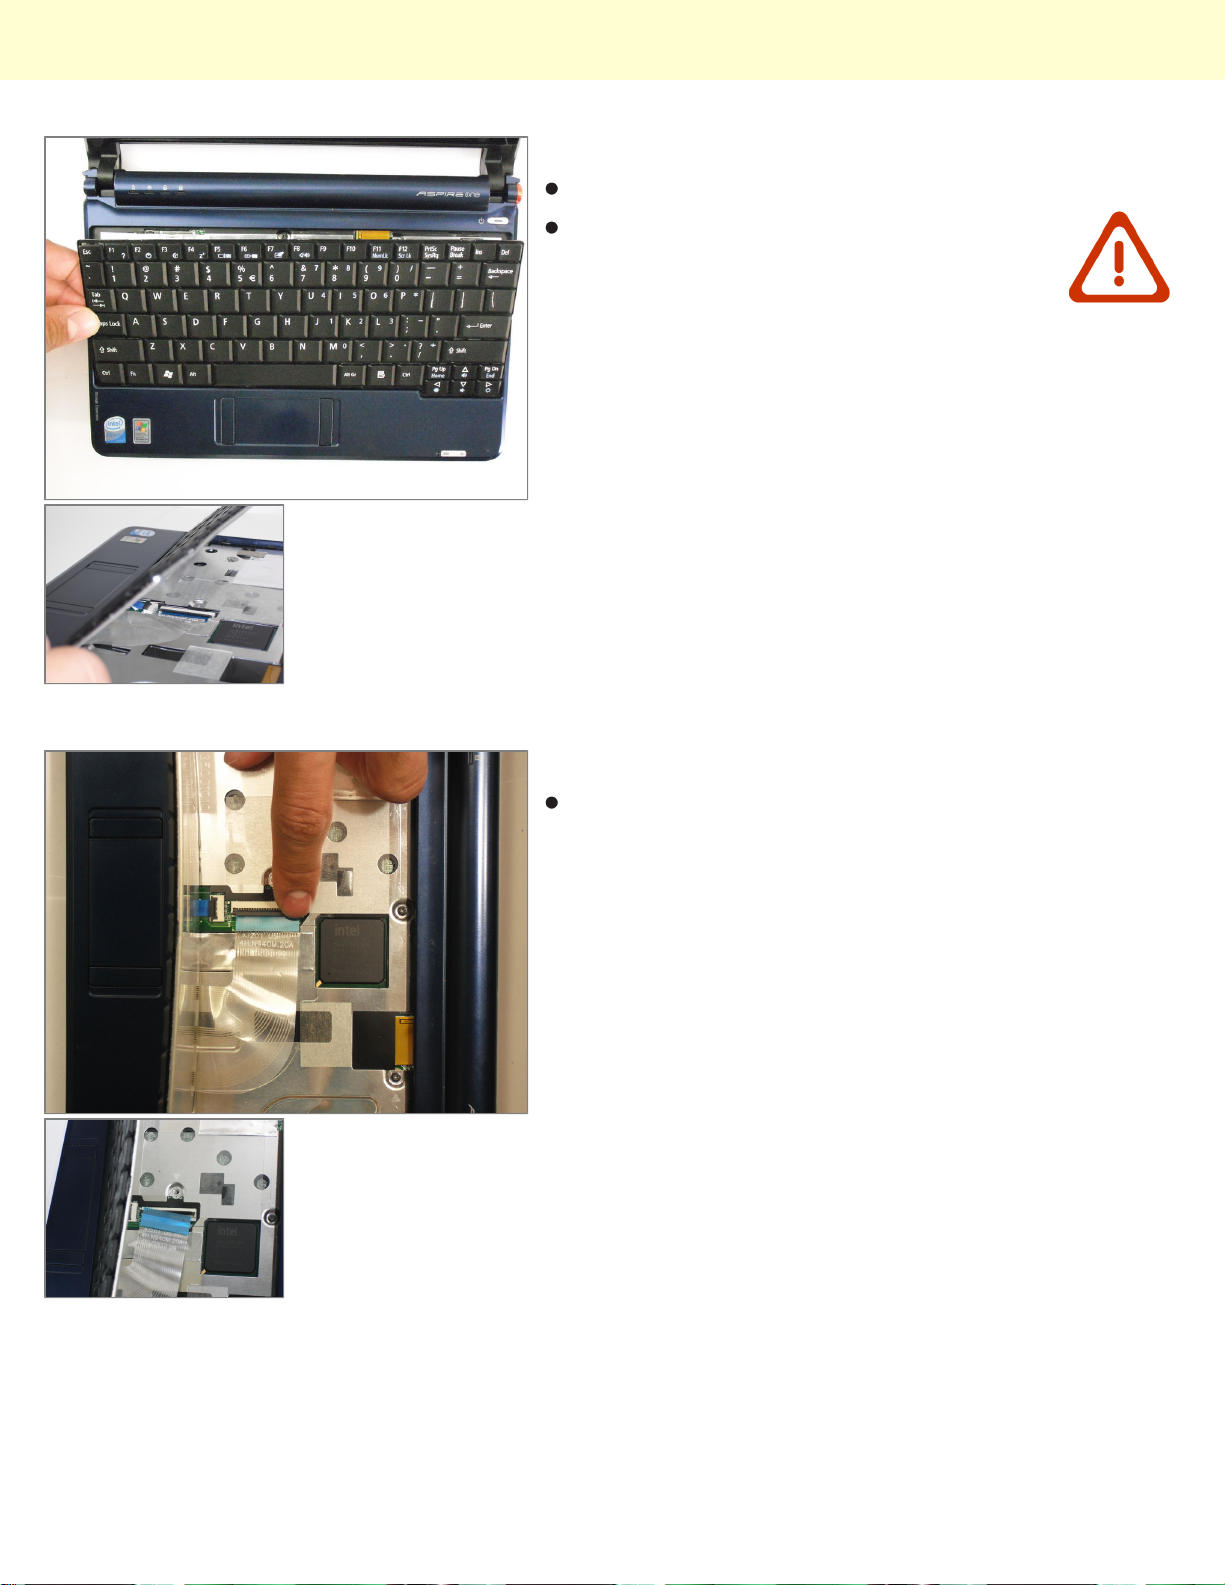
Step 6
Lift top of keyboard up.
There is a short ribbon cable connecting the
keyboard to the netbook.
Step 7
Disconnect the ribbon by lifting the black plastic hinge
and removing the clear blue cable.
© 2010 iFixit — CC BY-NC-SA www.iFixit.com Page 4 of 5
Page 5

Installing Acer Aspire One ZG5 Keyboard
To reassemble your device, follow these instructions in reverse order.
This document was last generated on Dec 15, 2010.
© 2010 iFixit — CC BY-NC-SA www.iFixit.com Page 5 of 5
 Loading...