

Page 1
Installing Acer Aspire 5100 Fan
Installing Acer Aspire 5100 Fan
Tools used in this guide
Phillips #0 Screwdriver (1)
Spudger or other soft prying device (1)
Replace a broken fan for an Acer Aspire 5100 laptop.
Parts relevant to this guide
Replacement fan (1)
© 2010 iFixit — CC BY-NC-SA www.iFixit.com Page 1 of 3
Page 2
Installing Acer Aspire 5100 Fan
Step 1 - Fan
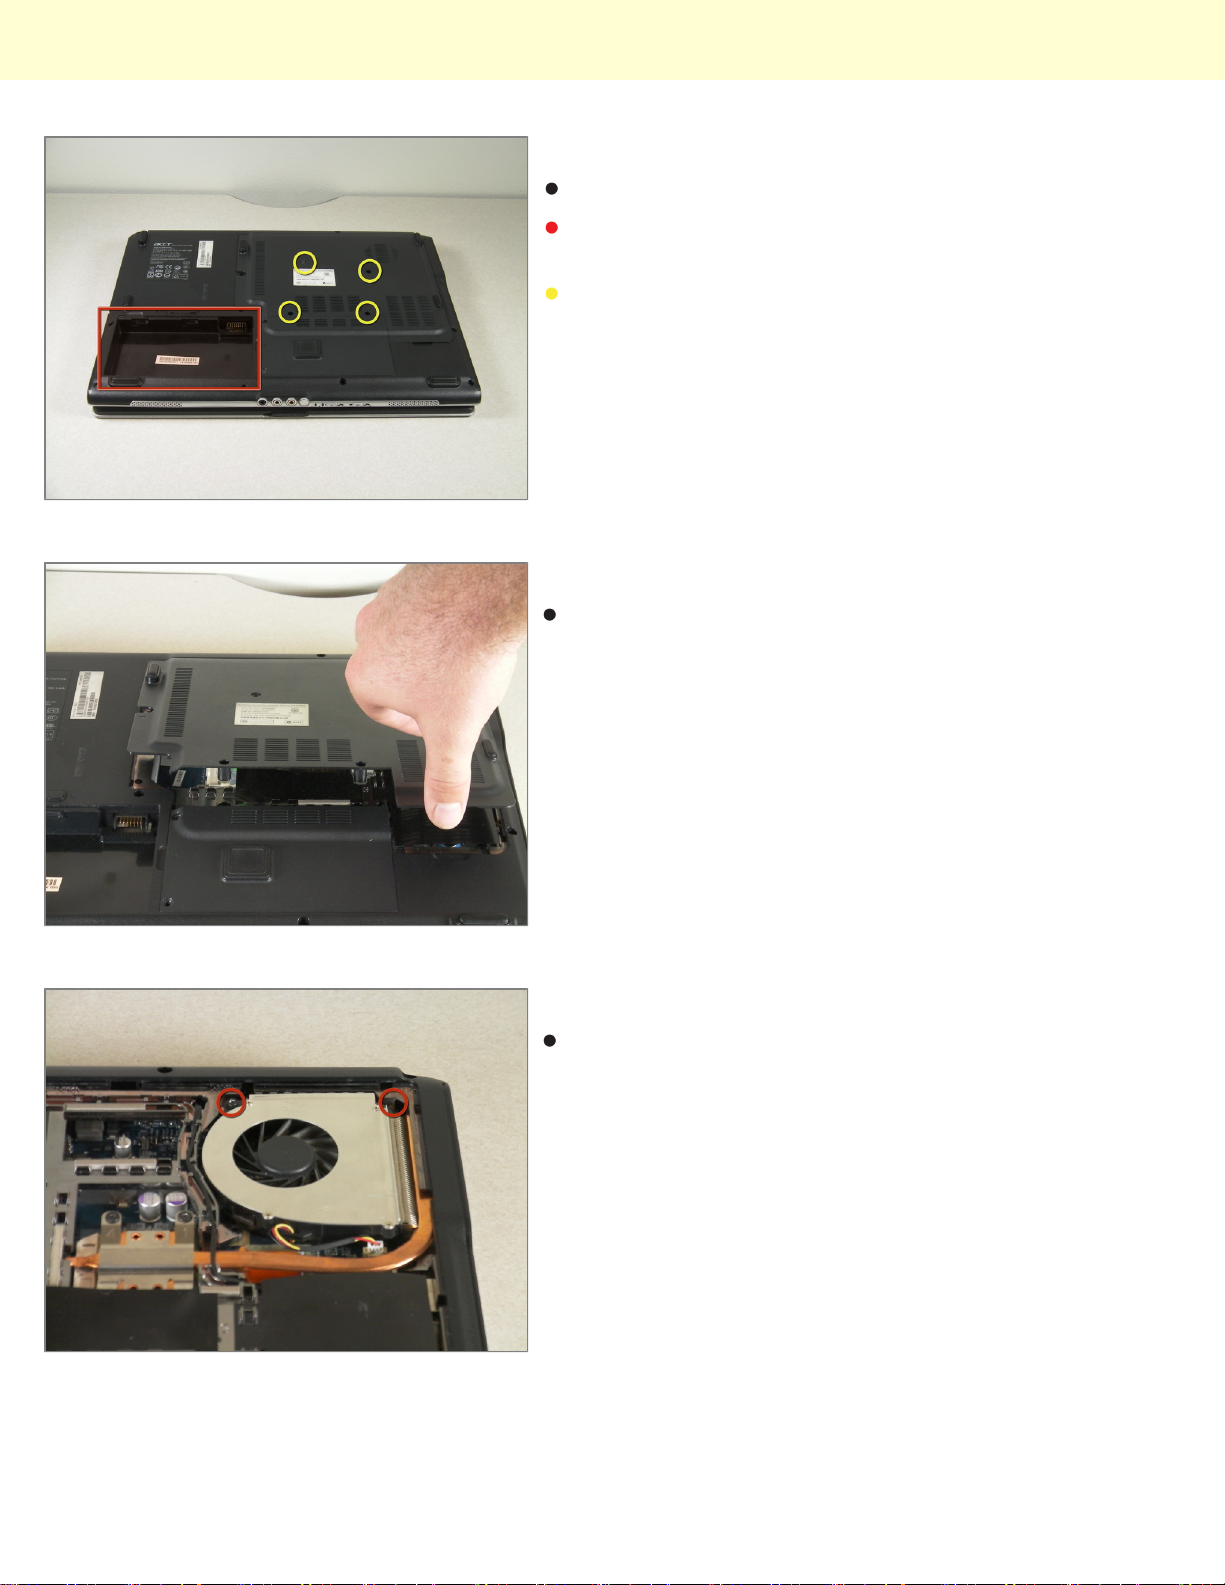
Place the laptop upside down.
Although the battery is missing in this photo, it is not
necessary to remove.
Locate the largest removable panel on the back and
remove the four screws connecting it.
Step 2
Lift up and remove the panel.
Step 3
Locate the fan and remove the two screws connecting it.
© 2010 iFixit — CC BY-NC-SA www.iFixit.com Page 2 of 3
Page 3
Installing Acer Aspire 5100 Fan
Step 4
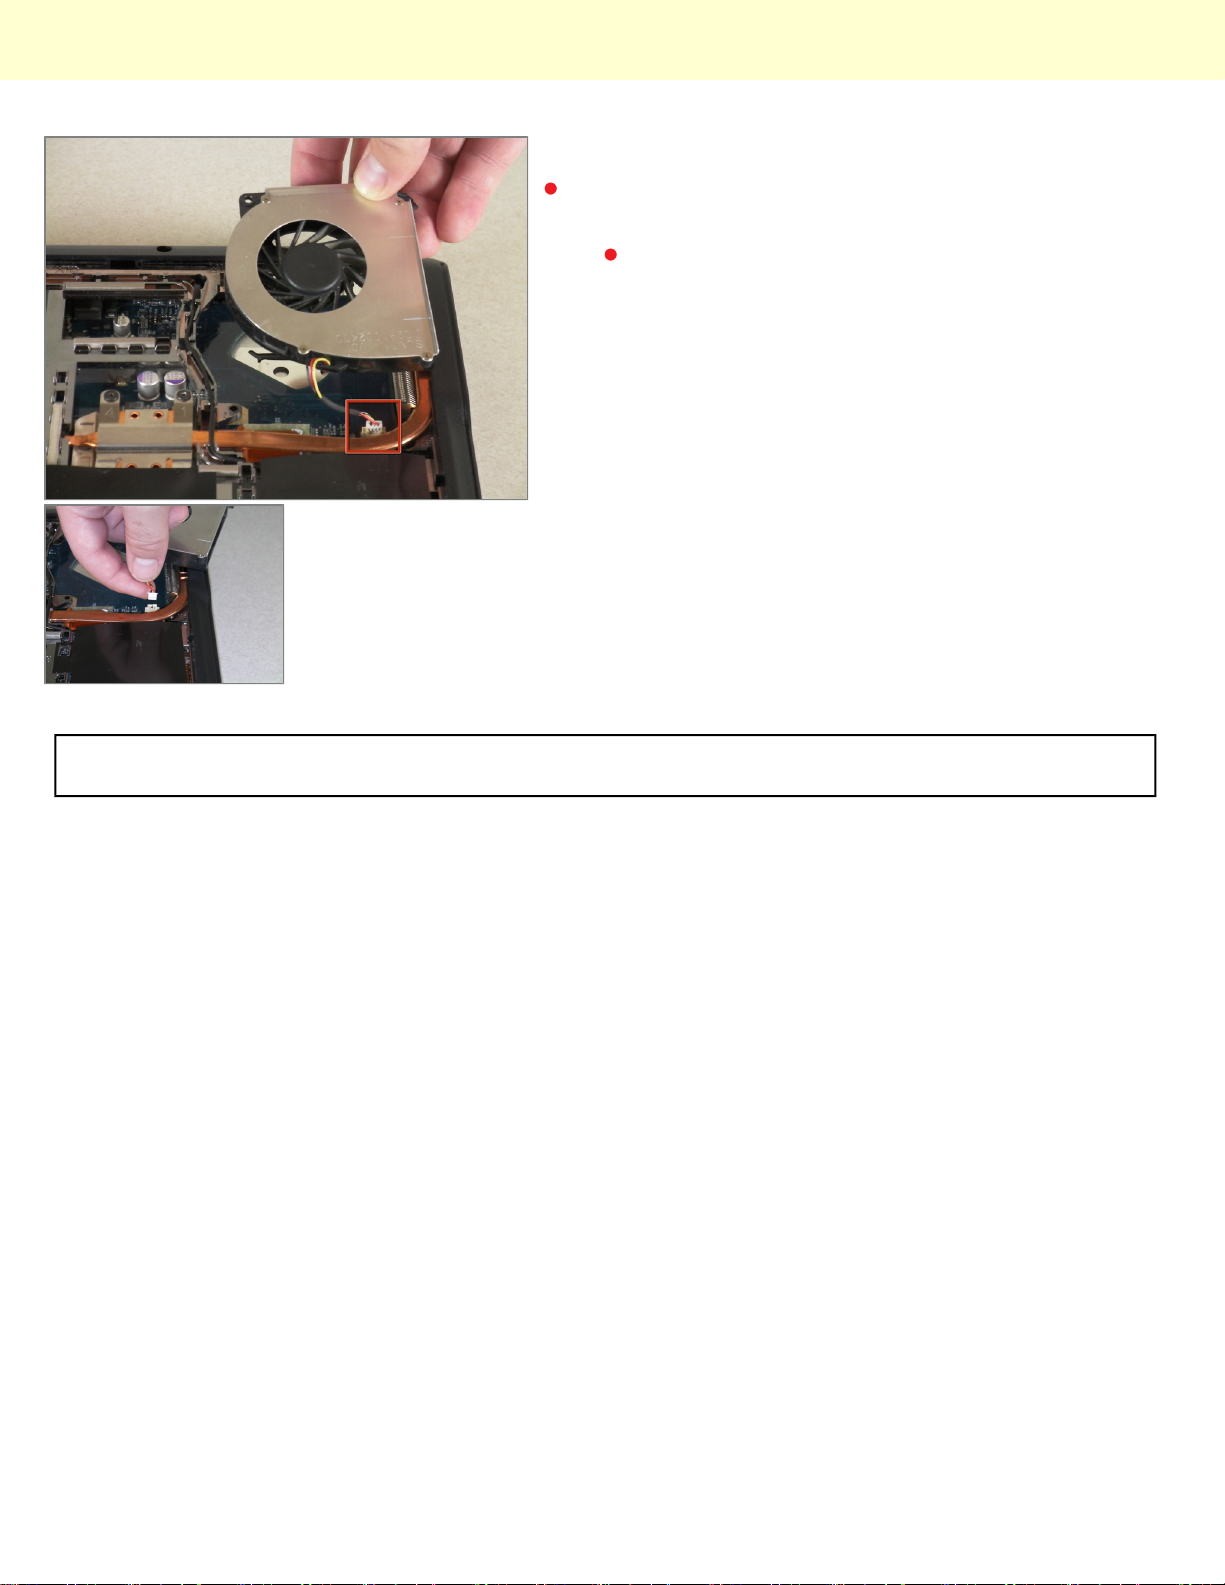
Lift out the fan CAREFULLY and detach the cable that
connects the fan to the motherboard.
When detaching the cable, do not pull on the
cable itself. Instead, use a small spudger to
detach it at the white section that connects it to
the motherboard.
To reassemble your device, follow these instructions in reverse order.
This document was last generated on Dec 15, 2010.
© 2010 iFixit — CC BY-NC-SA www.iFixit.com Page 3 of 3
 Loading...