

Page 1

Acer FP855
LCD Color Monitor
18.1” (45.9cm) LCD Panel Size
English
Page 2
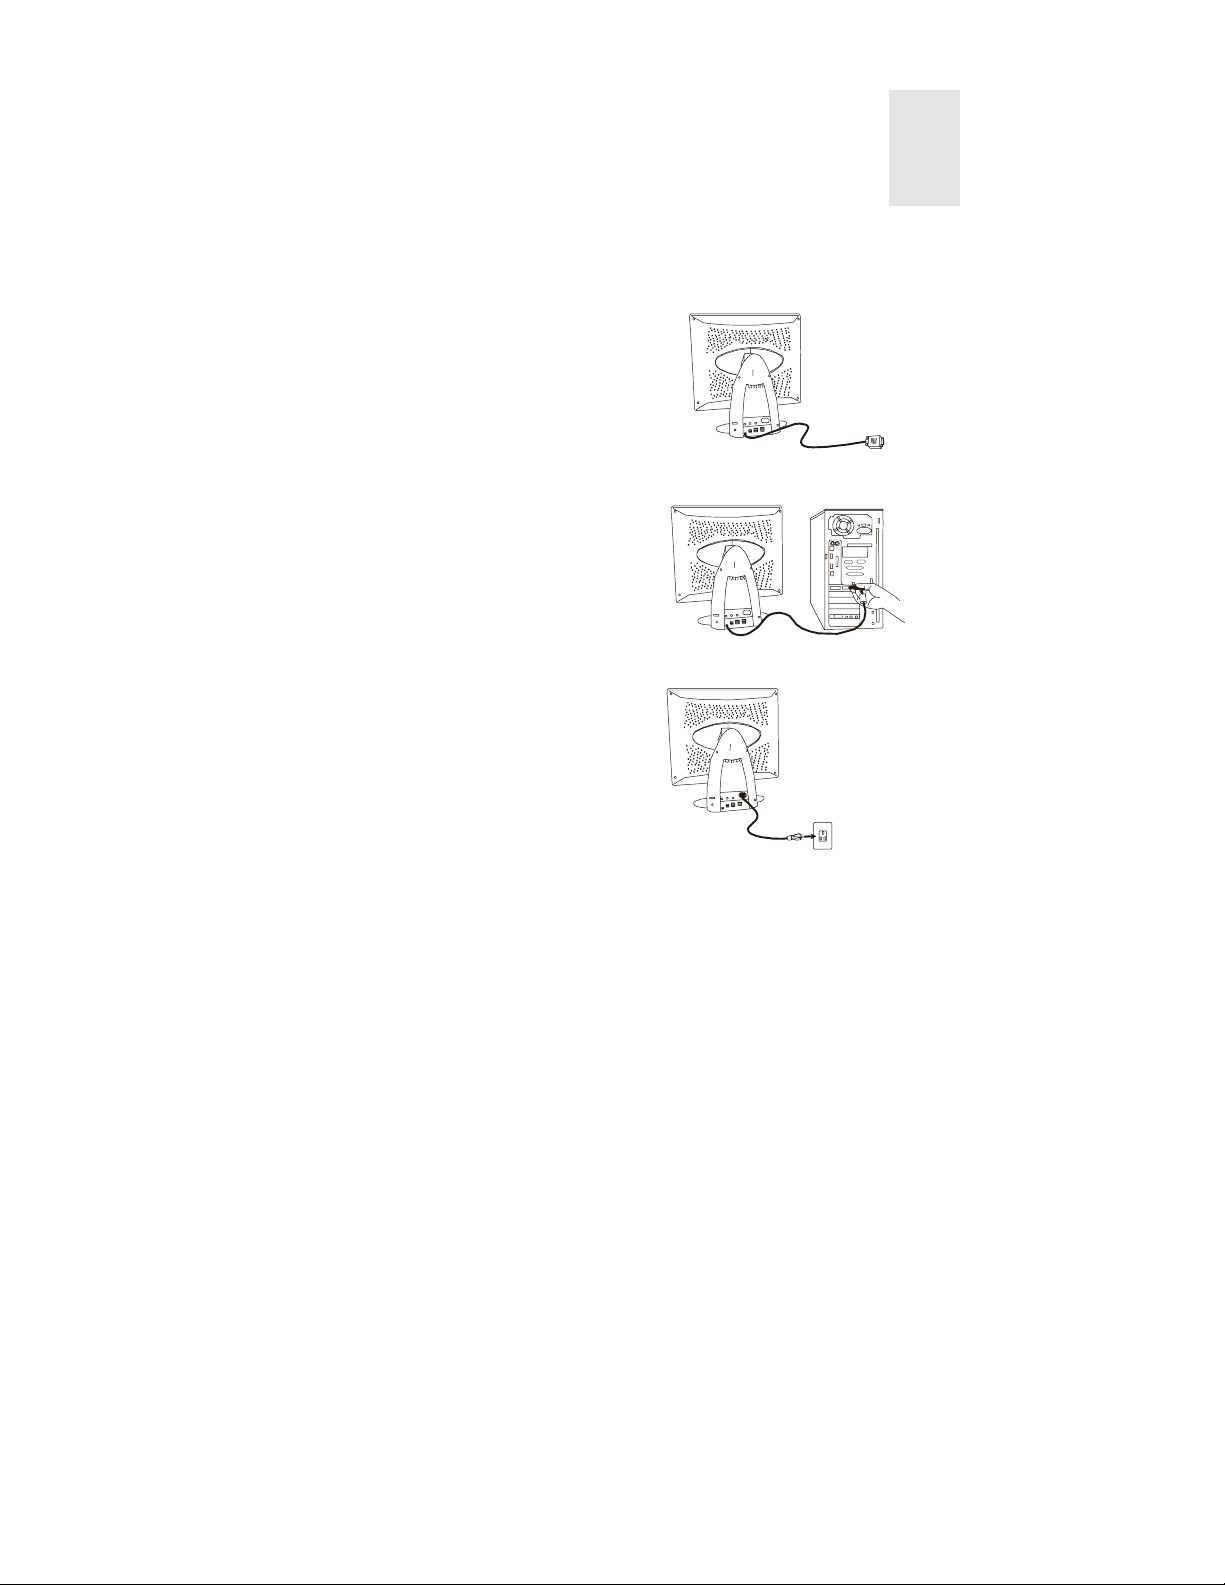
Installing the Monitor
This monitor is equipped with an auto-sensing power supply for voltage ranges
100~240V AC, 50~60Hz.
1. Make sure that the system power is
turned off.
2. Plug the signal cable to the signal
connector at the rear of PC.
3. Plug the end of power cord to the
monitor.
4. Connect the other end of power cord
to power source.
5. Turn on the computer and the
monitor.
1
1
Page 3
Connecting the Microphone
After connecting the microphone, you can use recording programs to record or edit
audio files.
1. Turn the system power off.
2. Plug one end of audio cable to LINE IN port at the rear of computer and the other
end to the microphone connector.
3. Turn on the computer and the monitor.
)
To record, you don't need to get close to the microphone. Staying in
usual operation position allows you to achieve perfect recording
performance.
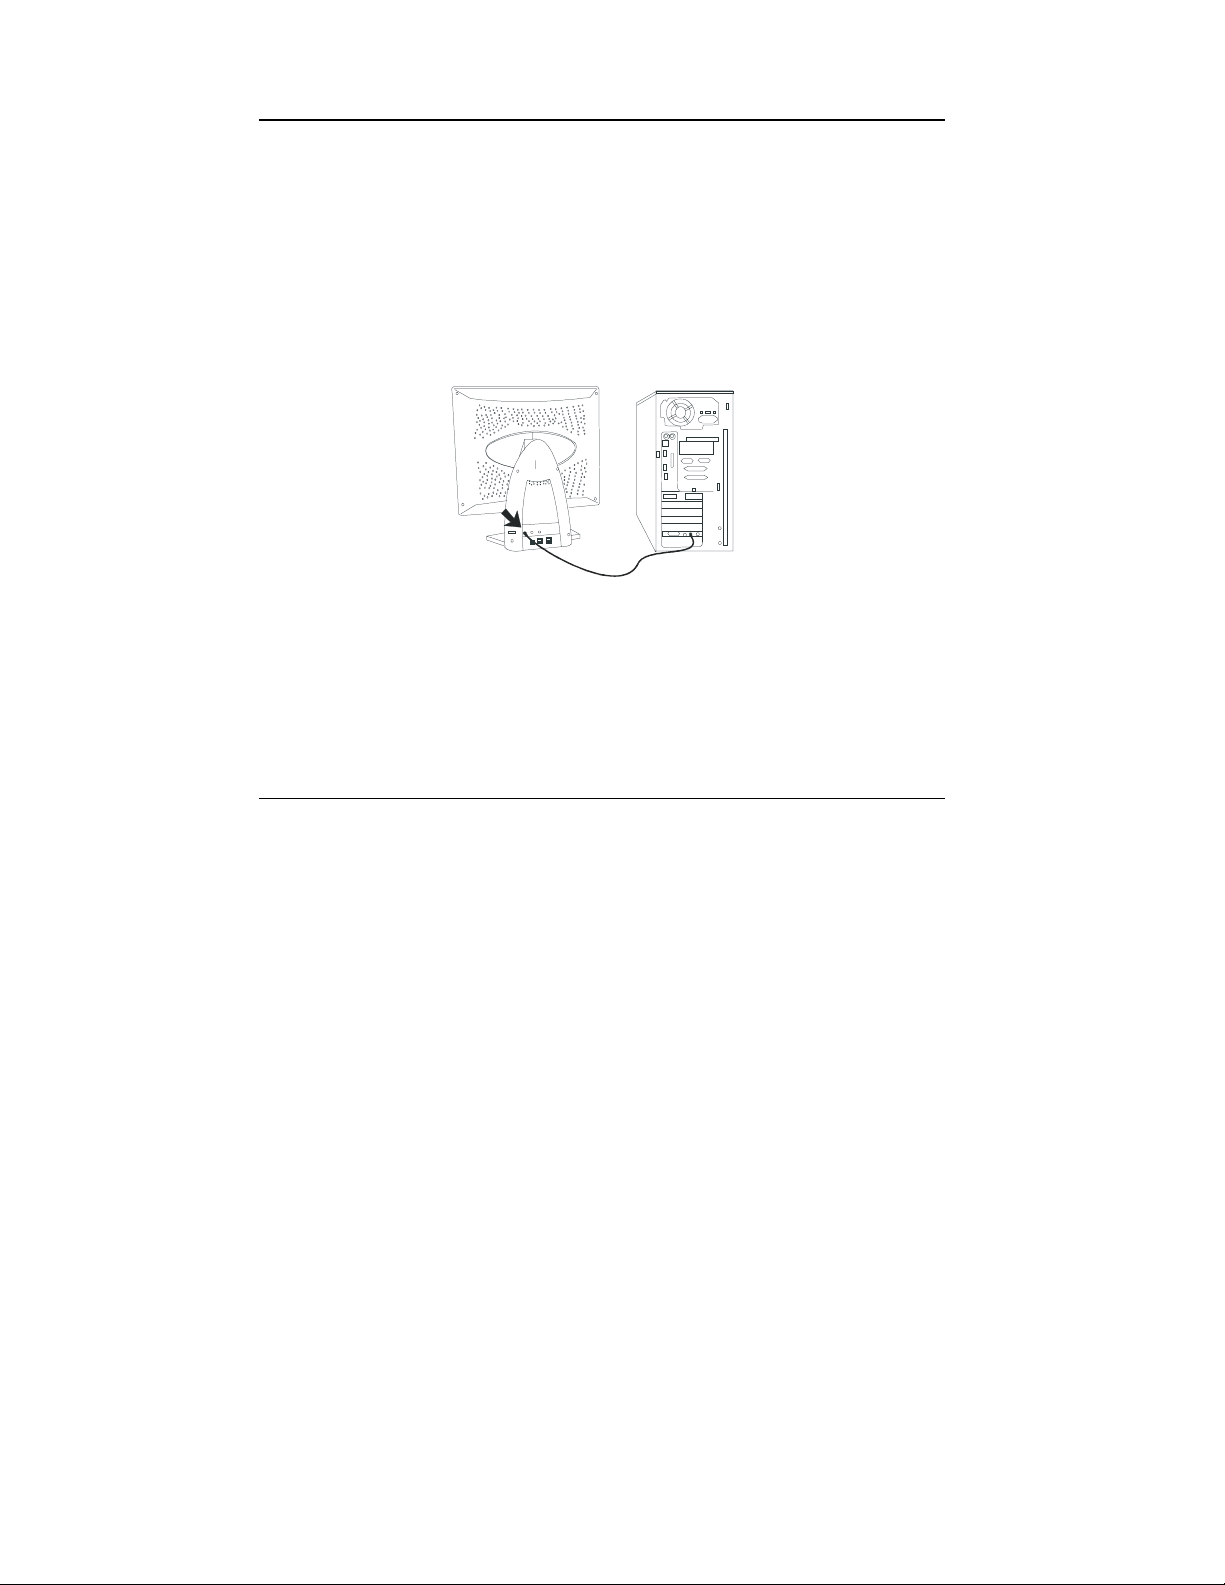
Connecting the Speaker
This model is equipped with built-in speakers. After connecting the speaker, you can
enjoy music easily.
1. Turn the system power off.
2. Plug one end of audio cable to the LINE OUT port at the rear of computer and the
other end to the speaker port at the back of monitor.
3. Turn on the computer and the monitor.
2
Page 4
)
To adjust the audio volume, use the volume control at the right side of
your monitor.
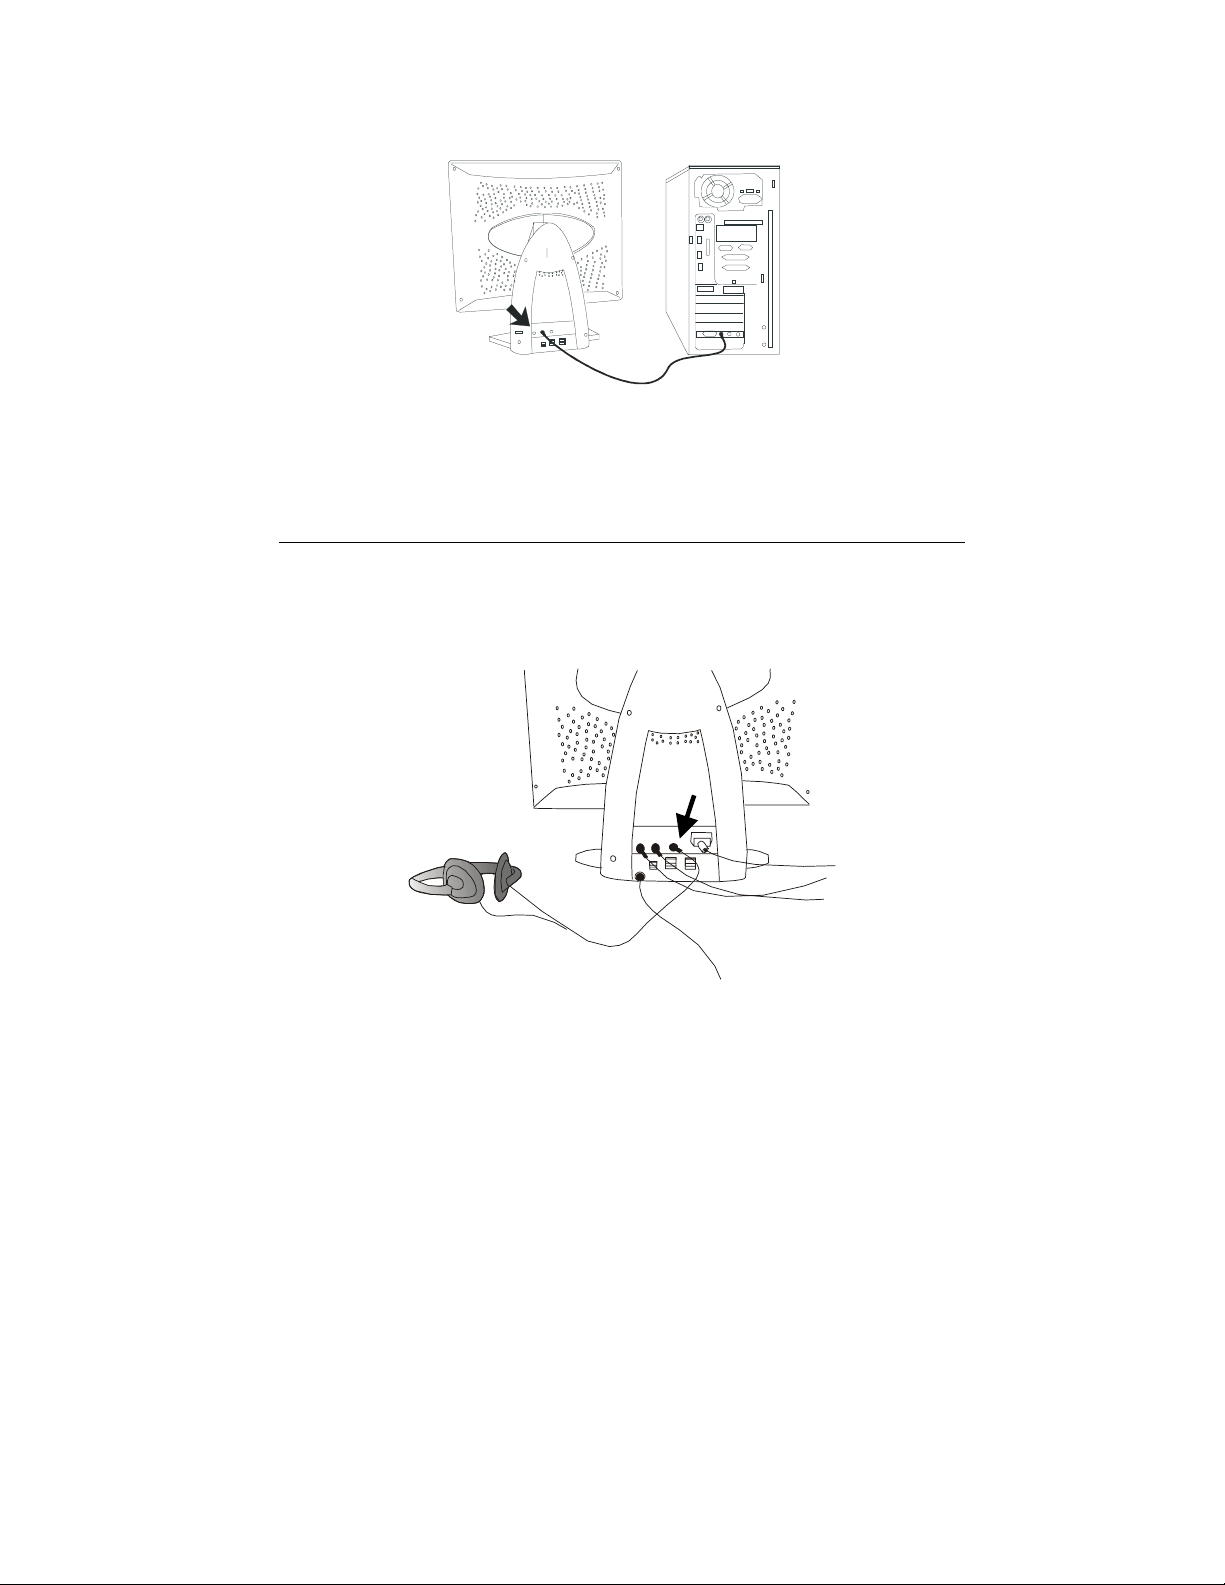
Connecting the Earphone
Just plug your earphone to the earphone connector at the rear of monitor, you don't
worry to disturb others while enjoying the audio entertainment.
3
Page 5
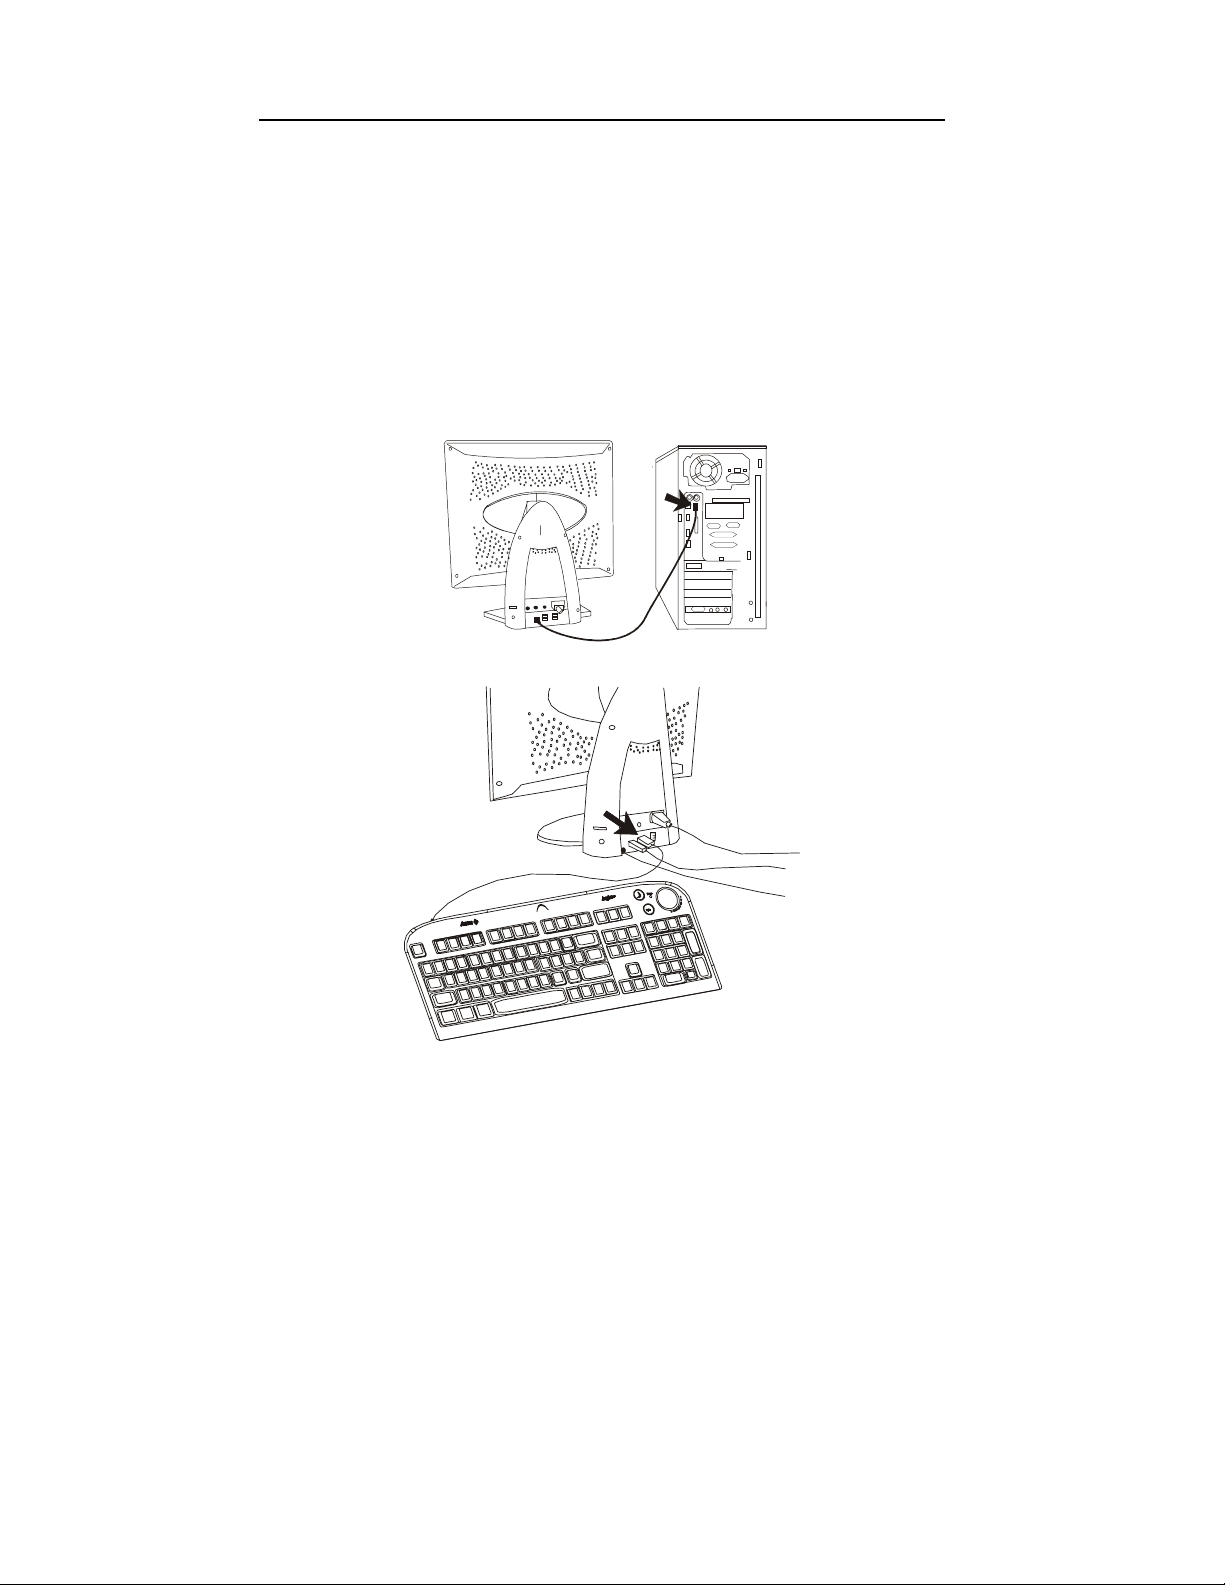
Connecting your USB Devices
With its USB compliance, you can connect any USB compliant device on one universal
connector. Up to four devices can be connected to the USB connectors.
1. Turn the system power off.
2. Connect the USB cable to the computer and the USB up port at the rear of
monitor.
3. Connect the USB cable supplied with other peripherals to USB connectors and
your peripherals.
4. Turn on the computer and the monitor.
4
Page 6
CD Installation
When you place this CD-ROM into your CD-ROM drive, the system will execute
"monitor.htm" automatically. If you can't read it by Windows autorun, please open
"acerlcd.htm" by your Internet browser or double click "monitor.htm" file.
)
If you don't have any Internet browser such as Microsoft Internet Explorer
or Netscape Navigator, this CD-ROM provides you Microsoft Internet
Explorer 5.0 for English Version.(Microsoft Internet Explorer is the
product of Microsoft Corp., all rights reserved.)
)
If there is any question, please e-mail us at apidisplaycsd@api.com.tw
2
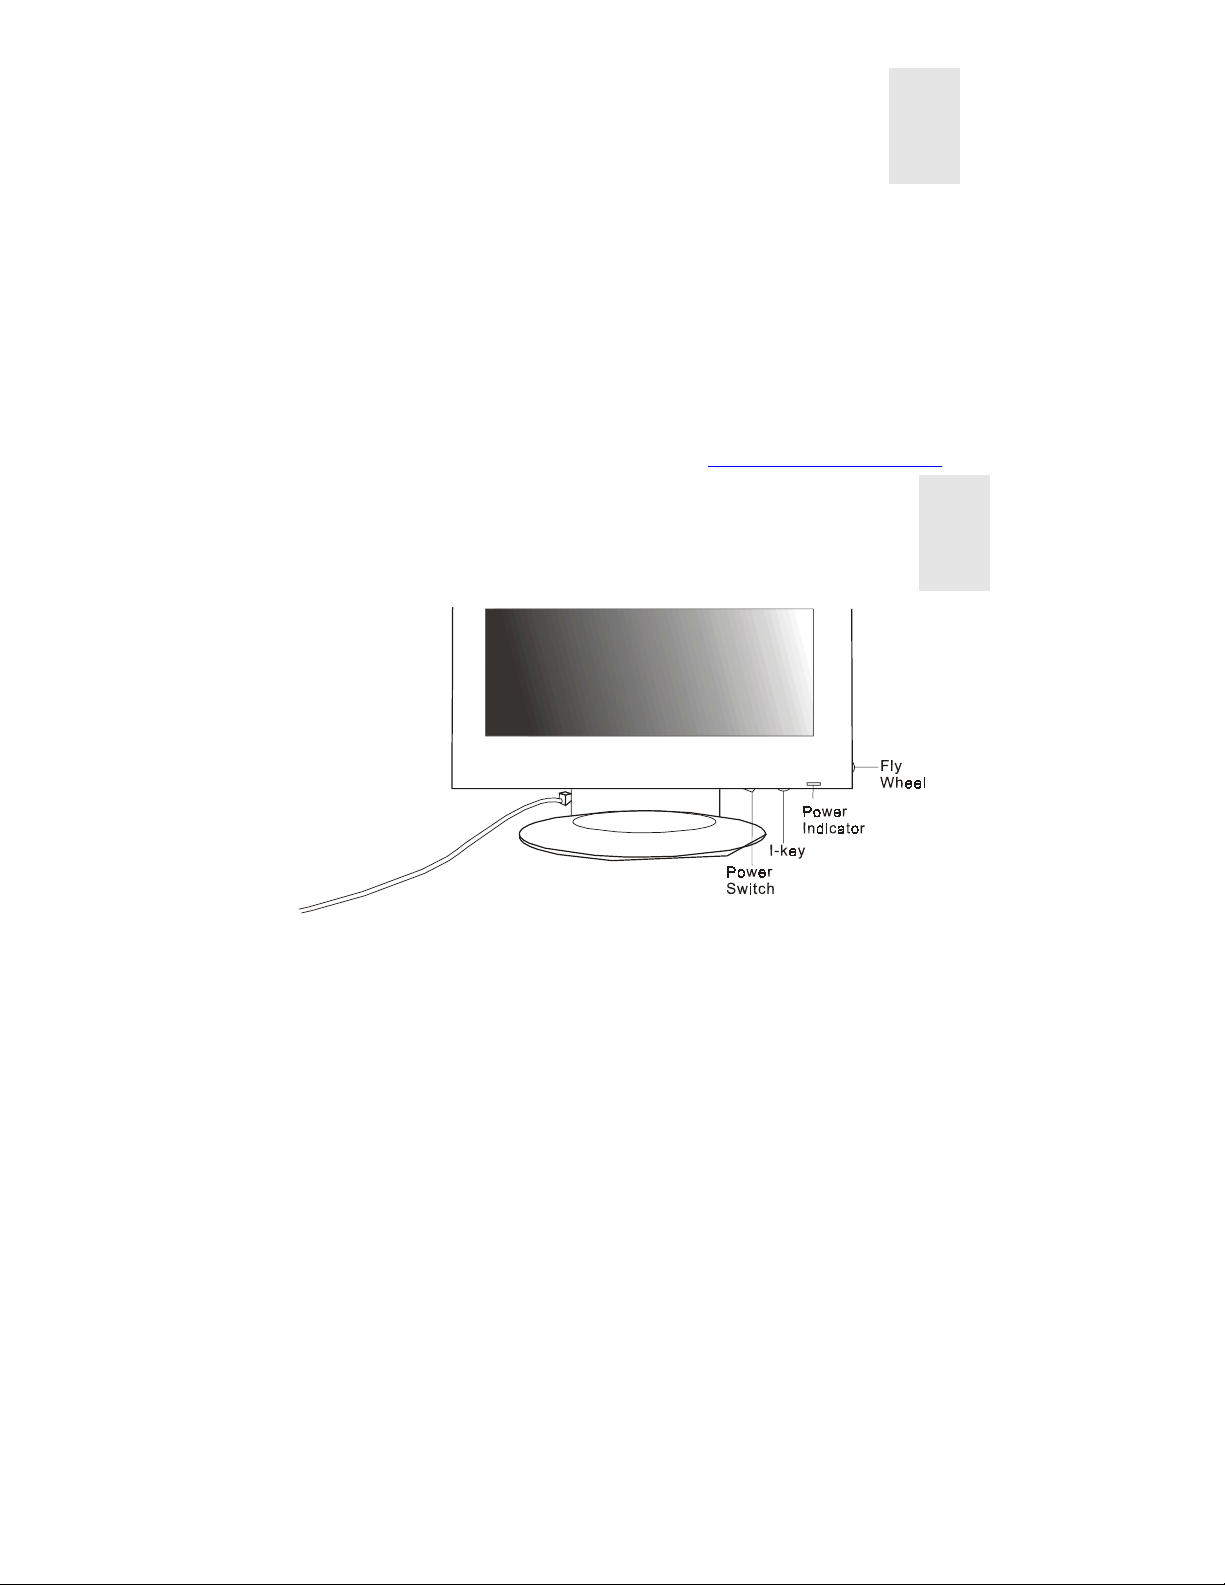
A Look at the Control Panel
Power Switch:
I-Key botton:
Position, Phase, H-Position and Pixel Clock.
Fly Wheel:
Audio Volume Control:
turns on or off the power.
intelligent key used for auto-adjustment of color temperature, V-
rotates and presses to make OSD adjustments.
rotates to adjust the audio volume.
3
5
Page 7
Supported Timings
Input display data Multi-scan
Resolution Horizontal
Frequency
(Khz)
640 x 350 31.47 70.08 25.17 DOS
640 x 350 37.86 85.10 31.50 VESA
720 x 400 31.47 70.08 28.32 DOS
720 x 400 37.93 85.00 35.50 VESA
640 x 480 35.00 67.00 30.24 Macintosh
640 x 480 31.47 60.00 25.18 DOS
640 x 480 37.86 72.80 31.50 VESA
640 x 480 37.50 75.00 31.50 VESA
640 x 480 43.27 85.00 36.00 VESA
800 x 600 35.16 56.25 36.00 VESA
800 x 600 37.88 60.32 40.00 VESA
800 x 600 48.08 72.19 50.00 VESA
800 x 600 46.87 75.00 49.50 VESA
800 x 600 53.67 85.10 56.25 VESA
832 x 624 49.72 74.55 57.29 Macintosh
1024 x 768 48.36 60.00 65.00 VESA
1024 x 768 56.48 70.10 75.00 VESA
1024 x 768 60.02 75.00 78.75 VESA
1024 x 768 35.52 86.95 44.96 Interlace
1024 x 768 60.24 74.93 80.00 Macintosh
1280 x 1024 64.00 60.00 108.00 VESA
1280 x 1024 80.00 75.00 135.00 VESA
Vertical
Frequency
(Hz)
Dot Clock
Frequency
(MHz)
Remark Actual
operation
display
resolution
Full screen
1280 x 1024
6
Page 8

Troubleshooting and
4
Useful Hints
Troubleshooting
Make sure that your monitor is properly installed if you have encountered any trouble
using this product.
9
Can't find Acer FP855 on the Windows 95 or Windows 98 monitor lists.
You need to update the Windows 95 or Windows 98 setup information
for your Acer FP855. You can download the updated file from the web site
(http://www.acerperipherals.com.tw/products/md/service/index.htm).
9
There is no picture on the screen.
Check:
Power saving mode. Press any key or move the mouse to deactivate the
mode.
Signal cable connector pins. If there are bent or missing pins, consult your
place of purchase.
9
The picture is unstable.
Check:
Signal cable connector pins. If there are bent or missing pins, consult your
place of purchase.
Graphics card. See if the settings are made properly.
Scanning frequency. Change the settings of your graphics card to acceptable
options.
9
Characters look too dark or too light.
Adjust related settings.
9
The speakers don’t work.
Check:
Audio cable. See if the audio cable is connected to PC’s “LINE-OUT” port
and monitor’s speaker port.
Volume control. Make sure that the volume control at the rear of monitor
base is set to proper volume.
7
Page 9

9
The microphone doesn’t work.
Check:
Audio cable. See if the audio cable is connected to PC’s “LINE-IN” port and
monitor’s microphone port.
9
There is noise from speakers when using the microphone.
Set microphone item of volume control function in Windows 95 or
Windows 98 to “MUTE”.
Please adjust as following steps:
1. Double click the speaker icon in Windows 95 or Windows 98
desktop.
2. In the volume control window, set the microphone item to “MUTE”.
9
I key does not function properly and "unsupported" message shows.
In some non-full-screen patterns, the i-key function couldn't work properly
and an "unsupported" OSD will pop up. In this situation, you need to use the
fly wheel to adjust your screen rather than i key.
9
The sound of speakers distorts and the screen flashes when using speakers.
Check whether the audio cable is connected to “ Line Out” port of PC rather
than the “ Speak Out” port.
Need More Help?
If your problems remain after checking this manual, please contact your place
of purchase or e-mail us at: APIDisplayCSD@api.com.tw
8
 Loading...