

Page 1

Extensa 365 Series
Notebook Computers
User’s Guide
49.40B05.011
Printed in Taiwan
Page 2

Copyright © 1998 Acer Incorporated
All Rights Reserved — Printed in Taiwan
Extensa 365 Series Notebook Computer User’s Guide
Part No. 49.40B05.011
Original Issue: Feb 1998
Changes may be made periodically to the information
in this publication. Such changes will be incorporated
in new editions of this manual.
Record the serial number, purchase date, and model
number in the space provided below. The serial
number and model number are recorded on the label
affixed to the case. All correspondence concerning
your unit should include the serial number, model
number, and date of purchase.
No part of this publication may be reproduced, stored
in a retrieval system, or transmitted, in any form or by
any means, electronic, mechanical, photocopy,
recording, or otherwise, without the prior written
permission of Acer Incorporated.
Extensa Notebook Computer
Model_______Serial No.____________Purchase Date________
Extensa is a trademark and a product of Acer Inc., developed with
Texas Instruments Inc. All other trademarks and registered
trademarks are the property of their respective companies.
Microsoft, MS-DOS, and Windows are registered trademarks of
Microsoft Corporation.
Page 3

NoticesNotices
FCC NoticeFCC Notice
This device has been tested and found to comply with the limits
for a Class B digital device pursuant to Part 15 of the FCC Rules.
These limits are designed to provide reasonable protection
against harmful interference in a residential installation. This
device generates, uses, and can radiate radio frequency energy
and, if not installed and used in accordance with the
instructions, may cause harmful interference to radio
communications.
However, there is no guarantee that interference will not occur in
a particular installation. If this device does cause harmful
interference to radio or television reception, which can be
determined by turning the device off and on, the user is
encouraged to try to correct the interference by one or more of the
following measures:
n Reorient or relocate the receiving antenna
n Increase the separation between the device and receiver
n Connect the device into an outlet on a circuit different from
that to which the receiver is connected
n Consult the dealer or an experienced radio/television
technician for help
Notice: Shield Cables
All connections to other computing devices must be made using
shielded cables to maintain compliance with FCC regulations.
Notice: Peripheral Devices
iii
Page 4

NoticesNotices
Only peripherals (input/output devices, terminals, printers, etc.)
certified to comply with the Class B limits may be attached to this
equipment. Operation with non-certified peripherals is likely to
result in interference to radio and TV reception.
Caution
Changes or modifications not expressly approved by the
manufacturer could void the user’s authority, which is granted by
the Federal Communications Commission, to operate this
computer.
Usage Conditions
This part complies with Part 15 of the FCC Rules. Operation is
subject to the following two conditions: (1) this device may not
cause harmful interference, and (2) this device must accept any
interference received, including interference that may cause
undesired operation.
Notice: Canadian Users
This Class B digital apparatus meets all requirements of the
Canadian Interference-Causing Equipment Regulations.
Remarque à l’intention des utilisateurs canadiens
Cet appareil numérique de la classe B respected toutes les
exigences du Règlement sur le matériel brouilleur du Canada.
iv
Page 5

NoticesNotices
Important Safety InstructionsImportant Safety Instructions
1. Read these instructions carefully. Save these instructions for
future reference.
2. Follow all warnings and instructions marked on the product.
3. Unplug this product from the wall outlet before cleaning. Do
not use liquid cleaners or aerosol cleaners. Use a damp cloth
for cleaning.
4. Do not use this product near water.
5. Do not place this product on an unstable cart, stand, or
table. The product may fall, causing serious damage to the
product.
6. Slots and openings in the cabinet and the back or bottom are
provided for ventilation; to ensure reliable operation of the
product and to protect it from overheating, these openings
must not be blocked or covered. The openings should never
be blocked by placing the product on a bed, sofa, rug, or
other similar surface. This product should never be placed
near or over a radiator or heat register, or in a built-in
installation unless proper ventilation is provided.
7. This product should be operated from the type of power
indicated on the marking label. If you are not sure of the
type of power available, consult your dealer or local power
company.
8. Do not allow anything to rest on the power cord. Do not
locate this product where persons will walk on the cord.
v
Page 6

NoticesNotices
9. If an extension cord is used with this product, make sure
that the total ampere rating of the equipment plugged into
the extension cord does not exceed the extension cord
ampere rating. Also, make sure that the total rating of all
products plugged into the wall outlet does not exceed the
fuse rating.
10. Never push objects of any kind into this product through
cabinet slots as they may touch dangerous voltage points or
short out parts that could result in a fire or electric shock.
Never spill liquid of any kind on the product.
11. Do not attempt to service this product yourself, as opening or
removing covers may expose you to dangerous voltage points
or other risks. Refer all servicing to qualified service
personnel.
12. Unplug this product from the wall outlet and refer servicing
to qualified service personnel under the following conditions:
a. When the power cord or plug is damaged or frayed
b. If liquid has been spilled into the product
c. If the product has been exposed to rain or water
d. If the product does not operate normally when the
operating instructions are followed. Adjust only those
controls that are covered by the operating instructions
since improper adjustment of other controls may result
in damage and will often require extensive work by a
qualified technician to restore the product to normal
condition
e. If the product has been dropped or the cabinet has been
damaged
f. If the product exhibits a distinct change in performance,
indicating a need for service
vi
Page 7

NoticesNotices
13. Replace battery with the same type as the product's battery
we recommend. Use of another battery may present a risk of
fire or explosion. Refer battery replacement to a qualified
serviceman.
14. Warning! The battery may explode if not handled properly.
Do not disassemble or dispose of it in fire. Keep it away from
children and dispose of any used battery promptly.
15. Use only the proper type of power supply cord set (provided
in your accessories box) for this unit. It should be a
detachable type: UL listed/CSA certified, type SPT-2, rated
7A 125V minimum, VDE approved or its equivalent.
Maximum length is 15 feet (4.6 meters).
Laser Compliance StatementLaser Compliance Statement
The CD-ROM drive in this computer is a laser product. The
CD-ROM drive’s classification label (shown below) is located on
the drive.
CLASS 1 LASER PRODUCT
CAUTION:
INVISIBLE LASER RADIATION WHEN OPEN. AVOID EXPOSURE TO BEAM.
APPAREIL A LASER DE CLASSE 1 PRODUIT LASER
ATTENTION:
RADIATION DU FAISCEAU LASER INVISIBLE EN CAS D’OUVERTURE.
EVITTER TOUTE EXPOSITION AUX RAYONS.
LUOKAN 1 LASERLAITE LASER KLASSE 1
VORSICHT:
UNSICHTBARE LASERSTRAHLUNG, WENN ABDECKUNG GEÖFFNET
NICHT DEM STRAHLL AUSSETZEN.
PRODUCTO LÁSER DE LA CLASE I
ADVERTENCIA:
vii
Page 8

NoticesNotices
RADIACIÓN LÁSER INVISIBLE AL SER ABIERTO. EVITE EXPONERSE A
LOS RAYOS.
ADVARSEL: LASERSTRÅLING VED ÅBNING SE IKKE IND I STRÅLEN.
VARO! AVATTAESSA OLET ALTTINA LASERSÄTEILYLLE
VARNING: LASERSTRÅLNING NÄR DENNA DEL ÄR ÖPPNAD
ÄLÄ TUIJOTA SÄTEESEEN
STIRRA EJ IN I STRÅLEN
VARNING: LASERSTRÅLNING NÄR DENNA DEL ÄR ÖPPNAD
STIRRA EJ IN I STRÅLEN
ADVARSEL: LASERSTRÅLING NÅR DEKSEL ÅPNES
STIRR IKKE INN I STRÅLEN
Lithium Battery StatementLithium Battery Statement
CAUTION
Danger of explosion if battery is incorrectly replaced. Replace only with
the same or equivalent type recommended by the manufacturer.
Discard used batteries according to the manufacturer’s instructions.
ADVARSEL!
Lithiumbatteri - Eksplosionsfare ved fejlagtig håndtering. Udskiftning
må kun ske med batteri af samme fabrikat og type. Léver det brugte
batteri tilbage til leverandøren.
ADVARSEL
Eksplosjonsfare ved feilaktig skifte av batteri. Benytt samme
batteritype eller en tilsvarende type anbefalt av apparatfabrikanten.
Brukte batterier kasseres i henhold til fabrikantens instruksjoner.
VARNING
Explosionsfara vid felaktigt batteribyte. Anvãnd samma batterityp eller
en ekvivalent typ som rekommenderas av apparattillverkaren. Kassera
anvãnt batteri enligt fabrikantens instruktion.
viii
Page 9
NoticesNotices
VAROITUS
Päristo voi räjähtää, jos se on virheellisesti asennettu. Vaihda paristo
ainoastaan laitevalmistajan suosittelemaan tyyppiin. Hävitä käytetty
paristo valmistajan ohjeiden mukaisesti.
VORSICHT!
Explosionsgefahr bei unsachgemäßen Austausch der Batterie Ersatz
nur durch denselben oder einem vom Hersteller empfohlenem
ähnlichen Typ. Entsorgung gebrauchter Batterien nach Angaben des
Herstellers.
Taking Care of Your ComputerTaking Care of Your Computer
Your computer will serve you well if you take care of it.
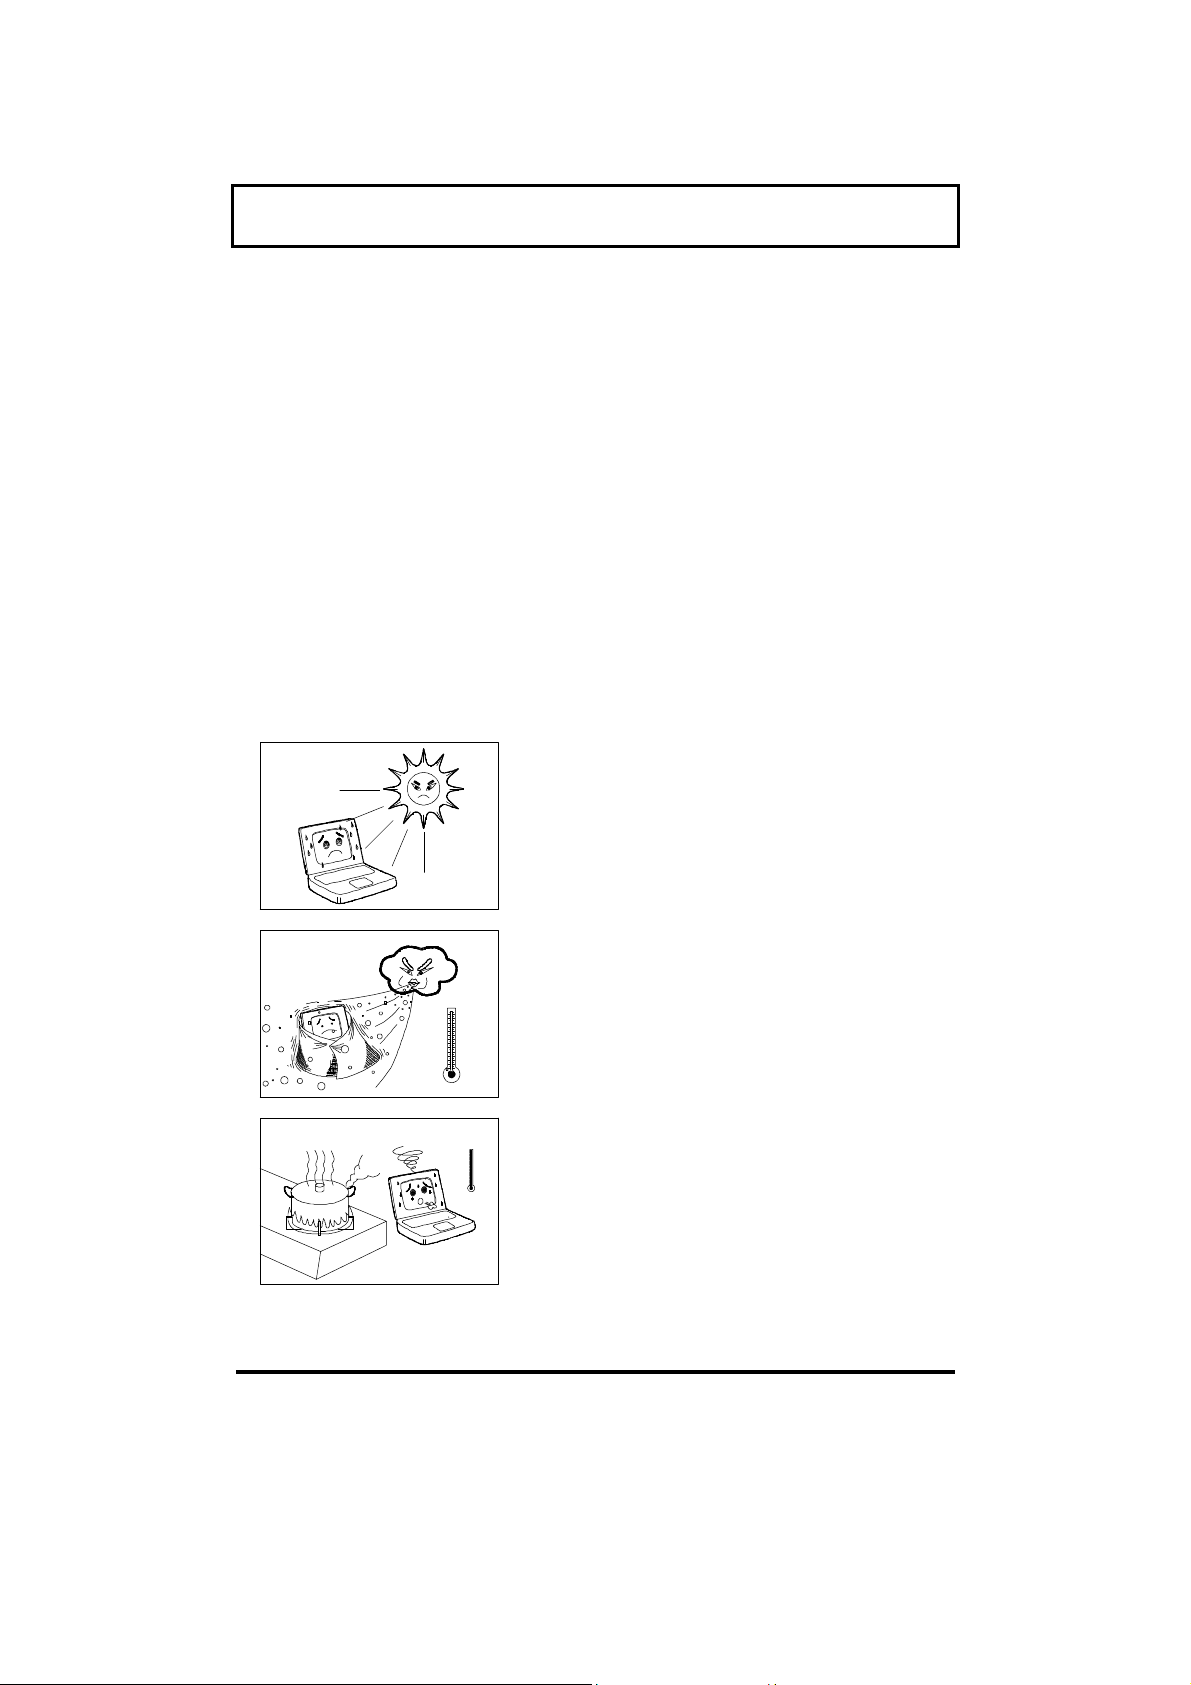
q Do not expose the
notebook to direct
sunlight. Do not place it
near sources of heat, such
as a radiator.
q Do not expose it to
temperatures below 0ºC
(32ºF)
or
q above 50ºC (122ºF).
ix
Page 10
NoticesNotices
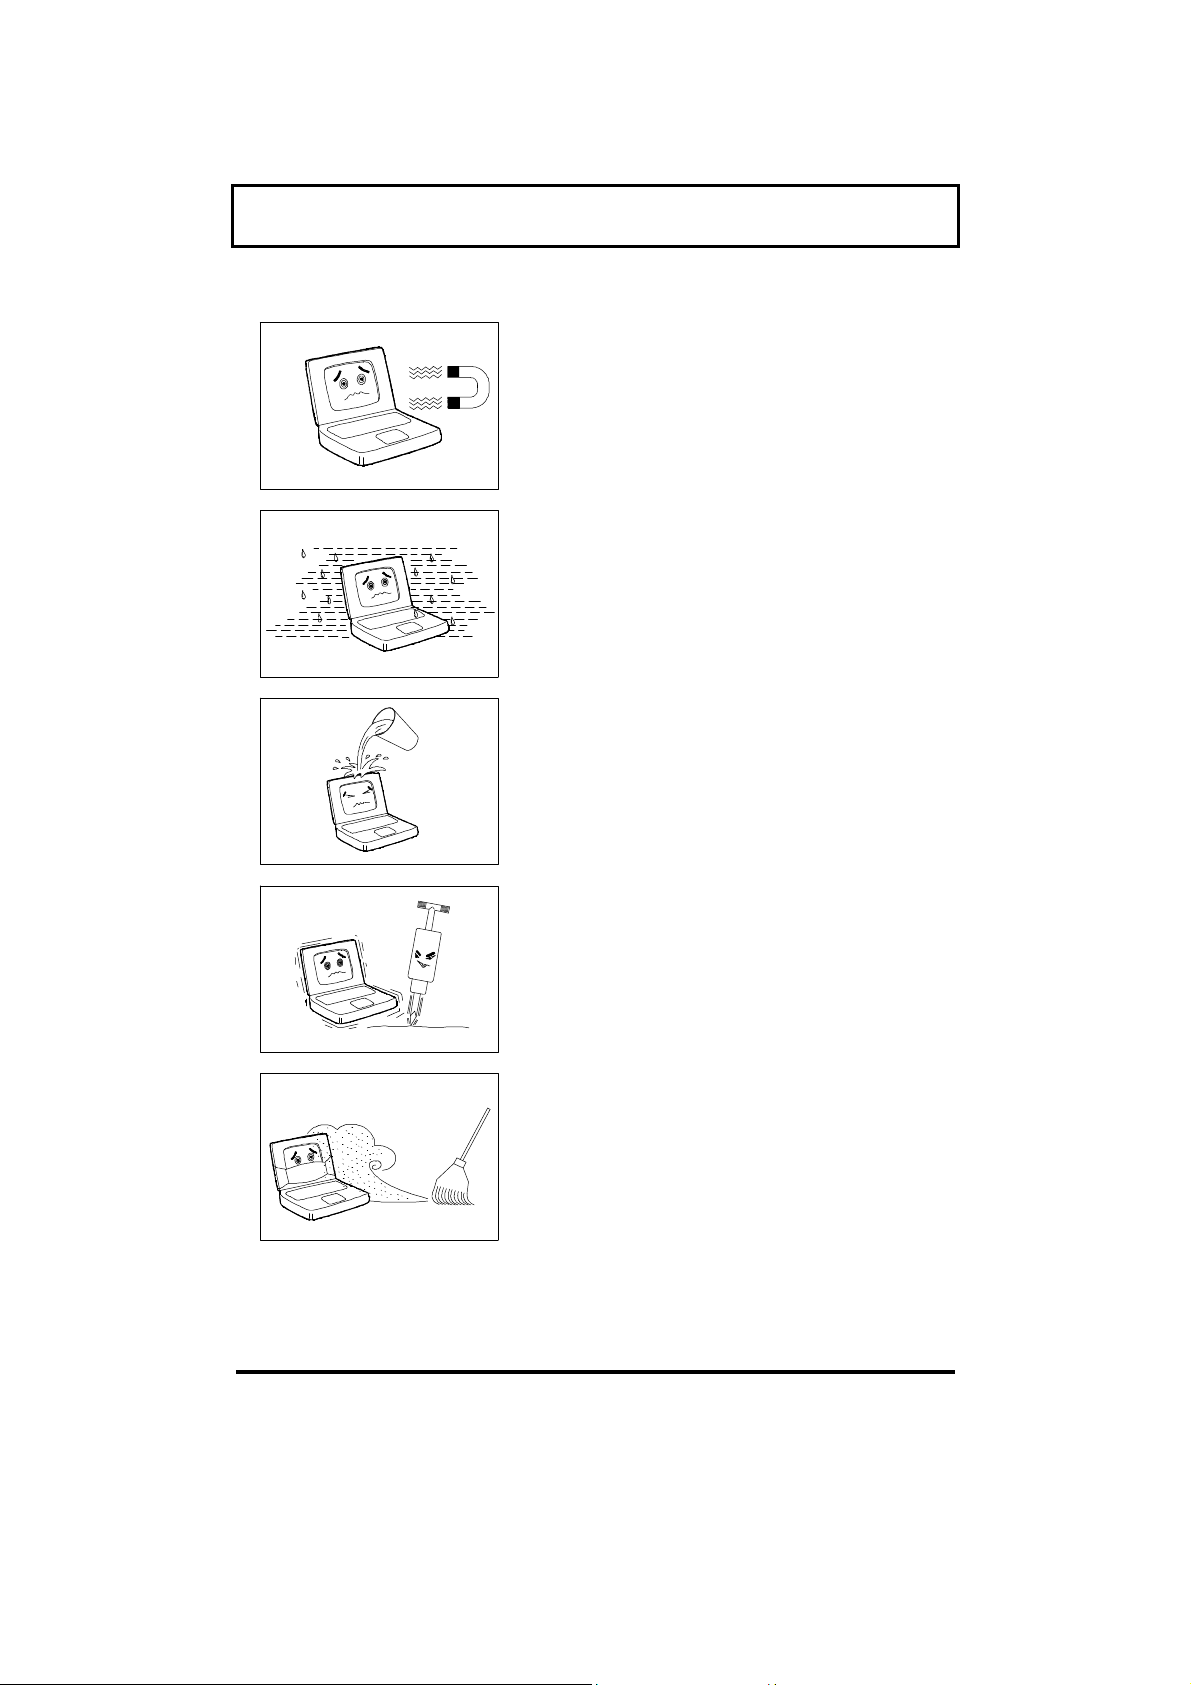
q Do not subject the
notebook to magnetic
fields.
q Do not expose the
notebook to rain or
moisture.
q Do not spill water or any
liquid on the notebook.
q Do not subject the
computer to heavy shock
and vibration.
q Do not expose the
notebook to dust and dirt.
x
Page 11
NoticesNotices
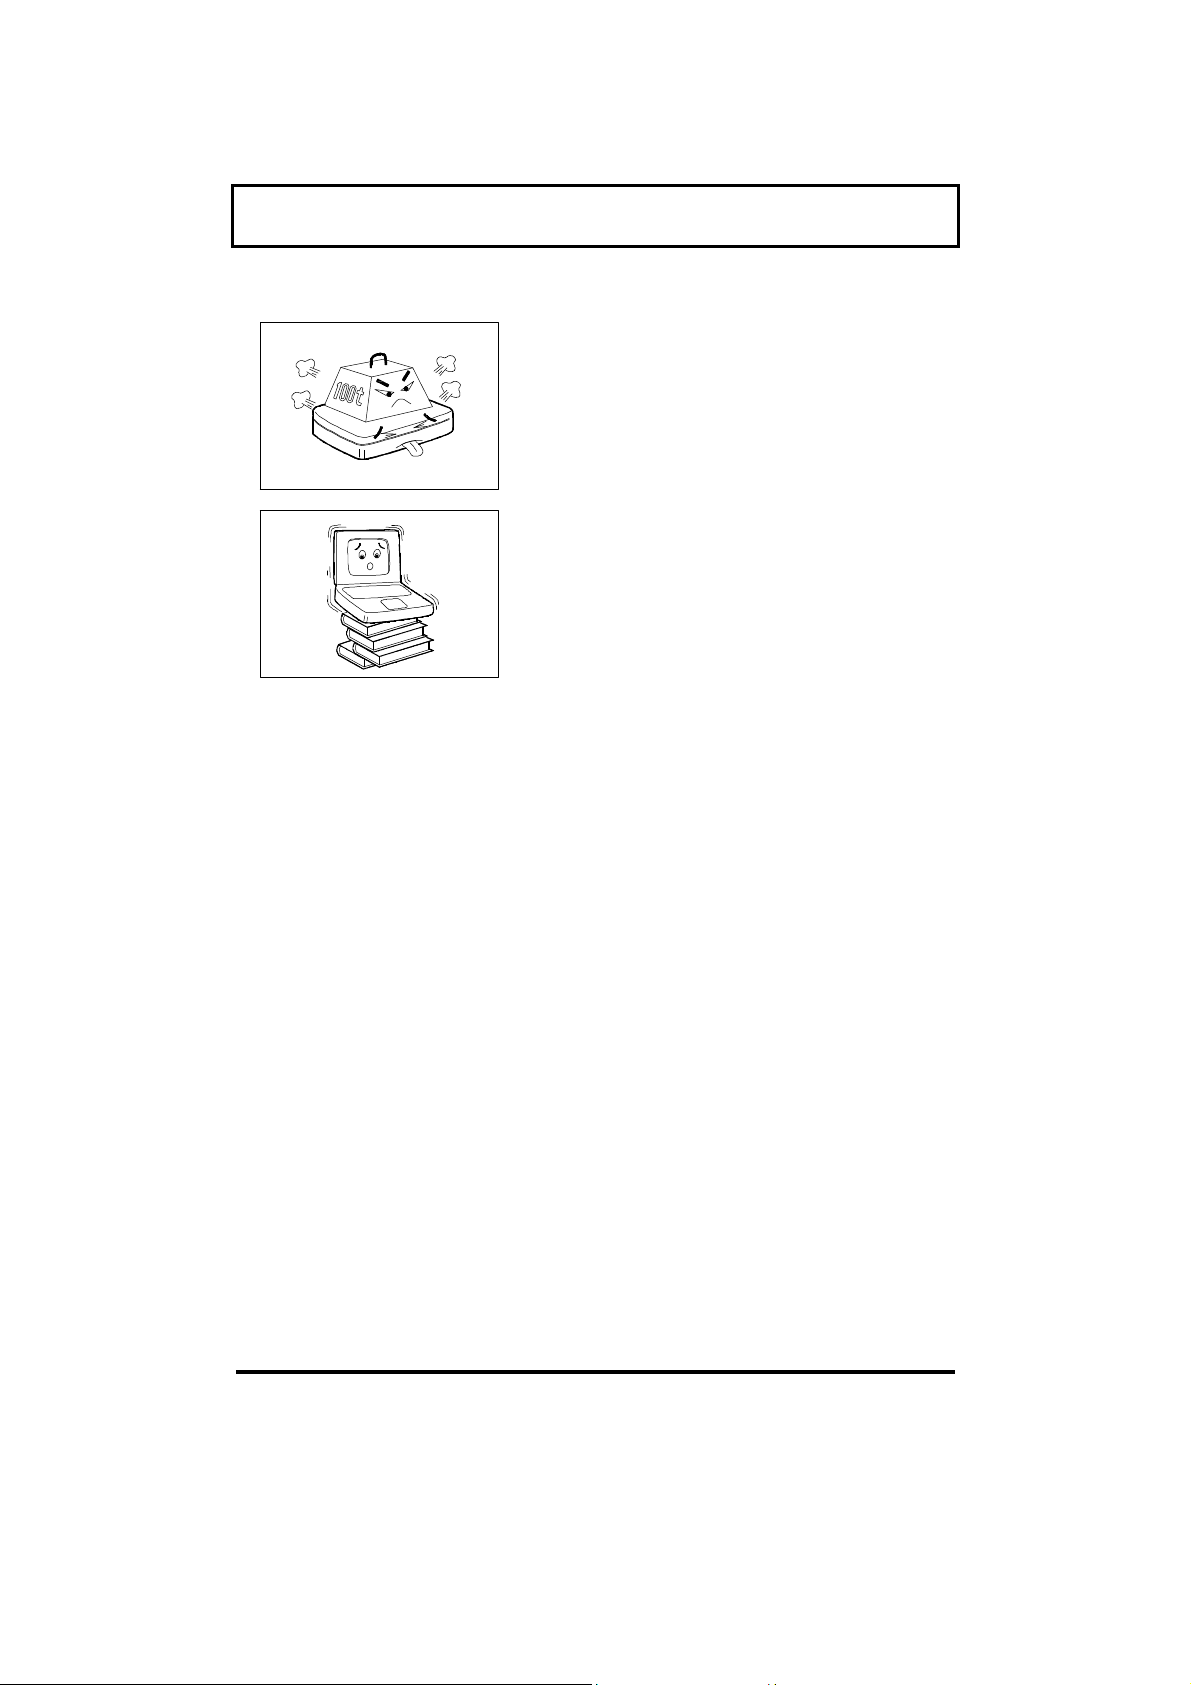
q Never place objects on top
of the notebook to avoid
damaging the notebook.
q Never place the notebook
on uneven surfaces.
Taking Care of Your AC Adapter and Battery PackTaking Care of Your AC Adapter and Battery Pack
Here are some ways of taking care of your AC adapter.
q Do not connect the adapter to any other device.
q Do not step on the power cord or place heavy objects on top of
it. Carefully route the power cord and any cables away from
personal traffic.
q When unplugging the power cord, do not pull on the cord
itself but pull on the plug.
q The total ampere ratings of the equipment plugged in should
not exceed the ampere rating of the cord if you are using an
extension cord. Also, the total current rating of all equipment
plugged into a single wall outlet should not exceed the fuse
rating.
Here are some ways of taking care of your battery pack.
q Use only batteries of the same kind as replacements. Turn
the power off before removing or replacing batteries.
xi
Page 12

NoticesNotices
q Do not tamper with batteries. Keep them away from children.
q Dispose of used batteries according to local regulations.
Recycle them if at all possible.
Cleaning and ServicingCleaning and Servicing
When cleaning the notebook, follow these steps:
1. Power off the notebook and remove the battery pack.
2. Disconnect the AC adapter.
3. Use a soft cloth moistened with water. Do not use liquid or
aerosol cleaners.
Contact your dealer or see your service technician if any of the
following occurs:
q Notebook has been dropped or the body has been damaged.
q Liquid has been spilled into the product.
q The notebook does not operate normally.
xii
Page 13

ContentsContents
PrefacePreface
Chapter 1 Getting Familiar with your ComputerChapter 1 Getting Familiar with your Computer
1.1 Features .......................................................1-2
1.2 Display .........................................................1-4
1.3 Indicators .....................................................1-6
1.4 Keyboard ......................................................1-8
1.4.1 Special Keys ...................................1-8
1.4.2 Keyboard Ergonomics ...................1-14
1.5 Touchpad ...................................................1-15
1.6 Storage .......................................................1-17
1.6.1 Hard Disk.....................................1-17
1.6.2 Internal Drive ...............................1-17
1.7 Ports...........................................................1-19
1.7.1 Left Ports......................................1-19
1.7.2 Rear Ports.....................................1-23
1.8 Audio..........................................................1-25
1.9 Securing your Computer.............................1-26
1.9.1 Security Notch..............................1-26
1.9.2 Passwords ....................................1-26
Chapter 2Chapter 2 Operating on Battery PowerOperating on Battery Power
2.1 Battery Pack .................................................2-2
2.1.1 Battery Pack Characteristics...........2-2
2.1.2 Installing and Removing the
Battery Pack...................................2-3
2.1.3 Charging the Battery ......................2-4
2.1.4 Checking the Battery Level .............2-6
2.1.5 Optimizing Battery Life ...................2-6
2.1.6 Battery-low Warning.......................2-8
2.2 Power Management.....................................2-10
2.2.1 Power Management Modes............2-11
2.2.2 Advanced Power Management.......2-17
xiii
Page 14

ContentsContents
Chapter 3Chapter 3 OptionsOptions
3.1 External Monitor...........................................3-2
3.2 External Keyboard ........................................3-3
3.3 External Keypad ...........................................3-4
3.4 External Pointing Device ...............................3-5
3.5 Printer ..........................................................3-7
3.6 Audio Devices ...............................................3-8
3.7 PC Cards ......................................................3-9
3.8 USB Devices ...............................................3-10
3.9 Miscellaneous Options................................3-11
3.9.1 Additional Power Packs.................3-11
3.9.2 Cables ..........................................3-11
3.10 Key Component Upgrades...........................3-14
3.10.1 Memory Upgrade ..........................3-14
3.10.2 Hard Disk Upgrade .......................3-16
Chapter 4Chapter 4 Moving with your ComputerMoving with your Computer
4.1 Disconnecting from the Desktop ...................4-2
4.2 Moving Around .............................................4-3
4.2.1 Preparing the Computer..................4-3
4.2.2 What To Bring to Short Meetings ....4-3
4.2.3 What To Bring to Long Meetings......4-3
4.3 Taking the Computer Home ..........................4-4
4.3.1 Preparing the Computer..................4-4
4.3.2 What To Bring with You..................4-4
4.3.3 Special Considerations....................4-4
4.3.4 Setting Up a Home Office ................4-5
4.4 Traveling with the Computer.........................4-6
4.4.1 Preparing the Computer..................4-6
4.4.2 What To Bring with You..................4-6
4.4.3 Special Considerations....................4-6
xiv
Page 15

4.5 Traveling Internationally with the
Computer .....................................................4-8
4.5.1 Preparing the Computer..................4-8
4.5.2 What To Bring with You..................4-8
4.5.3 Special Considerations....................4-9
Chapter 5Chapter 5 System UtilitiesSystem Utilities
5.1 Sleep Manager ..............................................5-2
5.1.1 Accessing the Sleep Manager ..........5-3
5.1.2 Sleep Manager Functions................5-6
5.2 SafeOff........................................................5-10
5.3 Setup Utility ...............................................5-11
5.3.1 Basic System Settings...................5-13
5.3.2 Startup Configuration...................5-15
5.3.3 Onboard Devices Configuration.....5-18
5.3.4 System Security............................5-20
5.3.5 Power Management Settings .........5-22
5.3.6 Load Default Settings....................5-25
ContentsContents
Chapter 6Chapter 6 TroubleshootingTroubleshooting
6.1 Q & A ...........................................................6-2
6.2 Error Messages.............................................6-7
Appendix AAppendix A SpecificatioSpecificationsns
Appendix BAppendix B Where to Get HelpWhere to Get Help
IndexIndex
xv
Page 16

xvi
Page 17

PrefacePreface
This manual describes features of the Extensa 365
Series notebook computer. The Extensa series of
computers incorporate such features as a
CardBus, 16-bit stereo audio, and internal
pointing device.
This manual should answer most of the questions
you have about the day-to-day operation of your
Extensa notebook computer.
Use the Just for Starters… instructions that came
with your computer to get your computer running
for the first time.
You should also take advantage of the online help
files that are available with almost all of the
programs shipped with your computer.
We hope you enjoy your Extensa computer. With
proper care, your computer will provide you with
years of productive service.
xvii
Page 18
PrefacePreface
Connecting the NotebookConnecting the Notebook
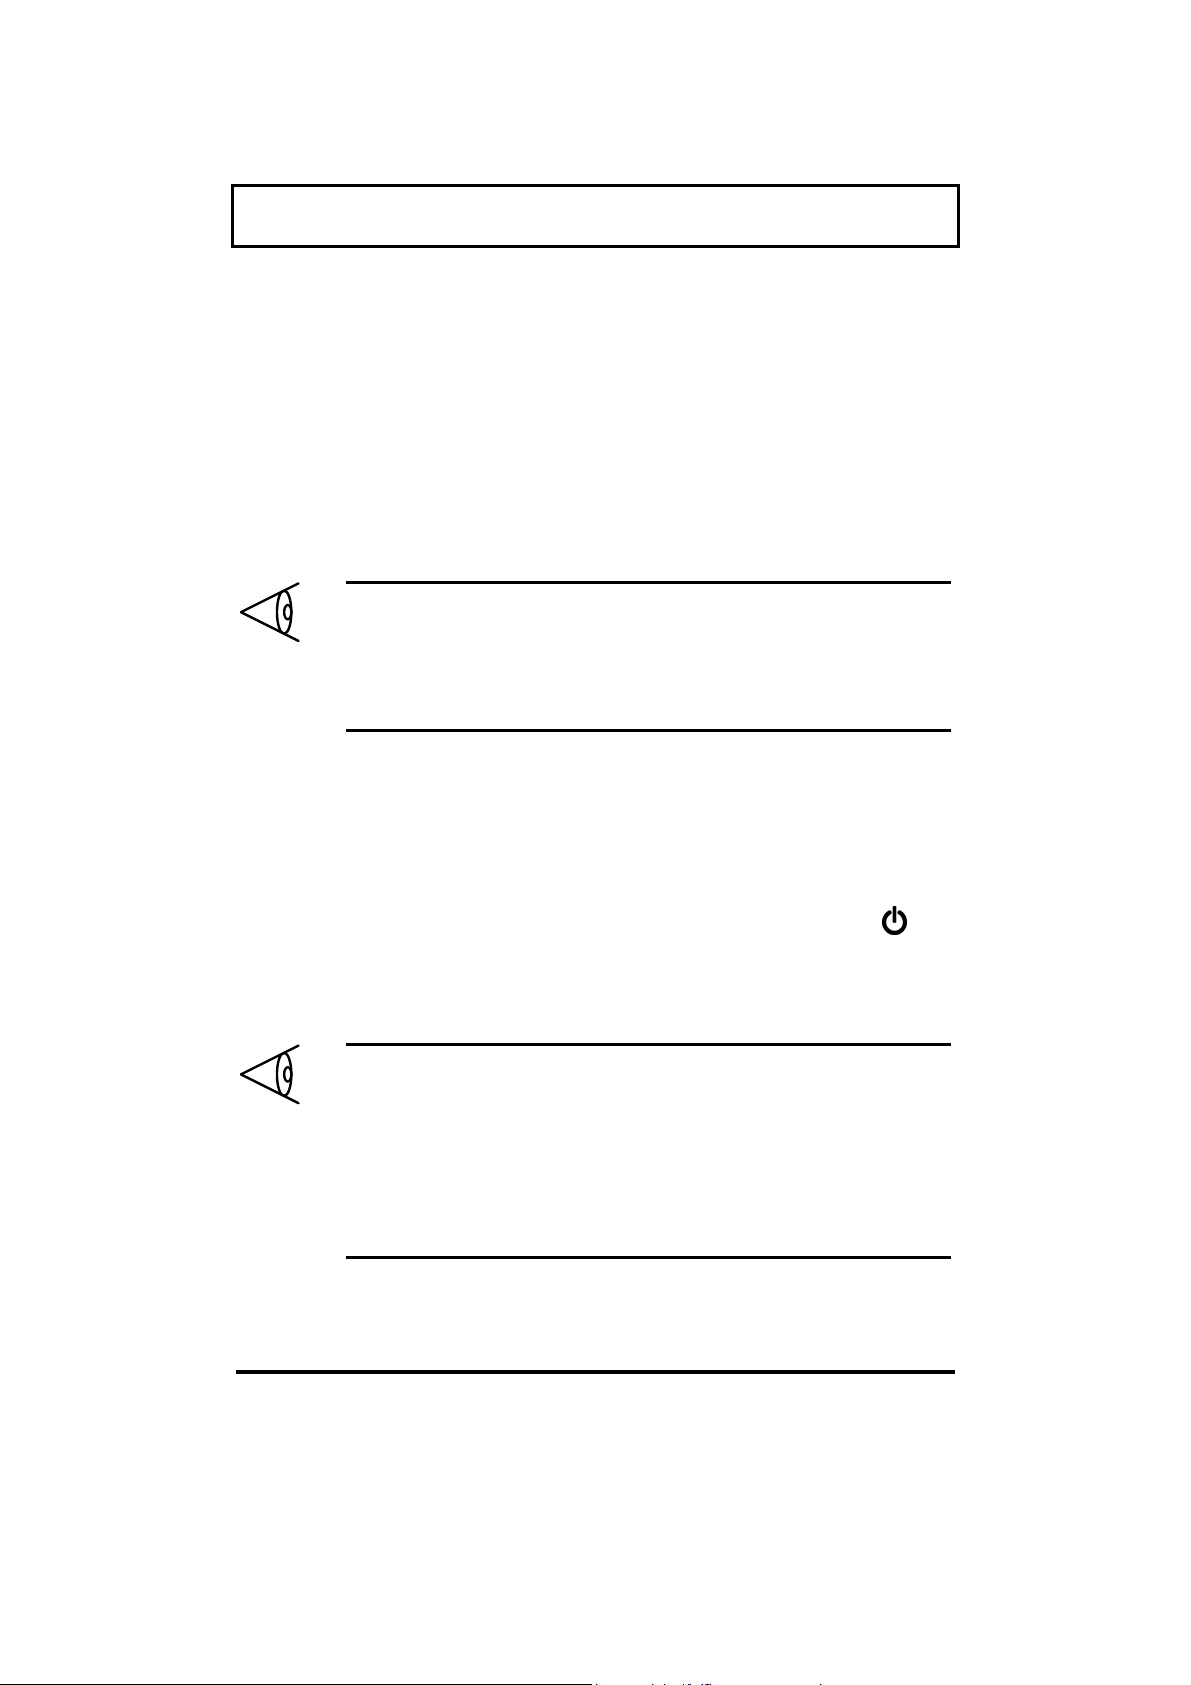
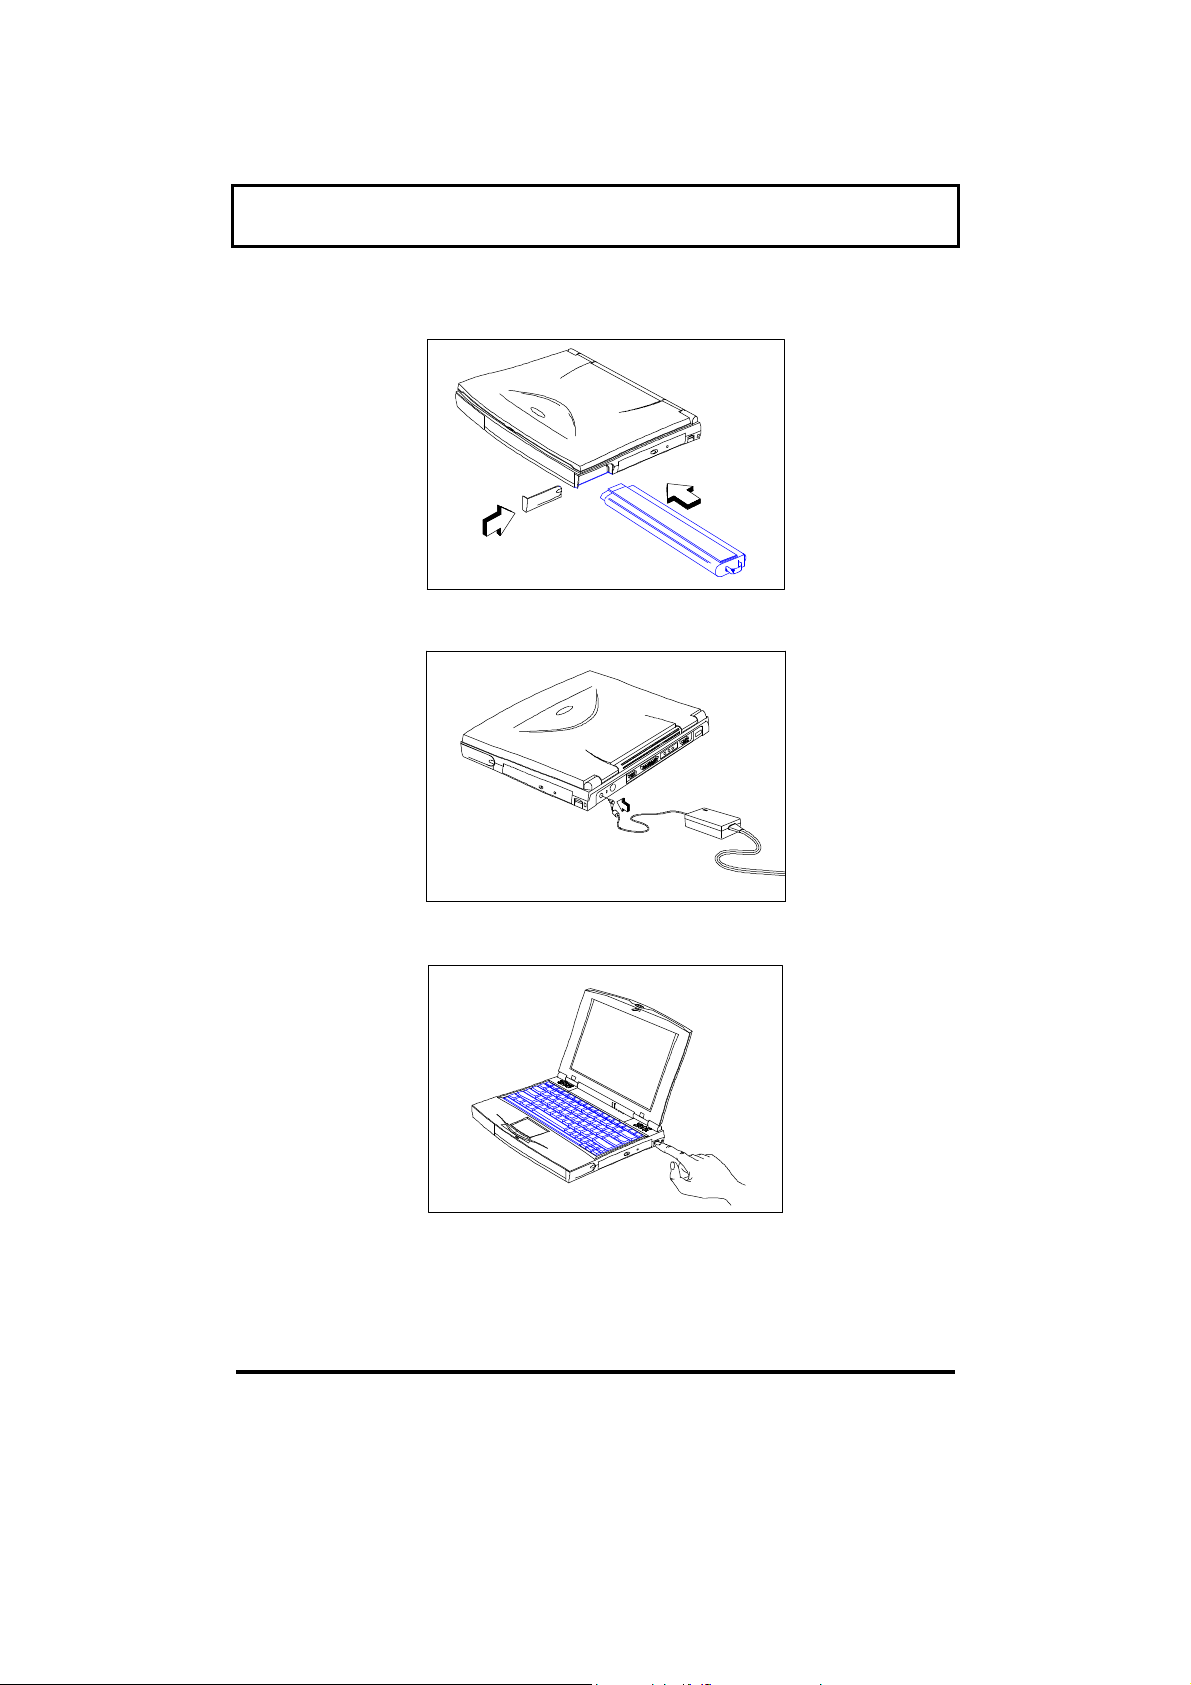
Connecting the computer is as easy is 1-2-3.
1. Insert the battery pack into the battery
compartment and slide the battery
compartment cover in place. The battery pack
has a pull loop at the end for easy removal.
Note: When using a battery pack for the first time,
fully recharge the battery, then disconnect the
adapter to use up the battery before recharging
again. You only need to do this once with a new
battery.
2. Connect one end of the AC adapter to the DC-in
port on the notebook’s rear panel and the other
end to a properly grounded power outlet.
xviii
3. Slide the display cover latch to the left to open
the display. Then press the power switch to
turn on the power. The POST (Power-On SelfTest) routine executes and Windows begins
loading.
Note: To turn off the power, press the power
switch for more than four seconds. If you are
using Windows 95, we recommend that you use
the Shutdown command to turn off the computer.
If you turn off the computer and want to turn it on
again, wait at least 2 seconds before powering up.
Page 19
11
22
PrefacePreface
33
xix
Page 20

PrefacePreface
Getting Help OnlineGetting Help Online
This user’s guide provides clear and concise
information about the notebook, so read it
thoroughly. To provide you with help when
traveling, the notebook has a comprehensive
online help.
Accessing Online HelpAccessing Online Help
Follow these steps to access the online
documentation:
1. Press the Windows logo key or click on the
Start button.
2. Select Programs.
xx
3. Click on Extensa Online.
The online help is easy to navigate with hypertext
and hypergraphics, so you can simply click on
highlighted items to learn more about them. Clear
illustrations help describe notebook operation as
well.
Getting OnlGetting Onlineine
If you are connected to the Internet and have
World Wide Web access, visit our home page
(http://www.acer.com/) and get the latest
information about our products.
 Loading...