

Page 1

Public Information Display
User Manual
DT653
Page 2

Page 3

Table of Contents
Declaration of Conformity .....................................................................3
FCC DECLARATION OF CONFORMITY .............................................................. 3
CE DECLARATION OF CONFORMITY ................................................................. 4
Safety Information .................................................................................5
Warnings ................................................................................................................ 5
Safety Information .................................................................................7
SAFETY PRECAUTIONS ....................................................................................... 7
RECOMMENDED USE .......................................................................................... 8
Package Contents ..................................................................................9
Features of Your Display .....................................................................10
IMAGE FEATURES .............................................................................................. 10
USAGE FEATURES ............................................................................................. 10
POWER FEATURES ............................................................................................ 10
Installation of Your Display .................................................................11
Moving Your Display ............................................................................................. 11
Mounting Location ................................................................................................ 12
Ventilation Requirements ................................................................................. 12
Mounting Equipment ............................................................................................. 13
Attaching Mounting Equipment to Your Display ................................................... 13
Display Components ...........................................................................15
CONTROL PANEL – LOCATION & BUTTONS ................................................... 15
PORTS & CONNECTORS ................................................................................... 16
REMOTE CONTROL ............................................................................................ 17
USING THE REMOTE CONTROL ....................................................................... 18
Setting Up the Infrared Remote Control Sensor .............................................. 18
Using the Remote Control ................................................................................ 18
Installing the Remote Control Batteries ............................................................ 18
Preparing Your Display for Use ..........................................................19
Operating Your Display .......................................................................20
POWER ON AND OFF MODES ........................................................................... 20
LED POWER INDICATOR ................................................................................... 21
Table of Contents | 1
Page 4

Connecting Devices to Your Display .................................................22
ANALOG CONNECTIONS ...................................................................................23
DIGITAL CONNECTIONS ....................................................................................23
USING THE TOUCHSCREEN .............................................................................25
PICTURE ASPECT RATIO ...................................................................................25
OSD (On-Screen-Display) Controls ................................................... 26
BASIC OPERATIONS OF THE OSD SCREEN ...................................................27
Troubleshooting ..................................................................................35
Product Specifications ........................................................................ 38
Appendix – Supported Media ............................................................. 41
VIDEO SPECIFICATIONS ....................................................................................41
AUDIO SPECIFICATIONS ...................................................................................42
IMAGE SPECIFICATIONS ................................................................................... 42
Manufacturer’s Recycling and Energy Information ......................... 43
2 | Table of Contents
Page 5

Declaration of Conformity
FCC DECLARATION OF CONFORMITY
This device complies with Part 15 of FCC Rules. Operation is subject to the following two
conditions. (1) This device may not cause harmful interference, and (2) this device must accept
any interference received, including interference that may cause undesired operation.
FCC Information
1. Use the attached specified cables with this display so as not to interfere with radio and
television reception.
(1) Please use the supplied power cord or equivalent to ensure FCC compliance.
(2) Please use the supplied shielded video signal cable.
2. This equipment has been tested and found to comply with the limits for a Class B digital device,
pursuant to part 15 of the FCC Rules. These limits are designed to provide reasonable
protection against harmful interference in a residential installation. This equipment generates,
uses, and can radiate radio frequency energy, and, if not installed and used in accordance with
the instructions, may cause harmful interference to radio communications. However, there is no
guarantee that interference will not occur in a particular installation. If this equipment does
cause harmful interference to radio or television reception, which can be determined by turning
the equipment off and on, the user is encouraged to try to correct the interference by one or
more of the following measures:
• Reorient or relocate the receiving antenna.
• Increase the separation between the equipment and receiver.
• Connect the equipment into an outlet on a circuit different from that to which the receiver is
connected.
• Consult your dealer or an experienced radio/TV technician for help.
If necessary, the user should contact the dealer or an experienced radio/television technician for
additional suggestions.
The user may find the following booklet, prepared by the Federal Communications Commission,
helpful: “How to Identify and Resolve Radio-TV Interference Problems.” This booklet is available
from the U.S. Government Printing Office, Washington, D.C., 20402, Stock No. 004-000-00345-4.
Declaration of Conformity | 3
Page 6

CE DECLARATION OF CONFORMITY
Hereby, Acer Inc., declares that this LCD monitor is in compliance with the essential requirements
and other relevant provisions of EMC Directive 2014/30/EU, Low Voltage Directive 2014/35/EU,
and RoHS Directive 2011/65/EU and Directive 2009/125/EC with regard to establishing a
framework for the setting of eco-design requirements for energy-related product.
Notice: Shielded cables
All connections to other computing devices must be made using shielded cables to maintain
compliance with EMC regulations.
Notice: Peripheral devices
Only peripherals (input/output devices, terminals, printers, etc.) certified to comply with the Class
B limits may be attached to this equipment. Operation with non-certified peripherals is likely to
result in interference to radio and TV reception.
Caution
Changes or modifications not expressly approved by the manufacturer could void the user
authority, which is granted by the Federal Communications Commission, to operate this product.
Notice: Canadian users
This Class B digital apparatus complies with Canadian ICES-003.
Remarque à l'intention des utilisateurs canadiens
Cet appareil numérique de la classe B est conforme a la norme NMB-003 du Canada.
4 | Declaration of Conformity
Page 7

Safety Information
Warnings
This symbol warns user that uninsulated voltage within the unit may have sufficient
magnitude to cause electric shock. Therefore, it is dangerous to make any kind of
contact with any part inside this unit.
This symbol alerts the user that important literature concerning the operation and
maintenance of this unit has been included. Therefore, it should be read carefully in
order to avoid any problems.
To prevent fire or shock hazards, do not expose this unit to rain or moisture.
Do not use this unit’s polarized plug with an extension cord receptacle or other outlets unless
the prongs can be fully inserted.
WARNING
WARNING
WARNING
Refrain from opening the display cabinet as there are high voltage components inside. Refer
servicing to qualified service personnel.
CAUTION
To reduce the risk of electric shock, make sure power cord is unplugged from wall socket. To
fully disengage the power to the unit, please disconnect the power cord from the ac outlet. Do
not remove cover (or back). No user serviceable parts inside. Refer servicing to qualified
service personnel.
CAUTION
Please use the power cord provided with this monitor in accordance with the table below. If a
power cord is not supplied with this equipment, please contact your supplier. For all other
cases, please use a power cord that matches the AC voltage of the power outlet and has been
approved by and complies with the safety standard of your particular country.
Safety Information | 5
Page 8

Plug
Shape
North America
(USA/Canada/
Taiwan)
European
Union
UK China Japan
Voltage 120
230 230 220 100
(110 in Taiwan)
When operating a display which requires an AC 125-240V power supply, make sure to use a
power supply cord that matches the power supply voltage of the AC power outlet being used.
NOTE
This product can only be serviced in the country where it was purchased.
Use the power cord which has BSMI mark at both ends when you use this monitor in Taiwan.
• The intended primary use of this product is as an Information Technical Equipment in an office
or domestic environment.
• The product is intended to be connected to a an external device and is not intended for the
display of television broadcast signals.
6 | Safety Information
Page 9

Safety Information
SAFETY PRECAUTIONS
Please note the following when setting up and using the display:
• DO NOT OPEN THE DISPLAY. There are no user serviceable parts inside and opening or
removing covers may expose you to dangerous shock hazards or other risks. Refer all
servicing to qualified service personnel.
• Do not spill any liquids into the cabinet or use your display near water.
• Do not insert objects of any kind into slots on the display, as they may touch dangerous voltage
points, which can be harmful or fatal or may cause electric shock, fire or equipment failure.
• Do not place any heavy objects on the power cord. Damage to the cord may cause shock or
fire.
• Do not place this product on a sloping or unstable cart, stand or table, as the monitor may fall,
causing serious damage to the display.
• Do not mount the display face up, face down or upside down for an extended period of time as
it may cause permanent damage to the screen.
• The power supply cord you use must have been approved by and comply with the safety
standards of your country. (Type H05VV-F 3G 1mm2 should be used in Europe)
• In UK, use a BS-approved power cord with melded plug having a black (13A) fuse installed for
use with this display.
• Do not place any objects on top of the display and do not use the display outdoors.
• Do not bend, crimp or otherwise damage the power cord.
• Do not use the display in high temperature, humid, dusty, or oily areas.
• If display glass is broken, do not come in contact with the liquid crystal and handle with care.
• Allow adequate ventilation around the display, so that heat can properly dissipate. Do not block
ventilated openings or place the display near a radiator or other heat sources.
• The power cable connector is the primary means of detaching the system from the power
supply. The monitor should be installed close to a power outlet, which is easily-accessible.
• Handle with care when transporting. Save packaging for transporting.
• Please clean the ventilation holes on the back of the display at least once a year to remove any
dust or dirt.
• Do not use the display under rapid temperature and humidity change condition or avoid cold air
from air-conditioning outlet directly, as it may shorten the lifetime of the display or cause
condensation. If condensation happens, let the display stand unplugged until there is no
condensation.
• The touch panel glass is not safety glass and is not laminated. As with other glass, the touch
panel glass may break into sharp pieces if misused, dropped, or otherwise subjected to a
substantial shock. If touch panel glass happens to break, please use care to avoid injury.
• DO NOT tap the monitor with hard or pointed objects, such as a pen or pencil.
Safety Information | 7
Page 10

RECOMMENDED USE
• For optimum performance, allow 20 minutes for warm-up.
• Position the display at a 90° angle to windows and other light sources to minimize glare and
reflections.
• Clean the display surface with a lint-free, non-abrasive cloth. Avoid using any cleaning solution
or glass cleaner.
• Adjust the display’s brightness, contrast and sharpness controls to enhance readability.
• Avoid displaying fixed patterns on the monitor for long periods of time to avoid image
persistence (after image effects).
Ergonomics
To realize the maximum ergonomic benefits, the following is recommended:
• Use the preset Size and Position controls with standard signals.
• Use the preset Color Setting.
• Use non-interlaced signals.
• Do not use primary color blue on a dark background, as it is difficult to see and may produce
eye fatigue due to insufficient contrast.
• Suitable for entertainment purposes at controlled luminous environments, to avoid disturbing
reflections from the screen.
Cleaning the LCD Panel
• When the liquid crystal panel is dusty, please gently wipe with a soft cloth.
• Do not rub the LCD panel with hard material.
• Do not apply pressure to the LCD surface.
• Do not use OA cleaner as it will cause deterioration or discolor on the LCD surface.
Cleaning the Cabinet
• Unplug the power supply
• Gently wipe the cabinet with a soft cloth
• To clean the cabinet, dampen the cloth with a neutral detergent and water, wipe the cabinet
and follow with a dry cloth.
NOTE
DO NOT clean with benzene thinner, alkaline detergent, alcoholic system detergent, glass
cleaner, wax, polish cleaner, soap powder, or insecticide. Rubber or vinyl should not be in
contact with the cabinet for an extended period of time. These types of fluids and materials can
cause the paint to deteriorate, crack or peel.
8 | Safety Information
Page 11

Package Contents
Darwin Large Format Display
User Manual
DT653
Model Number: S645HF64 V0 IWB65
Your new display should include the following items:
LCD monitor
Power cord
Setup Manual
Wireless Remote Control Remote Control Batteries
NOTE
For models shipped with touchscreen functionality, an additional A-type USB connector will be
attached to the left side of the display.
Package Contents | 9
Page 12

Features of Your Display
IMAGE FEATURES
Advanced Color Control: Adjust the colors of your screen image and customize the color
accuracy of your display to a wide variety of standards.
Six-Axis Color Control: Utilizes six-axis color control with the sRGB color control. Six-axis color
control allows color adjustments via six axes (R, G, B, C, M and Y) rather than through the typical
three axes (R, G and B).
sRGB Color Control: sRGB is a color management standard which allows for color matching on
computer displays and other peripherals. The sRGB standard provides the display with a uniform
color profile. This assures that the colors shown on the display are exactly the same as a printed
color output (with an operating system supporting sRGB and an sRGB printer). This allows you to
adjust the colors on your screen and customize the color accuracy of your display to uniform
accuracy across devices.
OSD (On-Screen-Display) Controls: The OSD Menu allows you to quickly and easily adjust all
elements of your screen image via simple to use on-screen menus.
FullScan Capability: Uses the entire screen area in most resolutions, significantly expanding
image size.
USAGE FEATURES
Plug and Play: The Microsoft® solution with the Windows® operating system facilitates setup and
installation by allowing the display to send its capabilities (such as screen size and resolutionsupport) directly to your computer, automatically optimizing display performance.
VESA Standard (FDMIv1) Mounting Interface: Connect your display to any VESA standard
(FDMIv1) third party mounting arm or bracket. Dealer recommends using a mounting interface that
complies with TÜV-GS and/or UL1678 standard in North America.
Self-Diagnosis Feature: If an internal error should occur, a failure state will be enacted and an
error LED will illuminate.
HDCP (High-bandwidth Digital Content Protection): HDCP is a system for preventing illegal
copying of video data sent over a digital signal. If you are unable to view material via the digital
input, this does not necessarily mean the display is not functioning properly. There may be cases
in which certain content is protected with HDCP and might not be displayed due to the content’s
creator registering with Digital Content Protection, LLC.
POWER FEATURES
IPM (Intelligent Power Manager) System: Provides innovative power-saving methods that allow
the display to shift to a lower power consumption level when on but not in use, saving two-thirds of
your display’s energy costs, reducing emissions and lowering the air conditioning costs of the
workplace.
Reduced Carbon Footprint: Provides superior image quality while being more energy-efficient
and reducing environmental impact than previous models.
10 | Features of Your Display
Page 13

Installation of Your Display
WARNING
• For proper installation it is strongly recommended to use a trained, authorized technician.
Failure to follow standard mounting procedures could result in damage to the equipment or
injury to the user or installer.
• Product warranty does not cover damage caused by improper installation, remodelling, or
natural disasters. Failure to follow these recommendations could result in voiding the
warranty.
• DO NOT mount the display yourself. For proper installation it is strongly recommended to
use a trained, qualified technician.
Moving Your Display
CAUTION
Never move or carry the display yourself.
Prior to installation, place the display on a flat area or surface with adequate space.
Make sure there is nothing on the floor/surface that can damage the display.
To avoid damaging the screen face, place a protective sheet on the surface underneath the
display.
NOTE
Do not leave the monitor in the face-up or face-down position for more than one hour as this
may result in a negative effect on the screen's performance.
OPTIONAL
You may secure carrying handles onto the display. Please check with your dealer for more info.
Installation of Your Display | 11
Page 14
Mounting Location
It is important to install the display in a location that allows adequate ventilation around the display,
so that heat can properly dissipate away from the display and its mounting accessories. If
installing the display onto a ceiling or wall with a mounting bracket, then the ceiling and wall must
be strong enough to support the display and its mounting accessories.
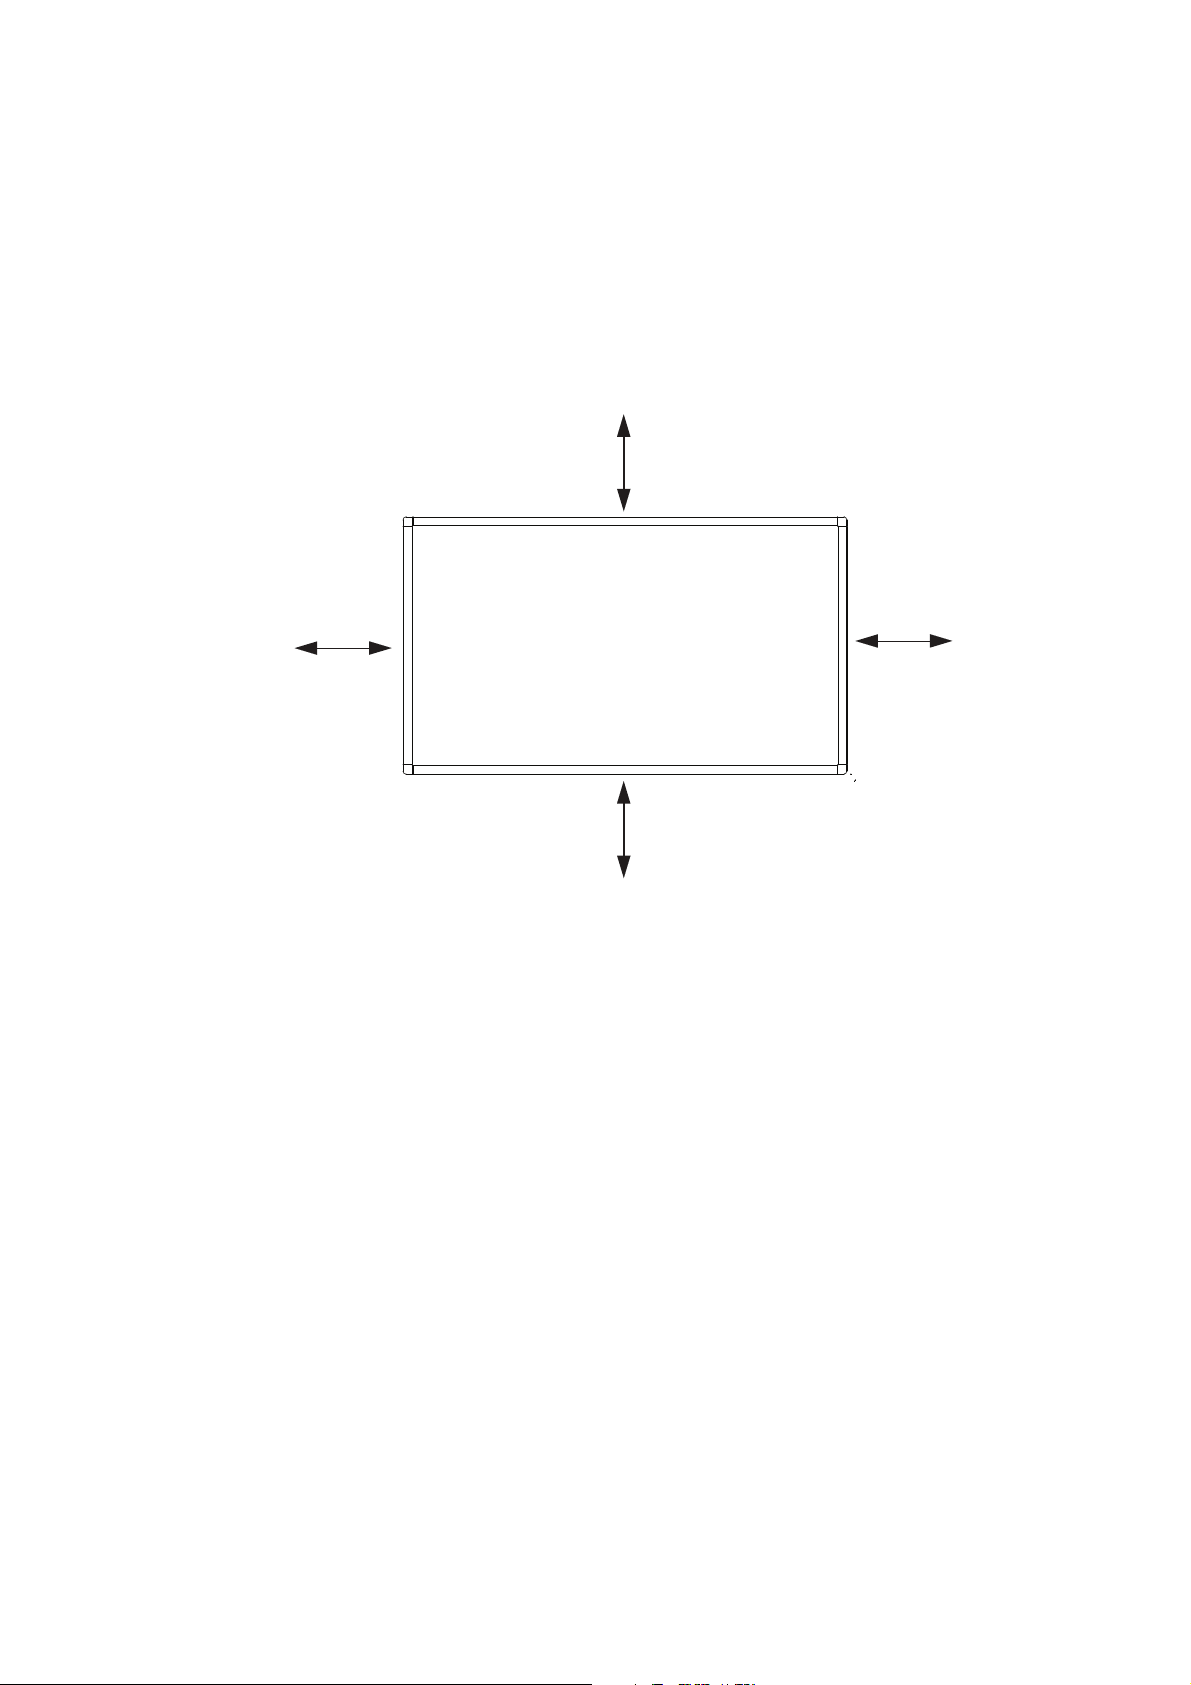
Ventilation Requirements
When mounting in an enclosed space or recessed area, leave adequate room between the display
and the enclosure in order to allow heat to disperse, as shown below.
100mm
100mm
100mm
100mm
Make sure to provide air conditioning around the display or adequate ventilation, so that heat can
properly dissipate away from the unit and mounting accessories.
Please note the following:
• DO NOT install in locations where a door can knock against the display.
• DO NOT install in areas where the display will be subjected to dust and/or strong vibrations.
• DO NOT install the display next to the location where the main power supply enters the
building.
• DO NOT install the display in an area where people can easily grab and hang onto the display
or its mounting accessories.
12 | Installation of Your Display
Page 15

Mounting Equipment
CAUTION
This display cannot be used or installed without a support stand or a mounting support
accessory.
The display is designed for use with the VESA mounting system. When using mounting
accessories other than those that are approved by the dealer, they must comply with the VESAcompatible (FDMlv1) mounting method. It is recommended to use mounting interfaces that comply
with UL1678 standard in North America.
Attaching Mounting Equipment to Your Display
For proper installation it is strongly recommended to use a trained, qualified technician.
NOTE
Refer to the proper installation instructions included with the mounting equipment.
1. Place the display face-down on a flat, padded surface for safe installation of mounting
accessories.
2. For installation, it is recommended to use M6 screws and tighten them securely. Screws should
have a Boss screw thread of at least 15mm, a loose-proof spring washer, and a length 10 mm
longer than the thickness of the mounting bracket.
(Recommended Torque: 470 - 635N·cm). Bracket hole should be under φ8.5 mm.
Installation of Your Display | 13
Page 16

3. Make sure there is no gap between the display and the bracket.
400.00mm
400.00mm
4. To ensure safe installation, use two or more brackets to mount the display. Mount the display to
at least two points on the installation location.
NOTE
• Be careful to avoid tipping the display over when attaching accessories.
• The display is designed to be used for landscape mode only. Do not install the display
vertically.
• Periodically check for loose screws, gaps, distortions, or other problems that may occur with
the mounting apparatus. If a problem is detected, please refer to qualified personnel for
service.
• Regularly check the mounting location for signs of damage or weakness that may occur over
time.
14 | Installation of Your Display
Page 17

Display Components
1
2
3
4
5
6
7
CONTROL PANEL – LOCATION & BUTTONS
1
2
3
4
5
6
7
MENU button Turns the OSD menu on/off.
SOURCE button Toggles between the input sources of your display: [HDMI1],
[HDMI2], [VGA], [USB] and [DVI-D]). Also acts as an INPUT
button within the OSD menu.
Volume Up button (+) In the OSD menu, acts as the LEFT button to adjust or
increase the function. Also increases the audio output level
when the OSD menu is turned off.
Volume Down button
(-)
Up button () In the OSD menu, acts as the UP button to move the
Down button () In the OSD menu, acts as the DOWN button to move the
Power button ()
In the OSD menu, acts as the RIGHT button to adjust or
decrease the function. Also decreases the audio output level
when the OSD menu is turned off.
highlighted area up to select adjustment items.
highlighted area down to select adjustment items.
Switches the power on/off. See also “POWER ON AND OFF
MODES” on page 20.
Display Components | 15
Page 18

PORTS & CONNECTORS
1
2
3
4
5
6
7
8
9
1
2
3
4
5
6
7
8
9
Remote control sensor
and Power Indicator
IR IN Connects to an external IR sensor module to the display.
AUDIO OUT Connects to external speakers, audio amplifiers, etc. or
AUDIO IN
(LINE IN)
D-Sub (VGA IN) Connects with the analog video output (VGA) of a computer
USB port Connects to a personal computer or USB 2.0 device to
HDMI IN Connects with devices supporting audio/video data using the
Receives the signal from the remote control. See also
“USING THE REMOTE CONTROL” on page 18.
When the display is in active use the power indicator
illuminates GREEN. When the display is powered off it
illuminates RED. When a component failure is detected, the
indicator will blink RED.
outputs the signal that is supplied to the AUDIO IN connector.
Connects with the audio out connector of a video source such
as a computer, VCR, or DVD player when the display is
connected to the source via the D-SUB connector.
or other RGB equipment. This input can be used with an RGB
or COMPONENT source.
display digital media.
digital HDMI interface.
AC IN connector Connects with the supplied power cord.
AC SWITCH Switches the main power of the display ON/OFF.
16 | Display Components
Page 19

REMOTE CONTROL
1
2
3
4
5
6
7
8
9
10
11
12
13
14
1
2
3
4
5
6
789
10
11
12
13
14
POWER
button
SOUND
buttons
PICTURE
button
INFO
button
VOLUME
buttons
(VOL)
MUTE
button
UP/DOWN/
RIGHT/
LEFT
buttons
Switches the power on/off.
Selects the sound mode options
STANDARD, DYNAMIC and
CUSTOM.
Selects the picture mode options
from STANDARD, DYNAMIC,
CINEMA and CUSTOM.
Displays the current screen
resolution and refresh rate.
Increases the audio output levels.
The plus (+) button increases and
the minus (–) button decreases
the audio output level.
Switches the mute function ON/
OFF.
Navigates the selection area in
the OSD menu. () button moves
the selection area up, () moves
the selection area down, ()
toggles the selection to the left,
() toggles the selection to the
right.
MENU button Switches the OSD menu mode on/off.
MEDIA CONTROL
buttons
Contextual buttons providing various media control functions
in specific menus. The functions of each button will be shown
in the OSD menu in its corresponding color.
INPUT button Displays the OSD menu to switch the video input. You can
select [HDMI1], [HDMI2], [HDMI3], [VGA], and [USB].
ASPECT button Displays the current display aspect ratio.
OK button Accepts the selection made in the OSD menu.
BACK button Returns to the previous OSD menu.
AUDIO/VIDEO
CONTROL buttons
Sets the control functions when playing media files. Fast
reverse (), play (), fast forward (), track backwards (),
stop (), pause (), and track forward ().
NOTE
If operation of the remote control is not available, you can use the control panel to access
settings. See “BASIC OPERATIONS OF THE OSD SCREEN” on page 27.
Display Components | 17
Page 20

USING THE REMOTE CONTROL
1
Setting Up the Infrared Remote Control Sensor
Before using the infrared remote control, the display’s
remote control sensor must be positioned. The
remote control sensor is the small black box located
on the back of left of the display. Press the small
button near the base of the remote control sensor,
and slide the sensor away from the display until it
locks in place. Reverse this procedure to return the
sensor to its original position.
Using the Remote Control
Point the remote control toward the display’s remote
control sensor when making selections with the
buttons. The operating range of the remote control is
a distance of about 10m from the front of the remote
control sensor. The horizontal and vertical angles of
the remote control are approximately 30° within a
distance of about 10m.
CAUTION
The remote control may not function when direct
sunlight or strong illumination strikes the remote
control sensor or when there is an object in its path.
Installing the Remote Control Batteries
The remote control is powered by two 1.5V AAA
batteries.
To install or replace batteries:
1. Press and slide to open the cover.
2. Align the batteries according to the (+) and (–)
indications inside the case.
3. Replace the cover.
2
3
18 | Display Components
Page 21

Preparing Your Display for Use
1. Install in the desired location.
CAUTION
MOVING OR INSTALLING THE DISPLAY MUST BE DONE BY TWO OR MORE PEOPLE.
Failure to follow this caution may result in injury if the display falls.
CAUTION
Do not mount or operate the display upside down, face up or face down.
IMPORTANT
When setting the display down to install the wall mount, place it face down on a flat and stable
surface covered by a protective sheet or cloth and a table cushion. DO NOT place the display
on an uncovered surface.
2. Make connections.
(See “Connecting Devices to Your Display” on page 22)
3. Plug the supplied power cable into the display and a power source.
NOTE
Please refer to the “Safety Information” on page 5 of this manual for proper selection of AC
power cord.
Preparing Your Display for Use | 19
Page 22

Operating Your Display
A
B
POWER ON AND OFF MODES
1. Turn the AC switch located at the bottom of the display on.
OFF
AC SWITCH
2. To power up the display, select either the Power button [ ] on the control panel (A) or the
Power button [ ] on the remote control (B).
ON
NOTE
The display power indicator will turn green while powered on and will turn red while powered off.
20 | Operating Your Display
Page 23

LED POWER INDICATOR
Indicator
Condition
LED (RED) LED (GREEN)
On OFF ON
Off (=Standby) ON OFF
Power Saving ON ON
Schedule Standby BLINK ON
Over safe temperature BLINK OFF
USB auto upgrade (use in
factory)
Over alarm temperature BLINK OFF
BLINK BLINK
Operating Your Display | 21
Page 24

Connecting Devices to Your Display
HDMI 1
HDMI 2
VGA
IN
AUD INAUD
OUT
IR IN
PC
DVD/Blu-Ray Player
External Speakers
External IR Sensor
HDMI 3 USB
Before connecting any equipment:
• First turn off the power of all the attached equipment and then make connections to the display.
• Refer to the user manual included with each separate piece of equipment.
NOTE
Do not connect/disconnect cables when turning on the display or when turning on other external
equipment as this may result in image loss.
NOTE
Use an audio cable without a built-in resistor. This type of audio cable turns down the sound.
22 | Connecting Devices to Your Display
Page 25

Connecting
equipment
Connecting
video terminal
Input signal
name on
source menu
Connecting audio
terminal
Input button on
remote control
AV HDMI 1
HDMI 2
HDMI 3
PC HDMI 1
HDMI 2
HDMI 3
D-SUB
(VGA IN)
HDMI 1
HDMI 2
HDMI 3
[Optional: AUDIO IN]
HDMI 1
HDMI 2
HDMI 3
[Optional: AUDIO IN]
VGA AUDIO IN INPUT > VGA
HDMI 1
HDMI 2
HDMI 3
HDMI 1
HDMI 2
HDMI 3
INPUT > HDMI 1
INPUT > HDMI 2
INPUT > HDMI 3
INPUT > HDMI 1
INPUT > HDMI 2
INPUT > HDMI 3
ANALOG CONNECTIONS
Connecting with an Analog Video Source:
D-SUB connection:
1. Connect a VGA cable to the D-SUB connector.
2. Select VGA using the [SOURCE] button on the display, or the [INPUT] button on the remote
control. Once selected, the audio automatically switches to [LINE IN] on the display.
Audio with a D-SUB connection:
• Connect an audio cable (3.5-mm stereo mini), to the AUDIO IN connector. Because the audio
automatically switches to [LINE IN], the audio is output simply by connecting the cable.
DIGITAL CONNECTIONS
Connecting with a Digital Video Source:
HDMI Connection:
1. Connect an HDMI cable to the HDMI1, HDMI2 or HDMI3 connector.
2. Select HDMI1, HDMI2, or HDMI3 according to the connected connector by pressing the
[SOURCE] button on the display or the [INPUT] button on the remote control.
NOTE
Please use an HDMI cable with HDMI logo.
Audio with an HDMI connection:
• For HDMI 1, HDMI 2 or HDMI 3, the default setting of audio source is a TMDS signal with HDMI
cable. Users can use an external audio source if an audio cable (3.5-mm stereo mini) is
connected to the AUDIO IN connector. Open the OSD Menu and select Sound > Audio
Source > LINE IN. (See “OSD (On-Screen-Display) Controls” on page 26).
NOTE
It may take a moment for the signal to appear on the screen.
Connecting Devices to Your Display | 23
Page 26

NOTE
Some display cards or drivers may not display an image correctly.
NOTE
The image may be reduced and may not be displayed full screen at a resolution of 1920 x 1080.
Check the setting of the device’s video card.
Connecting a Personal Computer:
Some display cards with a pixel clock over 162MHz may not display an image correctly. Your
display projects the proper image by adjusting the factory preset timing signal automatically.
Typical factory preset signal timing:
Scanning frequency
Resolution
Horizontal Vertical
640 x 480 31.5 kHz 60 Hz
800 x 600 37.9 kHz 60 Hz
1024 x 768 48.4 kHz 60 Hz
Remarks
1280 x 768 48 kHz 60 Hz
1360 x 768 48 kHz 60 Hz
1280 x 1024 64 kHz 60 Hz
1600 x 1200 75 kHz 60 Hz Compressed image
1920 x 1080 67.5 kHz 60 Hz Recommended resolution
24 | Connecting Devices to Your Display
Page 27

USING THE TOUCHSCREEN
The display supports touchscreen functionality with an external A-type USB connector located at
the left side of the panel.
To use the touchscreen function:
1. Turn off the power of the display.
2. Connect the display’s A-type USB connector to the USB port of an external computer.
3. Turn on the power of the display. The external computer’s desktop should automatically appear
on the display panel.
NOTE
You may need to select the input signal of the external computer to its USB connector.
A
A
A
A
PICTURE ASPECT RATIO
You can set the aspect ratio of the screen by selecting an item for Aspect Ratio (OSD Menu) or
by using the [ASPECT] button on the remote control. Select 4:3, 16:9, ZOOM, CINEMA or DOT
BY DOT.
NOTE
When Over Scan is set to OFF, you can only select 4:3, 16:9 or DOT BY DOT
Connecting Devices to Your Display | 25
Page 28

OSD (On-Screen-Display) Controls
Main Menu
Picture
Sound
OK
OK
Exit
Menu
Setup
Initial Setting
System Information
Move
For this display, an OSD (On-Screen Display) function is used to allow you to easily adjust
settings. You can use the OSD function to control the menu displayed on the screen and to adjust
the picture, sound and other settings of the display.
To access the OSD Main Menu, press the [MENU] button on the remote control or the control
panel.
OSD Main Menu
Sub-Menu Name FUNCTION See Page
Picture Adjusts the picture settings of the display 30
Sound Adjusts the audio settings of the display 31
Setup Adjusts general settings of the display such as
Initial Setting Adjusts the language and time settings of the display 33
System Information Displays the model number and software version of
32
Scheduler, Power Save, and updating firmware
34
the display
26 | OSD (On-Screen-Display) Controls
Page 29

BASIC OPERATIONS OF THE OSD SCREEN
Make sure that the display is powered on and that the LED power indicator is green.
Step Wireless Remote Control Keypad Operation
1 Opening and Navigating the
OSD Main Menu
2 Making Selections in the
OSD Main Menu
Press the [MENU] button to
display the OSD screen.
Press the up ()/down ()
button to select an item in
the main menu.
Press the [OK] button to
determine the selected item
in the main menu. The top
item in the relevant sub
menu is selected.
Press the [MENU] button to
display the OSD screen.
Press the up ()/down ()
button to select an item in
the main menu.
Press the [SOURCE] button
to determine the selected
item in the main menu. The
top item in the relevant sub
menu is selected.
OSD (On-Screen-Display) Controls | 27
Page 30

Step Wireless Remote Control Keypad Operation
3 Opening and Navigating
OSD Sub-Menus
4 Making Selections in the
OSD Sub-Menus
Press the up ()/down ()
button to navigate to an
item in the sub menu.
Press the [OK] button to
select an item in the sub
menu.
Press the up ()/down ()
button to navigate to an
item in the sub menu.
Press the [SOURCE] button
to determine the selected
item in the sub menu.
28 | OSD (On-Screen-Display) Controls
Page 31

Step Wireless Remote Control Keypad Operation
5 Adjusting settings in the
OSD sub-menus
6 Returning to the previous
menus and exiting the OSD
Main Menu
Press the left ()/right ()
button to adjust a setting or
press the [OK] button to
display further features of
the setting.
Press the [BACK] button to
exit from the current menu
and return to the previous
menu. Press the [MENU]
button to exit from the OSD
Menu.
Press the plus (+)/minus (–)
button to select a setting
and press the [SOURCE]
button to determine the
setting.
Press the [MENU] button to
exit from the OSD Menu.
OSD (On-Screen-Display) Controls | 29
Page 32

PICTURE
Picture
Picture Mode
Backlight
OK
OK
Exit
Menu
Color Temperature
Gamma
Color Range
Back
VGA setting
Reset Picture Setting
Dynamic
11500
2.2
Auto
100
Move
Noise Reduction
Adaptive Contrast
Over Scan
Strong
Aspect Ratio
Off
16:9
Automatic
PICTURE FUNCTION
Picture Mode Select Dynamic, Cinema, Custom, or Standard.
Backlight Adjust the Backlight setting.
Color Temperature Adjust Color Temperature and the Red Gain, Green Gain and
Gamma Select a Gamma setting.
Noise Reduction Adjust Noise Reduction setting
Adaptive Contrast Select Adaptive Contrast to ON or OFF.
Over Scan Adjust Over Scan to AUTO or OFF.
Aspect Ratio Adjust Aspect Ratio setting.
Color Range Adjust Color Range setting
VGA setting Adjust H Position, V Position, Clock, and Phase.
Reset Picture Setting Resets the settings in the Picture menu back to their factory
Adjust Contrast, Brightness, Sharpness, Tint, and Color.
Blue Gain.
• Select 4:3, 16:9, ZOOM, CINEMA, or DOT BY DOT.
When Over Scan is set to OFF, you can select 4:3, 16:9, or DOT
BY DOT.
settings.
30 | OSD (On-Screen-Display) Controls
Page 33

SOUND
Sound
Sound Mode
Surround Sound
Speaker
Audio Source
Standard
Off
Internal
HDMI1
Reset Audio Setting
OK
Menu
OK
Exit
Move
Back
SOUND FUNCTION
Sound Mode Select Standard, Dynamic, or Custom.
Adjust Treble, Bass, and Balance.
Surround Sound Adjust Surround Sound to ON or OFF.
Speaker Select Speaker setting to INTERNAL or EXTERNAL.
Audio Source Select the Audio Source to either LINE IN, HDMI1, HDMI2 or
HDMI3.
Reset Sound Setting Resets the settings in the Sound menu back to their factory settings.
Restore Default Resets the settings in the Setup menu back to their factory settings.
OSD (On-Screen-Display) Controls | 31
Page 34

SETUP
Setup
Scheduler
Signal Check Priority
Adjust
Exit
Menu
CEC Control
Back
Off
Move
Sleep Timer
Power Save
Software Update (USB)
Restore Default
On
Off
300 Sec
SETUP FUNCTION
Scheduler Change the Scheduler setting.
• The schedule function allows the display to be set to power on
and off at different times. Up to seven different schedules can be
programmed.
• If schedules are overlapping then the schedule with the highest
number will have priority over the schedule with the lowest
number. For example schedule #7 will have priority over
schedule #1.
Signal Check Priority When Signal Check Priority is enabled, the display attempts to
CEC Control Select CEC Control settings to ON or OFF.
Sleep Timer Change the Sleep Timer setting or set Sleep Timer to OFF.
Power Save Change the Power Save setting or set Power Save Mode to OFF.
Software Update (USB) Updates software via the USB port.
Restore Default Resets the settings in the Setup menu back to their factory settings.
find a valid signal source according to the Signal Check Priority
setting at power on.
• Set PRIORITY 1 to PRIORITY 5 (PRIORITY 1: highest priority)
as the priority of each signal. When the current source signal is
lost, the display attempts to find a new signal source according to
the Signal Check Priority setting.
• When the signal source for which PRIORITY 1 is set is not
found, the display checks other sources in order of priority and
switches to the available source with the highest priority.
• When the signal source with the highest priority recovers, the
display automatically switches to the source again.
• When Signal Check Priority is disabled, the display uses the
last used source at power on.
• When Signal Check Priority is enabled and the signal source is
USB, the USB data is automatically played at power on.
32 | OSD (On-Screen-Display) Controls
Page 35

INITIAL SETTING
Initial Setting
Menu Language
Time Format
Clock
Remote Operation
Keypad Operation
Anti-Image Retention
Move
Back
INITIAL SETTING FUNCTION
Menu Language Change the language used for OSD Menu.
Time Format Select 12 HOUR or 24 HOUR.
Clock Set the time and date.
Remote Operation Enable or disable Remote Operation.
• When Remote Operation is enabled and locked, press the
following combination on the remote control: [MENU], left [],
right [], up [], and down []. The Remote Operation will
become unlocked and disabled.
Menu
English
12-hour
2017/1/1 12:00PM
Enable
Enable
Off
Adjust
Exit
Keypad Operation Enable or disable Keypad Operation.
Anti-Image Retention Select PICTURE SHIFT or WHITE PIXEL, or set Anti-Image
Retention to OFF.
NOTE
Image Persistance: Please be aware that LCD Technology may experience a phenomenon
known as Image Persistence. Image Persistence occurs when a residual or “ghost” image of a
previous image remains visible on the screen. Unlike CRT monitors, image persistence in LCD
monitors is not permanent, but constant images being displayed for a long period of time should
be avoided.
To alleviate image persistence, turn off the monitor for as long as the previous image was
displayed. For example, if an image was on the monitor for one hour and a residual image
remains, the monitor should be turned off for one hour to erase the image.
As with all personal display devices, dealer recommends displaying moving images and using a
moving “Anti-Image Retention” at regular intervals whenever the screen is idle or turning off the
monitor when not in use.
Please set Anti-Image Retention, Clock and Scheduler functions to further reduce the risk of
Image persistence.
OSD (On-Screen-Display) Controls | 33
Page 36

SYSTEM INFORMATION
System Information
Model Name
SW Version
Exit
Menu
Back
BH281
Move
0.03.01
SYSTEM
INFORMATION
Model Name Displays the model name of the display.
SW Version Displays the version of the current software of the display.
FUNCTION
34 | OSD (On-Screen-Display) Controls
Page 37

Troubleshooting
No picture
• The signal cable should be completely connected to the display card/computer.
• The display card should be completely seated in its slot.
• Check the main Power Switch, it should be in the ON position.
• Power Switch and computer power switch should be in the ON position.
• Check to make sure that a supported mode has been selected on the display card or system
being used. (Please consult display card or system manual to change graphics mode.)
• Check the display and your computer’s display card with respect to compatibility and
recommended settings.
• Check the signal cable connector for bent or pushed-in pins.
• The display automatically goes into OFF at the preset time period after signal is lost. Press the
power button.
Power Button does not respond
• Unplug the power cord of the display from the AC outlet to turn off and reset the display.
• Check the main Power Switch on the back side of the display.
Image persistence
• Please be aware that LCD Technology may experience a phenomenon known as Image
Persistence.
Image Persistence occurs when a residual or “ghost” image of a previous image remains visible
on the screen. Unlike CRT monitors, image persistence in LCD monitors is not permanent, but
constant images being displayed for a long period of time should be avoided. To alleviate
image persistence, turn off the display for as long as the previous image was displayed.
For example, if an image was on the display for one hour and a residual image remains, the
display should be turned off for one hour to erase the image.
NOTE
As with all personal display devices, dealer recommends displaying moving images and
using a moving “Anti-Image Retention” at regular intervals whenever the screen is idle or
turning off the monitor when not in use.
Image is unstable, unfocused or swimming is apparent
• Signal cable should be completely attached to the computer.
•Use the OSD Image Adjust controls to focus and adjust display by increasing or decreasing
the fine adjustment.
• When the display mode is changed, the OSD Image Adjust settings may need to be re-adjusted.
• Check the display and your computer’s display card with respect to compatibility and
recommended signal timings.
• If your text is garbled, change the video mode to non-interlace and use 60Hz refresh rate.
• The image may be distorted when turning the power on or changing the settings.
Troubleshooting | 35
Page 38

LED on display is not lit (no green or red color can be seen)
• Power Switch should be in the ON position and power cord should be connected.
• Check the main Power Switch, it should be in the ON position.
• Make certain the computer is not in a power-saving mode (touch the keyboard or mouse).
• Check to see that the power indicator option in the OSD is set to ON.
RED LED on monitor is blinking
• A certain failure might have occurred, please contact your nearest authorized dealer service
facility.
• Display is powered off by the inside temperature being higher than the normal operating
temperature. Power on the display again after confirming the inside temperature has been
reduced to normal operation temperature.
Display image is not sized properly
• Use the OSD Image Adjust controls to increase or decrease the coarse adjustment.
• Check to make sure that a supported mode has been selected on the display card or system
being used. (Please consult display card or system manual to change graphics mode.)
Selected resolution is not displayed properly
•Use OSD Display Mode to enter Information menu and confirm that the appropriate resolution
has been selected. If not, select corresponding option.
No Sound
• Check to see if audio cable is properly connected.
• Check to see if mute is activated.
• Check to see if volume is set at minimum.
• Check to see if computer supports an audio signal.
If unsure, contact the computer manufacturer.
• Check to see if SURROUND is set to ON.
• Check the external speaker switch.
Remote Control is not available
• Check the status of the Remote Control’s batteries.
• Check if batteries are inserted correctly.
• Check if the Remote Control is pointing at the monitor’s remote sensor.
• Check the Remote Operation setting status.
• The remote control system may not function when direct sunlight or strong illumination strikes
the remote control sensor of the display, or when there is an object in the path.
Scheduler/Sleep Timer function is not working properly
•The Scheduler function will be disabled when the Sleep Timer is set.
• If the Sleep Timer function is enabled and the power to the display is turned off when the
power supply is interrupted unexpectedly, then the Sleep Timer will be reset.
36 | Troubleshooting
Page 39

Interference in TV
• Check components for shielding, move away from monitor if necessary.
The touch panel does not respond
• Check the input signal setting.
• Make sure the USB cable is connected properly.
• When using touch function at the display edge, there may be a slight gap between touch
position on the screen and where you touched. It is the specification and not a failure of
product.
The response of the touch screen is not correct
• Avoid direct sunlight or strong light on the screen.
• If there are some obstacles near the touch screen, it may malfunction.
• Wipe gently with a soft cloth.
The computer’s power management does not work
• It is recommended to choose “S3” at the “Power Management” item in the BIOS (abbreviation
of Basic Input / Output System) computer’s setup screen.
Either faint vertical or horizontal stripes may appear, depending on the specific display pattern.
This is no product fault or degradation.
Troubleshooting | 37
Page 40

Product Specifications
LCD Module
65" V / 1639.0 mm diagonal
Pixel Pitch 0.744 mm
Resolution 1920 x 1080
Color Over 1073 million colors
Brightness 400 cd/m2 (with cover glass)
Contrast Ratio 4000:1
Viewing Angle Left/Right: 170° (typ) @ CR>10, Up/Down: 170° (typ) @
CR>10
Frequency
Horizontal 15.625 kHz - 67.5 kHz (Analog Input)
31.5 kHz - 67.5 kHz (Digital Input)
Vertical 50.0 - 60.0 Hz
Pixel Clock
13.5 - 148.5MHz (Analog)
25.0 - 148.5MHz (Digital)
Viewable Size
1428.5 x 803.5 mm
Input Signal
VGA 15pin Mini
D-sub
HDMI HDMI
Connector
Analog RGB 0.7 Vp-p/75 ohm
VGA60, SVGA60, XGA60, WXGA60, SXGA60, UXGA60,
1920X1080 (60Hz)
Sync Separate: TTL level (Pos./Neg.)
Composite sync on Green Video: 0.3 Vp-p Neg.
Digital YUV
Digital RGB
HDMI
VGA60, SVGA60, XGA60, WXGA60, SXGA60, UXGA60,
1920X1080(60Hz), 1125p(1080p),
1125i(1080i), 750p(720p)@50Hz/60Hz,
525p(480p)@60Hz, 625p(576p)@50Hz,
525i(480i)@60Hz, 625i(576i) @50Hz
38 | Product Specifications
Page 41

Audio
Audio Input Stereo Mini
Jack
HDMI
Analog
Stereo L/R 0.5 Vrms
Audio
Digital Audio PCM 32, 44.1, 48 KHz (16/20/24bit)
Connector
Audio
Output
Stereo Mini
Jack
Analog
Audio
Stereo L/R 0.5 Vrms
Speaker Output
Internal Speaker 10W + 10W
Control
Remote IN Stereo Mini jack 3.5?
Power Supply
2.5 A @ 100-240V AC, 50/60Hz
Operational Environment
Temperature 0 - 40°C / 32 -104°F
Humidity 20 - 80% (without condensation)
Altitude 0 - 2000 m (Brightness may decrease with altitude)
Storage Environment
Temperature -20 - 60°C / -4 - 140°F
Humidity 10 - 90% (without condensation) / 90% - 3.5% x (Temp -
40°C) regarding over 40°C
Dimension
1489.0 (W) x 866.1 (H) x 86.7 (D) mm / 58.6 (W) x 34.1 (H) x 3.4 (D) inches
Weight
42.1 kg (92.8 lbs)
Detection Method
IR scanning method
Operating System
(Multi Touch) Windows8, Windows7
(Single Touch) Windows8, Windows7, Windows XP, Windows Vista
Multi-touch
More than 10 touches (limited accuracy)
PC Connector
USB V2.0 Full Speed
Product Specifications | 39
Page 42

Protective Glass
Material Tempered glass
Thickness 4.0 mm
Surface Treatment Anti-Glare coating
Transparency More than 89%
Reflection Rate δ2%
Surface Hardness 6H
Impact Resistance 100 cm
VESA compatible mounting interface
400 mm x 400 mm (M6, 4 Holes)
Power Management
VESA DPM
Plug & Play
VESA DDC2B
Accessories
Setup manual, Power Cord, Remote Control, AAA Battery x 2
NOTE
Technical specifications are subject to change without notice.
40 | Product Specifications
Page 43

Appendix – Supported Media
VIDEO SPECIFICATIONS
File
extension
.mpg
.mpeg
.ts
.trp
.to
.m2ts
.vob MPEG2-PSMPEG-2
.mp4 MP4 MPEG-4
.mkv MKV H.264 1080P 30fps 20Mbps
Container
− MPEG-2
MPEG2-TSMPEG-2
Video
codec
Video
Video
H.264 1080P 30fps 20Mbps
Video
AVC
H.264 1080P 30fps 20Mbps
MPEG-1 1080P 30fps 20Mbps
MPEG-2
Video
Maximum
resolution
1080P 30fps 20Mbps
1080P 30fps 20Mbps
1080P 30fps 20Mbps
1080P 30fps 20Mbps
1080P 30fps 20Mbps
Maximum
frame
rate
Maximum
bit rate
MPEG-1
Audio
Layer2
and 3
AAC WMA L-PCM
MPEG-4
AVC
.avi AVI MPEG-2
Video
MPEG-4
AVC
H.264 1080P 30fps 20Mbps
.asf
.wmv
* Some videos may not be able to be played. In particular, MP4 videos may not be able to be played by the encoder.
ASF H.264 1080P 30fps 20Mbps
MPEG-2
Video
MPEG-4
AVC
WMV3 1080P 30fps 20Mbps
1080P 30fps 20Mbps
1080P 30fps 20Mbps
1080P 30fps 20Mbps
1080P 30fps 20Mbps
1080P 30fps 20Mbps
Appendix – Supported Media | 41
Page 44

AUDIO SPECIFICATIONS
File extension Audio codec Bit rate Sampling rate
.mp3
.m4a
.AAC
.wma
.asf
N/A
(Movie file only)
MPEG1 Audio
Layer 3
AAC, HEAAC 24Kbps - 384Kbps 8kHz - 48kHz
WMA 128Kbps - 320Kbps 8kHz - 48kHz
LPCM 64Kbps - 1.5 Mbps 8kHz - 48kHz
32Kbps - 320Kbps 32kHz - 48kHz
IMAGE SPECIFICATIONS
File extension Codec (format) Photo Resolution
baseline 15360x8640
.jpg JPEG
progressive 1024x768
non-interlace 9600x6400
.png PNG
interlace 1200x800
.bmp BMP -- 9600x6400
42 | Appendix – Supported Media
Page 45

Manufacturer’s Recycling and Energy Information
IT Equipment Recycling Information
Acer is strongly committed to environmental protection and views recycling, in the form of
salvaging and disposal of used equipment, as one of the company's top priorities in minimizing the
burden placed on the environment.
We at Acer are very conscious of the environmental effects of our business and strive to identify
and provide the best working procedures to reduce the environmental impact of our products.
For more information and help when recycling, please go to this website: http://www.acergroup.com/public/Sustainability/
Visit www.acer-graoup.com for further information on the features and benefits of our other
products.
Disposal instructions
Do not throw this electronic device into the trash when discarding.
To minimize pollution and ensure utmost protection of the global environment, please recycle. For
more information on the Waste from Electrical and Electronics Equipment (WEEE) regulations,
visit http://www.acer-group.com/public/Sustainability
Energy Saving
This monitor features an advanced energy saving capability. When a Display Power Management
signal is sent to the monitor, the Energy Saving mode is activated. The monitor enters a single
Energy Saving mode.
Mode Power consumption LED color
Normal Operation*1, *2 Approx. 140 W Green
Energy Saving Mode*1, *3
(Power Save)
Energy Saving Mode*1, *3
(AUTO STANDBY)
Power Off Less than 0.5 W Red
*1: without any option, with factory settings.
*2: depends on destination.
*3: VGA input only.
Less than 0.5 W Amber
Less than 0.5 W Red
Manufacturer’s Recycling and Energy Information | 43
Page 46

WEEE Mark (European Directive 2012/19/EU)
Disposing of your used product: In the European Union
EU-wide legislation as implemented in each Member State requires that used electrical and
electronic products carrying the mark (left) must be disposed of separately from normal household
waste. This includes monitors and electrical accessories, such as signal cables or power cords.
When you dispose of such products, please follow the guidance of your local authority or ask the
shop where you purchased the product, or if applicable, follow applicable legislation or agreement
you may have. The mark on electrical and electronic products may only apply to the current
European Union Member States.
Outside the European Union
If you wish to dispose of used electrical and electronic products outside the European Union,
please contact your local authority and ask for the correct method of disposal.
For EU: The crossed-out wheeled bin implies that used batteries should not be put to
the general household waste! There is a separate collection system for used batteries,
to allow proper treatment and recycling in accordance with legislation.
According the EU directive 2006/66/EC, the battery can't be disposed improperly. The
battery shall be separated to collect by local service.
44 | Manufacturer’s Recycling and Energy Information
 Loading...