

Page 1
ACCUSPLIT AE1790WPR Pedometer
9789
�
STEP
DIST
CAL
◴
▶
INSTRUCTIONS
Congratulations on taking the first step to wellness
with your purchase of an ACCUSPLIT pedometer.
It’s easy to set up your new pedometer.
Just follow the steps below, and start walking!
DISPLAY MODES
• STEP: STEP mode shows your step count
since last reset, up to 1,000,000 steps.
• DIST: DISTANCE mode shows distance
walked or jogged since last reset.
• CAL:
CALORIE mode shows calories
burned through step activity
since last reset.
•
◴: CLOCK mode shows time of day.
• ◯: ACTIVITY TIMER MODE shows
Red:
MODE
Blue:
SET
total activity time in minutes and seconds since last reset. The timer
runs automatically whenever steps are being recorded.
White:
RESET
You are also helping to support the cause
of breast cancer awareness and research.
A portion of the proceeds from your purchase
will be donated to a breast cancer initiative.
SETTING UP YOUR PEDOMETER
To record your distance and calories accurately, you
will need to set your stride length and body weight.
Finding Your Stride Length:
length of one of your steps, measured from “toe to
toe.” To measure, walk 10 steps with your normal
stride and measure the TOTAL DISTANCE from the
toe of your starting step to the toe of your 10th step
(see diagram below). Divide the TOTAL DISTANCE
by 10, and multiply the decimal portion by 12 to find
your stride length in feet and inches. Example: If you
walk 23 feet in 10 steps, your stride length is 2.3 feet.
Multiply 0.3 x 12 = 4. Your stride length is 2 feet, 4
inches.
Setting Your Stride Length:
MODE button until indicator points to “DIST.” Press
the blue SET button once to enter setting mode.
Display will shift to show stride, in feet and inches.
Press and hold down the blue SET button to increase
stride length. Press the red MODE button to exit
setting mode.
Note: Pressing the white RESET button resets
stride length to 2' 0".
Setting Your Weight:
button until indicator points to “CAL.” Press the blue
SET button once to enter setting mode, then press
and hold the blue SET button to increase weight
(in pounds). Press the red MODE button to exit setting
mode.
Note: Pressing the white RESET button resets weight
to 120 lbs.
Setting the Clock:
button until indicator points to “◴.” Press the white
RESET button. The dash will stop flashing. Press and
hold down the red MODE button until the correct
hour is displayed; release button. Press and hold
down the blue SET button until the correct minutes
are displayed; release button. Press the white RESET
button to exit setting mode. The dash will begin
flashing. The clock is now set.
Repeatedly press the red MODE
Your stride length is the
Repeatedly press the red
Repeatedly press the red MODE
E Rig! W Mr! Lv W!
ACCUSPLIT Lftl
First, loop the
pedometer leash slot
Next, loop the metal
clip, then clasp clothing
Or, loop a
badge holder,
then put into pocket
Or, loop a belt or belt loop
Adjusting your Pedometer’s Measurement
Sensitivity
step counters. However, some walkers may find
that their step counts tend to be a bit too high, or
too low. All AE1700 models come with a sensitivity
adjustment, to help account for individual
differences. The adjustment switch has three
positions: “+,” “-,” and center. The adjustment
switch is located on the bottom of the pedometer, on
the right-hand side when looking from the front.
Adjustment Procedure:
STEPS display to see how many steps were actually
counted. Repeat once to make sure results are
about the same. If the pedometer counts fewer
steps than you actually walked, slide the sensitivity
adjustment towards the “+” icon. This will increase
recorded steps by about 10%. If the pedometer
counts more steps than you actually walked, slide
the sensitivity adjustment towards the “-” icon. This
will decrease recorded steps by about 10%.
WEARING YOUR PEDOMETER
While gently holding the belt clip open, slide the
pedometer onto your belt or the top edge of your
pants or skirt. It should fit snugly and level, above
one knee.
Note: The pedometer should be as vertical as
possible. Walkers with larger stomachs may find it
helpful to wear the pedometer farther back on the
body, toward one hip.
The cover must be closed for the pedometer to
work. To avoid losing or dropping your pedometer,
use the included leash and clip to fasten the
pedometer securely to your clothing.
AE1700 pedometers are highly accurate
Take 100 steps, then check
(Badge holder
not included)
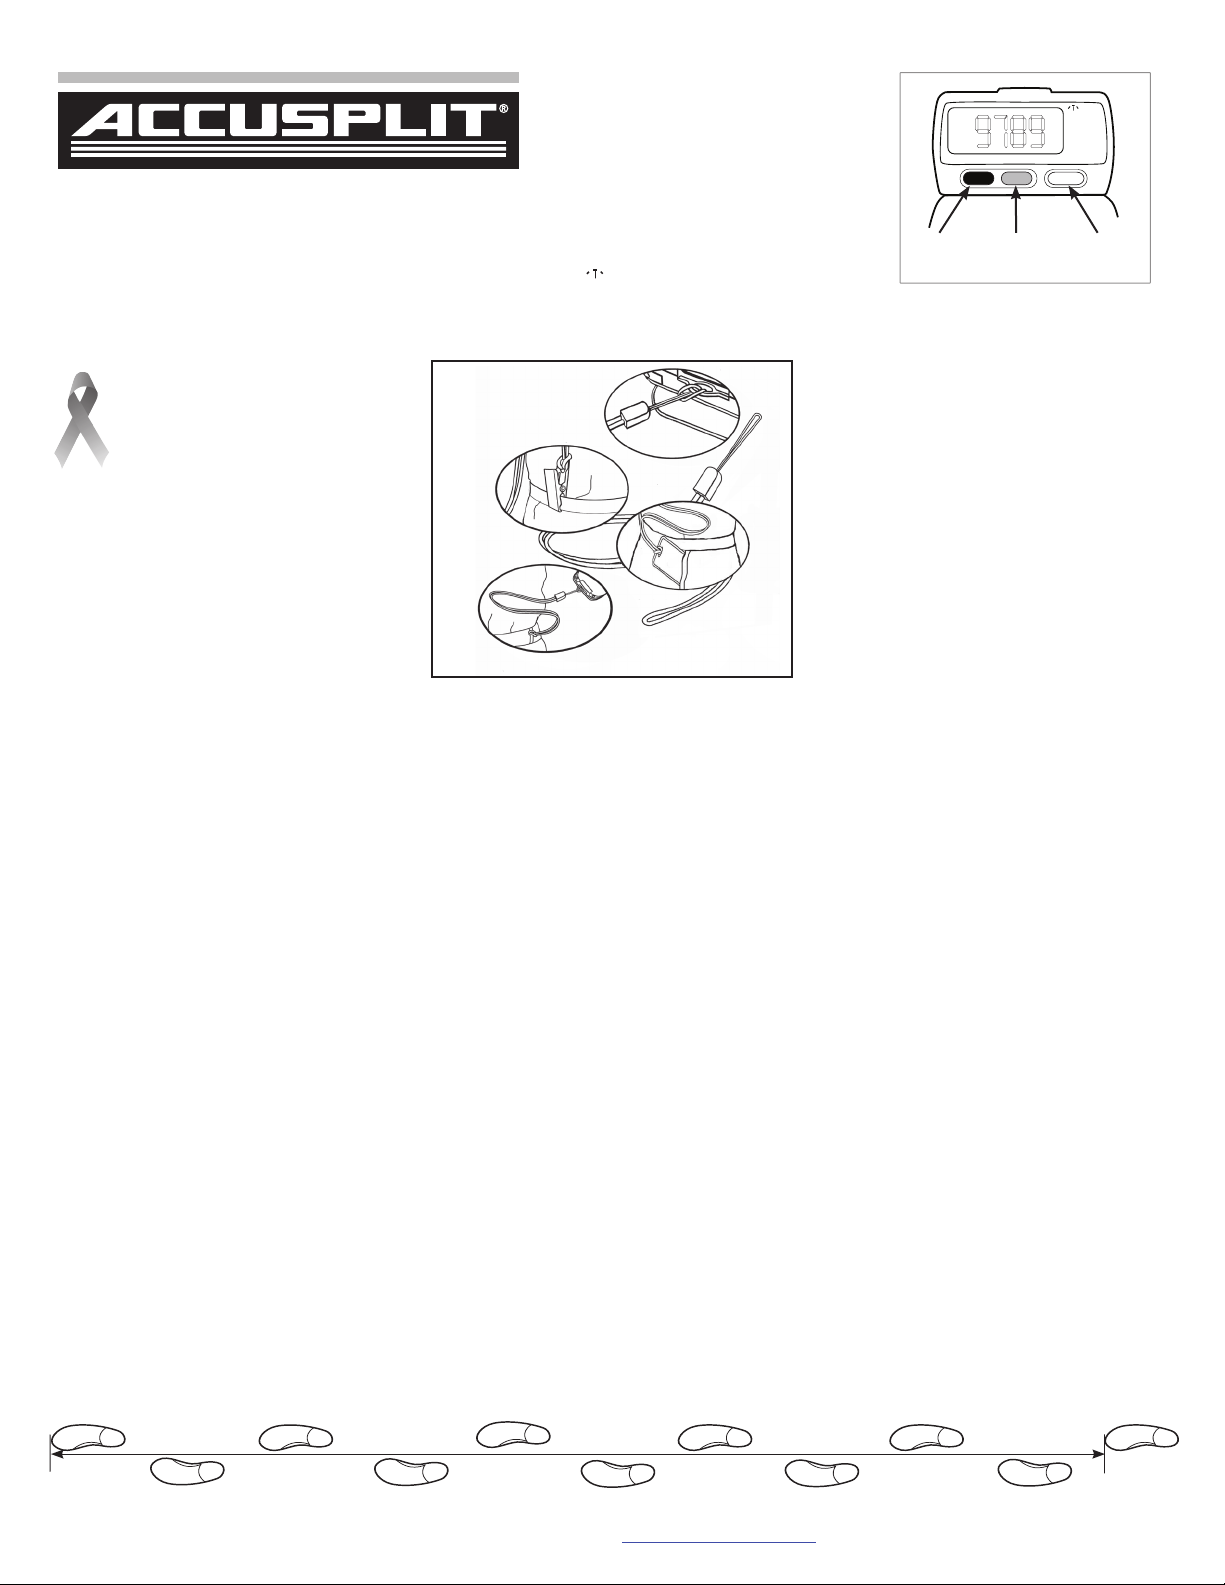
Attaching the Leash: Attach the pedometer to the
leash by looping the leash through the pedometer
leash slot. Next, loop the leash through the metal
clip, then clasp the waistband of your clothing
with the pedometer belt clip. You can also use a
safety pin to fasten the leash to your clothing, loop
the leash through your belt or belt loop, or use a
badge holder.
VIEWING YOUR RESULTS
Once you put on your pedometer with the cover
closed, it will automatically begin to record your
steps, distance, calories burned, and activity time.
Repeatedly press the red MODE button to cycle
through the pedometer modes:
STEP → DISTANCE → CALORIE → CLOCK →
ACTIVITY TIMER → STEP
RESETTING YOUR PEDOMETER
Most people prefer to reset step, distance, and
calorie counts daily. To reset: From STEP, DISTANCE,
or CALORIE mode, press and hold the white RESET
button for at least 2 seconds.
CHANGING UNITS (English vs. Metric)
The Pedometer can display either in English units
(inches, miles, and pounds - this is the default), or in
Metric units (cm, km, and kg). To change between
display modes, push and hold the red MODE button
for 5 seconds, until you see all display indicators
momentarily come on. You can check to see which
system of units you are using by repeatedly pressing
the red MODE button until it displays either MI or KM
when showing Distance traveled.
REPLACING THE BATTERY
When the display starts to dim or goes blank, it is
time to replace the battery. Your pedometer uses one
Type L1142 (LR43) 1.5 volt silver oxide battery.
To replace:
1. Insert a coin into the slot on the front of the
case, and twist counterclockwise to loosen
the battery door.
2. Remove battery door and take out the old
battery. Replace it with a new battery. The
battery’s positive (+) terminal should be
FACE UP while you put it into the pedometer.
3. Put the battery door back on and twist the
coin clockwise to tighten.
10 steps
ACCUSPLIT, Inc. • 2290M Ringwood Ave. • San Jose, CA 95131
800-965-2008 • 925-226-0888 • FAX 925-463-0147 • www.ACCUSPLIT.com • [email protected]
970-054
 Loading...