

Page 1
ACCUSPLIT®
170
JW200
Di
g
iw
a
lkerX
L
.com
4728
EAGLE
AE120XLE, AE140XLE, and AE170XLE
INSTRUCTIONS
Congratulations on taking the first step to wellness
with your purchase of an ACCUSPLIT pedometer.
It’s easy to use your new pedometer, with nothing to set up.
Just follow the steps below, and start walking!
Key Features
• Built around the Japanese-made JW200 PedometerEngine™
Step Sensor, the current gold standard for accuracy.
• The ACCUSPLIT exclusive case makes this the slimmest
available pedometer built around the JW200 Step Sensor.
• Chromed, Spring Steel clip resists breakage.
• Case includes two leash slots, for attaching safety leash
on either side. Made from tough polycarbonate plastic.
For this special Educational series, the stride length (for AE140XLE and
AE170XLE) and weight settings (for AE170XLE) are fixed. Therefore,
students will all get the same amount of credit for distance walked (1.75
ft stride, which is 3000 steps per mile) and calories burned (weight used
is 100 lbs), and there is no special setup required!
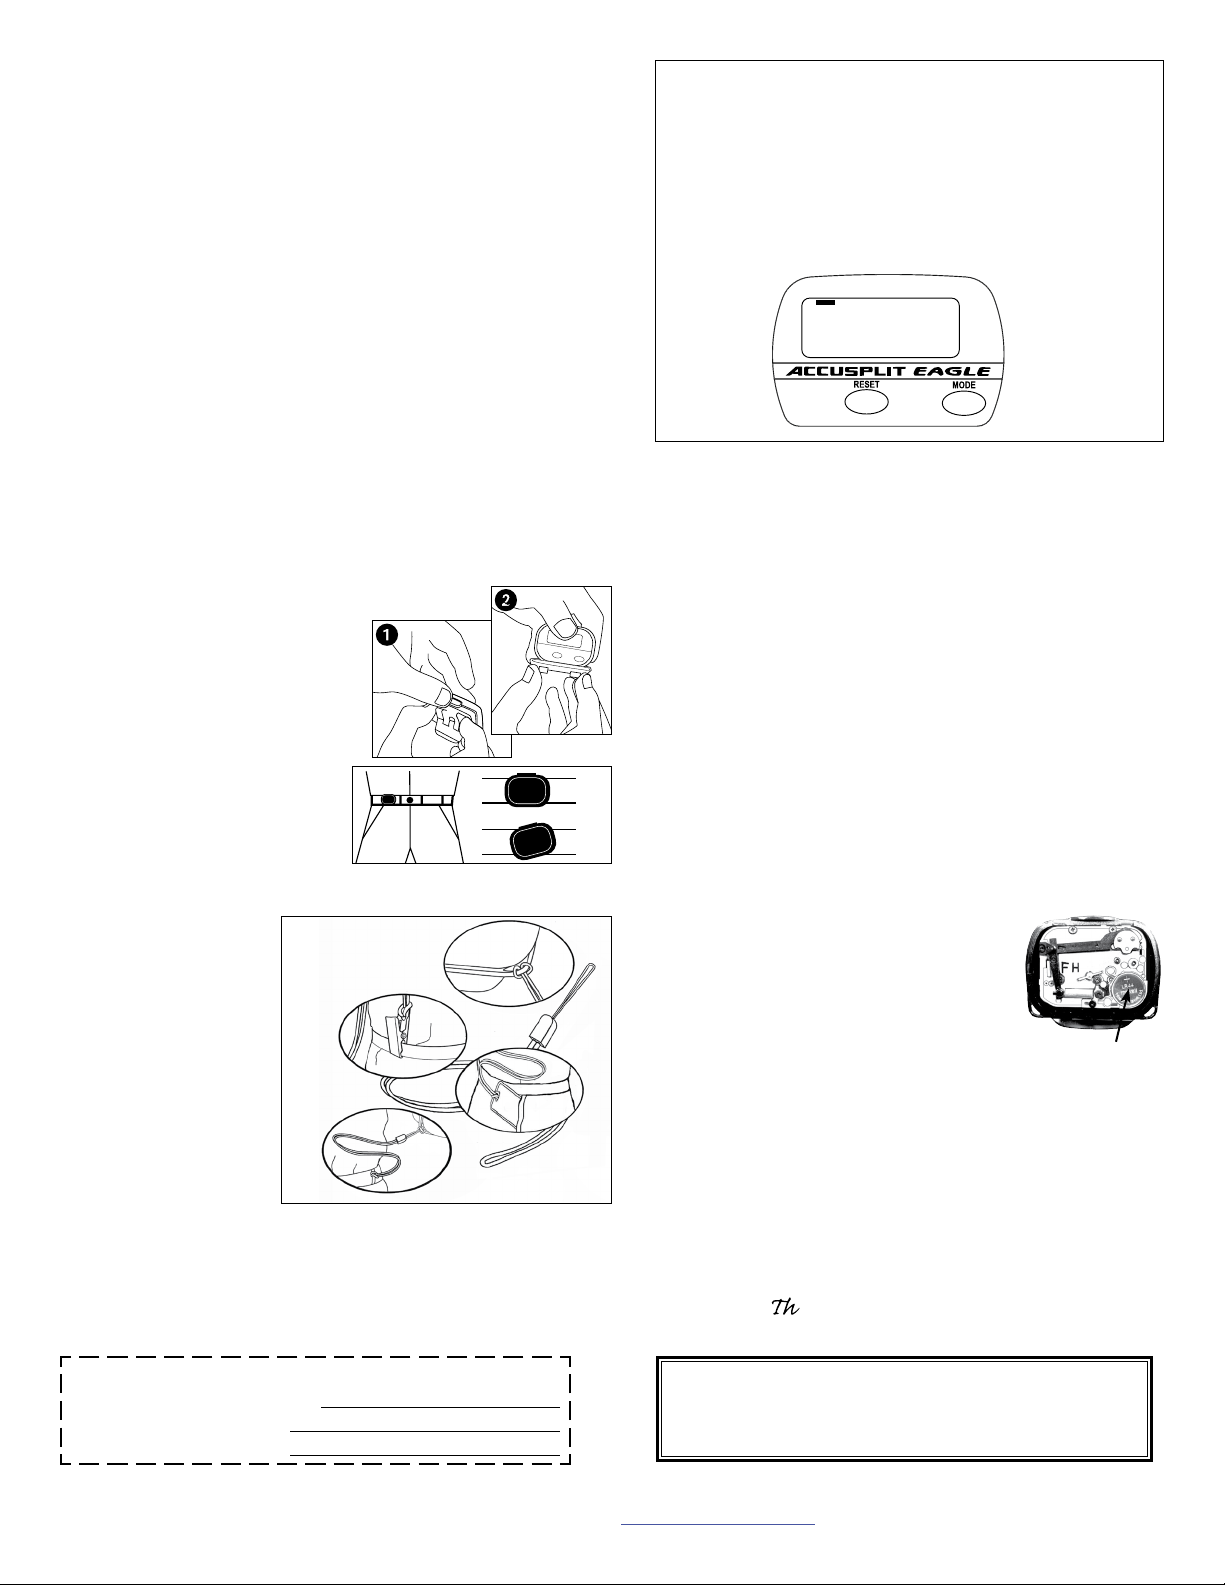
HOW TO OPEN YOUR PEDOMETER.
See diagrams at right.
WEARING YOUR PEDOMETER
While gently holding the belt clip open,
slide the pedometer onto your belt
or the top edge of your pants or skirt.
It should fit snugly and level, above
one knee.
Note: The pedometer should be as
vertical as possible. Walkers with
larger stomachs may find it helpful
to wear the pedometer farther back
on the body,
The cover must be closed for the pedometer to work.
To avoid losing or dropping
your pedometer, use the
included leash and clip to
fasten the pedometer
securely to your clothing.
Attaching the Leash
1. Attach the pedometer to
the leash by looping the
thin side of the leash
through the one of the
leash slots on the
pedometer case.
2. Put the pedometer onto
your clothing as
discussed above.
3. Attach the alligator clip to a belt loop or the top edge
of the pants or skirt.
Note: You can also use a safety pin to fasten the leash to your clothing,
loop the leash through your belt or belt loop, or use a badge holder.
toward one hip.
First, loop leash
through slot on side
of pedometer.
Next, c lasp clothi ng
Or, loop a belt
or belt loop
™
S
TEP TIME DIST CA
L
ACCUS
P
LIT
EAGLE
RESE
T
170
XL
E
MODE
yes
no
Or, loop a
badge holder, then
put into pocket
(Badge holder
not included)
REGULAR DISPLAY MODES
Press the yellow MODE button to cycle through:
• STEP: STEP mode shows step count.
• TIME: AUTO ACTIVITY TIMER MODE shows total
activity time in min and sec.
• DIST: DISTANCE mode shows distance traveled (mi).
(AE140XLE and AE170XLE)
• CAL: CALORIE mode shows calories burned. (AE170XLE)
IGI
ALKERXL.COM
D
W
-
STEP TIME DIST C AL
5638
E
XL
VIEWING YOUR RESULTS
Once you put on your pedometer with the cover closed, it will
automatically begin to record your steps, activity time, distance
(AE140XLE and AE170XLE), and calories (AE170XLE) burned.
Repeatedly press the MODE button to cycle through the pedometer
modes:
STEPS TIME DISTANCE CALORIE STEPS
RESETTING YOUR PEDOMETER
Most people prefer to reset counts daily. To reset your counts: From
STEP, TIME, DISTANCE (AE140XLE and AE170XLE), or CALORIE
(AE170XLE) mode, press and hold the yellow RESET button for at
least 2 seconds. You’ll see the values all go back to zero.
REPLACING THE BATTERY
When the display starts to dim or goes blank, it is time to replace
the battery. Your pedometer uses one Type LR44 1.5 volt alkaline
battery.
To replace:
1. Insert a coin into the slot on the bottom of the case, and
twist to loosen the faceplate. Remove faceplate and set aside
2. Locate the battery holder as seen on sketch.
Pull out the old battery, and push a new LR-44
battery into the holder, with positive terminal
(+) facing up.
3. Snap faceplate back into place.
SPECIFICATIONS, FEATURES, and FUNCTIONS
Description of Functions
• Counts steps up to 99,999 then rollover
• Counts time spent i
n step activity, up to 999 Min 59 sec, then
rollover. Automatically counts whenever step activity is occurring.
• Counts distance traveled during step activity (AE140XLE and
AE170XLE), up to 999.99 mi, then rollover. Automatically
counts whenever step activity is occurring.
• Counts Calories consumed during step activity (AE170XLE), up
to 9,999.9 Kcal, then rollover. Automatically counts whenever
step activity is occurring.
Eat Right! Walk More! Live Well!
e ACCUSPLIT Lifestyle
Battery
REGISTER NOW Please return
your AE100XLE pedometer registration to the Repair Center address
in the warranty, and we will let you
know about future products.
Email (preferred)
User
NO-PROOF-OF-PURCHASE LIMITED WARRANTY
Free service for first year of ownership;
$12 fee for service thereafter. See label inside unit for date.
See www.ACCUSPLIT.com/support for details
ACCUSPLIT, Inc. • 3090 Independence Drive, Suite 148 • Livermore, CA 94551 USA
800-935-1996 • 925-290-1900 • FAX 925-290-1930 • www.ACCUSPLIT.com • support@ACCUSPLIT.com
970-082C
 Loading...