How it Works
Log In / Sign Up
Buy Points
How it Works
FAQ
Contact Us
Questions and Suggestions
Users
Accuphase
Loading...
C
C-200
7
C-2000
2
C-2002
C-200 II
C-200L
5
C-200S
C-200V
3
C-200X
3
C-202
3
C-2110
2
C-2120
2
C-2150
C220
3
C222
7
C-230
3
C-2300
C-240
5
C-2400
2
C2410
4
C-2420
2
C-245
4
C-2450
C-250
3
C-260
3
C-265
3
C-27
2
C-270
3
C-270V
3
C-275
C-275-V
2
C-280
5
C-2800
2
C-280-L
4
C280V
4
C-2810
4
C-2820
C-290
3
C-2900
C-290-V
2
C-300
C-37
C-3800
C-3850
2
C-3900
2
C-47
C-7
5
Cables
Cinch Cable
CX-260-E
D
D9
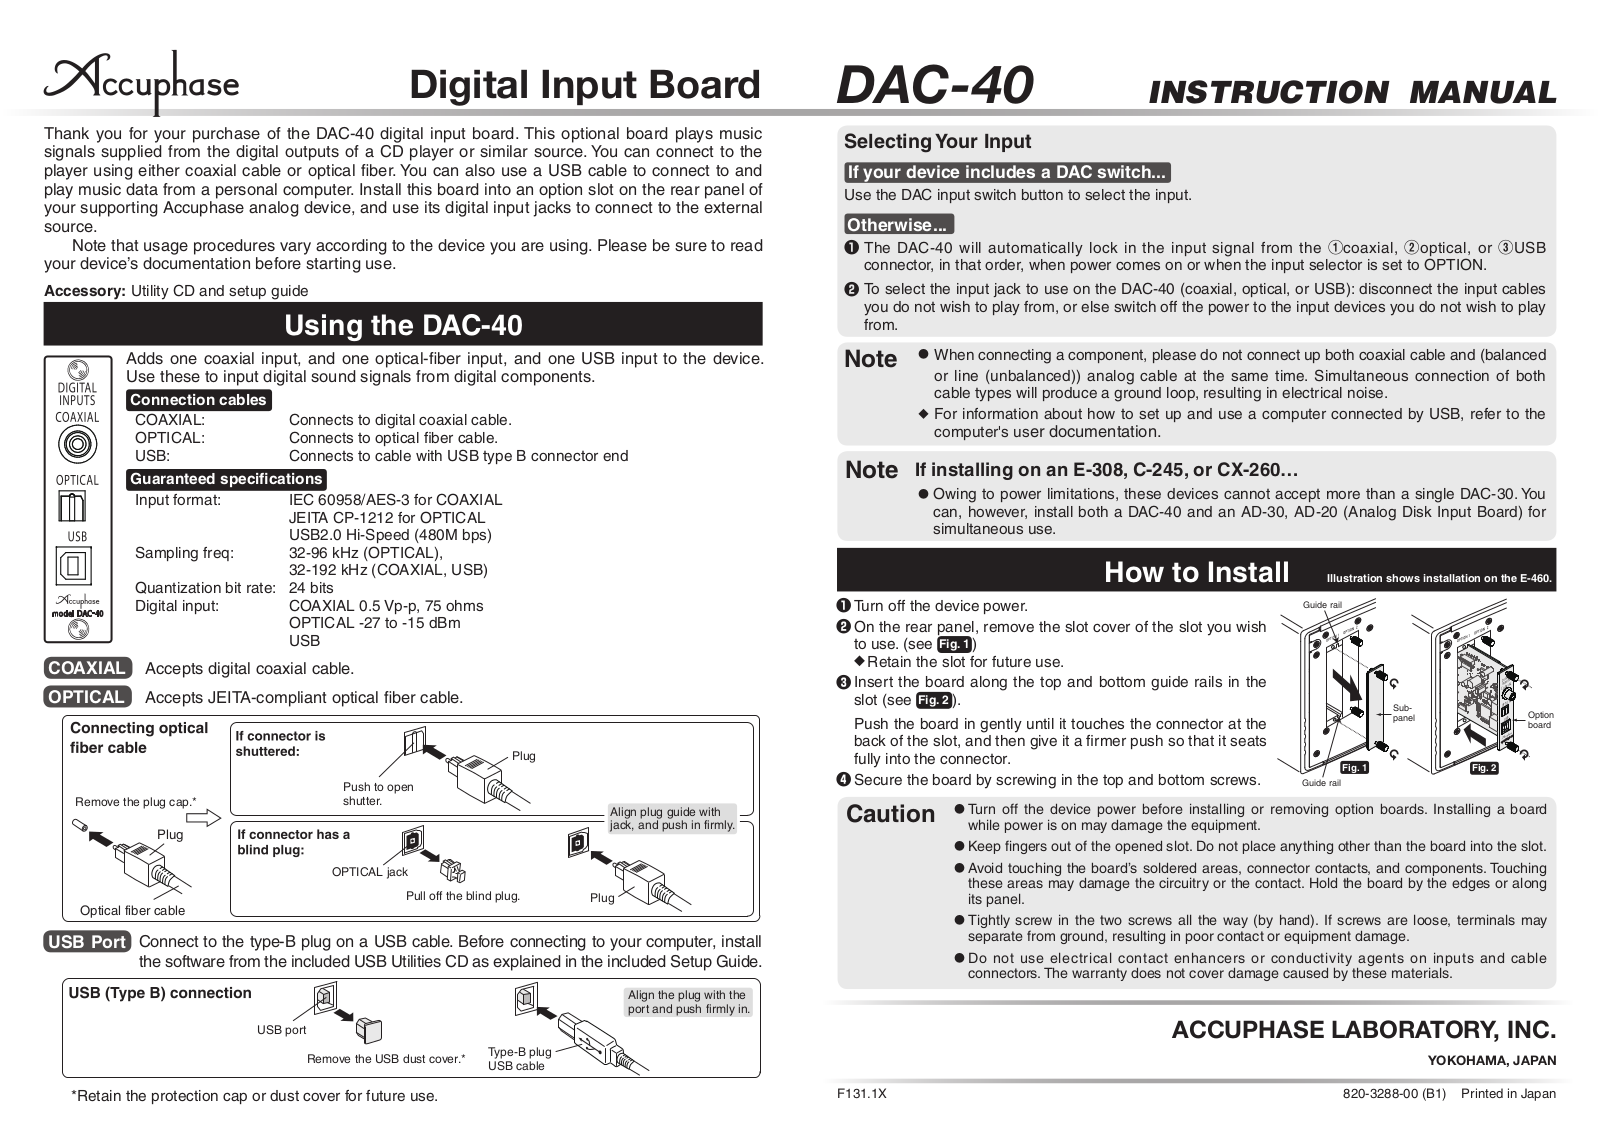
DAC-40
DAC-50
DC-101
2
DC-300
2
DC-330
3
DC-37
2
DC-61
DC-80
DC801
2
DC-81
3
DC-81L
DC-901
DC-91
DC-950
DF-45
DF-55
DG-28
DG-38
DG-48
Digital Option
DP-100
DP-100-G
DP-11
2
DP-11-DE
DP-400
DP-410
DP-430
DP-500
DP-55
2
DP-550
DP-55-DE
DP-55-V
2
DP-560
DP-57
2
DP-60
2
DP-600
2
DP-60-DE
DP-65
DP-65-DE
DP-65V
2
DP-65-VDE
DP-70
2
DP-700
DP-70V
DP-720
DP-75
DP-75V
2
DP-78
DP-80
2
DP-800
2
Loading...
Loading...
Nothing found
DAC-40
instruction manual [ja]
2 pgs
1.92 Mb
0
Table of contents
Loading...
Accuphase DAC-40 instruction manual [ja]
...
Accuphase instruction manual [ja]
Download
Specifications and Main Features
Frequently Asked Questions
User Manual
Download
Page 1
Page 2
Loading...
+
hidden pages
Unhide
You need points to download manuals.
1 point = 1 manual.
You can buy points or you can get point for every manual you upload.
Buy points
Upload your manuals