

Page 1
Advanced Setup
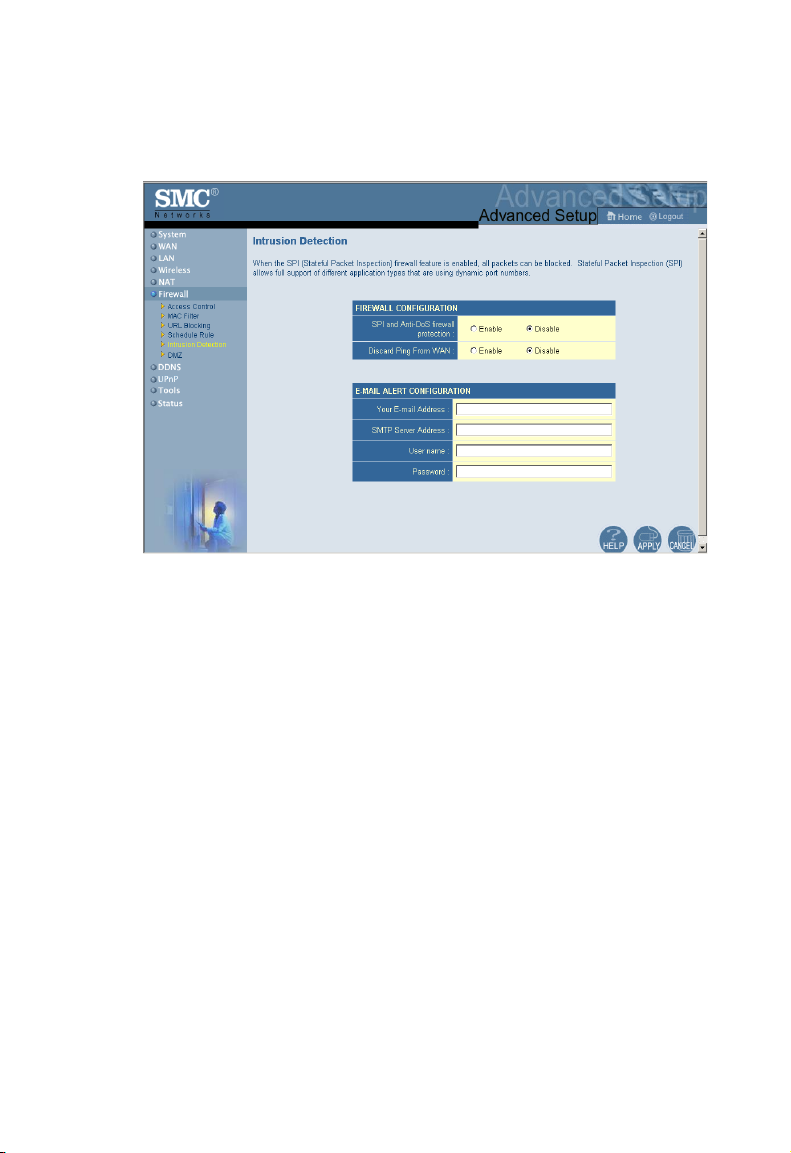
Intrusion Detection
• SPI and Anti-DoS (Denial-of-Service) firewall protection
(Default: Disabled) – The Intrusion Detection Feature limits
access for incoming traffic at the WAN port. When the SPI
(Stateful Packet Inspection) feature is turned on, all incoming
packets will be blocked except for those types marked with a
check in the Stateful Packet Inspection section.
• Discard Ping from WAN (Default: Disabled) – Prevents the
router from responding to any PING request on the WAN port.
• E-mail Alert Configuration – Enter your E-mail address.
Specify your SMTP and POP3 servers, user name, and
password.
61
Page 2

Configuring the Wireless Barricade g Router
DMZ (Demilitarized Zone)
If you have a client PC that cannot run an Internet application
properly from behind the firewall, then you can open the client up
to unrestricted two-way Internet access. Enter the IP address of
a DMZ host to this screen. Adding a client to the DMZ may
expose your local network to a variety of security risks, so only
use this option as a last resort.
62
Page 3
Advanced Setup
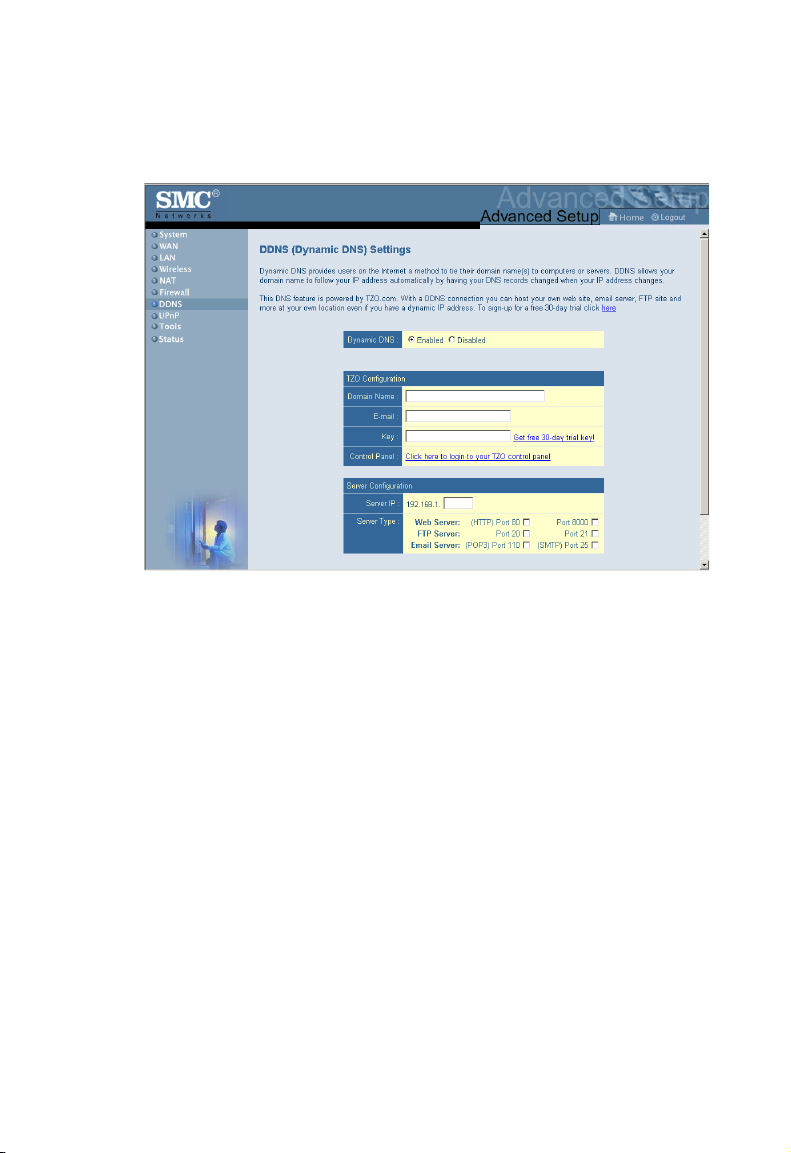
DDNS (Dynamic DNS) Settings
Domain Name – A series of alphanumeric strings separated by
periods that maps to the address of a the Router network
connection and identifies the owner of the address.
Dynamic DNS provides users on the Internet with a method to tie
their domain name to the router or server. DDNS allows your
domain name to follow your IP address automatically by having
your DNS records changed when your IP address changes.
The section also has a “Server Configuration” section that
automatically opens the port options checked in the Virtual
Server section. Simply enter in the IP Address of your server,
such as a web server, and then click on the port option “HTTP
Port 80” so users can access your server from the WAN
connection (Internet).
63
Page 4
Configuring the Wireless Barricade g Router
This DNS feature is powered by TZO.com. With a DDNS
connection you can host your own web site, E-mail server, FTP
site, and more at your own location even if you have a dynamic
IP address. (Default: Disable)
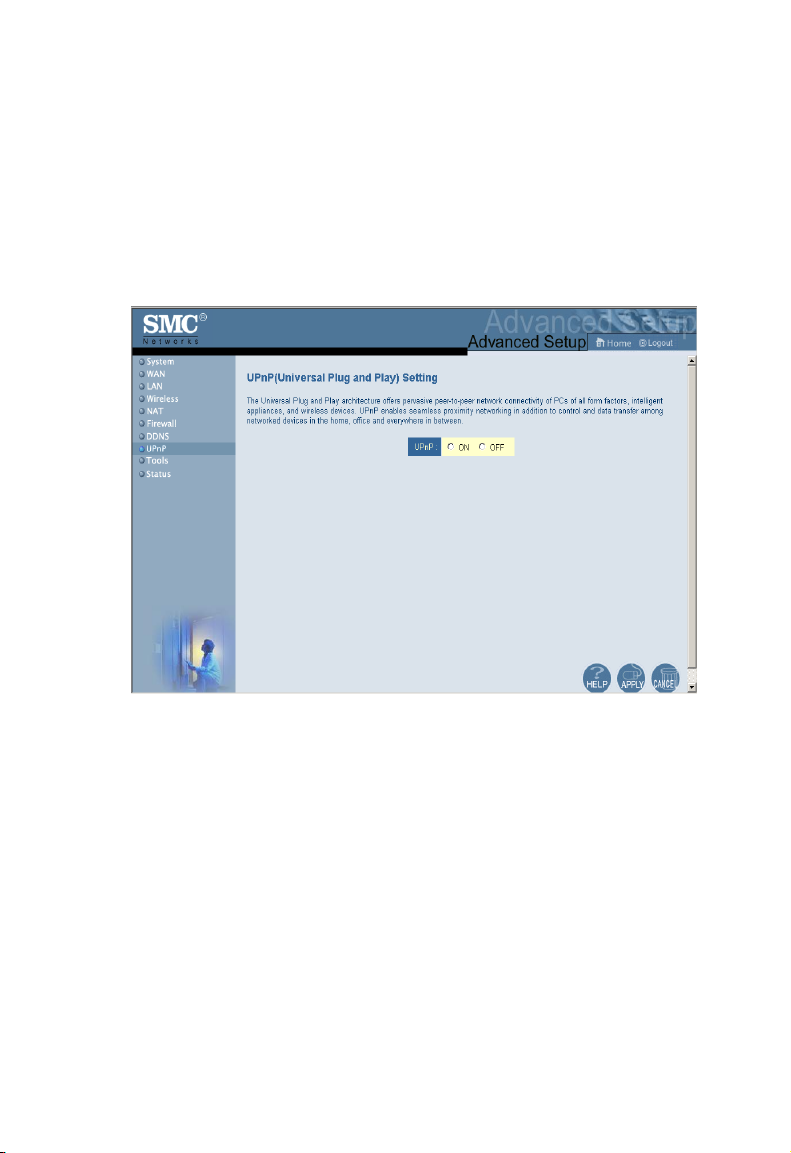
UPnP (Universal Plug and Play) Setting
Enable UPnP by checking ON in the screen above. UPnP allows
the device to automatically:
• dynamically join a network
• obtain an IP address
• convey its capabilities and learn about the presence and
capabilities of other devices.
64
Page 5

Advanced Setup
Tools
Use the Tools menu to back up the current configuration, restore
a previously saved configuration, restore factory settings, update
firmware, and reset the Router.
Tools - Configuration Tools
• Backup – Saves the Router’s configuration to a file.
• Restore – Restores settings from a saved backup
configuration file.
• Restore to factory defaults – Restores the Router settings
back to the factory defaults.
65
Page 6

Configuring the Wireless Barricade g Router
Tools - Firmware Upgrade
Use this screen to update the firmware or user interface to the
latest versions. Download the upgrade file from the SMC web
site (www.smc.com) and save it to your hard drive. In the
Upgrade Target field, choose Firmware. Then click Browse to
look for the previously downloaded file. Click APPLY. Check the
Status page Information section to confirm that the upgrade
process was successful.
66
Page 7

Advanced Setup
Tools - Reset
Click APPLY to reset the Router. The reset will be complete
when the power LED stops blinking.
Note: If you use the Reset button on the front panel, the
Router performs a power reset. If the button is held
depressed for over five seconds, all the LEDs will
illuminate and the factory settings will be restored.
67
Page 8

Configuring the Wireless Barricade g Router
Status
The Status screen displays WAN/LAN connection status,
firmware, and hardware version numbers, illegal attempts to
access your network, as well as information on DHCP clients
connected to your network.
The following items are included on this screen:
Section Description
INTERNET Displays WAN connection type and status.
GATEWAY Displays system IP settings, as well as DHCP and Firewall
INFORMATION Displays the number of attached clients, the firmware
Security Log Displays illegal attempts to access your network.
Save Click on this button to save the security log file.
Clear Click on this button to delete the access log.
Refresh Click on this button to refresh the screen.
DHCP Client Log Displays information on all DHCP clients on your network.
status.
versions, the physical MAC address for each media interface,
as well as the hardware version and serial number.
68
Page 9

TROUBLESHOOTING
The information outlined in this section describes some useful
steps for getting your computer and the Router online.
A. Verify your connection to the Router
If you are unable to access the Router’s web-based
administration pages then you may not be properly connected or
configured. The screen shots in this section were taken on a
Windows 2000 machine, but the same steps will apply to
Windows 95/98/Me/XP.
To determine your TCP/IP configuration status please follow the
steps below:
1. Click Start then choose Run.
2. Type cmd or command to open a DOS prompt.
3. In the DOS window, type ipconfig and verify the information
that is displayed.
4. If your computer is set up for DHCP, then your TCP/IP
configuration should be similar to the information displayed:
• IP Address: 192.168.2.X (x is number between 100 and
199 by default.)
• Subnet: 255.255.255.0
• Gateway: 192.168.2.1
69
Page 10

Troubleshooting
If you have an IP address that starts with 169.254.XXX.XXX then
see the next section.
If you have another IP address configured, then see section C.
B. I am getting an IP Address that starts with
169.254.XXX.XXX
If you are getting this IP Address, then you need to check that
you are properly connected to the Router.
Confirm that you have a good link light on the Router for the port
this computer is connected to. If not, please try another cable.
If you have a good link light, please open up a DOS window as
described in the previous section and type ipconfig/renew.
If you are still unable to get an IP Address from the Router,
reinstall your network adapter. Please refer to your adapter
manual for information on how to do this.
C. I have another IP Address displayed
If you have another IP address listed then the PC may not be
configured for a DHCP connection. Please refer to “Configuring
Client TCP/IP” on page 12 for information.
Once you have confirmed your computer is configured for DHCP,
then please follow the steps below.
1. Open a DOS window as described above.
70
Page 11

2. Type ipconfig/release.
3. Then type ipconfig/renew.
Troubleshooting
D. The 10/100 LED does not light after a connection is made.
1. Check that the host computer and the Router are both
powered on.
2. Be sure the network cable is connected to both devices.
3. Verify that Category 5 cable is used if you are operating at
100 Mbps, and that the length of any cable does not exceed
100 m (328 ft).
4. Check the network card connections.
5. The 10BASE-T/100BASE-TX port, network card, or cable
may be defective.
71
Page 12

SPECIFICATIONS
Below is an outline of the technical specifications for the
SMC2804WBR.
Standards
IEEE 802.3 10BASE-T Ethernet
IEEE 802.3u 100BASE-TX FastEthernet
IEEE 802.11b
IEEE 802.11g draft
WAN Interface
10BASE-T/100BASE-TX
LAN Interfaces
10BASE-T/100BASE-TX
4 RJ-45 ports: LAN data transfer rate is up to 10/20 Mbps
(10BASE-T half/full duplex) or 100/200 Mbps (100BASE-TX
half/full duplex)
Antenna
2 detachable antennas with reversed SMA connectors
Management
Browser-based management
Both DHCP Server and Client provided
Advanced Features
Dynamic IP Address Configuration – DHCP, DNS
Wireless Security – 64/128-bit WEP encrption, SSID broadcast
disabled, MAC address filtering
Firewall – Access Control, hacker prevention, logging
Virtual Server via NAT & NAPT
Virtual Private Network – PPTP, L2TP, IPSec pass-through
Intrusion Detection, E-mail Alerts, Parental Control
72
Page 13

Specifications
Indicator Panel
Power, WLAN, WAN (Link, Activity), LAN (Link/Activity,
Speed - 10/100 Mbps)
Dimensions
130 x 85 x 32 mm (5.12 x 3.35 x 1.26 in.)
Weight
370 g (13.05 oz)
Input Power
9 V, 1 A
Maximum Current
0.04 A
Power Consumption
5 Watts max. @ 100-240 VAC
Internet Standards
RFC 826 ARP, RFC 791 IP, RFC 792 ICMP, RFC 768 UDP, RFC
793 TCP, RFC 854-859 TELNET, RFC 1321 MD5, RFC 1497
BOOTP Extension, RFC 1570 PPP LCP Extension, RFC 1631
NAT, RFC1661 PPP, RFC 1700 Assigned Numbers, RFC 1866
HTML, RFC 1945 HTTP, RFC 1994 CHAP, RFC 2131 DHCP,
RFC 2637 PPTP
Temperature
Operating 0 to 40 °C (32 to 104 °F)
Storage -40 to 70 °C (-40 to 158 °F)
Humidity
5% to 95% (noncondensing)
max. @ 110 V/240 V
RMS
73
Page 14

Specifications
Compliances
CE Mark
Emissions
FCC Class B
VCCI Class B
Industry Canada Class B
EN55022 (CISPR 22) Class B
C-Tick - AS/NZS 3548 (1995) Class B
Immunity
EN 61000-3-2/3
EN 61000-4-2/3/4/5/6/8/11
Safety
CSA/NRTL (UL1950, CSA 22.2.950)
GS (EN60950)
CB (IEC60950)
74
Page 15

Page 16

FOR TECHNICAL SUPPORT, CALL:
From U.S.A. and Canada (24 hours a day, 7 days a week)
(800) SMC-4-YOU; (949) 679-8000; Fax: (949) 679-1481
From Europe (8:00 AM - 5:30 PM UK Time)
44 (0) 118 974 8700; Fax: 44 (0) 118 974 8701
INTERNET
E-mail addresses:
techsupport@smc.com
european.techsupport@smc-europe.com
support@smc-asia.com
Driver updates:
http://www.smc.com/index.cfm?action=tech_support_drivers_downloads
World Wide Web :
http://www.smc.com
http://www.smc-europe.com
http://www.smc-asia.com
FOR LITERATURE OR ADVERTISING RESPONSE, CALL:
U.S.A. and Canada: (800) SMC-4-YOU; Fax (949) 679-1481
Spain: 34-93-477-4935; Fax 34-93-477-3774
UK: 44 (0) 1932 866553; Fax 44 (0) 118 974 8701
France: 33 (0) 41 38 32 32; Fax 33 (0) 41 38 01 58
Italy: 39 (0) 335 5708602; Fax 39 02 739 14 17
Benelux: 31 33 455 72 88; Fax 31 33 455 73 30
Central Europe: 49 (0) 89 92861-0; Fax 49 (0) 89 92861-230
Nordic: 46 (0) 868 70700; Fax 46 (0) 887 62 62
Eastern Europe: 34 -93-477-4920; Fax 34 93 477 3774
Sub Saharian Africa: 27 0126610232; Fax 27-11 314 9133
North West Africa: 216 71236616; Fax 216 71751415
CIS: 7 (095) 789 35 73; Fax 7 (095) 789 35 73
PRC (Beijing): 86-10-8251-1550; Fax 86-10-8251-1551
PRC (Shanghai): 86-21-6485-9922; Fax 86-21-6495-7924
Taiwan: 886-2-8797-8006; Fax 886-2-8797-6288
Asia Pacific: (65) 6 238 6556; Fax (65) 6 238 6466
Korea: 82-2-553-0860; Fax 82-2-553-7202
Japan: 81-3-5645-5715; Fax 81-3-5645-5716
Australia: 61-2-8875-7887; Fax 61-2-8875-7777
India: 91 22 5696 2790; Fax 91 22 5696 2794
Middle East: 97 14 299 4466 Fax 97 14 299 4664
Thailand: 66 2 651 8733 Fax 66 2 651 8737
If you are looking for further contact information, please visit www.smc.com,
www.smc-europe.com, or www.smc-asia.com.
38 Tesla
Irvine, CA 92618
Phone: (949) 679-8000
Model Number: SMC2804WBR
Revision Number E072003-R01 V.2 F 1.0
 Loading...