

ABtUS AV601-D User Manual
LCD Monitor
Cantilever Mount
(Double Arm)
ABtUS SINGAPORE PTE LTD www.abtussingapore.com
Model: AV601-D
ABtUS SIGAPORE PTE LTD www.abtussingapore.com
ABtUS SINGAPORE PTE LTD www.abtussingapore.com
User Operation Guide
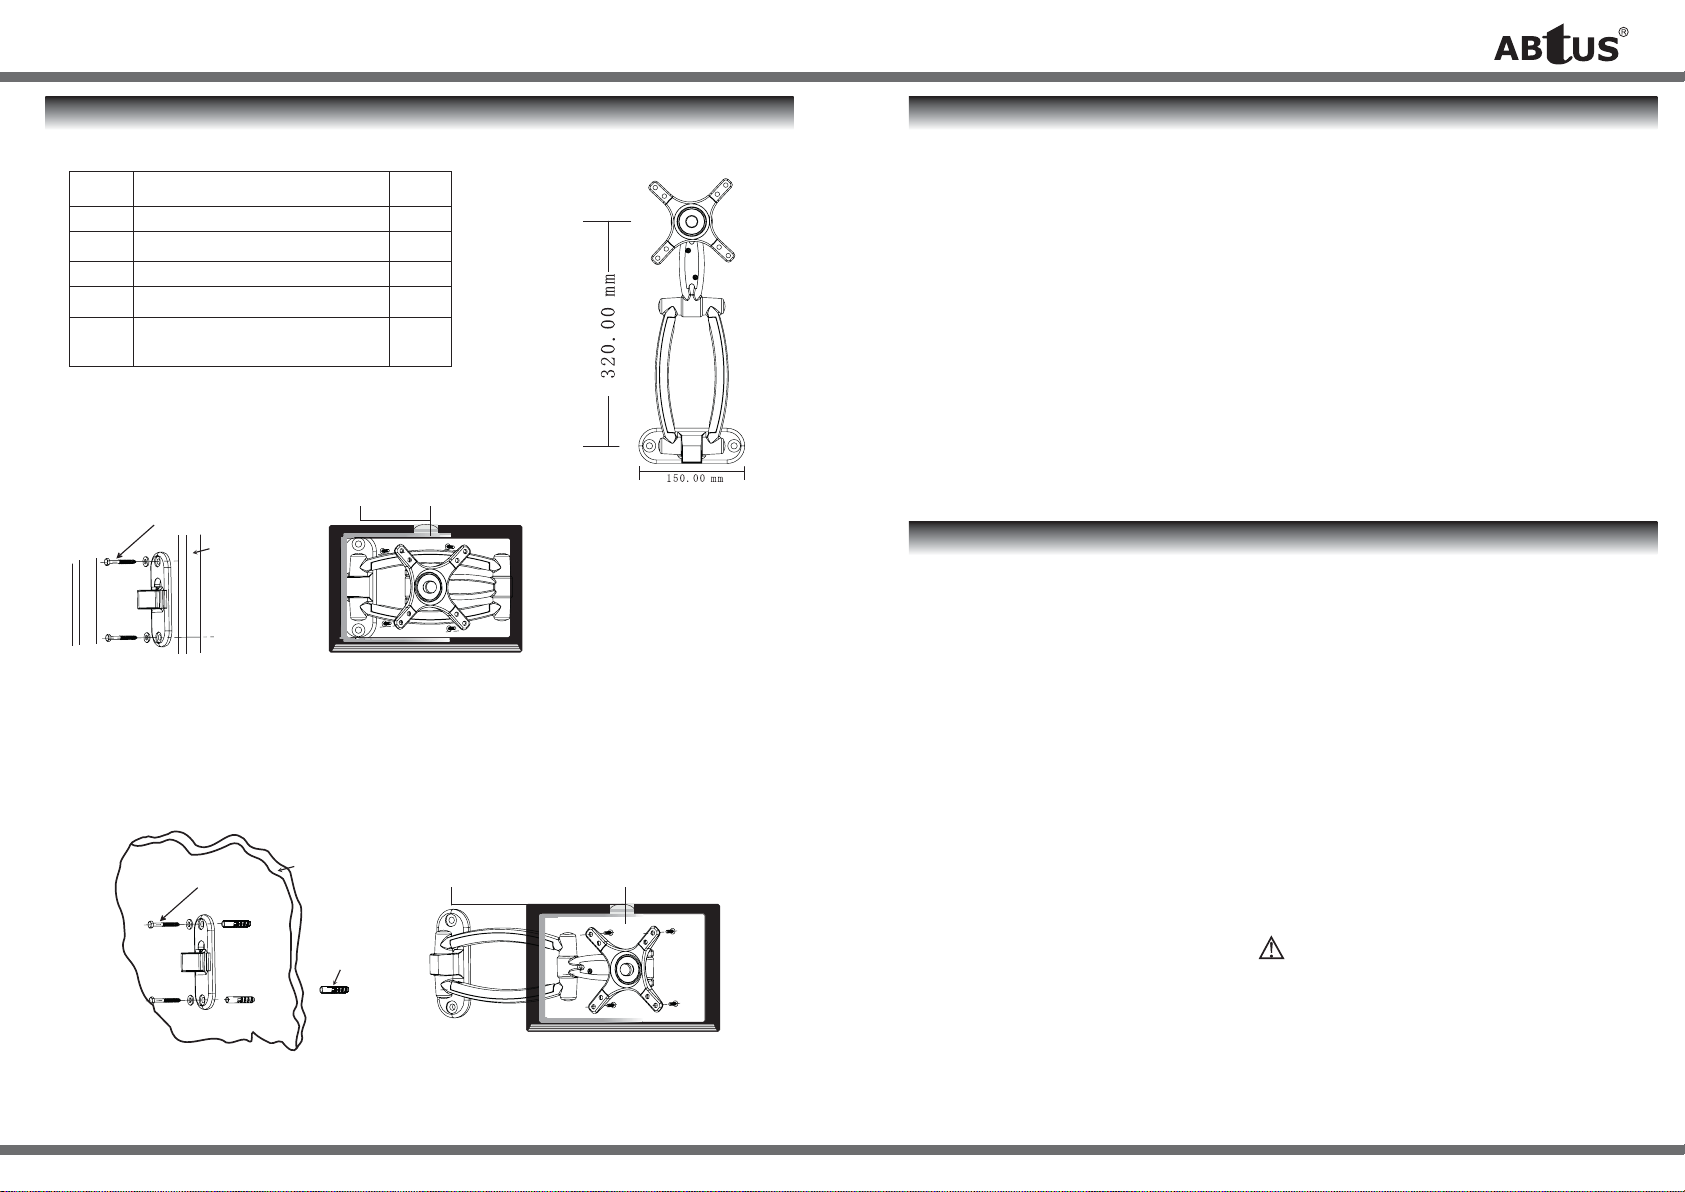
PACKAGE CONTENTS INSTALLATION OF CANTILEVER MOUNT WOOD STUD MOUNTING
The wall plate of Cantilver Mount, must be mounted on the STUD.
ID Description Qty
A Washer Ф 8 x 1.6 2
B Truss Head Screw M4x15 4
C Bottom Head Screw M5x15 4
D Lag Bolt washer ST8 x 50 2
E Masonry Wall Anchor
Ф10 x Ф7 x 45 2
Lag Bolt and washer
Wood stud
Fig 1
Fig 3
80.00mm
SPECIFICATION
10” to 22” LCD TV/Panel
with VESA standards
75/100
Load Capacity
10kg (22lbs)
Position the wall plate in the desired mounting over the stud. Make sure that the wall plate is
straight, use the mounting hole on the Cantilver Mount to do hole markings over the studs.
It will be good to use a high quality electronic stud sensor to locate the stud.
Use a 3/16” bit and pre-drill a 3” deep hole into the wall and stud.
Attach the wall plate to the wall using the lag bolts and Ф8 washers as shown in (Fig 1). The
wall plate must be mounted to the wall with 2 lag bolts.
Next secure the LCD Monitor to the Cantilever Mount, using the M4x15, M5x15, Truss head
Screw (depend on the different Model Monitor), as shown in (Fig 3).
CONCRETE (MASONRY) MOUNTING
The wall plate of the Cantilever Mount, must be mounted on to the Wall.
Position the wall plate in the desired mounting area on the wall. Making sure the wall plate is
straight, use the mounting hole on the Cantilver Mount to do hole markings on the wall.
Use a 1/2” mansory bit and pre-drill a 3” deep hole into the wall.
Install the supplied plastic anschors in each hole. Tap into the hole until fully seated. Attach
the wall plate to the wall using the lag bolts and Ф8 washers as shown in (Fig 2). The wall
plate must be mounted to the wall with 2 lag bolts.
Lag Bolt and
washer
Fig 2
Concrete
Mansonry
wall anchor
320.00mm
Fig 4
Next Secure the LCD Monitor to the Cantilever Mount, using the M4x15, M5x15, Truss head
Screw (depend on the different Model Monitor), as shown in (Fig 3).
Warning
Tighten lag bolts till washers are pressed
fi rmly against the wall plate.
DO NOT OVER TIGHTEN THE LAG BOLTS
** For details and updated Command and Program Software, please visit and download from www.abtussingapore.com
*Specifi cations are subject to changes without notice.
Caution
Wall anchors should only be used
for masonry mounting. NEVER use
wall anchors to mount the Cantilever
Mount to dry wall.
*Specifi cations are subject to changes without notice.
 Loading...