

Page 1
Blood Glucose Monitoring System
Sistema de prueba para glucosa en sangre
Virtually
Pain-Free
Testing
No Coding
Required
Pruebas
prácticamente
indoloras
¡No requiere
codificación!
Owner’s Booklet
Manual del propietario
Page 2

Table of Contents
Important Information About Your
FreeStyle® Lite Blood Glucose Monitoring System ..................................... 2-3
Important Health-Related Information ...........................................................4
The FreeStyle Lite Meter and FreeStyle Lite Test Strip
The FreeStyle Lite Meter and How It Works ............................................... 5-6
The FreeStyle Lite Meter Display ................................................................. 7-8
The FreeStyle Lite Test Strip ........................................................................ 9-10
The FreeStyle Control Solution
The FreeStyle Control Solution ................................................................. 10-11
Performing a Control Solution Test.......................................................... 12-13
Testing Your Blood Glucose
Testing Your Blood Glucose .... .......................................................................14
Performing a Blood Glucose Test .............................................................15-17
LO and HI Readings .........................................................................................18
Meter Set-Up
Using Your Meter’s Lights ................................................................................19
Setting Up Your Meter ......................................................................................20
Setting the Reminder Alarms .................................................................... 20-21
Setting the Sound, Time, Time Format .........................................................22
Setting the Date and Date Format .................................................................23
Meter Results
Meter Memory, 7-, 14- and 30-Day Averages ............................................... 24
Test Results (Blood Glucose, Control Solution) ........................................... 25
Data Download ..................................................................................................26
Meter Maintenance
Battery ................................................................................................................27
Replacing the Battery .................................................................................. 27-28
Caring for Your Meter ......................................................................................28
System Troubleshooting
Error Messages .............................................................................................29-31
Troubleshooting .................................................................................................32
FreeStyle Lite System Specifications ...............................................................33
ENGLISH ESPAÑOL
Page 3
ENGLISH
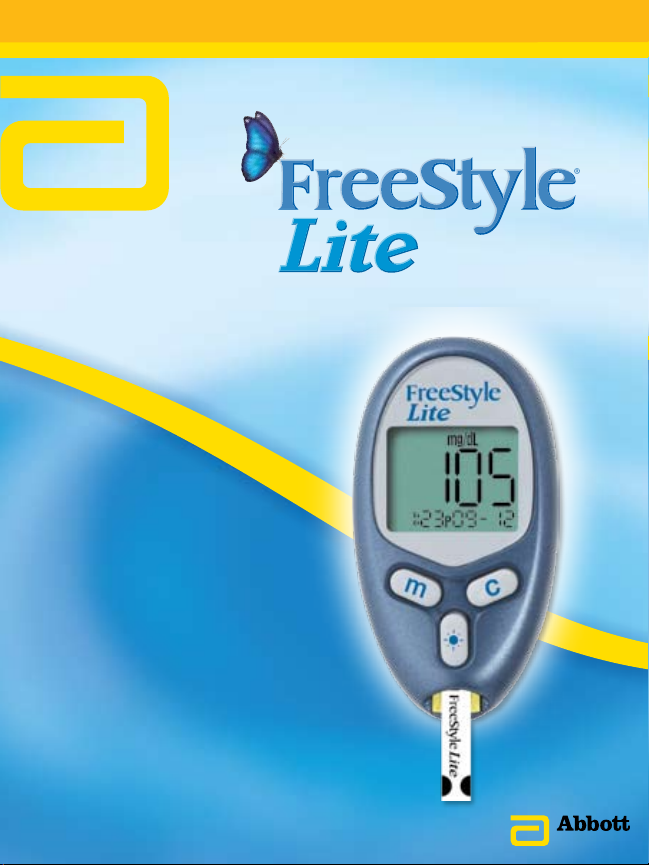
The FreeStyle Lite System Uses the World’s
Smallest Sample So You Can Test on a Variety of
Locations
Most Test Sites Available
Suggested Test
Areas for the Hand
Upper arm
Forearm
Hand
Fingertips
Thigh
Calf
The human figure above shows the areas where you can test with the
FreeStyle Lite System. Avoid moles, veins, bones, and tendons.
WARNING:
We recommend that you test on your fingers if you are testing
for hypoglycemia (low blood glucose) or if you suffer from
hypoglycemia unawareness.
Call Customer Care Toll Free at 1-888-522-5226 www.AbbottDiabetesCare.com
1
Page 4

Important Information About Your FreeStyle® Lite
Blood Glucose Monitoring System
How the FreeStyle Lite System Should Be Used
The FreeStyle Lite System is intended for use outside the body (in •
other words, in vitro diagnostic use only).
The FreeStyle Lite System is used for measuring blood glucose (also •
known as blood sugar) from samples taken from the forearm, upper
arm, hand, thigh, calf, or fingers.
Important: The FreeStyle Lite Meter should only be used with
FreeStyle Lite Test Strips and FreeStyle Control Solution. Using
other test strips and control solution with this meter can produce
inaccurate results.
Do use the FreeStyle Lite System for:
Testing blood glucose.•
Testing only with fresh capillary whole blood samples.•
Do not use the FreeStyle Lite System for:
The diagnosis of diabetes.•
Testing on newborns.•
Testing of arterial blood.•
ENGLISH ESPAÑOL
2
Page 5

ENGLISH
Important Information About Your FreeStyle® Lite
Blood Glucose Monitoring System (cont)
WARNING:
The FreeStyle Lite System contains small parts that may be •
dangerous if swallowed.
Peritoneal dialysis solutions containing Icodextrin or compounds •
of Galactose ≥13 mg/dL, Maltose ≥20 mg/dL or Lactose ≥10 mg/dL
cause the FreeStyle Lite Blood Glucose Monitoring System to
overestimate blood glucose test results.
Caution: Please read all the instructions provided in this O w ne r ’s
Booklet and practice the testing procedures before using the
FreeStyle Lite System. Blood glucose monitoring should be done
with the guidance of a healthcare professional.
Call Customer Care Toll Free at 1-888-522-5226 www.AbbottDiabetesCare.com
3
Page 6

Important Health-Related Information
Severe dehydration and excessive water loss may cause false low •
results. If you believe you are suffering from severe dehydration,
consult your physician immediately.
Test results below 60 mg/dL mean low blood glucose (hypoglycemia).•
Test results greater than 240 mg/dL mean high blood glucose •
(hyperglycemia).
If you get results below 60 mg/dL or above 240 mg/dL and do not •
have symptoms of hypoglycemia or hyperglycemia, repeat the test. If
you have symptoms or continue to get results that fall below 60 mg/dL
or above 240 mg/dL, follow the treatment advice of your healthcare
professional.
If you are experiencing symptoms that are not consistent with your •
blood glucose test and you have followed all instructions described in
the FreeStyle® Lite Owner’s Booklet, call your healthcare professional.
ENGLISH ESPAÑOL
4
Page 7
ENGLISH
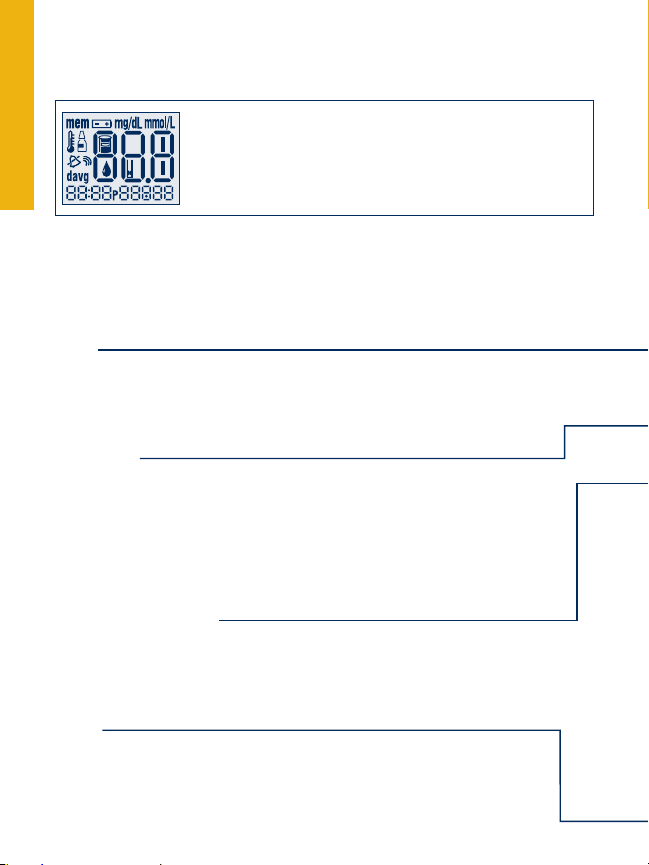
The FreeStyle® Lite Meter and How It Works
System Check Screen
This screen always appears when the meter is turned on
so that you can make sure the display is working properly.
Do not use the meter if the system check screen does not
match the example here. Please call Customer Care.
Display Screen
Displays your test results and other important information.
m (Mode) Button
Move to different mode settings.•
Scrolls backward.•
Silence a reminder alarm.•
Light Button
Controls the display backlight and test light.
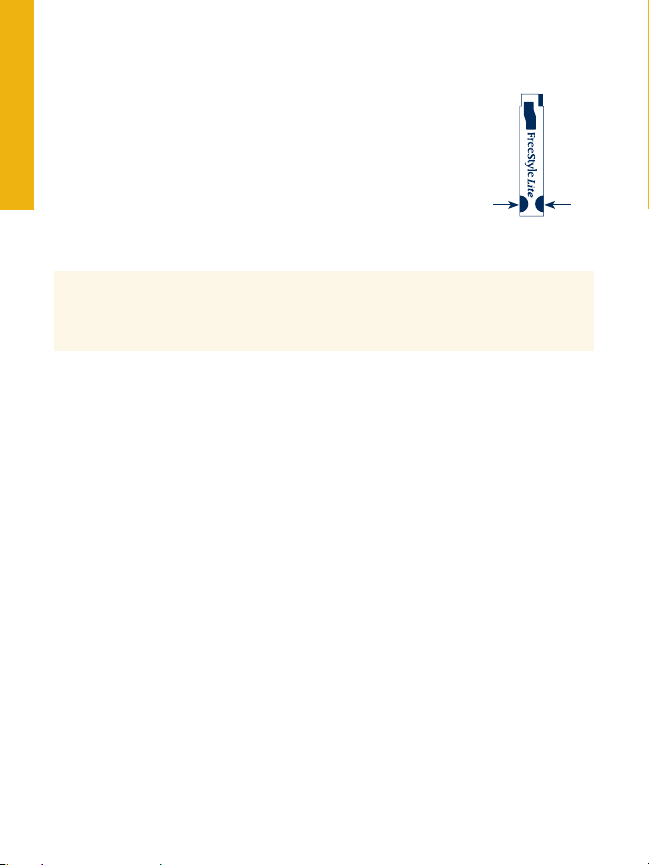
Sample Areas (dark-colored half-circles on Test Strip)
Apply blood or control solution to one Sample Area only.
Insert strip into the meter printed side up (see image to the
right.)
Call Customer Care Toll Free at 1-888-522-5226 www.AbbottDiabetesCare.com
5
Page 8
Data Port
Download test results. Requires
a compatible data management
system. For more information,
please go to our website or call
Customer Care.
c (Configure) Button
Marks a control solution test.•
Scrolls forward.•
Displays clock.•
Silence a reminder alarm.•
Test Strip Port
Insert the Top end of a new FreeStyle
Lite Test Strip here. The meter powers
on when you insert the test strip.
ENGLISH ESPAÑOL
To p
FreeStyle Lite Test Strip
Bottom
Sample Area
6
Page 9
ENGLISH
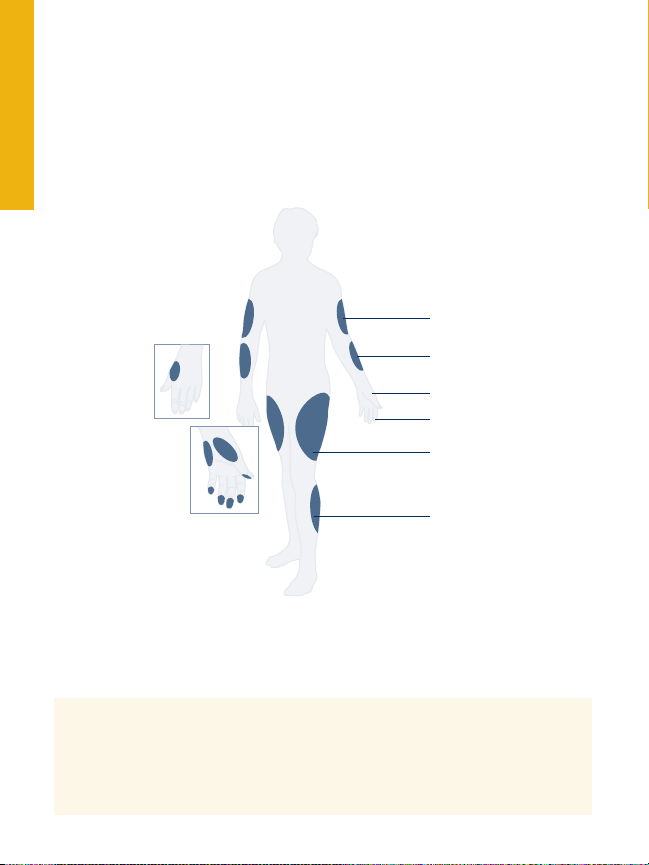
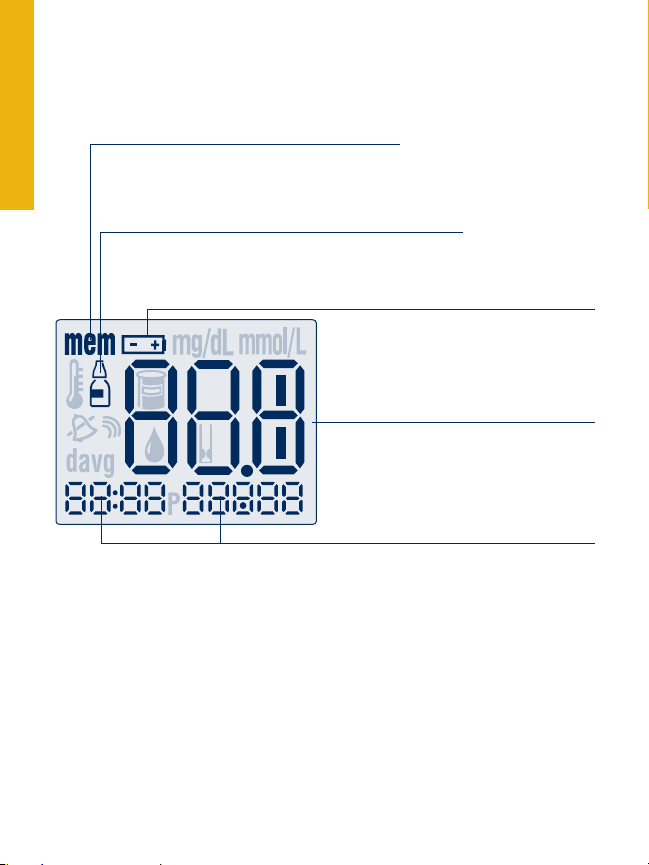
The FreeStyle® Lite Meter Display
Memory Mode Symbol
Shows you test results stored in the
meter memory.
Control Solution Test Result Symbol
Shows that you have marked a test result as a
control solution test.
Battery Symbol
Appears when you should replace
your meter battery.
Test Result Area
Displays test results.
Message Area
Displays date, time, and number of tests.
Call Customer Care Toll Free at 1-888-522-5226 www.AbbottDiabetesCare.com
7
Page 10
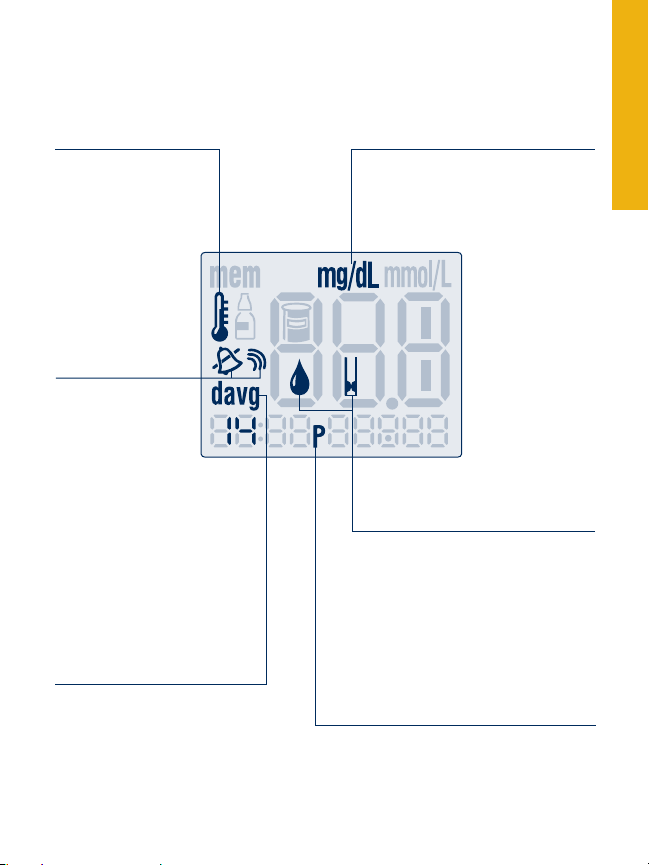
ENGLISH ESPAÑOL
Thermometer Symbol
Appears if your meter
is out of operating
temperature range.
Sound Level
Symbols
Indicates high,
low, or off sound
volume.
Day Average Symbol
Shows the average
value of glucose read-
ings from the last 7-,
14- or 30-days.
mg/dL (U.S. Standard)
Indicates unit of
measurement.
Blood Drop and
Test Strip Symbols
These symbols work together in
an animation to tell you when
the meter is ready for you to
apply blood or control solution.
P Symbol
Indicates PM in 12-hour format
only (for example 4:00 p.m.)
8
Page 11
ENGLISH
The FreeStyle Lite Test Strip
Apply blood or control solution to only one Test Strip
Sample Area per test.
Important: Use only one sample area of the test strip per
test. Do not apply blood to both sample areas. Test strips
may be used only once. Discard used test strips. You can
continue to fill the test strip for up to 60 seconds. Be sure
to reapply the sample to the same sample area.
WARNING:
The cap or vial contains drying agents that may be harmful if
inhaled or swallowed and may cause skin or eye irritation.
Important: The FreeStyle Lite Meter should only be used with FreeStyle
Lite Test Strips. Using other test strips with this meter can produce
inaccurate results.
Important Test Strip Information
The FreeStyle Lite System has an operating range of 40° to 104° F •
(4º to 40° C).
Store the test strip package in a cool, dry place between 40° and 86° F •
(4° to 30° C).
Use test strips only within the system operating temperature range.•
Keep away from direct sunlight and heat.•
Store your test strips in their original vial only; never transfer them •
to another vial or any other container.
Never store individual test strips outside the vial.•
After removing a FreeStyle Lite Test Strip from the vial, immediately •
close the vial cap tightly.
With clean, dry hands, you may touch the test strip anywhere when •
removing it from the vial or inserting it into the meter.
Call Customer Care Toll Free at 1-888-522-5226 www.AbbottDiabetesCare.com
9
Test Strip
Sample Area
Page 12
Do not use test strips beyond the expiration date. This may cause •
inaccurate results.
Do not bend, cut, or alter FreeStyle Lite Test Strips.•
Note: For further information, refer to the FreeStyle Lite Test Strip
package insert.
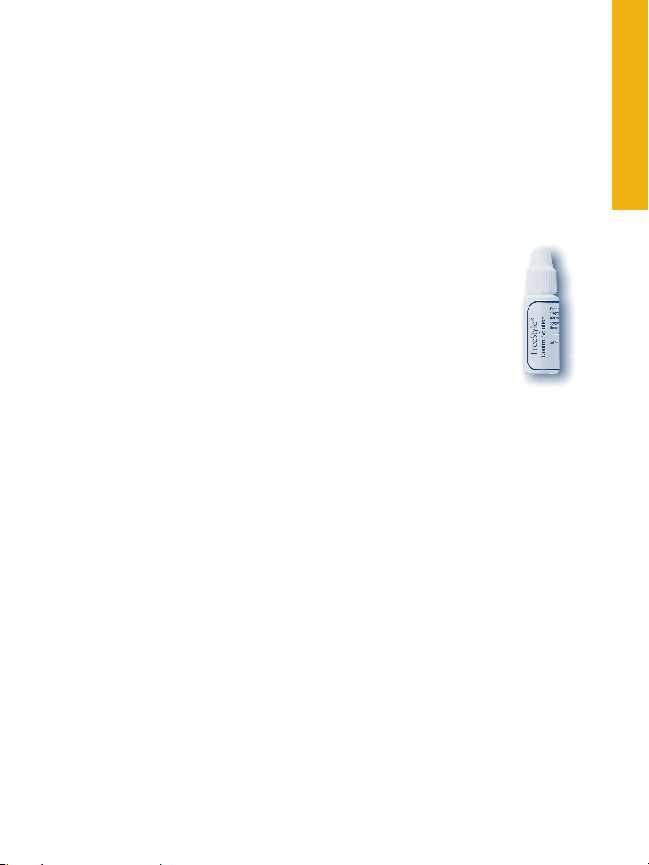
The FreeStyle® Control Solution
FreeStyle Control Solution is a red liquid that contains a
fixed amount of glucose that is used to:
Practice testing without having to use your own blood.•
Ensure that your meter and test strips are working •
together properly.
A control solution test should be performed when you
question your results and want to confirm that your monitor and test
strips are working properly.
For information on how to obtain Control Solution, call Customer
Care at 1-888-522-5226.
ENGLISH ESPAÑOL
10
Page 13

ENGLISH
Important Control Solution Information
FreeStyle® Control Solution is good for three months after opening
the bottle or until the expiration date printed on the label, whichever
comes first.
Important: Count forward three months from the date you open a new
bottle of control solution. This is your discard date. Write this date on
the side of the control solution bottle.
Example: You open the control solution on January 15th. Count
forward three months to April 15th. This is the discard date that you
record on the bottle.
Use only FreeStyle Control Solution with your FreeStyle Lite System.•
Replace the cap on the control solution bottle immediately after •
using.
Do not use control solution past the expiration date.•
Do not add water or any liquid to control solution.•
Control solution tests are specified to be accurate only when used •
between 59° to 104° F (15° to 40° C).
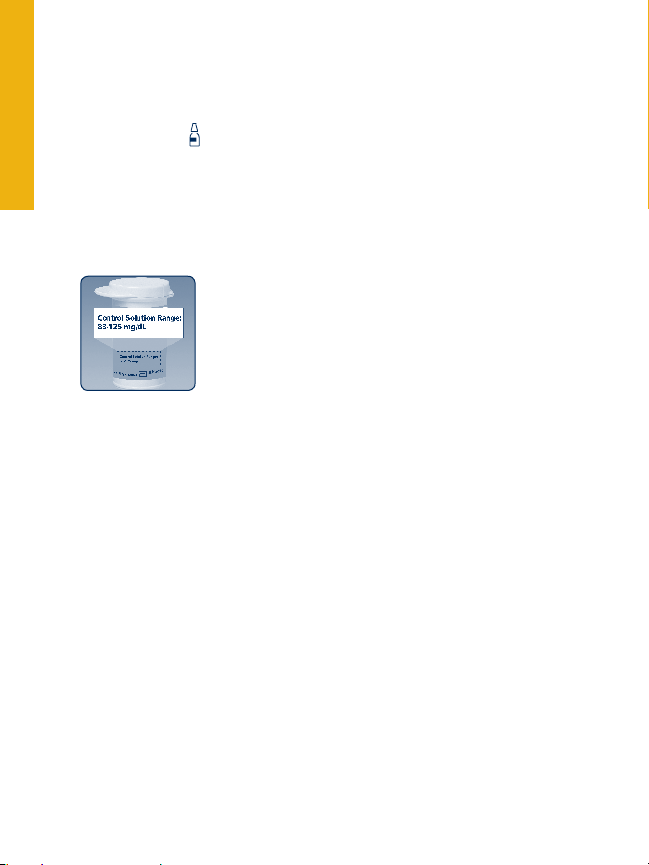
Control solution test results should fall within the range printed on •
the test strip vial label.
Important: The control solution range is a target range for control
solution only. It is not a target range for your blood glucose level.
If control solution results are out of this range, repeat the test.•
If your control solution test results continue to fall outside the range •
printed on the test strip vial, do not use the FreeStyle Lite System to
test your blood glucose. Contact Customer Care.
Caution: Results from FreeStyle Control Solution tests do not
reflect your blood glucose level.
Call Customer Care Toll Free at 1-888-522-5226 www.AbbottDiabetesCare.com
11
Page 14

Performing a Control Solution Test
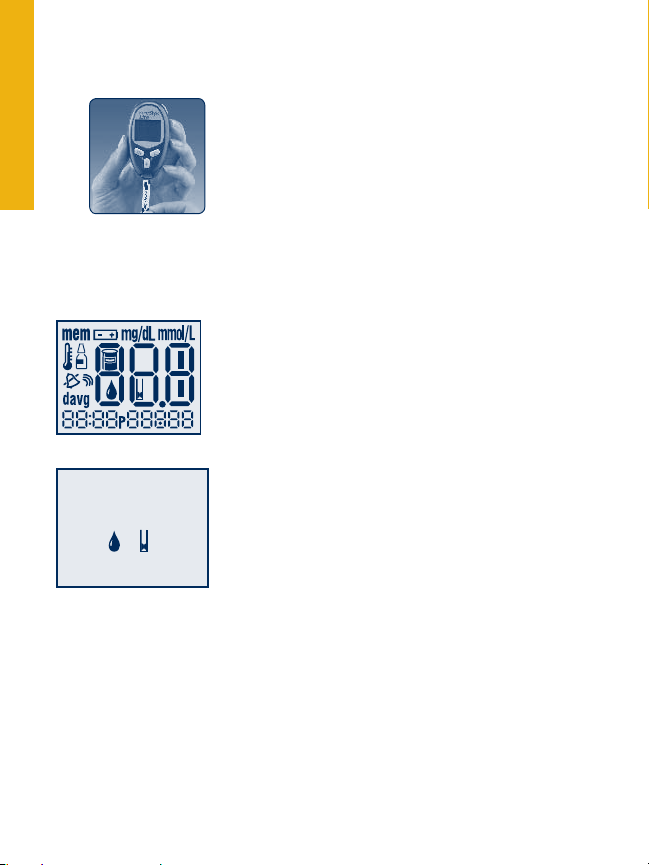
1
System Check
Insert the top of the test strip into your meter
until it stops. This will power on the meter.
System Check Screen
When the meter powers on, this screen
will appear so that you can make sure the
display is working properly.
ENGLISH ESPAÑOL
2
3
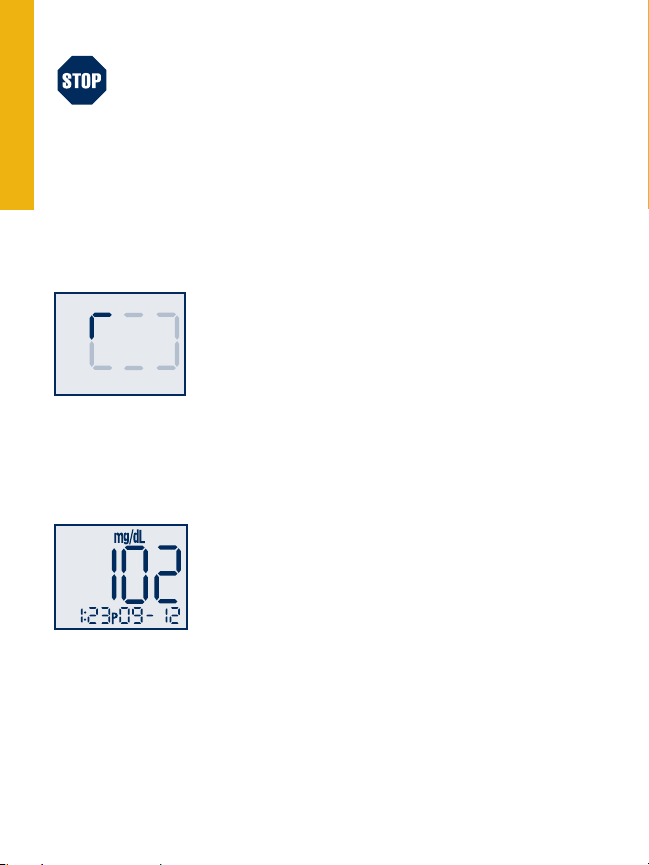
If the sound prompt is on, your meter will beep when the test strip
is full. A short line then moves clockwise around the display screen
while the sample is processing.
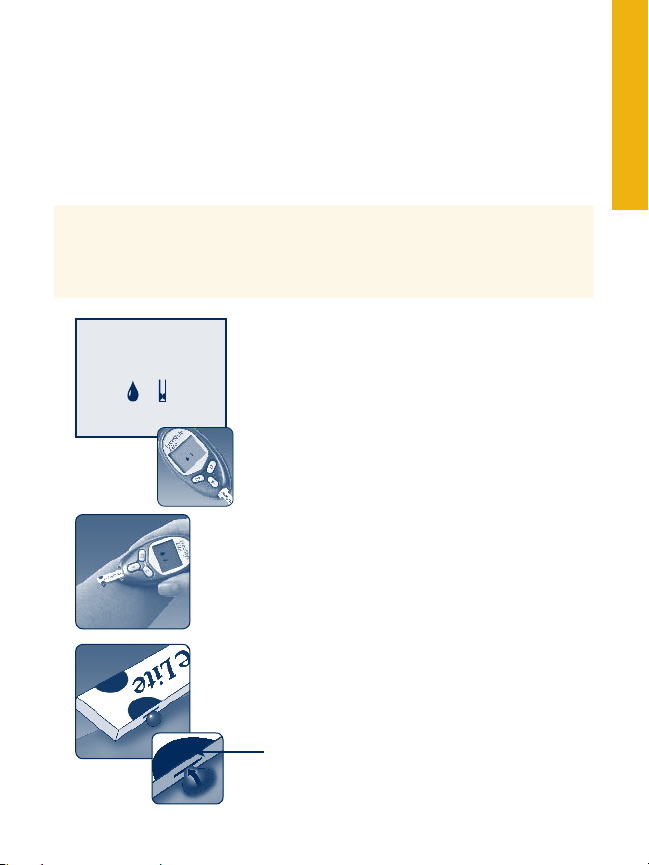
Wait for the meter to display the Blood
Drop and Test Strip symbols.
Gently touch only the Sample Area of the test
strip to the control solution.
Important: Do not apply control solution to both
Test Strip Sample Areas.
12
Page 15
ENGLISH
The result will appear on the display screen and if the sound is on,
your meter will beep twice. To mark the result as a control solution
result, press and hold the “c” button for two seconds until the control
solution symbol ( ) appears at the top left of the display screen.
If you have marked a blood glucose test as a control solution test by
mistake, you can unmark it by pressing and holding the “c” button
again for two seconds.
4
Out of range test results may be caused by:
Expired or bad control solution.•
Expired or bad test strip.•
Error in performing test.•
Watered-down control solution.•
Meter malfunction.•
Control solution test done outside 59° to 104° F.•
To turn the meter off, remove the test strip
Call Customer Care Toll Free at 1-888-522-5226 www.AbbottDiabetesCare.com
13
Compare your control solution test result to the
range printed on your test strip vial label. Your
control solution results should fall within the
range printed on the side of your test strip vial.
.
Page 16

Testing Your Blood Glucose
Important: To ensure accurate results, wash your
hands and test site (for example, your forearm) with
soap and water. Make sure there is no cream or lotion
on the test site. Thoroughly dry your hands and test
site.
With the FreeStyle® Lite Meter, you can test your blood glucose on •
your forearm, fingers, upper arm, hand, thigh, or calf.
Testing with the FreeStyle Lite Meter requires a very small sample •
size, 0.3 microliters of blood; about the size of pinhead
(example:•).
WARNING:
We recommend that you test on your fingers if you are testing
for hypoglycemia (low blood glucose) or if you suffer from
hypoglycemia unawareness.
Times when you may be checking for low blood glucose include:
When you are feeling symptoms such as weakness, sweating, •
nervousness, headache, or confusion.
When you have delayed a meal after taking insulin.•
When your healthcare professional advises you to do so.•
ENGLISH ESPAÑOL
14
Page 17
ENGLISH
Performing a Blood Glucose Test
1
Note: If you do not start the test within two minutes, the meter will
turn o. To restart your meter, take out the unused FreeStyle Lite Test
Strip and reinsert it into the meter.
Prepare Your Meter
Insert a FreeStyle Lite Test Strip into the meter
until it stops. e meter will power on.
System Check Screen
When the meter powers on, this screen will
appear so that you can make sure the display is
working properly.
System Check
e Blood Drop and Test Strip symbols will
appear on the display screen. Your meter is now
ready to apply blood sample.
Blood Drop and
Test Strip Symbols
Important: The FreeStyle Lite Meter should only be used with FreeStyle
Lite Test Strips. Using other test strips with this meter can produce
inaccurate results.
Call Customer Care Toll Free at 1-888-522-5226 www.AbbottDiabetesCare.com
15
Page 18
Obtain a Blood Sample
2
Select a test site. ere are dierences in testing on ngers versus
other alternative sites.
Use your lancing device to obtain a blood sample. Refer to the
Lancing Device insert for detailed instructions on how to use
the FreeStyle Lancing Device.
WARNING: If you are testing for hypoglycemia (low blood
glucose), or if you suffer from hypoglycemia unawareness, we
recommend that you test on your fingers.
ENGLISH ESPAÑOL
3
Filling the FreeStyle Lite Test Strip
with Blood
Make sure that the FreeStyle Lite Test Strip a.
is in the meter and the meter is powered
on. (If the meter is off, take out the test
strip and reinsert it into the meter.) You
are now ready to apply the blood sample.
Bring the FreeStyle Lite Test Strip to theb.
blood sample at a slight angle.
The FreeStyle Lite Test Strip acts like ac.
sponge and pulls the blood into the strip
through the sample area.
Test Strip Sample Area
16
Page 19
ENGLISH
4
If after five seconds your meter does not show a short line moving •
around the display screen, the sample may be too small. You may
add blood to the same sample area of the test strip from which you
started for up to 60 seconds from the time of the first application.
Do not press the FreeStyle Lite Test Strip against the test site.•
Do not scrape the blood onto the FreeStyle Lite Test Strip.•
Do not apply blood to the flat side of the FreeStyle Lite Test •
Strip.
Do not apply blood to the FreeStyle Lite Test Strip when the •
FreeStyle Lite Test Strip is out of the meter.
Do not put blood or foreign objects into the FreeStyle Lite Test •
Strip port.
Waiting for Result
Do not pull the • FreeStyle Lite Test Strip away
until you hear one beep or see the short line
moving clockwise on your meter screen. This
means you have enough blood and the meter
is reading your glucose.
The test result is complete when your blood •
glucose test result is shown on the display
screen and you will hear two beeps.
On average, your reading will display in 5 •
seconds. The time that the meter takes depends
on your blood glucose level. The higher your
glucose level, the longer it takes to get a result.
Potential Bruising
It is possible you may experience bruising at the test site. If bruising
does occur, you may choose to lance another test site.
Call Customer Care Toll Free at 1-888-522-5226 www.AbbottDiabetesCare.com
17
Page 20
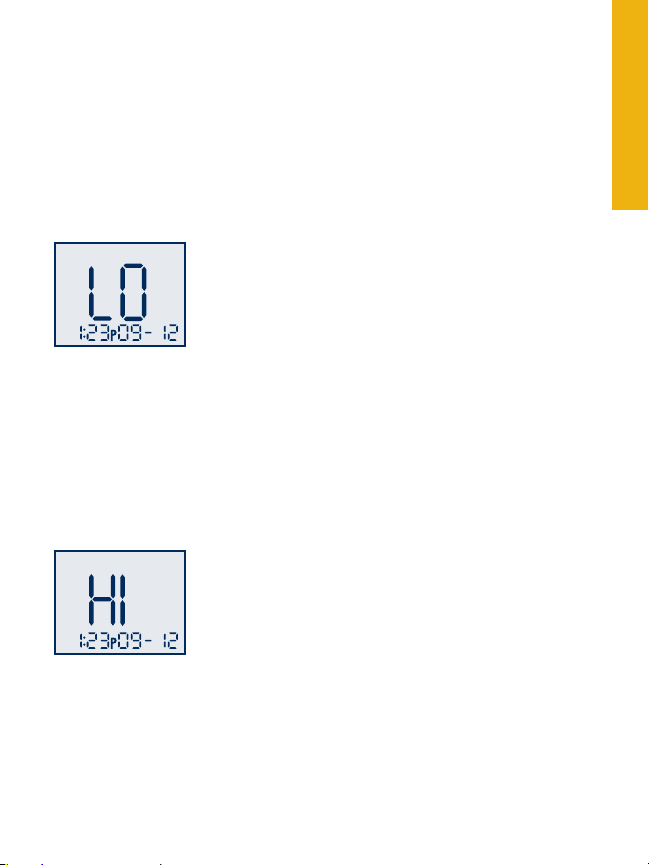
LO and HI Readings
Important: Low or high blood glucose readings can indicate a potentially
serious medical condition. The FreeStyle® Lite Meter displays results from
20 to 500 mg/dL.
If your test result is lower than 20 mg/dL, LO will appear on the meter
display screen. This reading indicates severe hypoglycemia (low blood
glucose).
LO Reading with Symptoms
If you have a LO reading and have symptoms
such as weakness, sweating, nervousness,
headache or confusion, then follow your doctor’s
recommendation to treat hypoglycemia.
LO Reading
LO Reading without Symptoms
If you get a LO reading, but have no symptoms of low blood glucose,
then retest with a new test strip on your fingers. If you still get a LO
reading, follow your doctor’s recommendation to treat hypoglycemia.
If your test is above 500 mg/dL, HI will appear on the display screen.
This indicates severe hyperglycemia (high blood glucose).
HI Reading with Symptoms
If you feel symptoms such as fatigue, thirst, excess
urination, or blurry vision, then follow your
doctor’s recommendation to treat hyperglycemia.
ENGLISH ESPAÑOL
HI Reading
HI Reading without Symptoms
If you get a HI reading, but have no symptoms of high blood glucose,
then retest with a new test strip. If you still get a HI reading, follow
your doctor’s recommendation to treat hyperglycemia.
18
Page 21
ENGLISH
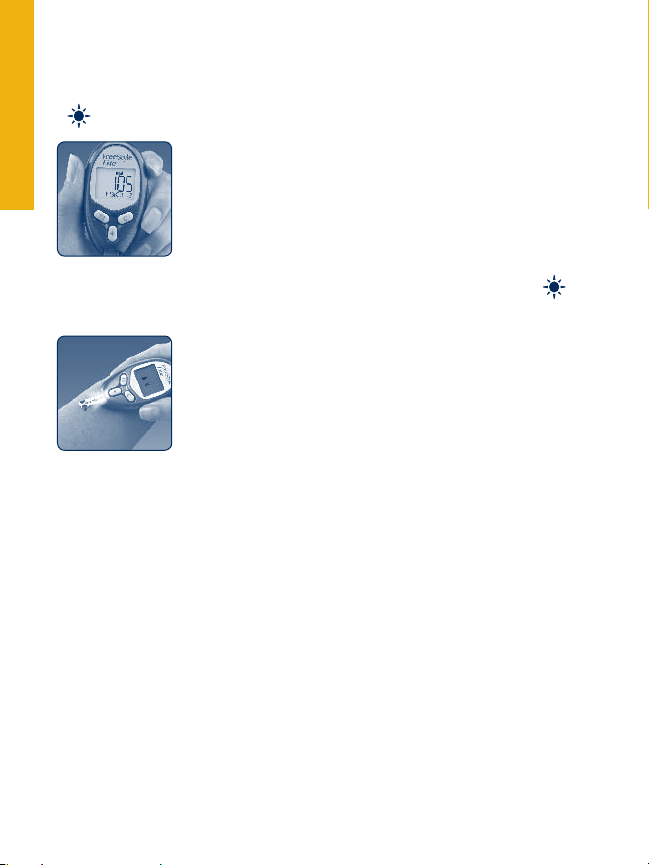
Using Your Meter’s Lights
Depending on what mode your meter is in, pressing the light button
(
) turns on either the display backlight or the test light.
Using the Display Backlight
Pressing the light button powers on the display
backlight in all modes except when applying a
sample. When applying a sample, the light button
turns the test light on.
e display backlight goes out when you press the light button ( )
again or when the meter is inactive for 10 seconds.
Using the Test Light
Pressing the light button while the Blood Drop and
Test Strip symbols appear on the display screen
powers on the test light
e test light goes out:
When you press the light button again.•
When the meter receives the correct amount of blood for a test (the •
FreeStyle Lite Test Strip is lled).
Aer 60 seconds of no activity.•
When a FreeStyle Lite Test Strip is removed from the meter.•
If you use either the backlight or the test light during the test mode,
the backlight lights again to show you the test results aer the
measurement is complete.
Call Customer Care Toll Free at 1-888-522-5226 www.AbbottDiabetesCare.com
19
Page 22
Meter Set-Up
•
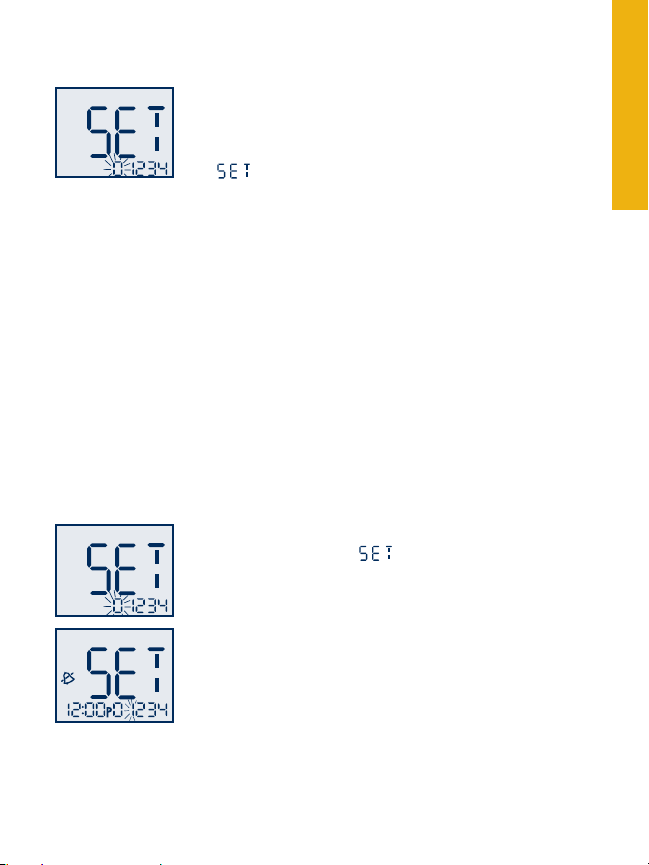
To Enter Setup Mode
Start with the meter off (no test strip inserted).
Press and firmly hold the “m” button until the
display screen appears.
To Exit at Any Time •
Press and hold the “m” button until the meter turns off.
To Move Through the Screens •
Press the “m” button to move through all the setup screens such
as reminder alarms, sound level, time, date, and so on.
To Change Settings Within the Screen•
Press the “c” (configure) button.
Setting the Reminder Alarms
You may set up any or all of the reminder alarms (1-4). Note: A
reminder alarm will never sound during a test.
To set a reminder alarm or multiple reminder alarms, please follow
these steps.
Start with the meter off. Press the “1. m” button
and hold until the
01234. You are now in the reminder alarm
setting mode and the “0” is blinking.
To move to the first reminder alarm press the “c” 2.
button once. You are now ready to set reminder
alarm 1 (“1” is blinking).
display appears with
ENGLISH ESPAÑOL
Select reminder
alarm
20
Page 23

ENGLISH
Press the “3. m” button to move to the hour setting.
With the hour blinking, press the “c” button
until the correct hour appears.
Select hour
Press the “4. m” button to move to the minute
setting. With the minute blinking, press the “c”
button until the correct minute appears.
Select minute
Press the “5. m” button to move to the reminder
alarm volume setting. Default setting is off.
Press the “c” button to select the desired volume
Select reminder
alarm volume
setting: low, high, or off.
Press the “6. m” button to finalize your alarm
setting. This will bring you back to the reminder
alarm setting
mode.
If you wish to set multiple reminder alarms press
Select reminder
alarm
“c” to move to reminder alarm 2. Repeat.
Note: To save your reminder alarm settings and exit set up mode,
press and hold the “m” button until the meter turns off. Press the “m”
button when “0” is blinking to move to the next set-up screen without
setting any reminder alarms.
Call Customer Care Toll Free at 1-888-522-5226 www.AbbottDiabetesCare.com
21
Page 24

Setting the Sound
There are three (3) sound volume options:
Off Low High
There are three sound volume options to let you know when the test
strip is full, when the reading is done, and when an error occurs:
Press the 1. “c” button until the desired sound level appears
Press the 2. “m” button to move to “Setting the Time.”
Setting the Time
With the hour blinking, press the “1. c” button
until the correct hour appears. The default for
the meter is the 12-hour time format. The “P”
displays for “PM” times.
Hour
Press the “2. m” button to move to minute
setting.
With the m3. inute blinking, press the “c” button
until the correct minute appears.
Minute
Press the “4. m” button to move to “Setting the
Time Format.”
Setting the Time Format
With the hour mode blinking, press the “1. c”
button to move between 12-hour and 24-hour
format. The time automatically updates to the
format selected.
Press the “2. m” button to move to “Setting the
Time Format
Date.”
ENGLISH ESPAÑOL
22
Page 25

ENGLISH
Setting the Date and Date Format
With the month blinking, press the “1. c” button
until the correct month appears.
Press the “2. m” button to move to the day setting.
Month
With the day blinking, press the “3. c” button until
the correct day appears.
Press the “4. m” button to move to “Date Format.”
With the date blinking, press the “5. c” button
to select month-day or day-month format.
Day
The date automatically updates to the format
selected.
Press the “6. m” button to move to the year setting.
With the year blinking, press the “7. c” button
until the correct year appears.
Ye a r
You have completed Meter Set-Up.
To move to “Setting the User Reminder Alarms” press the “• m”
button.
To exit press and hold the “• m” button.
Call Customer Care Toll Free at 1-888-522-5226 www.AbbottDiabetesCare.com
23
Page 26

Meter Results
Meter Memory
To En t e r•
Start with the meter o (no test strip inserted). Press the “m” button
and release; the rst memory screen to appear will be your 7-day
average.
To Exit•
Press and hold the “m” button until the meter turns off.
7-, 14-, 30- Day Average
The first memory display screen you see is your 7-day average. This
includes all the readings from the last 7 days starting from the current
date and time shown on the meter. (Control solution, LO, and HI
readings are not included in the average.)
7davg: Example:
7davg = your 7-day average
n = indicates the number of results
included in your average
The “c” button allows you to scroll forward to 14- and 30-day
averages. Continue to press the “c” button to view stored test results.
Your most recent result will display first.
The “m” button allows you to scroll backward.
ENGLISH ESPAÑOL
24
Page 27

ENGLISH
Test Results
The meter stores the last 400 test readings with time and date. You
may scroll through all of the readings by pressing and holding the “c”
button. The first reading you see is the most recent result.
Temperature: A result with a thermometer
symbol indicates that the reading was taken
outside of the meter’s specified operating
temperature range and may not be accurate.
This value is included in your 7-, 14- and 30-day
averages.
LO Reading: A LO reading (under 20 mg/dL) is included in the
memory as LO.
HI Reading: A HI reading (over 500 mg/dL) is included in the
memory as HI.
Blood Glucose Test
A result without a control solution symbol ( )
indicates that it is a blood glucose reading. The
date and time of the test will appear on the bottom
of the screen.
Control Solution Test
A value with ( ) indicates that you have marked
this reading as a control solution test. The date
and time of the control solution reading will
appear on the bottom of the screen.
Call Customer Care Toll Free at 1-888-522-5226 www.AbbottDiabetesCare.com
25
Page 28

Data Download
The “PC” symbol displays when a data cable
is inserted in the meter data port. You cannot
perform a test while the data cable is in the meter
data port.
The meter will display “PC” until the data cable is
removed from the data port.
(Requires a compatible data management system.)
For more information, please go to our website or call Customer Care.
ENGLISH ESPAÑOL
26
Page 29

ENGLISH
Meter Maintenance
Battery
Your FreeStyle® Lite Meter comes with one preinstalled, #2032,
3 volt, lithium battery. The battery provides enough power for the
meter to perform about 500 tests. If your battery runs low, the battery
symbol ( ) appears on every display screen until you change the
battery. When the battery runs low, the display backlight and test light
may not power on.
Important: When this symbol appears, or when the backlight and test
light begin to dim, you should replace the battery immediately.
To avoid losing the time and date settings, replace the battery within •
one minute of removing the old battery.
If you take more than one minute to replace the battery, you may •
need to reset the time and date to get the correct 7-, 14- and 30-day
averages. If the time and date settings are lost, the time and date
displays flash 12:00 and 00-00 until they are reset.
Removing the battery does not affect the meter’s memory log or •
previously-stored user settings (such as date and time format).
Even if you lose your time and date settings – you can perform a •
blood glucose test, and results will not be affected.
Replacing the Battery
1
Turn the meter over. Press in the battery
door clip to open. Swing the battery door up
to open and then off the meter.
To remove the battery, push the battery
downward to release the battery.
Call Customer Care Toll Free at 1-888-522-5226 www.AbbottDiabetesCare.com
27
Page 30

Replacing the Battery (cont)
2
Install the battery with the positive (+) sign up
toward you.
ENGLISH ESPAÑOL
3
To close, angle the battery door back onto the
meter and swing down until it snaps into place.
Note: Batteries need to be properly disposed of.
For this purpose, all shops selling batteries provide
battery collection boxes on their premises.
Caring for Your Meter
Avoid getting dirt, dust, blood, control solution, water, or any other
liquid in the meter’s test strip and data ports.
Clean the outside of the meter using a cloth dampened with one of the
following:
Mild detergent/mild soap and water.•
70% isopropyl alcohol.•
A mix of one part household bleach, nine parts water.•
Important: Never immerse the meter in water or any other liquid.
28
Page 31

ENGLISH
System Troubleshooting
Error Messages
Error 1
Possible Causes
What You Should Do
If you have symptoms such as weakness, sweating, nervousness, 1.
headache, or confusion, follow your doctor’s recommendation for
treating hypoglycemia.
Conduct a control solution test using a new FreeStyle Lite Test Strip. 2.
If the results of the control solution test are within the range printed
on the side of your test strip vial, retest using blood and a new
FreeStyle Lite Test Strip.
If the retest using control solution does not work or the error 3.
persists, call Customer Care.
Error 2
Possible Causes
Sample is too small.•
Problem with the FreeStyle Lite Test Strip.•
Problem with the meter.•
Very low blood glucose (less than 20 mg/dL).•
Problem with the FreeStyle Lite Test Strip.•
Problem with the meter.•
Very high glucose (above 500 mg/dL).•
HIGH control solution applied when •
temperature is too cold. (This applies only to
control solution that is labeled as HIGH.)
Call Customer Care Toll Free at 1-888-522-5226 www.AbbottDiabetesCare.com
29
Page 32

What You Should Do
If you have symptoms such as thirst, fatigue, excess urination, or 1.
blurry vision, follow your doctor’s recommendation for treating
hyperglycemia.
Conduct a control solution test using a new FreeStyle Lite Test Strip. 2.
If the results of the control solution test are within the range printed
on the side of your test strip vial, retest using blood and a new
FreeStyle Lite Test Strip.
If the retest using control solution does not work or the error 3.
persists, call Customer Care.
Error 3
Possible Causes
Incorrect test procedure. For example, putting •
blood on the test strip before inserting the test
strip into the meter or applying blood before the
Blood Drop and Test Strip symbols display.
Problem with the FreeStyle Lite Test Strip.•
Problem with the meter.•
What You Should Do
Be sure you see the Blood Drop and Test Strip symbols on the 1.
display screen before you apply blood or control solution.
Conduct a control solution test using a new FreeStyle Lite Test Strip. 2.
If the results of the control solution test are within the range printed
on the side of your test strip vial, retest using blood and a new
FreeStyle Lite Test Strip.
If the retest using control solution does not work or the error 3.
persists, call Customer Care.
ENGLISH ESPAÑOL
30
Page 33

ENGLISH
Error 4
What You Should Do
Conduct a control solution test using a new test strip. If the results 1.
of the control solution test are within the range printed on the side
of your test strip vial, retest using blood and a new FreeStyle Lite
Test Strip.
If the retest using control solution does not work or the error 2.
persists, call Customer Care.
Possible Causes
Problem with FreeStyle Lite Test Strip.•
Problem with the meter.•
Call Customer Care Toll Free at 1-888-522-5226 www.AbbottDiabetesCare.com
31
Page 34

Troubleshooting
Meter does not enter the test mode after inserting a test strip.
Probable Cause What to Do
The battery is dead. Replace the battery (and reset the date and time,
The battery is installed
incorrectly or there is no
battery in the meter.
Test strip inserted upside
down, wrong end in, or
incompletely inserted into
the meter.
Defective meter or test strips. Call Customer Care.
Blood or foreign objects put
into the test strip port.
Test does not start after applying the blood sample.
Probable Cause What to Do
Blood sample too small. You may add blood to the same sample area
Defective test strip. Repeat the test with a new FreeStyle Lite Test
Sample applied after meter
times out (two minutes) and
turns off.
Defective meter or test
strips.
if necessary.)
Check that the battery is installed correctly with
the positive (+) sign facing upward, toward you.
Insert the FreeStyle Lite Test Strip with the
printed side up and the top of the strip in the
meter.
Call Customer Care.
of the FreeStyle Lite Test Strip from which you
started for up to 60 seconds from the time of
the first application. If necessary, repeat the test
using a new FreeStyle Lite Test Strip and a larger
blood sample.
Strip
Repeat the test using a new test strip. Wait until
you see the Blood and Test Strip symbols on
the display screen before you apply the blood
sample.
Call Customer Care.
ENGLISH ESPAÑOL
32
Page 35

ENGLISH
FreeStyle Lite System Specifications
Assay Method Coulometric electrochemical sensor
Automatic Shuto Two minutes aer last user action
Battery Life 500 tests
Calibration Plasma equivalent
Hematocrit 15% to 65%
Measurement Units mg/dL
Meter Storage Temp. -4º to 140º F (-20º to 60º C)
Memory 400 blood glucose and control solution
tests with date and time
Operating Relative
Humidity
Operating Temperature 40° to 104° F (4º to 40º C)
Power Source One #2032, 3 volt, lithium battery,
Result Range 20 to 500 mg/dL
Sample Whole blood, capillary
5% to 90% (non-condensing)
replaceable
Sample Size 0.3 microliter (300 nanoliters)
Size Width 1.57” x Length 2.9” x Depth 0.65”
Test Time Average of 5 seconds
Weight 1.4 oz. including battery
Call Customer Care Toll Free at 1-888-522-5226 www.AbbottDiabetesCare.com
33
Page 36

Page 37

Page 38

Índice
Información importante sobre su
Sistema de prueba para glucosa en sangre FreeStyle® Lite ....................... 2-3
Información sanitaria de importancia..............................................................4
El medidor FreeStyle Lite y las tiras de prueba FreeStyle Lite
El medidor FreeStyle Lite y cómo funciona ................................................ 5-6
La pantalla del medidor FreeStyle Lite ........................................................ 7-8
La tira de prueba FreeStyle Lite................................................................... 9-10
La solución de control FreeStyle
La solución de control FreeStyle ...............................................................10-11
Cómo realizar una prueba de solución de control ................................. 12-13
Prueba de su glucosa en sangre
Prueba de su glucosa en sangre .... ..................................................................14
Cómo realizar una prueba de glucosa en sangre .................................... 15-17
Lecturas HI (ALTO) y LO (BAJO) .................................................................18
Configuración del medidor
Cómo usar las luces de su medidor ................................................................ 19
Cómo configurar su medidor ..........................................................................20
Cómo configurar las alarmas de recordatorio ........................................ 20-21
Cómo configurar el sonido, la hora y el formato de hora .......................... 22
Cómo configurar la fecha y el formato de fecha ..........................................23
Resultados del medidor
Memoria del medidor, promedios de 7, 14 y 30 días ...................................24
Resultados de las pruebas (glucosa en sangre, solución de control)..........25
Cómo descargar datos ......................................................................................26
Mantenimiento del medidor
Pila ....................................................................................................................... 27
Cómo cambiar la pila .................................................................................. 27-28
Cuidado de su medidor .................................................................................... 28
Resolución de problemas del sistema
Mensajes de error ........................................................................................ 29-31
Resolución de problemas .................................................................................32
Especificaciones del sistema FreeStyle Lite ...................................................33
ESPAÑOL
Page 39

El sistema FreeStyle Lite utiliza la muestra más
pequeña del mundo para que pueda realizar
pruebas en varios lugares
La mayoría de las zonas de prueba disponibles
ESPAÑOL
Áreas de prueba
de la mano sugeridas
Brazo
Antebrazo
Mano
Yemas de los dedos
Muslo
Pantorrilla
La figura humana que aparece más arriba muestra las zonas donde
puede realizar pruebas con el sistema FreeStyle Lite. Evite lunares,
venas, huesos y tendones.
ADVERTENCIA:
Le recomendamos que realice las pruebas en los dedos de la
mano si está haciendo una prueba de hipoglucemia (bajo nivel de
glucosa en sangre) o si sufre de hipoglucemia asintomática.
Comuníquese con el Departamento de Atención al Cliente de forma gratuita
1
llamando al 1-888-522-5226 o visítenos en www.AbbottDiabetesCare.com.
Page 40

Información importante acerca de su sistema de
prueba para glucosa en sangre FreeStyle® Lite
Cómo se debe usar el sistema FreeStyle Lite
El sistema FreeStyle Lite está destinado a utilizarse fuera del •
organismo (es decir, sólo para uso diagnóstico in vitro).
El sistema FreeStyle Lite se utiliza para medir la glucosa en sangre •
(también conocida como azúcar en sangre) de muestras extraídas del
antebrazo, brazo, mano, muslo, pantorrilla o dedos.
Importante: El medidor FreeStyle Lite sólo debe utilizarse con
tiras de prueba FreeStyle Lite y solución de control FreeStyle.
El uso de otras tiras de prueba y solución de control con este
medidor puede producir resultados inexactos.
Utilice el sistema FreeStyle Lite para:
realizar pruebas de glucosa en sangre;•
realizar pruebas sólo con muestras de sangre entera capilar reciente.•
No utilice el sistema FreeStyle Lite para:
obtener un diagnóstico de diabetes;•
realizar pruebas a recién nacidos;•
realizar pruebas de sangre arterial.•
ESPAÑOL
2
Page 41

Información importante sobre su sistema para prueba
de glucosa en sangre FreeStyle® Lite (continuación)
ADVERTENCIA:
El sistema FreeStyle Lite contiene piezas pequeñas que pueden ser •
peligrosas si se ingieren.
Las soluciones para diálisis peritoneal que contienen Icodextrina o •
compuestos de Galactosa ≥13 mg/dL, Maltosa ≥20 mg/dL o Lactosa
ESPAÑOL
≥10 mg/dL hacen que el sistema de prueba para glucosa en sangre
FreeStyle Lite sobrevalore los resultados correspondientes.
Precaución: Lea todas las instrucciones detalladas en este manual
del propietario y practique los procedimientos de prueba antes
de utilizar el sistema FreeStyle Lite. El control de glucosa en
sangre debe realizarse con la orientación de un profesional de la
salud.
Comuníquese con el Departamento de Atención al Cliente de forma gratuita
3
llamando al 1-888-522-5226 o visítenos en www.AbbottDiabetesCare.com.
Page 42

Información sanitaria de importancia
Es posible que la deshidratación grave y la pérdida de agua •
en exceso provoquen resultados bajos incorrectos. Si cree que
está sufriendo de deshidratación grave, consulte a su médico
inmediatamente.
Los resultados de pruebas por debajo de 60 mg/dL muestran un •
bajo nivel de glucosa en sangre (hipoglucemia).
Los resultados de prueba superiores a 240 mg/dL muestran un alto •
nivel de glucosa en sangre (hiperglucemia).
Si obtiene resultados inferiores a 60 mg/dL o superiores a 240 mg/dL •
y no presenta síntomas de hipoglucemia ni de hiperglucemia, repita
la prueba. Si tiene síntomas o continúa obteniendo resultados
inferiores a 60 mg/dL o superiores a 240 mg/dL, siga el tratamiento
sugerido por su profesional de la salud.
Si tiene síntomas que no coinciden con su prueba de glucosa en •
sangre y ha seguido todas las instrucciones descritas en el manual del
propietario de FreeStyle® Lite, consulte a su profesional de la salud.
ESPAÑOL
4
Page 43

El medidor FreeStyle® Lite y cómo funciona
Pantalla de comprobación del sistema
Esta pantalla siempre aparece cuando el medidor
se enciende para que pueda asegurarse de que la pantalla
funciona correctamente. No use el medidor si la pantalla
de comprobación del sistema no coincide con este
ejemplo. Comuníquese con el Departamento de Atención
al Cliente.
ESPAÑOL
Pantalla
Muestra los resultados de sus pruebas y otra información
importante.
Botón m (modo)
Cambia a distintas configuraciones de modo.•
Retrocede.•
Silencia una alarma de recordatorio. •
Botón de luz
Controla la retroiluminación de la pantalla y la
luz de prueba.
Áreas de muestra (semicírculos de color oscuro en la tira de prueba)
Aplique sangre o solución de control a una sola área de
muestra. Introduzca la tira en el medidor con el lado
impreso hacia arriba (ver imagen a la derecha).
Comuníquese con el Departamento de Atención al Cliente de forma gratuita
5
llamando al 1-888-522-5226 o visítenos en www.AbbottDiabetesCare.com.
Page 44

Puerto de datos
Descarga de los resultados de prueba. Requiere un sistema de control
de datos compatible. Para obtener
más información, visite nuestro
sitio web o comuníquese con el
Departamento de Atención al Cliente.
Botón c (Configurar)
Señala una prueba de solución •
de control.
Adelanta.•
Muestra el reloj.•
Silencia una alarma de •
recordatorio.
Puerto de la tira de prueba
Introduzca aquí el extremo de arriba
de una nueva tira de prueba FreeStyle
Lite. El medidor se enciende cuando
introduce la tira de prueba.
Arriba
Tira de prueba FreeStyle Lite
Abajo
Área de muestra
ESPAÑOL
6
Page 45

La pantalla del medidor FreeStyle® Lite
Símbolo de modo de memoria
Muestra los resultados de sus pruebas
almacenados en la memoria del medidor.
Símbolo de resultado de la prueba de solución de control
Muestra que ha marcado un resultado de prueba como
ESPAÑOL
una prueba de solución de control.
Aparece cuando debe cambiar la pila
Muestra los resultados de la prueba.
Muestra la fecha, la hora y la cantidad de pruebas.
Símbolo de pilas
de su medidor.
Área de resultado de la prueba
Área de mensajes
Comuníquese con el Departamento de Atención al Cliente de forma gratuita
7
llamando al 1-888-522-5226 o visítenos en www.AbbottDiabetesCare.com.
Page 46

Símbolo de termómetro
Aparece si su medidor
está fuera del rango
de temperaturas de
funcionamiento.
Símbolos de nivel
de sonido
Indica el volumen
del sonido alto,
bajo o apagado.
Símbolo de promedio de días
Muestra el valor promedio de
lecturas de glucosa de los
últimos 7, 14 o 30 días.
mg/dL (estándar de EE.UU.)
Indica la unidad de medida.
ESPAÑOL
Símbolos de gota de
sangre y tira de prueba
Estos símbolos funcionan
juntos en una animación para
indicarle cuándo está listo el
medidor para que aplique la
sangre o la solución de control.
Símbolo P
Indica PM sólo en el formato de
12 horas (por ejemplo, 4:00 p.m.)
8
Page 47

La tira de prueba FreeStyle Lite
Aplique sangre o solución de control en una sola área
de muestra de la tira de prueba por prueba.
Importante: Use solamente un área de muestra de la tira
de prueba por prueba. No aplique sangre a ambas áreas
de muestra. Las tiras de prueba se podrán usar una sola
vez. Deseche las tiras de prueba usadas. Puede continuar
llenando la tira de prueba durante 60 segundos como
máximo. Asegúrese de volver a aplicar la muestra a la
misma área de muestra.
ESPAÑOL
ADVERTENCIA:
El tapón o el vial contienen secantes que pueden ser nocivos si son
inhalados o ingeridos y pueden causar irritación en los ojos o en
la piel.
Importante: El medidor FreeStyle Lite sólo se debe usar con tiras de
prueba FreeStyle Lite. El uso de otras tiras de prueba con este medidor
puede producir resultados inexactos.
Información importante de las tiras de prueba
El sistema FreeStyle Lite tiene un rango de funcionamiento de 40º a •
104ºF (4° a 40° C).
Almacene el paquete de tiras de prueba en un lugar fresco y seco, a •
una temperatura de entre 40º y 86º F (4° a 30° C).
Utilice las tiras de prueba sólo dentro del rango de temperaturas de •
funcionamiento del sistema.
Manténgalas alejadas de la luz directa del sol y del calor.•
Almacene sus tiras de prueba solamente en su vial original; nunca •
las transfiera a otro vial u otro recipiente.
Nunca almacene tiras de prueba individuales fuera del vial.•
Después de extraer una tira de prueba FreeStyle Lite del vial, cierre •
bien el tapón del vial inmediatamente.
Con las manos limpias y secas, puede tocar la tira de prueba •
en cualquier lado, al extraerla del vial o introducirla dentro del
medidor.
Comuníquese con el Departamento de Atención al Cliente de forma gratuita
9
llamando al 1-888-522-5226 o visítenos en www.AbbottDiabetesCare.com.
Área de muestra
de la tira de
prueba
Page 48

No utilice tiras de prueba después de su fecha de caducidad. Esto •
puede dar lugar a resultados inexactos.
No doble, corte ni altere las tiras de prueba FreeStyle Lite.•
Nota: Para obtener más información, consulte el tríptico del paquete
de las tiras de prueba FreeStyle Lite.
La solución de control FreeStyle®
La solución de control FreeStyle es un líquido rojo que
contiene una cantidad fija de glucosa que se utiliza para:
realizar pruebas de práctica sin tener que usar su propia •
sangre;
asegurarse de que su medidor y tiras de prueba estén •
funcionando en conjunto de manera adecuada;
Cuando dude de sus resultados y desee confirmar que su monitor y
tiras de prueba están funcionando de manera adecuada, se deberá
realizar una prueba de solución de control.
Para obtener información sobre cómo obtener soluciones de control,
comuíquese con el Departamento de Atención al Cliente llamando al
1-888-522-5226.
ESPAÑOL
10
Page 49

Información importante acerca de la solución de control
La solución de control FreeStyle® dura hasta tres meses una vez
abierta la botella o hasta la fecha de caducidad impresa en la etiqueta,
lo que ocurra primero.
Importante: Cuente tres meses hacia adelante a partir de la fecha en que
abre una nueva botella de solución de control. Ésta es la fecha de desecho.
Escriba esta fecha en el lado de la botella de la solución de control.
Ejemplo: Abre la solución de control el 15 de enero. Cuente tres
meses hacia adelante hasta el 15 de abril. Ésta es la fecha de desecho
que registrará en la botella.
ESPAÑOL
Use solamente la solución de control FreeStyle con su sistema •
FreeStyle Lite.
Vuelva a colocar el tapón en la botella de la solución de control •
inmediatamente después de usarla.
No utilice la solución de control después de la fecha de caducidad.•
No agregue agua ni algún otro líquido a la solución de control.•
Las pruebas de la solución de control están especificadas para ser •
precisas sólo cuando se usan entre 59º y 104º F (15° y 40° C).
Los resultados de las pruebas de la solución de control deberían estar •
dentro del rango impreso en la etiqueta del vial de la tira de prueba.
Importante: El rango de la solución de control es un rango deseado
sólo para la solución de control. No es un rango deseado para su nivel
de glucosa en sangre.
Si los resultados de la solución de control están fuera de este rango, •
repita la prueba.
Si los resultados de su prueba de solución de control continúan •
estando fuera del rango impreso del vial de la tira de prueba, no
utilice el sistema FreeStyle Lite para medir su glucosa en sangre.
Póngase en contacto con el Departamento de Atención al Cliente.
Precaución: Los resultados obtenidos en las pruebas de
soluciones de control FreeStyle no reflejan sus niveles de glucosa
en sangre.
Comuníquese con el Departamento de Atención al Cliente de forma gratuita
11
llamando al 1-888-522-5226 o visítenos en www.AbbottDiabetesCare.com.
Page 50

Cómo realizar una prueba de solución de control
1
Comprobación del
sistema
Introduzca la parte de arriba de la tira de prueba
en el medidor hasta que se detenga.
Esto encenderá el medidor.
Pantalla de comprobación del sistema
Cuando el medidor se enciende, aparecerá
esta pantalla para que se asegure de que está
funcionando correctamente.
ESPAÑOL
2
3
Si el aviso de sonido está activo, su medidor emitirá un sonido cuando
la tira de prueba esté llena. Luego, una línea corta se mueve alrededor
de la pantalla en el sentido de las agujas del reloj mientras la muestra
se está procesando.
Espere a que el medidor muestre los
símbolos de gota de sangre y tira de prueba.
Toque suavemente sólo el área de la muestra de
la tira de prueba con la solución de control.
Importante: No aplique solución de control a las
dos áreas de muestra de la tira de prueba.
12
Page 51

El resultado aparecerá en la pantalla y si el sonido está activado, su
medidor emitirá un sonido dos veces. Para marcar el resultado como
un resultado de la solución de control, mantenga presionado el botón
“c” durante 2 segundos hasta que el símbolo de solución de control
( ) aparezca en la parte superior izquierda de la pantalla.
Si ha marcado una prueba de glucosa en sangre como prueba de solución de control por error, puede desmarcarlo manteniendo presionando el botón “c” nuevamente durante dos segundos.
ESPAÑOL
4
Los resultados de las pruebas fuera de rango pueden ser causados por:
solución de control vencida o en mal estado;•
tira de prueba vencida o en mal estado;•
error al realizar la prueba;•
solución de control debilitada;•
mal funcionamiento del medidor;•
la prueba de la solución de control se realizó fuera del rango de •
59º a 104ºF.
Para apagar el medidor, retire la tira de prueba
Compare el resultado de su prueba de solución
de control con el rango impreso en la etiqueta
del vial de su tira de prueba. Los resultados de
la solución de control deberían estar dentro del
rango impreso en el lado del vial de su tira de
prueba.
.
13
Comuníquese con el Departamento de Atención al Cliente de forma gratuita
llamando al 1-888-522-5226 o visítenos en www.AbbottDiabetesCare.com.
Page 52

Prueba de su glucosa en sangre
Importante: Para garantizar resultados exactos,
lave sus manos y la zona de prueba (por ejemplo, su
antebrazo) con agua y jabón. Cerciórese de que no
haya loción ni crema en la zona de prueba. Seque
completamente sus manos y la zona de prueba.
Con el medidor FreeStyle® Lite, puede medir la glucosa en sangre en •
el antebrazo, dedos, brazo, mano, muslo o pantorrilla.
Las pruebas con el medidor FreeStyle Lite requieren una muestra de •
tamaño muy pequeño, 0,3 microlitros de sangre; aproximadamente
el tamaño de una cabeza de alfiler (ejemplo:•).
ADVERTENCIA:
Le recomendamos que realice las pruebas en los dedos de la mano
si está haciendo una prueba de hipoglucemia (bajo nivel de glucosa
en sangre) o si sufre de hipoglucemia asintomática.
Los momentos en los que puede controlar si su glucosa en sangre está
baja son:
cuando tiene síntomas como debilidad, sudores, nerviosismo, dolor •
de cabeza o confusión;
cuando ha demorado una comida después de tomar insulina;•
cuando se lo recomienda su profesional de la salud.•
ESPAÑOL
14
Page 53

Cómo realizar una prueba de glucosa en sangre
1
Nota: Si no comienza la prueba en dos minutos, el medidor se apagará.
Para reiniciar su medidor, retire la tira de prueba FreeStyle Lite sin usar
ESPAÑOL
y vuelva a introducirla en el medidor.
Comprobación del
sistema
Símbolos de gota
de sangre y tira de
prueba
Cómo preparar su medidor
Introduzca una tira de prueba FreeStyle Lite en
el medidor hasta que se detenga. El medidor se
encenderá.
Pantalla de comprobación del sistema
Cuando el medidor se enciende, aparecerá
esta pantalla para que se asegure de que está
funcionando correctamente.
Los símbolos gota de sangre y tira de prueba
aparecerán en la pantalla. Su medidor está listo
para aplicar una muestra de sangre.
Importante: El medidor FreeStyle Lite sólo se debe usar con tiras de
prueba FreeStyle Lite. El uso de otras tiras de prueba con este medidor
puede dar lugar a resultados inexactos.
Comuníquese con el Departamento de Atención al Cliente de forma gratuita
15
llamando al 1-888-522-5226 o visítenos en www.AbbottDiabetesCare.com.
Page 54

Cómo obtener una muestra de sangre
2
Seleccione una zona de prueba. Existen diferencias entre realizar
una prueba en los dedos de la mano o en otras zonas alternativas.
Use su dispositivo para lancetas para obtener una muestra de
sangre. Consulte el tríptico del dispositivo para lancetas para
obtener instrucciones detalladas sobre cómo usar el dispositivo
para lancetas FreeStyle.
ADVERTENCIA: Le recomendamos que realice las pruebas en
los dedos de la mano, si está haciendo una prueba de hipoglucemia (bajo nivel de glucosa en sangre) o si sufre de hipoglucemia
asintomática.
ESPAÑOL
3
Llene la tira de prueba FreeStyle Lite con
sangre
Asegúrese de que la tira de prueba a.
FreeStyle Lite esté en el medidor y que el
medidor esté encendido. (Si el medidor
está apagado, retire la tira de prueba y
vuelva a introducirla.) Ahora está listo
para aplicar la muestra de sangre.
Acerque la tira de prueba FreeStyle Lite a b.
la muestra de sangre en ángulo.
La tira de prueba FreeStyle Lite actúa c.
como una esponja y absorbe la sangre en
la tira a través del área de la muestra.
Área de muestra de la tira de
prueba
16
Page 55

ESPAÑOL
No presione la tira de prueba FreeStyle Lite contra la zona de •
prueba.
No frote la sangre contra la tira de prueba FreeStyle Lite.•
No aplique sangre al lado plano de la tira de prueba FreeStyle •
Lite.
No aplique sangre a la tira de prueba FreeStyle Lite cuando la •
tira de prueba FreeStyle Lite se encuentra fuera del medidor.
No coloque sangre ni objetos extraños en el puerto de la tira •
de prueba FreeStyle Lite.
A la espera del resultado
4
Si después de cinco segundos, su medidor no muestra una línea •
corta moviéndose alrededor de la pantalla, es posible que la
muestra sea demasiado pequeña. Puede agregar sangre a la misma
área de la muestra de la tira de prueba con la cual comenzó
durante 60 segundos como máximo a partir del momento de la
primera aplicación.
No jale la tira de prueba FreeStyle Lite hasta •
que escuche un sonido o vea la línea corta
moviéndose en el sentido de las agujas del
reloj en la pantalla de su medidor. Esto
significa que tiene suficiente sangre y que el
medidor está leyendo su glucosa.
El resultado de la prueba está completo cuando •
aparece en la pantalla el resultado de su prueba
de glucosa en sangre y escuchará dos sonidos.
En promedio, su lectura se mostrará en 5 •
segundos. El tiempo que tome el medidor
depende de su nivel de glucosa en sangre.
Cuanto más alto sea el nivel de glucosa, más
tiempo lleva obtener un resultado.
Posibles hematomas
Es posible que aparezcan hematomas en la zona de prueba. Si esto
ocurre, puede optar por pinchar en otra zona de prueba.
Comuníquese con el Departamento de Atención al Cliente de forma gratuita
17
llamando al 1-888-522-5226 o visítenos en www.AbbottDiabetesCare.com.
Page 56

Lecturas LO (BAJO) y HI (ALTO)
Importante: Las lecturas de glucosa en sangre altas o bajas pueden
indicar una enfermedad potencialmente grave. El medidor FreeStyle®
Lite muestra resultados de 20 a 500 mg/dL.
Si el resultado de su prueba es inferior a 20 mg/dL, aparecerá LO
(BAJO) en la pantalla del medidor. Esta lectura indica hipoglucemia
grave (bajo nivel de glucosa en sangre).
Lectura LO (BAJO) con síntomas
Si obtiene LO (BAJO) en la lectura y presenta
síntomas como debilidad, sudores, nerviosismo,
dolor de cabeza o confusión, entonces siga las
recomendaciones de su médico para tratar la
Lectura LO (BAJO)
Lectura LO (BAJO) sin síntomas
Si obtiene LO (BAJO) en la lectura, pero no tiene síntomas de bajo
nivel de glucosa en sangre, entonces vuelva a realizar la prueba con
una nueva tira de prueba en sus dedos. Si aún obtiene LO (BAJO)
en la lectura, siga las recomendaciones de su médico para tratar la
hipoglucemia.
Si su prueba es superior a 500 mg/dL, aparecerá HI (ALTO) en la pantalla.
Esto indica hiperglucemia grave (alto nivel de glucosa en sangre).
Lectura HI (ALTO)
Lectura HI (ALTO) sin síntomas
Si obtiene una lectura HI (ALTO), pero no tiene síntomas de alto nivel
de glucosa en sangre, entonces vuelva a realizar la prueba con una
nueva tira de prueba. Si aún obtiene HI (ALTO) en la lectura, siga las
recomendaciones de su médico para tratar la hiperglucemia.
hipoglucemia.
Lectura HI (ALTO) con síntomas
Si presenta síntomas como fatiga, sed, orina
en exceso o visión borrosa, entonces siga las
recomendaciones de su médico para tratar la
hiperglucemia.
ESPAÑOL
18
Page 57

Cómo usar las luces de su medidor
Según el modo en que esté su medidor, al presionar el botón de luz
(
) se enciende la retroiluminación de la pantalla o bien la luz de
prueba.
Cómo usar la retroiluminación de la pantalla
Al presionar el botón de luz, se enciende la
retroiluminación de la pantalla en todos los modos
excepto cuando aplica una muestra. Cuando aplica
ESPAÑOL
La retroiluminación de la pantalla se apaga cuando presiona el botón
de luz (
segundos.
La luz de prueba se apaga:
cuando presiona el botón de luz nuevamente;•
cuando el medidor recibe la cantidad correcta de sangre para una •
prueba (la tira de prueba FreeStyle Lite está llena);
después de 60 segundos de inactividad;•
cuando se extrae una tira de prueba FreeStyle Lite del medidor.•
Si utiliza ya sea la retroiluminación o la luz de prueba durante el modo
de prueba, la retroiluminación se enciende nuevamente para mostrarle
los resultados de la prueba después de que se completó la medición.
una muestra, el botón de luz enciende la luz de
prueba.
) nuevamente o cuando el medidor está inactivo durante 10
Cómo usar la luz de prueba
Al presionar el botón de luz mientras aparecen en la
pantalla los símbolos gota de sangre y tira de prueba,
se enciende la luz de prueba
19
Comuníquese con el Departamento de Atención al Cliente de forma gratuita
llamando al 1-888-522-5226 o visítenos en www.AbbottDiabetesCare.com.
Page 58

Cómo configurar su medidor
•
Para ingresar en el modo configurar
Comience con el medidor apagado (sin haber
introducido una tira de prueba). Presione y
sostenga con firmeza el botón “m” hasta que
aparezca en la pantalla.
Para salir en cualquier momento •
Mantenga presionado el botón “m” hasta que el medidor se apague.
Para desplazarse de una pantalla a otra •
Presione el botón “m” para desplazarse por todas las pantallas
de configuración tales como alarmas de recordatorio, nivel de
sonido, hora, fecha, etc.
Para cambiar la configuración dentro de la pantalla•
Presione el botón ”c” (configurar).
Cómo configurar las alarmas de recordatorio
Puede configurar todas las alarmas de recordatorio (de 1 a 4) o
ninguna. Nota: Una alarma de recordatorio nunca sonará durante una
prueba.
Para configurar una alarma de recordatorio o varias alarmas de
recordatorio, siga estos pasos.
Comience con el medidor apagado. Presione el 1.
botón “m” y sosténgalo hasta que aparezca
y 01234 en la pantalla. Ahora está en el modo
de configuración de alarma de recordatorio
y aparece el “0” intermitentemente.
ESPAÑOL
Seleccione
alarma de
recordatorio
Para ir a la primera alarma de recordatorio 2.
presione el botón “c” una vez. Ahora está listo
para configurar la alarma de recordatorio 1
(“1” aparece intermitentemente).
20
Page 59

ESPAÑOL
Seleccione la
hora
Seleccione
los minutos
Seleccione el
volumen de
la alarma de
recordatorio
Seleccione
la alarma de
recordatorio
Presione el botón “3. m” para ir a la configuración
de la hora. Con la hora intermitente, presione el
botón “c” hasta que aparezca la hora correcta.
Presione el botón “4. m” para ir a la configuración
de los minutos. Con los minutos intermitentes,
presione el botón “c” hasta que aparezca el
minuto correcto.
Presione el botón “5. m” para ir a la configuración
de volumen de la alarma de recordatorio. La
configuración predeterminada está apagada.
Presione el botón “c” para seleccionar la
configuración de volumen deseada: bajo, alto o
apagado.
Presione el botón “6. m” para finalizar la
configuración de su alarma. Esto lo llevará
nuevamente al modo de configuración de alarma
de recordatorio.
Si desea configurar varias alarmas de
recordatorio, presione el botón “c” para ir a la
alarma de recordatorio 2. Repita.
Nota: Para guardar sus configuraciones de alarma de recordatorio y
salir del modo configurar, mantenga presionado el botón “m” hasta
que el medidor se apague. Presione el botón “m” cuando aparece el
“0” intermitentemente para ir a la siguiente pantalla de configuración
sin configurar ninguna alarma de recordatorio.
Comuníquese con el Departamento de Atención al Cliente de forma gratuita
21
llamando al 1-888-522-5226 o visítenos en www.AbbottDiabetesCare.com.
Page 60

Configuración del sonido
Hay tres (3) opciones de volumen de sonido:
Apagado Bajo Alto
Hay tres opciones de volumen de sonido que le permiten saber cuando
la tira de prueba está llena, cuando se realiza la lectura y cuando se
produce un error:
Presione el botón 1. “c” hasta que aparezca el nivel de sonido deseado
Presione el botón 2. “m” para ir a “Cómo configurar la hora”.
Cómo configurar la hora
Con la hora intermitente, presione el botón “1. c”
hasta que aparezca la hora correcta. El medidor
está predeterminado en formato de 12 horas.
Aparece la “P” para las horas “PM”.
Hora
Presione el botón “2. m” para ir a la configuración
de minutos.
Con los minutos intermitentes, presione el botón 3.
“c” hasta que aparezcan los minutos correctos.
Presione el botón “4. m” para ir a “Cómo
Minuto
configurar el formato de hora”.
ESPAÑOL
Cómo configurar el formato de hora
Con el modo hora intermitente, presione el 1.
botón “c” para desplazarse entre el formato de 12
y 24 horas. La hora se actualiza automáticamente
al formato seleccionado.
Formato de hora
Presione el botón “2. m” para ir a “Cómo
configurar la fecha”.
22
Page 61

Cómo configurar la fecha y el formato de fecha
Con el mes intermitente, presione el botón “1. c”
hasta que aparezca el mes correcto.
Presione el botón “2. m” para ir a la configuración
Mes
del día.
Con el día intermitente, presione el botón “3. c”
hasta que aparezca el día correcto.
Presione el botón “4. m” para ir a “Formato de
f e c h a ”.
ESPAÑOL
Día
Con la fecha intermitente, presione el botón “5. c”
para seleccionar el formato mes-día o día-mes.
La fecha se actualiza automáticamente al formato
seleccionado.
Presione el botón “6. m” para ir a la configuración
del año.
Con el año intermitente, presione el botón “7. c”
hasta que aparezca el año correcto.
Año
Ha completado la configuración del medidor.
Para ir a “Configuración de alarmas de recordatorio del usuario”, •
presione el botón “m”.
Para salir, mantenga presionado el botón “• m”.
23
Comuníquese con el Departamento de Atención al Cliente de forma gratuita
llamando al 1-888-522-5226 o visítenos en www.AbbottDiabetesCare.com.
Page 62

Resultados del medidor
Memoria del medidor
Para ingresar •
Comience con el medidor apagado (sin haber introducido una tira
de prueba). Presione el botón “m” y suéltelo; la primera pantalla de
memoria que aparece será su promedio de 7 días.
Para salir•
Mantenga presionado el botón “m” hasta que el medidor se apague.
Promedio de 7, 14 y 30 días
La primera pantalla de memoria que ve es su promedio de 7 días.
Esto incluye todas las lecturas desde los últimos 7 días, comenzando
desde la fecha y la hora actuales que se muestran en el medidor.
(Las lecturas de solución de control, BAJO y ALTO no están incluidas
en el promedio).
Promedio de 7 días: Ejemplo:
Promedio de 7 días = su promedio de 7 días
n = indica la cantidad de
resultados incluidos
en su promedio
El botón “c” le permite adelantar los promedios de 14 y 30 días.
Continúe presionando el botón “c” para ver los resultados de prueba
almacenados. Su resultado más reciente se mostrará primero.
El botón “m” le permite retroceder.
ESPAÑOL
24
Page 63

Resultados de pruebas
El medidor almacena lecturas de las últimas 400 pruebas con fecha
y hora. Puede recorrer todas las lecturas manteniendo presionado el
botón “c”. La primera lectura que ve es el resultado más reciente.
Temperatura: Un resultado con el símbolo de
termómetro indica que la lectura fue tomada fuera
del rango de temperaturas de funcionamiento
especificado para el medidor y puede no ser
preciso. Este valor se incluye en su promedio de 7,
ESPAÑOL
14 y 30 días.
Lectura LO (BAJO): Una lectura LO (BAJO) (inferior a 20 mg/dL) se
incluye en la memoria como LO (BAJO).
Lectura HI (ALTO): Una lectura HI (ALTO) (superior a 500 mg/dL)
se incluye en la memoria como HI (ALTO).
Prueba de glucosa en sangre
Un resultado sin un símbolo de solución de
control (
) indica que es una lectura de glucosa en
sangre. La fecha y hora de la prueba aparecerán en
la parte inferior de la pantalla.
Prueba de solución de control
Un valor con ( ) indica que ha marcado esta
lectura como una prueba de solución de control.
La fecha y hora de la lectura de solución de control
aparecerán en la parte inferior de la pantalla.
25
Comuníquese con el Departamento de Atención al Cliente de forma gratuita
llamando al 1-888-522-5226 o visítenos en www.AbbottDiabetesCare.com.
Page 64

Cómo descargar datos
El símbolo “PC” muestra cuándo se introdujo un
cable de datos en el puerto de datos del medidor.
No puede realizar una prueba mientras el cable de
datos está en el puerto de datos del medidor.
El medidor mostrará “PC” hasta que el cable de
datos se extraiga del puerto de datos.
(Requiere un sistema de control de datos compatible.)
Para obtener más información, visite nuestro sitio web o comuníquese con el
Departamento de Atención al Cliente.
ESPAÑOL
26
Page 65

Mantenimiento del medidor
Pila
Su medidor FreeStyle® Lite viene con una pila de litio ya instalada
Nº 2032 de 3 voltios. La pila le brinda suficiente energía para que el
medidor realice 500 pruebas. Si la pila está baja, el símbolo de pila
(
) aparece en todas las pantallas hasta que cambie la pila.
Cuando la pila está baja no se encenderán la retroiluminación de la
pantalla y la luz de prueba.
Importante: Cuando aparece este símbolo o cuando la retroiluminación
ESPAÑOL
y la luz de prueba comienzan a quedar más tenues, debe cambiar la pila
inmediatamente.
Para evitar perder las configuraciones de la hora y la fecha, cambie •
la pila antes de que pase un minuto desde que extrajo la pila vieja.
Si toma más de un minuto cambiar la pila, es posible que deba •
reiniciar la fecha y la hora para obtener el promedio de 7, 14 y 30
días correcto. Si se pierden la fecha y la hora, las pantallas de hora
y fecha muestran 12:00 y 00-00 en forma intermitente hasta que se
reinicie.
El hecho de extraer la pila no afecta el registro de memoria •
del medidor ni las configuraciones del usuario previamente
almacenadas (como formato de hora y de fecha).
Aún si pierde sus configuraciones de fecha y hora, puede realizar •
una prueba de glucosa en sangre y los resultados no se verán
afectados.
Cómo cambiar la pila
1
Voltee el medidor. Presione el clip de la tapa
del compartimiento de las pilas para abrir.
Mueva la tapa del compartimiento de las
pilas para abrir y luego apague el medidor.
Para extraer la pila, empuje la pila hacia abajo
para liberarla.
27
Comuníquese con el Departamento de Atención al Cliente de forma gratuita
llamando al 1-888-522-5226 o visítenos en www.AbbottDiabetesCare.com.
Page 66

Cómo cambiar la pila (continuación)
2
Instale la pila con el polo positivo (+) hacia arriba
y hacia usted.
3
Para cerrar, coloque la tapa del compartimiento
de las pilas en ángulo dentro del medidor y mueva
hacia abajo hasta que quede en su lugar.
Nota: Es necesario desechar las pilas de forma
adecuada. Por ello, todas las tiendas que venden
pilas cuentan con cajas para la recolección de
pilas.
Cuidado de su medidor
Evite que entre suciedad, polvo, sangre, solución de control, agua o
cualquier otro líquido en los puertos de la tira de prueba y de datos
del medidor.
Limpie la parte exterior del medidor usando un paño humedecido en
algunos de estos líquidos:
Detergente/agua y jabón suave.•
Alcohol isopropílico 70%.•
Una mezcla de una parte de blanqueador doméstico y nueve partes •
de agua.
Importante: No sumerja el medidor en agua ni en ningún otro líquido.
ESPAÑOL
28
Page 67

Resolución de problemas del sistema
Mensajes de error
Error 1
Causas posibles
La muestra es demasiado pequeña.•
Problema con la tira de prueba FreeStyle Lite.•
Problema con el medidor.•
ESPAÑOL
Qué debe hacer
Si tiene síntomas como debilidad, sudores, nerviosismo, dolor de 1.
cabeza o confusión, siga las recomendaciones de su médico para
tratar la hipoglucemia.
Realice una prueba de solución de control con una nueva tira de 2.
prueba FreeStyle Lite. Si los resultados de la prueba de solución de
control están dentro del rango impreso en el lado del vial de su tira
de prueba, vuelva a realizar la prueba usando sangre y una nueva
tira de prueba FreeStyle Lite.
Si la segunda prueba usando solución de control no funciona o si 3.
el error persiste, comuníquese con el Departamento de Atención al
Cliente.
Glucosa en sangre muy baja (inferior a 20 mg/dL).•
Error 2
Causas posibles
Problema con la tira de prueba FreeStyle Lite.•
Problema con el medidor.•
Glucosa muy alta (superior a 500 mg/dL).•
Solución de control ALTA aplicada cuando la •
temperatura es demasiado fría.
(Esto se aplica solamente a una solución de
control etiquetada como ALTA).
29
Comuníquese con el Departamento de Atención al Cliente de forma gratuita
llamando al 1-888-522-5226 o visítenos en www.AbbottDiabetesCare.com.
Page 68

Qué debe hacer
Si tiene síntomas como sed, fatiga, orina en exceso o visión borrosa, 1.
siga las recomendaciones de su médico para tratar la hiperglucemia.
Realice una prueba de solución de control con una nueva tira de 2.
prueba FreeStyle Lite. Si los resultados de la prueba de solución de
control están dentro del rango impreso en el lado del vial de su tira
de prueba, vuelva a realizar la prueba usando sangre y una nueva
tira de prueba FreeStyle Lite.
Si la segunda prueba usando solución de control no funciona o si 3.
el error persiste, comuníquese con el Departamento de Atención al
Cliente.
Error 3
Causas posibles
Procedimiento de prueba incorrecto. Por •
ejemplo, colocar sangre en la tira de prueba antes
de introducir la tira de prueba en el medidor
o aplicar sangre antes de que aparezcan los
símbolos gota de sangre y tira de prueba.
Problema con la tira de prueba FreeStyle Lite.•
Problema con el medidor.•
Qué debe hacer
Asegúrese de ver los símbolos gota de sangre y tira de prueba en la 1.
pantalla antes de aplicar la sangre o la solución de control.
Realice una prueba de solución de control con una nueva tira de 2.
prueba FreeStyle Lite. Si los resultados de la prueba de solución de
control están dentro del rango impreso en el lado del vial de su tira
de prueba, vuelva a realizar la prueba usando sangre y una nueva
tira de prueba FreeStyle Lite.
Si la segunda prueba usando solución de control no funciona o si 3.
el error persiste, comuníquese con el Departamento de Atención al
Cliente.
ESPAÑOL
30
Page 69

Error 4
Causas posibles
Problema con una tira de prueba FreeStyle Lite.•
Problema con el medidor.•
Qué debe hacer
Realice una prueba de solución de control con una nueva tira de 1.
prueba. Si los resultados de la prueba de solución de control están
ESPAÑOL
dentro del rango impreso en el lado del vial de su tira de prueba,
vuelva a realizar la prueba usando sangre y una nueva tira de prueba
FreeStyle Lite.
Si la segunda prueba usando solución de control no funciona o si 2.
el error persiste, comuníquese con el Departamento de Atención al
Cliente.
31
Comuníquese con el Departamento de Atención al Cliente de forma gratuita
llamando al 1-888-522-5226 o visítenos en www.AbbottDiabetesCare.com.
Page 70

Resolución de problemas
El medidor no ingresa en el modo de prueba después de
introducir una tira de prueba.
Causa probable Qué hacer
La pila está descargada. Cambie la pila (y vuelva a configurar la fecha y la
La pila se instaló
incorrectamente o no hay
pila en el medidor.
La tira de prueba se introdujo al revés, se introdujo el
extremo incorrecto o no se
introdujo por completo en el
medidor.
Medidor o tiras de prueba
defectuosos.
Sangre u objetos extraños en
el puerto de la tira de prueba.
La prueba no comienza después de aplicar la muestra de sangre.
Causa probable Qué hacer
La muestra es demasiado
pequeña.
Tira de prueba defectuosa. Repita la prueba con una nueva tira de prueba
Se aplicó la muestra después
del tiempo de espera del
medidor (dos minutos) y éste
se apaga.
Medidor o tiras de prueba
defectuosos.
hora, si es necesario).
Compruebe que la pila esté instalada correctamente con el polo positivo (+) hacia arriba y
hacia usted.
Introduzca la tira de prueba FreeStyle Lite con el
lado impreso hacia arriba y la parte superior de
la tira en el medidor.
Comuníquese con el Departamento de Atención
al Cliente.
Comuníquese con el Departamento de Atención
al Cliente.
Puede agregar sangre al área de la muestra de la
tira de prueba FreeStyle Lite con la cual comenzó
durante 60 segundos como máximo después
del momento de la primera aplicación. Si es
necesario, repita la prueba con una nueva tira de
prueba FreeStyle Lite y una muestra de sangre
más grande.
FreeStyle Lite
Repita la prueba con una tira de prueba nueva.
Espere hasta ver los símbolos gota de sangre y
tira de prueba en la pantalla antes de aplicar la
muestra de sangre.
Comuníquese con el Departamento de Atención
al Cliente.
ESPAÑOL
32
Page 71

Especificaciones del sistema FreeStyle Lite
Método de ensayo Sensor electromecánico coulométrico
Apagado automático Dos minutos después de la última acción
del usuario
Duración de la pila 500 pruebas
Calibración Equivalente en plasma
Hematocrito 15% a 65%
ESPAÑOL
Unidades de medida mg/dL
Temperatura para
almacenamiento del
medidor
Memoria 400 pruebas de glucosa en sangre y
Humedad relativa de
funcionamiento
Temperatura de
funcionamiento
Fuente de alimentación Una pila de litio Nº 2032 de 3 voltios
Rango de resultados 20 a 500 mg/dL
Muestra Sangre entera, capilar
Tamaño de la muestra 0,3 microlitros (300 nanolitros)
Tamaño 1,57” de ancho x 2,9” de largo x 0,65” de
Duración de la prueba Promedio de 5 segundos
-4º a 140º F (-20º a 60º C)
solución de control con fecha y hora
de 5% a 90% (sin condensación)
40° a 104° F (4º a 40º C)
reemplazable
profundidad
Peso 1,4 oz., y esto incluye la pila
Comuníquese con el Departamento de Atención al Cliente de forma gratuita
33
llamando al 1-888-522-5226 o visítenos en www.AbbottDiabetesCare.com.
Page 72

Abbott Diabetes Care Inc.
1360 South Loop Road
Alameda, CA 94502
Customer Care is available 24 hours a day, 7 days a week.
El Departamento de Atención al Cliente atiende
las 24 horas del día, los 7 días de la semana.
www.AbbottDiabetesCare.com
Call Customer Care
Toll Free at 1-888-522-5226
www.AbbottDiabetesCare.com
Comuníquese con el Departamento de
Atención al Cliente de forma gratuita
llamando al 1-888-522-5226
Covered by one or more of the following U.S. Patents:
Cubierto por una o más de las siguientes patentes de los Estados Unidos:
D424,696 and D426,638 and 6,071,391 and 6,120,676 and 6,143,164 and
6,338,790 and 6,299,757 and 6,461,496 and 6,503,381 and 6,591,125 and
6,592,745 and 6,616,819 and 6,618,934 and 6,676,816 and 6,749,740 and 6,893,545.
© 2006 Abbott Printed in U.S.A.
ART10792 Rev. B 01/07
 Loading...