

Page 1

NeuroSphere™ Virtual Clinic
Supplement
for Clinician Programmer
For Spinal Cord Stimulation Systems
Model 3874
Page 2

CAUTION: Federal (USA) law restricts this device to sale by or on the order of a physician.
™ Indicates a trademark of the Abbott group of c
‡ Indicates a third
Bluetooth and Bluetooth logo are registered trademarks of Bluetooth SIG, Inc.
Pat.
©
http://www.abbott.com/patents
2021 Abbott. All Rights Reserved.
-party trademark, which is property of its respective owner.
ompanies.
Page 3

Contents
About This Manual ........................................................................................................... 1
Prescription and Safety Information ................................................................................... 1
Precautions ................................................................................................................................... 2
Overview of Remote Care Feature ...................................................................................... 3
Getting Started .................................................................................................................. 4
Downloading the Clinician Programmer App with NeuroSphere™ Virtual Clinic .............................. 4
Navigating the Home Screen ......................................................................................................... 5
Connecting the Clinician Programmer to a Generator ..................................................................... 6
Registering the Clinician Programmer for Remote Programming .................................................... 7
Enabling the Generator for Remote Programming ........................................................................ 10
Logging In the Clinician Programmer for Remote Session ............................................................. 11
Preparing for a Remote Session ................................................................................................... 13
Starting a Remote Session ........................................................................................................... 14
Programming in a Remote Session .................................................................................. 15
Navigating the Remote Session Screens ...................................................................................... 15
Switching Between Standard and Full Screen Views .................................................................... 18
Monitoring Network Connection Status ........................................................................................ 21
Adjusting and Managing Patient Therapy ..................................................................................... 22
Managing the Protected Recovery Program ................................................................................. 25
i
Page 4

Ending a Remote Session ............................................................................................................ 29
Logging Out of Remote Session ................................................................................................... 29
Restoring Program Due to Interruptions ....................................................................................... 30
Cybersecurity .................................................................................................................. 31
Privacy ........................................................................................................................... 32
Troubleshooting .............................................................................................................. 32
Troubleshooting Chart ................................................................................................................. 32
Enabling Device Settings ............................................................................................................. 40
Technical Support .......................................................................................................... 41
Appendix A: Optional Accessory Guidelines ..................................................................... 41
ii
Page 5

About This Manual
This manual explains how to set up and use NeuroSphere™ Virtual Clinic (also known as the Remote
Care feature) in the St. Jude Medical™ Clinician Programmer application (app) (Model 3874) with
Abbott Medical neurostimulation systems. For information about using the clinician programmer app
with the neurostimulation system, refer to your clinician programmer app manual.
NOTE: This manual is a supplement to your clinician programmer app manual. Refer to the
"clinician programmer app manual" as directed for additional information, features, and
programming instructions.
Prescription and Safety Information
Read this section for precautions related to the Remote Care feature.
NOTE: Refer to your clinician programmer app manual to get additional prescription information
for the clinician programmer app. Refer to the clinician's manual for the appropriate
neurostimulation system to get prescription information, including indications for use and
contraindications. For specific instructions, warnings, precautions, and adverse effects about other
system components, see the clinician's manual for those components.
1
Page 6

Precautions
Remote Care patient selection. Select patients appropriately for neurostimulation. The patient should
be able to use the patient controller and correctly interpret the icons and messages that appear on the
screen.
Consider the following additional factors when selecting patients for remote programming:
Patient's cognitive and physical capabilities in performing technical activities to connect their
devices to the internet and troubleshoot any connection issues.
Level of available support from a caregiver.
Remote Care procedure selection. Assess the patient and the planned procedure to determine if an
in-office or remote session is more appropriate.
Alternate communication method. To ensure patient comfort and safety, you should have an alternate
means of contacting the patient available when engaging in a remote session. After an interrupted
session, you should contact the patient to ensure that the patient controller shows the expected therapy
settings, and then do any troubleshooting necessary to restore the remote connection.
Communication loss. If communication is lost between you and the patient during a remote session,
the system will apply the protected recovery program. A change in stimulation may result in effects
including unintended stimulation and coordination loss. To minimize discomfort, contact the patient to
ensure that the patient controller is connected to the generator and confirm the program settings.
Programmer device heating. Clinician programmer device heating during a remote session could lead
to superficial tissue irritation. If you encounter this issue, you may minimize discomfort by ensuring your
clinician programmer is used with an accessory. For considerations, refer to the optional accessory
guidelines appendix.
2
Page 7

Overview of Remote Care Feature
The Remote Care feature requires the patient controller to be registered in the AirWatch‡ mobile device
management service. In addition, you must enable the Remote Care mode for the patient's implantable
pulse generator (IPG) to establish communication between your clinician programmer and the patient’s
generator.
For patients with the Remote Care feature activated, you will be able to:
1. Log into the secure Remote Care system from your clinician programmer.
2. Securely connect to the patient via the patient’s connected patient controller after the patient has
enabled a remote session.
3. Assess your patient via audio and video feedback between the patient controller and your clinician
programmer.
4. Make therapy adjustments, manage programs, and view settings on the IPG.
5. Complete a patient programming session, end the remote connection and generate a final report
of the session.
During a remote session, you cannot enable the following features:
MRI Mode
Surgery Mode
Programming external pulse generator (EPG)
Lead type and configuration
3
Page 8

Getting Started
This section contains information about the clinician programmer app with Virtual Clinic and
instructions for pairing and connecting the clinician programmer to a patient's generator in-office or
remotely.
Downloading the Clinician Programmer App with NeuroSphere™ Virtual Clinic
NOTE: The clinician programmer app with Virtual Clinic is compatible with the Apple‡ iPad‡
mobile digital device provided by Abbott Medical. The patient controller app is compatible with an
Apple iOS‡ mobile digital device (either a device provided by Abbott Medical or a compatible
personal Apple iOS device).
To download the clinician programmer app with Virtual Clinic, follow the same download instructions
provided in your clinician programmer app manual.
After installation completes, the clinician programmer app with Virtual Clinic icon
appears on the clinician programmer Home screen.
NOTE: If managing patients enrolled for remote programming, always use the clinician
programmer app with Virtual Clinic.
4
automatically
Page 9
Navigating the Home Screen
When you launch the clinician programmer app with Virtual Clinic , the clinician programmer app
Home screen appears. From this screen, you can access the following areas:
Tap Generators to locate a generator for programming.
Tap Patient Records to open the patient records screen.
Tap Demonstration Mode to open a software demonstration. Demonstration Mode provides
representative functionality for the clinician programmer app, including creating programs and
adjusting parameter limits within available combinations.
Tap to open the Information popover where you can view clinician and programmer information
(including the clinician programmer app model number and software version).
NOTE: The first time you launch the clinician programmer app, the Legal Notices popover opens
along with a prompt requesting you to allow Bluetooth
Tap OK to allow the app to communicate with the generator. If not accepted, you can
later return to the clinician programmer Home screen, tap Settings > Bluetooth and
enable access.
Read and accept the legal notices to use the app. To view the legal notices again, tap
Legal Notices in the Information popover.
NOTE: The clinician programmer app times out after 30 minutes of inactivity; however, if you
navigate away from the app (such as press the clinician programmer Home button), the app times
out after 3 minutes of inactivity. During a remote session, do not navigate away from the app.
®
wireless communication access.
5
Page 10
Connecting the Clinician Programmer to a Generator
The clinician programmer app with Virtual Clinic allows you to manage a patient’s therapy either
in-office or remotely when the patient is outside your office. When you tap Generators on the clinician
programmer app Home screen, the Select Generator popover opens with the In-Office tab selected.
In-Office − Set up communication between the clinician programmer or patient controller and the
generator when the patient is in the medical office. Refer to your clinician programmer app
manual for the pairing instructions.
Remote − Set up remote communication with the patient’s generator. For instructions, see the
following sections.
- "Registering the Clinician Programmer for Remote Programming" (page 7)
- "Enabling the Generator for Remote Programming" (page 10)
- "Logging In the Clinician Programmer for Remote Session" (page 11)
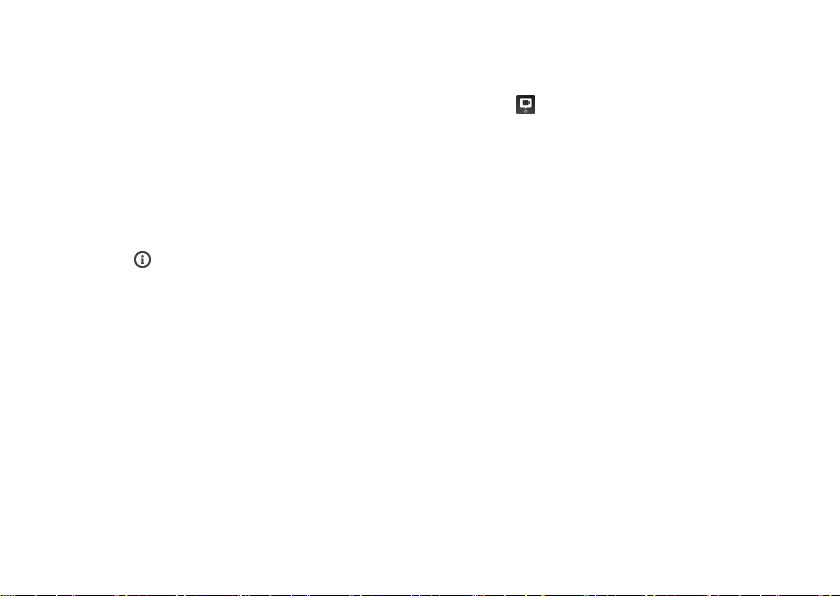
Figure 1. Select Generators popover with Remote tab selected
1. In-Office tab
2. Remote tab
6
Page 11

NOTE: The first time you tap the Remote tab, prompts display requesting access to the camera
and microphone on your device. Tap
communication in the remote sessions. If not accepted, you can later return to the clinician
programmer Home screen, tap
Microphone and enable access.
OK on both messages to allow video and audio
Settings > Privacy > Camera and enable access. Then tap
Registering the Clinician Programmer for Remote Programming
Each clinician programmer must be registered for remote programming before you can set up remote
connections with patients enrolled for remote programming. All users must register to create an
account.
NOTE: If you have not registered, the Register screen displays when you tap Remote on the Select
Generator popover.
To register the clinician programmer for remote programming:
1. Tap Generators on the clinician programmer app Home screen.
2. On the Select Generator popover, tap Remote, and then tap Register.
The Register screen opens.
NOTE: The first time you tap the Register tab, a prompt displays requesting you to allow
notifications. Tap
receive the code, but later can return to the clinician programmer Home screen, tap
Notifications. Then tap the clinician programmer app icon, and tap Allow Notifications to enable
access.
Allow to receive a verification code when requested. Otherwise, you will not
Settings >
7
Page 12
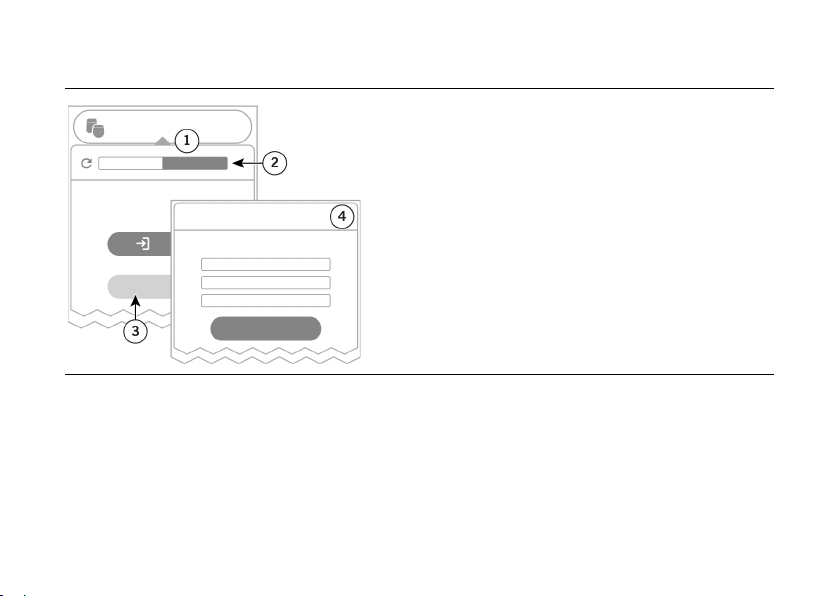
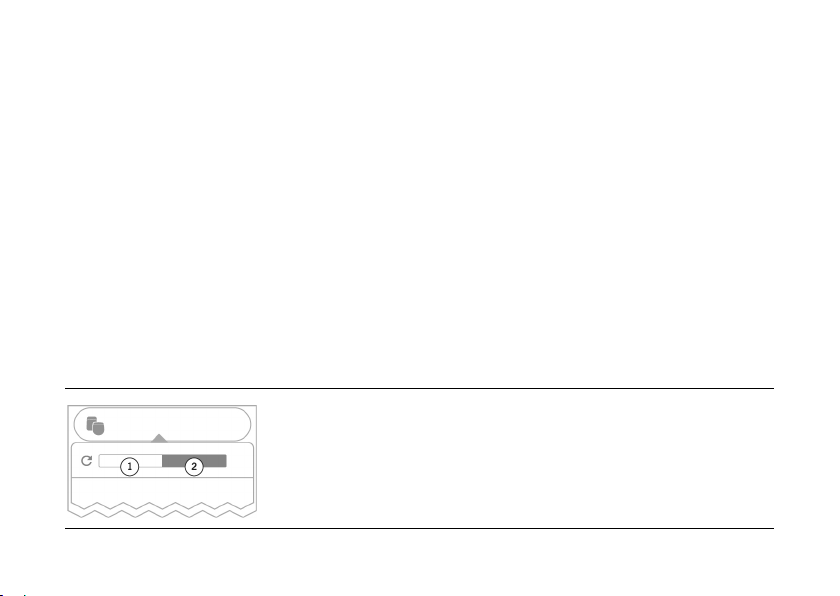
Figure 2. Registering clinician programmer for remote programming
1. Select Generator popover
2. Remote tab
3. Register button
4. Register device screen
3. Tap the Email box and enter the email address you want to use for your Remote Care account.
4. Tap the Password box and enter a unique password you want to use for remote sessions. Then,
tap the Retype Password box and enter the password again.
For password guidelines, see "Cybersecurity" (page 31).
5. Tap Enroll.
When the registration process finishes, the Secure Connection popover opens.
8
Page 13

6. When a message displays with the verification code, enter the code in the Enter Code box and tap
Continue.
If you did not receive the verification code, tap Resend Code and repeat this step.
NOTE: If you did not accept the prompt to allow notifications, the verification code will not display.
You can enable notifications, return to this app and request a verification code again. To enable
the notifications: Return to the clinician programmer Home screen, tap
Tap the clinician programmer app icon, and then tap
Allow Notifications to enable access.
Settings > Notifications.
NOTES:
When the "Connection Secure" message displays, the clinician programmer is registered and
you are logged in for remote programming.
If no generators are found, the Select Generator popover opens displaying the "No Supported
Generators Found" message. Be sure the clinician programmer is connected to the internet.
If the clinician programmer has never established a remote connection with a patient's
generator, you must enable the generator for remote programming. For instructions, see
"Enabling the Generator for Remote Programming" (page 10).
9
Page 14

Enabling the Generator for Remote Programming
To set up remote programming for a patient, you must enable Remote Care service for the patient's
generator in the Abbott Medical Remote Care system. You can enable Remote Care service for the
patient's generator by connecting the clinician programmer to the generator using Bluetooth
technology.
NOTE: Your patient must enable the Remote Care feature in the patient controller app before you
can connect remotely to the patient’s generator.
To enable the generator for remote programming:
1. If you are not already logged in, see "Logging In the Clinician Programmer for Remote Session"
(page 11) for instructions
2. On the Select Generator popover, tap the In-Office tab, and then select the patient’s generator.
The "Connecting to Generator…" message displays while the clinician programmer is connecting
to the generator. When connected, the Program screen opens.
3. Tap at the top of the Program screen to view the generator details.
The Remote Care Mode button displays whether the patient’s generator is enabled for the remote
session.
4. If the Remote Care Mode toggle button is not enabled, tap it.
5. Tap outside the popover with the generator details. Tap Done and then End Session to exit.
10
®
wireless
Page 15

Logging In the Clinician Programmer for Remote Session
To log in for a remote session:
1. Tap Generators on the clinician programmer app Home screen.
2. On the Select Generator popover, tap the Remote tab, and then tap Login.
The Remote Login screen opens.
Figure 3. Logging in for a Remote Session
1. Select Generator popover
2. Remote tab
3. Login button
4. Remote Login screen
11
Page 16

3. Enter the email address and password used to register the clinician programmer for remote
programming.
NOTE: If you forgot the login credentials, contact Technical Support.
4. Tap Continue.
The Select Generator popover opens.
NOTE: Before you can connect remotely to a patient generator, the generator must be enabled for
remote programming. For information, see "Enabling the Generator for Remote Programming"
(page 10).
12
Page 17

Preparing for a remote session:
charging cable can be plugged in.
Preparing for a Remote Session
Before starting a remote session, follow these guidelines.
Devices Fully charge your clinician programmer before the remote session.
Have a charging cable in case you need to recharge your clinician programmer.
Keep area around the charging port of your clinician programmer clear so the
Connection
Patient
communication
and assistance
Comfort
Be sure the clinician programmer is connected to the internet and has a strong
network connection (at least two bars on Wi-Fi‡ or cellular).
Be sure Bluetooth® wireless communication access is on. Otherwise, the clinician
programmer app cannot connect with the generator.
Communicate with the patient before the remote session to give general instructions
about enabling the session and under what circumstances to contact the clinician or
physician.
Have your patient's phone number available in case a voice call is needed or the
session is interrupted.
If needed, ensure patient has a caregiver present to assist with the remote session.
If needed, identify another way or an accessory to hold the clinician programmer.
See "Appendix A" (page 41) for accessory guidelines.
13
Page 18

Starting a Remote Session
NOTE: Your patient must enable the Remote Care feature in the patient controller app before you
can connect remotely to the patient's generator.
To start a remote session with the patient:
1. If you are not already logged in, see "Logging In the Clinician Programmer for Remote Session"
(page 11) for instructions.
2. From the clinician programmer Home screen, tap Generators and then tap the Remote tab.
The Select Generator popover opens.
3. Select the patient’s generator from the list of available generators.
If no generators are found, the "No Supported Generators Found" message displays.
a. Be sure the clinician programmer is connected to the internet.
b. Wait for the patient to enable the Remote Care feature on the patient controller.
c. Tap
When the generator is found, the "Connecting to the Generator..." message displays until the
patient accepts the "Session Ready to Start" message received on the patient controller.
Once you connect successfully, the remote session opens with the Program screen displaying the
video overlay of the patient and you. The "Program Protected" message displays identifying the
program name that is protected and copied for program recovery in case the remote session is
interrupted. For information, see "Managing the Protected Recovery Program" (page 25).
to search for available generators again and refresh the generator list.
14
Page 19

Programming in a Remote Session
The Remote Care feature provides real-time, interactive communication between you and the patient.
This section provides instructions and information about features available during a remote session.
NOTE: While you are in a remote session:
Do not navigate away from the clinician programmer app.
You cannot enable the Surgery Mode or MRI Mode. These modes are only available
when connected to a local generator via Bluetooth® wireless technology.
Navigating the Remote Session Screens
The remote session videos display once you successfully connect remotely to the patient’s generator.
The default screen view is a live video stream of the patient and you in a video overlay on the Program
screen.
Buttons and Icons on the Remote Session Screens and Popovers
The following table provides definitions for buttons and icons that you may encounter.
NOTE: Not all buttons or icons will be available on all screens. For information about the Program
screen, refer to your clinician programmer app manual.
15
Page 20

Button or Icon
Button or Icon Name
Description
Table 1. Remote session screen descriptions
Video display on/off button
Tap to show or hide the video overlay on the
Program screen.
Front/Rear camera button
Tap to swap between the clinician programmer’s
front-facing and rear-facing camera.
Expand video button
Tap to switch from the standard screen view (video
overlay on the Program screen) to the full screen
view.
Collapse video button
Tap to switch from full screen view to the standard
screen view (video overlay on the Program screen).
Mute off button
Indicates the clinician programmer microphone is
unmuted (gray). (Tap to mute the microphone.)
Mute on button
Indicates the clinician programmer microphone is
muted (white). (Tap to unmute the microphone.)
Stop stimulation button Tap to stop stimulation.
Network status indicator
Displays the network connection state of the
clinician programmer (left) and the patient controller
(right).
16
Page 21

Button or Icon
Button or Icon Name
Description
Table 1. Remote session screen descriptions
Lock icon
Indicates the program designated as the protected
recovery program.
Protect button
Tap to designate the selected program as the new
protected recovery program.
Login icon Indicates a button or selection to log in.
Logout icon Indicates a button or selection to log out.
17
Page 22

Switching Between Standard and Full Screen Views
The remote session opens with the video overlay displaying on the Program screen. The overlay shows a
video of the patient's camera view in the background and the clinician's camera view in the small video.
Figure 4. Standard screen view in remote session
1. Video display on/off button
2. Video overlay of the clinician view of
patient video
3. Network status indicator
4. Patient view of clinician video
5. Program screen
18
Page 23

In the standard screen view, tapping
in the video overlay switches the video to full screen view. The
view shows the patient's video in full screen, the clinician's video in the small window, and the Settings
control panel at the bottom of the screen.
Figure 5. Full screen view in remote session
1. Clinician view of patient video
2. Network status indicator
3. Patient view of clinician video
4. Settings control panel
19
Page 24

The Settings control panel has a lead display, stimulation settings, Stimulation toggle button, and the
video settings. The programming mode (tonic or burst) determines which stimulation settings display in
the control panel. Changing the stimulation settings in the control panel also changes them in the
Program screen.
Figure 6. Settings control panel (tonic program)
1. Lead display
2. Stimulation settings
3. Stimulation toggle button
4. Video settings
Figure 7. Settings control panel (BurstDR™ stimulation program)
1. Lead display
2. Stimulation settings
3. Stimulation toggle button
4. Video settings
20
Page 25

Clinician
Programmer
Patient
Controller
Network Connection Description
Monitoring Network Connection Status
The network connection state of the clinician programmer and the patient controller displays in the
standard and full screen views. You can monitor the network connection status and take appropriate
action. The following table provides descriptions of the network status indicators.
Table 2. Network status descriptions for clinician programmer and patient controller
Good (green): Connection is strong.
Slow (yellow): Connection is weak.
Very slow (red): Connection is very weak and may drop.
21
Page 26

Adjusting and Managing Patient Therapy
You may adjust and manage the patient’s therapy as though the patient were in the medical office. You
can adjust the stimulation therapy settings of the area selected for stimulation on the Program screen in
standard screen view or in full screen view.
NOTES:
For more information about the therapy settings, refer to the "Programming with the Clinician
Programmer App" instructions in your clinician programmer app manual.
At any time, you can stop the patient’s stimulation by tapping
toggle button.
Due to the additional time for signals to be sent between the clinician programmer and the
patient device, it may take longer to implement and confirm settings changes than it would
in-office.
22
or tapping the Stimulation
Page 27

To adjust therapy settings in standard screen view
Adjust therapy settings
Use the Program screen to make therapy adjustments, manage
programs, and view the generator's settings in the Program screen.
For more information about the Program screen, refer to the
"Programming with the Clinician Programmer App" instructions in
your clinician programmer app manual.
NOTE: After making programming changes, the "Applying
programming changes to remote device…" message appears.
Wait for the message to close before making additional changes.
NOTE: Switching programs will save the program.
To move the patient view of
clinician video
To hide or show the video
overlay
Touch the patient view of clinician video and drag it to the desired
location in the video overlay.
Tap when you want to hide or show the video overlay while
adjusting the therapy settings on the Program screen.
NOTE: Hiding the video overlay does not disable the video
stream to the patient.
To mute or unmute
microphone
Tap the Mute (white) or Unmute (gray) button to switch between
turning off and on your microphone audio.
To change to full screen view Tap to switch the video to full screen view.
23
Page 28

To adjust therapy settings in full screen view
Adjust stimulation settings
Use the Settings control panel to adjust the following settings as
needed:
Tap the Amplitude box, and then tap the
Tap the Pulse Width box, and then tap
Tap the Frequency box, and then tap
The programming mode (tonic or burst) determines which settings
display. See "Switching Between Standard and Full Screen Views"
(page 18) for information.
To move the patient view of
clinician video
To change to standard screen
view
Touch the patient view of clinician video and drag it to the desired
location in the full screen view.
Tap to switch the video to the standard screen view with the video
overlay on the Program screen.
change the amplitude value.
or buttons to
or buttons to change
the pulse width value.
or buttons to change
the frequency value.
NOTE: After making programming changes, the "Applying
programming changes to remote device…" message appears.
Wait for the message to close before making additional changes.
24
Page 29

Managing the Protected Recovery Program
The Remote Care feature supports the Protected Recovery Program feature that ensures the patient is
returned to a known state if a remote session is interrupted. The Protected Recovery Program features
include:
Every remote session has one program designated as the protected recovery program.
When a remote session starts, the Protected Recovery Program feature designates the patient's
active program as the protected recovery program and prevents its modifications. In addition, the
clinician programmer automatically copies the protected recovery program and makes the copied
program the new active program for modifications.
In the Manage Programs screen, you can view the protected recovery program details, set its
stimulation on/off status, and designate another program as the protected recovery program.
If the remote session is interrupted (such as network issue) and the patient controller is connected
to the generator, the patient controller makes the designated protected recovery program the
active program on the generator. For more information, see "Restoring Program Due to
Interruptions" (page 30).
25
Page 30

To View the Protected Recovery Program Settings
To view the settings of the protected recovery program:
1. On the Program screen, tap next to the program name. The Manage Programs popover opens.
2. Tap Manage Programs to open the list of available programs.
The programs list opens with the currently active program selected and next to the current
protected recovery program.
3. In the list of available programs, tap the program name with .
Figure 8. Manage Programs screen
1. Current active program (Program 3)
2. Current protected recovery program
(Program 1)
26
Page 31

To Set Another Program as the Protected Recovery Program
You can change which program the patient controller should revert to if a remote session is interrupted.
To set another program as the protected recovery program:
1. On the Program screen, tap next to the program name. The Manage Programs popover opens.
2. Tap Manage Programs to open the list of available programs.
The programs list opens with the currently active program selected and next to the current
protected recovery program.
3. In the list of available programs, tap the program name you want to designate as the new
protected recovery program, and then tap .
Figure 9. Manage Programs screen – setting another program as the new protected recovery program
1. Current active program (Program 3)
2. Current protected recovery program
(Program 1)
3. Program selected to designate as new
protected recovery program
(Program 2)
4. Protect button
27
Page 32

The "Protect Program" message displays with the program name and prompts you to set
stimulation to on or off.
4. Select whether the new protected recovery program should have stimulation on or off.
The list of available programs changes automatically displaying next to the new protected
recovery program and removes from the previous protected recovery program.
Figure 10. Manage Programs screen – displaying the new protected recovery program
1. New protected recovery program
(Program 2)
2. Stimulation setting for the new
protected recovery program
5. Tap Done to save changes and return to the Programs screen.
28
Page 33

Ending a Remote Session
Ending a remote session will close the video and end communication with the patient.
To end a remote session:
1. On the Program screen, tap Done and then End Session.
The program is automatically saved to the generator and the session report opens.
2. Tap Done to dismiss the session report.
Logging Out of Remote Session
To log out of a remote session, do either of the following:
From the Home screen of the clinician programmer app with Virtual Clinic, tap Generators. On the
Select Generator popover, tap the Remote tab and then tap .
When the "Logout of Remote Care" message appears, tap Logout.
Double tap the clinician programmer Home button. Then swipe upward on the clinician
programmer app with Virtual Clinic to log out and close the app.
29
Page 34

Patient controller connected to IPG
when session is interrupted
Patient controller not connected to IPG
within 30 minutes after session is
interrupted
Done
Restoring Program Due to Interruptions
Prior to a remote session, establish and discuss an alternate means of contacting your patient if a
session is interrupted. If an interruption occurs, patients should always connect the patient controller to
the generator to confirm the active program and therapy settings are appropriate.
Table 3. State when a remote session is interrupted
Patient controller will apply the Protected Recovery Program
feature.
See "Managing the Protected Recovery Program" (page 25)
for instructions to view the current protected recovery
program or to designate a new program.
IPG will restore the saved active program.
Last saved active program is a modified program that is
saved to the IPG when you either:
Switch to another program.
Tap
to end the programming session.
30
Page 35

Cybersecurity
The clinician programmer requires a password and email address to prevent unauthorized remote
programming access. Follow these guidelines to keep patient data and communications secure:
The password requires a minimum of 14 characters.
Use unique passphrases or sentences that you can remember easily.
In addition, remote programming requires a passcode to prevent unauthorized access to your Apple‡
device. For instructions, refer to the user guide available at support.apple.com/manuals for the Apple‡
iOS‡ device you are using to run the clinician programmer app.
Users should adhere to the following guidelines when using the system for remote programming:
Secure networks to which the Apple device will connect with a Wi-Fi‡ password or other similar
security measures.
Connect only to trusted secured networks.
For more information about cybersecurity and secure use guidelines, refer to your clinician programmer
app manual. Information about the Abbott Medical cybersecurity program is available at
www.NMCybersecurity.Abbott.
If your Apple device is lost or stolen:
1. Contact your Abbott Medical representative to remotely erase your patient information from the
device.
2. Use the Apple instructions at support.apple.com to disable and/or erase your device.
31
Page 36

Privacy
The privacy policy and terms of use are displayed during initial enrollment in the Remote Care system.
For any questions regarding privacy, information is available at VirtualClinic.Abbott/privacypolicy.
Troubleshooting
This section provides troubleshooting suggestions for issues you may experience with remote
programming. If you encounter issues other than those described in this section or in the clinician
programmer app manual, call Technical Support. When you call, be ready to give the representative:
Information about what you were doing when the error occurred.
What error messages appeared.
Refer to "Viewing Generator Details" in your clinician programmer app manual for instructions about
creating a generator log and a programmer log.
Troubleshooting Chart
Typically, the clinician programmer app displays a message for issues associated with programming
patients and managing records. If you are experiencing issues, check the clinician programmer app
screen for a message and follow any instructions it gives to correct the issue. If you still experience the
issue or if you experience an issue without receiving an on-screen message, refer to the following table
for possible causes and solutions.
32
Page 37

Problem
Possible Cause
Possible Solution
Table 4. Possible causes and solutions for potential issues with Remote Care Feature
Cannot locate clinician
programmer app with
Virtual Clinic
Unable to start a
remote session
Clinician programmer app with
Virtual Clinic is not on clinician
programmer Home screen.
Clinician programmer has poor
or no internet connection, or
airplane mode is enabled.
33
Swipe through screens from the clinician
programmer Home screen to locate app.
Search for the app using the iOS‡ search
function.
Re-install the app. Refer to "Downloading
the Clinician Programmer App with
NeuroSphere™ Virtual Clinic" (page 4).
Move to area where you receive stronger
network connection.
Be sure the clinician programmer is
connected to the internet and has a strong
network connection (at least two bars on
Wi-Fi‡ or cellular).
Page 38

Problem
Possible Cause
Possible Solution
Settings
Wi-Fi
Cellular
Settings
Table 4. Possible causes and solutions for potential issues with Remote Care Feature
Turn on Wi-Fi or cellular if connectivity is
disabled:
Return to the clinician programmer Home
screen, tap
Tap
button.
Tap
toggle button.
Return to the clinician programmer Home
screen, tap
Mode is disabled.
34
and then either:
, then tap the Wi-Fi toggle
, then tap the Cellular Data
and be sure Airplane
Page 39

Problem
Possible Cause
Possible Solution
Settings
Bluetooth
logged in for remote session.
for the remote session.
Table 4. Possible causes and solutions for potential issues with Remote Care Feature
Bluetooth® wireless connection
is not strong or turned off.
Clinician programmer is not
Patient has not enabled Remote
Care feature.
35
Turn on Bluetooth wireless connection if
connectivity is disabled:
Return to the clinician programmer Home
screen, tap
then tap the Bluetooth toggle button.
Move away from sources of interference
such as appliances, Wi-Fi‡ routers, or
electrical equipment.
Be sure clinician programmer is logged in
Contact the patient to be sure the Remote
Care toggle button is enabled, and the
patient has accepted the "Session Ready to
Start" message received on the patient
controller.
, tap
, and
Page 40

Problem
Possible Cause
Possible Solution
interrupted
connection to internet.
network connection.
Table 4. Possible causes and solutions for potential issues with Remote Care Feature
Poor audio quality or
video quality during
remote session
Remote session
Clinician programmer has poor
connection to internet.
Patient controller has poor
connection to internet.
Clinician programmer has poor
36
Move to area where you receive stronger
network connection.
Be sure the clinician programmer is
connected to the internet and has a strong
network connection (at least two bars on
Wi-Fi or cellular).
Ask the patient to confirm the patient
controller has a strong connection to the
wireless network.
Move to area where you receive stronger
Be sure the clinician programmer is
connected to the internet and has a strong
network connection (at least two bars on
Wi-Fi or cellular).
Page 41

Problem
Possible Cause
Possible Solution
Table 4. Possible causes and solutions for potential issues with Remote Care Feature
Patient controller has lost
connection to clinician
programmer.
Restart remote session:
1. Double tap the clinician programmer
Home button and then swipe upward
on the clinician programmer app with
Virtual Clinic to close and log out of
remote session.
2. Log in and restart the remote session.
1. Call patient and confirm the "Session
Ended Unexpectedly" message
displays on the patient controller.
2. Attempt to restart the remote session.
3. If unable to re-establish the
connection, schedule an in-office visit
to complete the program.
37
Page 42

Problem
Possible Cause
Possible Solution
Table 4. Possible causes and solutions for potential issues with Remote Care Feature
Patient controller has lost
connection to the generator.
38
1. Call patient and have them reconnect
to the generator.
If the patient does not reconnect to the
IPG using the patient controller within
30 minutes, the IPG will discard
unsaved programming changes on the
active program.
2. Confirm "Session Ended
Unexpectedly" message displays on
the patient controller.
3. Attempt to restart the remote session.
4. If unable to re-establish the
connection, schedule an in-office visit
to complete the program.
Page 43

Problem
Possible Cause
Possible Solution
Table 4. Possible causes and solutions for potential issues with Remote Care Feature
Unable to delete active
program
Program limit reached
on remote generator
The only program available is
the active program, and the
protected recovery program
cannot be modified.
Patient's generator has the
maximum number of allowed
programs and is unable to copy
the active program for the
Protected Recovery Program
feature.
39
Edit the active program to the desired
settings.
On the Program screen, navigate to the
Manage Programs screen to view the list of
available programs, and then delete a
program.
Page 44

Access Request
To Enable Access
Settings > Bluetooth
Settings
Wi-Fi
Cellular
Settings > Notifications
Allow Notifications
Settings > Privacy > Camera
Settings > Privacy > Microphone
Enabling Device Settings
The following table provides instructions to allow access to device settings on your clinician programmer
that were not accepted when the access request messages initially appeared.
Table 5. Enabling device settings
Bluetooth® wireless connection for
communication with generator
Internet connection
Allow notifications
Camera for video communication
Microphone for audio communication
Return to the clinician programmer Home screen, tap
Return to the clinician programmer Home screen, tap
and then either:
Tap
Tap
Return to the clinician programmer Home screen, tap
app icon, and tap
Return to the clinician programmer Home screen, tap
clinician programmer app.
Return to the clinician programmer Home screen, tap
the clinician programmer app.
40
and enable access.
, then tap the Wi-Fi toggle button.
, then tap the Cellular Data toggle button.
. Then tap the clinician programmer
to enable access.
, and then enable access for the
, and then enable access for
Page 45

Technical Support
For technical questions and support for your product, use the following information:
+1 855 478 5833 (toll-free within North America)
+1 651 756 5833
For additional assistance, call your local Abbott Medical representative.
Appendix A: Optional Accessory Guidelines
You may want to obtain an accessory such as a stand or dock (not provided by Abbott Medical) to use
with your clinician programmer during a remote session. Consider the following guidelines when
choosing an accessory to hold the clinician programmer for remote sessions.
41
Page 46

Feature
Purpose for Remote Sessions
fall off the accessory.
Table 6. Optional accessory guidelines
Compatible with your Apple
device
Adjustable
Stable Has a wide base or can attach securely to the surface you set it on.
Accessibility of buttons on
clinician programmer
Charging capability
Manufacturer specifications of the accessory lists your Apple device to
ensure:
Gripping mechanism is designed for the size of your Apple device.
Accessory allows for the thickness of your Apple device with a
protective case.
Allows you to change the view angle or tilt your clinician programmer so
the camera can show the patient clearly.
Tilting or repositioning the clinician programmer does not cause it to
Gripping mechanism does not interfere with the outside controls (power,
Home, or volume buttons) on the Apple device.
Allows your clinician programmer to remain plugged in and charging
during the remote session. (recommended for older Apple devices)
42
Page 47

Page 48

Abbott Medical
Abbott Medical
2021-01
*600146778*
6901 Preston Road
Plano, Texas 75024 USA
+1 855 478 5833
+1 651 756 5833
ARTEN600146778 A
The Corporate Village
Da Vincilaan 11 Box F1
1935 Zaventem
Belgium
+32 2 774 68 11
 Loading...