

Page 1

P1 PROJECTOR PACKING LIST
PROJECTOR
A/V CABLE
100-240V AC ADAPTER
I
Page 2
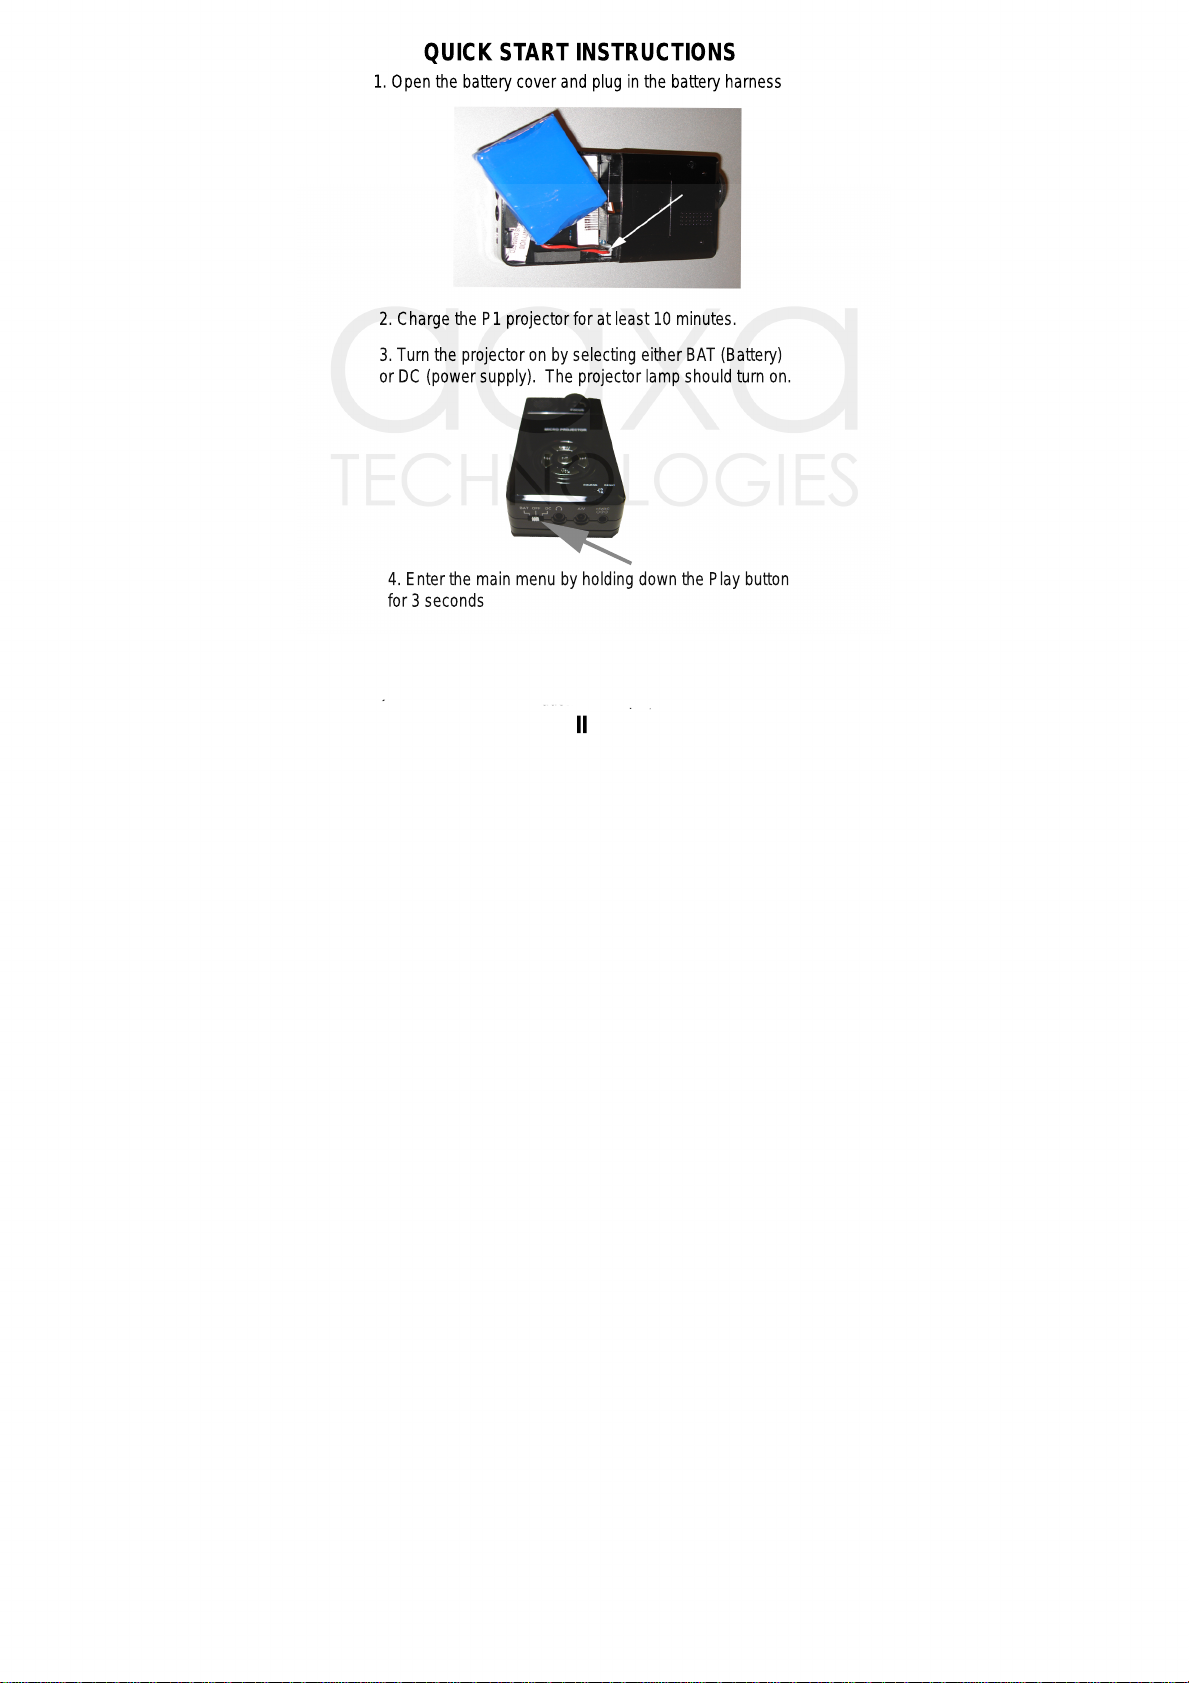
QUICK START INSTRUCTIONS
1. Open the battery cover and plug in the battery harness
2. Charge the P1 projector for at least 10 minutes.
3. Turn the projector on by selecting either BAT (Battery)
or DC (power supply). The projector lamp should turn on.
4. Enter the main menu by holding down the Play button
for 3 seconds
II
Page 3
IMPORTANT
Thank for purchasing the Aaxa Technologies P1 Pico Projector.
• This product is a micro projector with Video and Picture projector
capabilities along with the ability to connect to mobile phones, ipods
, iphones, PSP, PDA’s, DVD players, Notebooks, and any other devices
that are capable of supporting a composite video output and 640x480
resolution.
• Before using the product, please read the manual carefully.
• Due to safety reasons the projector is shipped with the battery
unplugged. Please be sure to plug in the battery before use.
• Please charge for 10 minutes before using battery.
• This product has 1GB of on-board memory and has the ability to accept
TF/Micro SD cards of up to 2GB.
• Please be sure to leave at least 30 MB of free space in the onboard
memory to allow proper operation of the Operating System (OS).
• If OS is not functioning or responding, please press the RESET button
to reset the MP4 player.
• Do NOT use the P1 projector in wet or very hot places.
• The projection output resolution is 640x480 pixels. Separately, the MP4
module accepts up to 640x480 resolution.
• When you turn off the MP4 module, please wait 3 seconds before
turning it back on repeatedly.
• For the latest setting information of your product, please visitour website.
III
Page 4
IV
3
4
5
5
6
7
8
8
9
10
Page 5
Page 6

Including Battery(s)
Page 7

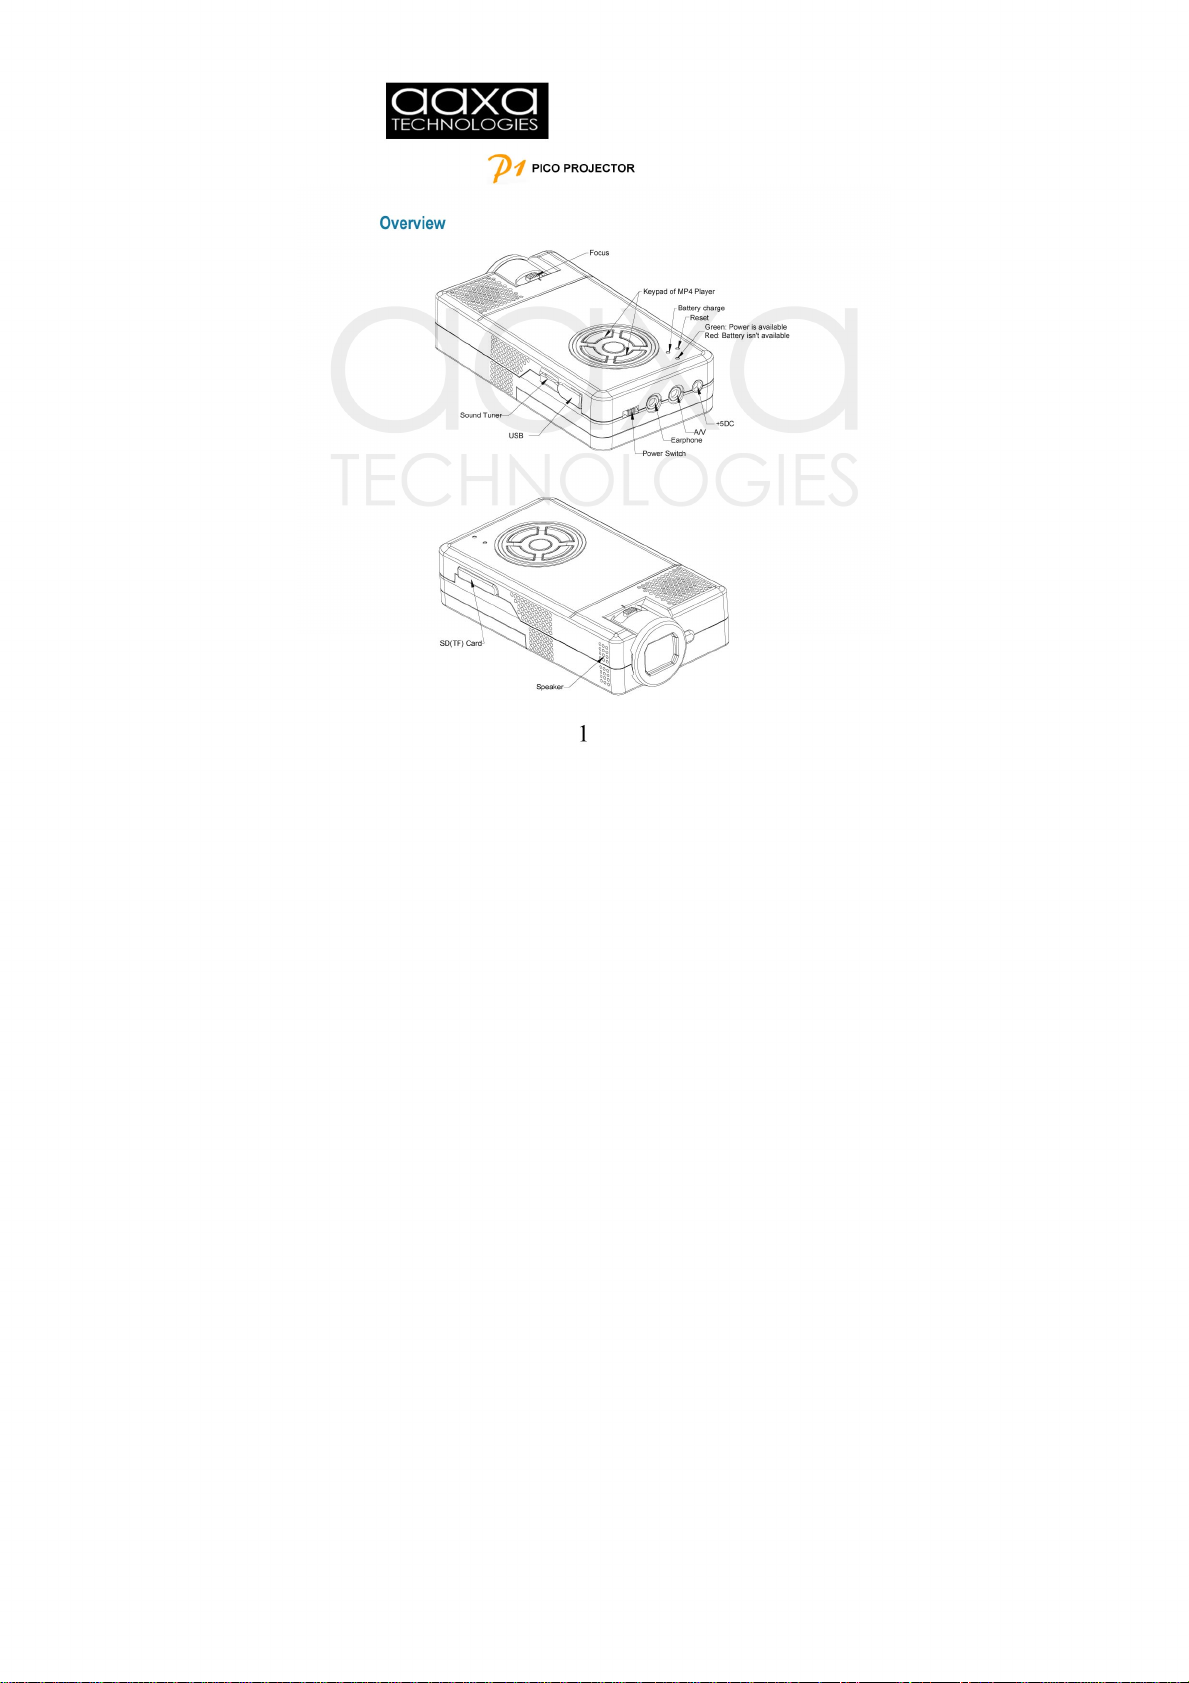
3. Micro SD Card
The P1 Pico Projector accepts Micro SD Cards up to 2GB. The card
needs to be inserted with the data contact portion facing up and will
lock into place (please see picture).
4. Mini-USB Connection
The mini-USB connection is designed to allow access to the
1GB on-board memory. This is a data connection only and
not an A/V input port.
Page 8

PERIPHERALS
Composite Audio / Video (A/V) Connection
The P1 projector can connect to any device that outputs composite video / audio (RCA type).
The projector auto-detects the A/V cable. When the A/V cable is plugged in the main menu
is not accessible. The projector will automatically display any A/V image that is sent through
.
the cable
Connecting to a Laptop
The P1The P1 projector can connect to laptops via two methods. 1. Composite video output
from the laptop (supported by certain video cards). 2. AAXA Tech VGA harness (sold
separately)
Connecting to Iphone / Ipod
The P1 projector can connect to Iphones and Ipods via the AAXA Ipod / Iphone cable (sold
separately). The cable functions the same as an A/V cable and is auto-detected. Please see
your Ipod / Iphone manual on “how to output to TV” for Iphone / Ipod operating instructions.
Most Iphones / Ipods will auto-detect the A/V cable. Some Ipods require selecting “video out”
to display pictures and videos.
Connecting to Zune
The P1 projector can connect to Zunes via the AAXA Zune cable (sold separately). The cable
functions the same as an A/V cable and is auto-detected. Users must select
under the Settings -> Display in the Zune menu before the display is outputted.
the “TV out”
Page 9

5
Page 10

Fast Forward / Rewind:
Page 11

7
Page 12

8
Page 13

9
Page 14

No Power – Check if the battery is charged / plugged in.
No Sound – Check the volume selector. Check the software
volume settings. Ensure media file has good volume.
Player is frozen – On occasion some files will cause the
player to crash. Unplug / plug the battery for a hard-reset.
Cannot play media file – Check to make sure media file
is of compatible format and resolution. High frame
rate / greater than 640x480 resolution files cannot be played.
Pictures appear distorted – Check to make sure the picture
resolutions are correct. Greater than 640x480 resolutions
are re-processed by the player which may cause distortion.
Cannot connect to USB port – Check USB cable. Switch
USB ports.
 Loading...