

Page 1

QUICK SETUP GUIDE
Http://www.a4tech.com
G10-280L
Page 2

THIS DEVICE COMPLIES WITH PART 15 OF THE FCC RULES. OPERATION IS SUBJECT TO
THE FOLLOWING TWO CONDITIONS: (1) THIS DEVICE MAY NOT CAUSE HARMFUL
INTERFERENCE AND (2) THIS DEVICE MUST ACCEPT ANY INTERFERENCE RECEIVED,
INCLUDING INTERFERENCE THAT MAY CAUSE UNDESIRED OPERATION.
Federal Communications Commission Requirements
The equipment has been tested and found to comply with the limit s for Cla ss B Digit al Dev ice, p u rsuant to p a rt 15
of the FCC Rules. These limits are designed to provide reasonable protection against harmful interference in a
residential installation. This equipment generates uses and can radiate radio frequency energy and, if not
installed and used in accordance with the instruction, may cause harmful interference to radio communication.
However, there is no guarantee that interference will not occur in a particular installation. If this equipment does
cause harmful interference to radio or television reception, which can be determined by turning the equipment off
and on, the user is encouraged to try to correct the interference by one or more of the following measures:
●Reorient of relocate the receiving antenna.
●Increase the separation between the equipment and receiver.
●Connect the equipment into an outlet on a circuit different from that to which the receiver is connected.
●Consult the dealer or an experienced radio/TV technician for help.
THE CHANGES OR MODIFICATIONS NOT EXPRESSLY APPROVED BY THE PARTY
RESPONSIBLE FOR COMPLIANCE COULD VOID THE USER’S AUTHORITY TO OPERATE
THE EQUIPMENT.
This device complies with Part 15 of the FCC Rules. Operation is subject to the following two conditions:
(1) This device may not cause harmful interference, and
(2) This device must accept any interference received, including interference that may cause undesired
operation.
FCC Radiation Exposure Statement
The equipment complies with FCC radiation exposure limits set forth for uncontrolled equipment and meets the
FCC radio frequency (RF) Exposure Guidelines in Supplement C to OET65. The equipment has very low levels of
RF energy that it is deemed to comply without testing of specific absorption ratio (SAR).
Hardware Installation
- 1 -
Page 3
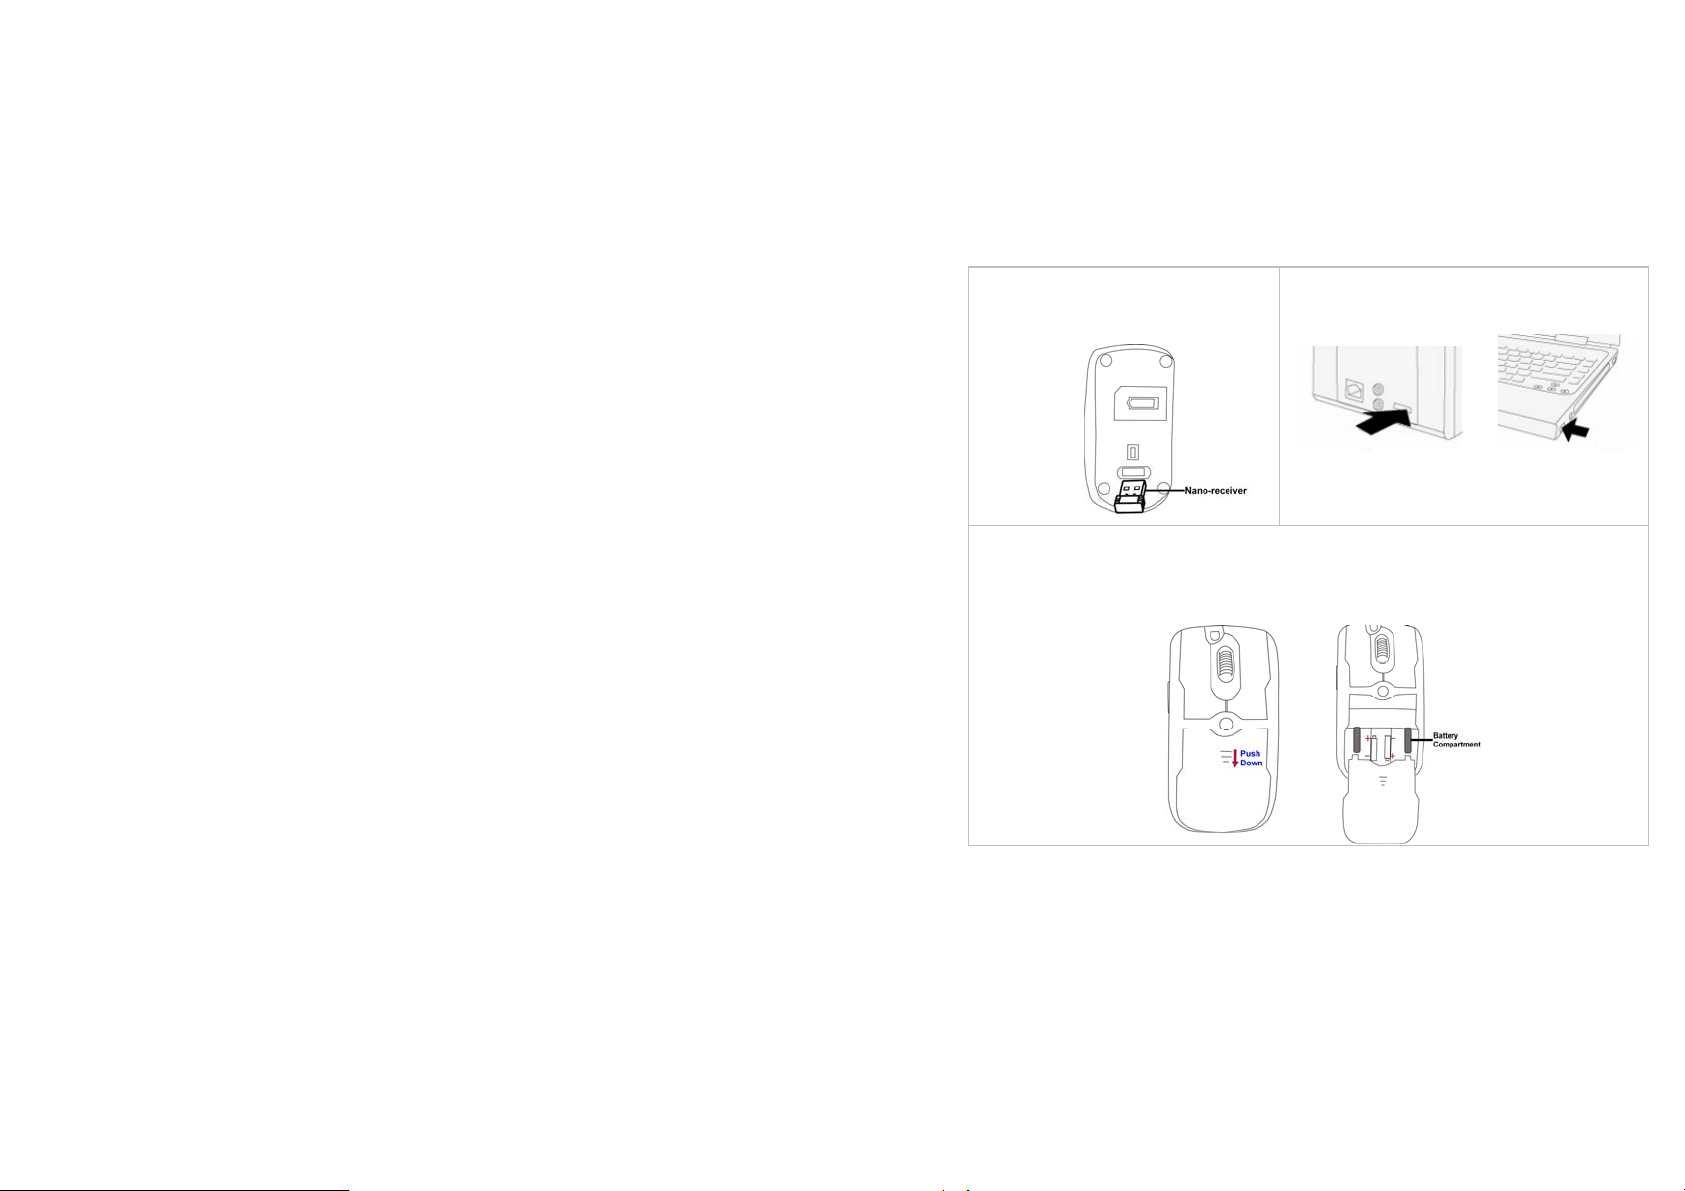
1. Pull out the 10-Link
Nano-receiver from bottom of
2. Plug 10-Link Nano-receiver into USB port
of your computer or notebook.
mouse.
3. Push down battery cover and insert the supplied batteries, making sure that the positive (+)
and negative (-) ends of the batteries match the polarity indicators inside the battery
compartment of the
mouse.
Power Management
- 2 -
Page 4

1. Slide on the power switch to turn on the mouse.
2. To turn off the mouse, just slide off the power
switch and then LED light is off immediately.
The wireless mouse is plug-and-play. No driver is required. If you would like to get more
function, please install the software (enclosed on the CD) first.
Software Installation
1. Before installing the mouse software, please uninstall any previously installed
mouse software.
2. Insert enclosed CD to start installation.
3. Follow on-screen instructions to complete the instal lation.
4. The icon
the software.
5. To launch the software, double click the icon
will appear on your desktop, then you have successfully installed
- 3 -
on your desktop or go to
Page 5
Start—Programs—A4TECH Software—G10 Full-Play---G10 Full-Play, then the
icon will appear in the taskbar at the right corner of your screen.
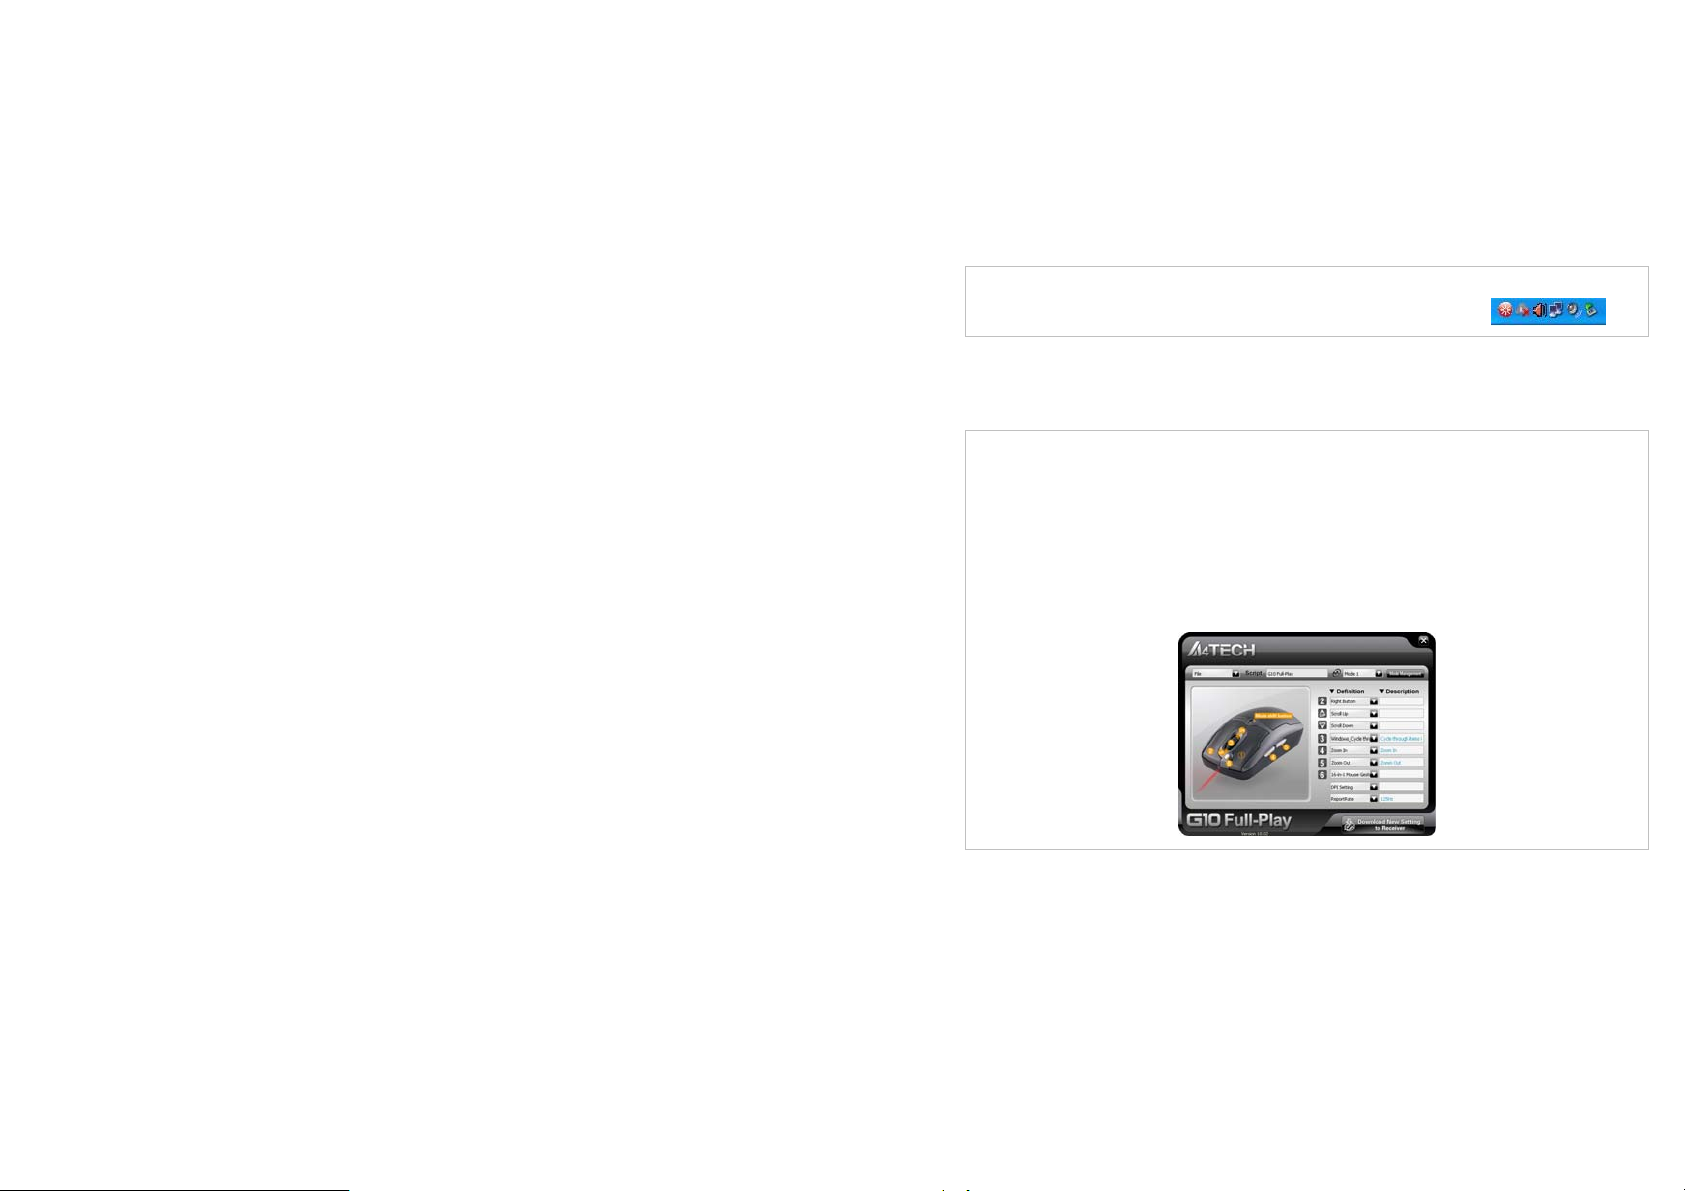
Software Instruction
A “Mode Management“
Refer to software interface as below, click “Mode Management“, there are five
preset modes: Office, Presenter, Multimedia, HTPC, Gaming in mode
management. For de-selecting mode, un-tick from bottom to top one by
one; for adding, tick conversely.
mode, the corresponding mode name will be displayed at right corner of your
screen.
Press mode-shift button to shift among different
- 4 -
Page 6

Mode 2: Meeting/Teaching (Illustration Of Button Function)
Illustration of Multi-Mouse&KBs meeting
Download New Settings
New Mice/KBs ID Pairing
10-Link
- 5 -
Control Multi-Mouse&KBs
10-Link Meeting Management
Page 7

B 10-Link Meeting Management
1. Open 10-Link Meeting Management, click
【New Mice/KBs ID Pairing】to add new mice/KBs.
One 10-Link receiver allows to link up to 5 sets
mice & KBs to the same computer with defined
name and provides the best sharing of meeting to
consolidate all member intelligences.
2. Click 【10-Link Meeting Management】and refer
to the text on pop-up window to know clearly on
how to operate.
- 6 -
Page 8

3. 5-color LinePointer: Press defined LinePointer
button to draw a line or a circle to remark vital
points. Each mouse lines with an exclusive color,
double click to delete the line, and triple click to
delete all lines. LinePointer is obviously more
excellent than just a flash of LaserPointer, highly
improve efficiency of meeting/teaching.
Press 6th button to use LaserPointer
Use WalkingPad for mobility
- 7 -
Page 9

Troubleshooting
If the mouse is not working:
1. Make sure the mouse is on.
2. Check battery and battery installation.
3. Check receiver installation.
4. Try another USB port.
Product Support
Need help with technical support? Please go to:
http://www.a4tech.com/ennew/support.asp and our support team will respond within 72 hours.
**Features and specifications of all A4 TECH products are subject to change without notification.
- 8 -
 Loading...