


Bluetooth Mouse User Guide
Model: BT-630
www.a4tech.com

—
—
THIS DEVICE COMPLIES WITH PART 15 OF THE FCC RULES. OPERATION IS SUBJECT TO THE FOLLOWING TWO CONDITIONS: (1) THIS DEVICE MAY NOT CAUSE
HARMFUL INTERFERENCE AND (2) THIS DEVICE MUST ACCEPT ANY INTERFERENCE RECEIVED, INCLUDING INTERFERENCE THAT MAY CAUSE UNDESIRED
OPERA TION.
Federal Communications Commission Requirements
The equipment has been tested and found to comply with the limits for Class B Digital Device, pursuant to part 15 of the FCC Rules. These limit s are designed to provide reas onable
protection against harmful interference in a residential installation. This equipment generates uses and can radiate radio frequency energy and, if not installed and used in
accordance with the instruction, may cause harmful interference to radio communication. However, there is no guarantee that interference will not occur in a particular installation. If
this equipment does cause harmful interference to radio or television reception, which can be determined by turning the equipm ent off and on, the user i s encouraged to try to correct
the interference by one or more of the following measures:
●Reorient of relocate the receiving antenna.
●Increase the separation between the equipment and receiver.
●Connect the equipment into an outlet on a circuit different from that to which the receiver is connected.
●Consult the dealer or an experienced radio/TV technician for help.
THE CHANGES OR MODIFICATIONS NOT EXPRESSLY APPROVED BY THE PARTY RESPONSIBLE FOR COMPLIANCE COULD VOID THE USER’S AUTHORITY TO
OPERA TE THE EQUIPMENT.
This device complies with Part 15 of the FCC Rules. Operation is subject to the following two conditions:
(1) This device may not cause harmful interference, and
(2) This device must accept any interference received, including interference that may cause u ndesired operation.
FCC Radiation Exposure Statement
The equipment complies with FCC radiation exposure limits set forth for uncontrolled equipment and meets the FCC radio frequency (RF) Exposure Guidelines in Supplement C to
OET65. The equipment has very low levels of RF energy that it is deemed to comply without testing of specific absorption ratio (SAR).
1

—
—
Package Contents
1. Bluetooth Mouse
2. 1*AA Battery
3. Quick Set Up Guide
4. CD (CD User Manual)
Features
1. Bluetooth V2.0, 10 meter range
2. 1000DPI
3. Four stages power saving mode, low battery warning
4. 8 in Right software, innovative 4D wheel
System Requirement: Windows XP/Vista /Windows7
Know your product
Back View
Dual-color LED Indicator
Bluetooth Mouse LED Status
Power On Green LED: Turn off after 1 Second
Low Battery Warning Red LED: Blinking
Connection Start Alternate Blink Between Red and Green
Connection Complete Stop Blinking
Front View
2
—
—
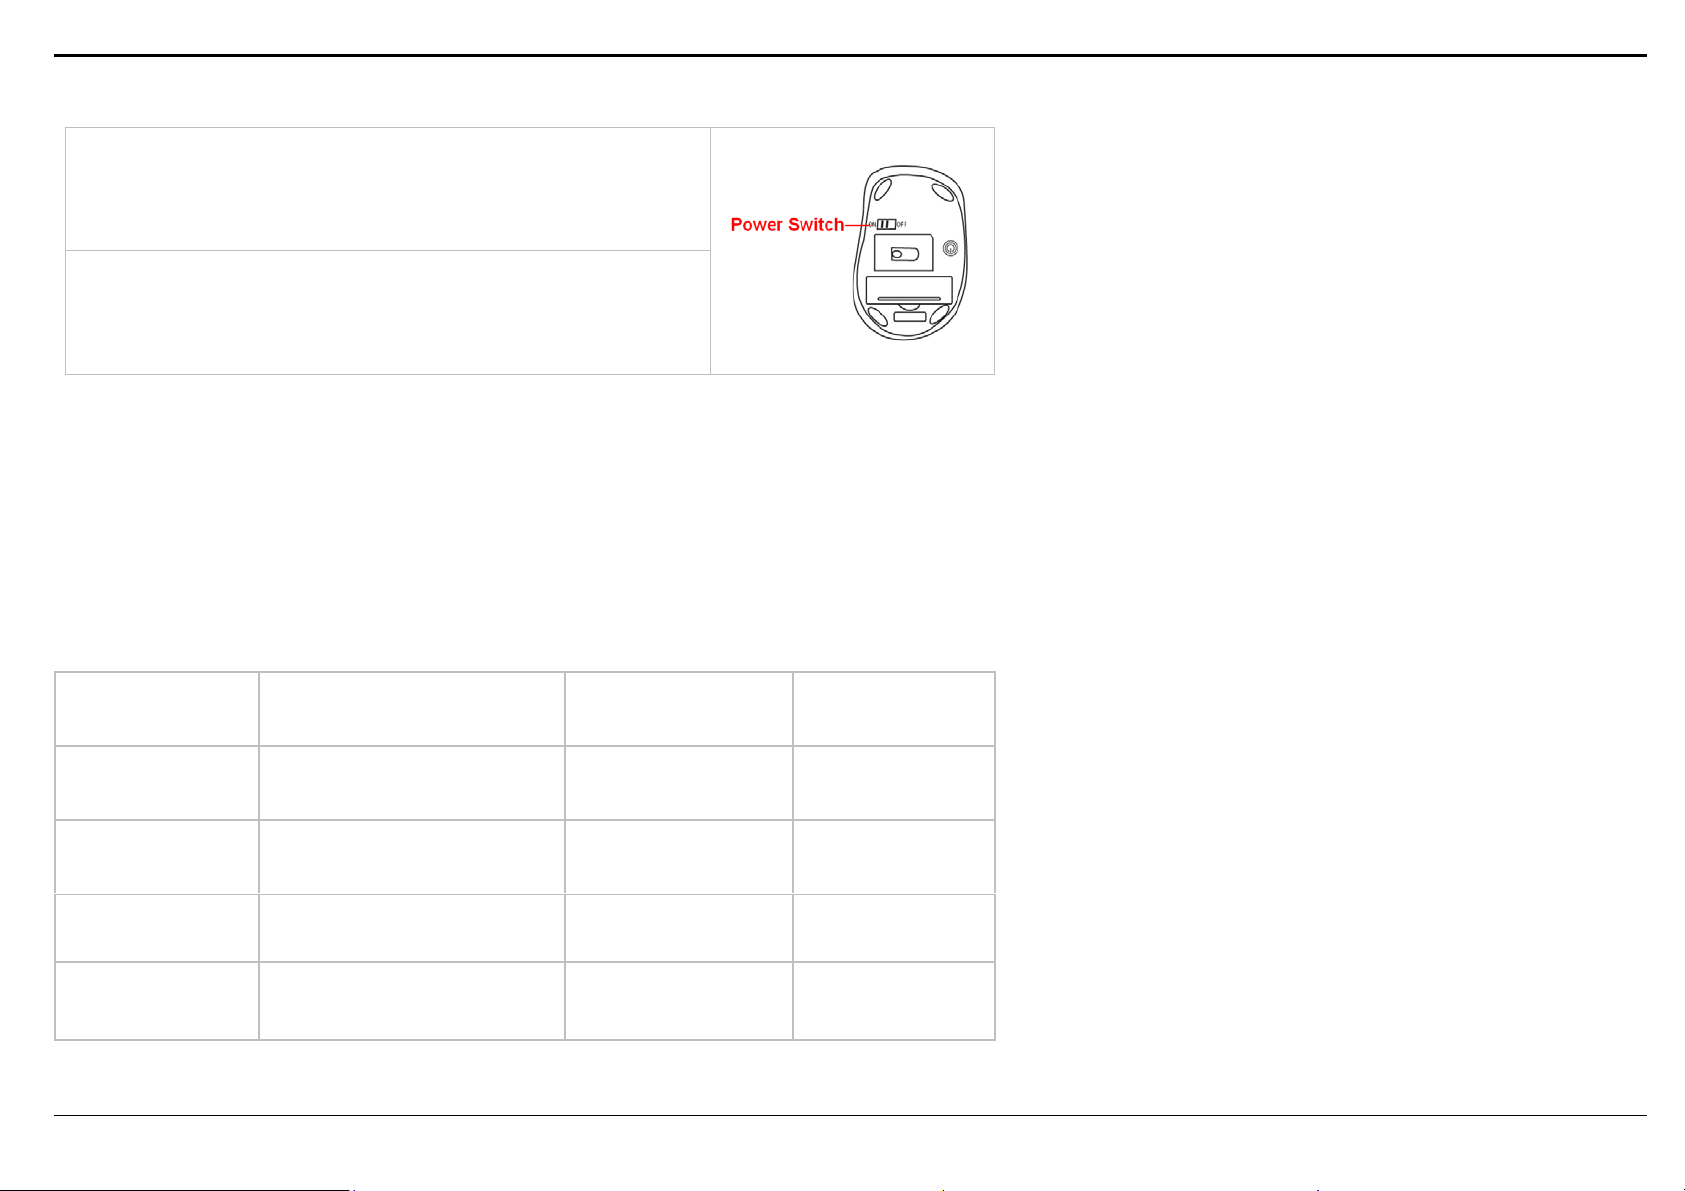
Turn On/Off Mouse
1. Slide on the power switch to immediately turn on the mouse.
2. To turn off the mouse, just slide off the power switch and then LED
light is off immediately.
Battery Installation
Open battery cover and insert the supplied AA battery. Please make sure that the positive (+) and negative (-) ends of
the battery match the polarity indicators inside the battery compartment.
Power Saving Management
Four stages power saving mode provide the best power saving management. In Deep Sleep, the mou se ca n be
activated by clicking any mouse buttons. In other sleep statuses, just move the mouse to activate it.
Status Time elapses to enter the mode Power Consumption Way to wake up
Note:
PC. To wake it up, turn on PC and click any mouse button.
Configuration
Stand-by 0 second 20mA Moving
Slight Sleep 2 seconds 10mA Moving
Middle Sleep 4 seconds 1.7mA Moving
Our Bluetooth Mouse is designed to work with Five major software
standards: Microsoft, Broadcom, IVT,Toshiba,
Apple. Please select the corresponding connection way according to
your software standard.
The mouse will enter Deep Sleep ten seconds after turning off
Deep Sleep 5 minutes 0.3mA Clicking
3

—
—
Bluetooth
Software
Vendor
Microsoft
Broadcom Widcomm
Toshiba Bluetooth Stack
Note:Before start Bluetooth Mouse connectivity, please check whether your system has already installed Bluetooth
software and whether it works.
IVT BlueSoleil
Apple
Bluetooth
Software
Name
Windows
Bluetooth
Mac OS X
Bluetooth
Bluetooth
Device Not
Inserted
Windows
Mac OS X
Bluetooth
Device
Already
Inserted
Bluetooth
Device In
Working
Support
Version
XP(SP2)
Above
V4.0 Above
V5.0 Above
V3.0 Above
10.4~10.5
Above
Bluetooth Software: MICROSOFT
Step 1:Click Start, click Control Panel (ma ke sure
you're in Classic View), and then double-click
Bluetooth Devices.
Step 2:In popped Bluetooth Devices window,Click
Add.
4

—
—
Step 3 : Turn on the mouse and press the
connection button at the bottom of mouse until
the LED Indicator in the middle wheel blinks
alternately in Red and Green. In the Add
Bluetooth Device Wizard, select the My device
is set up and ready to be found check box, and
then click Next.
Step 5:When the wizard asks to specify a passkey,
click Don't use a passkey, and then click Next.
Step 4:After the device names appear,click
Bluetooth Mouse, and then click Next.
Step 6:Please wait while the wizard completes the
process of adding your Bluetooth mouse. In the
final page of the wizard, click Finish, and then
OK. The LED Indicator in the middle wheel
click
stops blinking.
5

—
—
Bluetooth Software: WIDCOMM
Step 1:Right click on Bluetooth icon located at
system tray, then select Add a Bluetooth
Device.
Step 2:In popped Initial Bluetooth Configuration
Wizard, Click Next.
Step 3 : Turn on the mouse and press the
connection button at the bottom of mouse until
the LED Indicator in the middle wheel blinks
alternately in Red and Green. In Bluetooth
Devices Selection, it will automatically detects
discoverable bluetooth devices.
Step 5:Please wait while the wizard completes the
process of adding your Bluetooth mouse. In the
final page of the wizard, click Click here. The
LED Indicator in the middle wheel stops blinking,
the Bluetooth mouse has successfully installed.
Step 4:After the device names appear,click
BlueTooth Mouse, and then click Next.
6

—
—
Bluetooth Software: BLUESOLEIL
Step 1:Right click on Bluetooth icon located at
system tray, then select Add a Display Classic
View.
Step 2:Double click orange circle button to start
searching Bluetooth devices.
Step 3 : Turn on the mouse and press the
connection button at the bottom of mouse until
the LED Indicator in the middle wheel blinks
alternately in Red and Green. The mouse icon
will display after searching Bluetooth devices
sucessfully.
Step 4:Right click on the mouse icon and select
Connect Bluetooth Human Interface Device.
7

—
—
Step 5:The Bluetooth mouse will automatically
complete the connection. The bluetooth mouse
has successfully installed while the LED Indicator
in the middle wheel stops blinking.
8

—
—
Bluetooth Software: Bluetooth Stack
Step 1:Right click on Bluetooth icon located at
system tray, then select Add New Connection.
Step 2:In popped Bluetooth Settings, Click New
Connection.
Step 3 : Turn on the mouse and press the
connection button at the bottom of mouse until
the LED Indicator in the middle wheel blinks
alternately in Red and Green. In Add New
Connection Wizard, click Express Mode, and
then click Next to search Bluetooth devices.
Step 5:Please wait while the wizard completes the
process of adding your Bluetooth mouse. The
mouse doesn’t require Passkey(PIN code).
Step 4:Please wait until the device names
appear,click
BlueTooth Mouse, and then click Next.
Step 6:The LED Indicator in the middle wheel stops
blinking after the mouse has successfully installed.
9

—
—
Bluetooth Software: Mac OS X Bluetooth
Step 1:Right click on Bluetooth icon located at
system tray, then select Set up Bluetooth
Device.
Step 2:Follow on-screen instructions to continue
setup. Select Mouse when below window appears.
Step 3 : Turn on the mouse and press the
connection button at the bottom of mouse until
the LED Indicator in the middle wheel blinks
alternately in Red and Green. After device names
appear, click BlueTooth Mouse, and then click
Next.
Step 4: The bluetooth mouse has successfully
installed while the LED Indicator in the middle
wheel stops blinking. You can choose to set up
another device or click Quit to exit.
10

—
—
Software Installation
1. Before installing the mouse software, please uninstall any previously installed mouse soft ware.
2. Insert enclosed CD to start installation.
3. Follow on-screen instructions to complete the installation.
4. The icon will appear on your desktop, then you have successfully installed the software.
5. To launch the software, double click the icon
then the icon will appear in the taskbar at the right corner of your screen.
.For more completed instructions on how to set up this software, please refer to software manual in CD.
**Features and specifications of all A4 TECH products are subject to change without notification.
on your desktop or go to Start—Programs—A4tech 8 in Right,
11
 Loading...