

8x8 Inc BPG510 User Manual

Broadband Phone Gateway BPG510
Technical Users Guide
(Firmware version 0.14.1 and later)
Revision 1.0
© 2006, 8x8 Inc.

BPG510 User Interface Guide
Table of Contents
About your Broadband Phone Gateway (BPG510).............................................4
Opening the BPG510's Configuration Utility ...................................................... 4
Connecting to Your Broadband Modem.............................................................. 6
Setting up with DHCP..........................................................................................6
Setting up with PPPoE........................................................................................7
Connecting Local Computers .............................................................................. 7
Connecting a single computer.............................................................................8
Connecting a local network.................................................................................8
Supporting a host server on the local network (port forwarding).........................8
Setting up a DMZ ................................................................................................ 9
Detailed Screen Reference.................................................................................11
WAN Menu........................................................................................................11
WAN Status.................................................................................................... 11
WAN Configuration.........................................................................................12
PPPoE............................................................................................................ 13
MAC Cloning .................................................................................................. 13
LAN Menu.........................................................................................................14
LAN Configuration..........................................................................................14
DHCP Client Table......................................................................................... 16
Router Configuration ......................................................................................18
Dynamic Routing............................................................................................18
Static Routing.................................................................................................18
Port Forwarding.............................................................................................. 19
Filtering Configuration .................................................................................... 20
DMZ Host Configuration.................................................................................21
SYSTEM Menu ................................................................................................. 22
Set Security Password ...................................................................................22
Localization.....................................................................................................22
Call Log .......................................................................................................... 23
Error Log ........................................................................................................ 24
Handset Configuration.................................................................................... 24
Upgrade Firmware Menu................................................................................... 26
RESET Menu.................................................................................................... 27
Page 2 of 27 © 8x8 Inc., 2005
BPG510 User Interface Guide
About your Broadband Phone Gateway (BPG510)
FRONT
(1) Power – The Power light is solid green when the power is on.
(2) Service – The Service light is solid green when you are authenticated with
Packet8
(3) WAN – The WAN light is green to indicate that your modem is connected
properly to the Internet. It blinks rapidly when information is being sent over the
port between BPG510 and the modem.
(4) LAN – The LAN light is green when a PC or other networking device is
connected to the BPG510 with a network cable.
(5) Line – The Line light is green when you go off hook to indicate that your BPG510
is ready to make a call.
(6) Message – The Message light is green when you have a message waiting in
your mailbox.
REAR
(picture)
(1) Power Jack – Connect the included power cord to this jack.
(2) Reset Switch – The “Reset” button is used in rare cases when the BPG510 may
function improperly. Resetting the BPG510 will restore the BPG510’s normal
operation while maintaining the programmed settings. We recommend you
consult a Packet8 customer service representative before using this button.
(3) WAN – The WAN port is for connection to your cable or DSL modem or to
connect to your existing router.
(4) LAN – The LAN port is for connection to your computer or other networking
device.
(5) Line – The Line port is for connection to your telephone handset. Use the
telephone cable to connect the telephone to this port.
© 8x8 Inc., 2005 Page 3 of 27
BPG510 User Interface Guide
Opening the BPG510's Configuration Utility
Your BPG510 VoIP phone provides a browser-based configuration utility. You can
configured the phone using the same web browser you use to surf the Internet. To
open your phone's configuration utility, follow these instructions:
1. Connect a computer with a web browser directly to the LAN port of your BPG510.
(You may be able to connect to the BPG510 through a router or wireless access
point, but if you have any difficulty connecting, try connecting directly to BPG510’s
LAN Ethernet port.)
2. Be sure that this computer is configured to dynamically get an IP address (e.g.,
has the DHCP client enabled).
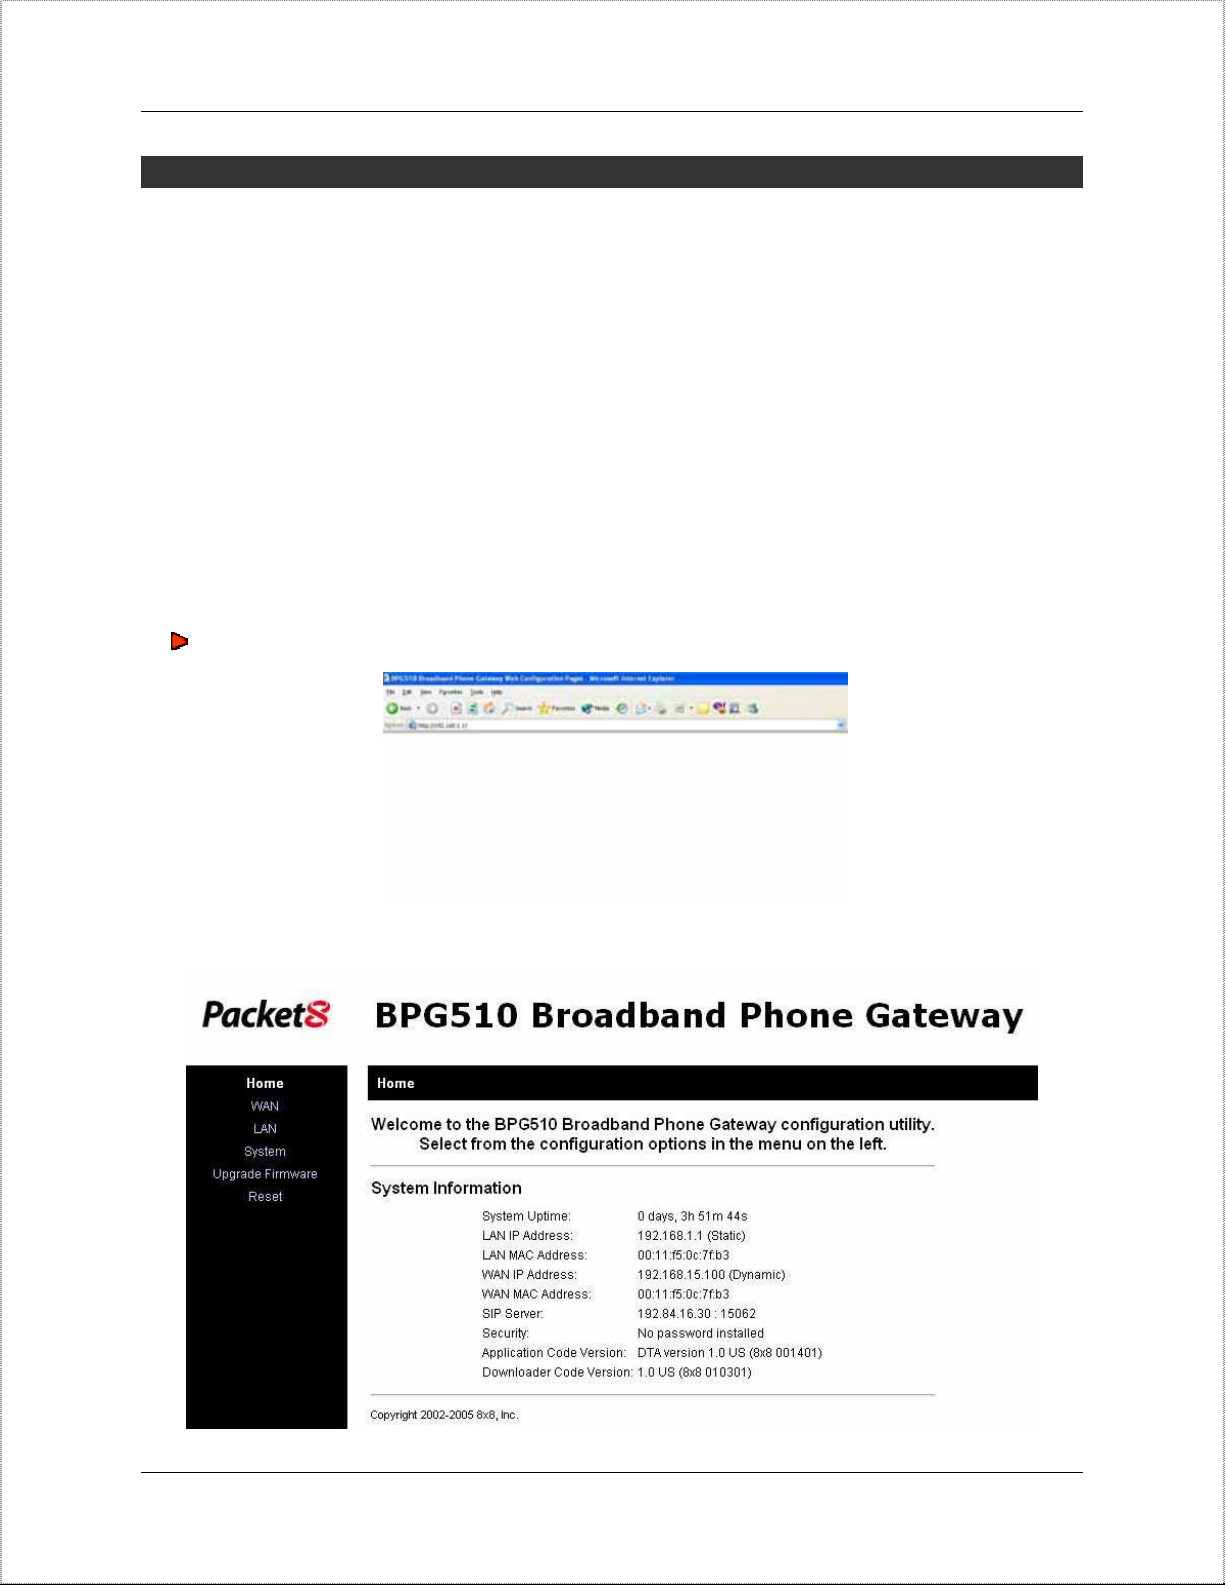
3. Type the IP address of your BPG510’s into the address bar of your web browser.
The default IP address of your BPG510 is 192.168.88.1. Then press the ENTER
key. You will be prompted to enter a password (the default password is admin).
Note: If you change the LAN IP address of your phone, be sure to make note of it.
4. You should now see the your BPG510’s System Information Screen:
Page 4 of 27 © 8x8 Inc., 2005

BPG510 User Interface Guide
If you have any trouble opening the utility, first check the connection between your
computer and the BPG510. Then, reboot your computer while it is connected to the
BPG510.
© 8x8 Inc., 2005 Page 5 of 27
BPG510 User Interface Guide
Connecting to Your Broadband Modem
Setting up with DHCP
The BPG510 is configured for use with Dynamic Host Configuration Protocol (DHCP)
by default. If your broadband connection uses DHCP, then you simply have to
connect your phone's WAN port to your broadband modem and then connect the
power on the phone. (See the BPG510 Router configuration Guide for detailed
connection diagrams.)
If you have disabled the DHCP client (for example, it you have used your phone in a
network requiring either PPPoE or a static IP address) and need to re-enable it,
follow the steps below:
1. Open the configuration utility.
2. In the menu bar down the left side of the screen, select WAN.
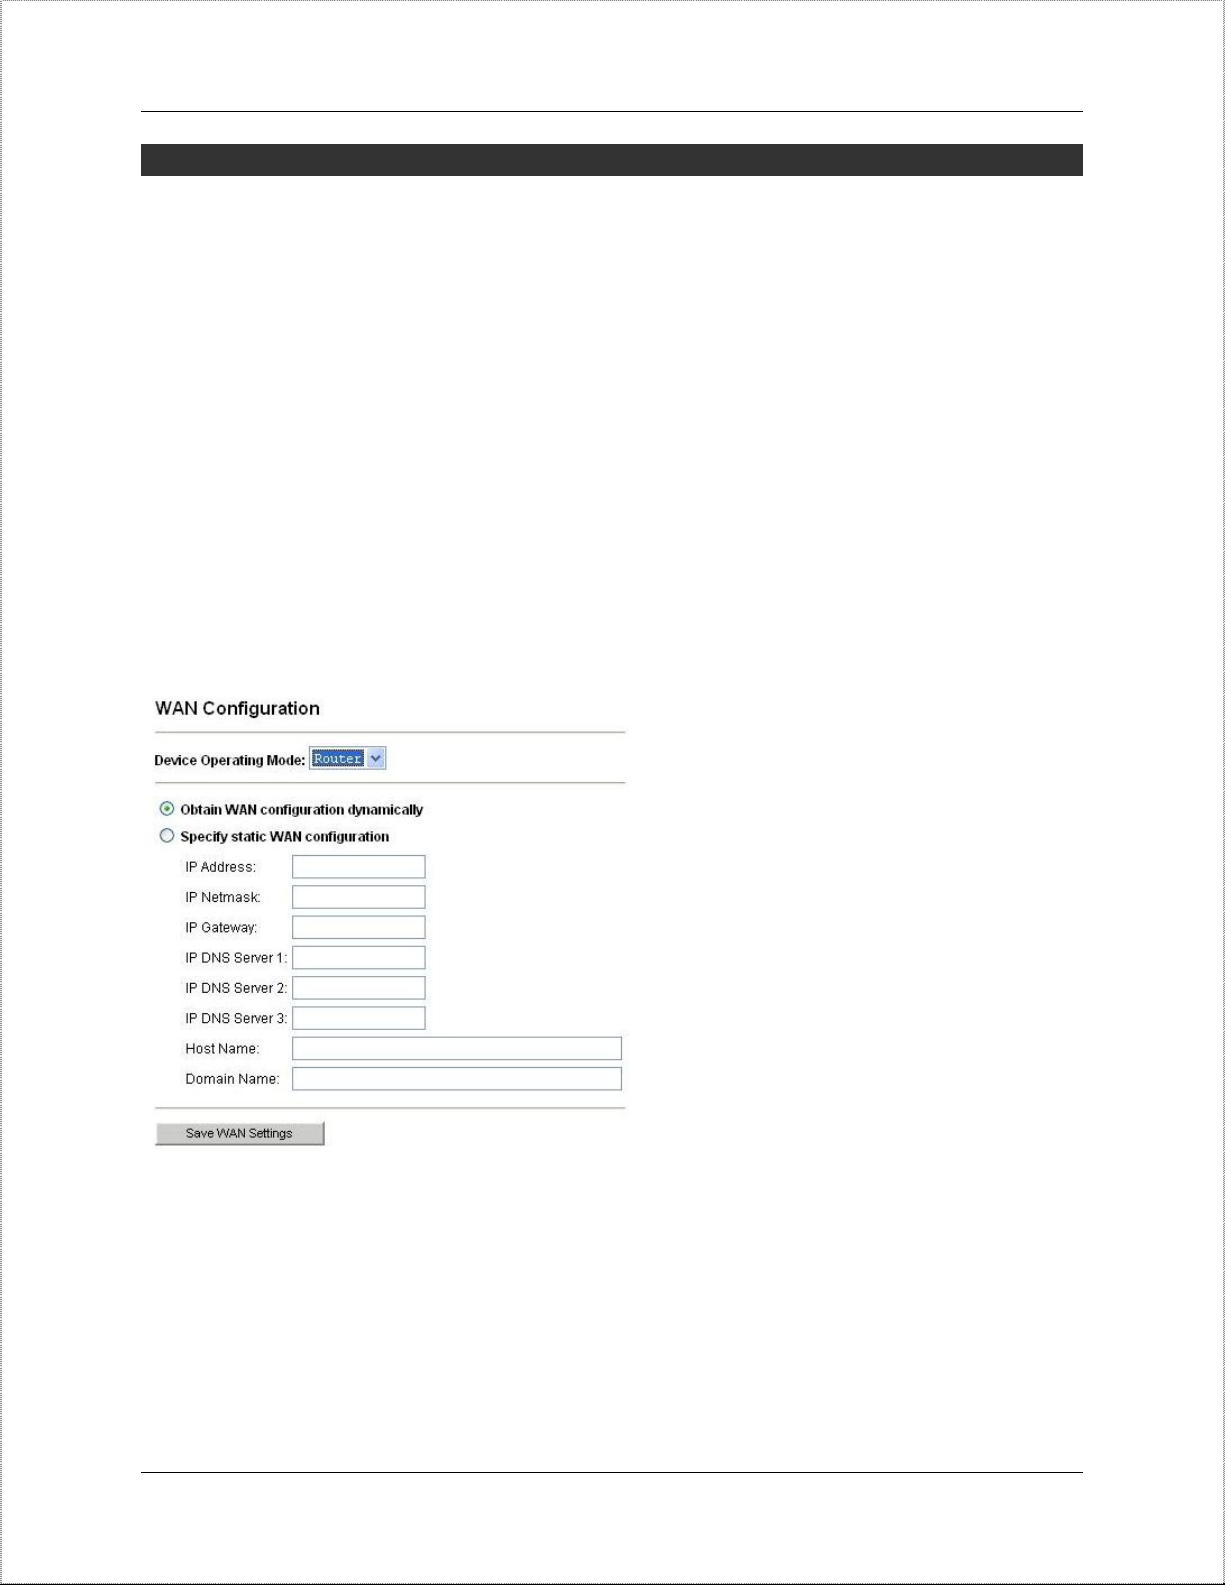
3. In the top menu bar, select WAN Settings. This will open the Wan Configuration
screen.
4. Select the radio button labeled
5. Click
Page 6 of 27 © 8x8 Inc., 2005
SAVE WAN SETTINGS.
OBTAIN WAN CONFIGURATION DYNAMICALLY.
BPG510 User Interface Guide
Setting up with PPPoE
Point to Point Protocol over Ethernet (PPPoE) is often used by DSL broadband
providers to connect and authenticate users on their networks. The service provider
will give you a user name and password, and usually some additional software you
need to run in order to go online. The BPG510 can take the place of the additional
PPPoE software, allowing you to establish and maintain your broadband connection
without running any extra programs on your computer.
Follow the steps below to configure the BPG510 to use a PPPoE-based connection:
1. Open the configuration utility.
2. In the menu bar down the left side of the screen, select WAN.
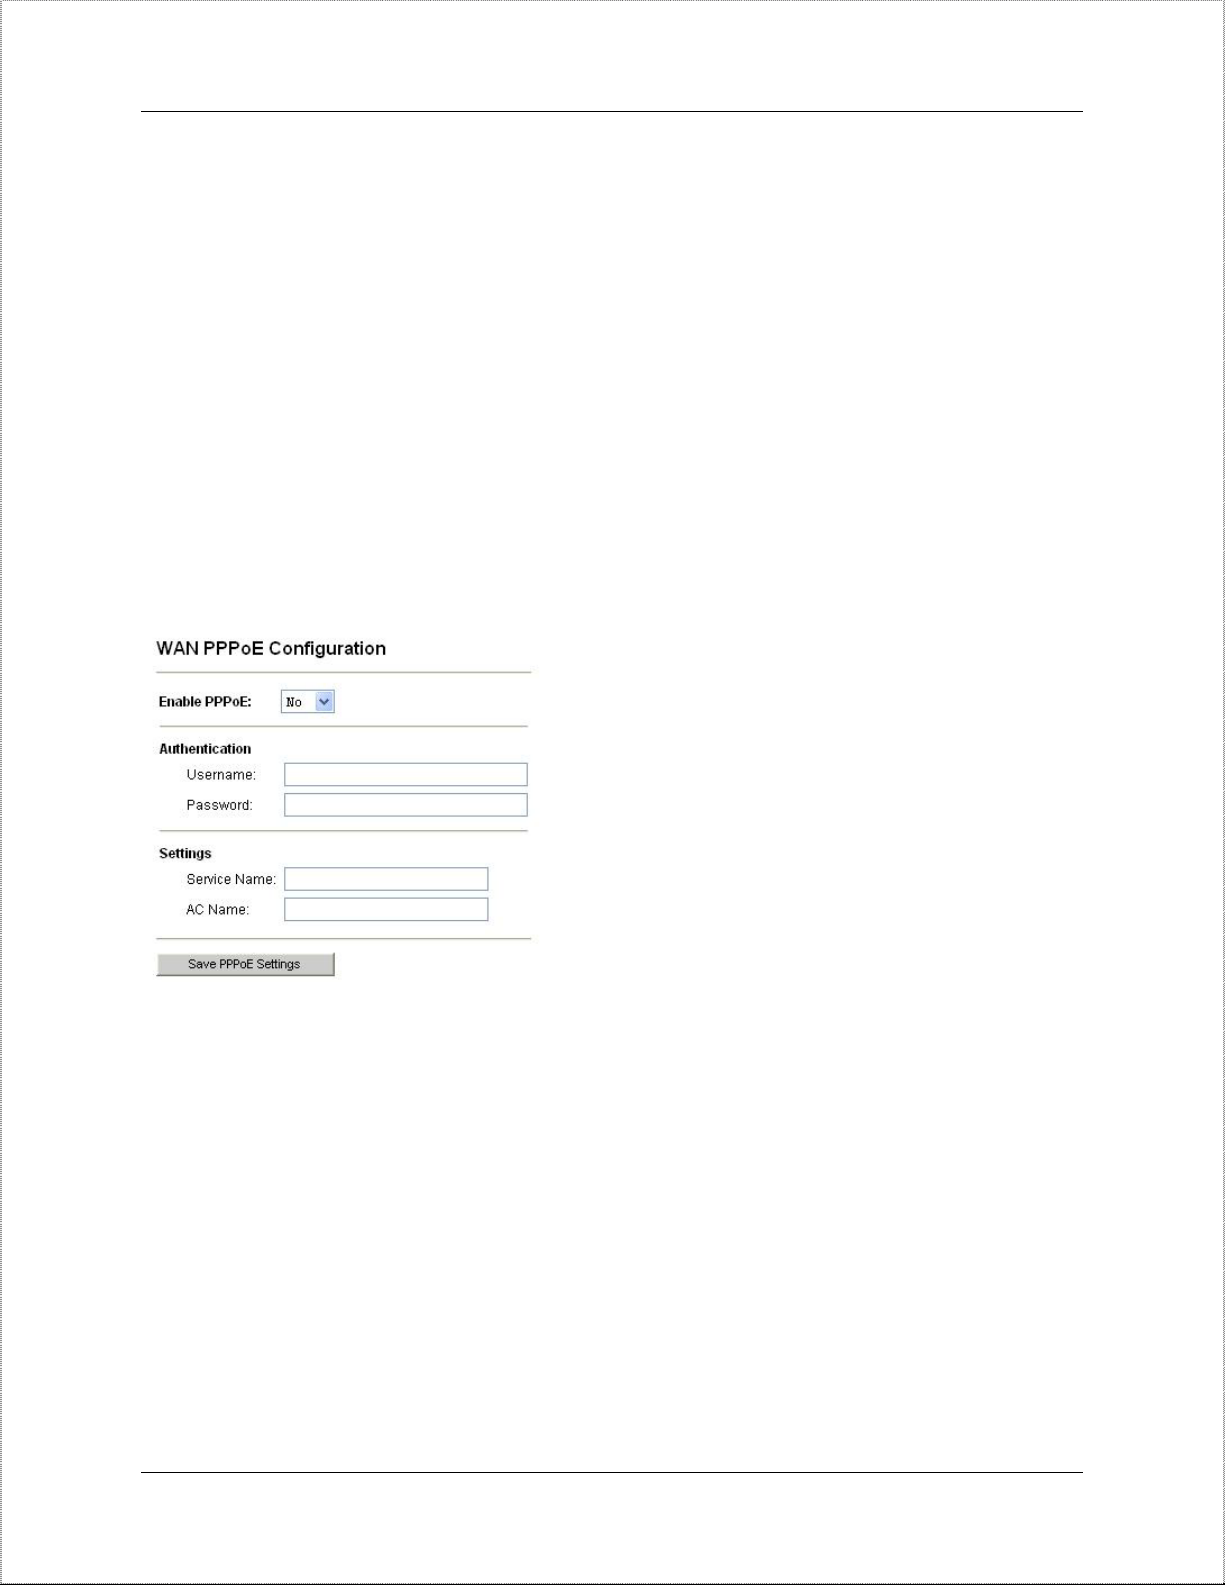
3. In the menu bar on the top of the screen, select PPPoE. This opens the WAN
PPPoE Configuration screen.
4. Under
5. Under
ENABLE PPPOE, click the drop-down arrow and select YES.
AUTHENTICATION, enter the USERNAME and PASSWORD that were provided by
your ISP. Username and password are often case-sensitive, so be sure enter
capital and small letters correctly.
6. Under
SETTINGS, enter the SERVICE NAME and AC NAME required by your ISP. If you
are not sure, leave this blank.
7. Click
© 8x8 Inc., 2005 Page 7 of 27
SAVE PPPOE SETTINGS.

BPG510 User Interface Guide
Connecting Local Computers
Connecting a single computer
If you want to connect a single computer to the Internet through your BPG510, use a
standard CAT5 Ethernet cable to connect the BPG510's LAN port to your computer's
Ethernet port. You may have to reboot your computer after you connect it to the
phone, but no other configuration should be necessary.
Connecting a local network
If you have more than one device you want to connect to the Internet, then you will
need to use an intermediary device such as a switch, a router, or a wireless access
point. We strongly recommend that you connect your BPG510 directly to your
broadband modem and connect your switch, router, or access point to the LAN port
of your phone. The BPG510 performs essential Quality of Service (QoS) function that
allows for superior voice quality. Placing any other device between the BPG510 and
your broadband modem, may reduce the quality of your VoIP phone calls due to the
traffic on your network.
Supporting a host server on the local network (port forwarding)
If you plan to set up a computer on your local network to host files or programs
accessible to the Internet, you will need to configure your BPG510 to forward the data
associated with the specific type of service you want to support (such as a web
server, an FTP server, game server, etc.) to the host server. Internet protocol
separates data traffic for different services into port ranges. To configure the BPG510
to forward any data that comes in on the port range of the service, follow the steps
below.
1. Determine the TCP/UDP ports used by the application you are hosting. A list of
commonly used ports can be found at
numbers.
2. Open the configuration utility.
3. In the menu bar down the left side of the screen, select LAN.
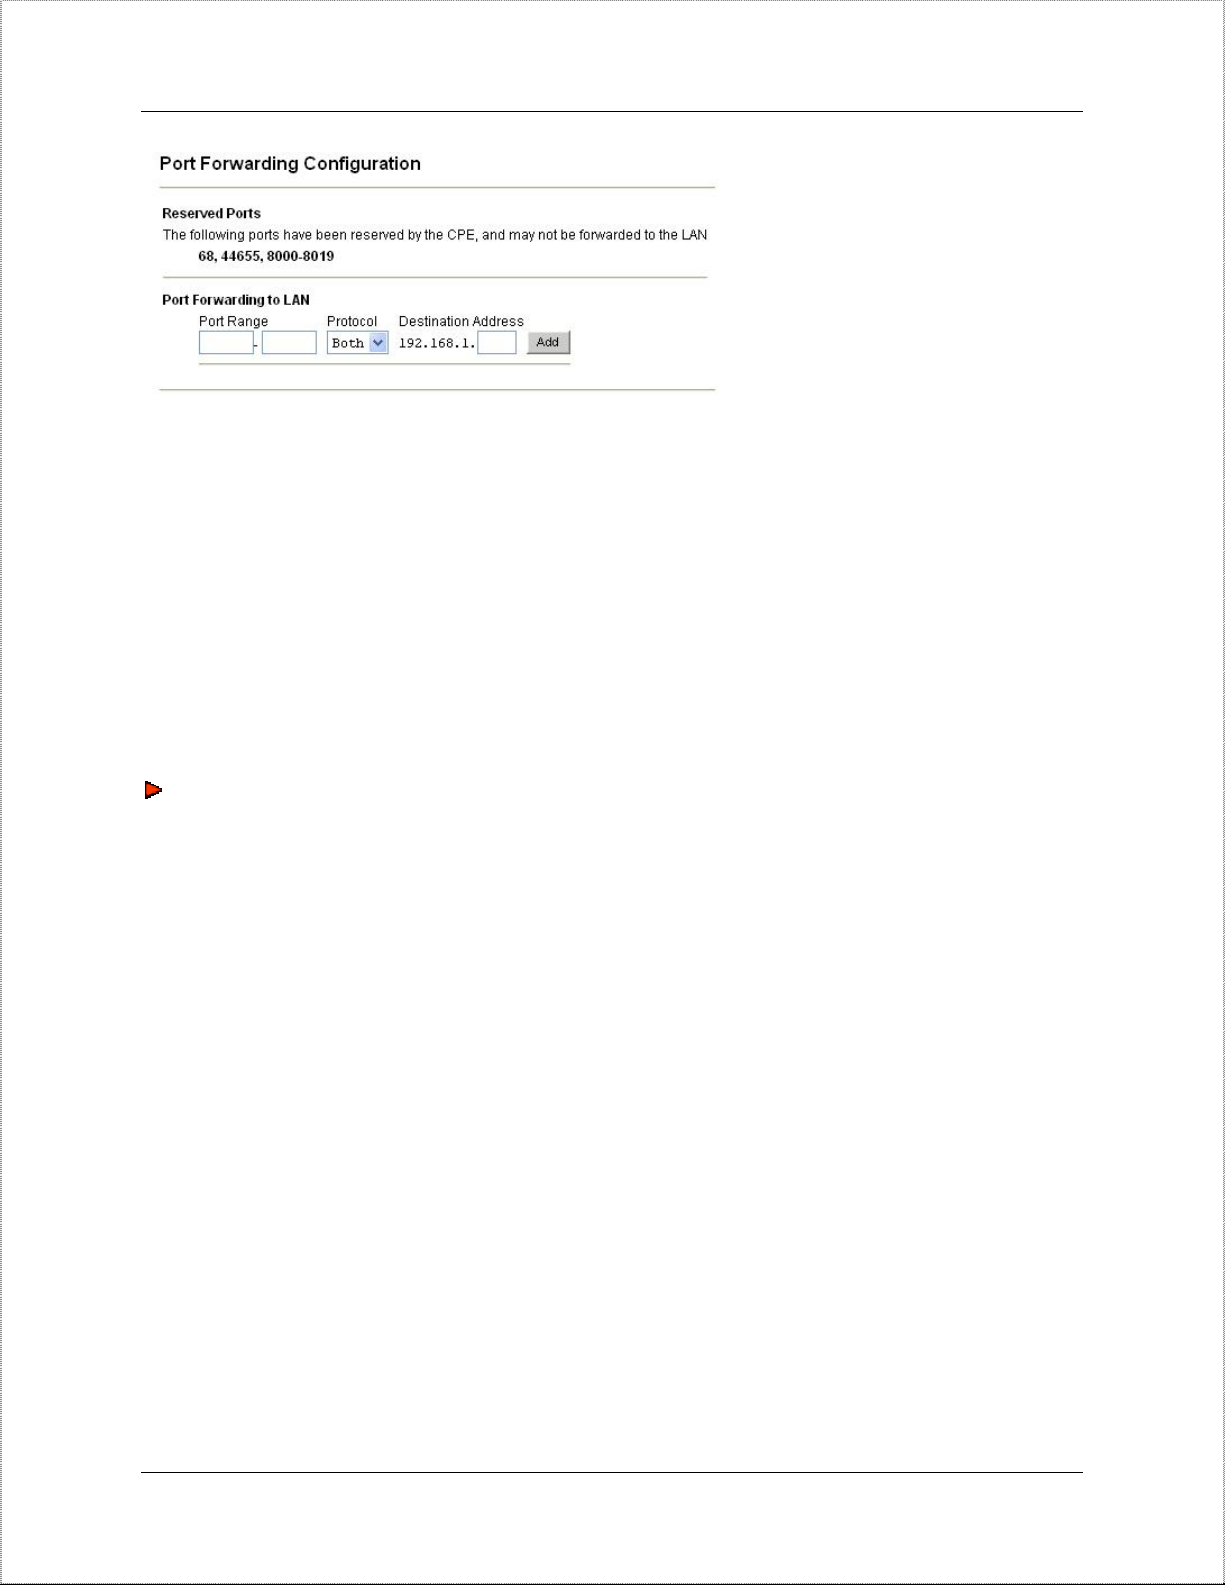
4. In the menu bar on the top of the screen, select Port Forwarding. This opens the
Port Forwarding Configuration screen.
http://www.iana.org/assignments/port-
Page 8 of 27 © 8x8 Inc., 2005
BPG510 User Interface Guide
5. Under Port Range, enter the first port of the range you want to forward in the first
box and the last port of the range in the second box. If the service you are
supporting only uses one port, enter the same port number in both boxes.
Ports in each range must be consecutive. If your service uses non-consecutive
ports, simply enter them as two separate port ranges.
6. Under Protocol, select whether the ports in the range are
BOTH.
UDP ports, TCP ports, or
7. Under Destination Address, enter the IP address of the computer you want the
data sent to.
8. Click
ADD. The BPG510 will add this port range to list of forwarded ports.
9. Repeat steps 5 through 8 for any additional ports ranges you want to forward. To
remove any port ranges from the list of forwarded ports, click the
REMOVE button
beside the port range you want to delete.
Setting up a DMZ
If you want to have one computer on your network receive all un-forwarded data that
arrives at your firewall (for instance, because you want to monitor network traffic on
the WAN side or you have one computer running too many services to configure all
the forwarded ports), you can establish a single computer as a DMZ. Any data that is
not in a port forwarding range will be sent to the DMZ. Follow the steps below to
configure a computer as a DMZ.
© 8x8 Inc., 2005 Page 9 of 27
 Loading...