

Page 1
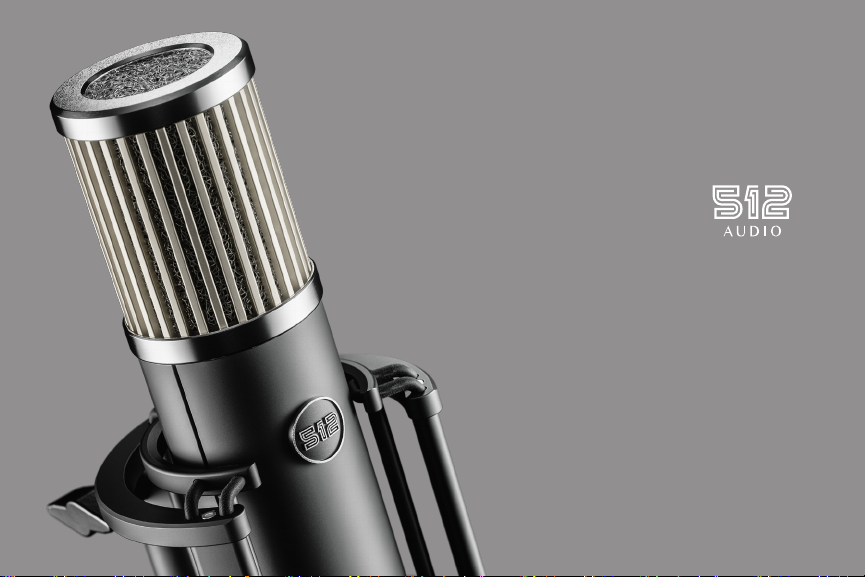
SKYLIGHT USER GUIDE
STUDIO CONDENSER MICROPHONE
EN | FR | DE | ES | 中文 | 日本語
Page 2

TABLE OF CONTENTS
English ............................................................................... 3
French ............................................................................. 13
Deutsch ............................................................................ 23
Español ............................................................................ 33
中文 ............................................................................... 43
日本語 ............................................................................ 53
Page 3

WELCOME TO SKYLIGHT
A STUDIO QUALITY CONDENSER MICROPHONE FROM 512 AUDIO
Whether you Podcast, Broadcast, Stream, Play or Produce, 512 Audio’s new
Skylight Condenser Microphone delivers the studio quality sound you and your
listeners demand.
Designed by engineers with a deep passion for audio, Skylight is ready to bring
your voice to the world.
Let’s begin.
EN | 3
Page 4
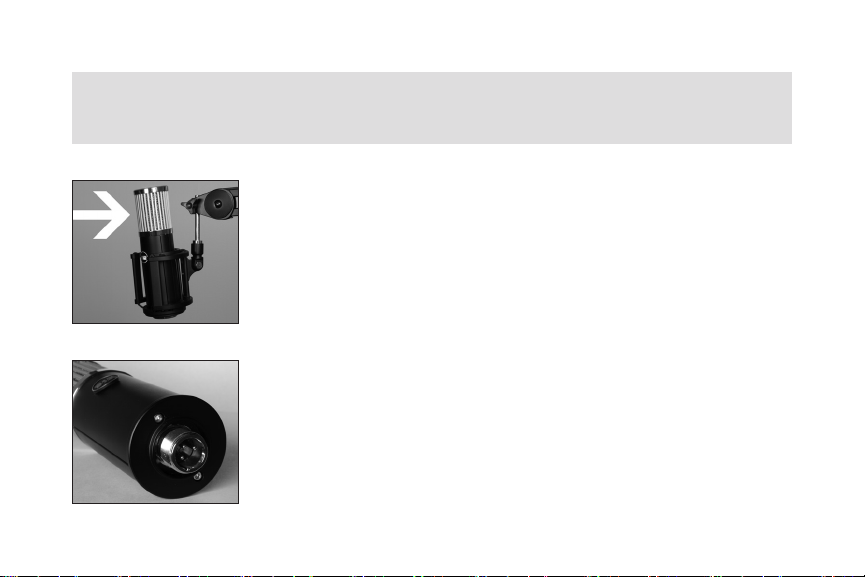
STEP INTO THE SKYLIGHT
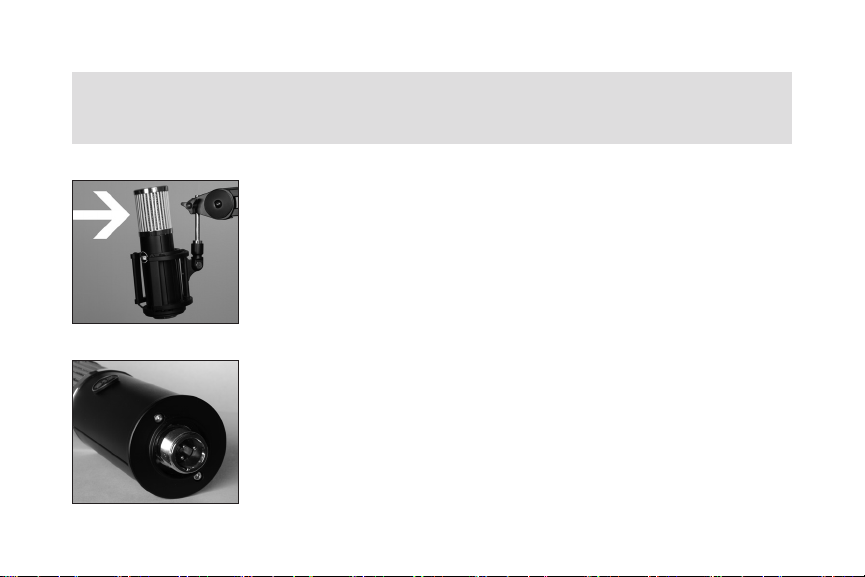
Skylight is a side-address design, which means that it picks
up audio coming in to the side of the microphone, not the
end. For easy reference, the “front” of the microphone body
carries the 512 Audio badge, so just point the side with the
badge towards the speaker you’re trying to capture and
you’ll be ready to go.
On the bottom of the microphone is the XLR connector
which accepts a standard 3-pin microphone cable for easy,
secure connection to your audio mixer, interface or portable
recorder.
4 | EN
Page 5
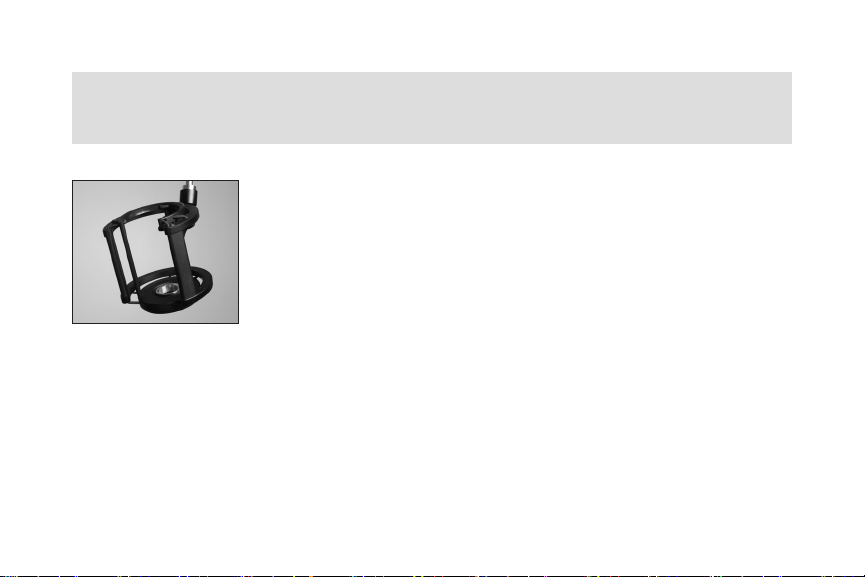
SHOCK TREATMENT
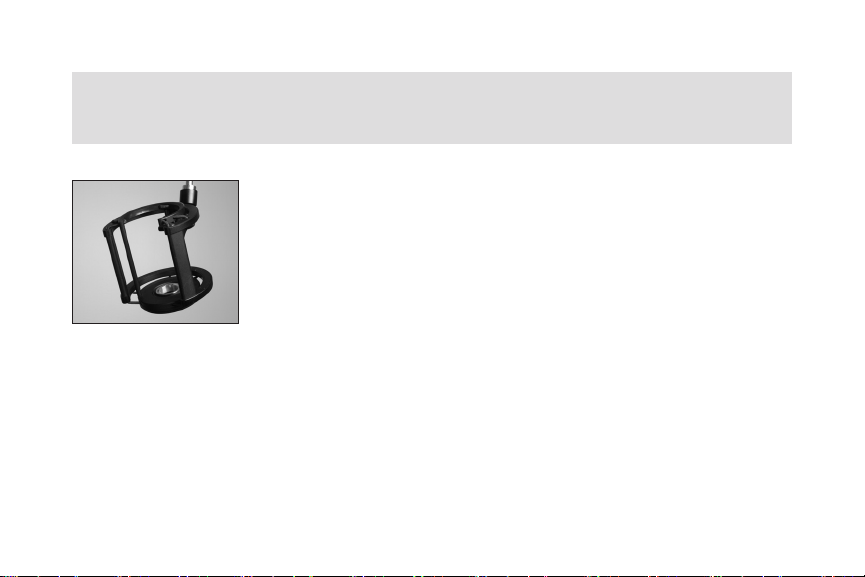
Your Skylight microphone includes an adjustable Shock
Mount cradle designed to gracefully suspend the
microphone exactly where you need it, which not only looks
great but protects your audio from the thumps and booms of
stomping feet and table-tapping guests. Simply attach the
Shock Mount to your boom arm or mic stand, slip Skylight
into place and tighten the bottom ring to snug everything
into place. Lastly, connect an XLR mic cable and run it from
Skylight to your mixer, interface or portable recorder.
EN | 5
Page 6
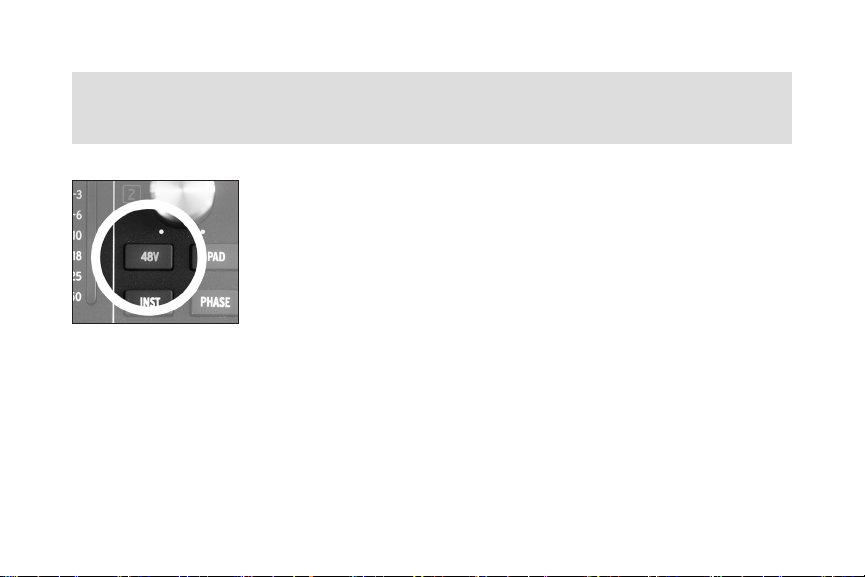
I GOT THE POWER
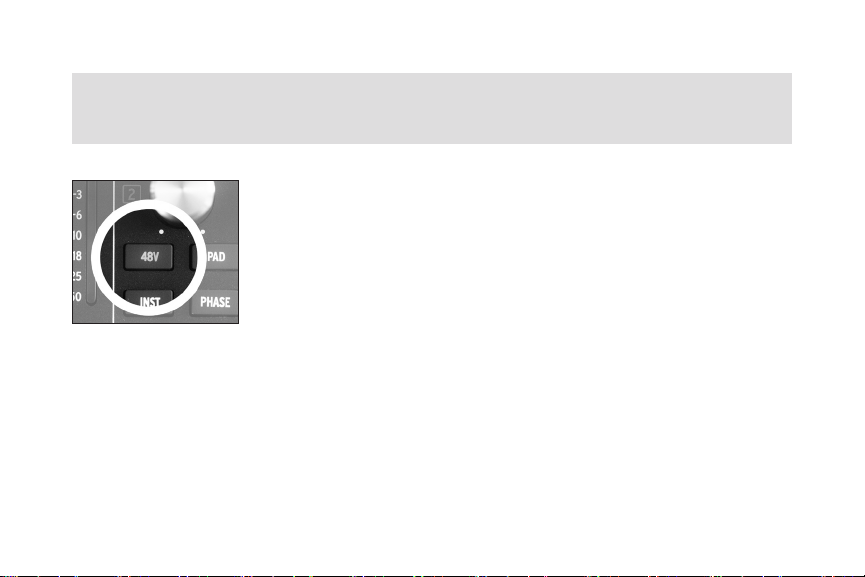
Skylight is a condenser microphone, which contributes to its
lush tone and sensitivity. It also means that it requires 48 Volts
of external power to operate (which is sometimes referred to
as “Phantom Power”). Most USB audio interfaces, modern
mixers, and recording devices are equipped with phantom
power, which is typically accessible via a switch or button
labeled “48V” somewhere near the microphone input or
on the front or back panel. (note: Before turning on phantom
power, it’s a good idea to turn your speakers down or take off
your headphones, as there’s often a bit of a “pop” sound as the
power first kicks on.) Once you’re connected and powered
on, you’re ready to rock.
6 | EN
Page 7
SOUND CHECK
Now that you’re up and running, let’s take a few moments to talk about how to get the
best out of your new microphone. Here are a few tips to help you sound your best:
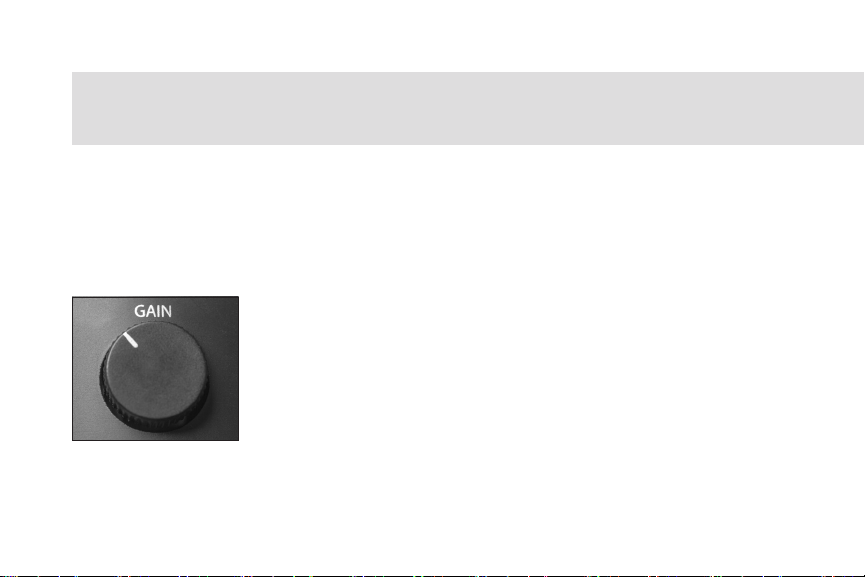
PLAYING THE GAIN
Not to be confused with volume, the Gain setting on your
mixer, interface, or portable recorder is used to both provide
a clear, noise-free signal and to shape the tone of your
recording to suit your creative fancy. This all-important
setting controls the sensitivity of the microphone and allows
you to determine how much the sound of your room is
captured along with your voice or instrument. Setting the
gain on the low side and moving in close to the microphone
will produce a breathy, intimate tone that’s perfect for any
EN | 7
Page 8

SOUND CHECK (CONTINUED)
major motion picture trailers that you might be hired to narrate. This will also
reduce the amount of reverberation and room echo that the microphone will hear.
By the same token, increasing the gain and moving further from the microphone
will allow more of the sound of your room to be captured, adding a nice “live”
feel. A few minutes of experimentation with the gain setting and microphone
placement will not only let you say classic things like “Test, test” and “Check one –
Check two” like a pro, but will help you to quickly zero in on your signature sound.
8 | EN
Page 9

MIND YOUR Ps AND Ts
To help tame popping Ps and thumping Ts, Skylight comes complete with a custom
Pop Filter. Simply use the two elastic bands to position the pop filter over the top
of the microphone, so that it sits between the mic and your mouth. This will help
to remove any small bursts of air from these powerful plosives but will still let your
voice shine through loud and clear.
EN | 9
Page 10

SOUND CHECK (CONTINUED)
Pro Tip
If you prefer not to block your face with the pop filter for visual reasons, you
can still easily address plosives by adjusting the Angle of Incidence (this is
a fancy way of saying “move the mic,” and will convince your friends you
went to audio engineering school). As an exercise, place your hand in front
of your face and say the word “pop” over and over. Now move your hand
slowly side to side as you speak. You’ll quickly notice that you only feel the
puffs of air when your hand is directly in front of your mouth. Simply move
the microphone up or to the side - while still pointing it at your mouth – you’ll
sound as great as ever and won’t be bothered by annoying pops.
10 | EN
Page 11

SPECS AND TECH
Capsule Type Condenser
Capsule Size 34mm Gold plated large diaphragm
Polar Pattern Cardioid
Frequency Range 20Hz – 20kHz
Sensitivity -42dB +3dB (0dB =1V/Pa at 1kHz)
Impedance 200 ohm
Max SPL 144d B
Weight 1kg
Dimensions 202 x 55.5mm
Included Accessories Shock Mount, Pop filter, carry bag
EN | 11
Page 12

WARRANT Y STATEMENT
512 Audio warranties this product to be free from defect in materials and workmanship for one year from the date of
purchase, for the original purchaser to whom this equipment is registered. This warranty is non-transferable.
This warranty is void in the event of damage incurred from unauthorized service to this unit, or from electrical or
mechanical modification. This warranty does not cover damage resulting from abuse, accidental damage, misuse,
improper electrical conditions such as mis-wiring, incorrect voltage or frequency, unstable power, disconnection
from earth ground (for products requiring a 3 pin, grounded power cable), or from exposure to hostile environmental
conditions such as moisture, humidity, smoke, fire, sand or other debris, and extreme temperatures.
512 Audio will, at its sole discretion, repair or replace this product in a timely manner. This limited warranty extends
only to products determined to be defective and does not cover incidental costs such as equipment rental, loss of
revenue, etc. Please visit us at www.512audio.com for more information on your warranty, or to request warranty
service.
This warranty applies to products sold in the United States of America. For warranty information in any other country,
please refer to your local 512 Audio distributor. This warranty provides specific legal rights, which may vary from
state to state. Depending on the state in which you live, you may have rights in addition to those covered in this
statement. Please refer to your state laws or see your local 512 Audio retailer for more information.
12 | EN
Page 13

DÉCOUVREZ LE SKYLIGHT
UN MICROPHONE À CONDENSATEUR DE QUALITÉ STUDIO DE 512 AUDIO
Que vous fassiez du podcast, de la radio, du streaming, du jeu ou de la
production, le nouveau microphone à condensateur Skylight de 512 Audio offre
une qualité sonore de studio que vous et vos auditeurs attendez.
Conçu par des ingénieurs passionnés par l'audio, le Skylight est prêt à faire
entendre votre voix au monde entier.
Commençons.
FR | 13
Page 14
LAISSEZ LE SKYLIGHT VOUS ÉCLAIRER
Le Skylight est un modèle à prise latérale, cela signifie qu'il
capte le son qui arrive sur le côté du microphone et non pas
à son extrémité. Pour vous repérer facilement, le «devant»
du corps du microphone porte le badge 512 Audio. Il suffit
donc de pointer le côté avec le badge vers la personne dont
vous voulez capter la voix et vous serez paré.
Sur le dessous du microphone se trouve le connecteur XLR
qui accepte un câble de microphone standard à 3 broches
pour une connexion facile et sûre à votre table de mixage,
interface audio ou enregistreur portable.
14 | FR
Page 15
UN TRAITEMENT DE CHOC
Votre microphone Skylight comprend un support antichoc
conçu pour suspendre élégamment le microphone
exactement là où vous en avez besoin, ce qui est non
seulement très esthétique mais qui protège aussi votre son
des coups et des bruits sourds des pieds sur le sol et des
invités qui tapotent sur la table. Il suffit de fixer la suspension
antichoc à votre perche ou pied de micro, de glisser le
Skylight à sa place et de serrer l'anneau inférieur pour que
tout soit bien en place. Enfin, connectez un câble micro
XLR allant du Skylight à votre table de mixage, interface ou
enregistreur portable.
FR | 15
Page 16
L'IMPORTANCE D'UNE BONNE ALIMENTATION
Le Skylight est un microphone à condensateur et cela permet
d'avoir un son riche et de garder de la sensibilité. Cela signifie
également qu'il a besoin d'une alimentation externe de 48
volts pour fonctionner (qui est parfois appelée «alimentation
fantôme»). La plupart des interfaces audio USB, des tables de
mixage modernes et des appareils d'enregistrement sont équipés
d'une alimentation fantôme généralement accessible via un
interrupteur ou un bouton marqué «48V» quelque part près
de l'entrée du microphone ou sur le panneau avant ou arrière.
(REMARQUE: Avant d'allumer l'alimentation fantôme, il est conseillé
de baisser le volume des haut-parleurs ou d'enlever les écouteurs
car il y a souvent un petit bruit de «pop» lorsque l'on enclenche le
courant.) Une fois que vous l'avez connecté et allumé, vous êtes
prêt à vous lancer.
16 | FR
Page 17
VÉRIFICATION DU SON
Maintenant que vous êtes opérationnel, prenons quelques instants pour parler
de la manière de profiter au mieux de votre nouveau microphone. Voici quelques
conseils pour vous aider à obtenir le meilleur son possible:
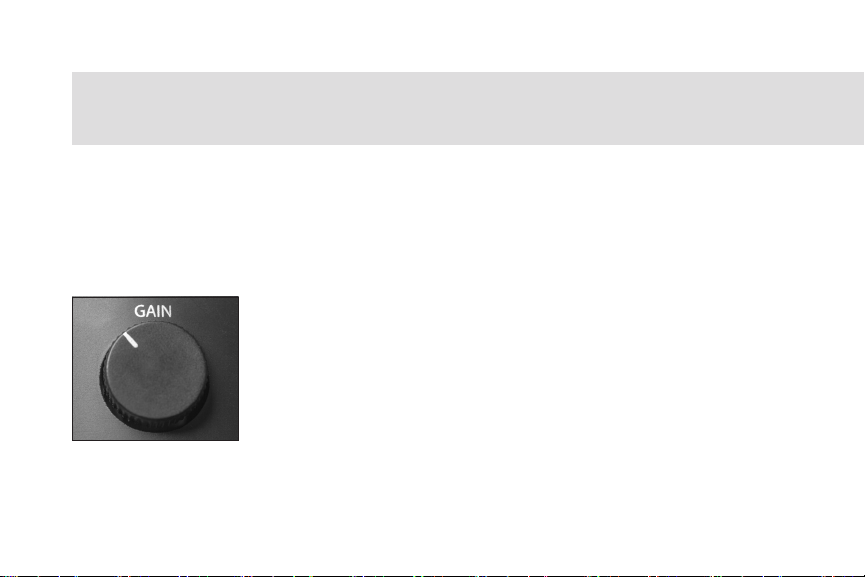
JOUER AVEC LE GAIN
À ne pas confondre avec le volume, le réglage du gain
de votre table de mixage, de votre interface ou de votre
enregistreur portable sert à la fois à fournir un signal clair et
sans bruit, ainsi qu'à sculpter le son de votre enregistrement en
fonction de votre ambition créative. Ce réglage très important
contrôle la sensibilité du microphone et vous permet de
déterminer dans quelle mesure le son de votre pièce est capté
en même temps que votre voix ou votre instrument. En réglant
le gain plus bas et en vous approchant du microphone, vous
FR | 17
Page 18

VÉRIFICATION DU SON
obtiendrez un son accentuant le souffle et l'air dans la voix, un son intime qui est
parfait pour toutes les bandes-annonces de cinéma que vous pourriez être amené
à narrer. Cela permettra également de réduire la quantité de réverbération et l'écho
de la pièce que le microphone captera. De même, augmenter le gain et s'éloigner
du microphone permettra de capturer une plus grande partie du son de votre pièce,
ajoutant une agréable touche de «live». Quelques minutes d'expérimentation avec
le réglage du gain et le placement du microphone vous permettront non seulement
de dire des choses classiques comme «Test, test» et «Un, deux, un, deux» comme
un pro, mais vous aideront aussi à définir rapidement votre signature sonore.
18 | FR
Page 19

FAITES ATTENTION À VOS P ET T
Pour aider à dompter les P et les T, le Skylight est fourni avec un filtre anti-pop
conçu spécialement pour ce microphone. Il suffit d'utiliser les deux bandes
élastiques pour positionner le filtre anti-pop sur le dessus du microphone, de
manière à ce qu'il se trouve entre le micro et votre bouche. Cela permettra
d'éliminer les petits souffles d'air de ces puissantes plosives, tout en laissant votre
voix passer de façon transparente.
FR | 19
Page 20

VÉRIFICATION DU SON
Conseil de pro:
Si vous préférez ne pas cacher votre visage avec le filtre anti-pop pour des raisons
visuelles, vous pouvez toujours facilement vous occuper des plosives en ajustant
l'angle d'incidence (c'est une façon un peu sophistiquée de dire «bougez le micro», et
vous pourrez convaincre vos amis que vous avez fait des études d'ingénieur du son).
Pour vous entraîner, placez votre main devant votre visage et répétez le mot «pop»
plusieurs fois. Maintenant, déplacez lentement votre main d'un côté à l'autre pendant
que vous parlez. Vous remarquerez rapidement que vous ne sentez les bouffées d'air
que lorsque votre main est directement devant votre bouche. Il suffit de déplacer le
microphone vers le haut ou sur le côté - tout en le gardant pointé vers votre bouche - le
son sera toujours aussi bon, et vous ne serez pas gêné par des pops pénibles.
20 | FR
Page 21

SPÉCIFICATIONS ET CARACTÉRISTIQUES TECHNIQUES
Type de capsule Condensateur
Taille de la capsule 34 mm Large membrane plaquée or
Courbe de directivité Cardioïde
Plage de fréquence 20 Hz – 20 kHz
Sensibilité -42 dB +3 dB (0 dB = 1 V/Pa à 1 kHz)
Impédance 200 ohm
Niveau de pression
acoustique maximum
Poids 1 kg
Dimensions 202 x 55,5 mm
Accessoires inclus
144 dB
Support antichoc, filtre anti-pop, sac de transport
FR | 21
Page 22

DÉCLARATION DE GARANTIE
512 Audio garantit que ce produit est exempt de défauts de matériaux et de fabrication pendant un an à compter
de la date d'achat pour le premier acheteur au nom duquel ce matériel est enregistré. Cette garantie n'est pas
transférable. Cette garantie est annulée en cas de dommage résultant d'une réparation non autorisée de cet
appareil ou d'une modification électrique ou mécanique. La présente garantie ne couvre pas les dommages
résultant d’abus, de dommages accidentels, de mauvaise utilisation, de conditions électriques inappropriées telles
qu'un câblage incorrect, une tension ou une fréquence incorrectes, une alimentation instable, une déconnexion
de la terre (pour les produits nécessitant un câble d’alimentation à 3 broches, mis à la terre), ou de l'exposition
à des conditions environnementales hostiles telles que la buée, l'humidité, la fumée, le feu, le sable ou d'autres
débris et les températures extrêmes. 512Audio réparera ou remplacera ce produit dans un délai raisonnable, à
sa seule discrétion. Cette garantie limitée s’applique uniquement aux produits jugés défectueux et ne couvre pas
les frais accessoires tels que la location d’équipement, la perte de revenus, etc. Veuillez nous rendre visite sur
www.512audio.com pour plus d'informations sur votre garantie, ou pour solliciter le service de garantie. Cette
garantie ne s'applique qu'aux produits vendus aux États-Unis d'Amérique. Pour obtenir des informations sur la
garantie dans tout autre pays, veuillez vous adresser à votre distributeur 512Audio local. Cette garantie prévoit des
droits légaux spécifiques qui peuvent varier d’un État à l’autre. Selon l'État dans lequel vous vivez, vous pouvez avoir
des droits en plus de ceux couverts dans cette déclaration. Veuillez vous référer aux lois de votre État ou consulter
votre revendeur 512 Audio local pour plus d'informations.
22 | FR
Page 23

WILLKOMMEN BEI SKYLIGHT
EINEM KONDENSATORMIKROFON IN STUDIOQUALITÄT VON 512 AUDIO
Egal ob Sie im Bereich Podcasting, Rundfunk, Streaming, Gaming oder in der
Produktion tätig sind, das neue Kondensatormikrofon Skylight von 512 Audio
liefert einen Klang in Studioqualität, wie Sie und Ihre Zuhörer ihn erwarten.
Skylight wurde von Ingenieuren mit einer großen Leidenschaft für die Audiotechnik
entwickelt und ist bereit, Ihre Stimme in die Welt zu tragen.
Los geht’s!
DE | 23
Page 24
ERSTE SCHRITTE MIT DEM SKYLIGHT
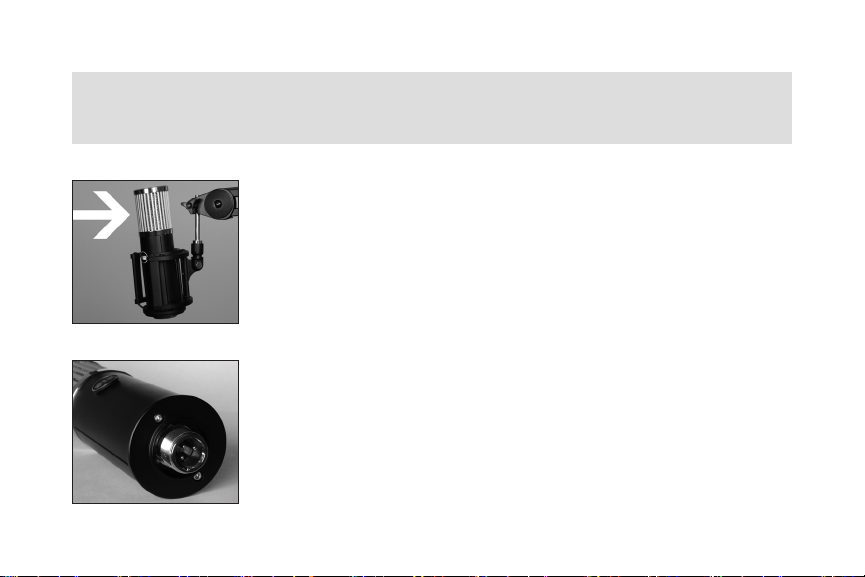
Skylight ist seitlich adressiert, d. h. es nimmt Audiosignale
auf, die seitlich vom Mikrofon erzeugt werden und nicht
am Ende. Die „Vorderseite“ des Mikrofongehäuses ist mit
der 512 Audio-Plakette versehen. Richten Sie also einfach
die Seite mit der Plakette in Richtung des aufzunehmenden
Sprechers und schon sind Sie einsatzbereit.
An der Unterseite des Mikrofons befindet sich der XLR-Anschluss, an den ein herkömmliches 3-poliges Mikrofonkabel
angeschlossen werden kann, um eine einfache und sichere
Verbindung zu Ihrem Audiomischpult, Ihrem Interface oder
Ihrem tragbaren Aufnahmegerät herzustellen.
24 | DE
Page 25
SCHOCKBEHANDLUNG
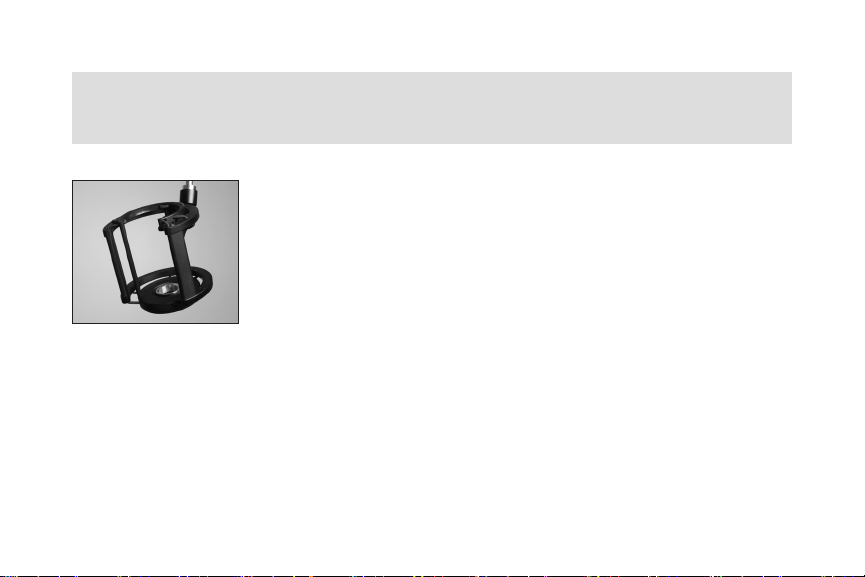
Im Lieferumfang Ihres Skylight ist eine verstellbare
Stoßdämpferhalterung enthalten, mit der Sie das Mikrofon
an der gewünschten Stelle aufhängen können. Das sieht
nicht nur gut aus, sondern schützt Ihren Ton auch vor
Erschütterungen durch stampfende Füße und auf den Tisch
klopfende Gäste. Befestigen Sie den Stoßdämpfer einfach
an Ihrem Schwenkarm oder Mikrofonständer, schieben
Sie das Skylight in die richtige Position und ziehen Sie den
unteren Ring fest, um alles zu fixieren. Als letztes schließen
Sie ein XLR-Mikrofonkabel an und führen es vom Skylight
zu Ihrem Mischpult, Ihrem Interface oder Ihrem tragbaren
Aufnahmegerät.
DE | 25
Page 26
STROMVERSORGUNG
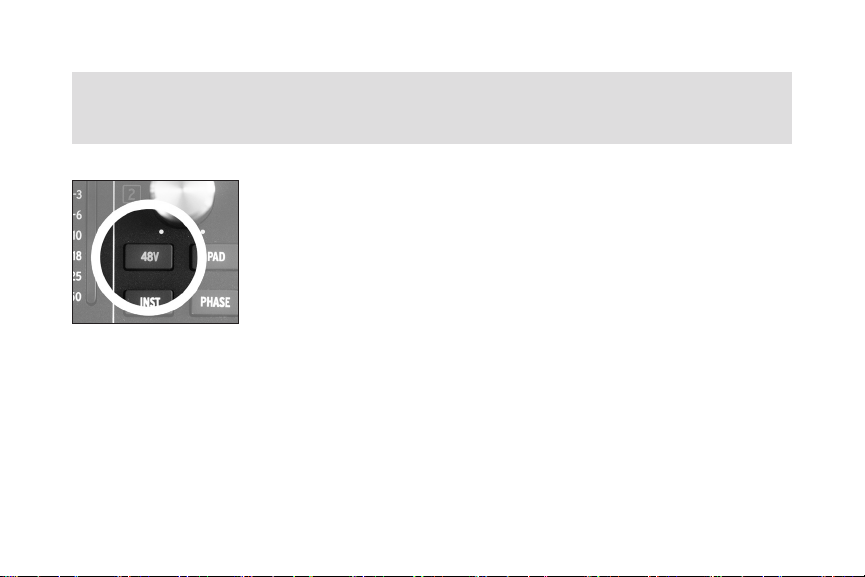
Skylight ist ein Kondensatormikrofon, was einen satten Klang und
eine hohe Empfindlichkeit bedeutet. Zudem bedeutet das, dass
für den Betrieb eine externe Spannung von 48 Volt erforderlich ist
(was manchmal auch als „Phantomspeisung“ bezeichnet wird). Die
meisten Audio Interfaces mit USB-Anschluss, modernen Mischpulte
und Aufnahmegeräte sind mit einer Phantomspeisung ausgestattet,
die in der Regel über einen Schalter oder eine Taste mit der
Bezeichnung „48 V“ irgendwo in der Nähe des Mikrofoneingangs
oder auf der Vorder- oder Rückseite aktiviert werden kann.
(ACHTUNG: Bevor Sie die Phantomspeisung einschalten, sollten Sie
die Lautsprecher leiser stellen oder die Kopfhörer abnehmen, da es
beim Einschalten oft einen kleinen Knall gibt.) Sobald die Verbindung
hergestellt und das Gerät eingeschaltet ist, können Sie loslegen.
26 | DE
Page 27
SOUNDCHECK
Da nun alles einsatzbereit ist, lassen Sie uns kurz darauf eingehen, wie Sie das
Beste aus Ihrem neuen Mikrofon herausholen können. Hier sind ein paar Tipps, die
Ihnen zu einem optimalen Klang verhelfen werden:
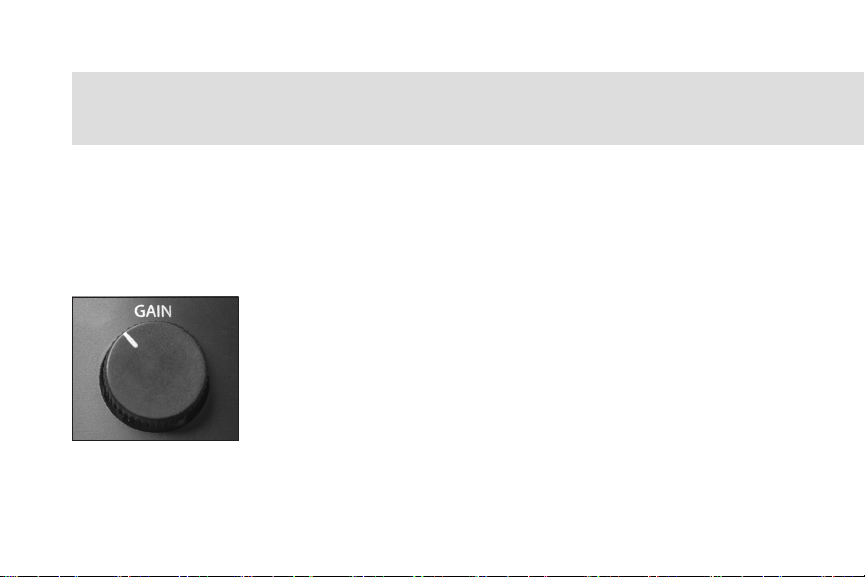
DIE GAIN-EINSTELLUNG
Die GAIN-Einstellung an Ihrem Mischpult, Ihrer Schnittstelle
oder Ihrem tragbaren Aufnahmegerät ist nicht zu
verwechseln mit der Lautstärke. Mit ihr können Sie sowohl
ein klares, rauschfreies Signal erzeugen als auch den Klang
Ihrer Aufnahme nach Ihren kreativen Vorstellungen gestalten.
Diese wichtige Einstellung regelt die Empfindlichkeit des
Mikrofons. Mit ihr können Sie bestimmen, wie stark der Klang
des Raums zusammen mit Ihrer Stimme oder Ihrem Instrument
erfasst wird. Eine niedrige Einstellung und Nähe zum
DE | 27
Page 28

SOUNDCHECK
Mikrofon erzeugen einen gehauchten, intimen Ton, der sich perfekt für größere
Kinotrailer eignet, für die Sie vielleicht als Sprecher engagiert werden. Dadurch
werden auch der Nachhall und das Raumecho reduziert, die durch das Mikrofon
aufgenommen werden. Umgekehrt können Sie durch eine hohe Einstellung und
einen größeren Abstand zum Mikrofon mehr vom Raumklang einfangen, was ein
schönes „Live“-Gefühl erzeugt. Ein paar Minuten des Experimentierens mit der
GAIN-Einstellung und der Mikrofonplatzierung lassen Sie nicht nur klassische
Dinge wie „Test, Test“ und „Eins, zwei, drei“ wie ein Profi sagen, sondern helfen
Ihnen auch, schnell Ihren charakteristischen Sound zu finden.
28 | DE
Page 29

ACHTEN SIE AUF IHRE PLOSIVLAUTE
Um den Klang Ihrer Ps und Ts zu verbessern, wird mit dem Skylight ein eigener
Poppschutz mitgeliefert. Verwenden Sie einfach die beiden elastischen Bänder,
um den Poppschutz über der Oberseite des Mikrofons zu positionieren, so dass
er zwischen dem Mikrofon und Ihrem Mund befestigt ist. Dadurch werden kleine
Luftstöße von diesen kräftigen Plosivlauten abgefangen, aber Ihre Stimme wird
trotzdem laut und deutlich aufgenommen.
DE | 29
Page 30

SOUNDCHECK
Profi-Tipp:
Wenn Sie es vorziehen, Ihr Gesicht aus optischen Gründen nicht mit dem
Poppschutzfilter zu verdecken, können Sie Plosivlaute trotzdem ganz einfach
verbessern, indem Sie den Einfallswinkel einstellen. Als Übung können Sie
die Hand vor Ihr Gesicht halten und wiederholt das Wort „Popp“ sagen.
Bewegen Sie nun Ihre Hand langsam von einer zur anderen Seite, während
Sie sprechen. Sie werden schnell feststellen, dass Sie die Luftstöße nur dann
spüren, wenn sich Ihre Hand direkt vor Ihrem Mund befindet. Bewegen Sie
das Mikrofon einfach nach oben oder zur Seite, während Sie es immer noch
auf Ihren Mund richten. So klingen Sie so gut wie immer und werden nicht
durch lästige Poppgeräusche gestört.
30 | DE
Page 31

TECHNISCHE DATEN
Kapseltyp Kondensator
Kapselgröße 34 mm, goldbeschichtete Großmembran
Richtcharakteristik Niere
Frequenzbereich 20 Hz bis 20 kHz
Empfindlichkeit –42 dB +3 dB (0 dB = 1 V/Pa bei 1 kHz)
Impedanz 200 Ohm
Max. Schalldruckpegel 144 dB
Gewicht 1 kg
Maße 202 x 55,5 mm
Enthaltenes Zubehör
Stoßdämpferhalterung, Poppschutz, Tragetasche
DE | 31
Page 32

GARANTIEERKLÄRUNG
512 Audio garantiert, dass dieses Produkt für den Erstkäufer, auf den dieses Gerät registriert ist, für ein Jahr ab
Kaufdatum keine Material- und Verarbeitungsfehler enthält. Diese Garantie ist nicht übertragbar. Diese Garantie
erlischt im Falle von Schäden, die durch unbefugte Wartung dieses Gerätes oder durch elektrische oder
mechanische Veränderungen entstehen. Diese Garantie gilt nicht für Schäden, die durch Missbrauch, versehentliche
Beschädigung, Fehlgebrauch, unsachgemäße elektrische Bedingungen wie Fehlverdrahtung, falsche Spannung
oder Frequenz, instabile Stromversorgung, Trennung von der Erdung (für Produkte, die ein 3-poliges, geerdetes
Netzkabel erfordern) oder durch Einwirkung feindlicher Umgebungsbedingungen wie Nässe, Feuchtigkeit, Rauch,
Feuer, Sand oder andere Rückstände und extreme Temperaturen entstehen. 512 Audio wird dieses Produkt nach
eigenem Ermessen zeitnah reparieren oder ersetzen. Diese beschränkte Garantie erstreckt sich nur auf Produkte,
die als defekt festgestellt wurden, und deckt keine Nebenkosten wie Gerätemiete, Einnahmeverluste usw. ab. Bitte
besuchen Sie uns unter www.512audio.com, um weitere Informationen zu Ihrer Garantie zu erhalten oder um eine
Garantieleistung anzufordern. Diese Garantie gilt für Produkte, die in den Vereinigten Staaten von Amerika verkauft
werden. Für Garantieinformationen in allen anderen Ländern wenden Sie sich bitte an Ihren lokalen 512 AudioHändler. Diese Garantie gewährt spezifische Rechtsansprüche, die von Staat zu Staat unterschiedlich sein können.
Je nachdem, in welchem Staat Sie leben, haben Sie möglicherweise weitere Rechte als die in dieser Erklärung
genannten. Bitte beachten Sie Ihre Landesrechte oder wenden Sie sich für weitere Informationen an Ihren lokalen
Händler von 512 Audio
32 | DE
Page 33

BIENVENIDO A SKYLIGHT
UN MICRÓFONO DE CONDENSADOR CON CALIDAD DE ESTUDIO DE 512 AUDIO
Tanto si realiza podcast, broadcast, streaming, es músico o produce, el nuevo
micrófono de condensador Skylight de 512 Audio le ofrece el sonido de calidad
de estudio acorde a sus necesidades.
Diseñado por ingenieros con una gran pasión por el sonido, Skylight está listo
para que su voz se oiga en todo el mundo.
Comencemos.
ES | 33
Page 34
CONOCE SKYLIGHT
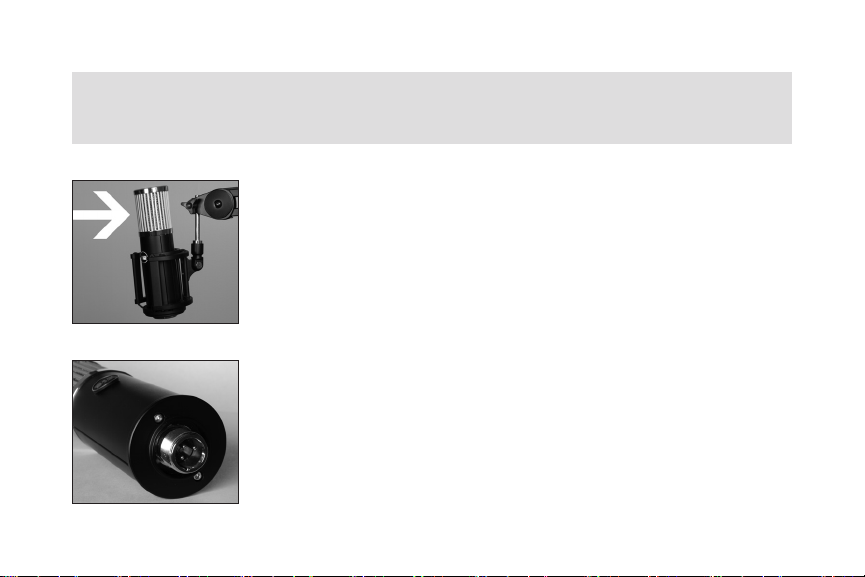
Skylight es un diseño de dirección lateral, lo que significa
que captura el sonido que llega al lado del micrófono, no
al extremo. Para una fácil referencia, la «parte delantera»
del cuerpo del micrófono lleva el distintivo de 512 Audio, de
modo que solo tiene que dirigir el lado con el distintivo hacia
la persona que habla y que se intenta capturar, y ya está.
En la parte inferior del micrófono se encuentra el conector
XLR que acepta un cable de micrófono estándar de 3 pines
para que pueda conectarlo de forma fácil y segura a su
mesa de mezclas, interfaz o grabadora portátil.
34 | ES
Page 35
TRATAMIENTO DE CHOQUE
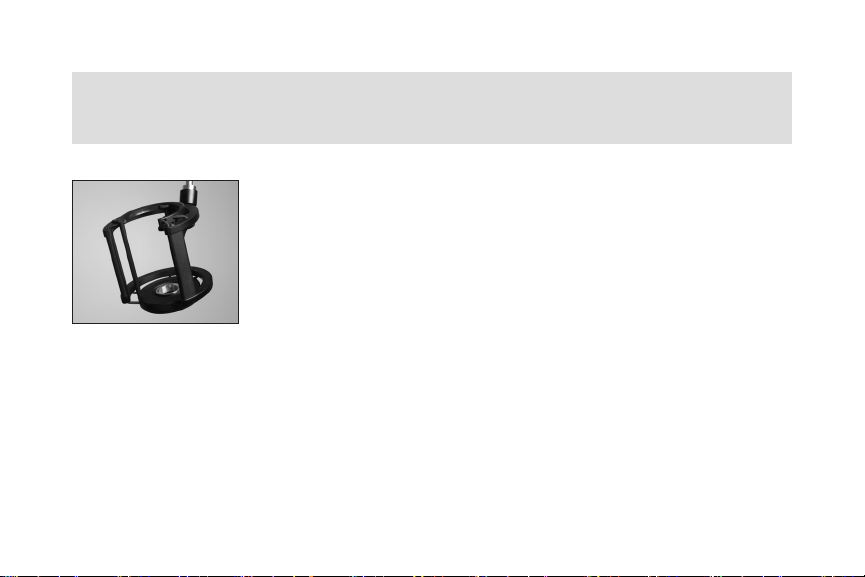
Su micrófono Skylight incluye un soporte de amortiguación
ajustable que ha sido diseñado para poder colgar
fácilmente el micrófono exactamente donde se necesite,
que no solamente queda muy bien, sino que protege el
audio contra los golpes y el ruido que se produce al pisar
fuerte y cuando los invitados dan golpecitos en la mesa.
Solo tiene que acoplar el soporte de amortiguación a su
brazo articulado o pie de micrófono, deslizar Skylight en
su posición y apretar la anilla inferior para que quede todo
en su sitio. Por último, conecte un cable de micrófono XLR
y tiéndalo desde Skylight a su mesa de mezclas, interfaz o
grabadora portátil.
ES | 35
Page 36
TENGO LA POTENCIA
Skylight es un micrófono de condensador, característica que
contribuye a su sonido de lujo y su sensibilidad. Esto también
significa que necesita una corriente externa de 48 voltios para
funcionar (lo que a veces se denomina «alimentación phantom»).
Casi todas las interfaces de audio USB, mesas de mezclas y
dispositivos de grabación actuales cuentan con alimentación
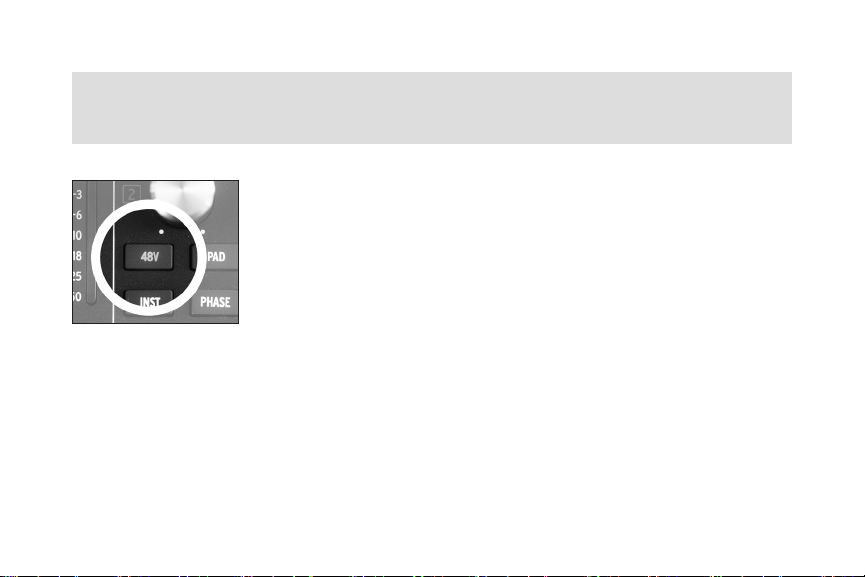
phantom, a la que normalmente se puede acceder a través de un
interruptor o botón rotulado como «48V» que se encuentra cerca
de la entrada de micrófono o en el panel delantero o trasero.
(NOTA: Antes de activar la alimentación phantom, es recomendable
apagar los altavoces o quitarse los auriculares, ya que a menudo
suena un "chasquido" cuando se activa la alimentación phantom por
primera vez.) Una vez conectado y recibiendo alimentación, todo
estará listo para disfrutar.
36 | ES
Page 37
PRUEBA DE SONIDO
Ahora que todo está funcionando, hablemos de cómo sacar el máximo partido
a su nuevo micrófono. A continuación le proporcionamos algunos consejos para
que suene lo mejor posible:
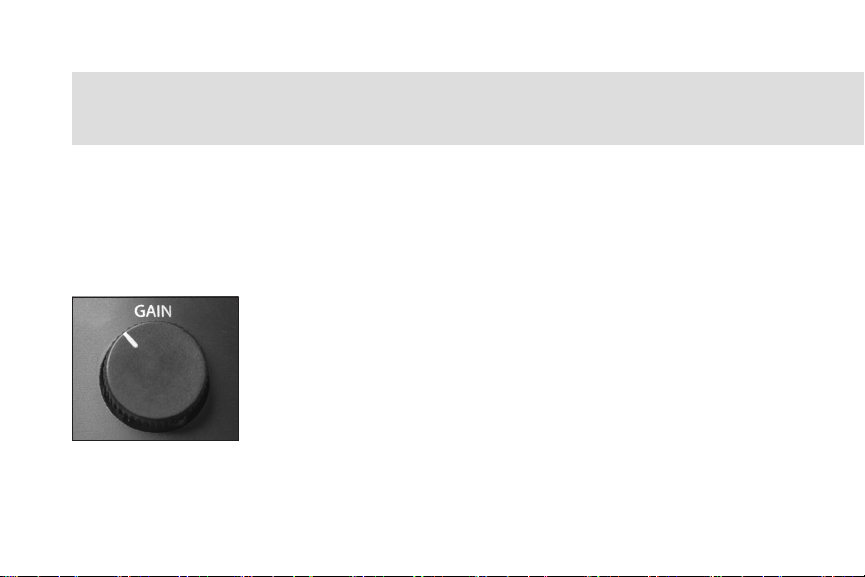
USO DE LA GANANCIA
No debiendo confundirse con el volumen, los ajustes de
ganancia en su mesa de mezclas, interfaz o grabadora
portátil se pueden utilizar tanto para proporcionar una
señal clara y sin ruido como para dar forma al sonido de la
grabación de modo que se adapte a su fantasía creativa.
Estos ajustes tan importantes controlan la sensibilidad del
micrófono y permiten establecer la cantidad de sonido
ambiente de la habitación que se va a capturar junto
con la voz o instrumento. Si ajusta la ganancia en el lado
ES | 37
Page 38

PRUEBA DE SONIDO
bajo y se acerca al micrófono, se producirá un sonido profundo y denso que
es perfecto para cualquier tráiler de películas importantes cuya narración le
puedan encargar. Esto también reducirá la cantidad de reverberación y eco
ambiental capturada por el micrófono. Del mismo modo, si aumenta la ganancia
y se aleja del micrófono, podrá capturar más el sonido de la habitación, lo que
añadirá una agradable sensación de «sonido en directo». Con unos minutos
de experimentación con los ajustes de ganancia y la ubicación del micrófono,
no solo podrá decir cosas clásicas como «prueba, prueba» y «probando uno,
probando dos» como un profesional, sino que además podrá concentrarse
rápidamente en lograr su sonido característico.
38 | ES
Page 39

CUIDE SUS «PES» Y SUS «TES»
Para ayudar a aplacar los sonidos explosivos de las «pes» y las «tes», Skylight
viene con un filtro antipop personalizado. Simplemente utilice las dos cintas
elásticas para colocar el filtro antipop sobre la parte superior del micrófono, de
modo que quede entre el micrófono y la boca. Esto ayudará a eliminar cualquier
pequeña ráfaga de aire de estos intensos sonidos oclusivos, pero aún podrá
escuchar la voz fuerte y clara.
ES | 39
Page 40

PRUEBA DE SONIDO
Consejo profesional:
Si prefiere no bloquear la cara con el filtro antipop por motivos visuales, puede
solucionar fácilmente los sonidos explosivos ajustando el ángulo de incidencia
(esta es una forma imaginativa de decir «mueva el micrófono» y convencerá
a sus amigos de que estudió en una escuela de ingeniería de audio). Como
ejercicio, póngase la mano delante de la cara y diga la palabra «pop» una
y otra vez. Ahora mueva la mano lentamente de lado a lado mientras habla.
Notará rápidamente que solo siente las bocanadas de aire cuando la mano
está directamente delante de la boca. Solo tiene que mover el micrófono
hacia arriba o hacia un lado, sin dejar de apuntar a la boca: sonará tan bien
como siempre y no le molestarán los irritantes chasquidos de las consonantes
oclusivas.
40 | ES
Page 41

ESPECIFICACIONES Y CARACTERÍSTICAS TÉCNICAS
Tipo de cápsula Condensador
Tamaño de la cápsula
Patrón polar Cardioide
Rango de frecuencia 20 Hz-20 kHz
Sensibilidad -42 dB +3 dB (0 dB = 1 V/Pa a 1 kHz)
Impedancia 200 ohmios
SPL máximo 144 d B
Peso 1 Kg
Dimensiones 202 x 55,5 mm
Accesorios incluidos
Diafragma de gran tamaño de 34 mm chapado en oro
Sopor te de amortiguación, filtro antipop, bolsa de transporte
ES | 41
Page 42

DECLARACIÓN DE GARANTÍA
512 Audio garantiza que este producto no tendrá defectos de materiales y mano de obra durante un año a partir
de la fecha de compra para el comprador original a cuyo nombre esté registrado este equipo. Esta garantía no
es transferible. Esta garantía se anula en caso de que se produzcan daños por una reparación no autorizada a
esta unidad, así como por una modificación eléctrica o mecánica. Esta garantía no cubre los daños resultantes
por abuso, daños accidentales, uso indebido, condiciones eléctricas inadecuadas como puede ser un cableado
incorrecto, voltaje o frecuencia incorrectos, alimentación inestable, desconexión de la toma de tierra (para
productos que requieran un cable de alimentación de 3 clavijas con conexión a tierra) o exposición a condiciones
ambientales hostiles como humedad, humo, fuego, arena u otros desechos y temperaturas extremas. 512 Audio
reparará o reemplazará este producto, a su entera discreción, de manera oportuna. Esta garantía limitada se
extiende únicamente a los productos que se determine que son defectuosos, y no cubre costes incidentales
tales como alquiler de equipos, pérdida de ingresos, etc. Visítenos en www.512audio.com para obtener más
información sobre tu garantía o para solicitar el servicio de garantía. Esta garantía es válida con los productos
vendidos en los Estados Unidos de América. Para obtener información sobre la garantía en cualquier otro país,
consulte a su distribuidor local de 512 Audio. Esta garantía proporciona derechos legales específicos que pueden
variar de un estado a otro. Dependiendo del estado en el que viva, puede que tenga otros derechos además
de los que se incluyen en esta declaración. Para obtener más información, consulte las leyes de su estado o a su
distribuidor local de 512 Audio.
42 | ES
Page 43

欢迎了解 512 AUDIO 的录音棚
级电容话筒 SKYLIGHT
无论您是做播客、广播、流媒体、游戏还是录音,512 Audio 的新款 Skylight
电容话筒都可提供录音棚级音效,满足您和听众的需求。
Skylight 由对音频有着深厚热情的工程师设计,可以随时帮助您将自己的声
音 传 向 世 界。
我 们 开始吧。
中文 | 43
Page 44
了解 SKYLIGHT
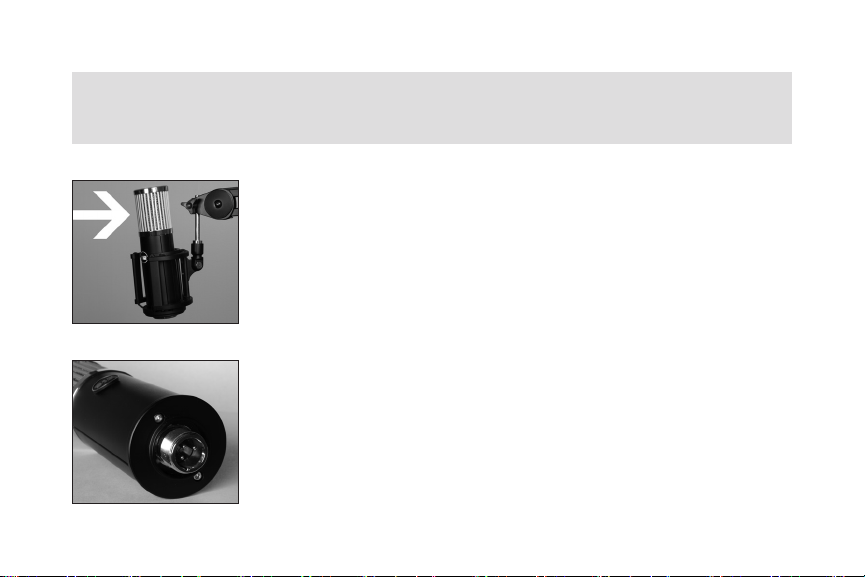
Skylight 是一款边侧拾音话筒,也就是拾取话筒侧边而
不是顶端的音频。简单说来就是,话筒主体的“前面”设有
512 Audio 徽章,所以只需将带有徽章的侧边指向您想
要捕捉声音的讲话人,就可以开始了。
话筒的底部有 XLR 连接器,可以接受标准的 3 针话筒线
缆,以 方 便、安 全 地 连 接 至 您 的 音 频 混 音 器、接 口或便 携
式 录 制设 备。
44 | 中文
Page 45
防震处理
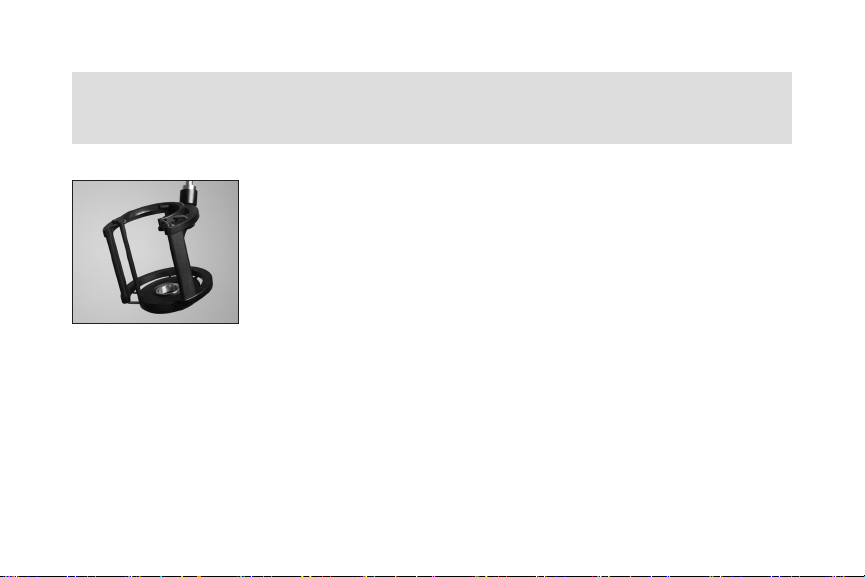
您的 Skylight 话筒包含一个可调节的防震支架,设计用
于优雅地将话筒悬挂于您所需的准确位置,这样不仅外形
美观,还能让音频免受嘉宾跺脚和轻敲桌子时发出的砰砰
声和咚咚声的干扰。您只需将防震器安装到吊臂或话筒架
上,然后将 Skylight 滑到合适的位置,拧紧底环,以便所
有部件贴合到位。最后,连接 XLR 话筒线缆,从 Skylight
上将其配布至混音器、接口或便携式录制设备。
中文 | 45
Page 46
接通电源
46 | 中文
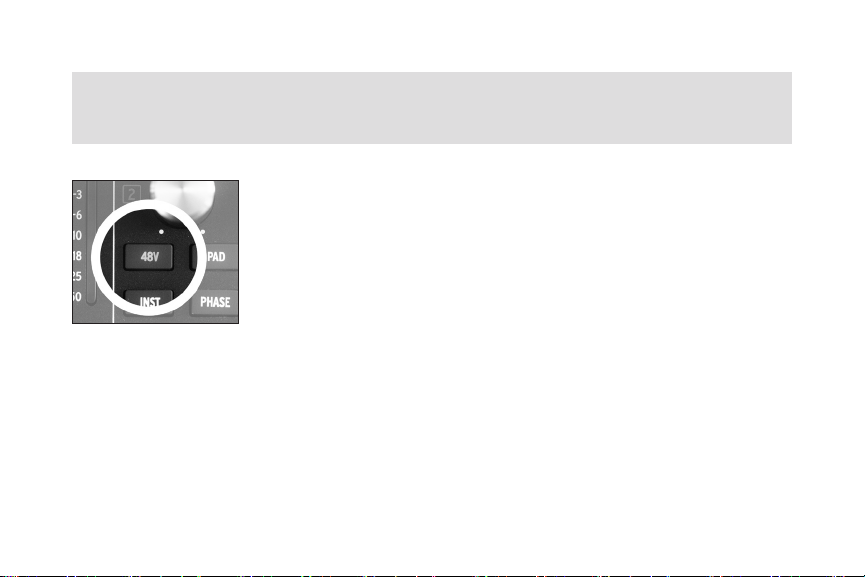
Skylight 是一款电容话筒,有助于实现华丽的音调和提
高灵敏度。这也意味着操作时需要连接 48 伏特的外部电
源(有时也称为“幻象电源”)。大多数 USB 音频接口、现
代混音器和录制设备都配有幻象电源,通常可以通过话筒
输入端附近或前面板或后面板上标有“48伏”的开关或按
钮接入。(注意:在接通“幻象电源”之前,最好把扬声器
音量调小或摘掉耳机,因为电源刚接通时通常会有一点爆
破音。)连接并通电后,就可以开始摇滚了。
Page 47
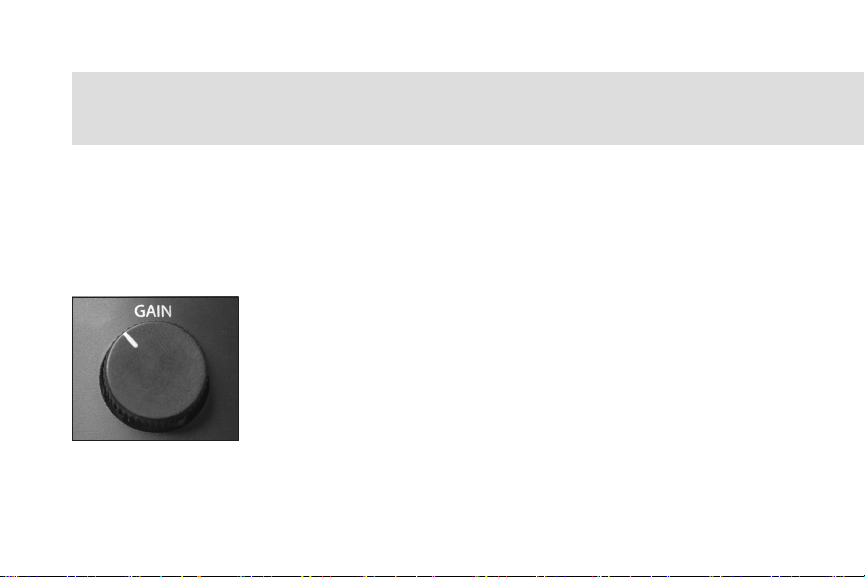
声音检查
现在一切就绪了,下面我们来简单讲讲如何让您的新话筒发挥出最好的效
果。以下小技巧将有助于您实现最佳音效:
调节增益
与音量不同的是,您的混音器、接口或便携式录制设备中
的增益设置既可以提供清晰无噪音的信号,也可以根据您
的创意喜好来调整录音的音调。该非常重要的设置可以控
制话筒的灵敏度,由此您可以确定要将房间中的声音以及
您或乐器的声音录制到什么程度。调低增益并靠近话筒会
产生一种能听见呼吸声的亲密音调,这非常适用于可能雇
用您作旁白的大型电影的预告片。这也可减少话筒会听到
的混响声和房间回声。同理,调高增益并远离话筒可以捕
中文 | 47
Page 48

声音检查
捉到房间中的更多声音,增加很棒的“现场”感。花几分钟的时间测试增益设
置和话筒的位置不仅能让您像专业人士一样说“测试、测试”和“试音、再试
音”,还可帮助您快速锁定您的标志性声音。
48 | 中文
Page 49

小心爆破音
为了帮助削弱爆破音,Skylight 配备了一个自定义的爆破音滤除器。只需用两
根橡皮筋将爆破音过滤器固定在话筒顶部,将其置于话筒和您的嘴部之间即
可。这将有助于消除这些强大的爆破音中任何细小的气流,但仍能让您的声
音 响 亮 清 晰。
中文 | 49
Page 50

声音检查
专业技巧:
如果为了视觉效果,您不希望滤除器挡住您的脸,则您仍然可以通过
调整“入射角”(这是“移动话筒”的一种文雅说法,并且会让您的
朋友们相信您上过音频工程学校)来轻松地处理爆破音。练习时,将
一只手放在面前,重复说“pop”一词。然后一边说话一边将手从一
侧慢慢地移动到另一侧。您很快就会发现,只有当手处于嘴前时,才
会感觉到呼出的气流。只需将话筒向上或侧边移动,同时仍将其对准
嘴部,就可获得最佳的音效,且不会受到烦人的爆破音的干扰。
50 | 中文
Page 51

技术规格
音头类型
音头尺寸
指向性
频率范围
灵敏度
阻抗
最大声压级
重量
尺寸
内含附件
电容式
34 毫米镀金大振膜
心型
20 赫兹 – 20 千赫
-42 分贝 +3 分贝(0 分贝 = 1 千赫时为每帕 1 伏)
200 欧姆
144 分贝
1 千克
202 x 55.5 毫米
防 震 架、爆 破 音 滤 除 器、手 提包
中文 | 51
Page 52

质保声明
512 Audio 向注册了本设备的原始购买者保证,自购买之日起的一年内,本产品不会出现用料和工艺上
的缺陷。本质保不可转让。擅自对本产品进行未经许可的维修,或者对产品进行电学或机械改造而造成
本产品受损的,会导致本质保失效。质保范围不包括滥用本品、意外损坏、误用本产品,以及包括接线错
误、电压或频率错误、电源不稳定、接地线断开(如需使用 3 脚接地电缆的产品)等电不当电气条件的
情况,或者将本产品暴露在包括水分、潮湿、烟雾、明火、沙子或其它碎片,以及极端温度在内的恶劣环境
之下出现的问题。512 Audio 将自行决定及时地对产品进行修理或更换。本品采用有限质保,只有在确
认本品的确存在瑕疵时方可延保,设备租赁、收入损失等附带成本不在质保范围内。请访问我们的网站
www.512audio.com,进一步了解您的质保信息,或请求质保服务。本质保适用于在美国销售的产品。如需
了解其它国家的质保信息,请联系您当地的 512 Audio 经销商。本质保提供特定的法律权利,该权利在各
州可能不尽相同。基于您所在的州,您可能享有本声明未述及的权利。请参考您所在州的法律,或咨询您
当地的 512 Audio 零售商,以了解更多信息
52 | 中文
Page 53

512 AUDIOのスタジオ品質コン
デンサーマイクSKYLIGHTへよう
こそ
ポッドキャスト、放送、ストリーミング、再生、プロデュースのいずれの場合で
も、512Audioの最新Skylightコンデンサーマイクは、あなたとあなたのリス
ナーが要求するスタジオ品質のサウンドを提供します。
オーディオに深い情熱を持つエンジニアによって設計されたSkylightは、あ
なたの声を世界に届ける準備ができています。
さ ぁ 、始 め よ う 。
日本人 | 53
Page 54
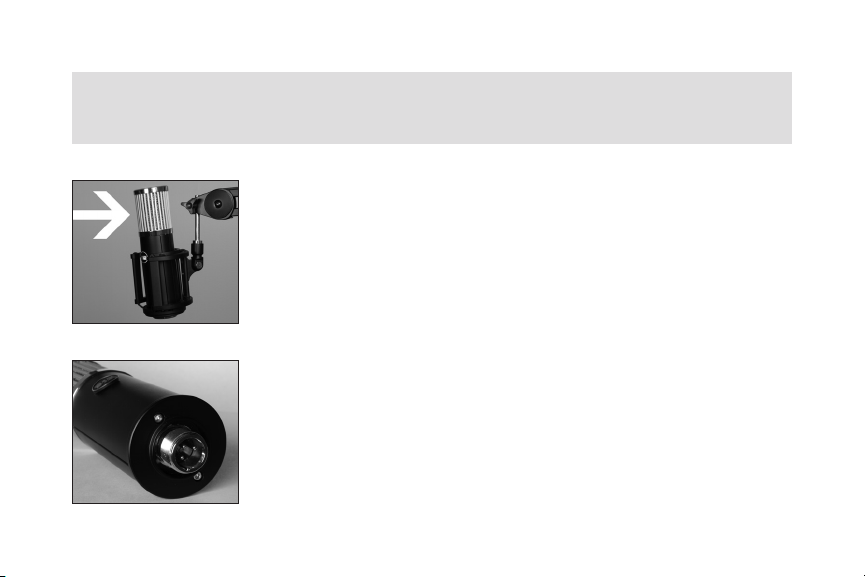
ス ポットラ イトに 足 を 踏 み入 れる
Sk yl ig htはサイドアドレス設 計です。つまり、マイクの 端
ではなく、マイクの側面から入ってくるオーディオを拾い
ます。簡単に参照できるように、マイク本体の「前面」に
は 51 2オー ディオバッジが付いているので、バッジのある
側をキャプチャしようとしているスピーカーに向けるだけ
で 、準 備 が 整 い ま す 。
マイクの下 部には、オーディオミキサー、インターフェイ
ス、またはポータブルレコーダーに簡単かつ安全に接続
するための標準の3ピンマイクケーブルを受け入れるXLR
コネクタが あります。
54 | 日本人
Page 55
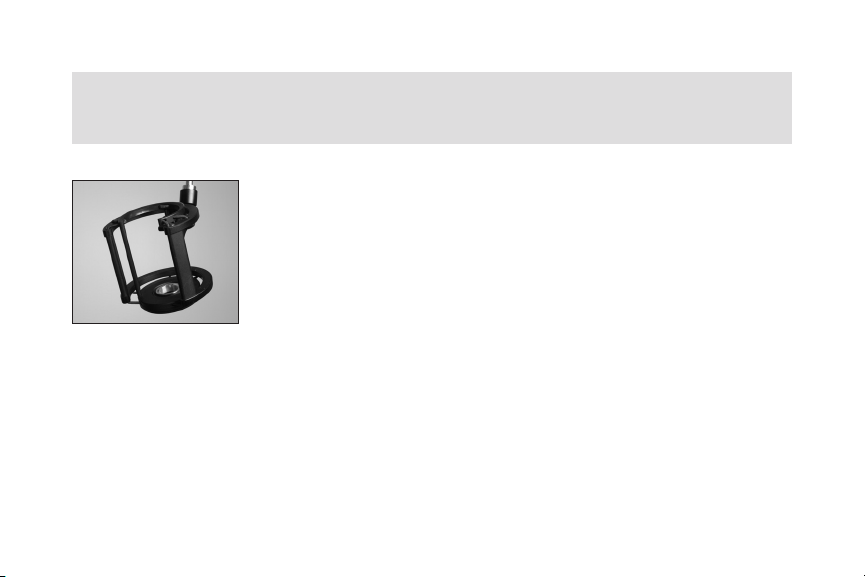
衝撃への対応
Skylightマイクには、調整可能なショックマウントベー
スが含まれており、マイクを必要な場所に正確に吊り下
げるように設計されています。これにより、見栄えが良
くなるだけでなく、ゲストが足踏みしたりテーブルを叩い
た り す る 衝 撃 か ら オ ー デ ィ オ を 保 護 し ま す 。シ ョ ッ ク マ
ウントをブームアームまたはマイクスタンドに接 続し、ス
ポットライトを所定の位置にスライドさせ、下部リングを
締めてすべてを所 定の位置にスナップするだけです。最
後に、XLRマイクケーブルを接続し、Sk ylightからミキサ
ー、インターフェイス、またはポータブルレコーダーに接
続します。
日本人 | 55
Page 56
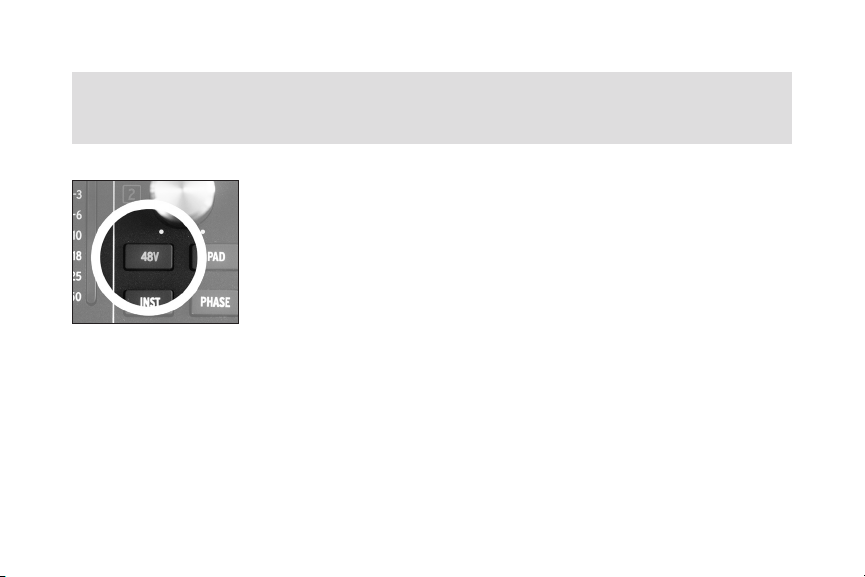
私は力を得た
Skylightはコンデンサーマイクで、豊かな音色と感度に
貢 献 し ま す 。ま た 、動 作 に は 4 8 ボ ル ト の 外 部 電 源 が 必 要
であることも意味します(これは「ファンタム電源 」と呼
ばれることもあります)。ほとんどのUSBオーディオイン
ターフェイス、最 新のミキサー、および 録音デバイスには
ファンタム電源が 装 備さ れていま す。ファン タム 電 源に
は、通常、マイク入力の近く、または前面パネルまたは背
面パネルにある「4 8V」というラベルの付いたスイッチま
たはボタンからアクセスできます。(注:ファンタム電源
をオンにする前に、スピーカーの電源を切るか、ヘッドホ
ンを外しておくことをお勧めします。電源が最初にオンに
なると、「ポップ」な音が聞こえることがよくあります。)
接続して電源を入れると、準備が整います。
56 | 日本人
Page 57
音量チェック
使用する準備ができたので、新しいマイクを最大限に活用する方法について
少し話しましょう。最高のサウンドを実現するためのヒントをいくつかご紹介し
ます。
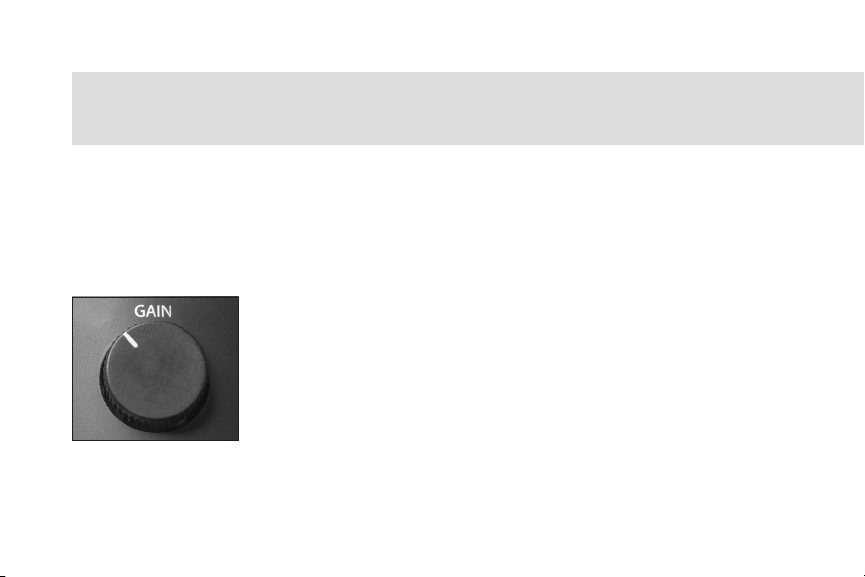
ゲインを再 生する
ボリュームと混同しないように、ミキサー、インターフェ
イ ス 、ま た は ポ ー タ ブ ル レ コ ー ダ ー の ゲ イ ン 設 定 を 使 用
して、クリアでノイズのない 信号を提 供し、クリエイティ
ブな想像力に合うように録音のトーンを形成します。この
非常に重要な設定は、マイクの感度を制御し、部屋の音
が声や楽器とともにどの程度キャプチャされるかを決定
できるようにします。ゲインをローサイドに設定し、マイク
の 近 く に 移 動 す る と 、息 を 呑 む よ う な 親 密 な ト ーン が 生
日本人 | 57
Page 58

音量チェック
成されます。これは、主要な映画の予告編のナレーターとして雇われた場合
に最適です。これにより、マイクに聞こえる残 響と周囲のエコーの量も減少し
ます。同様に、ゲインを上げてマイクから遠ざけると、部屋の音をより多くキ
ャプチャできるようになり、心地よい「ライブ」感 が追加されます。ゲイン設
定とマイク の配置を 数 分間 試してみる と、プ ロの ように「テスト 、テスト」、「1
つチェック-2つ チェック」などの決まり文句を言うことができるだけでなく、
独特のサウンドにすばやく集中するのに役立ちます 。
58 | 日本人
Page 59

PとTに注意してください
ポップPとサンピングTを飼いならすために、Skylightにはカスタムポップフ
ィル ター が付属しています。2つの 弾 性 バンドを 使 用して、ポ ップ フィル ター
をマイクの上に配置し、マイクと口の間に配置します。これは、これらの強力
なストップから小さな空気の爆発を取り除くのに役立ちますが、それでもあ
なた の声は 大きくはっきりと輝きます。
日本人 | 59
Page 60

音量チェック
プ ロ の ヒ ン ト:
視覚的な理由でポップフィルターで顔をブロックしたくない場合でも、入
射角を調整することで、爆発音を簡単に解決できます。 (これは「マイク
を動 かす」というエレガントな言 い 方で、オーディオエンジニアリングス
クールにいることを友達に納得させることができます)。練習として、顔
の前に 手 を置き、「ポップ」という言 葉 を繰り返し言います。次に、話すと
きに手をゆっくりと左右に動かします。手が口の真正面にあるときだけ
息 を 感 じるこ とに すぐに 気 付 くで しょう。マ イク を 上 また は 横 に 動 か す だ
けで(口 を指さしたまま)、これまでと同じように良 い 音 が鳴り、迷 惑な ポ
ップ 音に 悩まさ れ ること は ありませ ん。
60 | 日本人
Page 61

仕様と技術
カプセルタイプ
カプセルサイズ
極 性 パターン
周波数範囲
感度
インピーダンス
最大SPL
重さ
寸法
付属品
コンデンサー
34mm 金メッキ大型ダイアフラム
カー ディオイド
20Hz – 20kHz
-42dB+3dB(1kHzで0dB = 1V / Pa)
200オーム
144d B
1kg
202 x 55.5mm
ショックマウント、ポップフィルター、キャリーバッグ
日本人 | 61
Page 62

保証書
512 Audioは、購入日から1年間、この機器が登録されている最初の購入者に対して、材料および製造
上の 欠陥に対してこの製 品を保証します。この保証は 譲 渡できませんこのユ ニットへの 不正な サービス
または電気的または機械的な変更に起因する損傷の場合、この保証は無効になります。この保証は、
乱用、偶発的な損傷、誤用、誤配線、不適切な電圧、不適切な周波数、不安定な電源、3ピンの接地電
源ケーブルを必要とする製品のアースからの切断などの不適切な電気的状態に起因する損傷には適用
さ れ ま せ ん 。 こ の 保 証 は 、湿 気 、湿 度 、煙 、火 、砂 、そ の 他 の 破 片 、極 端 な 温 度 な ど の 過 酷 な 環 境 条
件への暴露からも適用されません。512 Audioは、独自の裁量により、この製品を適時に修理または交
換します。この限定保証は、欠陥が見つかった製品にのみ適用され、機器のレンタル、収益の損失など
の付 随的な費用には適 用されません。保証の詳 細について、または保 証サービスをリクエストするに
は、www.512audio.comにアクセスしてください。この保証は、アメリカ合衆国で販売されている製品に
適用されます。その他の国の保証情報については、最寄りの512オーディオ販売代理 店にお問い合わせ
ください。この保 証は、州ごとに異なる可能 性のある特定の 法的権利を提 供します。お住まい の 州によっ
ては、この声明に記載されている以 外の権 利が適 用される場 合があります。詳 細については、州 法を参
照するか、最寄りの512 Audio販売店にお問い合わせください。
62 | 日本人
Page 63

Page 64

www.512audio.com
2120 Downing Lane, Suite #100, Leander, TX 78641
Designed in Texas
 Loading...