

Page 1
512-BBA
USER GUIDE
EN | FR | DE | ES | 中文 | 日本語
Page 2

TABLE OF CONTENTS
English ............................................................................... 3
French ............................................................................. 12
Deutsch ............................................................................ 22
Español ............................................................................ 32
中文 ............................................................................... 42
日本語 ............................................................................ 50
Page 3

WELCOME
Congratulations for purchasing the BBA from 512 Audio! Perfect for any situation
where a microphone boom arm is needed, the 512-BBA allows you to position
your microphone where it sounds best for your voice, with a professional look on
camera, every time.
EN | 3
Page 4
LET'S GET STARTED
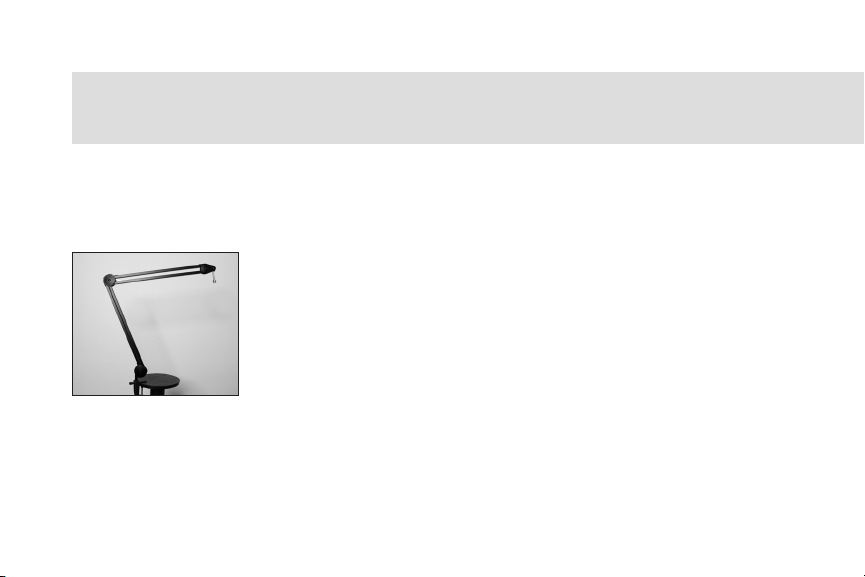
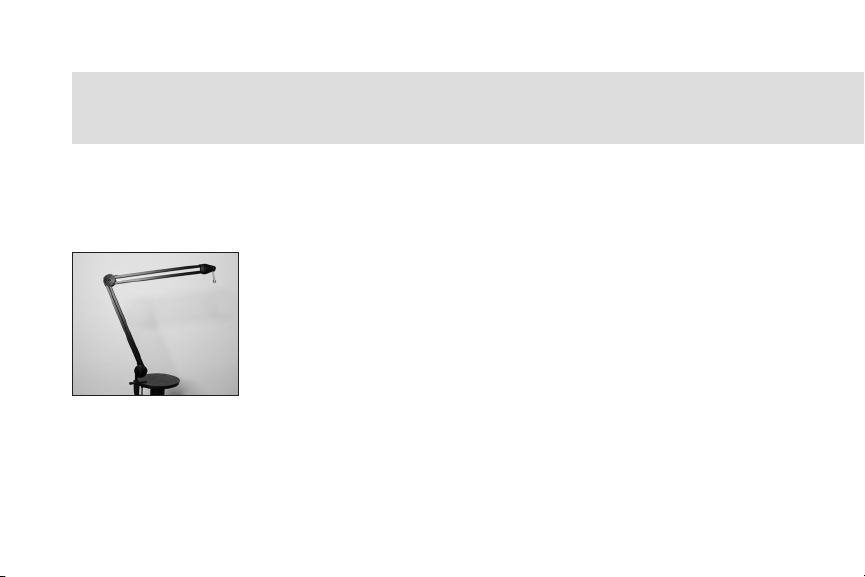
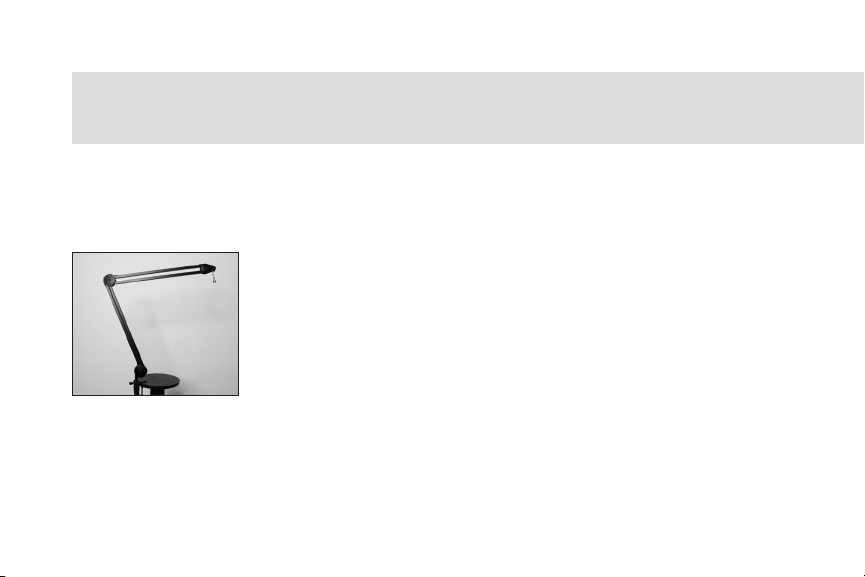
The BBA is intended to be mounted to a desktop or similar flat surface, using the
clamp assembly at the base of the arm.
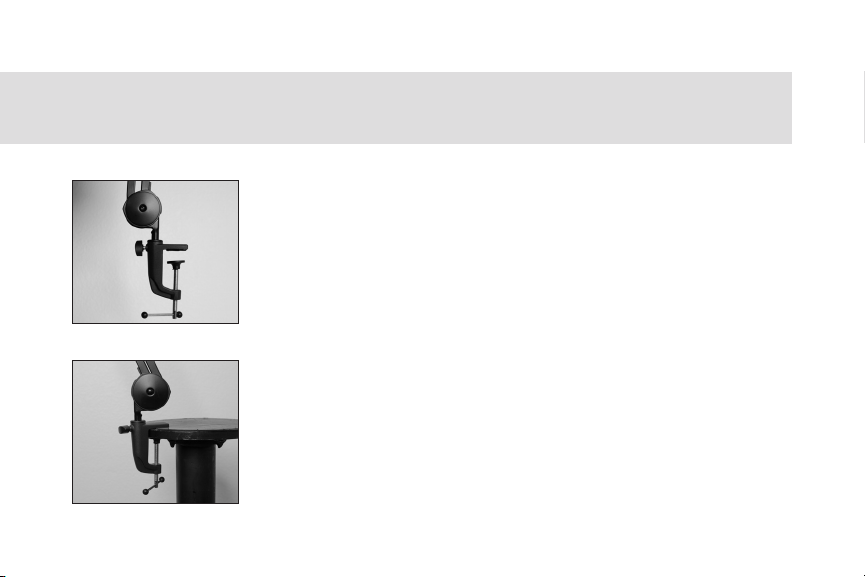
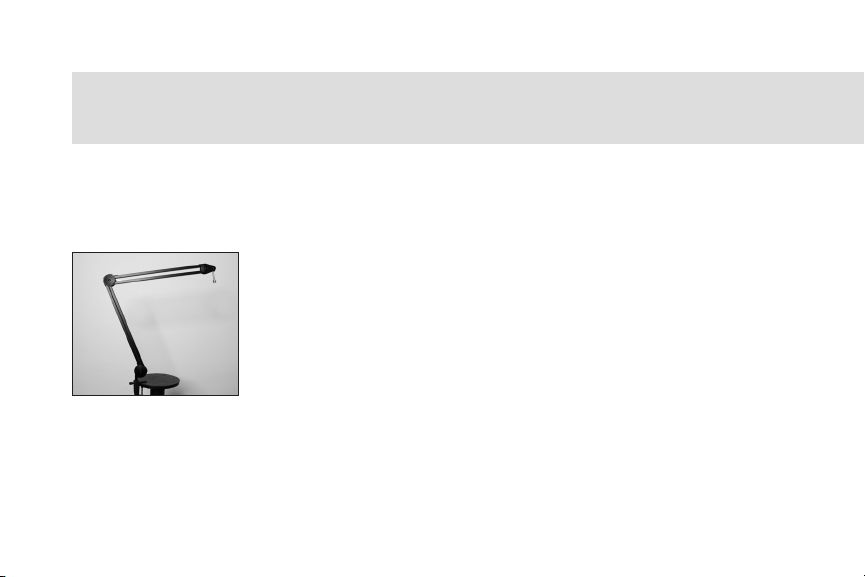
Begin by determining where on your worktop the base
should be placed. The boom arm should ideally come close
to forming an inverted “L” when set up, to allow the internal
spring assembly to handle the weight of any microphone
easily. That means that for very deep and large table tops or
work surfaces you may need to mount the arm on the same
side of the table that your body sits on, in order to maintain
the desired shape for the arm.
4 | EN
Page 5
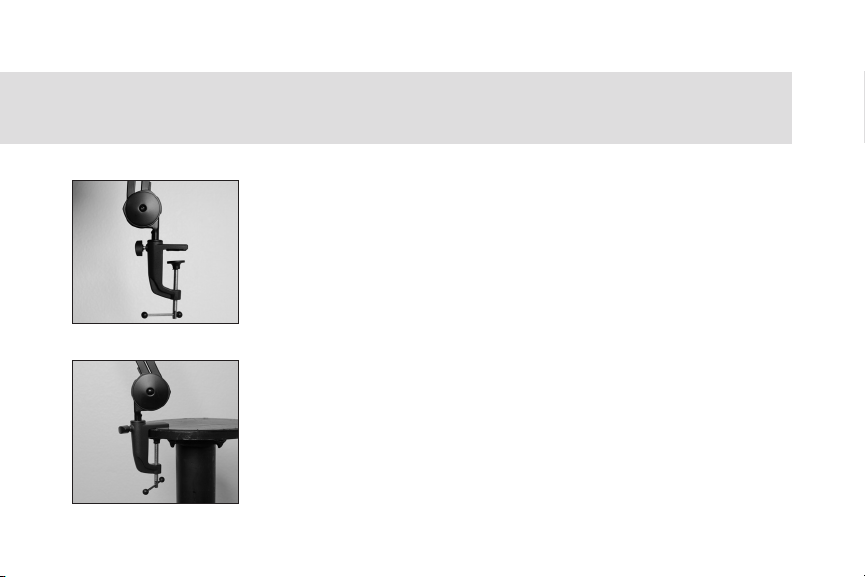
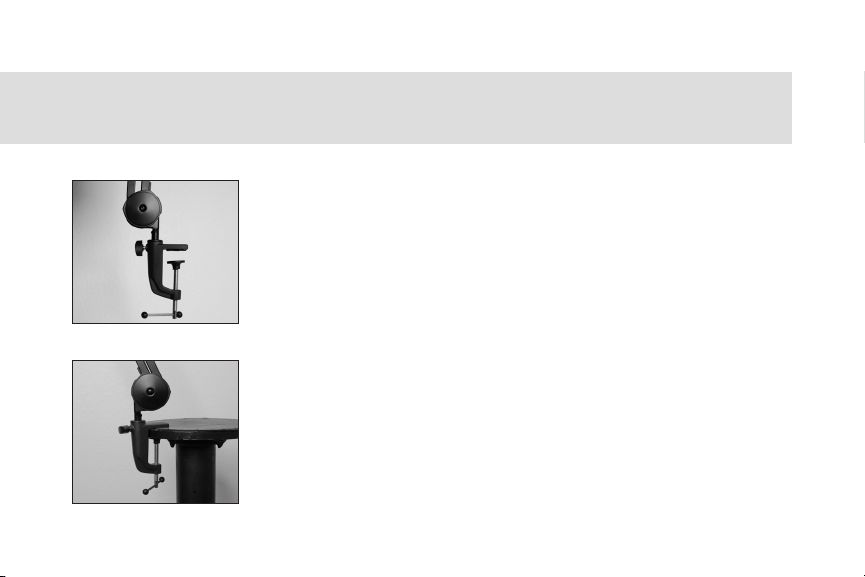
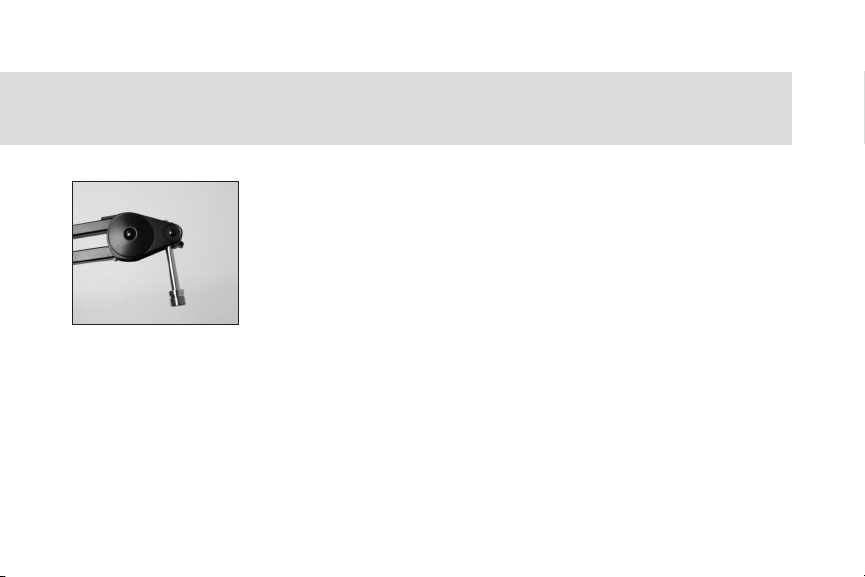
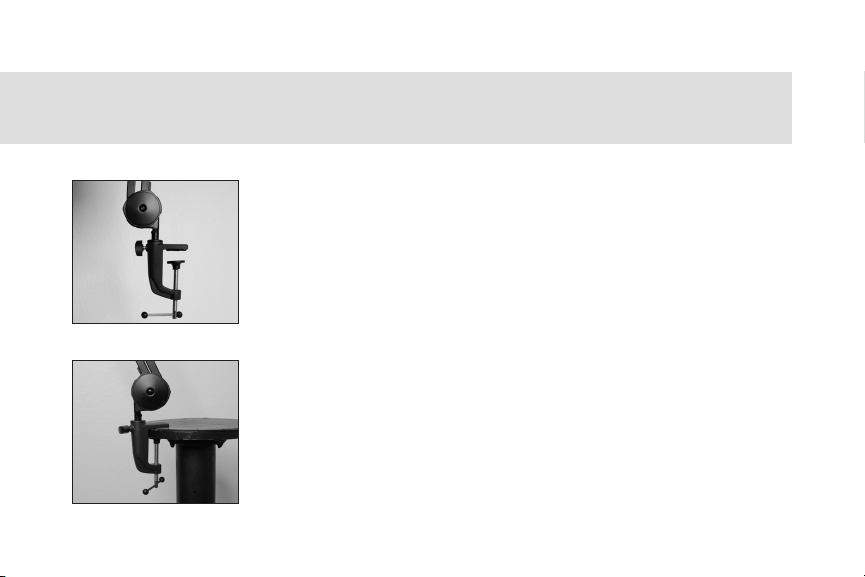
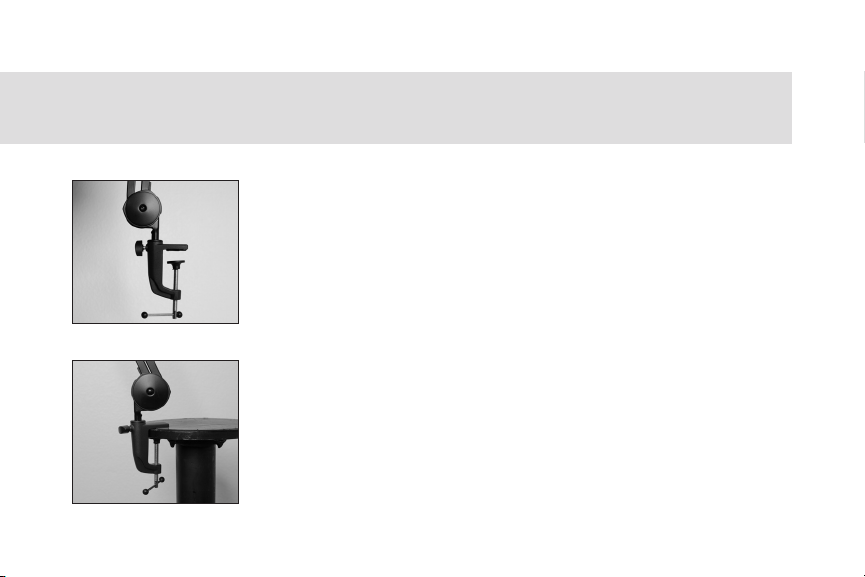
Open the clamp at the base of the arm wide enough to
accommodate the flat surface, and place the arm in position.
The clamp will be seated properly when both of its surfaces
are making solid contact with a flat and solid surface on the
top and bottom of the clamp.
Tighten the clamp until the assembly is secure and the base
of the arm won’t move unintentionally.
note: Make sure that you don’t over-tighten the clamp! (We
realize that might sound a lot like “make sure you don’t get overly
wet when you go swimming”, or “enjoy your dinner but don’t eat it
all”, but it’s true.)
EN | 5
Page 6

SETTING UP YOUR MICROPHONE
The BBA has a number of different ways to mount a microphone to it: mics can
be attached to the boom arm via hard mount, shock mount or even directly to the
microphone itself if desired (for instance, the Blue Yeti is often attached directly if a
shockmount isn’t being used).
The BBA can attach mounts or clips using either 3/8 or 5/8-inch threading, and
the microphone can hang from underneath the top of the arm (which is the most
traditional way of mounting mics in the broadcast world), or be mounted face up
above the top of the arm, if desired.
6 | EN
Page 7
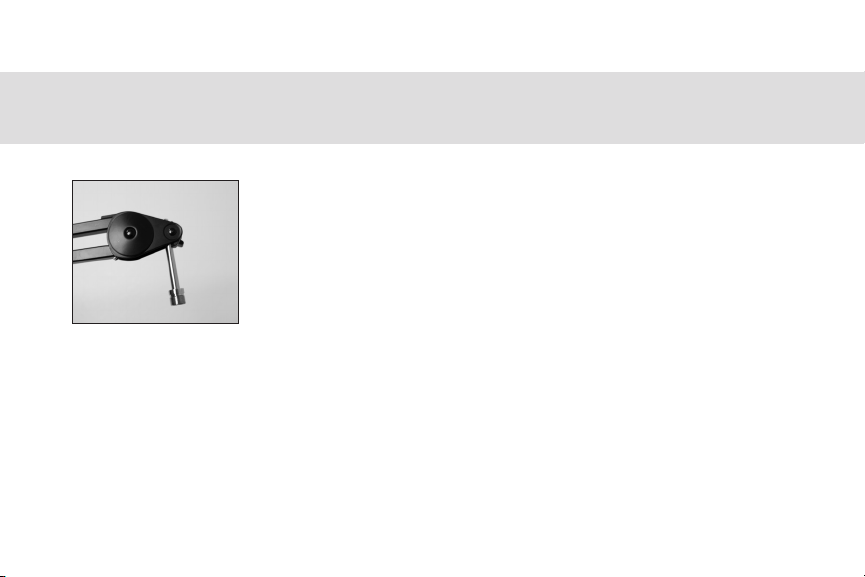
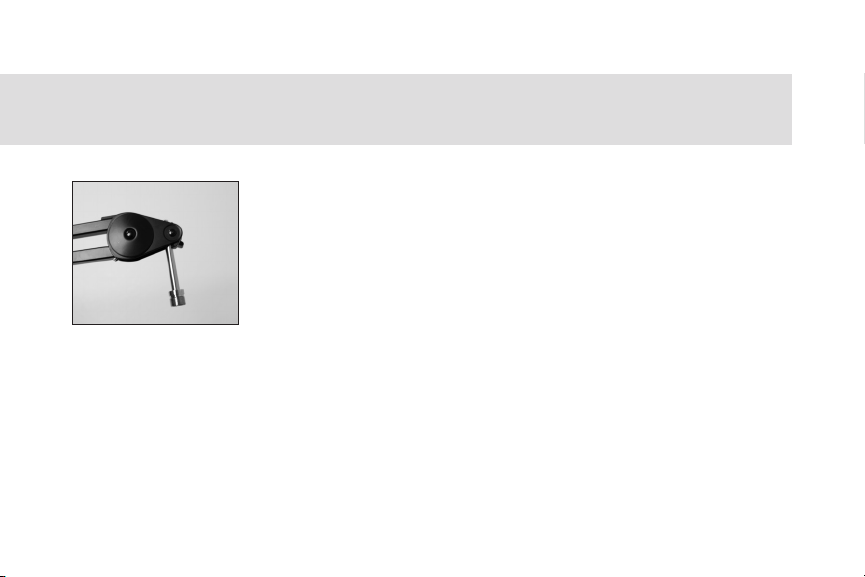
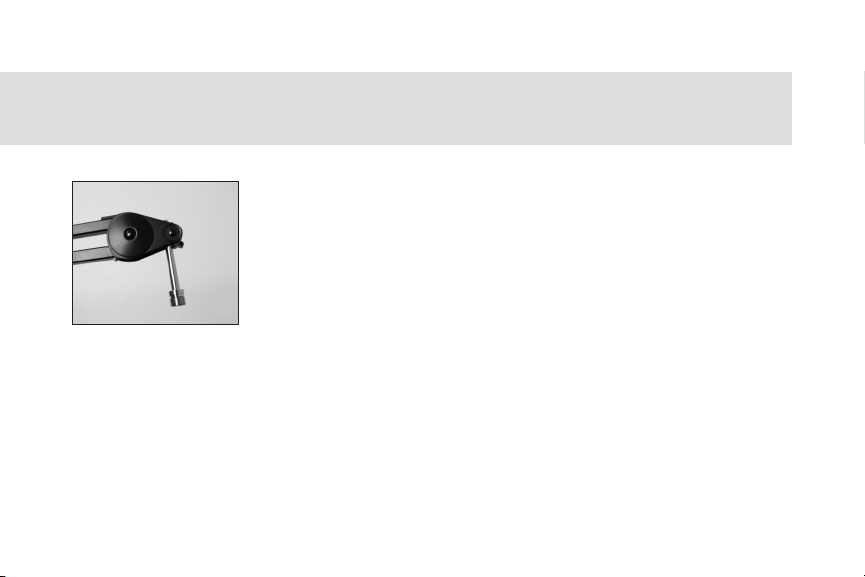
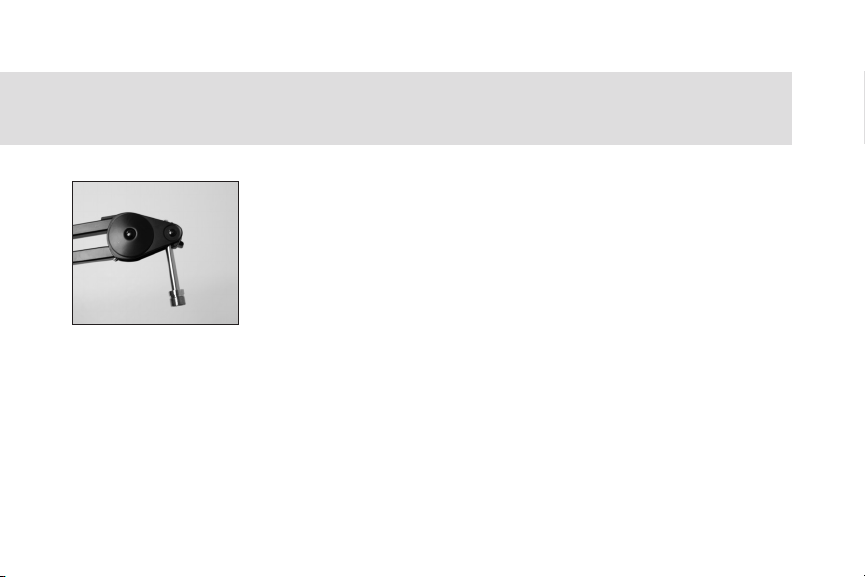
1. Once the clamp at the base is set correctly, attach your
microphone’s mount onto the BBA and make sure that it’s
secure (but remember - don't over-tighten!).
2. Attach your microphone to the mount according to the
manufacturer’s instructions.
3. The BBA has a high-tension spring system inside that
will hold it in position easily. Move the microphone into
roughly the correct position and move on to the next step.
EN | 7
Page 8

REFINE YOUR SETUP
Now that you have everything roughly in place, it’s time to get things looking
and sounding great for your production environment.
1. Sit down in your chair and get your body into the position that it will
normally be in when you’re streaming or broadcasting.
2. Determine the best position by speaking into the microphone and listening
to the sound of your voice. If you’re not appearing on-camera, it makes
sense to put the mic where it sounds the absolute best, regardless of what
it does to the look of your setup. If you ARE appearing on camera, you will
need to find the best compromise between sound quality, lighting and oncamera look.
3. Now that your microphone is properly situated, you can clean up the final
8 | EN
Page 9

look by attaching the microphone cable along the length of the boom arm
with the provided Velcro straps, pulling the cable tight to the arm but still
loose enough to make sure that the arm can swing freely.
Enjoy your BBA!
EN | 9
Page 10

SPECIFICATIONS
Upper arm length 470mm (18. 5")
Lower arm length 470mm (18. 5")
Weight 1.75kg (3.9 lbs)
Horizontal Reach 8 00mm (31.5 ")
Vertical Reach 820mm (32")
Rotation 360 degrees
Load Supports microphones weighing 450g - 1360g
Maximum Desktop
Thickness
10 | EN
(1-3 lbs) including shock mount
55mm (2.17")
Page 11

WARRAN TY STATEMENT
512 Audio warranties this product to be free from defect in materials and workmanship for one year from the date of
purchase, for the original purchaser to whom this equipment is registered. This warranty is non-transferable.
This warranty is void in the event of damage incurred from unauthorized service to this unit, or from electrical or
mechanical modification. This warranty does not cover damage resulting from abuse, accidental damage, misuse,
improper electrical conditions such as mis-wiring, incorrect voltage or frequency, unstable power, disconnection
from earth ground (for products requiring a 3 pin, grounded power cable), or from exposure to hostile environmental
conditions such as moisture, humidity, smoke, fire, sand or other debris, and extreme temperatures.
512 Audio will, at its sole discretion, repair or replace this product in a timely manner. This limited warranty extends
only to products determined to be defective and does not cover incidental costs such as equipment rental, loss of
revenue, etc. Please visit us at www.512audio.com for more information on your warranty, or to request warranty
service.
This warranty applies to products sold in the United States of America. For warranty information in any other country,
please refer to your local 512 Audio distributor. This warranty provides specific legal rights, which may vary from
state to state. Depending on the state in which you live, you may have rights in addition to those covered in this
statement. Please refer to your state laws or see your local 512 Audio retailer for more information.
EN | 11
Page 12

BIENVENUE
Félicitations pour l'achat de la BBA de 512 Audio ! Parfait pour toute situation
où une perche pour microphone est nécessaire, la 512-BBA vous permet de
positionner votre micro là où il a un meilleur rendu pour votre voix et en ayant l'air
professionnel à chaque fois devant la caméra.
12 | FR
Page 13
MAINTENANT, COMMENÇONS!
La BBA a été conçue pour être fixée sur un bureau ou autre surface plane de ce
style à l'aide d'une pince étau à la base de la perche.
Commencez en déterminant l'endroit où le socle doit être
placé sur votre plan de travail. Idéalement, le bras de la
perche devrait former un «L» inversé lors de son installation,
afin que le ressort interne puisse facilement supporter le
poids de n'importe quel microphone. Cela signifie que pour
les tables ou les surfaces de travail très profondes et larges,
vous devrez peut-être monter le bras du même côté de la
table que celui où vous êtes assis, afin de conserver l'angle
idéal de la perche.
FR | 13
Page 14
MAINTENANT, COMMENÇONS!
Ouvrez suffisamment la pince située à la base de la perche
pour s'adapter à la surface plane, et placez la perche en
position. La pince sera correctement placée lorsque les
surfaces du haut et du bas de la pince seront en contact
ferme avec une surface plane et solide.
Serrez la pince jusqu'à ce que l'ensemble soit bien fixé et que
la base de la perche ne se déplace pas involontairement.
rema rque: Veillez à ne pas trop serrer la pince ! Nous sommes conscients
que vous pouvez avoir l'impression qu'on vous dit « faites attention à ne pas
trop vous mouiller lorsque vous nagez » ou « profitez bien de votre dîner,
mais ne mangez pas tout », mais c'est réellement important.
14 | FR
Page 15

INSTALLATION DE VOTRE MICROPHONE
La BBA propose plusieurs manières de fixer un microphone à la perche : les micros
peuvent être fixés à la perche via un support universel, un support antichoc ou
même directement au microphone lui-même si vous le souhaitez (par exemple, le
Blue Yeti est souvent fixé directement sur la perche si un support antichoc n'est pas
utilisé). La BBA accepte des supports ou des pinces en filetage de 3/8 ou 5/8
pouces, et le microphone peut être suspendu sous le haut de la perche (ce qui est
la façon la plus traditionnelle d'installer les micros dans le monde de la radiodiffusion), ou, le cas échéant, être installé face vers le haut au-dessus de la perche.
FR | 15
Page 16
INSTALLATION DE VOTRE MICROPHONE
1. Une fois que la pince étau de la base est correctement
positionnée, placez le support de votre microphone sur
la BBA et assurez-vous qu'il est bien fixé (mais souvenezvous, ne serrez pas trop !).
2. Placez votre microphone sur le support en suivant les
instructions du fabricant.
3. La BBA est dotée d'un système de ressort à haute tension
à l'intérieur qui la maintient facilement en position. Placez
le microphone dans la bonne position et passez à l'étape
suivante.
16 | FR
Page 17

PEAUFINEZ VOTRE INSTALLATION
Maintenant que tout est à peu près en place, il est temps de faire en sorte que
les visuels et le son soient parfaits pour votre environnement de production.
1. Asseyez-vous sur votre chaise et mettez votre corps dans la position dans
laquelle il se trouve normalement lorsque vous diffusez en continu ou en
différé.
2. Déterminez la meilleure position en parlant dans le microphone et en
écoutant le son de votre voix. Si vous n'êtes pas devant une caméra, il est
logique de placer le micro là où il a un meilleur rendu, sans tenir compte
de l'apparence de votre installation. Si vous êtes devant une caméra, vous
devrez trouver le meilleur compromis entre la qualité du son, l'éclairage et
votre apparence à l'écran.
FR | 17
Page 18

PEAUFINEZ VOTRE INSTALLATION
3. Maintenant que votre microphone est bien placé, vous pouvez peaufiner
l'apparence final en attachant le câble du microphone sur la longueur de la
perche à l'aide des bandes velcro fournies et en tirant sur le câble pour qu'il
soit bien tendu mais suffisamment lâche pour que la perche puisse pivoter
librement.
Profitez de votre BBA!
18 | FR
Page 19

SPÉCIFICATIONS
Longueur de la perche
supérieure
Longueur de la perche
inférieure
Poids 1,75kg (3,9 lb)
Portée horizontale 800 mm (31,5")
Portée verticale 820 mm (32")
Rotation 360 degrés
Charge Supporte les microphones de 450 g à 1360 g (1-3 lb)
Épaisseur maximale du
bureau
470 mm (18,5")
470 mm (18,5")
le support antichoc inclus
55 mm (2,17")
FR | 19
Page 20

DÉCLARATION DE GARANTIE
512 Audio garantit que ce produit est exempt de défauts de matériaux et de fabrication pendant un an à compter
de la date d'achat pour le premier acheteur au nom duquel ce matériel est enregistré. Cette garantie n'est pas
transférable. Cette garantie est annulée en cas de dommage résultant d'une réparation non autorisée de cet
appareil ou d'une modification électrique ou mécanique. La présente garantie ne couvre pas les dommages
résultant d’abus, de dommages accidentels, de mauvaise utilisation, de conditions électriques inappropriées telles
qu'un câblage incorrect, une tension ou une fréquence incorrectes, une alimentation instable, une déconnexion
de la terre (pour les produits nécessitant un câble d’alimentation à 3 broches, mis à la terre), ou de l'exposition
à des conditions environnementales hostiles telles que la buée, l'humidité, la fumée, le feu, le sable ou d'autres
débris et les températures extrêmes. 512Audio réparera ou remplacera ce produit dans un délai raisonnable, à
sa seule discrétion. Cette garantie limitée s’applique uniquement aux produits jugés défectueux et ne couvre pas
les frais accessoires tels que la location d’équipement, la perte de revenus, etc. Veuillez nous rendre visite sur
www.512audio.com pour plus d'informations sur votre garantie, ou pour solliciter le service de garantie. Cette
garantie ne s'applique qu'aux produits vendus aux États-Unis d'Amérique. Pour obtenir des informations sur la
garantie dans tout autre pays, veuillez vous adresser à votre distributeur 512Audio local. Cette garantie prévoit des
droits légaux spécifiques qui peuvent varier d’un État à l’autre. Selon l'État dans lequel vous vivez, vous pouvez avoir
des droits en plus de ceux couverts dans cette déclaration. Veuillez vous référer aux lois de votre État ou consulter
votre revendeur 512 Audio local pour plus d'informations.
20 | FR
Page 21

FR | 21
Page 22

WELKOM
Herzlichen Glückwunsch zum Kauf des BBA von 512 Audio! Er ist perfekt für jede
Situation, in der ein Mikrofonarm benötigt wird. Mit dem 512-BBA können Sie
Ihr Mikrofon jederzeit dort positionieren, wo Ihre Stimme am besten klingt – mit
einem professionellen Look in der Kamera.
22 | DE
Page 23
LASSEN SIE UNS LOSLEGEN!
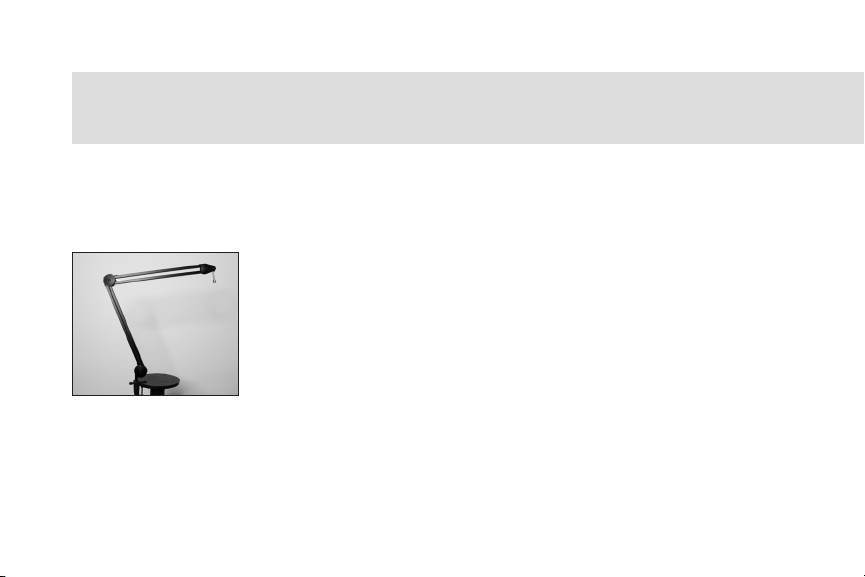
Der BBA ist für die Montage auf einem Schreibtisch oder einer ähnlichen flachen
Oberfläche vorgesehen, wobei hierzu die C-Klammer an der Basis des Auslegerarms verwendet wird.
Legen Sie als Erstes fest, wo auf Ihrer Arbeitsplatte der Sockel platziert werden soll. Der Auslegerarm sollte beim Aufstellen idealerweise annähernd ein umgedrehtes „L“ bilden,
damit das interne Federpaket das Gewicht jedes Mikrofons
problemlos tragen kann. Das bedeutet, dass Sie bei sehr
tiefen und großen Tischplatten oder Arbeitsflächen den Arm
möglicherweise auf der gleichen Seite des Tisches montieren
müssen, auf der Sie sitzen, um die gewünschte Form für den
Arm zu erhalten.
DE | 23
Page 24
LASSEN SIE UNS LOSLEGEN!
Öffnen Sie die Klammer an der Basis des Arms weit genug,
um die ebene Oberfläche einzuklemmen und bringen Sie
den Arm in Position. Die Klammer sitzt richtig, wenn ihre
beiden Oberflächen an der Ober- und Unterseite der
Klammer einen festen Kontakt mit einer ebenen und festen
Oberfläche haben.
Befestigen Sie die Klammer, bis die Baugruppe sicher steht
und sich die Basis des Arms nicht mehr leicht bewegen kann.
hinw eis: Achten Sie darauf, die Klammer nicht zu fest anzuziehen! Uns
ist klar, dass sich das vielleicht so anhört wie „Geben Sie acht, dass Sie
nicht nass werden, wenn Sie schwimmen gehen!“ oder „Genießen Sie Ihr
Abendessen, aber essen Sie nicht alles auf!“, aber es ist wahr.
24 | DE
Page 25

EINRICHTEN IHRES MIKROFONS
Der BBA bietet verschiedene Möglichkeiten, an ihm ein Mikrofon zu montieren: Sie
können über eine feste Halterung, eine elastische Aufhängung oder sogar direkt
am Auslegerarm befestigt werden, wenn dies gewünscht ist (das Blue Yeti wird z.B.
oft direkt befestigt, wenn keine elastische Aufhängung verwendet wird). Der BBA
kann Halterungen oder Clips mit einem 3/8- oder 5/8-Zoll-Gewinde aufnehmen,
und das Mikrofon kann unter der Oberseite des Arms hängen (die traditionellste
Art der Mikrofonbefestigung in der Welt des Rundfunks), oder auch mit der Vorderseite nach oben über der Oberseite des Arms montiert werden.
DE | 25
Page 26
EINRICHTEN IHRES MIKROFONS
1. Wenn die Klammer an der Basis korrekt eingestellt ist,
bringen Sie die Halterung Ihres Mikrofons am BBA an
und vergewissern Sie sich, dass sie fest sitzt (aber denken
Sie daran – nicht zu fest anziehen!).
2. Befestigen Sie Ihr Mikrofon gemäß den Anweisungen
des Herstellers in der Halterung.
3. Der BBA hat ein stark vorgespanntes Federsystem
eingebaut, das ihn leicht in Position hält. Bringen Sie das
Mikrofon ungefähr in die richtige Position und fahren Sie
mit dem nächsten Schritt fort.
26 | DE
Page 27

IHREN AUFBAU VERFEINERN
Nun, da Sie alles grob eingerichtet haben, ist es an der Zeit, dass Ihre
Produktionsumgebung nicht nur gut klingt, sondern auch gut aussieht.
1. Setzen Sie sich auf Ihren Stuhl und bringen Sie Ihren Körper in die Position,
in der Sie normalerweise streamen oder senden.
2. Sie ermitteln die beste Position, indem Sie in das Mikrofon sprechen und
auf den Klang Ihrer Stimme hören. Wenn Sie nicht selbst im Bild zu sehen
sein werden, sollten Sie das Mikrofon dort platzieren, wo es am besten
klingt – unabhängig davon, wie dadurch Ihr Aufbau aussieht. Wenn Sie
allerdings SCHON vor der Kamera auftreten, müssen Sie den besten
Kompromiss zwischen Tonqualität, Beleuchtung und Aussehen vor der
Kamera finden.
DE | 27
Page 28

IHREN AUFBAU VERFEINERN
3. Wenn Ihr Mikrofon nun richtig platziert ist, können Sie das endgültige Bild
verschönern, indem Sie das Mikrofonkabel entlang des Auslegerarms mit
den mitgelieferten Klettverschluss-Bändern befestigen. Ziehen Sie das
Kabel fest an den Arm, aber doch locker genug, um zu ermöglichen, dass
er frei schwingen kann.
Viel Spaß mit dem BBA!
28 | DE
Page 29

TECHNISCHE DATEN
Obere Armlänge 470 mm (18,5 Zoll)
Untere Armlänge 470 mm (18,5 Zoll)
Gewicht 1,75 kg (3,9 lbs)
Horizontale Reichweite 800 mm (31,5 Zoll)
Vertikale Reichweite 820 mm (32 Zoll)
Drehung 360 Grad
Tragfähigkeit Trägt Mikrofone mit einem Gewicht von 450–1360
Maximale TischplattenStärke
g (1–3 lbs) inklusive elastischer Aufhängung
55 mm (2,17 Zoll)
DE | 29
Page 30

GARANTIEERKLÄRUNG
512 Audio garantiert, dass dieses Produkt für den Erstkäufer, auf den dieses Gerät registriert ist, für ein Jahr ab
Kaufdatum keine Material- und Verarbeitungsfehler enthält. Diese Garantie ist nicht übertragbar. Diese Garantie
erlischt im Falle von Schäden, die durch unbefugte Wartung dieses Gerätes oder durch elektrische oder
mechanische Veränderungen entstehen. Diese Garantie gilt nicht für Schäden, die durch Missbrauch, versehentliche
Beschädigung, Fehlgebrauch, unsachgemäße elektrische Bedingungen wie Fehlverdrahtung, falsche Spannung
oder Frequenz, instabile Stromversorgung, Trennung von der Erdung (für Produkte, die ein 3-poliges, geerdetes
Netzkabel erfordern) oder durch Einwirkung feindlicher Umgebungsbedingungen wie Nässe, Feuchtigkeit, Rauch,
Feuer, Sand oder andere Rückstände und extreme Temperaturen entstehen. 512 Audio wird dieses Produkt nach
eigenem Ermessen zeitnah reparieren oder ersetzen. Diese beschränkte Garantie erstreckt sich nur auf Produkte,
die als defekt festgestellt wurden, und deckt keine Nebenkosten wie Gerätemiete, Einnahmeverluste usw. ab. Bitte
besuchen Sie uns unter www.512audio.com, um weitere Informationen zu Ihrer Garantie zu erhalten oder um eine
Garantieleistung anzufordern. Diese Garantie gilt für Produkte, die in den Vereinigten Staaten von Amerika verkauft
werden. Für Garantieinformationen in allen anderen Ländern wenden Sie sich bitte an Ihren lokalen 512 AudioHändler. Diese Garantie gewährt spezifische Rechtsansprüche, die von Staat zu Staat unterschiedlich sein können.
Je nachdem, in welchem Staat Sie leben, haben Sie möglicherweise weitere Rechte als die in dieser Erklärung
genannten. Bitte beachten Sie Ihre Landesrechte oder wenden Sie sich für weitere Informationen an Ihren lokalen
Händler von 512 Audio
30 | DE
Page 31

DE | 31
Page 32

BIENVENIDO
¡Enhorabuena por su compra del BBA de 512 Audio! Perfecto para cualquier
situación en la que se necesite un brazo de soporte de micrófono, el 512-BBA
le permite colocar su micrófono donde suene mejor para su voz, con un aspecto
profesional ante la cámara en todo momento.
32 | ES
Page 33
¡COMENCEMOS!
El BBA está diseñado para montarse en un escritorio o una superficie plana similar, utilizando el conjunto de abrazadera de la base del brazo.
Empiece por determinar en qué lugar de su mesa de trabajo
va a colocar la base. Lo ideal es que el brazo de soporte
forme lo más parecido a una "L" invertida cuando esté
colocado, de modo que el conjunto de muelles internos
pueda soportar fácilmente el peso de cualquier micrófono.
Esto significa que, en el caso de mesas o superficies de
trabajo muy profundas y grandes, podría ser necesario
montar el brazo en el mismo lado de la mesa en el que se
vaya a sentar usted con el fin de que el brazo mantenga la
forma deseada.
ES | 33
Page 34
¡COMENCEMOS!
Abra la abrazadera de la base del brazo lo suficiente
como para acomodarse en la superficie plana, y coloque el
brazo en su posición. La abrazadera estará bien asentada
cuando sus dos superficies hagan contacto sólido con una
superficie plana y sólida en la parte superior e inferior de la
abrazadera.
Apriete la abrazadera hasta que el conjunto quede
asegurado y la base del brazo no se mueva inintencionadamente.
nota: ¡Asegúrese de no apretar demasiado la abrazadera! Sabemos
que puede sonar muy parecido a «no te mojes demasiado cuando vayas a
nadar», o «disfruta de la cena pero no te la comas toda», pero es cierto.
34 | ES
Page 35

INSTALACIÓN DE SU MICRÓFONO
El BBA cuenta con varias formas para el montaje de un micrófono: los micrófonos
pueden fijarse al brazo de soporte mediante un soporte rígido, un soporte amortiguador o incluso directamente al propio micrófono si se desea (por ejemplo, el
Blue Yeti suele fijarse directamente si no se utiliza un soporte amortiguador). El
BBA puede acoplar soportes o clips con rosca de 3/8 o 5/8 de pulgada, y el micrófono puede colgar de la parte superior del brazo hacia abajo (que es la forma
más tradicional de montar los micrófonos en el mundo del broadcast), o montarse
boca arriba por encima de la parte superior del brazo, si se desea.
ES | 35
Page 36
INSTALACIÓN DE SU MICRÓFONO
1. Una vez que la abrazadera de la base esté bien
ajustada, coloque el soporte de su micrófono en el BBA
y asegúrese de que esté bien sujeto (pero recuerde: no
lo apriete demasiado).
2. Coloque el micrófono en el soporte de acuerdo a las
instrucciones del fabricante.
3. El BBA tiene un sistema de muelles de alta tensión en
su interior que lo mantendrá en su posición fácilmente.
Coloque el micrófono aproximadamente en la posición
correcta y pase al siguiente paso.
36 | ES
Page 37

PERFECCIONAR LA INSTALACIÓN
Ahora que tiene todo más o menos en su sitio, es el momento de lograr que las
cosas se vean y suenen bien dentro de su entorno de producción.
1. Siéntese en su silla y ponga su cuerpo en la posición en la que estará
normalmente cuando esté transmitiendo por streaming o broadcast.
2. Determine la mejor posición haciendo pruebas hablando por el micrófono
y escuchando el sonido de su voz. Si no va a aparecer ante la cámara,
tiene sentido poner el micrófono donde mejor suene, independientemente
de lo que suponga desde el punto de vista estético. Si va a aparecer ante
la cámara, tendrá que encontrar el mejor equilibrio entre calidad del
sonido, iluminación y aspecto ante la cámara.
3. Ahora que el micrófono está bien colocado, podrá arreglar el aspecto final
ES | 37
Page 38

PERFECCIONAR LA INSTALACIÓN
fijando el cable del micrófono a lo largo del brazo de soporte mediante las
correas de velcro proporcionadas, tirando del cable para que quede bien
sujeto al brazo, pero lo suficientemente suelto como para que el brazo pueda
oscilar libremente.
¡Disfrute de su BBA!
38 | ES
Page 39

ESPECIFICACIONES
Longitud del brazo
superior
Longitud del brazo
inferior
Peso 1.75 kg (3.9 libras)
Alcance horizontal 800 mm (31.5 pulg.)
Alcance vertical 820 mm (32 pulg.)
Rotación 360 grados
Carga Admite micrófonos con peso de 450 g a 1360 g (1
Grosor máximo del
escritorio
470 mm (18.5 pulg.)
470 mm (18.5 pulg.)
a 3 libras), incluido el soporte amortiguador
55 mm (2.17 pulg.)
ES | 39
Page 40

DECLARACIÓN DE GARANTÍA
512 Audio garantiza que este producto no tendrá defectos de materiales y mano de obra durante un año a partir
de la fecha de compra para el comprador original a cuyo nombre esté registrado este equipo. Esta garantía no
es transferible. Esta garantía se anula en caso de que se produzcan daños por una reparación no autorizada a
esta unidad, así como por una modificación eléctrica o mecánica. Esta garantía no cubre los daños resultantes
por abuso, daños accidentales, uso indebido, condiciones eléctricas inadecuadas como puede ser un cableado
incorrecto, voltaje o frecuencia incorrectos, alimentación inestable, desconexión de la toma de tierra (para
productos que requieran un cable de alimentación de 3 clavijas con conexión a tierra) o exposición a condiciones
ambientales hostiles como humedad, humo, fuego, arena u otros desechos y temperaturas extremas. 512 Audio
reparará o reemplazará este producto, a su entera discreción, de manera oportuna. Esta garantía limitada se
extiende únicamente a los productos que se determine que son defectuosos, y no cubre costes incidentales
tales como alquiler de equipos, pérdida de ingresos, etc. Visítenos en www.512audio.com para obtener más
información sobre tu garantía o para solicitar el servicio de garantía. Esta garantía es válida con los productos
vendidos en los Estados Unidos de América. Para obtener información sobre la garantía en cualquier otro país,
consulte a su distribuidor local de 512 Audio. Esta garantía proporciona derechos legales específicos que pueden
variar de un estado a otro. Dependiendo del estado en el que viva, puede que tenga otros derechos además
de los que se incluyen en esta declaración. Para obtener más información, consulte las leyes de su estado o a su
distribuidor local de 512 Audio.
40 | ES
Page 41

ES | 41
Page 42

欢迎
恭喜您从 512 Audio 购买 BBA!在任何需要使用话筒悬臂支架的场合,512BBA 都是理想之选,让您可以将话筒放置在最有声音表现力的位置,而且每
次都会让镜头前的您显得专业得体。
42 | 中文
Page 43
产品介绍
BBA 设计通过悬臂支架底座处的夹持机构固定在桌面或类似平面上。
首先要在台面上确定底座的安放位置。悬臂支架最好收紧
安放,形成一个倒“L”型,以便内部的弹簧组件能轻松承
受任何话筒的重量。这意味着,如果工作台面或操作台非
常深而且大,可能需要将悬臂支架固定在您所座位置的台
面一侧,以使悬臂支架保持理想的姿态。
中文 | 43
Page 44
产品介绍
44 | 中文
将悬臂支架底座固定夹开口拧开足够宽,使其可以夹持在
平坦的台面上,然后将悬臂支架安放到位。当固定夹的上
下夹持面与平坦坚实的台面的上下表面都牢靠接触后,说
明 固 定 夹已 安 放 到 位。
拧紧固定夹,直到组件固定牢靠,悬臂支架底座不会意外
移动。
注 意:确保不要把固定夹拧得太紧!我们知道,这句话听
起来就像是“确保游泳时不要让身体过湿”,或者“尽情享
受 晚 餐,但 不 要 吃 光”一 样 显 得 矛 盾,但 确 实 需 要 这 样。
Page 45

设置您的话筒
BBA 有多种不同的方式将话筒安装到悬臂支架上:话筒可通过硬架、防震
架固定到悬臂支架,如果需要的话,甚至可以将话筒本身直接固定到悬臂
支架上(例如,如果不使用防震架,通常可以直接固定 Blue Yeti 话筒)
。BBA 可以使用 3/8 或 5/8 英寸螺纹连接支架或夹具,话筒可悬挂在悬臂
顶部下方(这是广播界最传统的话筒安装方式),也可根据需要在悬臂顶
部上面朝上安装。
中文 | 45
Page 46
设置您的话筒
底座固定夹拧好后,将话筒的支架安装到 BBA 上,确保
固 定 牢 靠 (但 切 记 不 要 拧 得 过 紧 !)。
按 照制 造 商 的 说 明 将话 筒 连 接 到 支 架 上。
BBA 内部有一个高张力弹簧机构,可轻松将其固定到
位。将话筒大致移到合适的位置,然后继续下一步。
46 | 中文
Page 47

精调您的设置
现在,所有设备都已大致就位,可以调整其在工作环境中的具体位置,以达到
极 佳 的 观 感 和 音 质。
坐在椅子上,按照您在音视频直播或广播时通常采用的坐姿坐好。
对着话筒说话,倾听您的声音,以确定最佳位置。如果您不出镜,就应将话筒
放在声音最佳的位置,而不要管它是否会影响您工作室的镜头画面。如果您
要出镜,则需要在音质、灯光效果和镜头画面之间找到最佳的平衡。
现在,您的话筒位置已调整好,可以使用附带的尼龙扎带沿悬臂将话筒线
缆固定好,固定时将线缆拉紧,但仍要保持足够的松弛度,以确保悬臂可
以自由摆动。
享用你的 BBA!
中文 | 47
Page 48

规格
48 | 中文
上臂长度
下臂长度
重量
水平移动距离
竖直移动距离
旋转幅度
承重
最大台面厚度
470 毫米(18.5 英寸)
470 毫米(18.5 英寸)
1.75 千克(3.9 磅)
800 毫米(31.5 英寸)
820 毫米(32 英寸)
360 度
可支撑 450 克 - 1360 克(1-3 磅)重量的话筒(
含 防 震 架 )。
55 毫米(2.17 英寸)
Page 49

质保声明
512 Audio 向注册了本设备的原始购买者保证,自购买之日起的一年内,本产品不会出现用料和工艺上
的缺陷。本质保不可转让。擅自对本产品进行未经许可的维修,或者对产品进行电学或机械改造而造成
本产品受损的,会导致本质保失效。质保范围不包括滥用本品、意外损坏、误用本产品,以及包括接线错
误、电压或频率错误、电源不稳定、接地线断开(如需使用 3 脚接地电缆的产品)等电不当电气条件的
情况,或者将本产品暴露在包括水分、潮湿、烟雾、明火、沙子或其它碎片,以及极端温度在内的恶劣环境
之下出现的问题。512 Audio 将自行决定及时地对产品进行修理或更换。本品采用有限质保,只有在确
认本品的确存在瑕疵时方可延保,设备租赁、收入损失等附带成本不在质保范围内。请访问我们的网站
www.512audio.com,进一步了解您的质保信息,或请求质保服务。本质保适用于在美国销售的产品。如需
了解其它国家的质保信息,请联系您当地的 512 Audio 经销商。本质保提供特定的法律权利,该权利在各
州可能不尽相同。基于您所在的州,您可能享有本声明未述及的权利。请参考您所在州的法律,或咨询您
当地的 512 Audio 零售商,以了解更多信息
中文 | 49
Page 50

ようこそ
この度は、512オーディオのBBAをご購入いただきまして、誠にありがとうござ
います!512-BBAはマイクブームアームが 必 要な状況に 最 適 です。あなたの声
に最適な位置にマイクを配置することができ、カメラに映るプロの姿をいつでも
見 る こ と が で きま す。
50 | 日本人
Page 51
さあ 始 めましょう
BBA は、アームの基部にあるクランプアセンブリを使用したデスクトップまたは
同様の平面へ取り付けます。
ワークトップのどこにベースを置くかを決めることから始め
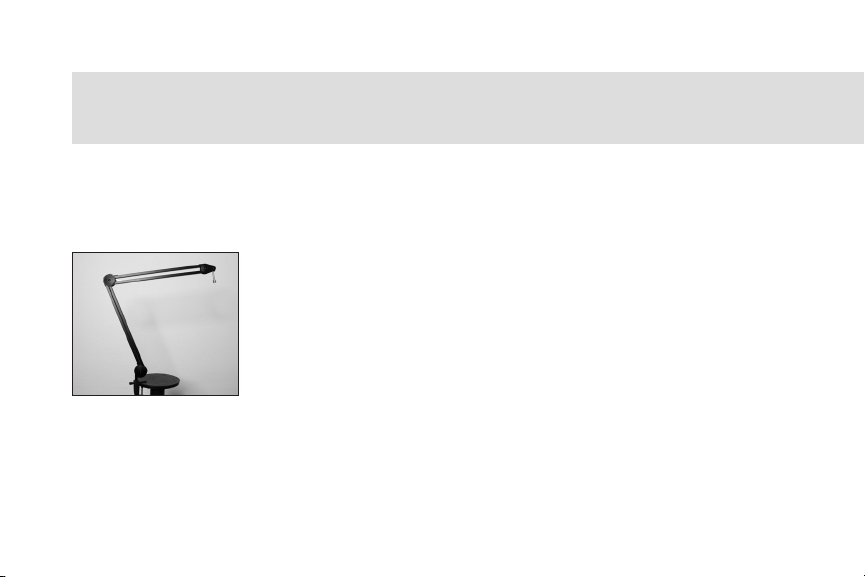
ます。ブームアームは理想的にはセットアップ時に逆「L」
字 型 に 近 い 形 に な る よ う に し て、 内 部 の ス プ リ ン グ ア セ ン ブ
リ が マイク の 重 量 を 簡 単 に 扱 える よ う に し ま す。つ ま り、 非
常に深くて大きなテーブルの天板や作業面には、アームの
形状を維持するために、体が座っているテーブルの同じ側
にアームを取り付ける必 要があるかもしれません。
日本人 | 51
Page 52
さあ 始 めましょう
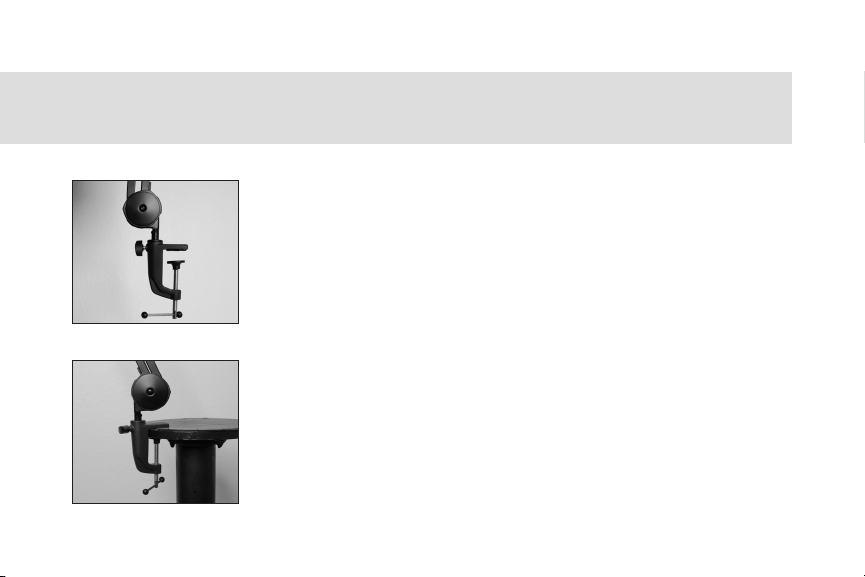
アームの根元のクランプを平面を収容できる程度の幅で開
き、アームを所 定 の 位 置 に 配 置 します。クラン プ は、そ の 表
面の両方がクランプの上部と下部の平らな、固体表面との
固体接触を作っているときに適切に固定されます。
アセンブリがしっかりと固定され、アームのベースが不用 意
に動かなくなるまでクランプを締めます。注:クランプを締
めすぎな いように注 意してください。「泳ぎに行くときは濡
れすぎないように気をつけて」とか、「夕食を楽しんでも、
全部食べるな」と同じように聞こえるかもしれません。確か
にそうですね。
52 | 日本人
Page 53

マイクロ ホ ン の 設 定
BBAには様々なマイクの取り付け方法があります:ハードマウント、シ
ョックマウント、または必要に応じてマイク自体に直接取り付けること
もできます(例えば、ブルーイエティはショックマウントを使用してい
ない場合には直接取り付けられることが多いです)。BBAは3/8または
5/8インチのネジ山を使ってマウントやクリップを取り付けることがで
きます。マイクはアームの上面の下からぶら下がったり(これは放送界
で最も伝統的なマイクの取り付け方法です)、必要に応じてアームの上
面を上に向けて取り付けられたりすることができます。
日本人 | 53
Page 54
マイクロ ホ ン の 設 定
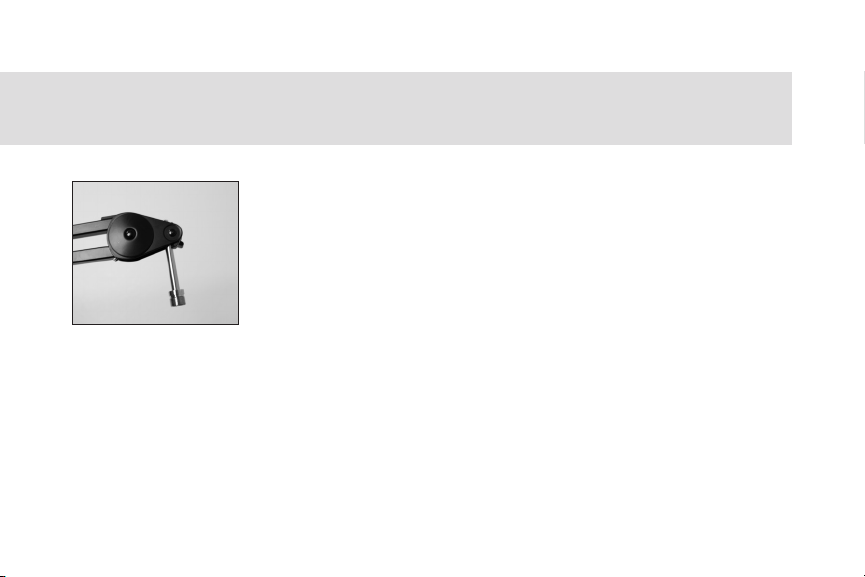
ベースのクランプが正しく設定されたら、BBAにマイクのマ
ウント を 取 り 付 け、そ れ が 安 全 で あ ることを 確 認 してくだ さ
い ( 締 め す ぎ な い で く だ さ い!)。
メー カ ー の 指 示 に 従 って、マイクを マ ウ ント に 取 り 付 け てく
ださい。
B B A は 内 部 に ハイテン ションのスプリングシステムを採用し
ており、簡単に固定することができます。マイクを大まかに
正しい位置に移動させて、次の手順に進みます。
54 | 日本人
Page 55

セ ットアッ プ を 絞 り 込 む
これで大まかな準備ができたので、あなたの制作環境のために見 栄えやサウンドを良く
するための 準備をしましょう。
椅 子に座 って、ストリーミングや 放 送 をして いる 時に普段 か ら体を動 かしている 姿 勢 にし
ましょう。
マイクに向かって話しかけ、自分の声の音を聞きながらベストポジションを決定します。
オンカメラに映っていない場合は、セットアップの見た目に関係なく、絶対的にベストに
聞 こ えるところにマイクを 置くの が 理 に か な って います。もしあ な た が カメラ に 映 る の で
あ れ ば、音 質、照明、オンカメラルックの ベ ストな 妥 協 点 を見つける 必要がありま す。
マイクが 適 切 に 配 置され たら、付 属 の ベ ル クロ ストラップ で ブー ム アーム の 長 さ に 沿って
マイクケーブルを取り付けます。アームにしっかりとケーブルを引っ張りながらも、アーム
が自由に揺れることが できるように十 分に緩 めておくことで、最終的な外 観をきれいに
することが で きま す。
B B Aを 楽 しんで ください!
日本人 | 55
Page 56

仕様
56 | 日本人
上 部アーム の長さ
下 部アームの長さ
重量
水平方向範囲
垂直方向範囲
回転
負荷
デ スクトップ の 最 大
厚さ
470 mm (18.5 インチ)
470 mm (18.5 インチ)
1.75 kg (3.9 ポンド)
800 mm (31.5インチ)
820 mm (32インチ)
360度
ショックマウントを含む450 g~1360 g(1~3
ポ ンド)の マイクに 対 応
55 mm (2.17 インチ)
Page 57

保証書
512 Audioは、購入日から1年間、この機器が登録されている最初の購入者に対して、材料および製造上の
欠陥に対してこの製 品を保証します。この保証は譲 渡できませんこのユニットへの不正なサービスまたは
電気的または機械的な変更に起因する損傷の場合、この保証は無効になります。この保証は、乱用、偶発
的な損傷、誤用、誤配線、不適 切な 電圧、不適切 な周 波 数、不 安定な 電源、3ピ ンの 接地電 源ケーブルを 必
要とする製品のアースからの切断などの不適切な電気的状態に起因する損傷には適用されません。 この
保証は、湿気、湿度、煙、火、砂、その他の破片、極端な温度などの過酷な環境条件への暴露からも適用さ
れ ません。5 1 2 A u d i o は、独 自 の 裁 量 に より、こ の 製 品 を 適 時 に修 理 または交 換しま す。この限 定 保 証 は、
欠陥が見つかった製品にのみ適用され、機器のレンタル、収益の損失などの付随的な費用には適用されま
せん。保証の詳細について、または保証サービスをリクエストするには、www.512audio.comにアクセスして
ください。この保証は、アメリカ合衆国で販売されている製品に適用されます。その他の国の保証情報につ
いては、最 寄りの 5 1 2 オーディオ 販 売 代 理 店 に お 問 い 合 わ せくだ さい。この 保 証 は、州ごと に 異 なる可 能性
のある特定の法的権利を提供します。お住まいの州によっては、この声明に記載されている以外の権利が
適用される場合があります。詳細については、州法を参照するか、最寄りの512 Audio販売店にお問い合わ
せくだ さい。
日本人 | 57
Page 58

www.512audio.com
2120 Downing Lane, Suite #100, Leander, TX 78641
Designed in Texas
 Loading...