

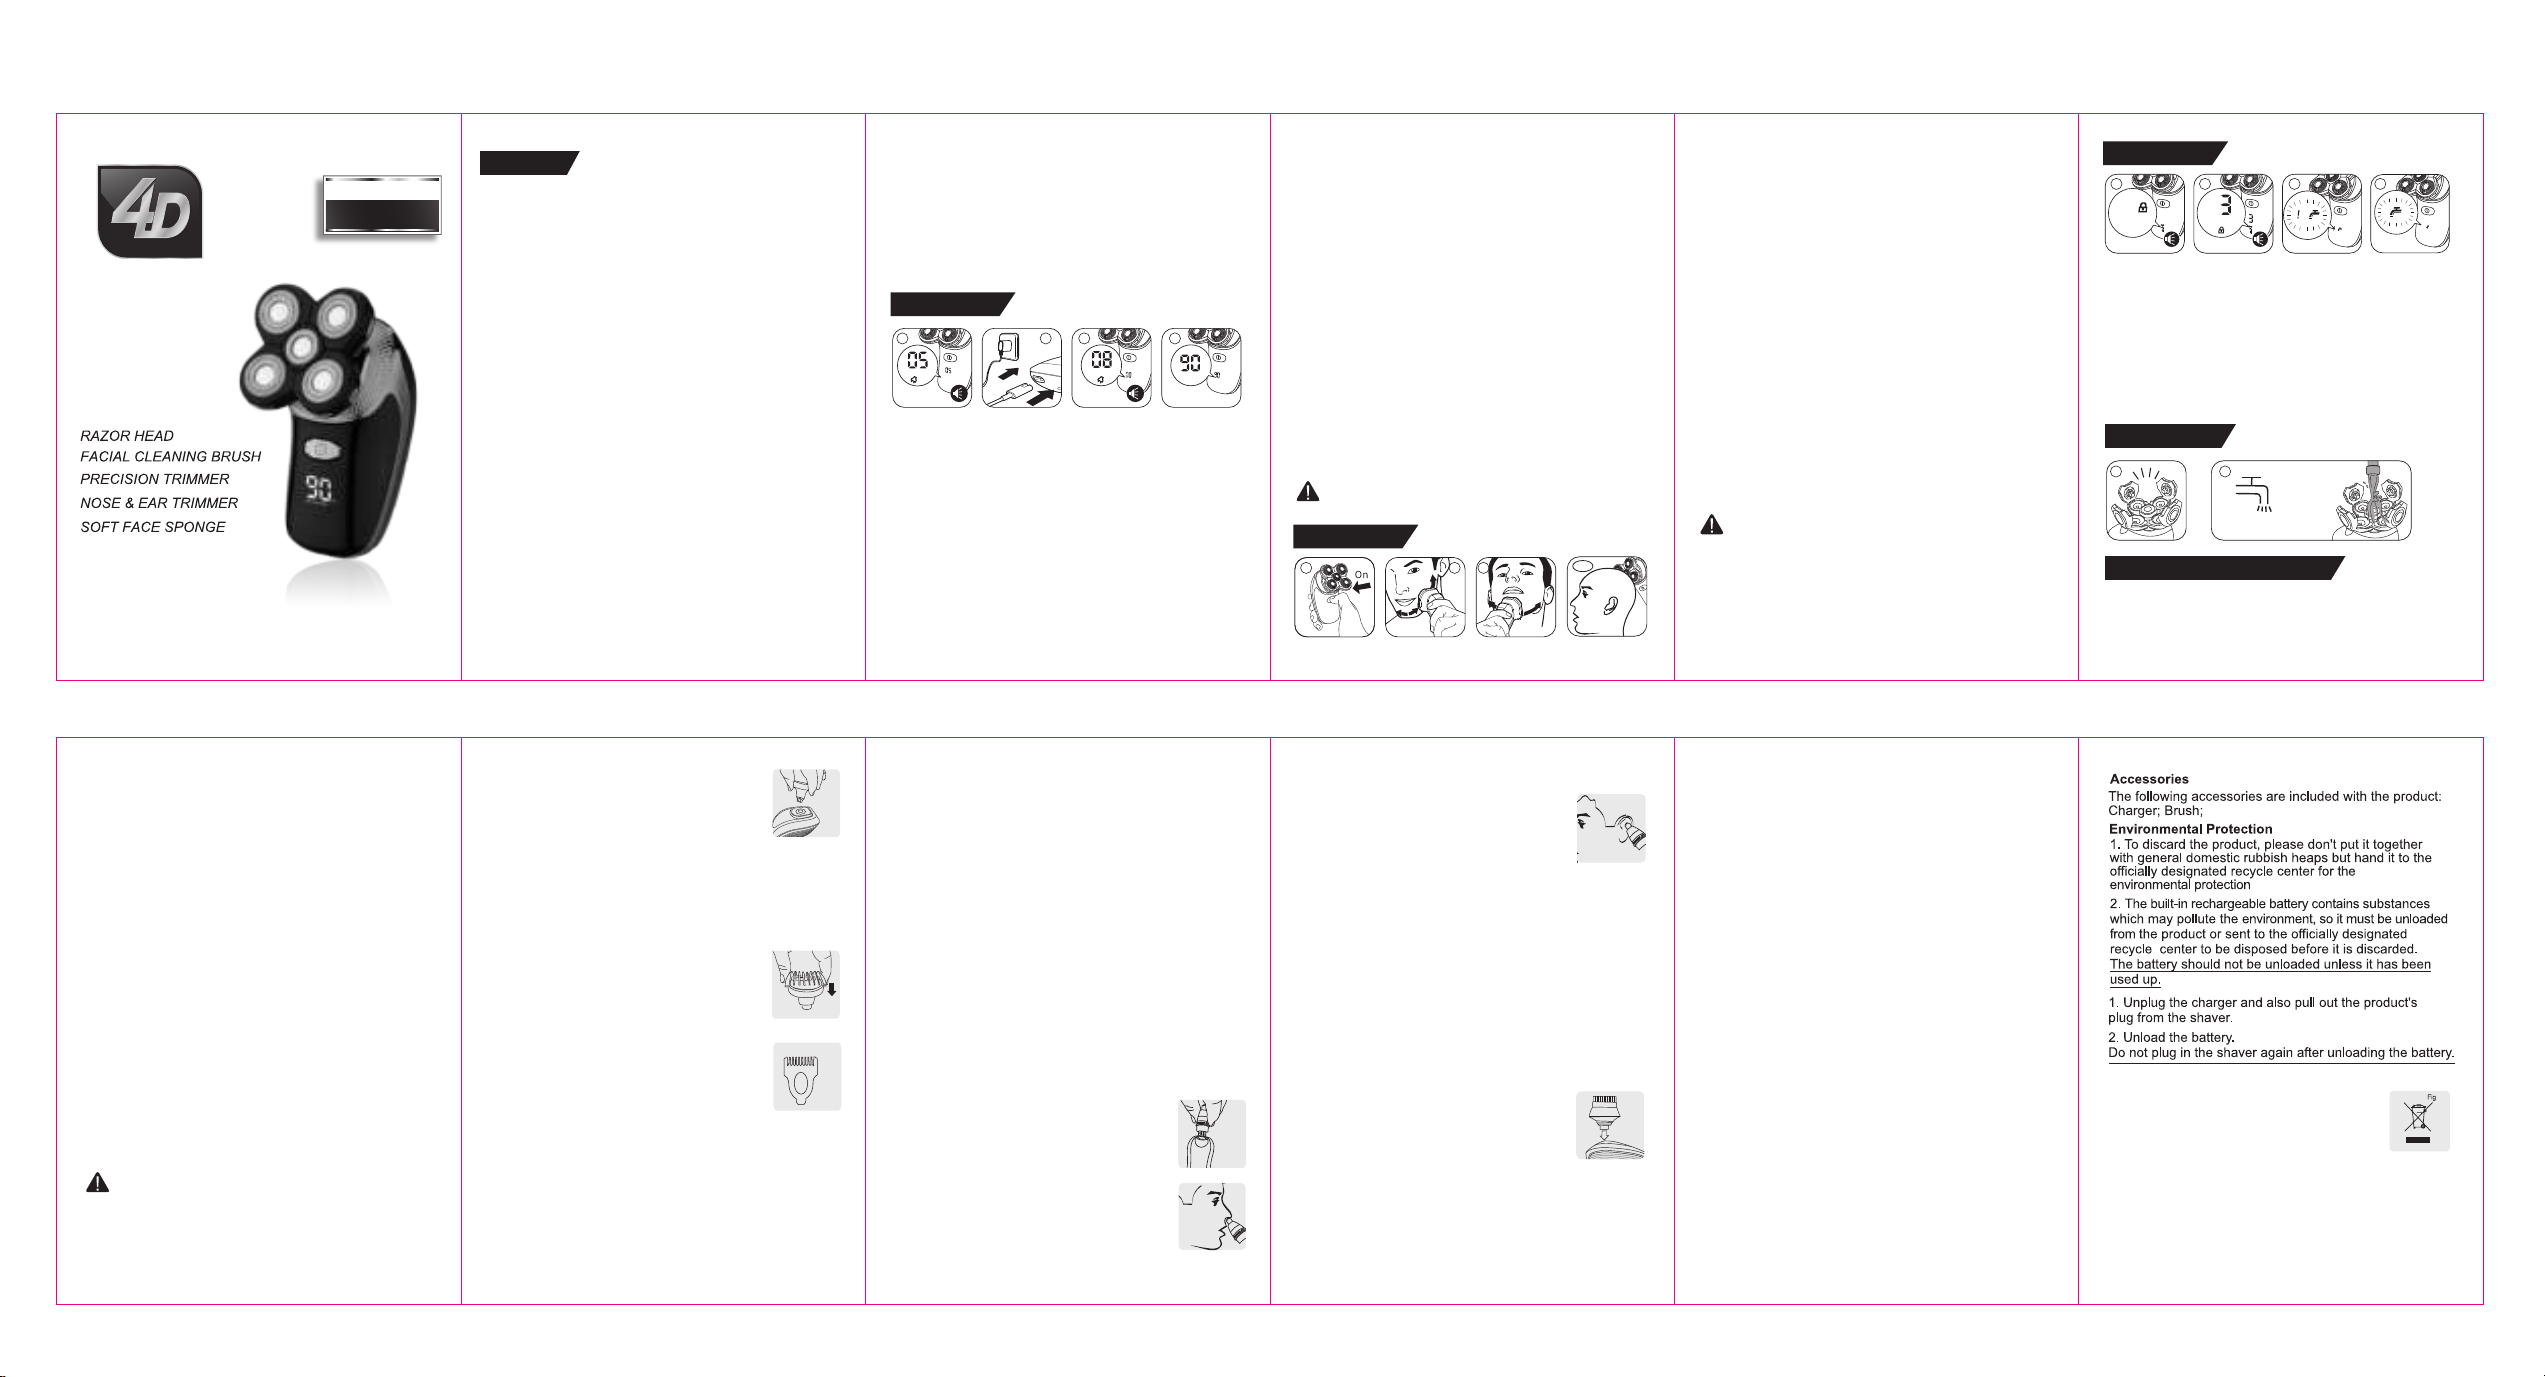
4D LK-5800, LK-5810 User Manual
Size:428X100mm
5-in-1
Notes
Electric Shaver
Strong Shaver
LK-5800/LK-5810
WARNING: Separate the handheld part from the power
cord before cleaning the handheld part in water.
1. This product uses a USB charging cable.
2. You can use the 5V adapter mobile phone
charger, or a USB interface of cars, computers and
others for charging.
3. If the charging cable is damaged, replace it with a
new one to avoid danger.
4. The product shall be charged and stored between
5℃ and 35℃.
5. Make sure the charge and charging cable are dry.
Do not plug or unplug with wet hands to prevent
electric shock.
6. Please check if the foil is damaged or deformed
before use to avoid damage to your skin.
7. Clean the electric shaver with clean water, but do
not soak it in water for a long time.
8. Do not use salt water, hot water above 60 °C,
thinners, gasoline, alcohol or other chemicals to
clean the electric shaver.
9. it's necessary to ensure to cover the electric
shaver with the protective cover when you travel to
protect its foil.
10. During the use and charging process, the
electric shaver may be slightly heated. This is
normal and please feel free to use it.
11. Please do not charge the electric shaver too
long.
12. Do not store the electric shaver in direct sunlight
or near other sources of heat.
How to Use
1
m
Availability time
Low Energy Charging 1 hour
234
2
Availability time
1
Availability time
Charge
1. When the display shows “Available time, 05
minutes”, the indicator light will flash, indicating that
the battery is low-energy and needs charging (Fig.
1).
2. Plug the USB charging cable end into the electric
shaver, then connect the USB cable to the charger
and plug it into the power socket (Fig. 2), or plug the
other end of the USB cable into a USB port of
computers or cars.
3. When the power is turned on, the display will light
up, with scrolling numbers which will increase as the
charging time extends, indicating that it’s charging
(Fig. 3).
4. Full charging takes about 2 hour on a continuous
basis. After full charging, “FULL” and “90 min” will be
displayed, indicating the shaver has been fully
charged and can be used for about 90 minutes
(Note: 90 means a rough available duration instead
of full charging until 100) (Fig. 4).
The LED display of this product can display
remaining energy. A fully charged electric shaver can
provide a shaving duration up to about 90 minutes,
but the actual shaving duration may be less than
expected due to differences in shaving habits,
cleaning habits and beard types.
The electric shaver can be used in the meanwhile it's being charged
by means of USB cable connection if it still has remaining energy.
How to Use
567
7-1
Shave Beard and Head
1. Press the switch button to turn on the electric
shaver (Fig. 5).
2. Move the electric shaver foil against the growth
direction of your beard on your skin and make
straight and reciprocated movements (Fig. 6).
3. Hair on your neck can also be shaved (Fig. 7).
4. Before shaving your head, clean it with warm
water and keep your hair dry. For a better effect of
use, please use the brush if you need to clean the
shaving head during the head shaving process, and
wash the shaving head after shaving is completed
(Fig. 7-1).
When shaving completed
Press the switch button again to turn off the electric
shaver, and then cover it with the protective cover to
avoid damages to the foil.
Please do not use any damaged shaving head to avoid injury to your
skin; instead, replace it immediately with our original spare shaving
head which can be bought where you buy your shaver.
Travel Lock
1. Press and hold the electric shaver switch button for
3 seconds, and then the electric shaver LED display
indicates that the safety lock has been locked (Fig. 8).
2. Repeat the above step to unlock (Fig. 9).
How to Use
8
Safety lock locked
Lock
9
Long press 3
seconds to unlock
Unlock Stall protection
10
11
Cleaning reminder
Intelligent Display of Contents
1. When the electric shaver is overloaded, it will be
automatically turned off, and the LED display will
indicate stall protection. At this time, it should be
cleaned up before use (Fig. 10).
2. When the faucet symbol flashes on the LED
display, it indicates that the electric shaver needs to
be cleaned (Fig. 11).
Maintenance
1213
Symbol meaning:
Suitable for cleaning under running taps.
Wash and Clean with Water
1. Before cleaning, be sure to separate the electric
shaver from the USB charging cable and press the
switch to the off state.
2. Pinch both sides of each shaving head to lift up
and open all shaving heads (Fig. 12).
3. The electric shaver can be washed directly under
running tap (Fig. 13), but please do not soak it in
water for a long time.
4. After washing, drain any excessive water, put it
horizontally and air-dry it. Do not wipe the shaving
head part with tissue or cloth, which may cause
damage.
5. First air-dry the electric shaver, then cover it with
the protective cover to prevent damage to the foil
and avoid accumulation of dust.
Replace Shaving Head
The shaving head should be replaced at least
once every six months for a good experience. If
there is no damaged caused by human factors,
the shaver can have a long service life. Any
damaged shaving head can only be replaced
with our original double-ring five-blade shaving
head.
Separate the handheld part from the power cord before cleaning the
handheld part in water.
Operating Instructions for Hair Clipper
Switch off the shaver, pull it up (not screw) to unload
the shaving head, and insert the flange of the hair
clipper head part into the groove on the
top of the shaver body. Then press down
the hair clipper head part to mount it on
the shaver body (a click will be heard)
Fig.17
(Fig.17).
Trim
Note: Make sure your hair is clean
and dry, and please don't use the
product for wet hair just washed.
1. Before trimming, first do remember
to comb hair along its growth direction
with a comb.
2. Mount the comb accessory into the
slots on both sides of the product (a
click will be heard), and make sure it's
Fig.18
Fig.19
mounted correctly (Fig.18).
3. The included combs are optional for
different haircut lengths, such as 3mm
and 6mm, which can be mounted as
required. To replace a comb, unload it from the
groove on one side first (Fig.19).
4. Press the ON/OFF button and move the product
slowly on hair. To get the best haircut effect, it's
necessary to move the product against the growth
direction of hair.
Clean
1. Pull out the hair clipper head and clean the
trimming part with the included brush or wash the
hair clipper head assembly with water.
2. Don't clean the product with such liquids as
abrasives, alcohol, petrol or acetone.
3. Clean the product immediately each time it's used.
Operating Instructions for Vibrissa Trimmer
Switch off the shaver, pull it up (not screw) to unload
the shaving head, and insert the flange of the
vibrissa trimmer head part into the groove on the top
of the shaver body. Then press down the vibrissa
trimmer head part to mount it on the shaver body (a
click will be heard) (Fig. 20).
Trim Vibrissa
1. Make sure your nasal cavity is clean
2. Start the ON/OFF button, insert the
vibrissa trimmer tip into one of your
nasal cavities slowly and meanwhile
turn the tip to remove overlong vibrissa
(Fig.21). The insertion depth of the tip
Fig.20
Fig.21
into your nasal cavity must not exceed
0.5cm. To reduce pruritus, make sure
that one side of the tip is firmly pressed
against your skin.
Trim Ear Hair
1. Clean your external auditory canal to
Fig.22
ensure there is no cerumen.
2. Start the ON/OFF button and then
make the tip circle along your ear
gently to remove protrudent hair on
your helix (Fig.22).
3. Insert the vibrissa trimmer tip into the external
auditory canal carefully. The insertion depth of the
tip into your auditory canal shall not exceed 0.5m, or
else your eardrum may be injured.
Clean Your Face with Facial Cleaner
Remove sebum and dirt on your face with the facial
cleaner every day, which helps to keep your skin
clean and healthy.
1. Make sure the device has been
Fig.23
turned off and that the cleaning brush
has been attached to the device (Fig.
23).
2. Moisten the facial cleaner with water.
Do not clean your face directly with a
dry facial cleaner, which may irritate
your skin.
(Fig 26)
26
 Loading...