


MINI MANUAL
Instructions for use
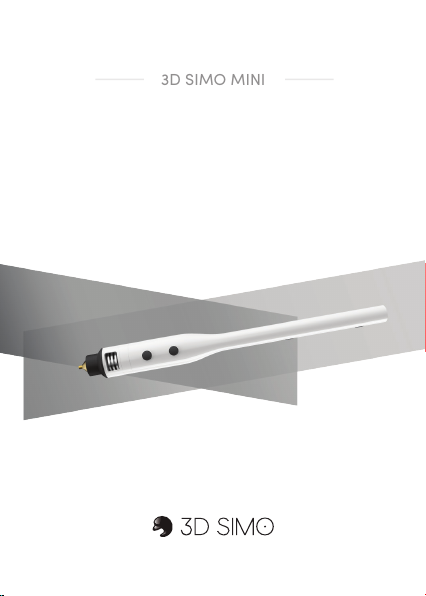
3D SIMO MINI

Content:
3D SIMO MINI
1.
Introduction of 3Dsimo mini
2.
The content of the packaged product
3.
Basic description of the 3Dsimo mini
4.
Mobile APP
5.
Procedure for operating and replacing
6.
3Dsimo mini extensions
7.
Maintenance
8.
Warning
9.
Specifications
10.
Certification
11.
Claims

of 3Dsimo mini
1. Introduction
You have got your hands on a pocket
workshop. This is the 3Dsimo mini, which
includes replaceable extensions (3D
drawing, welding, cutting, burning). Each
extension has logic for its detection and
a setup of all parameters so that you only
need to insert the extension.
The 3Dsimo mini communicates with a
mobile device using its own APP. It oers
a lot of instructional videos, templates,
but also the option of setting custom
material profiles. It’s OK if you don’t have a
smartphone; the 3Dsimo mini is equipped
with an LED display that shines through the
plastic wall.

1.
All the information needed to operate
this device can be found on the following
pages.
Strong recommendation from the
manufacturer:
Before using the 3Dsimo mini, please read
the instructions carefully and pay attention
to warnings.
If you need inspiration or are having issues,
visit our website:

packaged product
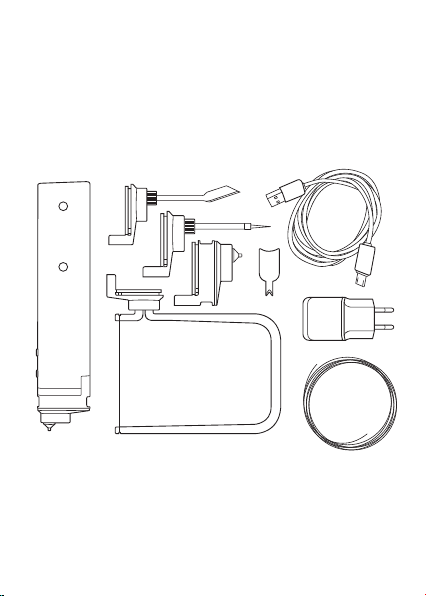
2. The content of the
The packaged product includes the
following components:
1 mini 3Dsimo with 3D drawing extension
1 connecting extension
1 burning extension
1 cutting extension
1 Adapter + USB cable
1 15m of the drawing filament
1 agent for removing a jammed filament
3 Resistance wire
1)
4)
ABS
3)
5)
2)
7)
6)
8)
9)

of 3dsimo mini
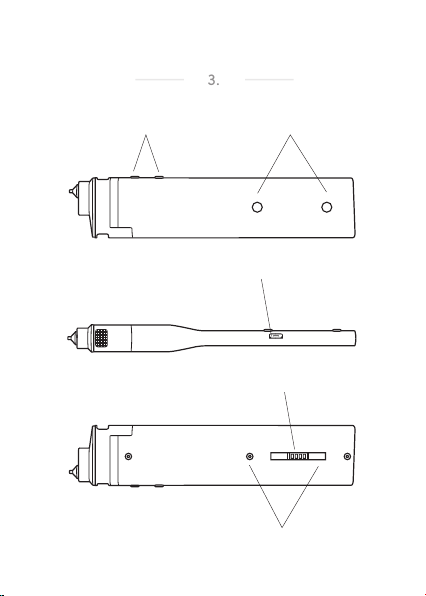
3. Basic description
1.
Material/temperature selection buttons
(depending on the chosen extension)
2.
The buttons used for inserting / ejecting
/ heating (depending on the chosen
extension)
3.
USB power connector
4.
Magnetic contacts for attaching
accessories
5.
Contact for power pack and other
accessories
6.
Opening for cutting jammed filament
7.
Plug-in mechanism
3.
2
1
AB S
3
5
4
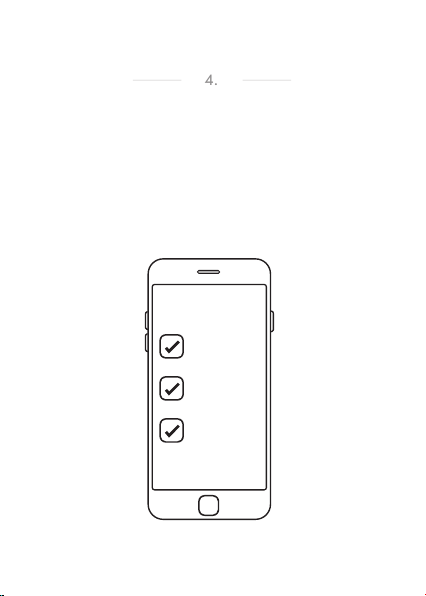
Mobile App
4.
The Mobile App can be downloaded for
Android, IOS, Win.
iOS
Android
Windows

and replacing
5.
extensions with the
3Dsimo mini
1.
After connecting the adapter into a
wall outlet and the USB connector, the
text saying 3D pen will be displayed
on the LED display and then the
specification of what extension you
should insert in the 3Dsimo mini. If you
do not have any extension inserted, the
text UNSPECIFIED will appear.
2.
Always insert the extension to the
stop (Fig. 4). (The extension is not
recognized when not inserted to the
stop!)

5.

3.
5.
3D DRAWING
After inserting this extension, the text 3D
tool appears, followed by the choice of
material. After selecting the desired
material, the text HEATING is displayed.
After reaching the appropriate
temperature (2-3min), READY is
displayed. Now the feeder mechanism
is already activated and you can insert
the filament of the 3Dsimo mini (Note:
Always insert a straightened filament,
which has a blunt end as in Fig. 5).

3.
5.
A) INSERTING THE FILAMENT:
insert the filament into the rear
opening and press the forward button
(Figure No. 6); at the same time you
need to gently push the string to get it
into he feed mechanism. Then it takes
approximately 10 seconds before
the wire reaches the nozzle and
the material starts flowing from the
3Dsimo mini.

3.
5.
B) SPECIAL FEATURE
After pressing both buttons
simultaneously for at least 2-3 sec.,
continuous extrusion will be activated

(Fig. no. 7). To disable this feature,
5.
press any front button.
2-3s

3.
5.
C) REPLACEMENT AND
REMOVAL OF THE FILAMENT:
Pressing the button for reverse running
and hold it until the entire string comes
out. Then, remove the string and insert
another one with a flat end (Fig. No.
8). (Remove the filament only after
warming up the 3Dsimo mini and
activating the feed mechanism!)

4.
5.
EXTENSIONS FOR WELDING,
CUTTING AND BURNING:
After inserting any extension, you’ll see
its name on the display and then the
temperature indicated in percentages.
100% corresponds to 480°C.
For preheating it is required to hold
the front button. To enable continuous
preheating, press both front buttons
simultaneously for at least 2-3 sec.
(Figure No. 7).

5.
5.
REPLACEMENT OF TIPS
AND EXTENSIONS FOR
BURNING AND CUTTING:
For proper replacement, refer to Figure
No 9. It is always necessary to carefully
tighten everything! (Replacement
of tips can only be carried out after
cooling!)

6.
5.
FITTING AND REPLACING
THE RESISTANCE WIRE FOR
THE CUTTING EXTENSION:
For proper replacement refer to Figure
No. 10.

Maintenance
6.
1.
3D DRAWING EXTENSION:
A) Before inserting the string, always
check that there is no dirt or deformed
plastic on the string. If the tip or end is
not smooth and flat, cut the distorted
portion with scissors.
B) After using the 3Dsimo mini, always
pull out the material and keep it in a
resealable bag.
C) If the deformed wire slides inside
3Dsimo mini and it can’t be pushed
out by a newly inserted string, use the
product in Figure No. 11, pushing the

6.
1.
product into the bottom hole, which
will cut the filament in half. Now you
can insert and remove the deformed
plastic.
D) If the nozzle is dirty, wipe with a
paper towel. (! Beware hot!)
Filament

6.
2.
SOLDERING AND BURNING
EXTENSION:
A) When the tip is dirty, wipe with
a paper towel.
B) Never try to get rid of dirt using
a knife or sandpaper. This would
damage the special coating for easy
soldering.
C) When replacing the tip, always
make sure to tighten all components
(because of contact)

6.
3.
CUTTING EXTENSION:
A) When the wire is dirty, wipe with
a paper towel.
B) If the wire breaks, always use new
wire. (Always use original resistance
wire from 3Dsimo!)

Warning
7.
A)
Risk of burns. 3dsimo mini nozzle and
tips reach high temperatures up to
480°C after heating. Do not touch the
nozzle/tips or parts in their vicinity, or
molten plastic, there is a risk of burns.
Hot parts are shown in Figure No. 12.

7.
B)
Never remove the 3D drawing extender
if no filament is inserted. Shown in
Figure No. 13.

7.
Filament
C)
Avoid contact of volatile and
flammable substances with the hot
nozzle/tip of the 3Dsimo mini. Inform
those around you that the device is hot
and should not be touched.
D)
Allow the nozzle/tip of the 3Dsimo to
cool completely before storage. In the

7.
D)
event of non-compliance, the carrying
case can get damaged.
E)
Use only original material and
accessories from our company.
Otherwise, the 3Dsimo mini may
get damaged due to poor quality or
incorrect width. Other damage may be
caused. The manufacturer is not liable
for damage caused by the use of nongenuine material.
F) Children may use the 3Dsimo only
under parental supervision. This
product is not a toy.

7.
G) Keep the 3Dsimo dry during storage,
transportation and operation as well
as avoid contact with liquids.
H) Do not disassemble the 3Dsimo mini
power adapter. In the case of defects
contact an authorized service center
for assistance or repair.
I)
Do not use the AC adapter if the cord is
damaged. Otherwise, you may
cause electric shock or fire.
J)
Keep this information for future use.
K)
The manufacturer is not liable for
damage caused using the device in
conflict with this manual.

Specifications
8.
ADAPTER:
Input voltage: 100 – 240V AC, 50Hz
Output power: 12W, Output voltage: 5V
3DSIMO MINI:
Input voltage 5V
NOISE LEVEL:
21 – 30 dB

Certifications
9.
A)
RESTRICTION OF
HAZARDOUS SUBSTANCES
This device complies with the European
Directive on Registration, Evaluation,
Authorization and Restriction of
Chemicals (REACH) (Directive No.
1907/2006/EC of the European
Parliament and the European Council)
and the European Directive on the
Restriction of Use of Certain Hazardous
Substances in Electrical and Electronic
Equipment (RoHS) (Directive 2002/95/
EC of the European Parliament and the
European Council).

9.
B)
COMPLIANCE WITH
EUROPEAN SAFETY
STANDARD
This device complies with European
safety directives.

Claims
10.
A warranty of 12 months is provided for the
equipment.
In the event of any defect or failure of the
device, you can complain at:
Info@3dsimo.com.
The original material can be purchased
here: www.3dsimo.com/e-shop
.
More information at
 Loading...