

Page 1
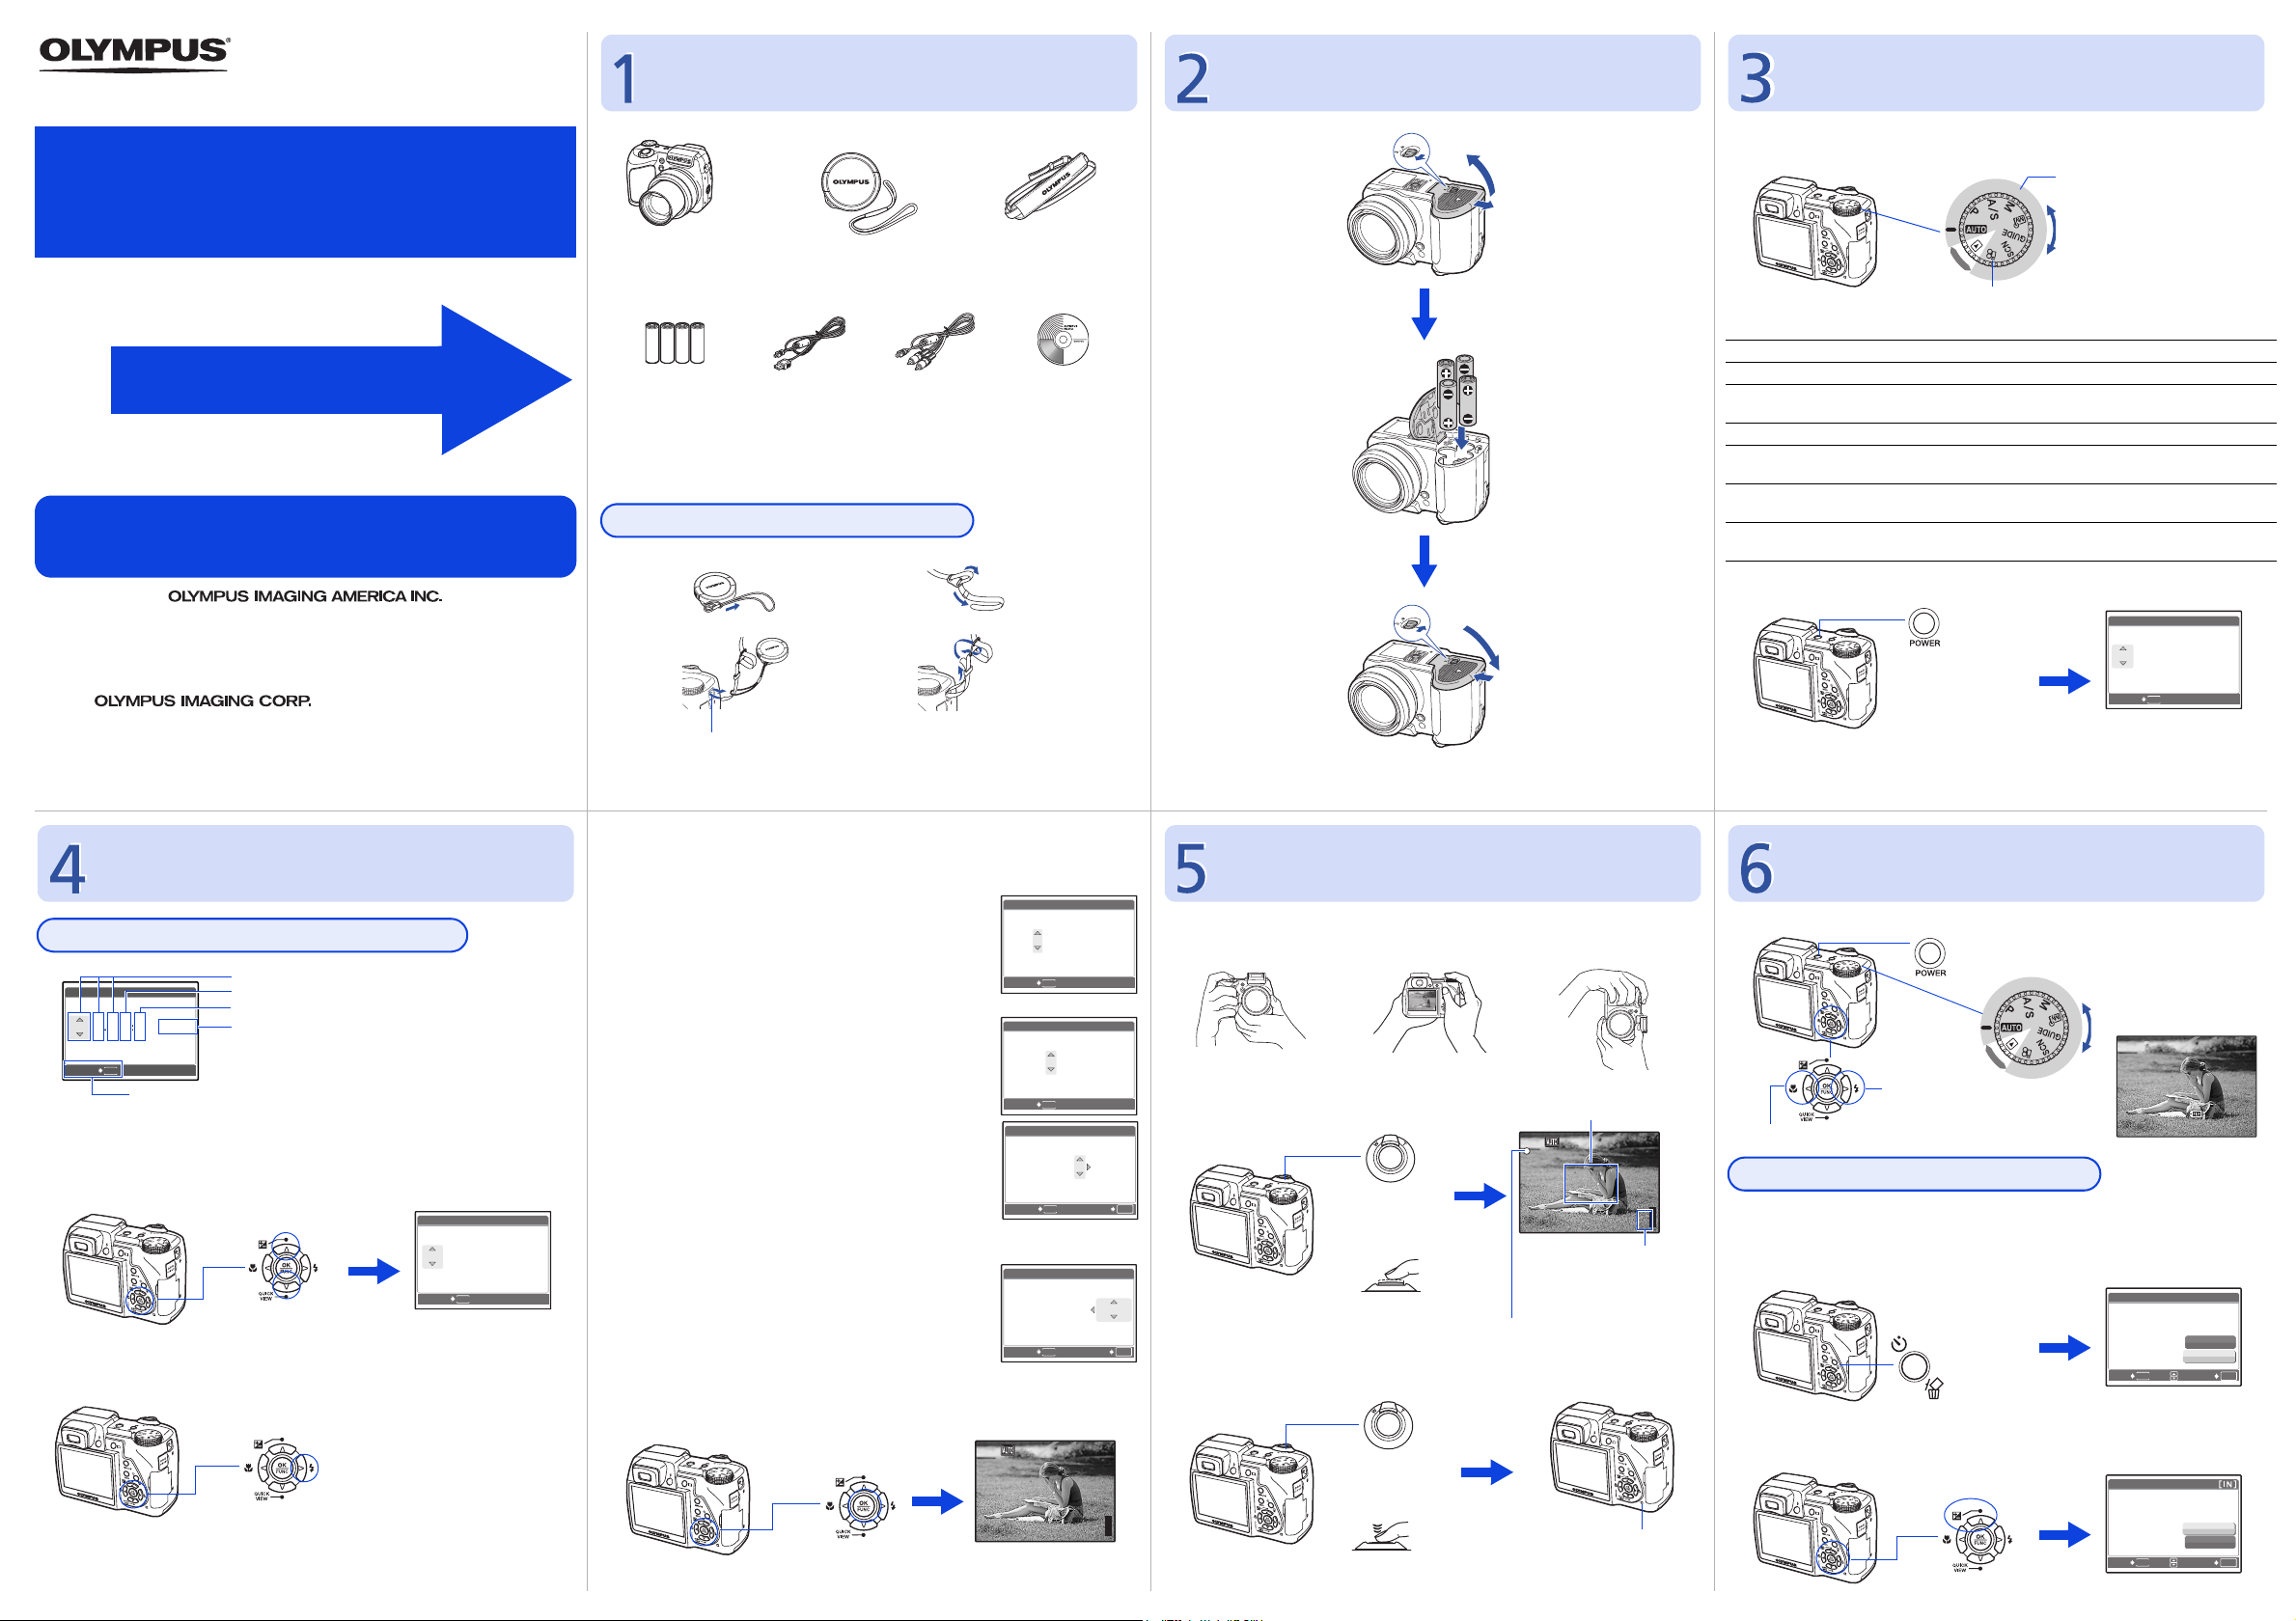
Gather these items (box contents)
Prepare the battery
Turn the camera on
Quick Start Guide
SP-510UZ
Start Here
For more information, please refer to the Basic & Advanced Manuals
or visit: www.olympusamerica.com/support
© 2006
Printed in Japan
1AG6P1P3138-- VH683701
Digital Camera Lens Cap/Lens Cap
String
AA Batteries
(four)
USB Cable AV Cable OLYMPUS Master
Software CD-ROM
Items not shown: Advanced Manual, Basic Manual and warranty card.
Contents may vary depending on purchase location.
Attach the strap and the lens cap
1
3
Strap Eyelet
Pull the strap tight so that it does not come loose.
2
4
·Attach the strap to the other
eyelet in the same manner.
Strap
1
3
2
4
7
5
6
For details on inserting an optional xD-Picture Card (hereinafter called
the card), please refer to the Advanced Manual.
This explains how to turn on the camera in shooting mode.
a. Set the mode dial to h.
Shooting mode
When shooting movies
Still picture shooting modes
h Allows you to take pictures with full automatic settings.
P The camera automatically sets the optimum aperture value and shutter speed.
A/S Allows you to set the aperture manually. / Allows you to set the shutter speed
M Allows you to set both the aperture and shutter speed manually.
r
g Allows you to set the target items by following the shooting guide displayed
s Allows you to shoot pictures by selecting a scene according to the shooting
manually.
Allows you to set each shooting function manually and use as your original
shooting mode.
on the screen.
condition.
b. Press the o button.
X
Y M D TIME
----.--.-- --:--
MENU
CANCEL
·To turn on the camera, press the POWER
button after removing the lens cap.
·This is displayed when
the date and time are
not set.
To turn off the camera, press the o button once again.
Y/M/D
Set date and time
About the date and time setting screen
X
Y M D TIME
----.--.-- --:--
CANCEL
MENU
Y/M/D
Exits a setting.
a. Press the sF button and the r QUICK VIEW
button to select [Y].
• The first two digits of the year are fixed.
b. Press the q# button.
Y-M-D (Year-Month-Day)
Hour
Minute
Date formats (Y-M-D, M-D-Y, D-M-Y)
sF Button
r QUICK VIEW
X
Y M D TIME
2006
.--.-- --:--
CANCEL
Button
q# Button
Y/M/D
MENU
c. Press the sF button and the
r QUICK VIEW button as in a. to
select [M].
d. Press the q# button.
e. Press the sF button and the
r QUICK VIEW button to select [D].
f. Press the q# button.
g. Press the sF button and the
r QUICK VIEW button to select
“hour”, “minute”.
• The time is displayed in the 24-hour format.
X
Y M D TIME
2006.11
.-- --:--
MENU
CANCEL
X
Y M D TIME
2006.11.26
MENU
CANCEL
X
Y M D TIME
2006.11.26 12:30
MENU
CANCEL
h. Press the q# button.
i. Press the sF button and the
r QUICK VIEW button to select [Y/
M/D].
j. After all items have been set, press
X
Y M D TIME
2006.11.26 12:30
MENU
CANCEL
the o button.
• For precise time setting, press the o button as the time signal strikes 00
seconds.
[ ]
HQ
3072×2304
o Button
--:--
[IN]
Y/M/D
Y/M/D
Y/M/D
SET
Y/M/D
SET
44
Shoot
a. Hold the camera.
b. Focus
OK
OK
c. Shoot
Horizontal grip Vertical grip
Place this mark over your subject.
Shutter Button
(Pressed
halfway)
[ ]
HQ
3072×2304
The number of storable
[IN]
still pictures is displayed.
The green lamp indicates the
focus and exposure are locked.
Shutter Button
(Pressed
completely)
The card access lamp blinks.
View pictures
a. Set the mode dial to q.
Arrow pad
Next Picture
Mode Dial
Prev. Picture
Erase pictures
44
a. As described in a. above, display the picture you
want to erase.
b. Press the Y/S button.
Y/S Button
c. Press the sF button to select [YES], and press the
o button to erase the image.
aF Button
[IN]
'06.11.26
100-0001
ERASE [IN]
YES
NO
MENU
BACK
ERASE
BACK
MENU
YES
NO
SET
SET
HQ
12:30
1
OK
OK
 Loading...