

Page 1
3B SCIENTIFIC® PHYSICS
U17250 Electroscope
Instruction Sheet
6/03 ALF
®
1
2
8
3
4
7
6
5
The device is used for an introduction into the fundamentals of electrostatics and for displaying DC and AC
voltages as well as demonstrating the operating principles of high voltage meters according to Braun.
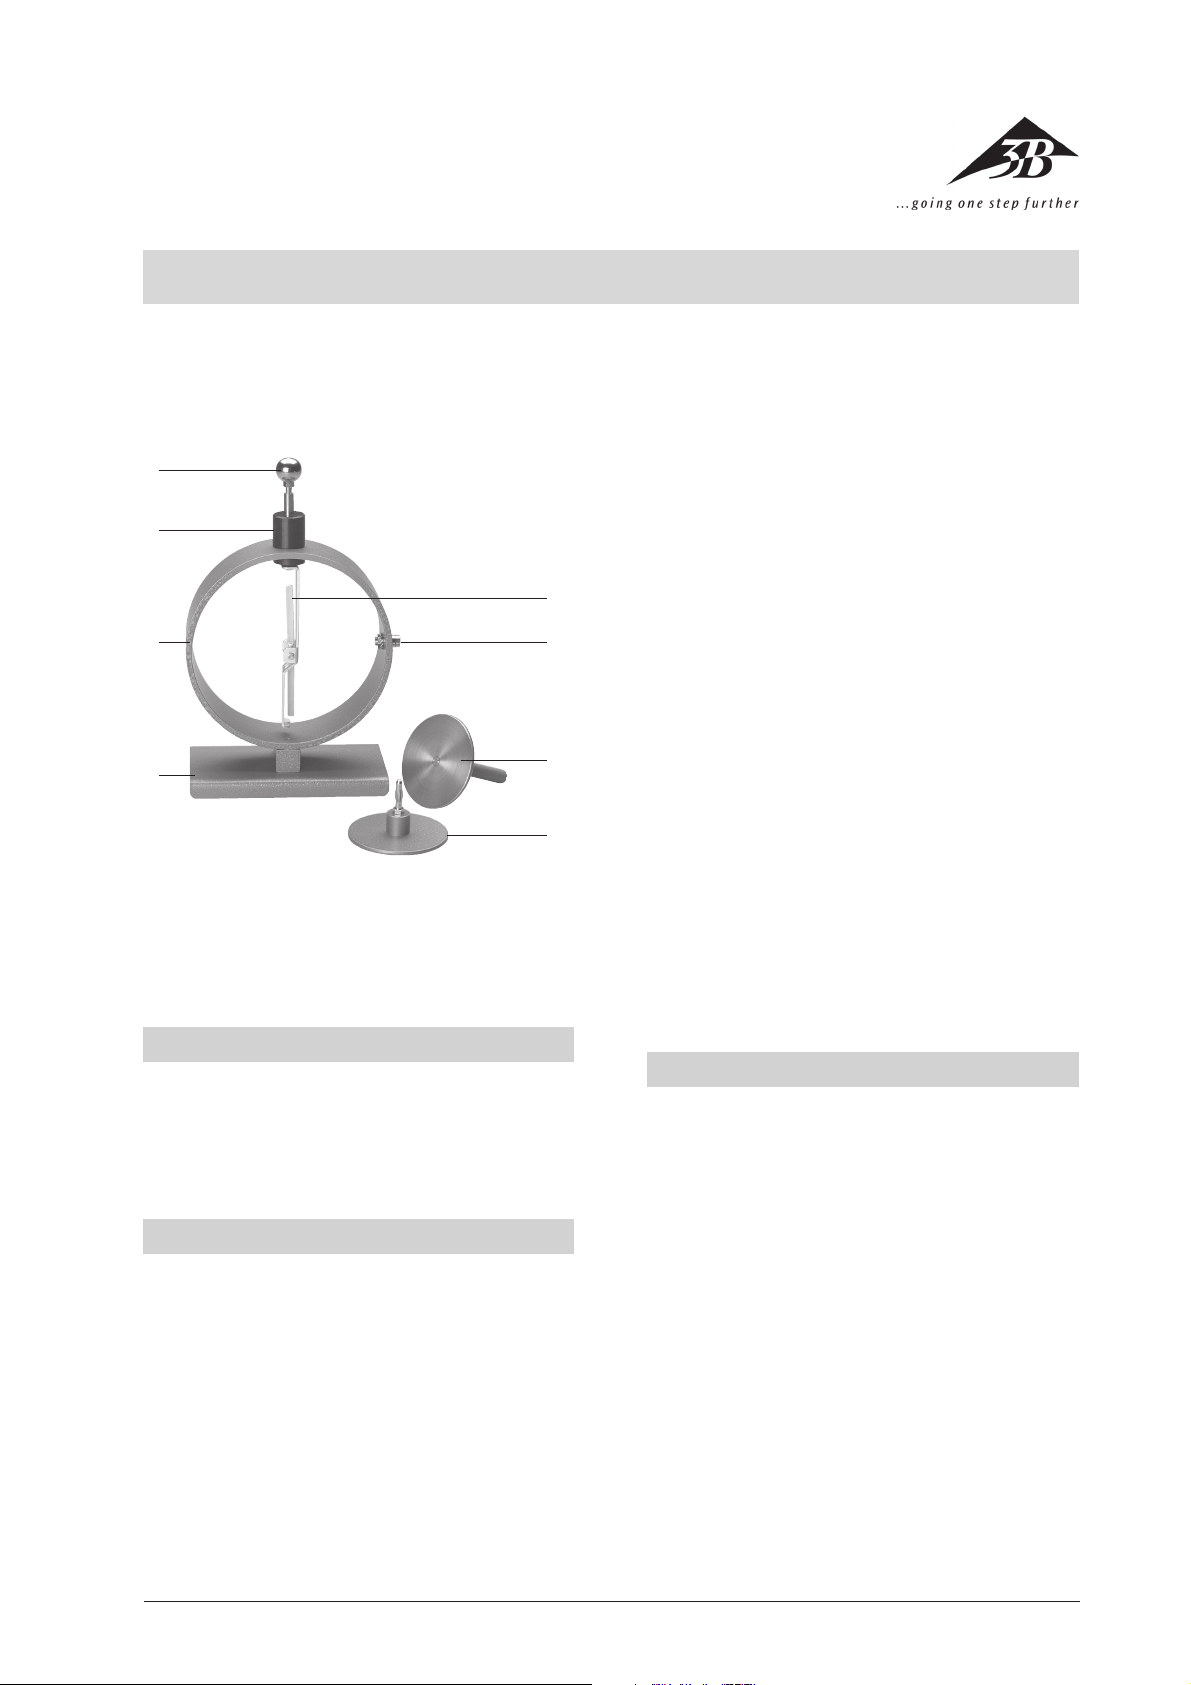
1 Sphere with 4-mm plug
2 Insulator
3 Shielding ring
4 Baseplate
5 Capacitor plate with 4-mm plug
6 Capacitor plate on insulating rod
7 4-mm socket
8 Support with pointer
2.1 Scope of supply
1 Electroscope
1 Sphere with 4-mm plug
1 Capacitor plate with 4-mm plug
1 Capacitor plate on insulating rod
1. Safety instructions
• Make sure that the insulator is always clean and
dry. If necessary use alcohol or spirits for cleaning.
• At high humidity and after transporting the unit
from a cool room into a warmer one, dry the electroscope in a stream of hot air (e.g. a hair dryer).
2. Description, technical data
The electroscope consists of a metal baseplate on which
the iron shielding ring for defined field distribution is
mounted. The iron ring is equipped with a 4-mm socket
for earthing purposes. The support for needle with
pivot bearing is attached electrically insulated to the
shielding ring. The pointer is suspended asymmetrically and so its weight delivers the restoring moment.
Inside the electrically conductive insulator at the upper part of the device there is a 4-mm socket for mounting the sphere and capacitor plate.
For demonstration experiments the electroscope is suitable for shadow projection using a point source light.
Diameter: 130 mm
3. Operation
The electroscope is charged using friction rods statically charged by various friction-inducing materials
(e.g. U11053), or using a high-voltage power supply unit
(e.g. U21060).
3.1 Charging up the electroscope by touching it
with a statically charged body
• Attach the sphere or capacitor plate to the electroscope.
• Rub the friction rod with the suitable material (PVC
or acrylic rods e.g. with plastic foil).
• Touch the sphere or capacitor plate with the
charged rod. The pointer deflects.
• Remove the friction rod, the pointer remains deflected.
• Touch the sphere with your hand. The pointer returns to normal.
• When a high-voltage power supply is used then
attach the capacitor plate to the positive pole of
the power supply unit. Connect the negative pole
3
Page 2
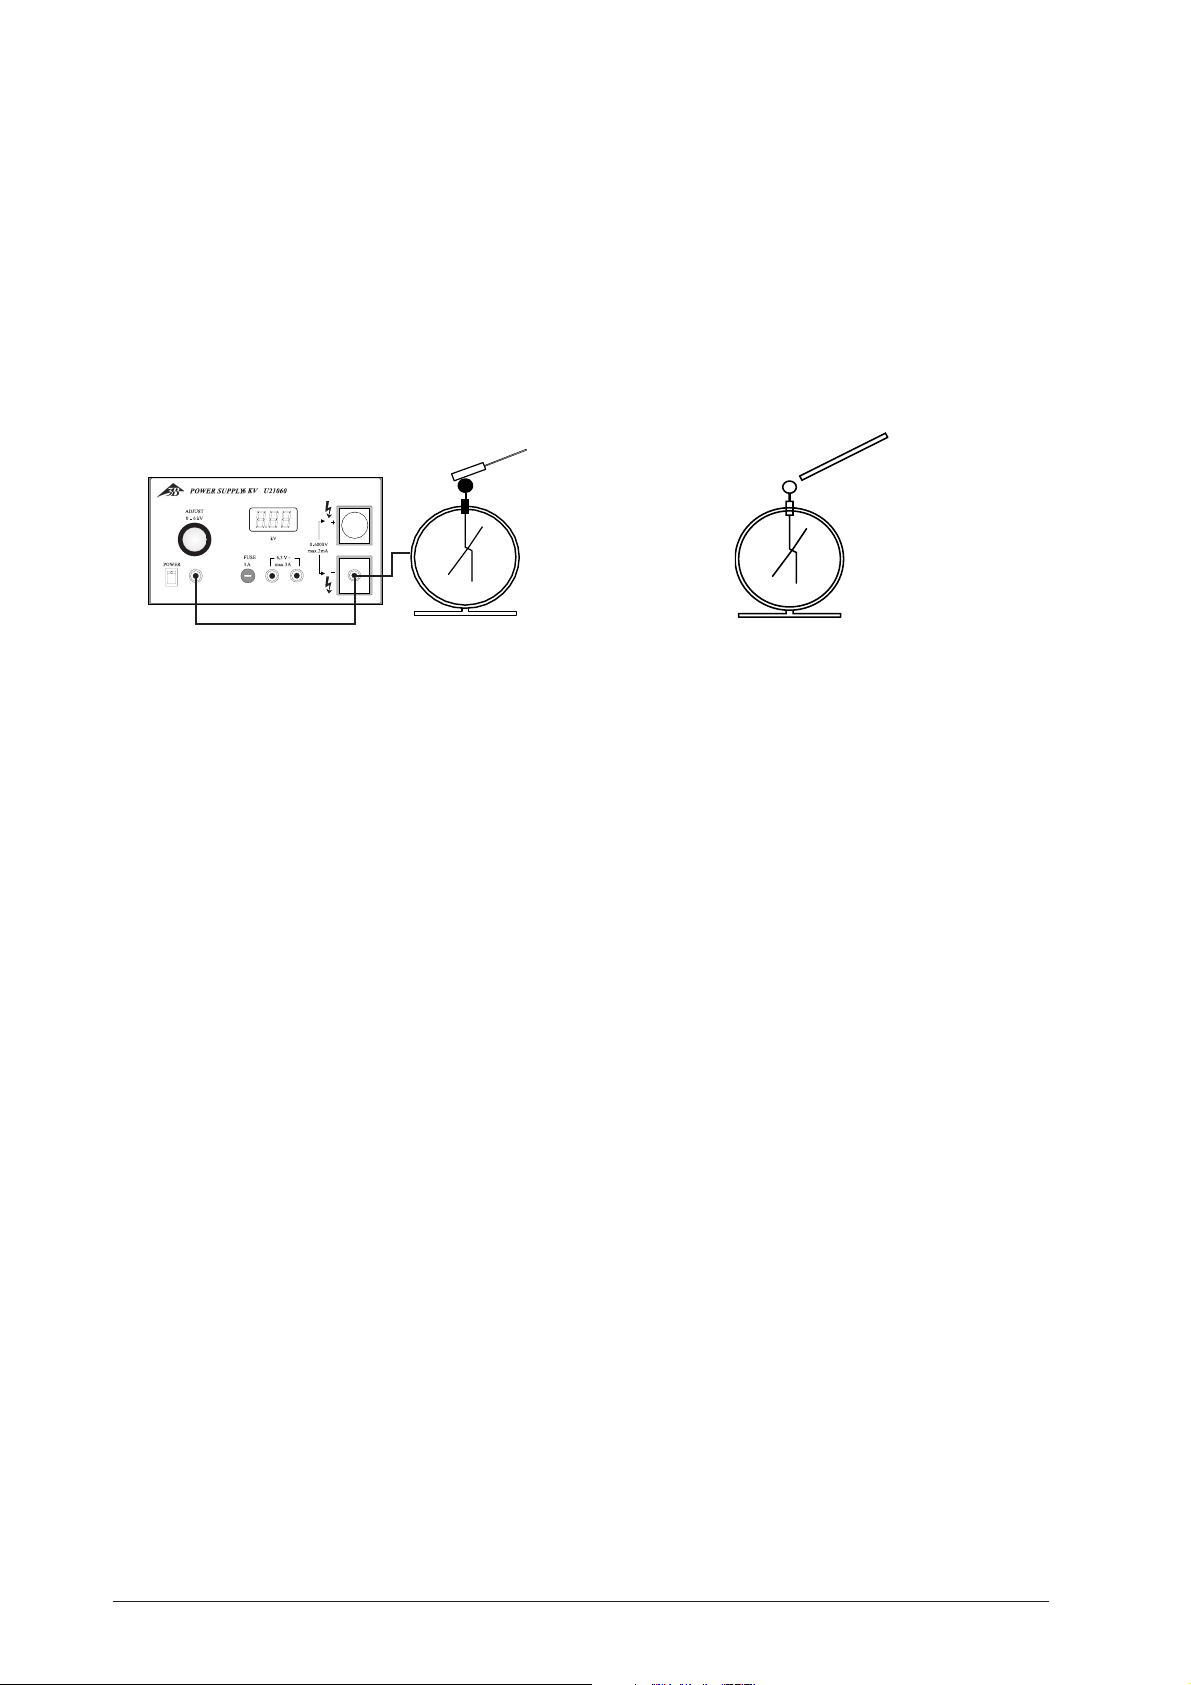
with the earth socket on the power supply and
with the earth socket on the electroscope.
• Use a charge spoon (e.g. U11051) to draw a charge
from the capacitor plate and transfer it to the electroscope.
3.2 Using electrostatic induction to charge up the
electroscope
• Approach but do not touch the sphere (or capacitor plate) with the statically charged friction rod.
The pointer deflects.
• Remove the friction rod. The pointer returns to
normal.
• Again approach the sphere with the statically
charged friction rod. Once again the pointer deflects.
• Briefly touch the sphere with your finger to discharge it. The pointer deflection disappears and
returns to normal.
• Now remove the friction rod. The pointer again
shows deflection.
Fig. 1: Charging the electroscope using the high-voltage
power supply U21060
Fig. 2: Charging the electroscope using a statically-charged
friction rod
3B Scientific GmbH • Rudorffweg 8 • 21031 Hamburg • Germany • www.3bscientific.com • Technical amendments are possible
4
 Loading...