

Page 1
Wireless Sensors
1. Useful materials for your TV2, including the Care and Use guide can be
downloaded here: http://www.e2di.com/CD-TV2/menu1.htm
2. Please print the Users Guide.
Although you should use the Users Guide to familiarize yourself with the TV2 before setting
it up, you can follow the quickstart instructions on the next page if you are in a hurry.
You should download the TView software to your desktop: Go to www.e2di.com
and place your mouse cursor on Support, and then click on the first subheading.
Next click on the link #2: PC Interface Software. Click on the program with
email.
Copy the software to your desktop, unzip it and click on 'Setup' to install.
Uninstall any old versions of TView first.
P O Box 159 • Crestwood, KY 40014 • (502) 243-0042 • (502) 243-0039 fax
Page 2
Quick Start
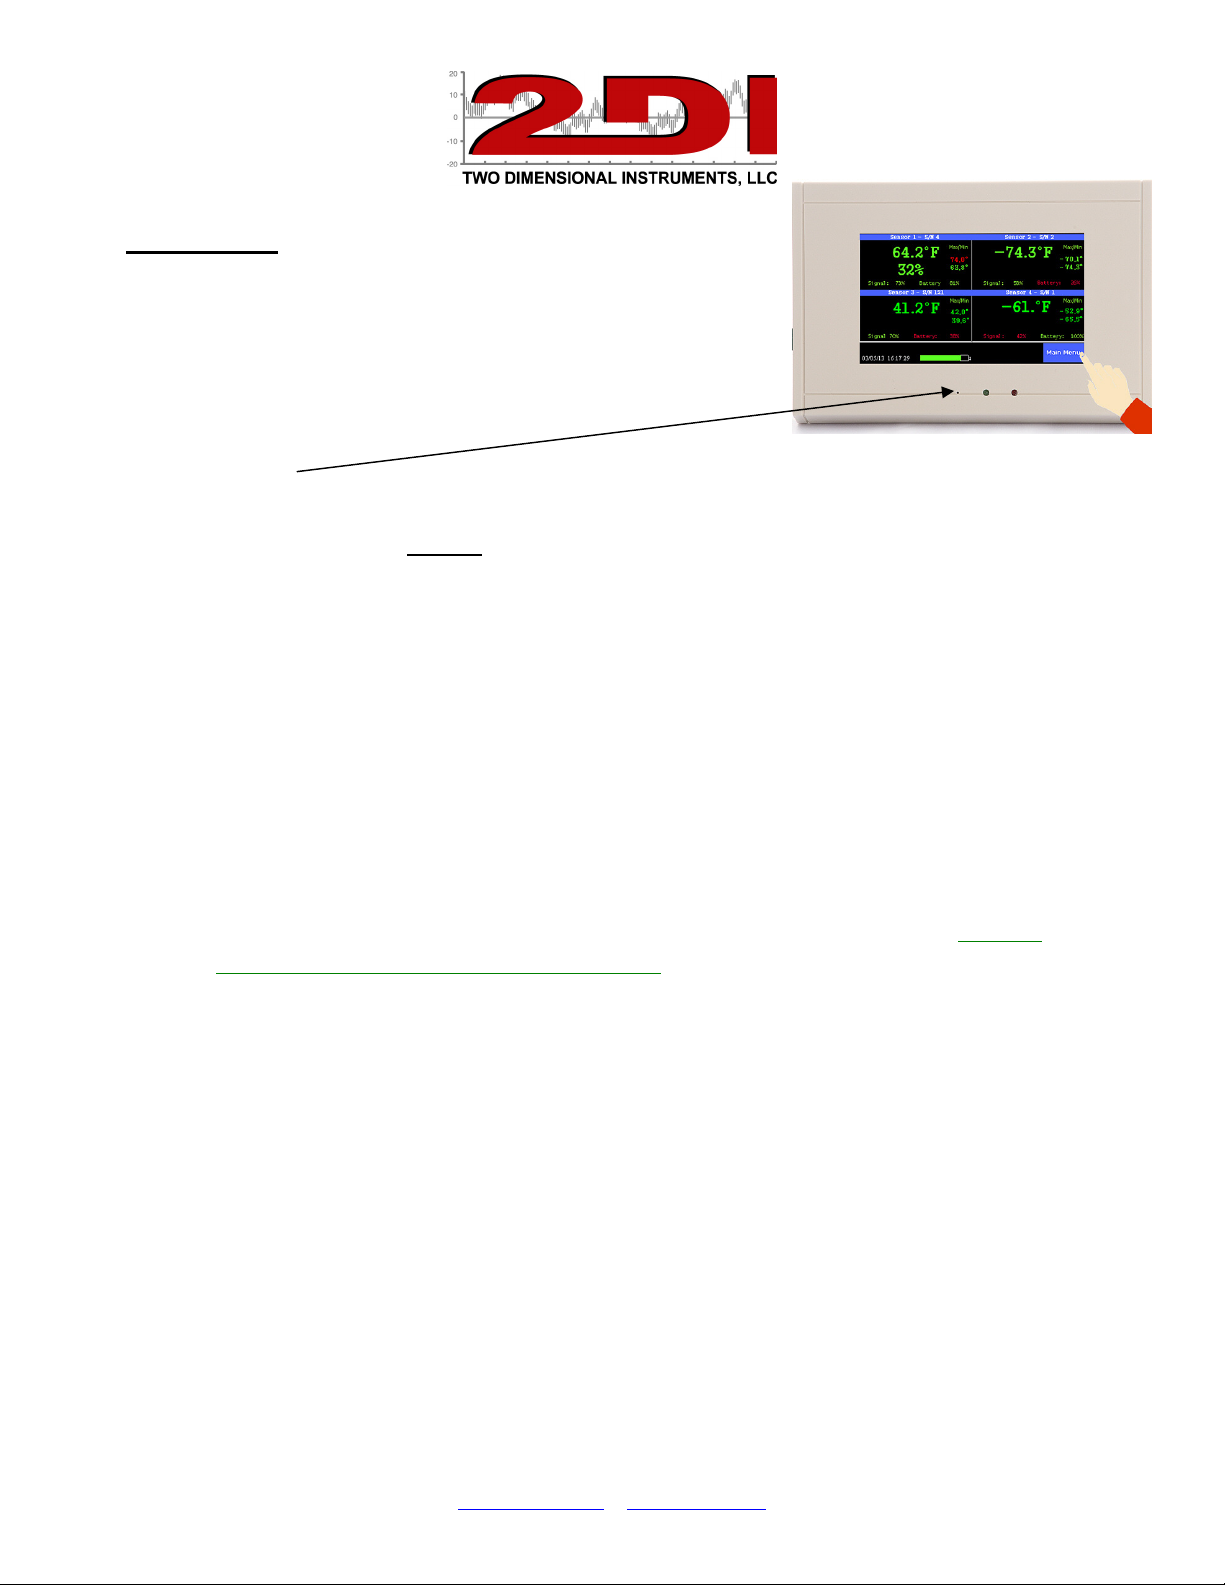
The TV2 is shipped in deep sleep mode.
1. Turn on the TV2 and set the date and time
A. Plug the USB cable into a PC or the power
supply. If the screen does not wake up push the
reset button with a paper clip.
B. Change the temperature scale (°C or °F) with 'Up' or 'Down' and touch 'Enter'.
C. Change the date format, if needed with 'Up' or 'Down' and touch 'Enter'.
D. Change the date and time, if needed using 'Up' or 'Down' and 'Enter'.
E. Touch 'Escape' twice to return to the current status screen.
F. Link each sensor to the TV2 monitor.
2. To set the chart display for a sensor
A. Touch 'Main Menu' and highlight the Sensor Setup menu with 'Right'
B. Use 'Up' or 'Down' to set the data logging rate. (between 1 minute & 24 hrs)
(10 minutes is frequently used, for refrigeration equipment).
C. Set the averaging with 'Up' and 'Down' and touch ‘Enter’. There are three
possible selections. Most people use Medium averaging.
D. Set the Maximum and Minimum temperature lines (& RH lines if you have a
humidity sensor). These are only the limits of the displayed chart not the
limits of the temperatures or the alarms. Touch ‘Enter’ after each entry.
3. To set the alarm for a sensor
A. From within the sensor setup menu move to the 'Set Alarm' menu at the
bottom of the screen with 'Right' or 'left' and touch 'Enter'.
B. 'Enable' the alarm with 'Up' and touch 'Enter'
C. Use 'Up' or 'Down' and then 'Enter' to set the alarm-on time. (30 seconds is a
good number if you are using an auto dialer).
D. Set the high alarm with 'Up' or 'Down' and the touch 'Enter.
E. Set the delay time 'Up' or 'Down' and then touch 'Enter'
F. Repeat the process for the low alarm.
G.
Touch 'Escape' until you return to the current status screen.
P O Box 159 • Crestwood, KY 40014 • (502) 243-0042 • (502) 243-0039 fax
Page 3

Linking a wireless sensor to the TV2 monitor
Each wireless sensor must be 'linked' to the TV2 monitor.
1. Remove the 9vdc battery from the sensor
2. Put the monitor in link mode
a. Touch 'Main Menu'
b. Highlight "Add'
c. The monitor will display a message saying, 'Waiting for Sensor'. Insert the
9vdc battery in the sensor you want to link.
3. The monitor will ask you to confirm the sensors pairing. Highlight 'yes' and touch
'Enter'
4. Repeat the process to link additional sensors to the TV2.
Once the sensor is paired the sensor setup menu will appear. (See 2 above)
P O Box 159 • Crestwood, KY 40014 • (502) 243-0042 • (502) 243-0039 fax
 Loading...