

Page 1

Quick Guide
Guida Rapida - Guide Rapide - Kurzanleitung
Page 2

Quick Guide
Guida Rapida
Guide Rapide
Kurzanleitung
2 3
Page 3

1Control LINK is a Wi-Fi accessory that enables remote
opening and voice commands with Alexa, Google Home
and Siri.
It is compatible with 2nd Generation 1Control devices such
as SOLO and DORY.
Before proceeding with the installation, check that you have
already downloaded the “1Control” app and that you have
congured your SOLO or DORY device.
1Control LINK è un accessorio Wi-Fi che abilita apertura
da remoto e comandi vocali Alexa, Google Home e Siri. È
compatibile con i dispositivi 1Control di 2a Generazione come
SOLO e DORY.
Prima di procedere nell’installazione verica di aver già
scaricato l’app “1Control” e di aver congurato il tuo dispositivo
SOLO o DORY.
1Control LINK est un accessoire Wi-Fi qui permet l’ouverture à
distance et les commandes vocales avec Alexa, Google Home
et Siri. Il est compatible avec les appareils 1Control de 2e
génération tels que SOLO et DORY.
Avant de procéder à l’installation, vériez que vous avez déjà
téléchargé l’application “1Control” et que vous avez conguré
votre appareil SOLO ou DORY.
Der 1Control-LINK ist ein WLAN-Zubehör, das Fernönung und
Sprachbefehle mit Alexa, Google Home und Siri ermöglicht. Er
ist mit 1Control-Geräten der 2. Generation kompatibel, wie z.B.
SOLO und DORY.
Bevor Sie mit der Installation fortfahren, stellen Sie sicher, dass
Sie die “1Control”-App bereits heruntergeladen haben und,
dass Sie Ihr SOLO- oder DORY-Gerät konguriert haben.
4 5
Page 4

1. Connect the antenna and power your
LINK
Connect the antenna you nd in the package to your LINK.
Screw it gently, you don’t need to apply force.
1. Collega l’antenna e alimenta il tuo LINK
Collega l’antenna che trovi nella confezione al tuo LINK. Avvitala
delicatamente, non è necessario applicare molta forza.
Collega cavo e caricatore USB in dotazione. LINK si accende
collegando l’alimentazione, non ci sono interruttori di accensione.
Connect the supplied USB cable and charger. LINK turns on
when power is connected, there are no power switches.
1. Connectez l’antenne et alimentez votre LINK
Connectez l’antenne que vous trouverez dans l’emballage à votre
LINK. Tournez-la doucement, vous n’avez pas besoin d’appliquer
beaucoup de force.
Connectez le câble USB et le chargeur fournis. LINK s’allume
lorsque l’alimentation est connectée, il n’y a pas d’interrupteur
d’alimentation.
1. Verbinden Sie die Antenne und laden Sie Ihren LINK
Verbinden Sie die Antenne, die Sie im Paket für Ihren LINK
nden. Schrauben Sie diese vorsichtig an; Sie müssen keine Kraft
anwenden.
Verbinden Sie das mitgelieferte USB-Kabel und das Ladegerät. Der
LINK schaltet sichein, wenn der Strom angeschlossen ist; es gibt
keinen Netzschalter.
6 7
Page 5
2. Place your LINK correctly
Correct positioning is essential for optimal operation of
1Control LINK.
1Control LINK must be within the range of your Wi-Fi
network and must be within 20-30 meters from the device
you want to control (1Control SOLO or 1Control DORY).
2. Posiziona correttamente il tuo LINK
Per un funzionamento ottimale di 1Control LINK è fondamentale un corretto
posizionamento. 1Control LINK deve trovarsi nel raggio della tua rete WiFi e deve trovarsi entro 20-30 metri dal dispositivo che vuoi controllare
(1Control SOLO o 1Control DORY).
Attenzione: eventuali ostacoli, come muri o reti metalliche, possono ridurre
signicativamente la distanza massima tra 1Control LINK e il dispositivo da
controllare.
2. Positionnez correctement votre LINK
Un positionnement correct est essentiel pour un fonctionnement optimal
du 1Control LINK. 1Control LINK doit être à portée de votre réseau Wi-Fi et
doit se trouver à moins de 20-30 mètres de l’appareil que vous souhaitez
contrôler (1Control SOLO ou 1Control DORY).
Attention: tout obstacle, tel que des murs ou des treillis métalliques, peut
réduire considérablement la distance maximale entre 1Control LINK et
l’appareil à contrôler.
2. Platzieren Sie Ihren LINK korrekt
Die korrekte Positionierung ist wesentlich für den optimalen Betrieb des
Attention
Any obstacles, such as walls or wire mesh, can signicantly
reduce the maximum distance between 1Control LINK and
the device to be controlled.
8 9
1Control-LINK. Der 1Control-LINK muss sich innerhalb der Reichweite
Ihres WLAN-Netzwerkes und innerhalb von 20-30 Metern von dem Gerät
benden, das Sie steuern möchten (1Control-SOLO oder 1Control-DORY).
Achtung: Hindernisse, wie z.B. Wände/Mauern oder Drahtgeechte,
können den maximalen Abstand zwischen dem 1Control-LINK und dem zu
steuernden Gerät wesentlich reduzieren.
Page 6

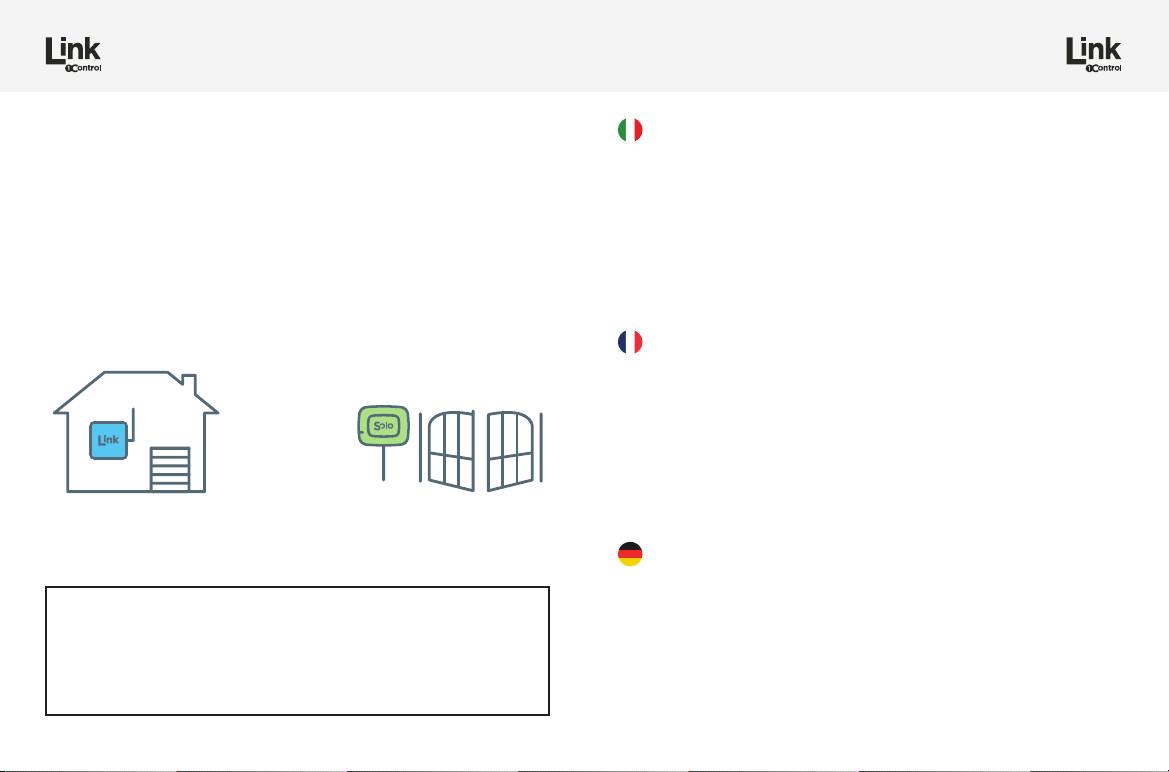
Examples of positioning
Esempi di posizionamento
A) 1Control SOLO posizionato vicino al cancello e 1Control LINK posizionato
in casa sulla nestra più vicina al cancello. Con questo posizionamento puoi
aprire il cancello sia utilizzando il Bluetooth sia utilizzando il Wi-Fi.
B) 1Control SOLO e 1Control LINK entrambi posizionati in casa sulla nestra
più vicina al cancello. In questo modo, sfruttando il raggio di funzionamento
del telecomando copiato sul tuo SOLO, è possibile coprire una distanza
maggiore e aprire utilizzando il Wi-Fi.
1Control SOLO placed near the gate and 1Control LINK
placed in the house on the window closest to the gate. This
solution allows you to open the gate both using Bluetooth
and using Wi-Fi.
Exemples de positionnement
A) 1Control SOLO positionné près du portail et 1Control LINK positionné dans
la maison sur la fenêtre la plus proche du portail. Avec ce positionnement,
vous pouvez ouvrir la porte à la fois en utilisant le Bluetooth et en utilisant le
Wi-Fi.
B) 1Control SOLO et 1Control LINK tous deux positionnés dans la maison
sur la fenêtre la plus proche du portail. De cette façon, en protant de la
plage de fonctionnement de la télécommande copiée sur votre SOLO, il est
possible de couvrir une plus grande distance et d’ouvrir en Wi-Fi.
Beispiele für die Positionierung
A) 1Control-SOLO platziert in der Nähe des Tores und 1Control-Link platziert
1Control SOLO and 1Control LINK both placed in the house
on the window closest to the gate.
In this way, taking advantage of the operating range of the
remote control copied into your SOLO, it is possible to cover
a greater distance and open through the Wi-Fi.
10 11
im Haus, am Fenster, das dem Tor am nächsten liegt. Diese Lösung
ermöglicht Ihnen, das Tor sowohl mit Bluetooth als auch mit WLAN zu önen.
B) 1Control-SOLO und 1Control-LINK beide im Haus, an dem Fenster, das
dem Tor am nächsten liegt, platziert. Auf diese Weise können Sie, indem
Sie die Reichweite der auf Ihrem SOLO integrierten Fernbedienung nutzen,
eine größere Entfernung abdecken und Ihr Tor über die WLAN-Verbindung
önen.
Page 7

3. Add LINK to your app and set a security
PIN code
Open the “1Control” app and select “Manage your devices”
in the settings. Select your LINK from the list, follow the
wizard and set an 8-digit PIN code to protect it.
3. Aggiungi LINK alla tua app e imposta un codice
PIN di sicurezza
Apri l’app “1Control” e nelle impostazioni seleziona la voce
“Gestisci i tuoi dispositivi”. Seleziona il tuo LINK dall’elenco,
segui la procedura guidata e imposta un codice PIN di 8 cifre per
proteggerlo.
3. Ajoutez LINK à votre application et définissez un
code PIN de sécurité
Ouvrez l’application “1Control” et sélectionnez “Gérer vos
appareils” dans les paramètres. Sélectionnez votre LINK dans la
liste, suivez l’assistant et dénissez un code PIN à 8 chires pour le
protéger.
3. Fügen Sie den LINK zu Ihrer App hinzu und
richten Sie einen Sicherheits-PIN-Code ein
Önen Sie die “1Control”-App und wählen Sie “Ihre Geräte
verwalten” in den Einstellungen. Wählen Sie Ihren LINK in der Liste
aus, folgen Sie dem Assistenten und richten Sie einen 8-stelligen
PIN-Code zum Schutz ein.
12 13
Page 8

4. Connect your LINK to Wi-Fi
Continue through the wizard and connect your LINK to
the home Wi-Fi, indicating the name and password of the
network.
4. Connetti il tuo LINK alla Wi-Fi
Prosegui nella procedura guidata e connetti il tuo LINK alla Wi-Fi di
casa, indicando il nome e la password della rete.
4. Connectez votre LINK au Wi-Fi
Continuez dans l’assistant et connectez votre LINK au Wi-Fi
domestique, en indiquant le nom et le mot de passe du réseau.
4. Verbinden Sie Ihren LINK mit WLAN
Fahren Sie mit dem Assistenten fort und verbinden Sie Ihren
LINK mit dem WLAN zuhause und geben Sie den Namen und das
Passwort des Netzwerks an.
14 15
Page 9

5. Connect LINK to your 1Control devices
Connect your LINK to your SOLO or DORY devices by
entering their security PIN code, the app will guide you
through all the steps. 1Control LINK must be within range of
your Wi-Fi network and must be within 20-30 meters of the
device you want to control (1Control SOLO or 1Control DORY).
5. Collega LINK ai tuoi dispositivi 1Control
Collega il tuo LINK ai tuoi dispositivi SOLO o DORY inserendo il loro codice PIN
di sicurezza, l’app ti guiderà in tutti i passaggi. 1Control LINK deve trovarsi nel
raggio della tua rete Wi-Fi e deve trovarsi entro 20-30 metri dal dispositivo che
vuoi controllare (1Control SOLO o 1Control DORY).
Attenzione: se la procedura fallisce prova a ridurre la distanza tra il tuo LINK
e i dispositivi da controllare. Eventuali ostacoli, come muri o reti metalliche,
possono ridurre signicativamente la distanza tra 1Control LINK e i dispositivi da
controllare.
5. Connectez LINK à vos appareils 1Control
Connectez votre LINK à vos appareils SOLO ou DORY en entrant leur code PIN
de sécurité, l’application vous guidera dans toutes les étapes. 1Control LINK doit
être à portée de votre réseau Wi-Fi et doit se trouver à moins de 20-30 mètres
de l’appareil que vous souhaitez contrôler (1Control SOLO ou 1Control DORY).
Attention: si la procédure échoue, essayez de réduire la distance entre votre
LINK et les appareils à contrôler. Tous les obstacles, tels que les murs ou les
treillis métalliques, peuvent réduire considérablement la distance entre 1Control
LINK et les appareils à contrôler.
5. LINK mit Ihren 1Control-Geräten verbinden
Verbinden Sie Ihren LINK mit Ihren SOLO- oder DORY-Geräten, indem Sie deren
Attention
If the procedure fails, try to reduce the distance between your
LINK and the devices to be controlled. Any obstacles, such
as walls or wire mesh, can signicantly reduce the distance
between the 1Control LINK and the devices to be controlled.
16 17
PIN-Code eingeben. Die App leitet Sie durch alle Schritte. Der 1Control-LINK
muss sich innerhalb Ihrer WLAN-Netzwerkreichweite und innerhalb von 20-30
Metern von dem Gerät benden, das Sie steuern möchten (1Control-SOLO oder
1Control-DORY).
Achtung: Falls das Verfahren fehlschlägt, versuchen Sie, den Abstand zwischen
Ihrem LINK und den zu steuernden Geräten zu reduzieren Hindernisse, wie z.B.
Wände/Mauern oder Drahtgeechte, können den maximalen Abstand zwischen
dem 1Control-LINK und den zu steuernden Geräten wesentlich verringern.
Page 10

6. Open remotely with your LINK
Now you can also open remotely using your LINK. On the
main screen of the app, you can switch views to open nearby
or remotely by clicking on the icon at the top right. The
circular button opens only nearby, the slider opens remotely,
wherever you are.
6. Apri da remoto con il tuo LINK
Da questo momento puoi aprire anche da remoto utilizzando
il tuo LINK. Nella schermata principale dell’app, puoi cambiare
visualizzazione per aprire in prossimità o da remoto cliccando
sull’icona in alto a destra. Il pulsante circolare apre solo in
prossimità, il cursore a scorrimento apre da remoto, ovunque ti
trovi.
6. Ouvrez à distance avec votre LINK
À partir de ce moment, vous pouvez également ouvrir à distance
à l’aide de votre LINK. Sur l’écran principal de l’application, vous
pouvez changer la vue pour ouvrir à proximité ou à distance en
cliquant sur l’icône en haut à droite. Le bouton circulaire ouvre
uniquement à proximité, le curseur ouvre à distance, où que vous
soyez.
6. Fernönung mit Ihrem LINK
Nun können Sie mit Ihrem Link auch aus der Ferne önen. Auf dem
Hauptbildschirm der App können Sie die Anzeigen so umschalten,
dass Sie in der Nähe oder aus der Ferne önen, indem Sie oben
rechts auf das Symbol klicken. Die runde Taste önet nur in der
Nähe, der Schieber önet aus der Ferne, egal wo Sie sind.
18 19
Page 11

7. Share remote access
Once you have connected a SOLO or DORY device to your
LINK, by creating a new share you can decide whether to
enable the user to access also remotely or not.
Or just share the PIN code of your LINK with friends and
family, to allow them unlimited access also remotely.
7. Condividi l’accesso remoto
Una volta che hai collegato un dispositivo SOLO o DORY al tuo
LINK, creando una nuova condivisione puoi decidere se abilitare
l’utente all’accesso anche da remoto o meno.
Oppure condividi semplicemente il codice PIN del tuo LINK con
amici e familiari, per permettere loro un accesso illimitato anche da
remoto.
7. Partagez l’accès à distance
Une fois que vous avez connecté un appareil SOLO ou DORY à
votre LINK, en créant un nouveau partage, vous pouvez décider
d’autoriser ou non l’utilisateur à y accéder même à distance.
Ou partagez simplement le code PIN de votre LINK avec vos amis
et votre famille, pour leur permettre un accès illimité, même à
distance.
7. Fernzugri freischalten
Nachdem Sie ein SOLO- oder DORY-Gerät mit Ihrem LINK
verbunden haben, können Sie entscheiden, ob Sie dem Benutzer
den Fernzugri ermöglichen möchten oder nicht, indem Sie eine
neue Freigabe erstellen.
Oder teilen Sie einfach den PIN-Code Ihres LINKS mit Freunden
und Familie, um ihnen auch aus der Ferne uneingeschränkten
20 21
Zugri zu ermöglichen.
Page 12

8. Enable voice commands
Connect your LINK to Amazon Alexa, Google Home and Siri
Shortcuts and manage everything via voice commands.
In the app, select the “Integrations” menu and follow the
specic guide for the voice control device you prefer.
8. Abilita i comandi vocali
Collega il tuo LINK ad Amazon Alexa, Google Home e Siri Shortcuts
e gestisci tutto tramite comandi vocali.
Nell’app seleziona il menu “Integrazioni” e segui la guida specica
per il dispositivo di controllo vocale che preferisci.
8. Activez les commandes vocales
Connectez votre LINK à Amazon Alexa, Google Home et aux
raccourcis Siri et gérez tout avec les commandes vocales.
Dans l’application, sélectionnez le menu «Intégrations» et suivez
le guide spécique pour l’appareil de commande vocale que vous
préférez.
8. Sprachbefehle aktivieren
Verbinden Sie Ihren LINK mit Amazon Alexa, Google Home und Siri
Kurzbefehle und verwalten Sie alles über Sprachbefehle.
Wählen Sie in der App das Menü “Integrationen” aus und befolgen
Sie die spezische Anleitung für das Sprachsteuerungsgerät, das
Sie bevorzugen.
22 23
Page 13

Commons problems
Problemi comuni
Problèmes communs
Häufige Probleme
24 25
Page 14

LINK does not connect to my Wi-Fi network
Make sure your LINK is within range of your network, verify
that your network operates at 2.4GHz and verify that you
enter the correct name and password to connect.
LINK non si connette alla mia rete Wi-Fi
Assicurati che il tuo LINK si trovi nel raggio di copertura della tua
rete, verica che la tua rete operi a 2.4GHz e verica di inserire
correttamente il nome e la password per collegarsi.
LINK ne se connecte pas à mon réseau Wi-Fi
Assurez-vous que votre LINK est à portée de votre réseau, vériez
que votre réseau fonctionne à 2,4 GHz et vériez que vous entrez
le nom et le mot de passe corrects pour vous connecter.
LINK verbindet sich nicht mit meinem WLANNetzwerk
Stellen Sie sicher, dass sich Ihr LINK innerhalb Ihrer
Netzwerkreichweite bendet, prüfen Sie, dass Ihr Netzwerk bei
2,4GHz arbeitet und prüfen Sie, dass Sie den korrekten Namen und
das korrekte Passwort für die Verbindung eingegeben haben.
26 27
Page 15

LINK does not connect to my SOLO or
DORY device
Make sure your LINK is within 20-30 meters of your SOLO or
DORY device. Try to reduce the distance if it still doesn’t work
or choose the positioning B) indicated on page 10 of this guide.
LINK non si collega al mio dispositivo SOLO o DORY
Assicurati che il tuo LINK si trovi entro 20-30 metri di distanza dal tuo
dispositivo SOLO o DORY. Prova a ridurre la distanza se ancora non
funziona o scegli il posizionamento B) indicato a pagina 10 di questa guida.
Attenzione: LINK è compatibile esclusivamente con i dispositivi SOLO o
DORY di 2a Generazione.
LINK ne se connecte pas à mon appareil SOLO ou
DORY
Assurez-vous que votre LINK est à moins de 20-30 mètres de votre
appareil SOLO ou DORY. Essayez de réduire la distance si cela ne
fonctionne toujours pas ou choisissez le positionnement B) indiquée à la
page 10 de ce guide.
Attention: LINK n’est compatible qu’avec les appareils SOLO ou DORY de
2e génération.
LINK verbindet sich nicht mit meinem SOLO- oder
DORY-Gerät
Stellen Sie sicher, dass sich Ihr LINK innerhalb 20-30 Metern von Ihrem
SOLO- oder DORY-Gerät bendet. Versuchen Sie, den Abstand zu
Attention
LINK is only compatible with 2nd Gen SOLO or DORY devices
28 29
reduzieren, wenn es immer noch nicht funktioniert, oder wählen Sie die
Positionierung B), angegeben auf Seite 8 dieser Anleitung.
Achtung: LINK ist nur mit SOLO- oder DORY-Geräten der 2. Generation
kompatibel.
Page 16

Haven’t found your language?
Check the other languages on our
website, scan the QR code below
Page 17

Follow us
1Control srl
Via Stassano, 29 - 25125 Brescia (IT)
info@1control - www.1control.it
 Loading...