

Page 1

Assembly Instructions
Caution: You must read this before you proceed
Please look in the leg frame for hardware packs.
Bench
Caution: This Bench is NOT a TOY
Keep your child/children at bay during the assembly process.
Whenever moving/lifting the Bench and to prevent damage to the Bench, two adults are needed
to execute these actions.
Page 1 of 1
Page 2

Upper Leg Support
①
②
Parts List
Label Pi
A Bench Seat Panel 1
B Iron Leg Frame 2
C
cture Description QTY
Bar
2
er Leg Support
D
Low
Bar
Hardware
Label Picture Description QTY
t
Bol
(M6x20mm)
Washer 23
③
Screw
(M6x45mm)
2
17
7
④ Allen Key 1
Pag
e 2 of 8
Page 3

Ass
Bef
embly Preparation
ore Beginning Assembly:
Pag
e 3 of 8
Page 4
Ass
embly Steps
Overview
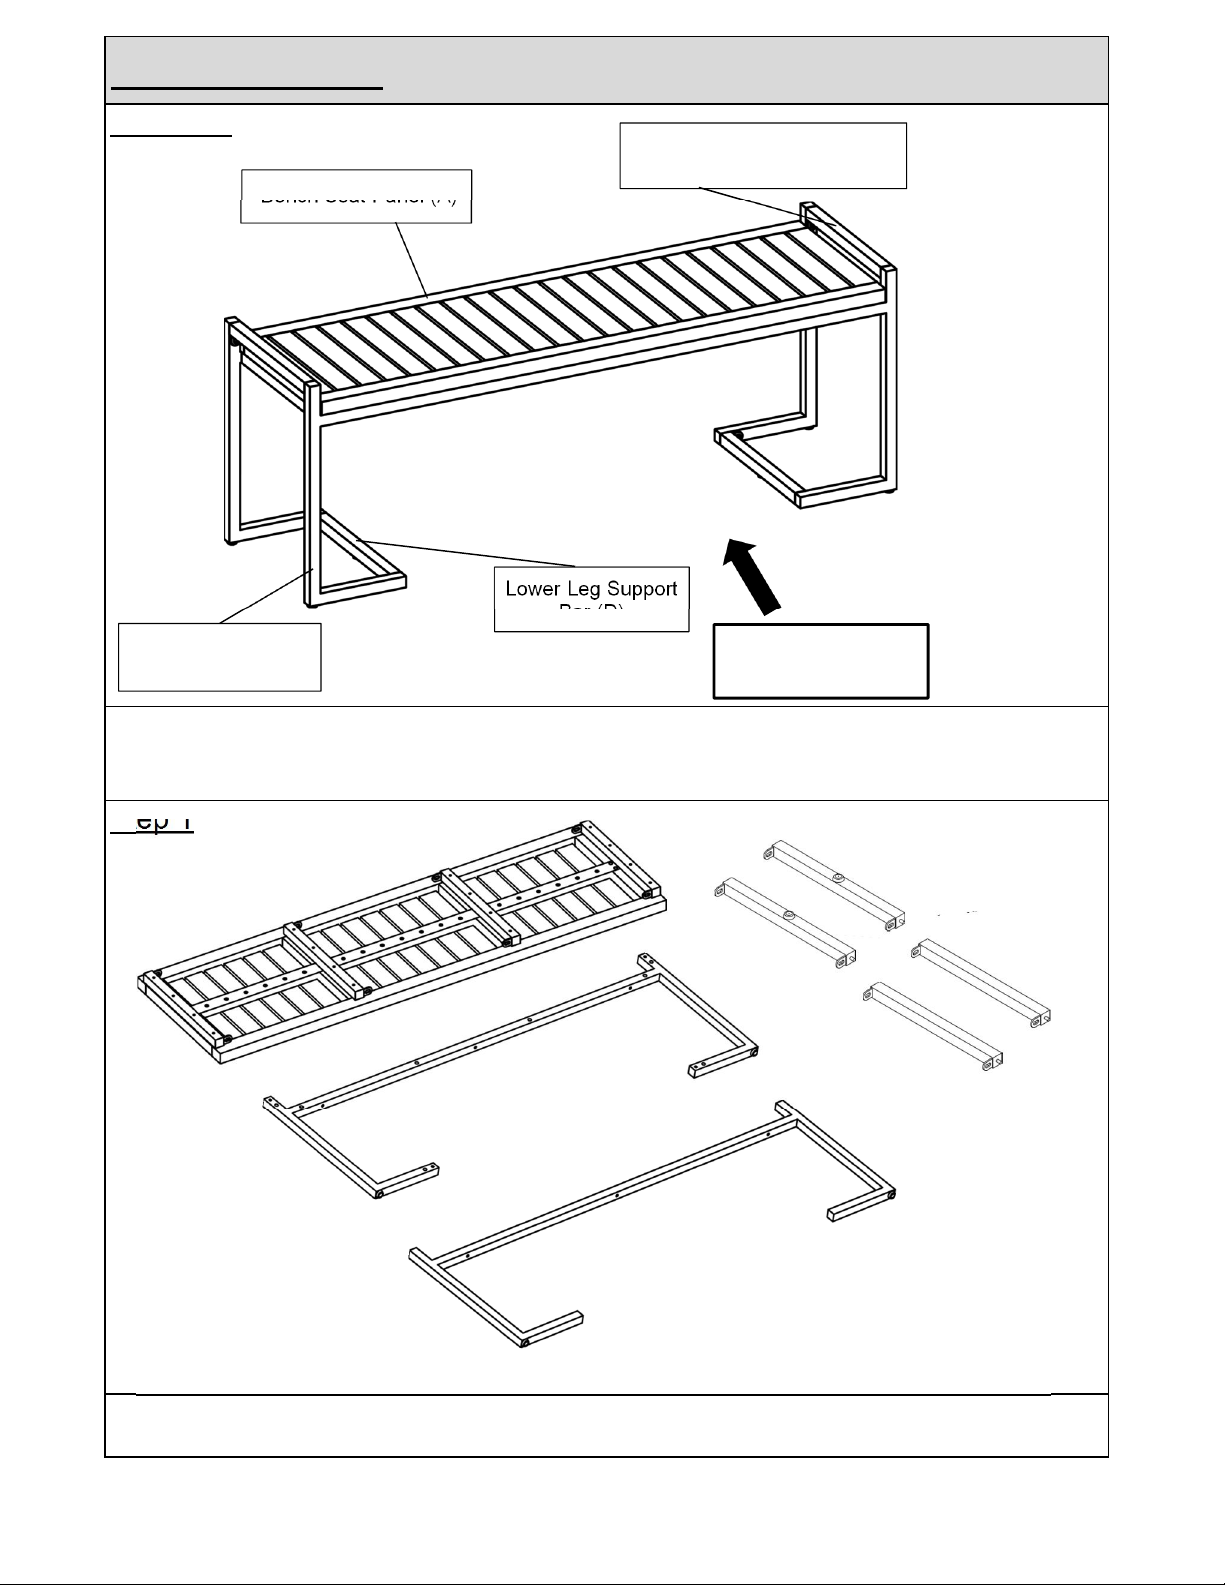
Upper Leg Support Bar (C)
Bench Seat Panel (A)
Lower Leg Support
Bar (D)
Iron Leg Frame(B)
This Bench has multiple parts and may require up to 30 minutes to assemble. To give you an overview of the
Bench parts, the above picture is to help you put the various parts into perspective. Please read through the
instructions below to familiarise yourself with the parts and steps before assembly.
NT FACING
FRO
Step 1
Unpack and place all parts on a clean, non-marring surface.
Pag
e 4 of 8
Page 5
Step 2
B
C
D
4
1
B
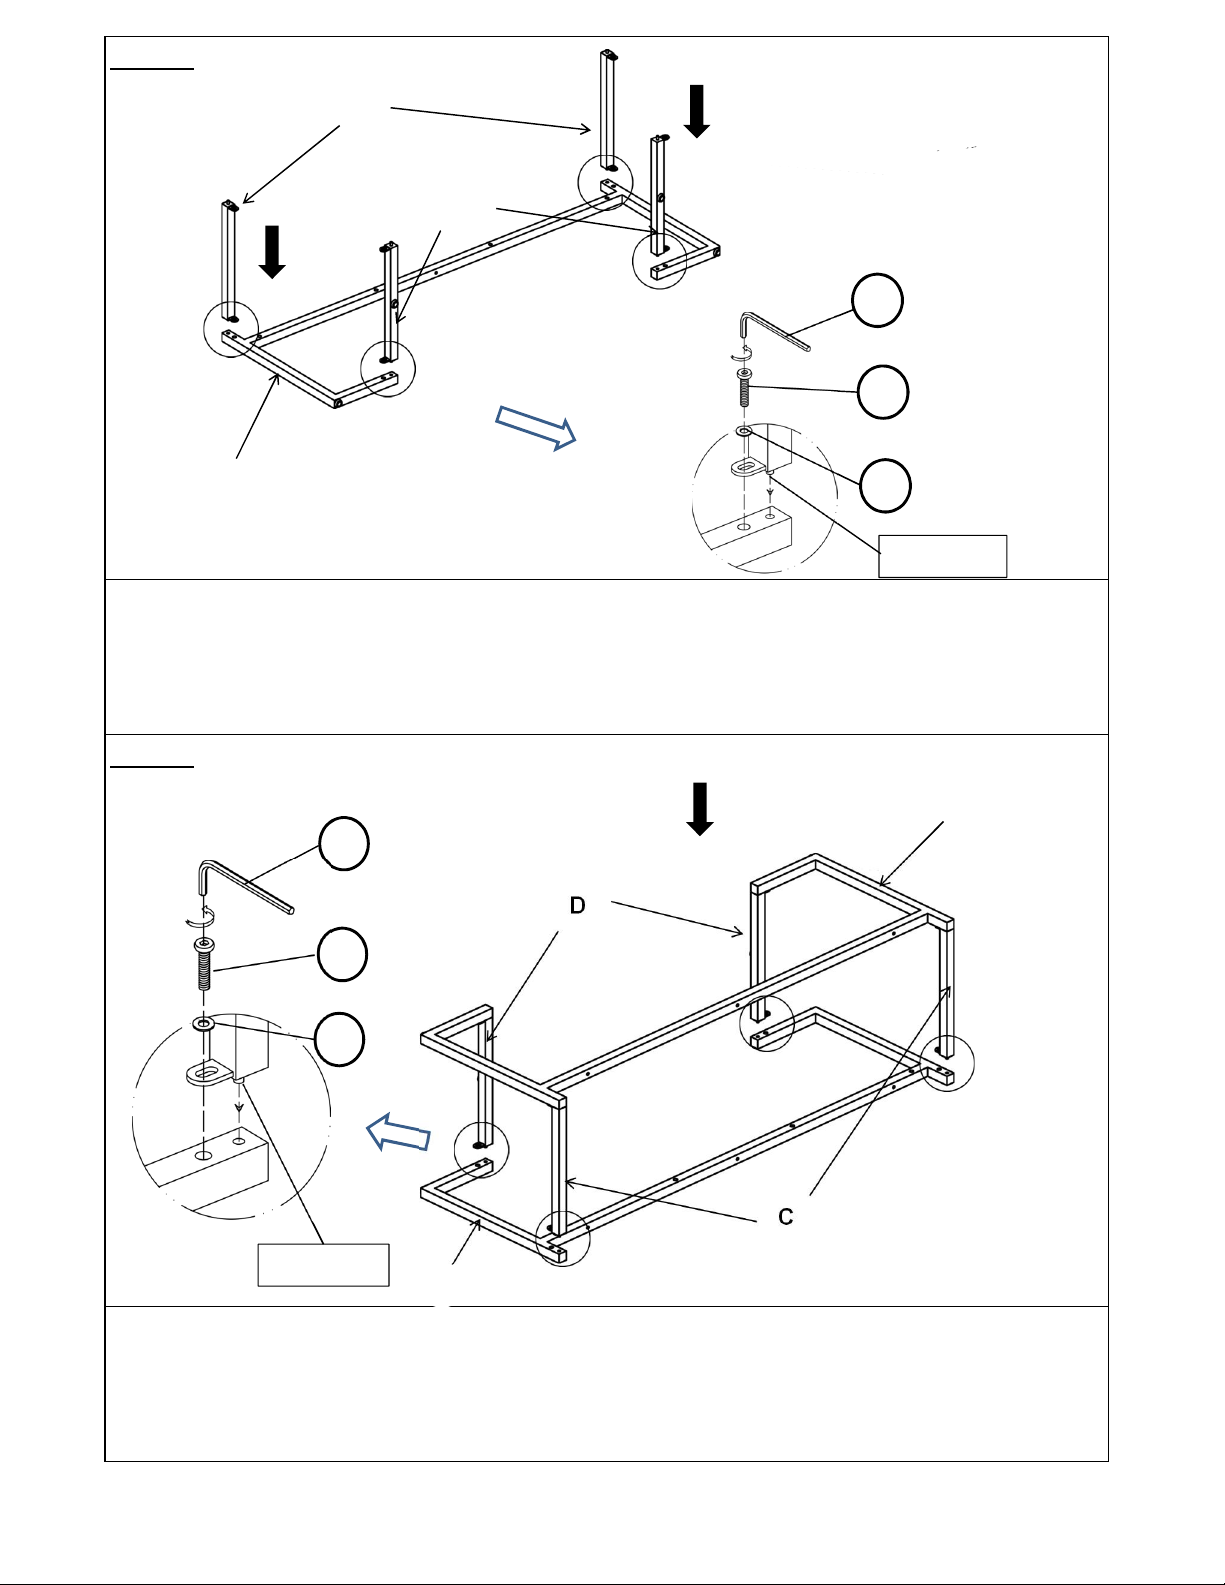
Position the Iron Leg Frame(B) facedown on a clean, non-marring surface.
Insert the Upper Leg Support Bars(C) and Lower Leg Support Bars(D) with pre-fixed iron dowels into the
housings on Iron Leg Frame(B) as shown above.
Attach Upper Leg Support Bars(C) and Lower Leg Support Bars(D) to Iron Leg Frame(B) using Bolts(①), and
Washers(②) with Allen Key(④).
Do not fully tighten the Bolts.
2
Iron Dowel
Step 3
B
4
D
1
2
C
Iron Dowel
Place the second Iron Leg Frame(B) facedown on a clean, non-marring surface.
Insert the Upper Leg Support Bars(C) and Lower Leg Support Bars(D) with pre-fixed iron dowel into the
housings on Iron Leg Frame(B) as pictured.
Attach Upper Leg Support Bars(C) and Lower Leg Support Bars(D) to Iron Leg Frame(B) using Bolts(①), and
Washers(②) with Allen Key(④).
Do not fully tighten the Bolts.
Pag
e 5 of 8
Page 6

Step 4
2
1
4
B
A
Position the Bench Seat Panel(A) facedown on a clean, non-marring surface.
Align the Iron Leg Frames(B) to Bench Seat Panel(A) as pictured.
Attach Bench Seat Panel(A) to Iron Leg Frames(B) using Bolts(①), and Washers(②) with Allen Key(④).
Do not fully tighten the Bolts.
Step 5
4
3
2
Attach the Iron Leg Frames(B) to the Bench Seat Panel(A) using Screws(③) and Washers(②) with Allen
Key(④).
Do not fully tighten the Screws.
Pag
e 6 of 8
Page 7
Step 6
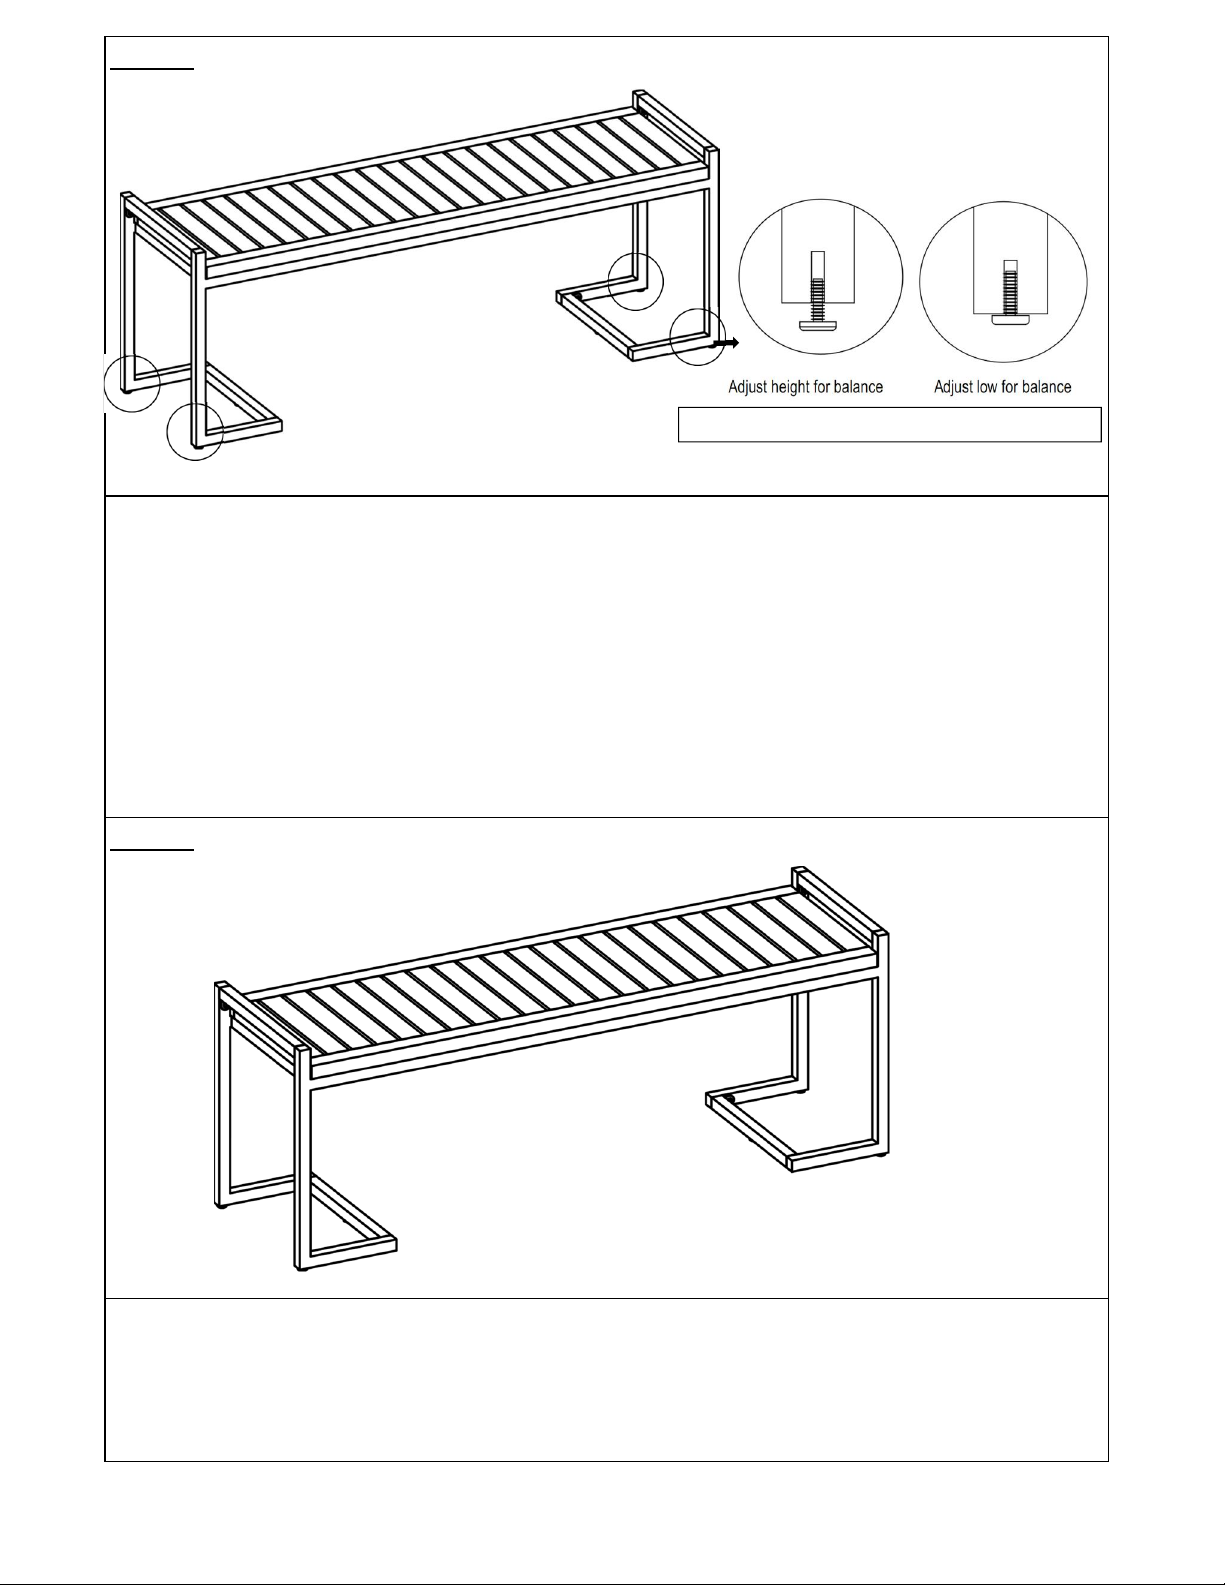
Adjust Pre-installed Levellers height for balance
Stand the Bench up.
Place the Bench on a LEVEL surface.
Inspect it and make sure all parts are adequately connected.
Gently and gracefully, sit onto the Bench.
This pressure will help the Legs and Bench reach full alignment status.
Check for wobbles on a LEVEL surface.
If no wobbles are found proceed to tighten the Bolts and Screws in a sequential manner, until evenly secured.
When tightening the Bolts and Screws tighten sequentially.
Do not tighten any Bolt or Screw fully and then move on towards the next one.
With assistance from your adult partners, adjust the Levellers to desired height to avoid wobbles.
Step 7
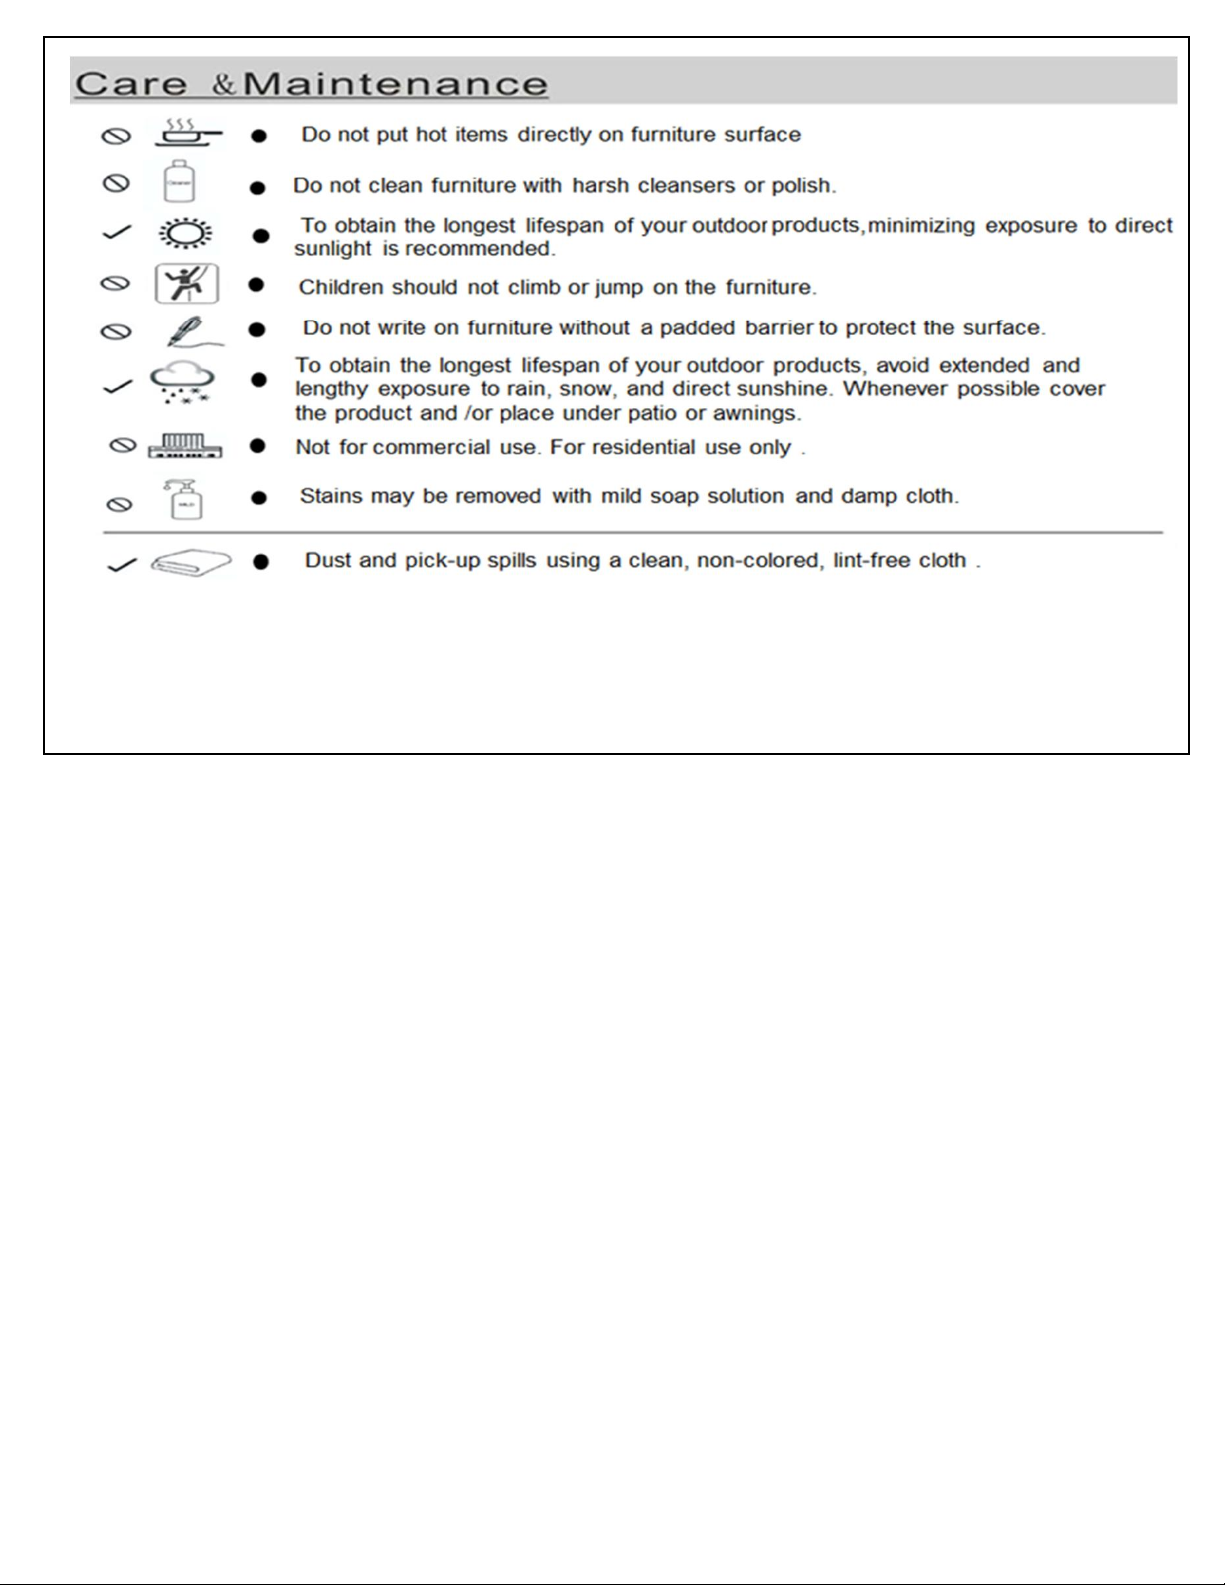
Your Bench is ready for use.
This Bench can only be used on a flat, level surface.
Pag
e 7 of 8
Page 8
Page 8 of 8
 Loading...