


G-3000H
802.11g Wireless Access Point
Quick Start Guide
Version 3.50
11/2005
G-3000H Quick Start Guide
Overview
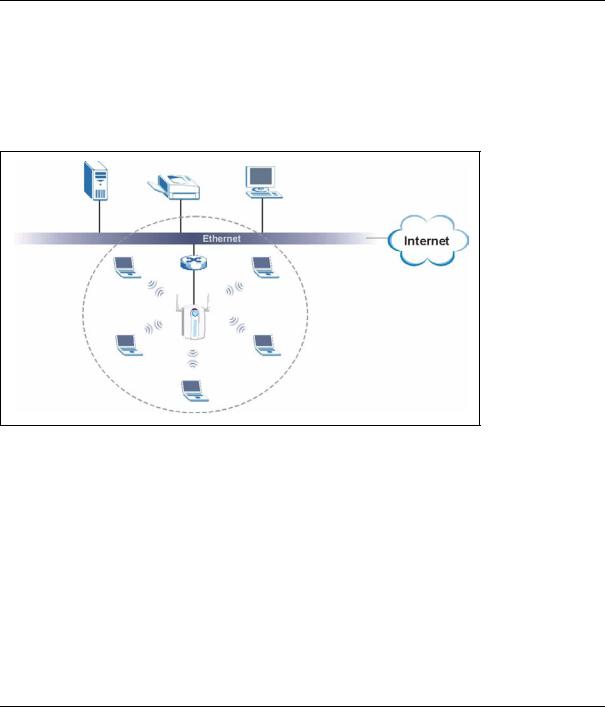
The ZyAIR G-3000H offers highly secured wireless connectivity to your wired network with IEEE 802.1x, Wi-Fi Protected Access, WEP data encryption and MAC address filtering. This Quick Start Guide shows how to set up and configure the ZyAIR to allow wireless clients to access your wired network. See your User’s Guide for more information.
The following lists what you need to do:
1. |
Hardware Connections |
4. |
Hardware Installation |
2. |
Accessing the Web Configurator |
5. |
Power over Ethernet (optional) |
3. |
Internet Access Setup |
6. |
Troubleshooting |
1 Hardware Connections
Note: You may need your Internet access information.
2

G-3000H Quick Start Guide
Do the following to make hardware connections for initial setup.
1 Using an Ethernet cable, connect the ETHERNET port to a computer for initial configuration.
2Connect the POWER 12VDC socket to a power source using only the included power adaptor for your region.
Note: Connect the ZyAIR ETHERNET port to an Ethernet jack with Internet access after you have completed the initial configuration.
1.1 The LEDs
The PWR and the ZyAIR LEDs turn on when the power is connected. The ETHN LED turns on, if the ETHERNET port is properly connected.
See the ZyAIR Front Panel LED Description table in the User’s Guide for more information.
2 Accessing the Web configurator
Use Internet Explorer 6.0 and later or Netscape Navigator 7.0 and later versions with JavaScript enabled.
3
G-3000H Quick Start Guide
2.1 Set Up Your Computer’s IP Address
This section shows you how to assign your computer a static IP address in the 192.168.1.2 to 192.168.1.254 range with a subnet mask of 255.255.255.0. This ensures that your computer can communicate with your ZyAIR. The following instructions are for the Windows 2000, Windows NT and Windows XP operating systems.
1In Windows XP, click Start, Control Panel.
In Windows 2000/NT, click Start, Settings, Control Panel.
2In Windows XP, click Network Connections.
In Windows 2000/NT, click Network and Dial-up Connections.
3 Right-click Local Area Connection and then click
Properties.
4 Select Internet Protocol (TCP/IP) (under the General tab in Windows XP) and click Properties.
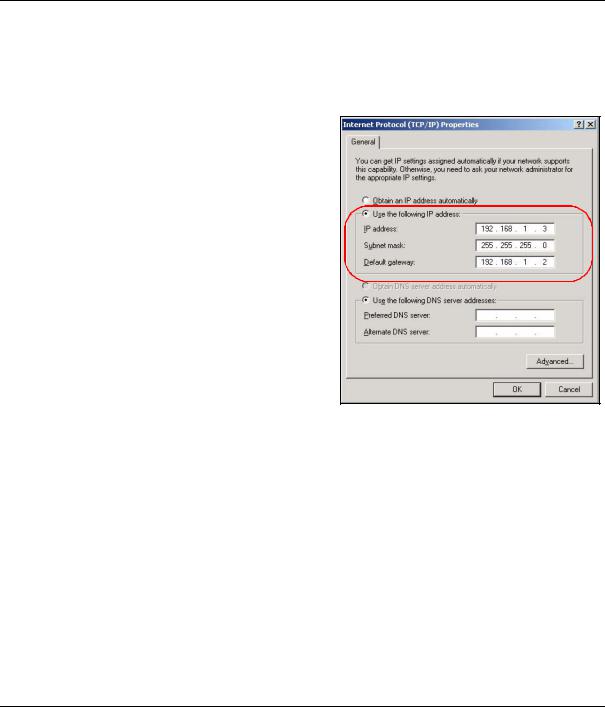
5The Internet Protocol TCP/IP Properties screen opens (the General tab in Windows XP).
6Select Use the following IP address and fill in the IP address (choose one from192.168.1.3 to 192.168.1.254), Subnet mask (255.255.255.0), and Default gateway (192.168.1.2) fields.
7Click OK to close the Internet Protocol (TCP/IP) Properties window.
8Click Close (OK in Windows 2000/NT) to close the
Local Area Connection Properties window.
Close the Network Connections screen.
4
 Loading...