Zenoah G380PU, G380PU-1 User Manual

2609-93112 (811)
OWNER’S MANUAL
MODEL: G380PU
G380PU-1
WARNING |
|
|
|
|
|
• Do not modify any parts of the engine. |
|
● |
• This engine is designed to be used to Radio |
|
|
controlled products. |
|
● |
• In case any modification by customer, |
|
|
ZENOAH shall not bear any responsibility from |
|
|
the damage caused by such modification. |
|
● |
• Keep ignition system well maintained. |
|
|
|
|
|
November 2008

1.Safety Precautions
•This engine is designed for the model aircraft use.
ZENOAH assumes no responsibility for those engines that are modified or used for any other applications.
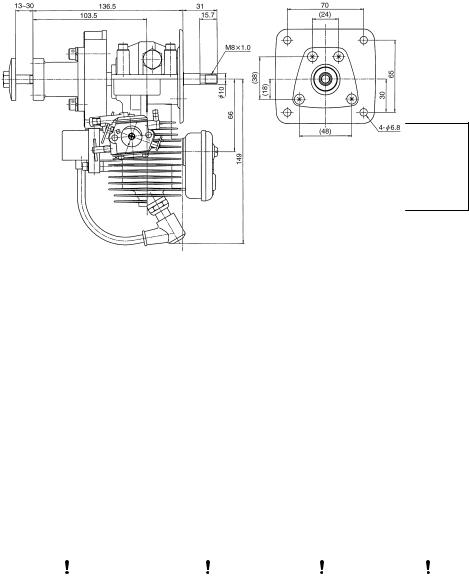
•This Manual describes the engine part only. For its mounting to the aircraft and its control, see instructions described in the manual of the aircraft.
•Check the propeller every time before starting the engine, and replace it with a new one if it is damaged.
•When the propeller hits something in operation, immediately stop the engine and check it.
•Check the flywheel, and replace it with a new one if it is damaged.
•Never modify the flywheel.
•Use the ZENOAH genuine parts for replacement.
•When the vibration is abnormal, stop the engine and check the entire unit for possible damage or loose fasteners.
•Mixing the gas and 2-cycle engine oil and filling it up are to be done in a wellventilated place.
•Never run the engine in a place of poor ventilation, as exhaust fumes contain harmful carbon monoxide.
2.Fuel
Mix unleaded gasoline and 2-stroke oil in the ratio of 25 ~ 40:1.
[ NOTE ]
1.Be sure to use a gasoline-resistant fuel piping. (Do not use any silicon rubber tube).
2.Never use any alcohol fuel or alcohol-added fuel, or the rubber part in the carburetor will be damaged.
3. Operation
Starting Engine
1.Fill the fuel and fix to the aircraft body firmly.
2.Close the choke and set the throttle to one third open.
[ NOTE ]
If the choke is closed too much, it may dampen the spark  plug and it may cause starting failure.
3.Turn the propeller slowly counterclockwise until it is resisted, and then powerfully. When turning it manually,use all the fingers except the thumb.Turn it at proper intervals.
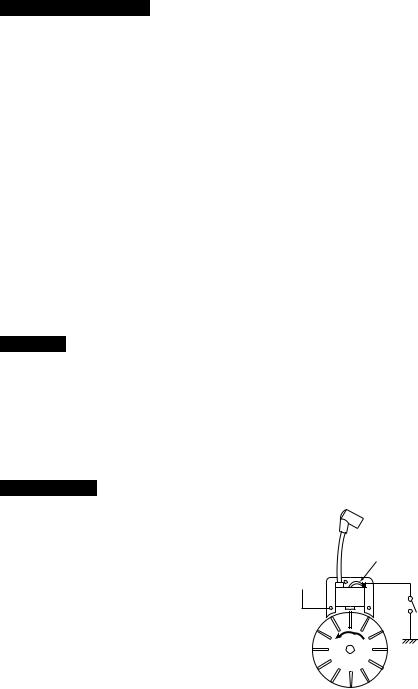
BLACK LEAD
KILL
SWITCH
ENGINE
BODY
EARTH
2

4.When engine first fires, open the choke and turn the propeller again in the same manner.
5.When the engine is started,warm it up for 2 to 3 minutes at low speed.
Stopping Engine
Ground the black wire from the source coil to the engine, and the engine will stop.
4. Carburetor Adjustment
The carburetor comes with a standard setting.
This setting is for optimum performance under the barometric pressure and climactic conditions at the factory.
Therefore, the carburetor should be readjusted wIth a load applied (with the propeller mounted) after the engine having been warmed up.
[ NOTE ]
1. Adjustment standards :
LOW SPEED NEEDLE : 1 ± 1/4 turns open
HIGH SPEED NEEDLE : 11/2 ± 1/4 turns open
2.IDLE SCREW - Turn clockwise to increase the idling rpm.
3.LOW SPEED NEEDLE - This needle controls fuel flow in the low rpm range.Turning clockwise makes the fuel lean. Turning counterclockwise makes the fuel rich.
4.HIGH SPEED NEEDLE - This needle controls fuel flow in the high rpm range. Turning clockwise makes the fuel lean and the reverse makes it rich. Set the needle 1/4 turns open from a position where the peak rpm is obtained on the ground.
5.Do not overtighten the needles.
6.Warm up the engine before adjusting the carburetor.
7.Make sure to stop the engine while adjusting the carburetor.
3
 Loading...