


Ceramic hob
ZKT 863 LX
Installation and Operating Instructions |
g |
Dear Customer,
Please read these user instructions carefully and keep them to refer to later.
Please pass the user instructions on to any future owner of the appliance.
The following symbols are used in the text:
1
3
Safety instructions
Warning! Notes that concern your personal safety.
Important! Notes that show how to avoid damage to the appliance.
Useful tips and hints
2 Environmental information
2
Contents |
|
Operating Instructions . . . . . . . . . . . . . . . . . . . . . . . . . . . . . . . . . . . . . . . . . . . . . . . . . . . . . . . . . . . . . |
4 |
Safety . . . . . . . . . . . . . . . . . . . . . . . . . . . . . . . . . . . . . . . . . . . . . . . . . . . . . . . . . . . . . . . . . . . . . . . . . . . . . . . |
4 |
Disposal . . . . . . . . . . . . . . . . . . . . . . . . . . . . . . . . . . . . . . . . . . . . . . . . . . . . . . . . . . . . . . . . . . . . . . . . . . . . . |
5 |
Description of the Appliance . . . . . . . . . . . . . . . . . . . . . . . . . . . . . . . . . . . . . . . . . . . . . . . . . . . . . . . . . . . . |
6 |
Cooking zones and control panel . . . . . . . . . . . . . . . . . . . . . . . . . . . . . . . . . . . . . . . . . . . . . . . . . . . . . . . . . . |
6 |
Digital displays . . . . . . . . . . . . . . . . . . . . . . . . . . . . . . . . . . . . . . . . . . . . . . . . . . . . . . . . . . . . . . . . . . . . . . . . |
7 |
Safety cut-out function for the cooking zones . . . . . . . . . . . . . . . . . . . . . . . . . . . . . . . . . . . . . . . . . . . . . . . . |
7 |
Before using for the first time . . . . . . . . . . . . . . . . . . . . . . . . . . . . . . . . . . . . . . . . . . . . . . . . . . . . . . . . . . . |
8 |
Initial Cleaning. . . . . . . . . . . . . . . . . . . . . . . . . . . . . . . . . . . . . . . . . . . . . . . . . . . . . . . . . . . . . . . . . . . . . . . . . |
8 |
Operating the hob . . . . . . . . . . . . . . . . . . . . . . . . . . . . . . . . . . . . . . . . . . . . . . . . . . . . . . . . . . . . . . . . . . . . . |
8 |
Touch control sensor panels . . . . . . . . . . . . . . . . . . . . . . . . . . . . . . . . . . . . . . . . . . . . . . . . . . . . . . . . . . . . . . |
8 |
Switching on the appliance. . . . . . . . . . . . . . . . . . . . . . . . . . . . . . . . . . . . . . . . . . . . . . . . . . . . . . . . . . . . . . . |
8 |
Switching off the appliance. . . . . . . . . . . . . . . . . . . . . . . . . . . . . . . . . . . . . . . . . . . . . . . . . . . . . . . . . . . . . . . |
8 |
Heat settings selecting . . . . . . . . . . . . . . . . . . . . . . . . . . . . . . . . . . . . . . . . . . . . . . . . . . . . . . . . . . . . . . . . . . |
9 |
Keep warm setting . . . . . . . . . . . . . . . . . . . . . . . . . . . . . . . . . . . . . . . . . . . . . . . . . . . . . . . . . . . . . . . . . . . . . |
9 |
Switching the double ring cooking zone off and on . . . . . . . . . . . . . . . . . . . . . . . . . . . . . . . . . . . . . . . . . . . . |
9 |
Switching the casserole zone on and off . . . . . . . . . . . . . . . . . . . . . . . . . . . . . . . . . . . . . . . . . . . . . . . . . . . . |
10 |
Switching off a cooking zone . . . . . . . . . . . . . . . . . . . . . . . . . . . . . . . . . . . . . . . . . . . . . . . . . . . . . . . . . . . . . |
10 |
Residual Heat Indicator. . . . . . . . . . . . . . . . . . . . . . . . . . . . . . . . . . . . . . . . . . . . . . . . . . . . . . . . . . . . . . . . . . |
10 |
Cooking using the automatic warm up function. . . . . . . . . . . . . . . . . . . . . . . . . . . . . . . . . . . . . . . . . . . . . . . |
12 |
Cooking without the automatic warm up function . . . . . . . . . . . . . . . . . . . . . . . . . . . . . . . . . . . . . . . . . . . . . |
12 |
Child safety lock . . . . . . . . . . . . . . . . . . . . . . . . . . . . . . . . . . . . . . . . . . . . . . . . . . . . . . . . . . . . . . . . . . . . . . . |
13 |
Timer . . . . . . . . . . . . . . . . . . . . . . . . . . . . . . . . . . . . . . . . . . . . . . . . . . . . . . . . . . . . . . . . . . . . . . . . . . . . . . . . |
14 |
Blocking/unblocking the control panel . . . . . . . . . . . . . . . . . . . . . . . . . . . . . . . . . . . . . . . . . . . . . . . . . . . . . . |
17 |
Uses, tables and tips . . . . . . . . . . . . . . . . . . . . . . . . . . . . . . . . . . . . . . . . . . . . . . . . . . . . . . . . . . . . . . . . . . |
18 |
Pans . . . . . . . . . . . . . . . . . . . . . . . . . . . . . . . . . . . . . . . . . . . . . . . . . . . . . . . . . . . . . . . . . . . . . . . . . . . . . . . . |
18 |
Advice on cooking with and without automatic warm up. . . . . . . . . . . . . . . . . . . . . . . . . . . . . . . . . . . . . . . . |
19 |
Settings for Cooking on the Zones . . . . . . . . . . . . . . . . . . . . . . . . . . . . . . . . . . . . . . . . . . . . . . . . . . . . . . . . . |
20 |
Cleaning and care . . . . . . . . . . . . . . . . . . . . . . . . . . . . . . . . . . . . . . . . . . . . . . . . . . . . . . . . . . . . . . . . . . . . . |
21 |
Hob . . . . . . . . . . . . . . . . . . . . . . . . . . . . . . . . . . . . . . . . . . . . . . . . . . . . . . . . . . . . . . . . . . . . . . . . . . . . . . . . . |
21 |
Hob Frame . . . . . . . . . . . . . . . . . . . . . . . . . . . . . . . . . . . . . . . . . . . . . . . . . . . . . . . . . . . . . . . . . . . . . . . . . . . |
22 |
What to do if … . . . . . . . . . . . . . . . . . . . . . . . . . . . . . . . . . . . . . . . . . . . . . . . . . . . . . . . . . . . . . . . . . . . . . . . |
23 |
Rectifying faults . . . . . . . . . . . . . . . . . . . . . . . . . . . . . . . . . . . . . . . . . . . . . . . . . . . . . . . . . . . . . . . . . . . . . |
23 |
Installation Instructions . . . . . . . . . . . . . . . . . . . . . . . . . . . . . . . . . . . . . . . . . . . . . . . . . . . . . . . . . . . . |
24 |
Technical Data. . . . . . . . . . . . . . . . . . . . . . . . . . . . . . . . . . . . . . . . . . . . . . . . . . . . . . . . . . . . . . . . . . . . . . . . . |
24 |
Regulations, Standards, Directives. . . . . . . . . . . . . . . . . . . . . . . . . . . . . . . . . . . . . . . . . . . . . . . . . . . . . . . . . |
24 |
Safety Instructions for the Installer . . . . . . . . . . . . . . . . . . . . . . . . . . . . . . . . . . . . . . . . . . . . . . . . . . . . . . . . . |
24 |
Electrical Connection . . . . . . . . . . . . . . . . . . . . . . . . . . . . . . . . . . . . . . . . . . . . . . . . . . . . . . . . . . . . . . . . . . . |
25 |
Electrical Connection Diagram . . . . . . . . . . . . . . . . . . . . . . . . . . . . . . . . . . . . . . . . . . . . . . . . . . . . . . . . . . . . |
26 |
Assembly . . . . . . . . . . . . . . . . . . . . . . . . . . . . . . . . . . . . . . . . . . . . . . . . . . . . . . . . . . . . . . . . . . . . . . . . . . . . |
27 |
Rating Plate. . . . . . . . . . . . . . . . . . . . . . . . . . . . . . . . . . . . . . . . . . . . . . . . . . . . . . . . . . . . . . . . . . . . . . . . . . . |
29 |
Warranty conditions. . . . . . . . . . . . . . . . . . . . . . . . . . . . . . . . . . . . . . . . . . . . . . . . . . . . . . . . . . . . . . . . |
30 |
Service and Spare Parts. . . . . . . . . . . . . . . . . . . . . . . . . . . . . . . . . . . . . . . . . . . . . . . . . . . . . . . . . . . . |
31 |
3
Operating Instructions
1 Safety
The safety aspects of this appliance comply with accepted technical standards and the German Appliance Safety Law. However, as manufacturers we also believe it is our responsibility to familiarise you with the following safety instructions.
Safety When Cleaning
•For safety reasons do not clean the appliance with a steam jet or high pressure cleaner.
•Clean the hob in accordance with the maintenance and cleaning instructions in this manual.
Electrical Safety
•The installation and connection of the new appliance must only be carried out by qualified personnel.
•Repairs to the appliance are only to be carried out by approved service engineers. Repairs carried out by inexperienced persons may cause injury or serious malfunctioning. If your appliance needs repairing, please contact your local Service Force Centre.
3Please follow these instructions, otherwise the warranty will not cover any damage that may occur.
•Flush-mounted appliances may only be operated following installation in suitable installation cabinets and workplaces which conform to the relevant standards. This ensures sufficient protection against contact for electrical units as required by the VDE [Association of German Electrical Engineers].
•If your appliance malfunctions or if fractures, cracks or splits appear:
–switch off all cooking zones,
–disconnect the hob from the electricity supply.
Child Safety
The cooking zones will become hot when you cook. Therefore, always keep small children away from the appliance.
To Avoid damaging your appliance
•Do not use the hob as a work surface or for storage.
•Do not operate the cooking zones when there is no pan or the pans are empty.
•Ceramic glass is insensitve to temperature shock and very robust; however it is not unbreakable. Especially sharp and hard objects that fall on the cooking surface can damage it.
•Do not use cast iron pans or pans with a rough, burred or damaged base. Scratching may occur if the pans are slid across the surface.
•Do not place any pans on the hob frame. Scratching and damage to the paint may occur.
•Make sure that no acidic liquids, e.g. vinegar, lemon or descaling agents, are spilt onto the hob frame, since these cause dull spots.
•If sugar or a preparation with sugar comes into contact with the hot cooking zone and melts there it must be cleaned off immediately with a scraper while it is still hot. If it cools, the surface may be damaged when it is removed.
•Keep all items and materials that can melt away from the ceramic glass surface, e.g. plastics, aluminium foil, or oven foils. If something of this nature should melt onto the ceramic glass surface, it must also be removed immediately using the scraper.
Safety During Use
•This appliance may only be used for normal cooking and frying in the home. It is not designed for commercial or industrial purposes.
•Do not use the hob to heat the room.
•Take care when plugging electric appliances into mains sockets near the hob. Connection leads must not come into contact with the hot surface.
•Overheated fats and oils catch fire quickly. You should supervise cooking when preparing foods in fat or oil (e.g. chips).
•Switch off the cooking zones after use.
4
2 Disposal
Disposing of the packaging material
All materials used can be fully recycled.
Plastics are marked as follows:
•>PE< for polyethylene, as used for the outer wrapping and the bags inside.
•>PS< for polystyrene foam, e.g., as used for the padding materials. They are completely free of CFCs.
Disposal of old appliances
1Warning: Before disposing of old appliances please make them inoperable so that they cannot be the source of danger.
To do this, disconnect the appliance from the mains supply and remove the mains lead.
To protect the environment, it is important that worn out appliances are disposed of in the correct manner.
•The appliance must not be disposed of with household rubbish.
•You can obtain information about collection dates or public refuse disposal sites from your local Council or Environmental Health Office.
5

Description of the Appliance
Cooking zones and control panel
Single ring cooking zone |
|
|
|
Casserole zone |
|||||
|
1200W |
|
|
|
2400W |
||||
|
|
|
|
|
|
|
|
|
|
|
|
|
|
|
|
|
|
|
|
|
|
|
|
|
|
|
|
|
|
|
|
|
|
|
|
|
|
|
|
|
|
|
|
|
|
|
|
|
|
|
|
|
|
|
|
|
|
|
|
|
|
|
|
|
|
|
|
|
|
|
|
|
|
|
|
|
|
|
|
|
|
|
|
|
|
|
|
|
|
|
|
|
|
|
|
|
|
|
|
|
|
|
|
|
|
|
|
|
|
|
|
|
|
|
|
|
|
|
|
|
Double ring cooking zone |
Control panel |
|
Single ring cooking zone |
||||||||||||||
|
|
|
|
|
2200W |
|
|
|
1200W |
|||||||||
|
Double-ring sensor field |
|
|
|
|
Casserole zone sensor field |
||||||||||||
|
„Lock“ |
|
|
Dual-ring control lamp |
Casserole zone control lamp |
|
|
|||||||||||
|
|
|
|
|||||||||||||||
|
sensor field |
|
|
|
||||||||||||||
|
|
|
|
|
|
|
|
|
|
|
|
|
|
|
|
|
||
|
|
|
|
|
|
|
|
|
|
|
|
|
|
|
|
|
|
|
|
|
|
|
|
|
|
|
|
|
|
|
|
|
|
|
|
|
|
|
|
|
|
|
|
|
|
|
|
|
|
|
|
|
|
|
|
|
|
|
|
|
|
|
|
|
|
|
|
|
|
|
|
|
|
|
|
|
|
|
|
|
|
|
|
|
|
|
|
|
|
|
|
|
|
|
|
|
|
|
|
|
|
|
|
|
|
|
|
|
|
|
|
|
|
|
|
|
|
|
|
|
|
|
|
|
|
|
|
|
|
|
|
|
|
|
|
|
|
|
|
|
|
|
|
|
|
|
|
|
|
|
|
|
|
|
|
|
|
|
|
|
|
|
|
|
|
|
|
|
|
|
|
|
|
|
|
|
|
|
|
|
|
|
|
|
|
|
|
|
|
|
|
|
|
|
|
|
|
|
|
|
|
|
|
|
|
|
|
|
Sensor panel |
Cooking setting |
“Timer” with |
Cooking setting selector |
”On/Off” |
selector |
control indicators |
|
Indicator for cooking setting/ residual warmth
6
Digital displays
The four display fields, which are assigned to the four cooking zones, display:
–¾ after being switched on,
–u when the keep warm setting has been selected,
–¿ to Ç, depending on the heat setting selected,
–a when using automatic cooking,
–h for residual heat,
–l when the child lock is activated,
–e with a fault
1 Safety cut-out function for the cooking zones
If one of the cooking zones is not switched off after a certain period of time or the cooking setting is not altered, that particular cooking zone will automatically switch itself off.
Any residual warmth will be indicated with h (as for “hot”) in the digital displays corresponding to the particular cooking zones.
The cooking zones switch themselves off when:
• Heat setting |
u, 1 - 2 after 6 hours |
|
• Heat setting |
3 - 4 |
after 5 hours |
• Heat setting |
5 |
after 4 hours |
• Heat setting |
6 - 9 |
after 1.5 hours |
3Should one or more cooking zones switch themselves off before the periods of time indicated have elapsed, see the chapter “What to do if …”.
Other causes for a cooking zone switching itself off
All cooking zones will immediately switch themselves off if liquid boils over and lands on the control panel.
The same thing will happen if you place a damp cloth on the control panel. In both instances, after the liquid or cloth has been removed, the appliance will need to be switched on again using the main switch
 .
.
7

Before using for the first time
Initial Cleaning
Wipe the ceramic glass surface with a damp cloth.
1Important: Do not use any caustic, abrasive cleaners! The surface could be damaged.
Operating the hob
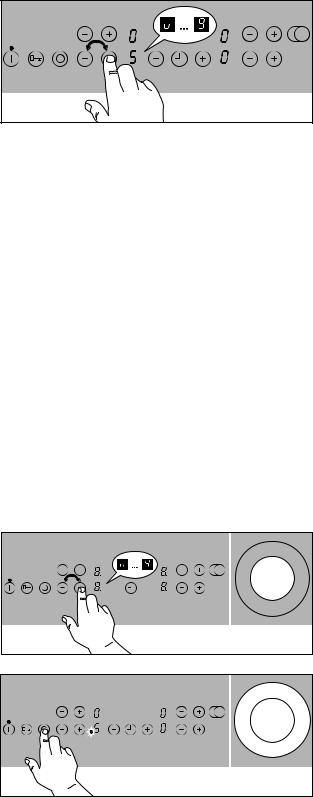
Touch control sensor panels
To operate the touch control sensor panels, touch the desired panel with the tip of your pointed finger until the relevant displays illuminate or go out, or until the desired function is carried out.
3Ensure that you are only touching one sensor panel when operating the appliance. If you finger is too flat on the panel, the sensor panel below may be actuated as well.
Switching on the appliance
The entire appliance is switched on using the ”On/ Off” sensor panel  .
.
Touch the “On/Off” sensor panel for approx. two seconds.
The digital displays will show ¾.
3After the “On/Off” sensor panel has been actuated to switch on your appliance, a cooking setting must be selected for a cooking zone within approx. 10 seconds, or a time must be set using the timer (egg timer function). If not, the appliance will switch itself off again for reasons related to safety.
Switching off the appliance
To completely switch off the appliance, actuate the “On/Off” sensor panel  .
.
Touch the “On/Off” sensor panel for approx. one second.
3After switching off a single cooking zone or the entire cooking surface, the existing residual warmth will be displayed in the digital displays of the corresponding cooking zones in the form of h (for “hot”).
8
Heat settings selecting
For setting and changing the heat setting (u to Ç) for the selected cooking zone.
Raise the heat setting using the heat setting selector sensor panel  .
.
Lower the heat setting using the heat setting selector sensor panel  .
.
Keep warm setting
Each of the 4 cooking zones has a keep warm setting u.
Use the heat setting selector sensor panel  to set the keep warm setting u.
Switching the double ring cooking zone off and on
According to the size of the saucepan or frying pan, when using the double ring cooking zone you can switch between the smaller cooking zone and the larger cooking zone using the “double ring zone” sensor panel.
3You can only switch between the two if a heat setting has already been set for the smaller heating ring.
1. Set the desired heat level.
2. Touch the “double ring” sensor panel.
This will switch the setting to the outer heating ring. The control light will illuminate.
3.To switch off the outer heating ring, touch the “double ring” sensor panel, and the outer heating ring will switch off.
9
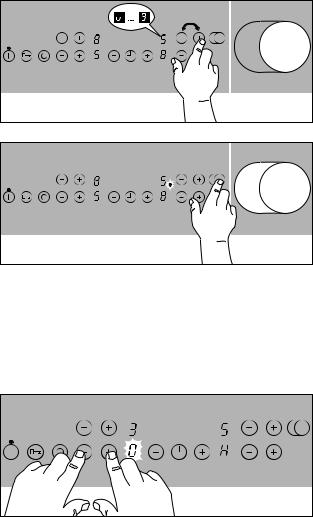
Switching the casserole zone on and off
1. Set the desired heat setting.
2.To switch the casserole zone on or off, place your finger flat on the “casserole zone” sensor field until the indicator light illuminates or goes off.
Switching off a cooking zone
1.To switch off a cooking zone touch the heat setting selector sensor panel  and
and  simultaneously, or return the setting to zero using the heat setting selector sensor panel
  .
.
10
 Loading...