


smart


 Living
Keyless Connected
Smart Door Lock Manual
Please read the intructions before fitting and using the
Keyless Connected Smart Door Lock.
The functions and design of this product can be changed without prior notice for performance and quality improvements.
The smarter way to protect your home•
YD-01-CON-UG REV2
smart


 Living
Hereby, ASSA ABLOY Ltd, School Street, WV13 3PW declares that the Keyless Connected Smart Door Lock is in compliance with Directive 2014/53/EU.
The full text of the EU declaration of conformity is available at the following internet address: www.yale.co.uk/declaration-of-conformity
2
Contents
Introduction
Getting Started
Smart Home
Security Features
Specifications
Guarantee
User Log
Help
Safety Precautions |
4 |
Product Features |
5 |
Getting to Know Your Lock |
6 |
Opening the Lock with a PIN Code/ |
|
Key Card/Tag or Remote Fob |
7 |
Set/Change Master Code |
8 |
Set a User Code |
9 |
Delete a User Code |
10 |
Set/Delete One Day Code |
11 |
Adding a Key Card/Tag |
12 |
Delete a Key Card/Tag |
13 |
Register a Remote Fob |
14 |
Delete Previously Paired Remote Fob |
15 |
Change PIN and Remote Re-lock Time |
16 |
Auto Re-lock On/Off |
17 |
Volume Settings |
18 |
Lock Modules |
19 |
Connecting to a Home Automation System |
20 |
Disconnecting from a Home Automation |
|
System |
21 |
Intrusion Alarm |
22 |
Incorrect PIN Lockout |
23 |
Emergency Power |
24 |
Resetting the Lock |
25 |
Specifications |
26 |
Guarantee |
27 |
User Code Log |
28 |
User Key Card/ Tag Log |
29 |
Remote Fob Log |
30 |
Customer Service |
31 |
|
|
3
Introduction
Thank you for choosing the Yale Keyless Connected Smart Door Lock. This new Smart Lock uses the latest technology to make your life easier.
This user manual enables you to operate the product safely and to its full potential.
Please ensure you read it completely before using the Yale Keyless Connected Smart Door Lock.
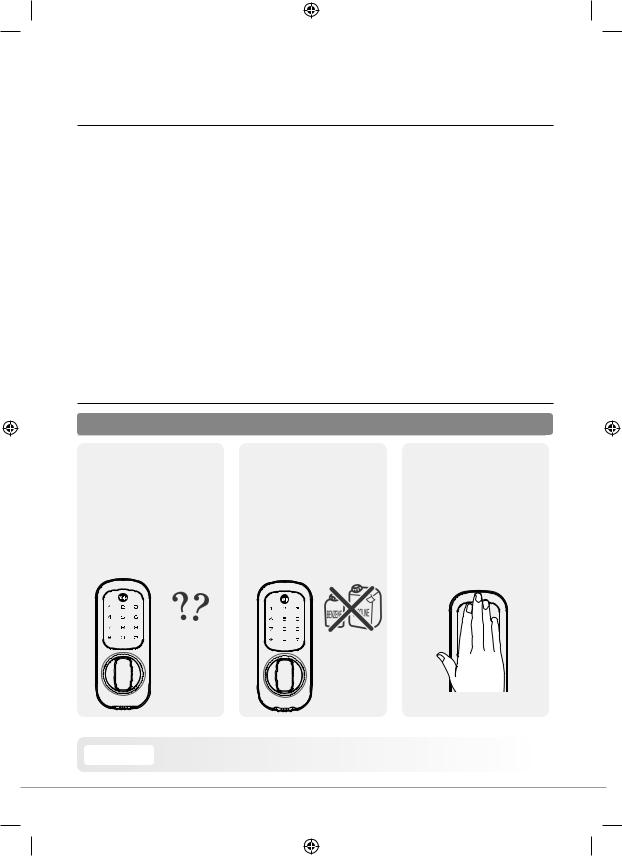
Safety Precautions
Please read this carefully
•Be careful not to let any unauthorised user discover your PIN code
•Please keep your PIN code safe
•To maintain the high quality finish, clean regularly with
a soft damp cloth taking care not to scratch the finish
•Do not use any chemicals when cleaning as this may affect your warranty
•The Yale Keyless Connected Smart Door Lock requires you to place your palm on the touch screen
•This is a safety feature so finger prints showing the PIN code are wiped
 Caution Make sure to follow the above instructions to avoid any injuries or damage to the product.
4
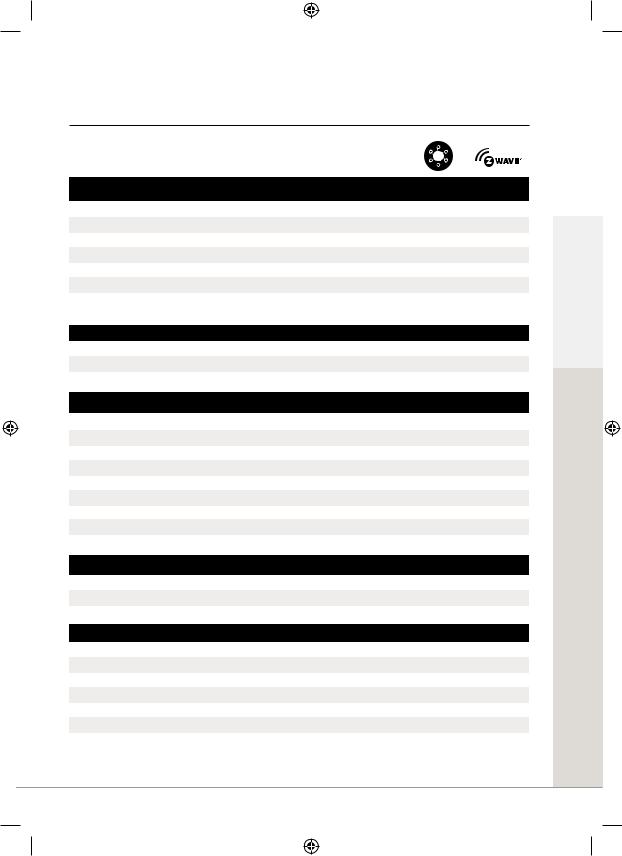
Product Features
|
|
Y |
|
|
|
|
|
|
Connected |
Yale® |
Z-Wave® |
How To Open The Lock |
Ready |
Module |
Module |
|
|
|
|
4 - 10 digit PIN code |
a |
a |
a |
|
|
|
|
24 hour PIN code for visitors |
a |
a |
a |
|
|
|
|
Key Card (includes one Card) |
a |
a |
a |
|
|
|
|
Key Tag (includes one Tag) |
a |
a |
a |
|
|
|
|
Control with Yale® app (when linked to Yale® alarm or CCTV) |
- |
a |
- |
Open through third party app |
- |
- |
a |
You can use a mix of up to 20 PIN codes, Key Tags, Key Cards and Remote Fobs plus app control (model dependant).
Security |
|
|
|
|
|
|
|
3 minute lock out if code is entered incorrectly 5 times |
a |
a |
a |
|
|
|
|
Tamper alarm |
a |
a |
a |
|
|
|
|
|
|
|
|
Features |
|
|
|
|
|
|
|
Replaces existing rim cylinder used on a 60mm backset nightlatch |
a |
a |
a |
|
|
|
|
Touchscreen with backlit Keypad |
a |
a |
a |
|
|
|
|
Battery operated |
a |
a |
a |
Low battery indicator with emergency battery connection |
a |
a |
a |
User codes and settings remain if batteries are replaced |
a |
a |
a |
Remotely add user user credentials |
- |
- |
a |
User schedules |
- |
- |
a |
Audit trails |
- |
- |
a |
|
|
|
|
Connectivity |
|
|
|
|
|
|
|
Connects to Yale® Alarm and CCTV range |
- |
a |
- |
Connects to Z-Wave® compatible smart home systems |
- |
- |
a |
|
|
|
|
Optional Accessories |
|
|
|
|
|
|
|
Remote Fob Module (includes one Fob) |
a |
- |
- |
Additional Remote Fobs |
a |
- |
- |
Yale® Module |
a |
- |
a |
Z-Wave® Module |
a |
a |
- |
Key Card |
a |
a |
a |
|
|
|
|
Key Tag |
a |
a |
a |
|
|
|
|
Introduction
5

Getting to Know Your Lock
Front (Front Body installed on the outside of the door)
Keypad (10-key)
7 |
Button |
Thumbturn
Reset Button
 Button
Emergency 9V power supply terminal
7 Low Battery Indicator
9V Emergency Battery
(Not Included)
Back (Back Body, installed on the inside of the door)
Battery Pack Cover
R 


 R
R  Button
1.5V AA Alkaline Batteries
Fixing Plate
Cover Release Button: Press
Both Simultaneously to
Release
Remote Module Slot
6
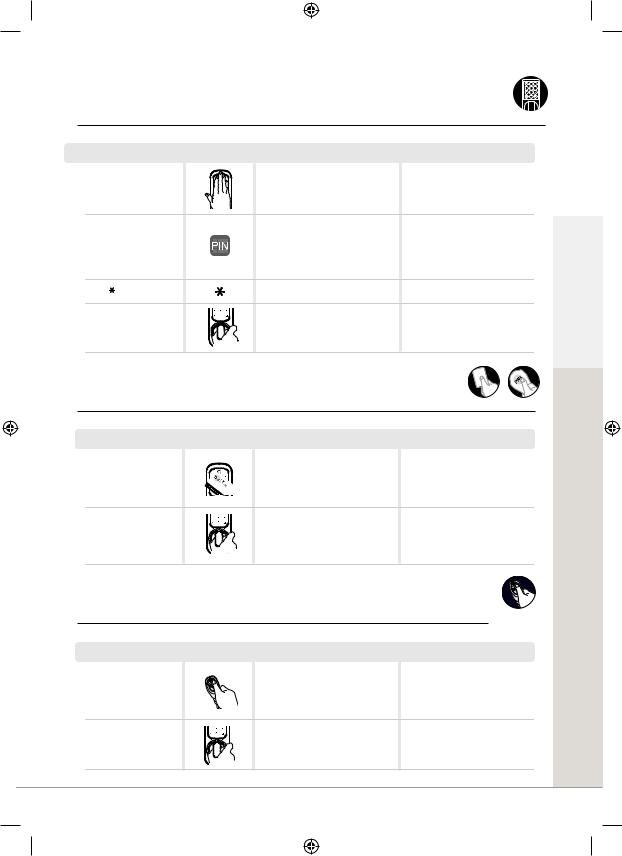
Opening the Lock with a PIN Code |
PIN Code |
|||
Step |
Icon |
Expected Feedback |
Description |
|
Touch the keypad with |
|
Keypad will illuminate |
Touch the keypad to begin |
|
the palm of your hand |
|
followed by 2 tone beep |
||
|
|
|
||
Enter a valid user code |
|
3 tone ascending beep |
Default code is ‘123456’ |
|
|
|
|
|
|
Press key |
|
3 tone ascending beep |
|
|
Turn the thumbturn to |
|
|
|
|
open the door |
|
|
|
|
Opening the Lock with a Key Card/Tag Key Card |
Key Tag |
|||
Step |
Icon |
Expected Feedback |
Present a valid Key |
|
3 tone ascending beep |
Card or Tag to the lock |
|
|
|
|
|
Turn the thumbturn to |
|
|
open the door |
|
|
Description
To add key cards and keytags follow instructions on page 12.
Turn the Thumbturn to open the door
Started Getting
Opening the Lock with a Remote Fob
Remote fob
Step |
Icon |
Expected Feedback |
Press any button on a |
|
3 tone ascending beep |
registered Remote Fob |
|
|
|
|
|
Turn the thumbturn |
|
|
to open the door |
|
|
Description
To add and remove fob follow instrcutions on page 14.
Turn the Thumbturn to open the door
7
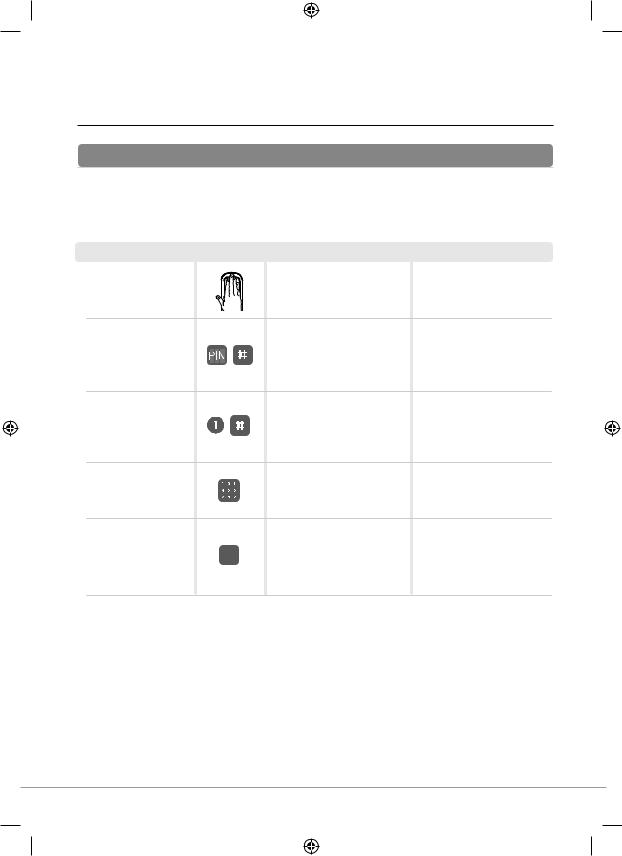
Set/Change Master Code
Registration
The master code is the main password to the lock. As well as allowing entry through the door, it is also used to configure the lock including adding and removing users.
Step |
Icon |
Expected Feedback |
Touch the keypad with |
|
Keypad will illuminate |
the palm of your hand |
|
followed by 2 tone beep |
Enter the master code, |
|
2 tone beep |
followed by # key |
|
|
|
|
|
Select the [1] button |
|
2 tone beep after each |
followed by # key |
|
button pressed |
Enter a new master code
3 tone ascending beep Press # to complete  followed by your new
code being illuminated
Description
Touch the keypad to begin
If you are setting the code for the first time the default code is 123456
You are now in the lock’s menu, choose option number [1] to change the master code
The master code must be 6 digits
This completes the master code setup
8
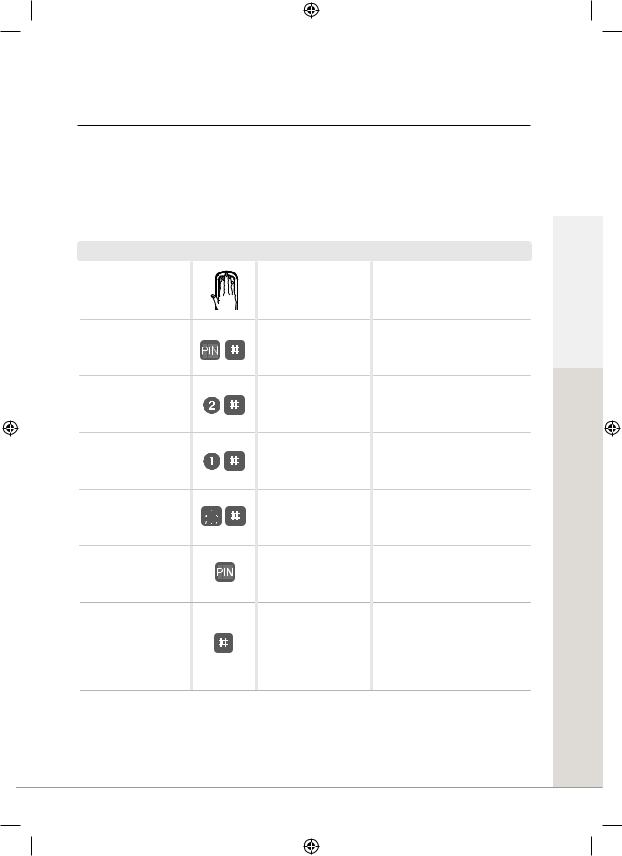
Set a User Code
The lock can hold up to 20 unique user codes, each one has a slot in the locks memory from 1 to 20. If a new code is written to a slot that already holds a code it will overwrite it. To save overwriting someone’s code it is important to record who’s codes are stored in each slot. Please use the User Code Log section in the back of the book to record this.
Step |
Icon |
Expected Feedback |
Touch the keypad with the palm of your hand
Enter the master code, followed by # key
Select the [2] button followed by # key
Press the [1] button and then #
Enter the slot number for the user code followed by
# key
Enter the new user code
Press the # button to complete
Keypad will illuminate followed by 2 tone beep
2 tone beep
2 tone beep after each button pressed
2 tone beep after each button pressed
2 tone beep
3 tone ascending beep
3 tone ascending beep followed by your new code being illuminated
Description
Touch the keypad to begin
If you have forgotten the master code please see the ‘Resetting the Lock’ section of the manual (Page 25)
You are now in the lock’s menu, choose option number 2 to select the user code setup
Option number [1] adds or modifies a user code
This is the number of the slot in memory where the code will be saved (1-20)
The user code can be between 4-10 digits
The new user code will now be added to the lock
Started Getting
9
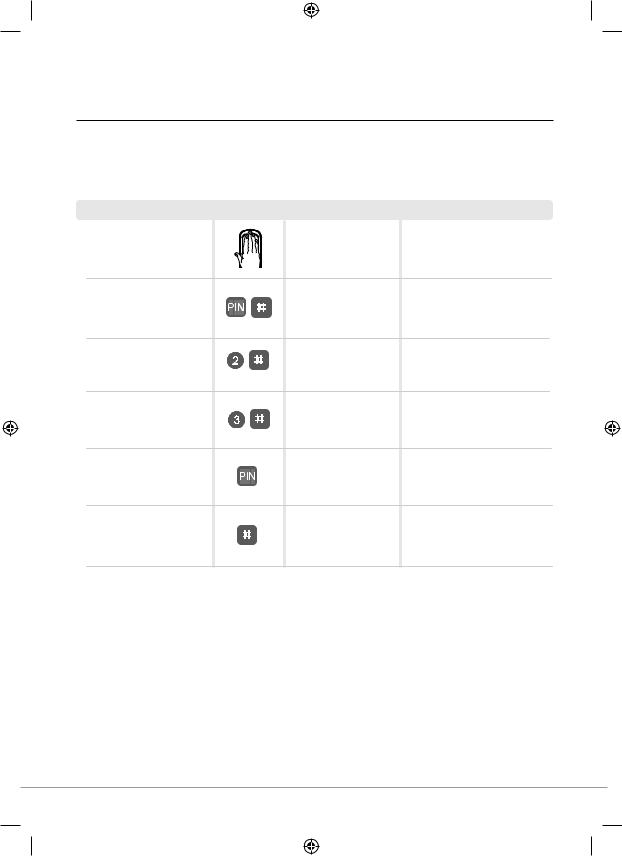
Delete a User Code
To stop a user having access their code will need to be deleted. Before doing this you will first need to know which slot in the locks memory their code is in. Please see the User Code Log at the back of the guide.
Step |
Icon |
Expected Feedback |
Touch the keypad with the palm of your hand
Enter the master code, followed by # key
Select the [2] button followed by # key
Press the [3] button and then #
Enter the slot number for the user code
Keypad will illuminate followed by 2 tone beep
2 tone beep
2 tone beep after each button pressed
2 tone beep after each button pressed
3 tone ascending beep
Press # to complete |
3 tone ascending beep |
Description
Touch the keypad to begin
If you have forgotten the master code please see the resetting the lock section of the manual (Page 25)
You are now in the lock’s menu, choose option number [2] to select the user code setup
Option number [3] deletes a user code
This is the number of the slot in memory where the code will be saved (1-20)
The user code will now be deleted from the lock
10
 Loading...