


 Loading...
Xerox 6204, 721P, 6050, 6030, UWP User Manual
...Version 12.0, November 2006
701P45705
8825/ 8830/ 8850/ 6030/ 6050/ 510 Series / 721P/ 6204
WIDE FORMAT COPY SYSTEM
User
Guide
Prepared by:
Xerox Corporation
Global Knowledge and Language Services
800 Phillips Road 845-17S
Webster, New York 14580
©2006 by Xerox Corporation. All rights reserved.
Copyright protection claimed includes all forms and matters of copyrightable material and information now allowed by statutory judicial law or hereinafter granted, including without limitation, material generated from the software programs which are displayed on the screen such as icons, screen displays, looks, etc.
Printed in the United States of America.
XEROX® and all Xerox product names mentioned in this publication are trademarks of XEROX CORPORATION.
One or more of the fonts listed within this document may be a registered trademark of Morisawa & Company, Ltd. or DYNALAB, Inc.
Changes are periodically made to this document. Changes, technical inaccuracies, and typographic errors will be corrected in subsequent editions.

Table of Contents |
|
|
SAFETY NOTES............................................................................................ |
|
VII |
WARNING – ELECTRICAL SAFETY INFORMATION......................................... |
|
IX |
OPERATIONAL SAFETY INFORMATION.............................................................. |
|
X |
MAINTENANCE INFORMATION......................................................................... |
|
XI |
OZONE SAFETY INFORMATION ........................................................................ |
|
XI |
FOR CONSUMAABLES ...................................................................................... |
|
XI |
RADIO FREQUENCY EMISSIONS ...................................................................... |
|
XII |
United States, Canada, Europe, Australia/New Zealand: .......................... |
xii |
|
PRODUCT SAFETY CERTIFICATION ................................................................. |
|
XII |
REGULATORY INFORMATION ......................................................................... |
|
XII |
ENVIRONMENTAL COMPLIANCE.................................................................... |
|
XIII |
GETTING TO KNOW THE WIDE FORMAT COPY SYSTEM................. |
1 |
|
FEATURE KEYS ................................................................................................. |
|
2 |
SCAN SYSTEM STANDARD COMPONENTS........................................................... |
|
3 |
SCAN SYSTEM COMPACT COMPONENTS............................................................. |
|
7 |
SCAN SYSTEM CONTROL PANEL ....................................................................... |
|
8 |
Media Selection ............................................................................................ |
|
9 |
Image Quality Area .................................................................................... |
|
13 |
Background Suppression ............................................................................ |
|
16 |
Copy ........................................................................................................... |
|
17 |
Reduce/Enlarge .......................................................................................... |
|
18 |
Graphical Display and Navigation Keys.................................................... |
|
20 |
Numeric Keypad and Special Features/Control Keys ................................ |
22 |
|
Special Features Keys ................................................................................ |
|
23 |
Scan Control Keys ...................................................................................... |
|
23 |
THE PRINTER AND THE FREEFLOW ACCXES CONTROLLER ............................. |
23 |
|
POWERING ON THE WIDE FORMAT COPY SYSTEM ................................. |
24 |
|
Initial power-on.......................................................................................... |
|
24 |
Switching on the Scan System..................................................................... |
|
24 |
Switching on the Controller and the Printer (XEROX WIDE FORMAT |
|
|
COPY SYSTEM 8825/8830/8850) .............................................................. |
|
25 |
CONTROLLER POWER SWITCHES..................................................................... |
|
26 |
Switching on the PUN or YKE Controller and the Printer (XEROX WIDE |
||
FORMAT 8825/8830/8850/510 Series/721P)............................................. |
|
26 |
Switching on the Printer and the Controller (PUN, YKE, and YKE-N |
|
|
controllers) ................................................................................................. |
|
27 |
POWERING THE XEROX 6204 WIDE FORMAT SOLUTION ON/OFF.................... |
30 |
|
Powering On the System............................................................................. |
|
30 |
Powering Off the System............................................................................. |
|
30 |
Scan System Warm-up ................................................................................ |
|
31 |
POWERING OFF THE SYSTEM ........................................................................... |
|
31 |
DOCUMENT QUALITY................................................................................. |
|
33 |
DOCUMENT QUALITY ...................................................................................... |
|
33 |
XEROX WIDE FORMAT COPY SYSTEM |
Table of Contents • iii |
|

|
DYNAMIC BACKGROUND REMOVAL ............................................................... |
33 |
|
Automatic edge detection and document centering .................................... |
34 |
|
DETERMINING DOCUMENT QUALITY................................................................ |
35 |
|
What is a good quality document?.............................................................. |
35 |
|
What is a bad quality document?................................................................ |
35 |
|
PREPARING DOCUMENTS ................................................................................. |
36 |
|
SCANNING STRATEGIES ................................................................................... |
37 |
|
IMAGE QUALITY .......................................................................................... |
39 |
|
ORIGINAL, TYPE.............................................................................................. |
39 |
|
COPY MODE................................................................................................. |
40 |
|
Type, Normal, Line, Photo,.........................................................................40 |
|
|
SCAN MODE................................................................................................. |
41 |
|
Type, Normal .............................................................................................. |
41 |
|
Type Line .................................................................................................... |
42 |
|
Type Photo.................................................................................................. |
43 |
|
Type, Color................................................................................................. |
44 |
|
BACKGROUND SUPPRESSION........................................................................... |
47 |
|
COPY............................................................................................................... |
48 |
|
MAKING COPIES........................................................................................... |
49 |
|
MAKING COPIES .............................................................................................. |
49 |
|
Controlling the scan ................................................................................... |
49 |
|
Image Quality ............................................................................................. |
51 |
|
MAKING A COPY WITH THE DEFAULT SETTINGS............................................... |
52 |
|
MAKING A COPY THE SAME SIZE AS THE ORIGINAL DOCUMENT ....................... |
53 |
|
FITTING THE IMAGE TO A FIXED COPY SIZE ...................................................... |
54 |
|
SCANNING WHEN USING A FOLDER ...................................................... |
55 |
|
SCANNING WHEN USING A FOLDER.................................................................. |
55 |
|
Ready to Copy Finisher Screen .................................................................. |
56 |
|
SCANNING OVERSIZED DOCUMENTS ................................................... |
57 |
|
SCANNING OVERSIZED DOCUMENTS ................................................................ |
57 |
|
LONG DOCUMENTS ................................................................................... |
57 |
|
WIDE DOCUMENTS.................................................................................... |
57 |
|
SPECIAL FEATURES KEYS......................................................................... |
59 |
|
SPECIAL FEATURES KEYS................................................................................. |
59 |
|
PRINTER INTERRUPT KEY ................................................................................ |
60 |
|
STORE/RECALL KEY ........................................................................................ |
61 |
|
Last Job ...................................................................................................... |
61 |
|
Job Templates............................................................................................. |
63 |
|
Save Default Template................................................................................ |
67 |
|
Recall Factory Defaults.............................................................................. |
68 |
|
FINISHER KEY.................................................................................................. |
68 |
|
Finisher menu options ................................................................................ |
70 |
|
SETS BUILD KEY.............................................................................................. |
73 |
|
Preparing to build the set ........................................................................... |
73 |
|
Building and printing the set ...................................................................... |
73 |
|
BATCH KEY ..................................................................................................... |
75 |
|
TRANSFORM KEY............................................................................................. |
76 |
|
Margins ...................................................................................................... |
76 |
|
Justification ................................................................................................ |
78 |
|
Transform ................................................................................................... |
79 |
|
SAMPLE KEY.................................................................................................... |
82 |
iv • Table of Contents |
XEROX WIDE FORMAT COPY SYSTEM |
|
Copy Mode Sample: ................................................................................... |
82 |
Scan Mode Sample: .................................................................................... |
82 |
SCANNING TO THE NETWORK (SCAN MODE)..................................... |
85 |
SCANNING TO THE NETWORK (SCAN MODE).................................................. |
85 |
SWITCHING BETWEEN COPY MODE AND SCAN MODE ................................... |
86 |
UNDERSTANDING THE READY TO SCAN SCREEN ........................................ |
87 |
SELECTIONS DISABLED IN SCAN MODE .......................................................... |
88 |
OPERATING IN SCAN MODE............................................................................ |
88 |
CLEARING THE SCANNED IMAGES.................................................................... |
90 |
MANAGING THE FILE SYSTEM.......................................................................... |
90 |
MAIN MENU.................................................................................................... |
93 |
MAIN MENU.................................................................................................... |
93 |
CONFIGURATION MENU ................................................................................... |
94 |
LOCALIZATION......................................................................................... |
95 |
CONTROL PANEL..................................................................................... |
96 |
COPY OPTIONS ........................................................................................ |
97 |
IMAGE ENHANCEMENTS...................................................................... |
102 |
TIMERS .................................................................................................... |
103 |
POWER SAVER........................................................................................ |
105 |
SCANNER CONTROL.............................................................................. |
105 |
SYSTEM INFORMATION MENU ....................................................................... |
107 |
SYSTEM DESCRIPTION.......................................................................... |
108 |
RECENT FAULT LIST ............................................................................. |
109 |
CONFIGURATION PRINTS .................................................................... |
110 |
SYSTEM ADMINISTRATION MENU.................................................................. |
112 |
Entering the system administration password .......................................... |
112 |
JOB ACCOUNTING................................................................................. |
113 |
FILE SYSTEM .......................................................................................... |
113 |
CHANGE PASSWORD............................................................................. |
117 |
SECURITY SETTINGS ............................................................................. |
118 |
DIAGNOSTICS MENU ...................................................................................... |
119 |
USAGE METERS...................................................................................... |
120 |
CLEAR SCANNER USAGE ...................................................................... |
121 |
SCANNER DIAGNOSTICS....................................................................... |
121 |
PASSWORD.............................................................................................. |
136 |
JOB ACCOUNTING...................................................................................... |
139 |
JOB ACCOUNTING.......................................................................................... |
139 |
OVERVIEW .................................................................................................... |
139 |
JOB ACCOUNTING MODE MENU..................................................................... |
140 |
SUBMITTING JOBS.......................................................................................... |
140 |
From the Scan System Control Panel....................................................... |
140 |
Over the network ...................................................................................... |
142 |
Terminating use under an account ........................................................... |
142 |
CLEANING AND MAINTENANCE - SCAN SYSTEM............................ |
143 |
CLEANING AND MAINTENANCE - SCAN SYSTEM............................................ |
143 |
CLEANING THE PLATEN GLASS, DOCUMENT DRIVE ROLLS, AND BACKER ROLL |
|
...................................................................................................................... |
144 |
CLEANING THE CALIBRATION STRIP ............................................................. |
145 |
PROBLEM SOLVING .................................................................................. |
147 |
PROBLEM SOLVING........................................................................................ |
147 |
XEROX WIDE FORMAT COPY SYSTEM |
Table of Contents • v |
SPECIFICATIONS........................................................................................ |
162 |
SPECIFICATIONS ............................................................................................ |
162 |
APPENDICES ................................................................................................ |
165 |
APPENDIX 1: SCANNING RESOLUTIONS AND SPEEDS..................................... |
165 |
APPENDIX 2: PAPER SHEET SIZES.................................................................. |
166 |
APPENDIX 3: PAPER ROLL SIZES ................................................................... |
168 |
APPENDIX 4: FILE FORMATS ......................................................................... |
169 |
APPENDIX 6: LED STATUS INDICATORS....................................................... |
170 |
APPENDIX 7: MAIN MENU STRUCTURE ........................................................ |
171 |
INDEX............................................................................................................. |
173 |
vi • Table of Contents |
XEROX WIDE FORMAT COPY SYSTEM |
Safety Notes
Read these safety notes carefully before using this product to ensure that you operate the equipment safely.
Your Xerox/Fuji Xerox product and recommended supplies have been designed and tested to meet strict safety requirements. These include safety agency approval, and compliance with established environmental standards. Please read the following instructions carefully before operating the product and refer to them as needed to ensure the continued safe operation of your product.
The safety and environment testing and performance of this product have been verified using Xerox materials only.
WARNING: Any unauthorized alteration, which may include the addition of new functions or connection of external devices, may affect the product certification. Please contact your Authorized Local Dealer for more information.
Warning Markings
All warning instructions marked on or supplied with the product should be followed.
Warning |
This WARNING alerts users to areas of |
|
the product where there is the possibility |
|
of personal injury |
Warning |
This WARNING alerts users to areas of |
|
the product where there are heated |
|
surfaces, which should not be touched. |
XEROX WIDE FORMAT COPY SYSTEM |
Safety Notes • vii |

Electrical Supply
This product shall be operated from the type of electrical supply indicated on the product's data plate label. If you are not sure that your electrical supply meets the requirements, please consult your local power company for advice.
WARNING: This product must be connected to a protective grounded circuit.
This product is supplied with a plug that has a protective grounding pin. This plug will only fit into a grounded electrical outlet. This is a safety feature. To avoid risk of electric shock, contact your electrician to replace the electrical outlet if you are unable to insert the plug into it. Never use a grounding adapter plug to connect the product to an electrical outlet that lacks a grounded connection terminal.
Operator Accessible Areas
This equipment has been designed to restrict operator access to safe areas only. Operator access to hazardous areas is restricted with covers or guards, which would require a tool to remove. Never remove these covers or guards.
Maintenance
Any operator product maintenance procedures will be described in the user documentation supplied with the product. Do not to carry out any maintenance on this product which is not described in the customer documentation.
Cleaning Your Product
Before cleaning this product, unplug the product from the electrical outlet. Always use materials specifically designated for this product, as the use of other materials may result in poor performance and may create a hazardous situation. Do not use aerosol cleaners, because they may be explosive and flammable under certain circumstances.
viii • Safety Notes |
XEROX WIDE FORMAT COPY SYSTEM |
WARNING – Electrical Safety
Information
•Use only the power cord supplied with this equipment.
•Plug the power cord directly into a grounded electrical outlet. Do not use an extension cord. If you do not know if an outlet is grounded, consult a qualified electrician.
If this machine needs to be moved to a different location, contact a Xerox service representative or your authorized local representative or service support organization.
•Improper connection of the equipment-grounding conductor can result in electrical shock.
•Do not place this equipment where people might step or trip on the power cord.
•Do not place objects on the power cord.
•Do not override or disable electrical or mechanical interlocks.
•Do not obstruct the ventilation openings.
•Never push objects of any kind into slots or openings on this equipment.
•If any of the following conditions occur, switch off the power to the machine immediately and disconnect the power cord from the electrical outlet. Call an authorized local service representative to correct the problem.
-The equipment emits an unusual noise or odor.
-The power cord is damaged or frayed.
-A wall panel circuit breaker, fuse, or other safety device has been tripped.
-Liquid is spilled into the copier/printer.
-The equipment is exposed to water.
-Any part of the equipment is damaged.
Disconnect Device
The power cable is the disconnect device for this equipment. It is attached to the back of the machine as a plug-in device. To remove all electrical power from the equipment, disconnect the power cable from the electrical outlet.
XEROX WIDE FORMAT COPY SYSTEM |
Safety Notes • ix |
Operational Safety Information
To ensure the continued safe operation of your Xerox/Fuji Xerox equipment, follow these safety guidelines at all times.
Do These:
-Always connect equipment to a correctly grounded power outlet. If in doubt, have the outlet checked by a qualified electrician.
-This equipment must be connected to a protective grounded circuit.
This equipment is supplied with a plug that has a protective grounding pin. This plug will only fit into a grounded electrical outlet. This is a safety feature. To avoid risk of electric shock, contact your electrician to replace the electrical outlet if you are unable to insert the plug into it. Never use a plug that lacks a grounded connection terminal to connect the product to an electrical outlet.
-Always follow all warnings and instructions that are marked on or supplied with the equipment.
-Always exercise care when moving or relocating equipment. Please contact your local Xerox/Fuji Xerox Service Department or your local support organization to arrange relocation of the product to a location outside your building.
-Always locate the equipment in an area that has adequate ventilation and room for servicing. See the Install guide for minimum dimensions.
-Always use materials and supplies specifically designed for your Xerox/Fuji Xerox equipment. Use of unsuitable materials may result in poor performance.
-Always unplug this equipment from the electrical outlet before cleaning.
Do Not Do These:
-Never use a plug that lacks a grounded connection terminal to connect the product to an electrical outlet.
-Never attempt any maintenance function that is not specifically described in this documentation.
-This equipment should not be placed in a built-in installation unless proper ventilation is provided. Please contact your Authorized Local Dealer for further information.
-Never remove covers or guards that are fastened with screws. There are no operator serviceable areas within these covers.
-Never locate the equipment near a radiator or any other heat source.
-Never push objects of any kind into the ventilation openings.
-Never override or “cheat” any of the electrical or mechanical interlock devices.
x • Safety Notes |
XEROX WIDE FORMAT COPY SYSTEM |
-Never operate the equipment if you notice unusual noises or odors. Disconnect the power cord from the electrical outlet and contact your local Xerox/Fuji Xerox Service Representative or Service Provider immediately.
Maintenance Information
Do not attempt any maintenance procedure that is not specifically described in the documentation that is supplied with your copier/printer.
-Do not use aerosol cleaners. The use of cleaners that are not approved may cause poor performance of the equipment, and could create a dangerous condition.
-Use supplies and cleaning materials only as directed in this manual. Keep all of these materials out of the reach of children.
-Do not remove covers or guards that are fastened with screws. There are no parts behind these covers that you can maintain or service.
-Do not perform any maintenance procedures unless you have been trained to do them by an Authorized Local Dealer or unless a procedure is specifically described in the user manuals.
Ozone Safety Information
This product will produce ozone during normal operation. The ozone produced is heavier than air and is dependent on copy volume. Providing the correct environmental parameters as specified in the Xerox installation procedure will ensure that the concentration levels meet safe limits.
If you need additional information about ozone, please request the Xerox publication Ozone by calling 1-800-828-6571 in the United States and Canada. In other markets please contact your Authorized Local Dealer or Service Provider.
For Consumaables
Store all consumables in accordance with the instructions given on the package or container.
○Keep all consumables away from the reach of children.
○Never throw toner, toner cartridges, or toner containers into an open flame
XEROX WIDE FORMAT COPY SYSTEM |
Safety Notes • xi |
Radio Frequency Emissions
United States, Canada, Europe, Australia/New Zealand:
NOTE: This equipment has been tested and found to comply with the limits for a class A digital device, pursuant to Part 15 of the FCC Rules. These limits are designed to provide reasonable protection against harmful interference when the equipment is operated in a commercial environment. This equipment generates, uses, and can radiate radio frequency energy and, if not installed and used in accordance with the instruction manual, may cause harmful interference to radio communications. Operation of this equipment in a residential area is likely to cause harmful interference, in which case the user will be required to correct the interference at his own expense.
Changes and modifications to this equipment not specifically approved by Xerox/Fuji Xerox may void the user’s authority to operate this equipment.
Shielded interface cables must be used with this equipment to maintain compliance with FCC regulations in the United States and the Radiocommunications Act 1992 in Australia/New Zealand as applicable.
Product Safety Certification
This product is certified by the following Agency using the Safety standards listed.
Agency |
Standard |
TUV Rhineland of North America |
UL60950-1 1st (2003) (USA/Canada) |
NEMKO |
IEC60950-1 Edition 1 (2001) |
This product was manufactured under a registered ISO9001 Quality system.
|
Regulatory Information |
|
CE Mark |
The CE mark applied to this product symbolizes Xerox’s declaration of |
|
conformity with the following applicable Directives of the European Union |
||
|
||
|
as of the dates indicated: |
|
|
January 1, 1995: Council Directive 72/23/EEC amended by Council |
|
|
directive 93/68/EEC, approximation of the laws of the member states |
|
|
related to low voltage equipment. |
|
|
January 1, 1996: Council directive 89/336/EEC, approximation of the |
|
|
laws of the member states related to electromagnetic compatibility. |
|
|
March 9, 1999: Council Directive 99/5/EC, on radio equipment and |
|
|
telecommunications terminal equipment and the mutual recognition of |
|
|
their conformity. |
xii • Safety Notes |
XEROX WIDE FORMAT COPY SYSTEM |

A full declaration of conformity, defining the relevant directives and referenced standards, can be obtained from your Authorized Local Dealer.
WARNING: In order to allow this equipment to operate in proximity to Industrial Scientific and Medical (ISM) equipment, the external radiation from the ISM equipment may have to be limited or special mitigation measures taken.
WARNING: This is a Class A product. In a domestic environment the product may cause radio frequency interference, in which case the user may be required to take adequate measures.
WARNING: Shielded interface cables must be used with this product to maintain compliance with Council Directive 89/336/EEC.
Environmental Compliance
USA
Energy Star As an ENERGY STAR partner, Xerox Corporation has determined that this product meets the ENERGY STAR guidelines for energy efficiency.
ENERGY STAR and the ENERGY STAR mark are registered U.S. marks.
The ENERGY STAR Office Equipment Program is a team effort between U.S., European Union and Japanese governments and the office equipment industry to promote energy-efficient copiers, printers, fax, multifunction machines, personal computers, and monitors. Reducing product energy consumption helps combat smog, acid rain, and long-term changes to the climate by decreasing the emissions that result from generating electricity.
Xerox ENERGY STAR equipment is preset at the factory to enter a “low power” state and/or shut off completely after a specified period of use. These energy-saving features can reduce product energy consumption in half when compared to conventional equipment.
XEROX WIDE FORMAT COPY SYSTEM |
Safety Notes • xiii |

Canada
Environmental Choice:
Terra Choice Environmental Services, Inc. of Canada has verified that this Xerox product conforms to all applicable Environmental Choice EcoLogo requirements for minimized impact to the environment.
As a participant in the Environmental Choice program, Xerox Corporation has determined that this product meets the Environmental Choice guidelines for energy efficiency.
Environment Canada established the Environmental Choice program in 1988 to help consumers identify environmentally responsible products and services. Copier, printer, digital press, and fax products must meet energy efficiency and emissions criteria, and exhibit compatibility with recycled supplies. Currently, Environmental Choice has more than 1600 approved products and 140 licensees. Xerox has been a leader in offering EcoLogo approved products.
xiv • Safety Notes |
XEROX WIDE FORMAT COPY SYSTEM |

Getting to know the WIDE FORMAT COPY SYSTEM
This manual contains operating instructions for the user and the system administrator for the XEROX WIDE FORMAT COPY SYSTEM 8825/8830/8850/510 Series, 721P, 6030/6050, and 6204 with version 12.0 FreeFlow Accxes firmware loaded into the Controller.
NOTE: For the 6030/6050 printers that want to use the FreeFlow Accxes firmware features, the printer also needs to be connected to a separate PUN or YKE controller, referred to as the FreeFlow Accxes Print Server. The Web Print Management Tool software will be loaded on the print server.
Your XEROX WIDE FORMAT COPY SYSTEM is an integrated solution for electronically scanning and then printing good quality copies of the images for engineering or architectural size documents. The WIDE FORMAT COPY SYSTEM consists of the WIDE FORMAT SCAN SYSTEM and Control Panel for capturing images, the FreeFlow Accxes Controller for processing these images, and XEROX WIDE FORMAT COPY SYSTEM Printers 8825, 8830, 8850, 510 Series, 721P, 6030/6050, or 6204.
The WIDE FORMAT COPY SYSTEM has two modes of operation - COPY and SCAN.
In the COPY mode, documents are scanned, temporarily stored in memory or on the FreeFlow Accxes Controller hard disk, and then sent to the local Printer as soon as the Printer is available.
In the SCAN mode:
Scan-to-Net: Documents are scanned and then stored on the FreeFlow Accxes Controller hard disk for later retrieval over a network by a remote device.
Scan-to-FTP: Scanned images can be transferred to 4 remote FTP destinations. The scanned images are not stored on the FreeFlow Accxes Controller’s hard drive. The FTP feature is located on the Sample Mode screen.
The WIDE FORMAT COPY SYSTEM allows concurrent printing, copying, and scanning to the network, so there is no need to wait for the Printer to finish before scanning the next document.
XEROX WIDE FORMAT COPY SYSTEM |
Getting to know the WIDE FORMAT COPY SYSTEM • 1 |

The XEROX WIDE FORMAT COPY SYSTEM contains Dynamic Background Suppression technology. Dynamic Background Suppression examines a sample of the document intelligently and makes automatic image quality adjustments that yield a good copy even from poor original documents. The document width is automatically detected and the centering of a scanned original for most opaque documents is adjusted. Translucent documents (transparencies, clear film, etc.) in most cases will not be detected.
The Productivity feature was introduced with version 10.0 firmware and requires that a new WIDE FORMAT SCAN SYSTEM has a new Document Feed-in Tray. Sensors built into the Feed Tray measure the document width without doing a prescan, which increases the document and copy throughput, thereby increasing productivity.
NOTE: Documents must be centered when using the sensors for width detection.
For documents that require additional adjustments to obtain the best copy quality, a variety of image quality and reduction/enlargement settings are available. All of these functions are controlled from the Scan System Control Panel. This Control Panel, which is mounted on top of the Scan System, receives all power and information from the Scan System.
Feature Keys
Print and Copy feature keys are standard for all printers using FreeFlow Accxes 12.0 firmware, except for the XEROX WIDE FORMAT 6030/6050 Printer. In the 12.0 firmware, the following feature keys need to be loaded before the features can be used. See the Feature Key instructions and Coupon Exchange screens on the www.xerox.com website.
•XEROX WIDE FORMAT Scan System Features:
Scan-to-Net Feature Key – to create an electronic file from a scanned image.
Scan-to-Print Feature Key – to scan, create a preview, and send the scanned image to the printer when the Scan-to-Net feature is present.
Color Enablement Feature Key – allows color scanning when the Scan-to-Net feature is present.
Speed Enhancement Turbo II Feature Key – 4 inches per second (ips) for 36” wide media.
Speed Enhancement Turbo III Feature Key – HFT, PUN, YKE, YKE-N Controllers only: 7.33 ips in Copy Mode.
•XEROX WIDE FORMAT 6030/6050 Printer:
Print Server Enablement Feature Key – Enables print and copy mode for a remote printer.
2 • Getting to know the WIDE FORMAT COPY SYSTEM |
XEROX WIDE FORMAT COPY SYSTEM |

•XEROX WIDE FORMAT Printers and Scan Systems:
Job Accounting Feature Key – Job accounting enables the tracking of media usage data. The Account Management Tool (AMT), or some other external accounting tool, is used to assign a User ID, Account ID, and Printer ID. It then collects and tallies the stored data from the printers.
PostScript Feature Key – This enables the interpretation of Adobe Post Script 3, PDF 1.6 for the YKE-N Controller, PDF 1.4 and 1.5 for the YKE controller, and PDF 1.3 for all other FreeFlow Accxes Controllers.
Disk Image Overwrite Feature Key – Enables the security options for overwriting image data on the hard drive. The immediate overwriting of data to DOD specification is such that the system, at any point in its operation, can be considered secure and all data will be removed no matter what operation the customer is performing.
OS Enablement Feature Key – Enables the YKE controller to print, copy, and scan.
NOTE: The Special Features Key section of this document refers to physical buttons (keys) that are on all the XEROX WIDE FORMAT Scan Systems.
Scan System standard components
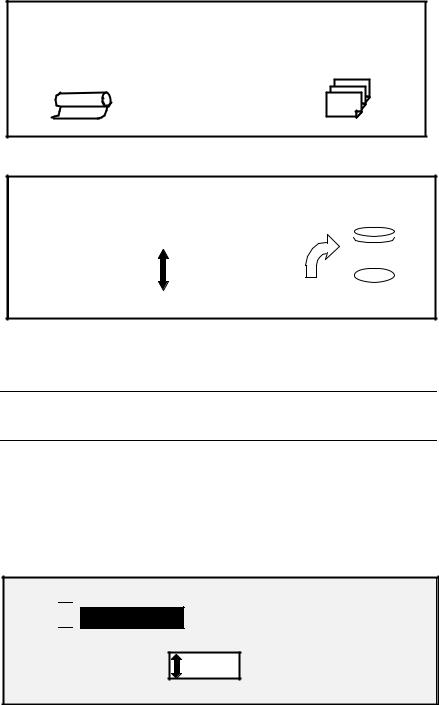
The illustrations below show the components of the WIDE FORMAT SCAN SYSTEM. These components are standard on the XEROX WIDE FORMAT COPY SYSTEM 8825, 8830, 8850, 6030/6050, 6204, and 510 Series. The Stand is standard or optional on the 8850. With the exception of the Stand and Standard Organizer, the components are standard on the 721P. Following the illustrations are descriptions of each of the components.
XEROX WIDE FORMAT COPY SYSTEM |
Getting to know the WIDE FORMAT COPY SYSTEM • 3 |

WIDE FORMAT SCAN SYSTEM Front View
B
A
C
F
D
A. Document Handler
Raise the Document Handler for routine maintenance functions and to access the optical paper sensors for diagnostic routines.
B. Scan System Control Panel
The control panel allows the selection of options and features and contains a graphical display for the communication of information and instructions. Refer to Scan System Control Panel for additional information.
C. Thick Document Lever
The Thick Document Lever is used to adjust the Scan System for thick documents and to remove documents from the Scan System feed mechanism. When setting the thickness for a document, raise the lever to the next thickness. If the document slides past the Feed Rolls into the Document Handler, lower the Lever to the next position.
D.Stand
The Stand is standard with the XEROX WIDE FORMAT COPY SYSTEM 8825, 8830, 8850, 6030/6050, 6204, and 510dp series. It is optional with the 721P.
E. Standard Organizer (not shown in previous photo)
The Organizer is located on the front of the Scan System. It is useful for holding multiple documents that are to be scanned. It has two
4 • Getting to know the WIDE FORMAT COPY SYSTEM |
XEROX WIDE FORMAT COPY SYSTEM |

extensions at its end that can be pulled out to accommodate longer documents (up to size E or A0).
F. Productivity Document Feed Tray
Insert documents to be scanned face down and centered into the Document Feed Tray. Provides built-in Document Width Sensors that eliminate the need to prescan document to do width measurement. This increases the document throughput resulting in higher productivity with a WIDE FORMAT COPY SYSTEM. This functionality is only available on the newer WIDE FORMAT SCAN SYSTEM.
WIDE FORMAT SCAN SYSTEM Rear View
A: Standard Stacker |
D: Power Cord and Connector |
B: Document Exit Slot |
E: Status Indicator LED |
C: Power On/Off switch |
F: IEEE 1394 Cable and Connector |
NOTE: Components shown above with the exception of the Standard
Organizer are also available on all WIDE FORMAT SCAN SYSTEMS
XEROX WIDE FORMAT COPY SYSTEM |
Getting to know the WIDE FORMAT COPY SYSTEM • 5 |

A. Standard Stacker
The Stacker is located at the rear of the Scan System. When the AUTORETURN feature is set to REAR, documents exit the Scan System onto the Stacker. The Stacker can be adjusted to any one of four positions by raising or lowering it. The height of the Stacker should be adjusted to accommodate the document being scanned. It has two extensions at its end that can be pulled out to accommodate longer documents (up to size E or A0). When scanning most common weight (20 lb, 80gsm) documents, move the Stacker to the 2nd rung from the bottom.
NOTE: All thick documents, and documents over 36 inches (914 mm), exit from the rear of the Scan System (regardless of the AUTORETURN setting). When scanning thick documents, the Stacker must be set to the lowest position for optimum performance.
B. Document Exit Slot
When the DOCUMENT RETURN feature is set to REAR, documents exit the Scan System through this slot and are delivered to the rear Stacker.
C. Power On/Off Switch
This switch turns the Scan System on and off. Press this switch to the on (I) position to turn on the Scan System and to the off (O) position to turn off the Scan System.
D. The Power Cord supplies power to the Scan System. Plug one end of the cord into the Scan System and the other end into an electrical outlet.
E. Status LED
The digital status LED provides an indication of the condition of the Scan System and communications with the FreeFlow Accxes Controller. A letter “P”, displayed on the LED Display on the rear of the Scan System, indicates that the Scan System is operating normally and has established communications with the controller.
F. IEEE 1394 Cable and Connector
The IEEE 1394 Cable is the communications link between the Scan System and the Controller. Plug one end of the cable into either one of the IEEE 1394 connections at the rear of the Scan System. Plug the other end into the IEEE 1394 connection on the Controller.
6 • Getting to know the WIDE FORMAT COPY SYSTEM |
XEROX WIDE FORMAT COPY SYSTEM |

Scan System compact components
The illustrations show the optional compact Stacker and organizer that are available for the WIDE FORMAT SCAN SYSTEM. The compact components allow the XEROX WIDE FORMAT COPY SYSTEM to be installed in sites where space requirements are at a premium.
Front View of the Wide Format Scan System
A: Compact Organizer
Back View of the Wide Format Scan System
A
A: Compact Stacker
XEROX WIDE FORMAT COPY SYSTEM |
Getting to know the WIDE FORMAT COPY SYSTEM • 7 |
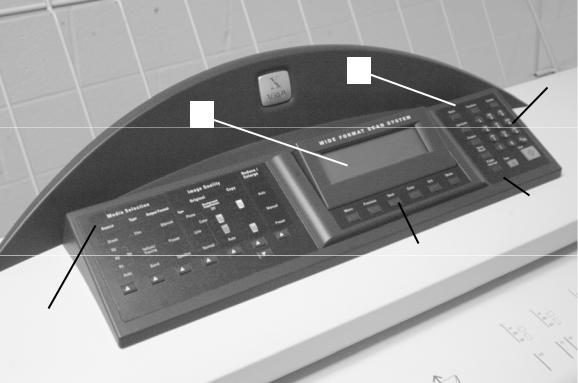
Scan System Control Panel
The Scan System Control Panel is divided into three sections:
•The options keys section (A), which contains the - Media Selection, Image Quality, and Reduce/Enlarge options selections
•The graphical display (B) and the navigation keys (F) section.
•The right-hand section, which contains the numeric keypad (D), the special features keys (E), and the scan control keys (C).
If the BEEP function is enabled (factory default), a beep sound will be heard when a key is pressed. If an incorrect key is pressed, a multiple beep sound will be heard.
Scan System Control Panel
C
D
B
E
F
A
A: Option Keys section |
D: Numerical Key pad |
B: Graphical Display |
E: Special Features keys |
C: Scan Control keys |
F: Navigation keys |
The left side of the Scan System Control Panel contains the keys for the OPTIONS KEYS selection of options. It is divided into three areas - Media Selection,
Image Quality, and Reduce/Enlarge.
To select an option, press the key(s) beneath the option. In some cases, a screen requiring a selection or input is displayed on the graphical
8 • Getting to know the WIDE FORMAT COPY SYSTEM |
XEROX WIDE FORMAT COPY SYSTEM |
display. When an option is selected, the indicator lamp to the left of the option illuminates.
The illustration below depicts the options portion of the Scan System Control Panel.
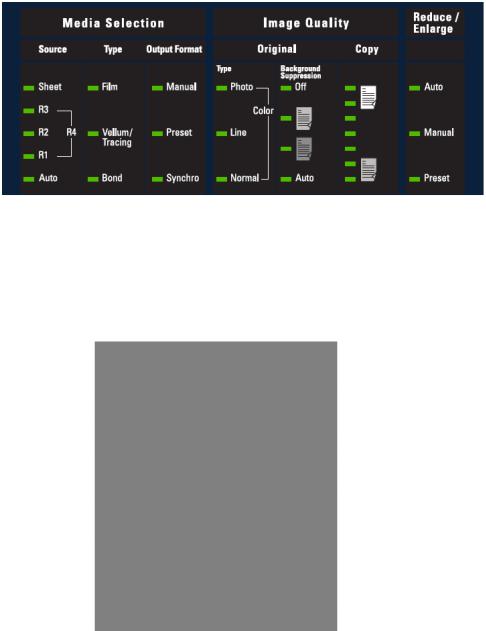
Control Panel Options Area
Media Selection |
The Media Selection area of the Scan System Control Panel allows you |
|
to select the media Source, Type, and Output Format. The illustration |
|
below depicts the Media Selection portion of the control panel. |
Media Selection Area
XEROX WIDE FORMAT COPY SYSTEM |
Getting to know the WIDE FORMAT COPY SYSTEM • 9 |

Source
The Source option allows you to select the source of the media on which the image will be printed. To select the media source, press the key beneath the Source settings until the desired source indicator lamp illuminates.
The Source settings are:
•Sheet – This setting tells the Printer to print from a manually inserted sheet of media.
•R4 – This setting is applicable to the WIDE FORMAT COPY SYSTEM 721P and 6050. When R4 is selected, both the R1 and R3 indicator lamps illuminate and the Printer then selects the media stored on Roll 4.
•R3 –When it is selected, the R3 indicator lamp illuminates and the Printer selects the media stored on Roll 3.
•R2 – This setting tells the Printer to select the media stored on Roll 2.
•R1 – This setting tells the Printer to select the media stored on Roll 1.
•Auto (factory default) – This setting automatically selects the roll containing the media that best fits the size of the captured image. For most documents, the Scan System is able to automatically detect the width of the scanned document. This permits the Auto function to automatically select the most appropriate roll of media.
NOTE: The presence of the Sheet feature and the amount of rolls available vary by the type of WIDE FORMAT PRINTER. If these options are not installed, they cannot be selected. To print from a cut sheet, Sheet mode must be explicitly selected. The Auto mode cannot select a cut sheet.
Type
The Type option allows you to select the kind of media on which to print
– Bond, Vellum/Tracing, or Film. To select the media type, press the key beneath the Type settings until the desired type indicator lamp illuminates.
NOTE: Only media types actually loaded into the Printer can be selected. When a roll is selected, the media type for that roll is automatically selected also. If more than one media type is loaded when the media source is set to Auto, the default choice priority is Bond (first), Vellum (second), and Film (third). Refer to the applicable Printer Operator Manual for instructions about how to load rolls and specify the width and media type.
10 • Getting to know the WIDE FORMAT COPY SYSTEM |
XEROX WIDE FORMAT COPY SYSTEM |

Output Format
The Output Format option allows you to select the size to which the roll feed media will be cut. It has three modes – Manual, Preset, and Synchro.
Manual
Manual allows you to enter the desired length and width manually.
To select the Manual mode:
1.Press the key beneath Output Format until the Manual indicator lamp illuminates. The CUSTOM OUTPUT FORMAT screen is displayed.
NOTE: If the indicator lamp is already lit, press the key once to display the screen.
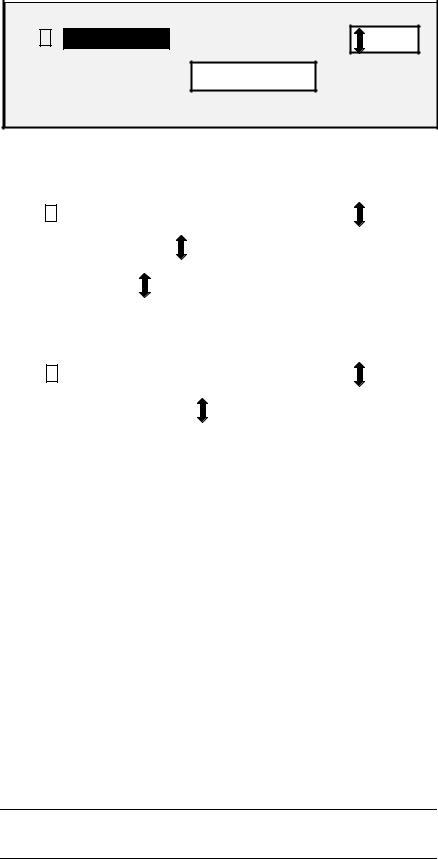
CUSTOM OUTPUT FORMAT
ENTER CUSTOM MEDIA SIZE: |
|
|
|
11.0 IN |
|
WIDTH (11.0 -36.0): |
||
LENGTH (8.3 – 1200.0): |
8.5 IN |
|
Custom Output Format Screen
2.Press the Previous or Next key to select WIDTH or LENGTH.
3.Press the Enter key to confirm the choice.
4.Use the numeric keypad to enter the desired value.
NOTE: The entered value must be within the limits shown in parentheses on the screen.
5.Press the Enter key to confirm the value.
6.Repeat steps 3 to 5 to enter the value for the remaining setting.
7.When the values for WIDTH and LENGTH are correct, press the Exit key to return to the READY screen.
Preset
Preset allows you to select a predefined length to which the roll media should be cut during printing. The associated width specification will depend on the Media Source selection. If the Media Source selection is set to Auto, the system will select the roll of media that best matches the width specification. If Media Source is set to R1, R2, R3, or R4; the system will use the selected roll regardless of the width specification.
To select the Preset mode:
1.Press the key beneath Output Format until the Preset indicator lamp illuminates. The PRESET OUTPUT FORMAT screen is displayed.
XEROX WIDE FORMAT COPY SYSTEM |
Getting to know the WIDE FORMAT COPY SYSTEM • 11 |
NOTE: If the indicator lamp is already lit, press the key once to display the screen.
PRESET OUTPUT FORMAT
SELECT: |
8.5 X 11 ANSI A |
|
|
Preset Output Format screen
2. Press the Previous or Next key to select an item from the list.
NOTE: Formats can be added or removed from this list. Refer to “Custom Media Formats” in the “Main Menu” section for more information.
3.Press the Enter key to confirm the choice and return to the READY screen.
Synchro
When the Synchro mode is selected, the length of the original is measured as it passes through the Scan System and automatically cuts the media at the Printer to match the length of the original document. Synchro is the factory default. To select the Synchro mode, press the key beneath Output Formats until the Synchro indicator lamp illuminates.
12 • Getting to know the WIDE FORMAT COPY SYSTEM |
XEROX WIDE FORMAT COPY SYSTEM |

Image Quality Area |
The Image Quality area of the Scan System Control Panel allows you to |
|
make corrective adjustments to the image and extract the best possible |
|
copy quality from an original document. It contains the Type, |
|
Background Suppression, and Copy options. |
|
The illustrations below depict the Image Quality portion of the Control |
|
Panel for FreeFlow Accxes software version 12.0 and SCAN SYSTEM |
|
firmware version 3.2.6 or higher. |
Image Quality Area
The SCAN SYSTEM firmware must be at version 3.2.6 or greater to support Normal, Line, Photo, or Color Type. If the SCAN SYSTEM is not at the required version, there will be an error message.
XEROX WIDE FORMAT COPY SYSTEM |
Getting to know the WIDE FORMAT COPY SYSTEM • 13 |
Depending on what Mode is selected (COPY or SCAN) the message will be displayed as show below.
INVALID MODE
UPGRADE SCANNER FIRMWARE
AUTO
100.0 % 1
Invalid Mode in Copy Mode
INVALID MODE
UPGRADE SCANNER FIRMWARE
|
|
|
|
|
|
|
|
|
|
|
|
TIFF/CCITTG4 |
|
|
|
400 DPI |
|
|
|
|
|||
|
|
|
|
|
|
||||||
|
|
1 BIT |
|
|
|
|
|
|
|
|
|
|
|
|
|
|
|||||||
|
|
|
|
|
|
|
|
|
|
|
|
|
|
|
|
|
|
|
|
|
|
|
|
|
|
|
|
|
|
|
|
|
|
|
|
|
|
|
|
|
|
|
|
|
|
|
|
Invalid Mode screen in Scan Mode
Original, Type
The Type option allows you to specify the type classification of your document. To select the document type, press the key beneath the Type settings until the desired Type indicator lamp illuminates.
Normal — (factory default) Select Normal for most copying needs. This Normal setting will provide good image quality for copying most types of
drawings containing text, line art, or a mixture of these. Shaded areas will be preserved. The TIFF, CALS, and PDF file types are available for Normal images.
In the SCAN mode, the following screen is displayed when the Normal key is pressed.
9

 PREVIEW
FORMAT: |
TIFF |
Scan Options (Normal) Screen
14 • Getting to know the WIDE FORMAT COPY SYSTEM |
XEROX WIDE FORMAT COPY SYSTEM |
Line Line — Select Line for an image containing fine lines, especially pencil. This selection produces high contrast and dark black images. The TIFF, CALS, and PDF file types are available for Line images. If the Mode selected is SCAN, and the Scan-to-Net feature key is installed, the SCAN OPTION (LINE) screen will be displayed. If the COPY mode is selected, the READY TO COPY screen will be displayed. Refer to the "Image Quality" section of this manual for additional information.
SCAN OPTIONS (LINE) 9

 PREVIEW
FORMAT: TIFF
Scan Options (Line) Screen
Photo Photo — Select Photo when the document contains a gray scale or color image, such as a photograph. TIFF is the file type that is available for Photo images. If the Copy Mode is selected, the READY TO COPY screen will be displayed. In Scan Mode, the following screen will be displayed. Refer to the Image Quality section of this manual for additional information.
SCAN OPTIONS (PHOTO) 9

 PREVIEW
COMPRESSION: RAW
FORMAT: |
TIFF |
Scan Options (Photo) Screen
NOTE: The Background Suppression option cannot be used with the
Photo setting. If Photo is selected, Background Suppression is automatically set to OFF.
Color Color — Color is only selectable in the SCAN mode. Select Color when scanning full color documents. When Color Type is selected, a version of the following screens will be displayed. The content of the screen will depend on the selected FORMAT and COMPRESSION.
The following screens will only be displayed in SCAN mode when the Scan-to-Net and Color Enablement feature keys are installed. The Normal and Photo LED's will be lit when Color is selected.
The selections that appear on the screen depend on the FORMAT and COMPRESSION selections.
XEROX WIDE FORMAT COPY SYSTEM |
Getting to know the WIDE FORMAT COPY SYSTEM • 15 |
Background
Suppression
SCAN OPTIONS (COLOR)
9 PREVIEW |
FORMAT: : TIFF |
COMPRESSION: : PACKBITS
Scan Options (Color) Screen - Packbits Compression Selection
|
|
|
SCAN OPTIONS (COLOR) |
|||||||||
9 |
PREVIEW |
|
|
|
FORMAT: |
: TIFF |
|
|||||
|
|
|
|
|
|
|
|
|
|
|
|
|
COMPRESSION: |
|
INDEX |
|
|
|
|
||||||
PALETTE: |
|
|
|
|
|
|
|
|
|
|
||
|
|
|
|
|
|
|
|
|||||
|
DEFAULT |
|
|
|
|
|
||||||
|
|
|
|
|
|
|
|
|
|
|
|
|
Scan Options (Color) Screen - Index Compression Selection |
||||||||||||
|
|
|
|
|
|
|
|
|
||||
|
|
|
SCAN OPTIONS (COLOR) |
|||||||||
9 |
PREVIEW |
|
|
|
FORMAT: |
JPEG |
|
|||||
COMPRESSION: |
|
|
|
|
|
|
|
|||||
|
|
|
|
|
|
|
||||||
|
NORMAL |
|
|
|
||||||||
|
|
|
|
|
|
|
|
|
|
|
|
|
|
|
|
|
|
|
|
|
|
|
|
|
|
Scan Options (Color) Screen – Normal Compression Selection
Background Suppression
The Background Suppression option enables you to make adjustments for documents that contain poor contrast between the foreground image and the background.
Four Background Suppression choices are provided:
Off This setting disables Background Suppression. All the characteristics of the original document with minimum alteration are reproduced on the copy. Choose this selection when:
•The lead edge of the document is very different from the rest of the document (e.g., the lead edge contains a black border).
•Maps with grayscale or color content may copy best in this mode.
•To retain more light color information, such as light gray or yellow.
NOTE: If Photo or Color is selected as the Original, Type, the Off setting is automatically selected. The contrast can still be adjusted by pressing the key(s) beneath Image Quality, Copy.
16 • Getting to know the WIDE FORMAT COPY SYSTEM |
XEROX WIDE FORMAT COPY SYSTEM |
Loading...