


 Loading...
Welcome to Xara 3D Maker 7
Traditional 3D programs are notoriously difficult to use and understand. Not so Xara 3D Maker 7. Unlike many 3D programs that take an age to learn and understand, Xara 3D Maker 7 has been created to perform one job, and performs that job with style, speed and simplicity.
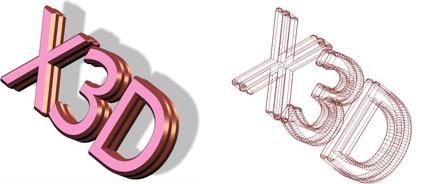
Xara 3D Maker 7 is solely designed to create the highest quality 3D text and graphics
, such as headings, logos, titles and buttons. It's the perfect way to add impact to your web pages, mailshots, movie titles and credits, and presentations (all images are fully anti-aliased for that smooth, professional quality). Xara 3D Maker 7 can also create awesome 3D animations in seconds - GIFs, AVIs and simple Flash movie sequences - and you can even enhance your desktop by saving any animation as a screensaver!
Getting started
These pages help you when you first install Xara 3D Maker 7.
The basics
Getting started
The design types
What's new in version 7
Customer support
How do I...?
Use this page
if you want to find out how to do something in Xara 3D Maker 7. Last changed: 2/16/2011
Page 1
Purchasing and unlocking Xara 3D Maker
When you run the downloaded trial version of Xara 3D Maker, the start screen will present you with three options. Check the option you require and you will be presented with further instructions.
Activate with serial number
Select this option if you have already purchased your copy of Xara 3D Maker and enter the serial number that you were given in the email confirming your purchase. Enter your email address so your copy can be registered (if you have already registered this will be ignored). Then click Register Online and Activate
.
Purchase online
Select this option if you would like to purchase a copy of Xara 3D Maker. You will be given a serial number when you purchase.
Continue using trial
Select this option if you would like to continue using the free trial. To the right of this option it will tell you how many days of the trial you have left. Then click Continue trial
.
Important note
: Please keep a record of the email address and password you used when purchasing Xara 3D Maker since you may need them in the future, for example if you wish to upgrade.
Other ways to purchase
If you do not have the trial you can order directly on our website www.xara.com/ordering and you will be given a serial number that can be used to unlock the trial later.
Xara titles are great value for the money, but we offer further generous discounts to academic establishments on all our products. You can find details on our website.
Page 2
What's New in Xara 3D
Maker Version 7
Xara 3D Maker now offers:
Two new animation types, Scroll and Scroll In/Out, allow you to move letters, words and phrases across the screen in a choice of directions, also giving you control over entrance and exit speed and acceleration/deceleration.
Seven new bevel styles add to the huge range of beveled types you can add to your 3D design. These include:
Four new smoothed bevel types that give you a wider choice of rounded bevel types - Smoothed 1a and 1b, Smoothed 2a and 2b
Smoothed 1a |
Smoothed 1b |
Smoothed 2a |
Smoothed 2b |
A stylish addition to the Fancy Incut bevel types
Fancy Incut 3
Two new striking angled designs, Angle Faced and Angle Cornered
Page 3
Angle Faced |
Angle Cornered |
A new View Options dialog allows you to enter an X & Y position for your image, and you can also specify precise angles for its horizontal and vertical rotation.
View options let you rotate precisely around three axes and view your design as wireframe
Easier insertion of line and page breaks in the Text Options dialog box enables faster text editing.
Instant access to hundreds of pre-built Xara 3D Maker samples via the new Open Sample command in the File menu.
The new autosave feature ensures you won't lose any of your 3D designs, even if you exit Xara 3D Maker without saving changes - your current view will be saved and will automatically open the next time you open the program.
On Windows 7 by default Xara 3D Maker now excludes fonts that are marked as hidden, from its font list. However this can be turned off so that the hidden fonts do appear in the font list. Refer to your Windows documentation for more information on Windows 7 hidden fonts.
You can now copy or cut and paste your 3D images to Microsoft Word and other programs.
Page 4

Other Xara products
There are trial versions and demo movies for many of these products at http://www.xara.com/products
.
Xara Photo & Graphic Designer 6
(formerly Xtreme) is quite simply the best value and fastest all-in-one graphics package you'll find. For drawings or photo work, for print or web graphics, it's the perfect choice.
See http://www.xara.com/products/designer/ for more information.
Xara Designer Pro
(formerly Xtreme Pro) is our top of the range product and includes all the features and templates of Web Designer and Photo & Graphic Designer. Plus it adds extra features that Pro designers need including support for PDF/X, PANTONE® and color separations, multi-core processor support for extra speed, enhanced import/export filters, a pro version of the photo panorama tool and more. See http://www.xara.com/products/designer/
for more information.
Xara Web Designer
is unlike any web editor you will have seen before; an easy template based solution that gives you total page design freedom, no HTML skills required. It offers comprehensive WYSIWYG web graphic, web page and website creation features.
See http://www.xara.com/products/webdesigner/ for more information.
Create professional graphical NavBars and DHTML menus in an instant with Xara Menu
Maker
- no technical or design skills required.
See http://www.xara.com/products/menumaker/ for more information.
Xara ScreenMaker 3D
is a screensaver maker that's fast, fun and easy to use. Create animated 3D text or tumbling picture cube screensavers.
See http://www.xara.com/products/screenmaker3d / for more information.
Page 5
Getting Help
In this chapter
Support
About Xara 3D Maker
Tooltips
Page 6
Support
http://support.xara .com
The Xara support site above offers a comprehensive FAQ page (frequently asked questions) which is constantly updated and available 24 hours, 7 days a week; always the best source for instant answers. You can also contact our technical support staff using the form on the support page, if you cannot find the answer to your question!
If you are an owner of a Xara product you can also submit a ticket to our support staff via the support site above, but please remember we can only respond during office hours! Please note TalkGraphics members cannot help with Xara account issues.
If you can't find the answer in this manual, we highly recommend viewing the Xara 3D Maker introduction movie
. It is the ideal way to get to know Xara 3D Maker and get an overview of its features, allowing you to make the most of the program.
If you need some help using this program, here are some sources of information that may be of use:
Program help - Choose Help topics from the Help menu to open Xara 3D Maker Help (containing hundreds of pages of information).
Status bar - Try reading the text on the status bar at the bottom of the main Xara 3D Maker window. It always describes what actions are currently possible and what they will do (even during drags), and helps you learn to use the Xara 3D Maker tools. It also gives details of what buttons and controls do as you move the pointer over them. See Status Bar for more details.
ToolTips - If you hold the mouse pointer over a button or control for a short while, then small message appears telling you what it does.
Dialog boxes - If you want to know what a dialog box does or how to use it, click its help button (displayed as a "?" mark).
Movies - Use menu "Help" > "Play Movie" or click here to watch the program introduction movie.
The TalkGraphics forums - Post your question in the popular, dedicated Xara forums at TalkGraphics.com (www.talkgraphics.com), where you can ask other Xara 3D Maker users for advice or suggestions ? available 24x7. You can share tips and ideas, ask questions or offer solutions to other users.
Xara Xone - Visit the Xara Xone (www.xaraxone.com) for a host of excellent Xara 3D Maker support resources, including over ten years of Xara Designer tutorials, hints & tips, featured artists, and Xara shareware
"The Outsider" newsletter (www.xara.com/outsider) Subscribe to our monthly newsletter "The Outsider" (with monthly tutorials and tips, offers, inspirational art, and more).
Join the Xara community on Facebook or follow our news on Twitter.
Page 7
About Xara 3D Maker
Choose "Help" > "About Xara 3D Maker 7
". This displays general information about the program. If you contact Xara support, you may be asked for this information.
Page 8
Tooltips
When you move over a button, the tooltip tells you the function of the button.
Page 9
Working with Xara 3D Maker
This section describes the basics of using Xara 3D Maker. Later sections provide more details of the various dialog boxes and toolbars and how to perform particular actions.
In this chapter
The Xara 3D Maker window Getting started
Page 10

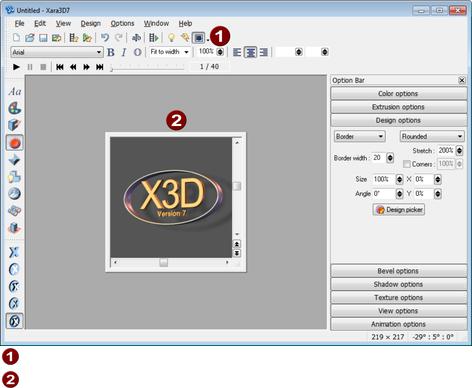
The Xara 3D Maker window
Display of the toolbars and Status Bar is optional. The Window menu lets you select which to display.
Standard toolbar: This provides common editing functions such as load and save. For more details see The standard toolbar
.
Text toolbar:_This provides quick access to the main text editing options such as font and size. For more details see The text toolbar
.
Time line: (Not displayed by default. Select Time line on the Window menu.) This provides greater control over animations. It lets you start, stop, pause and step through animations. For more details of the Time line see The time line. For more details of creating animations see Create animations
.
Preview area: The main part of the window shows a preview of your graphic as you create it. You can edit the graphic by, for example, dragging on a shadow to move the shadow, or dragging on the graphic to change the extrude or bevel
.
Options toolbar:
This provides shortcuts to the different options available. These are:
Animation options
Bevel options
Color options
Design options
Extrusion options
Shadow options
Text options
Texture options
Page 11

View options
Option bars: Each bar contains settings for the options listed above. They can be accessed by clicking on the required bar or by clicking the required button on the options toolbar above. For more details see Option bars
. You can move and dock the option bars, or remove completely. Design toolbar: Offers shortcuts to the different design types of: text
only, button, board, board with holes and border. For more details see Design options
.
Status bar: This provides feedback on available editing options and also shows you the current size and rotation angles of the 3D graphic. For more details see The status bar
.
Note:
Right click anywhere in the preview area (main window) to bring up a menu with options relating to that item. For example, right-clicking the background gives you the opportunity to change the background color and texture.
Page 12
Getting started
Traditional 3D programs are notoriously difficult to use and understand. This is not the case with Xara 3D Maker. Xara 3D Maker is so simple to use, literally anyone can produce high quality still and animated 3D graphics in minutes.
We highly recommend viewing the Xara 3D Maker introduction movie. It is the ideal way to get to know Xara 3D Maker and get an overview of its features, allowing you to make the most of the program. View the movie
.
Creating a 3D heading is easy:
1.Start typing to enter the text you want. You can delete existing text using backspace.
o Typically the first step is to enter your own text which you can do by just deleting the default text with the regular Delete key and typing your own. You can position the image in three dimensions by simply dragging it on screen (as long as you don't have a background texture, in which case use the scroll bars).
2.Select a font of your choice from the drop-down list in the text toolbar.
o You will likely also want to customize it, which you can do by clicking any of the option bars on the right hand side of the window (the buttons on the options toolbar also open these). Any changes you make are reflected instantly on the image, making it easy and fun to experiment.
3.Change the bevel and extrude if you wish.
o Dragging on the graphic itself can change the extrude or bevel. You can also add a shadow and drag it to the required position, and
4.Drag the text to get the angle you want.
5.Change the color of the text or background.
6.Resize the Xara3D window to set the size of the text.
7.Select Export on the file menu to save the heading as a BMP, PNG, GIF, JPEG, Flash SWF, ICO (icon) or CUR (cursor).
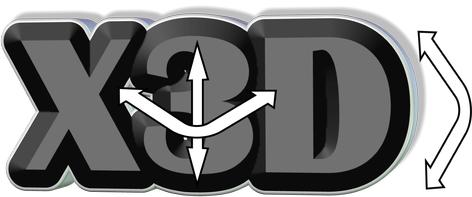
Want an animated heading?
Creating animations
is just as easy. The animation options offer a wide range of different animation types from simple rotation of the image to multi-page animations with alternating animation types per character.
Want to change the lighting angles or colors?
Simple. Click the light bulb button
. This displays the three lights that color the text (and a special striped light that creates the shadow). Drag the lights to change the angles or double-click on a light to display the color picker.
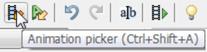
Want to copy styles from an existing heading?
And if you don't want to create your own headings you can simply copy one
that's already been created by using the design picker (under design options) to copy some or all of the attributes of an existing file to the current heading, or use the animation picker to copy animation settings.
Want to open one of the hundreds of samples that come with Xara 3D Maker?
Choose Open Sample from the File
menu and choose from the huge selection of .x3d files arranged into folders depending on their design. A
Page 13
preview is displayed as you click on each file, so you can see the image before you open it.
Want to import your own 2D graphic?
You can import
Windows metafiles (EMF or WMF) or Xara XAR/WEB files. Then you can convert them to extruded 3D graphics.
When you're happy with the results, you can export either a static image or an animation or movie in any of the most popular file formats. You can even create an animated screensaver either for use on your own computer or for distribution to other people.
Want to copy your 3D image into another application?
No problem, just copy your design (choose Copy from the Edit
menu or press "Ctrl + C") and it's placed on your clipboard in 24bpp bitmap form, as well as in XAR format. This means that you can paste it into any other application that handles bitmaps, such as Microsoft Word or Outlook, or graphics programs, as well as other Xara products such as Xara Designer Pro and Xara Photo & Graphic Designer. The XAR format supports a bitmap with a transparent background, while the 24bpp bitmap has a solid background.
Page 14
How To ...
This section describes using Xara 3D Maker to create quality 3D headings or buttons and then exporting static or animated files. In these descriptions we use 'graphic' as shorthand for the text or shape shown in the Xara 3D Maker window.
In this chapter Quick overview
Open a new document Change the text
Rotate and position the graphic Light the graphic
Color the graphic Resize the graphic Add bevels & extrude Select characters Add shadows
Create animations
Creating cursor (CUR & ANI) files Importing 2D objects
Apply the style of an existing graphic
Create buttons, boards, boards + holes and borders Create screen savers
Create Flash files Save and export
Customize Xara 3D Maker
Page 15

Quick overview
Use these pages if you want to find out how to do something in Xara 3D Maker. The basics
Text & 2D objects
Positioning & rotating
Changing the size
Changing the wording
Changing text spacing
Changing the font
Changing the color
Changing the bevel (edges)
Changing the 3D extrude (depth)
Changing the effects applied to selected characters
Changing the lighting
Creating hollow text
Shiny & matt surfaces
Selecting text
Typing international (accented) characters
Importing styles from an existing heading
Importing animation settings from an existing heading
Importing 2D objects
Creating 3D buttons, boards and border designs
Colors
Changing the text and background color
Changing the colors of the lights
Changing the shadow color
Changing the texture color (tint)
Creating and moving shadows
Changing the shadow color and type
Changing the shadow transparency and blur
Textures
and text
and the background
Changing the texture color (tint)
The lights
Changing their color and position
Buttons, boards and borders
Creating buttons, boards and border designs Making the designs wider or narrower
Page 16
Changing the curvature of the corners
Changing the size of buttons
Animation
Creating an animation/movie
Creating and editing a multipage animation Previewing an AVI movie
Importing animation settings from an existing heading The Time Line
Saving
Saving for reloading later
Saving a graphic
Saving screensavers
Correcting mistakes
Undo & Redo
Customizing Xara3D
Changing the default document Displaying and moving toolbars Docking dialog boxes
Making your own menu items and shortcuts Returning to default settings
Page 17
Open a new document
Click New on the File menu. This loads the default graphic. You can replace this default graphic with your own ? see Customizing Xara 3D Maker
.
Alternatively click Open Sample on the File
menu to open one of the hundreds of sample files that come with Xara 3D Maker. A preview of the image is displayed so you can see what it looks like before you open it.
Page 18

Change the text
The easiest way of changing the text is to delete the existing text (using Backspace) and then typing in the wording you want.
You can also display the text cursor. Select the show/hide cursor button on the standard toolbar.
You can then use the arrow keys on the keyboard to move the cursor in the text and to select part of the text ? for more information on this, see select characters
.
To change the font or apply effects such as increasing the space between characters, you can use the options in the text toolbar
.
Alternatively you can use the Text options dialog box
to select and change text and apply effects. This is often easier when you have several lines of text such as in multi-page animations.
Page 19
Rotate and position the graphic
The easiest way to rotate the graphic is simply to drag on it in the Xara 3D Maker window or drag on the background if you don't have a background texture (don't drag on the shadow ? this moves the shadow). This lets you rotate the graphic horizontally, vertically or around its center line. Alternatively, use the scroll bars.
Status bar
The Status bar shows the current angles (horizontal, vertical and rotation around the center line).
Positioning options
Normally the graphic is centered in the window. You can move the graphic to your preferred location using View options
and changing the X and Y position values. Alternatively you can use these keyboard shortcuts:
Alt-drag allows you to move the graphic freely around the screen. To return the graphic to the center of the window press "Alt+Home" (this also cancels any rotation.)
"Ctrl + Alt-drag" allows you to move the graphic horizontally on the x axis. "Alt + Shift-drag" allows you to move the graphic vertically on the y axis.
Rotate options
You can rotate your graphic by using the keyboard shortcuts below. Alternatively you can use View options
to rotate your graphic horizontally, vertically and around its center line by precise increments in degrees. To rotate around the horizontal (x) axis only:
"Shift-drag" on the window
or use the up/down arrow keys (1s rotation)
or use "Ctrl" and the up/down arrow keys (15s rotation) To rotate around the vertical (y) axis only:
"Ctrl-drag" on the window
or use the left/right arrow keys (1s rotation)
or use "Ctrl" and the left/right arrow keys (15s rotation) To rotate the graphic around its center line
"Ctrl + Shift-drag" on the window
or use "Shift" and the up/down arrow keys (1s rotation)
or use "Shift + Ctrl" and the up/down arrow keys (15s rotation) To cancel any rotation: (graphic is face-on) press "Alt + Home"
Note:
Page 20
If the text cursor is displayed, hold down "Alt" to rotate the text or click the show/hide cursor button to remove the cursor.
Page 21
Status bar
The Status bar shows the current angles (horizontal, vertical and rotation around the center line).
Positioning options
Normally the graphic is centered in the window. You can move the graphic to your preferred location using View options
and changing the X and Y position values. Alternatively you can use these keyboard shortcuts:
Alt-drag allows you to move the graphic freely around the screen. To return the graphic to the center of the window press "Alt+Home" (this also cancels any rotation.)
"Ctrl + Alt-drag" allows you to move the graphic horizontally on the x axis. "Alt + Shift-drag" allows you to move the graphic vertically on the y axis.
Rotate options
You can rotate your graphic by using the keyboard shortcuts below. Alternatively you can use View options
to rotate your graphic horizontally, vertically and around its center line by precise increments in degrees. To rotate around the horizontal (x) axis only:
"Shift-drag" on the window
or use the up/down arrow keys (1ÅŸ rotation)
or use "Ctrl" and the up/down arrow keys (15ÅŸ rotation) To rotate around the vertical (y) axis only:
"Ctrl-drag" on the window
or use the left/right arrow keys (1ÅŸ rotation)
or use "Ctrl" and the left/right arrow keys (15ÅŸ rotation) To rotate the graphic around its center line
"Ctrl + Shift-drag" on the window
or use "Shift" and the up/down arrow keys (1ÅŸ rotation)
or use "Shift + Ctrl" and the up/down arrow keys (15ÅŸ rotation) To cancel any rotation: (graphic is face-on) press "Alt + Home"
Note:
If the text cursor is displayed, hold down "Alt" to rotate the text or click the show/hide cursor button to remove the cursor.
Page 22
Positioning options
Normally the graphic is centered in the window. You can move the graphic to your preferred location using View options
and changing the X and Y position values. Alternatively you can use these keyboard shortcuts:
Alt-drag allows you to move the graphic freely around the screen. To return the graphic to the center of the window press "Alt+Home" (this also cancels any rotation.)
"Ctrl + Alt-drag" allows you to move the graphic horizontally on the x axis. "Alt + Shift-drag" allows you to move the graphic vertically on the y axis.
Rotate options
You can rotate your graphic by using the keyboard shortcuts below. Alternatively you can use View options
to rotate your graphic horizontally, vertically and around its center line by precise increments in degrees. To rotate around the horizontal (x) axis only:
"Shift-drag" on the window
or use the up/down arrow keys (1ÅŸ rotation)
or use "Ctrl" and the up/down arrow keys (15ÅŸ rotation) To rotate around the vertical (y) axis only:
"Ctrl-drag" on the window
or use the left/right arrow keys (1ÅŸ rotation)
or use "Ctrl" and the left/right arrow keys (15ÅŸ rotation) To rotate the graphic around its center line
"Ctrl + Shift-drag" on the window
or use "Shift" and the up/down arrow keys (1ÅŸ rotation)
or use "Shift + Ctrl" and the up/down arrow keys (15ÅŸ rotation) To cancel any rotation: (graphic is face-on) press "Alt + Home"
Note:
If the text cursor is displayed, hold down "Alt" to rotate the text or click the show/hide cursor button to remove the cursor.
Page 23
Rotate options
You can rotate your graphic by using the keyboard shortcuts below. Alternatively you can use View options
to rotate your graphic horizontally, vertically and around its center line by precise increments in degrees. To rotate around the horizontal (x) axis only:
"Shift-drag" on the window
or use the up/down arrow keys (1ÅŸ rotation)
or use "Ctrl" and the up/down arrow keys (15ÅŸ rotation) To rotate around the vertical (y) axis only:
"Ctrl-drag" on the window
or use the left/right arrow keys (1ÅŸ rotation)
or use "Ctrl" and the left/right arrow keys (15ÅŸ rotation) To rotate the graphic around its center line
"Ctrl + Shift-drag" on the window
or use "Shift" and the up/down arrow keys (1ÅŸ rotation)
or use "Shift + Ctrl" and the up/down arrow keys (15ÅŸ rotation) To cancel any rotation: (graphic is face-on) press "Alt + Home"
Note:
If the text cursor is displayed, hold down "Alt" to rotate the text or click the show/hide cursor button to remove the cursor.
Page 24
Light the graphic
Three colored lights create the highlights and shadows on the graphic. You can change the positions and colors of each light. The fourth light (shown striped) controls the position of the shadow ? see shadows
.
Shadow
Light
Light
Light
To display the lights:
Click the 'light bulb' button
or choose Display lighting on the View menu To change the color of a light, display the color options dialog box by:
Double-clicking on the light
or choosing Light color 1, 2, 3 on the View menu.
To move a light just drag it. To move a light from in front of the object to behind it (or from behind to in front) keep dragging the light left or right.
Page 25

Color the graphic
You can color the graphic either by changing the colors of the graphic or by changing the light colors or both.
If you are creating a graphic and you want two or more colors on the text, it is easier to use pale colored lights and to color the text. (The default text of Xara 3D Maker is an example of this: the X3D is pale gray, Version is light blue and version number is dark blue. The light shining on the face of the text is an orange cream color.)
The colors you see depend on the overlap of the lights, their colors and the graphic colors. The colors are also influenced by whether the graphic has a matt or gloss surface (selected in extrusion options ).
The graphic can have different colors on the faces (front and back) and on the sides. You can change the color or texture on a per-character basis. See color options
.
An example of an incut bevel with white face color and dark gray sides and bevel
Bevels display the color of the sides. Using square, round or triangular-faced or incut bevels can give the effect of two colors on the face of the graphic.
You can also use textures to color the sides or faces. You can import any BMP. GIF, ICO, JPEG or PNG file as a texture. Texture options let you scale, move or rotate the texture. Color options
let you tint a texture (an effect similar to placing a colored film over the texture).
Page 26
Resize the graphic
The easiest way to resize larger graphics is to resize the Xara 3D Maker window by dragging the corners or sides.
For smaller graphics this can make the Xara 3D Maker window too small and you cannot see all the buttons. To avoid this, choose Display frame on the Window menu or click the display frame button ( Standard Tool Bar
). This displays the graphic in a smaller frame which you can resize independently of the main Xara 3D Maker window.
Display frame
The frame
An advantage of the frame is that you can set it to a specific size. Use Frame size on the Window menu. When you save an X3D file when using the frame, Xara 3D Maker remembers the frame size and always opens the graphic at that size.
To make the exported image the same size as the frame area, select Current window size and uncheck Crop in the Export dialog box
.
Alternatively you can fix the graphic size using the font size drop-down list on the text toolbar. Choose any value except Fit to width
.
Page 27

Add bevels & extrude
The bevel is the decorative transition between the faces and the sides of the graphic. The extrude is the depth of the sides.
The bevel
The extrude
Bevel designs range from a simple angled or rounded bevel on the corner to complex rippled bevels that run the length of the sides. Bevels are always applied to the sides of the graphic, not to the faces. The result is to make the graphic larger and, with larger bevel sizes, text characters can merge into each other. This also has an effect when the faces and sides are different colors ? the bevel takes the side color. To alter the bevel, hover you mouse over the edge of the text while holding the shift key.
When the cursor changes to the bevel tool you can click and drag the bevel to the required size.
Bevel options
let you have more advanced control, like choosing a bevel style. For small extrude values there may not be enough space to display the complete bevel (depending on the bevel design.)
To change the extrude depth, just click and drag on the side of the text. You will see the cursor appear when altering the extrude.
Extrude options
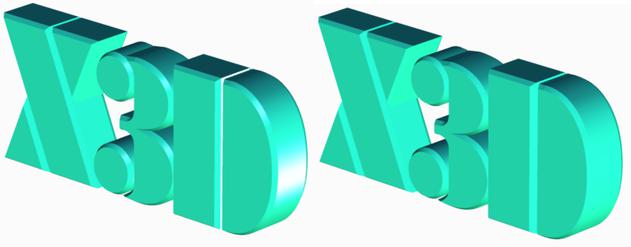
gives you more advanced control over the extrusion, and whether the graphic is matt or gloss. You can also choose the surface, either Gloss (reflective) or Matt
(non-reflective.) The surface affects the entire "feel" of the graphic. Gloss (shown below top) creates shiny, metallic effects; matt (shown below bottom) more subtle, toned-down graphics. When swapping between the two surfaces, you often need to move the lights to get the best results for that surface.
Page 28
Page 29

Select characters
Almost all Xara 3D Maker attributes (such as colors, bevels, textures, animation types) can be applied character-by-character. (The exceptions are the shadow, the lighting and some animation types.) Before you can apply an attribute to a character or block of characters, you must first select that character or block.
First step is to display the text cursor. Click the show/hide cursor button on the standard toolbar:
Then:
Use the arrow keys on the keyboard to move the cursor.
"Shift + left/right arrow keys" selects the character on the left or right.
"Ctrl + Shift + left/right arrow keys" selects all the characters from the cursor to the left or right of the line.
"Ctrl + A" selects all characters.
"Ctrl + P" selects all characters on the current page (for multi-page animations.)
When you have a selected character or block, any changes you make apply only to that character or block.
Page 30
Loading...