


WFU14FK3BW4
White-Westinghouse WFU14FK3BW4, WFU0912DW0, WFU14FK3BW5, WFC15K2BW3, WFC09K0DW0 Owner’s Manual
...
OWNER'SGUIDE
READ AND SAVE THESE INSTRUCTIONS
Record the Model No. and SefiaU No. of this freezer in the space provided beUow.
ModeU No.
SefiaJ No.
Keep these numbers for future reference.
iMPORTANT: Keep a copy of your bill of saUe. The date on the bill establishes
the warranty period should service be required, tf service is performed, it is in your
best interest to obtain and keep aH receipts.
Contents
2 important Safety instructions
3 First Steps
4 Setting the Temperature Control
4-5 Freezer Optional Features
5-6 Care and Cmeaning
7 Power Failure/Freezer Failure
7 Energy Saving ideas
8-9 Avoid Service Checklist
10 Warranty in the United States
This Owner's Guide provides specific operating instructions for your model. Use
the freezer only as instructed in this Owner's Guide.
Versi6n en espaSo_
Si desea obtener una copia en espaSol de este Manual del Usuario, sirvase escribir la
direcci6n que se induye a continuaci6n. Solicite la P/N 216960600.
Spanish Owner's Guides
Electrolux Home Products, Inc.
P.O. Box212378
Augusta, GA 30917
FREEZER
Product and feature specifications as described or illustrated are subject to change without notice.
P/N 216960500A (0403)
important Safety
instructions
Proper Disposal of Your
Risk of child entrap-
ment. Child entrapment and
suffocation are not problems of the past.
Junked or abandoned refrigerators or
freezer are still dangerous--even ifthey
will sit for "just a few days." if you are
getting rid of your old refrigerator or
freezer, please follow the instructions
below to help prevent accidents.
BEFORE YOU THROWAWAY YOUR
OLDREFR_GERATOR/FREEZER:
*Remove doors.
*Leave shelves in
place so children
may not easily
climb inside.
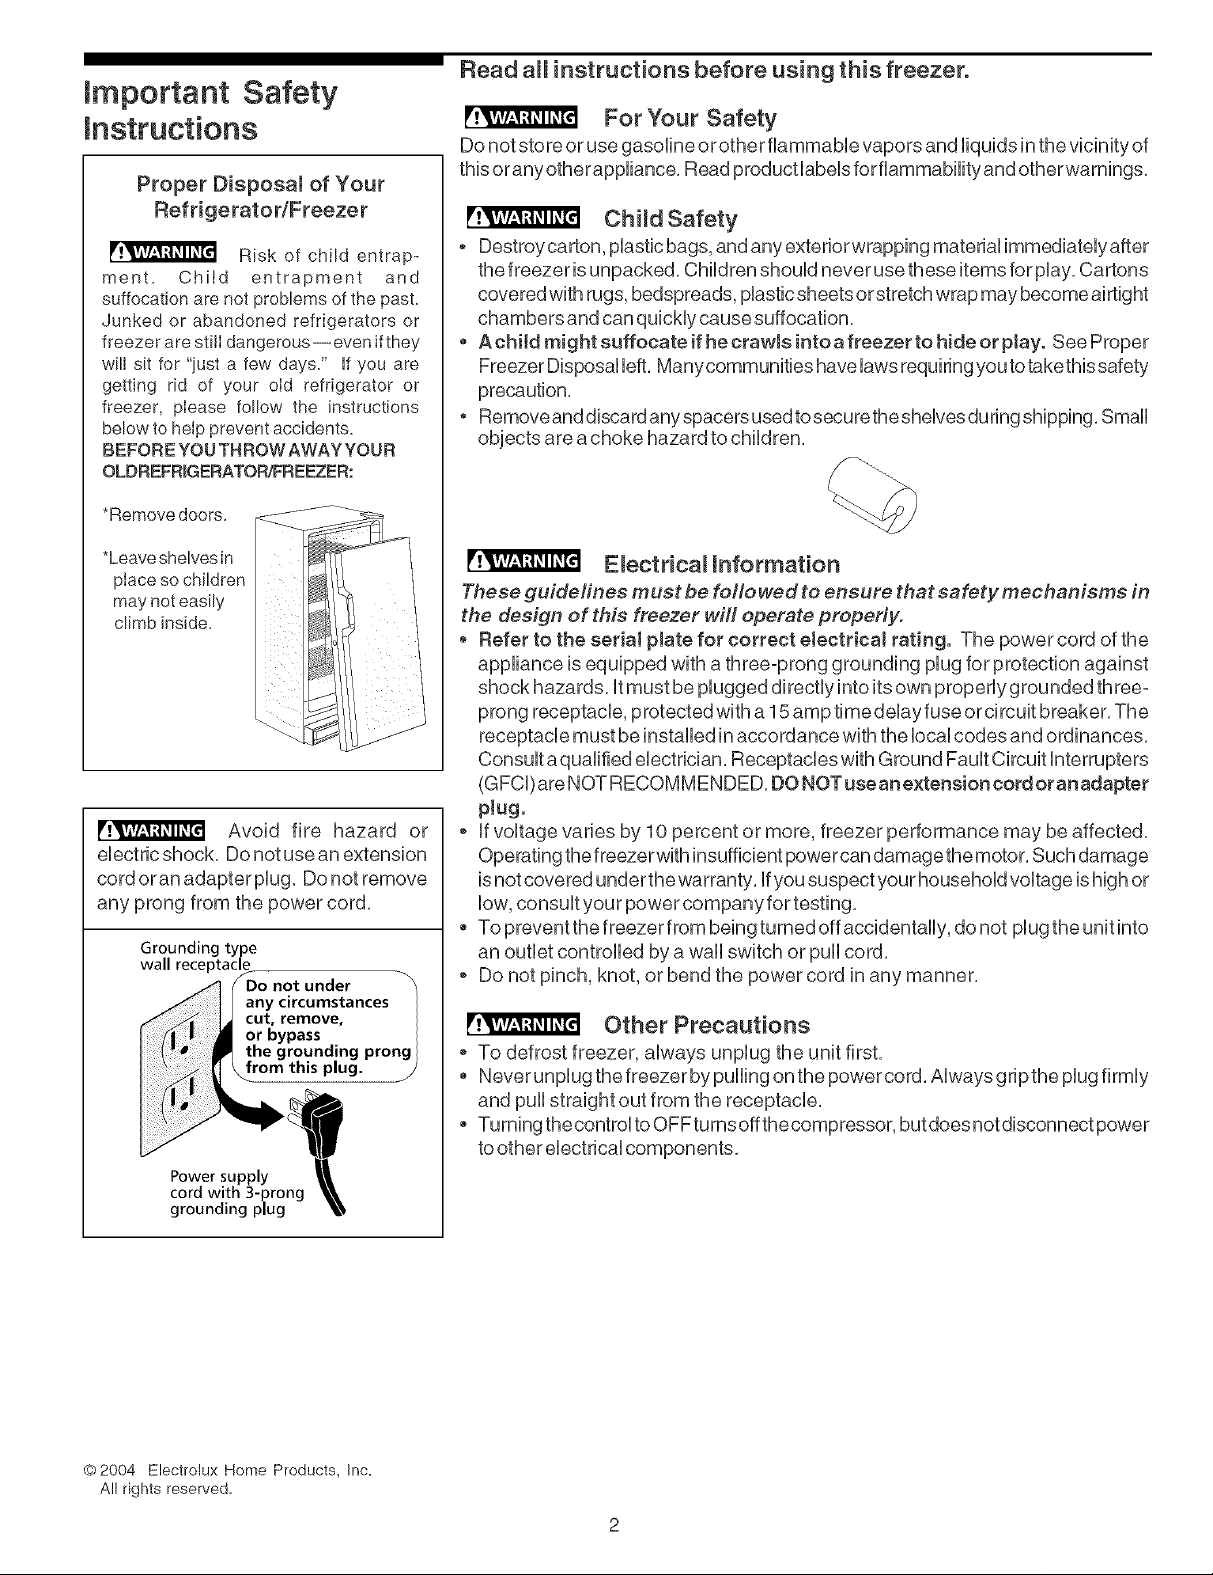
Avoid fire hazard or
electric shock, Do not use an extension
cord oran adapter plug. Do not remove
any prong from the power cord,
Grounding type
wall receptacle
A _Do not under -_
* I any circumstances
I ut'l'°m°ve'
I m or bypass
_1_ the grounding prong
/ I'1 \ from this plug. j
Power supply
cord with 3-prong _L_L
grounding plug _
Read all instructions before using this freezer.
For Your safety
Do not store or use gasoline or other fiammabb vapors and liquids in the vicinity of
this orany otherappliance, Read product labels forflammaWity and otherwamings,
Child Safety
o Destroycarton, plastic bags, and any exteriorwrapping material immediatelyafter
the freezer isunpacked, Children should never use these items for play, Cartons
covered with rugs, bedspreads, plastic sheets or stretch wrap may become airtight
chambers and can quickly cause suffocation.
,, AchiMmightsuffocateifhecrawlsintoafreezertohideorplay. SeeProper
Freezer Disposal bft, Manycommunities havelaws requiringyou totakethissafety
precaution,
, Removeand discard any spacers used tosecuretheshelves during shipping, Small
objects are a choke hazard to children,
Electrical information
These guidelines must be followed to ensure that safety mechanisms in
the design of this freezer will operate properly.
, Refer to the serial plate for correct eJectricaJ rating. The power cord of the
appliance is equipped with athree-prong grounding plug for protection against
shock hazards, it must be plugged directly into itsown properlygrounded three-
prong receptacle, protected with a 15 amptimedelay fuse orcircuit breaker, The
receptacle must be installed in accordance with the local codes and ordinances,
Consult aqualified electrician, Receptacles with Ground Fault Circuit interrupters
(GFCi)are NOT RECOMMENDED, DONOTusean extension cord oranadapter
p!ug,
o If voltage varies by 10 percent or more, freezer performance may be affected,
Operating thefreezerwith insufficient powercan damage the motor, Such damage
isnot covered underthe warranty, Ifyou suspect your household voltage is high or
low, consult your power company for testing,
,, To prevent the freezer from being tumed off accidentally, do not plug the unit into
an outlet controlled by a wall switch or pull cord,
o Do not pinch, knot, or bend the power cord inany manner,
r!VAv/_*_fl_l I_[I other Precautions
o To defrost freezer, always unplug the unit first,
,, Never unplug the freezer bypulling onthe power cord, Always gripthe plug firmly
and pull straight out from the receptacle,
,, Turning thecontrol to OFFtumsoffthecompressor, but does not disconnect power
toother electrical components,
©2004 Electrotux Home Products, Inc.
All rights reserved.
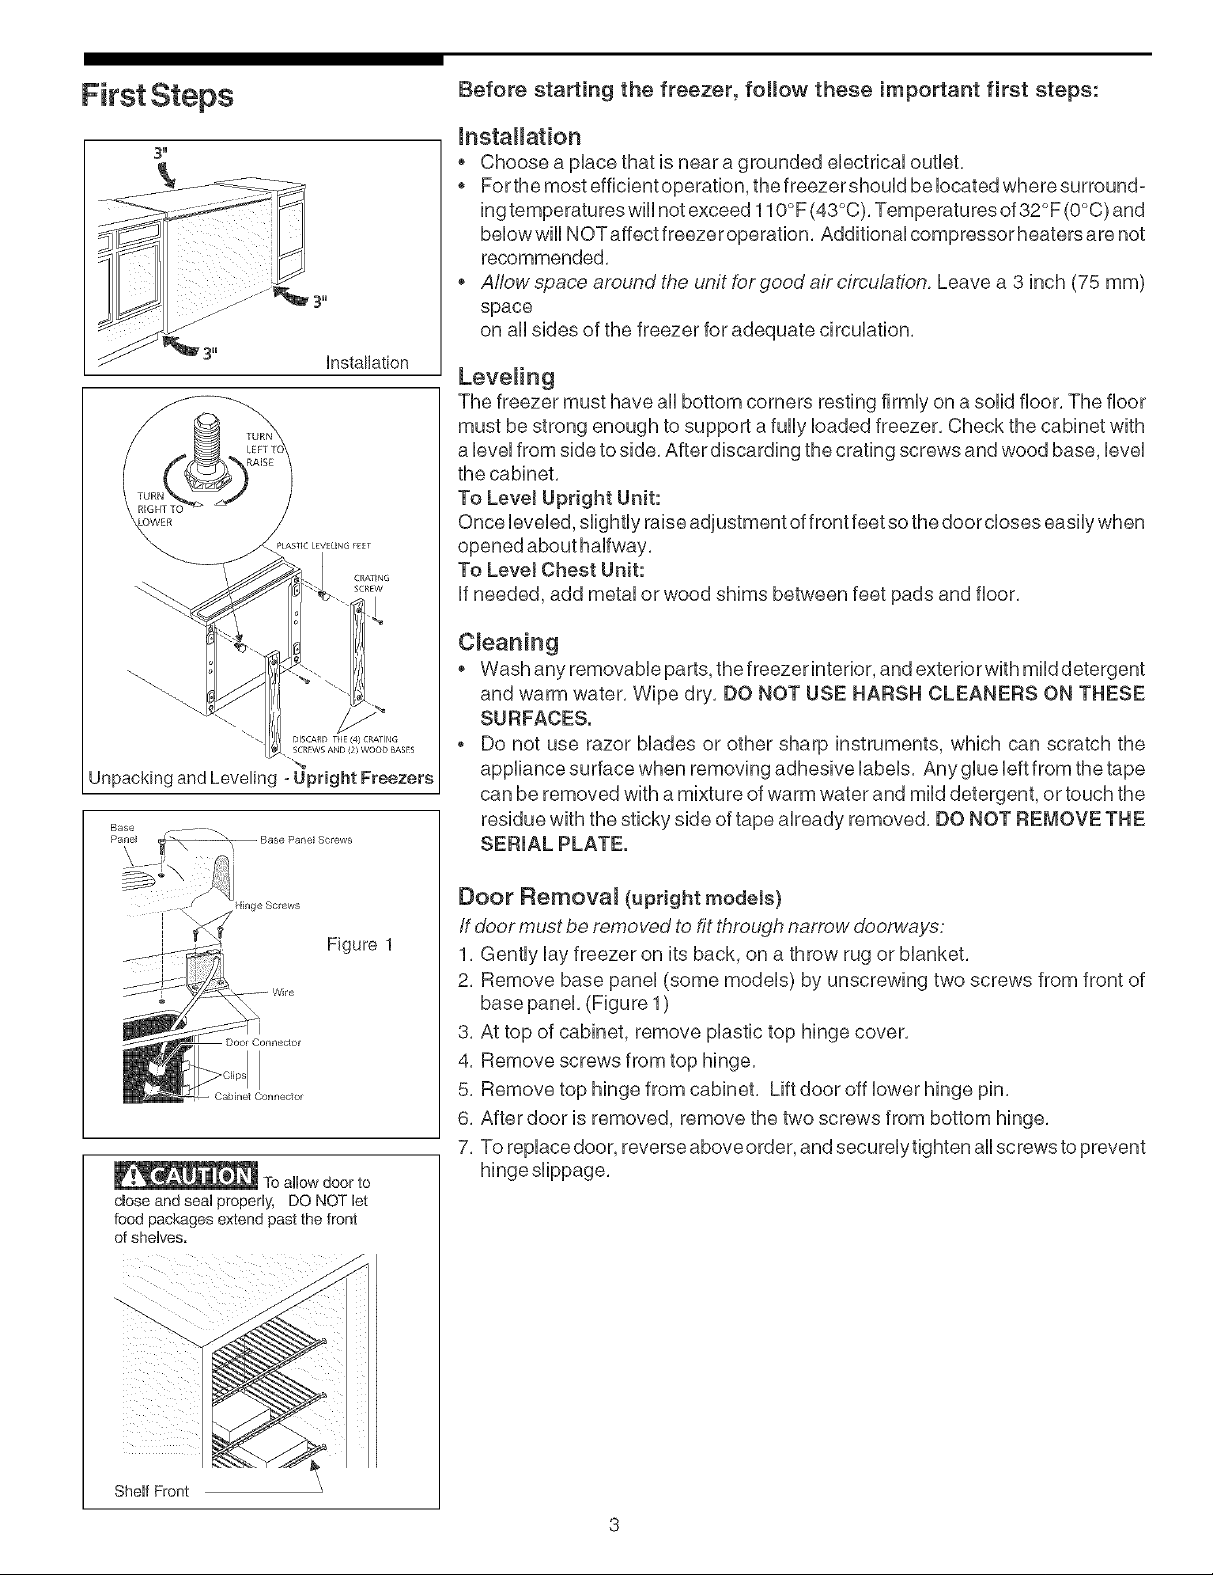
hstallation
DISCARD THE (4) CRATING
SCRWS AND (2) WOOD BASES
Unpacking and Leveling - Upright Freezers
Base
P{ -- Base Panel Screws
Figure 1
_'_1_11_41_ To allow door to
dose and seal properly, DO NOT let
food packages extend past the front
of shelves.
Before starting the freezer, follow these important first steps:
hstallation
Choose a place that is neara grounded electrical outlet,
o Forthe most efficient operation, the freezershould be located where surround°
ing temperatures will not exceed 110°F(43°C), Temperatures of 32°F (0°C) and
below will NOTaffect freezer operation, Additional compressor heaters are not
recommended,
Allow @ace around the unit for good air circulation, Leave a 3 inch (75 mm)
space
on all sides of the freezer for adequate circulation,
Leveling
The freezer must have aHbottom corners resting firmUyon a sofid floor, The floor
must be strong enough to support a fully loaded freezer, Check the cabinet with
a level from side to side, After discarding the crating screws and wood base, level
the cabinet,
To Level Upright Unit:
Once leveled, slightly raise adjustment of front feet so the door closes easily when
opened about halfway,
To Level Chest Unit:
if needed, add metal or wood shims between feet pads and floor,
C_eaning
Wash any removable parts, the freezer interior, and exterior with mild detergent
and warm water, Wipe dry, DO NOT USE HARSH CLEANERS ON THESE
SURFACES.
o Do not use razor blades or other sharp instruments, which can scratch the
appliance surface when removing adhesive labels, Any glue leftfrom the tape
can be removed with amixture of warm water and mild detergent, or touch the
residue with the sticky side of tape already removed, DO NOT REMOVE THE
SERIAL PLATE.
Door Remova_ (uprightmodels)
ff door must be remo red to fit through narrow doorways:
1, Gently lay freezer on its back, on a throw rug or blanket,
2, Remove base panel (some models) by unscrewing two screws from front of
base panel, (Figure 1)
3, At top of cabinet, remove plastic top hinge cover,
4, Remove screws from top hinge,
5, Remove top hinge from cabinet, Lift door off lower hinge pin,
6, After door is removed, remove the two screws from bottom hinge,
7, To replace door, reverse above order, andsecurely tighten allscrews to prevent
Shelf Front
 Loading...