


Prizm 6T
1
Prizm™
6T
Owner’s
Guide
White’s Electronics, Inc.
Manufacturers of the World’s Finest Metal Detectors
Prizm 6T
®

2
Prizm™
6T

3
Prizm™
6T
Assembly .............................................................................................. 4
Batteries ................................................................................................6
Getting Started ......................................................................................8
Controls/Features ................................................................................. 12
Displays ................................................................................................ 19
Repair Service ...................................................................................... 21
Warranty................................................................................................24
Target Recovery ....................................................................................30
Guide to this Manual
White’s Electronics, Inc.
1011 Pleasant Valley Road
Sweet Home, OR 97386
USA
®
4
Prizm™
6T
To Assemble
1. Remove all parts from shipping carton (see diagram next page).
2. Use nonmetallic washers (between round search coil and clevis fiber rod),
and fiber bolt and thumbnut to secure search coil to fiber rod.
3. Unlock Camlock on “S” rod, insert fiber rod into curved rod, line up buttons
into one of adjustment holes. Twist Camlock to LOCK.
4. Unravel search coil cable and wind around rods (first revolution over top of
rod). Plug search coil cable connector into control box. Screw finger tight to
secure. Secure cable to fiber rod near search coil (first revolution) with small
hook and loop strap provided. Allow slight cable slack (prior to first revolution)
to allow search coil tilting.
5. Grip by handle, with arm in elbow cup, and sweep search coil over floor. If
necessary for comfort, unlock camlock, compress buttons and reposition fiber
rod. If necessary, elbow cup is also adjustable for comfort.
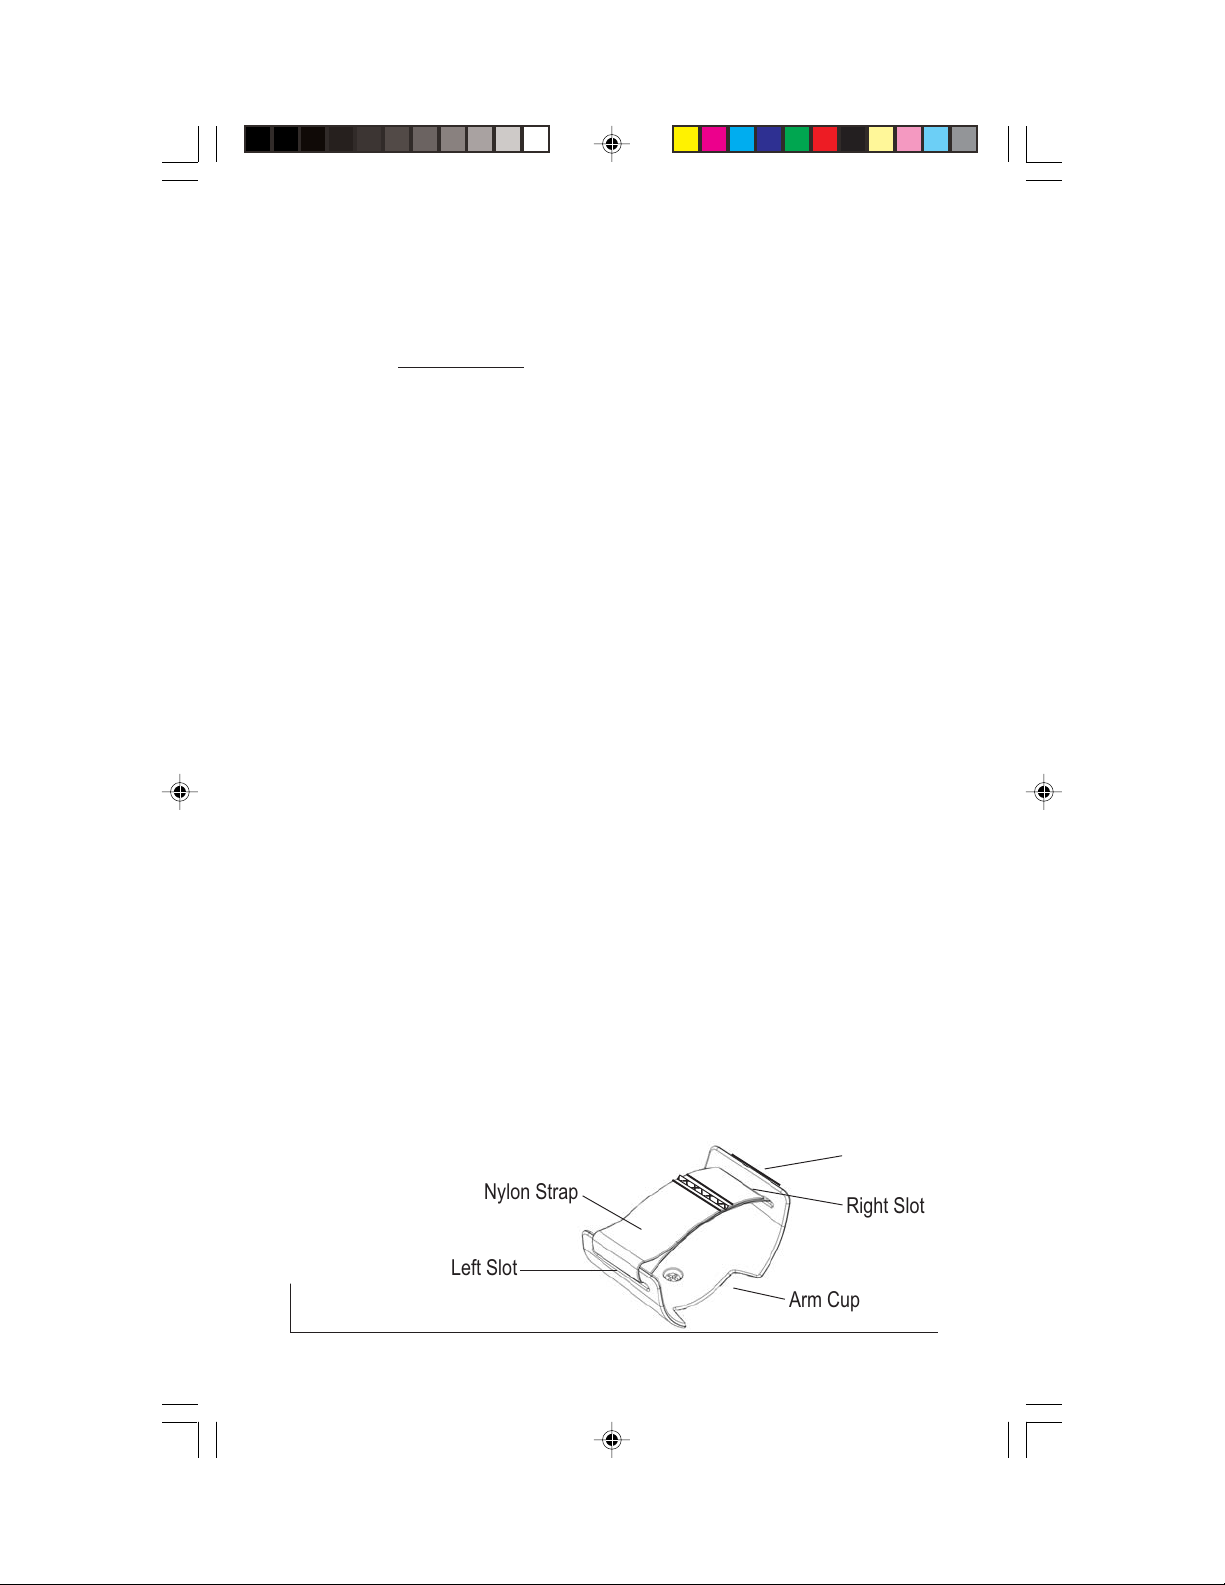
6. A large nylon strap is provided. When woven through the slots in elbow cup,
physical leverage and control is provided. Insert strap velcro side up through
right and left slots in the elbow cup. The end tab of the velcro strip bends into a
“T-lock”. Pull strap so that the “T-lock” locks firmly. With arm in elbow cup, pull
strap snug and then fold strap onto itself loose enough for your arm to be
inserted and removed without adjusting the velcro contact.
T-Lock
Nylon Strap
Arm Cup
Right Slot
Left Slot
5
Prizm™
6T
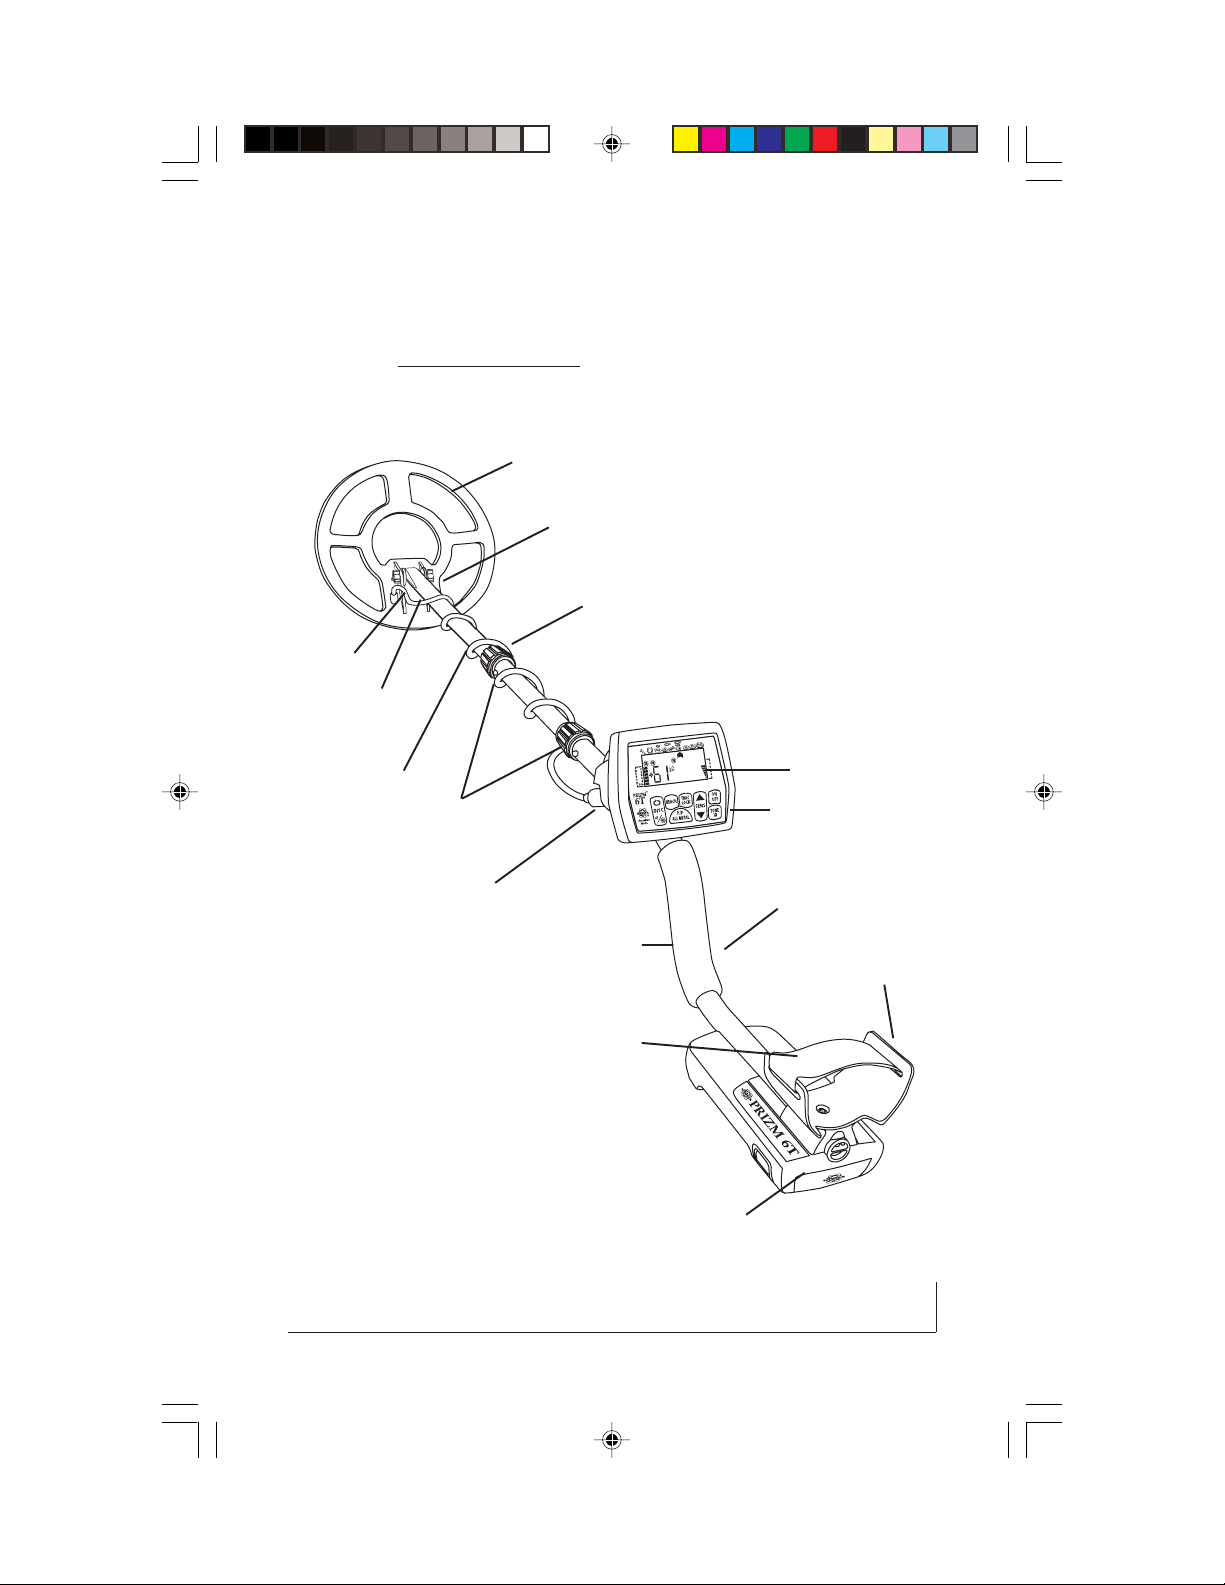
Assembly Diagram
Search Coil
Handle
Search Coil Cable
to Control Box Connector
Camlock
Thumbnut
Fiber Rod
“S” Rod
Search Coil Cable
Non-metallic
Washers
Fiber Bolt
Large Nylon Strap
Display
Control Buttons
Elbow Cup
Battery

6
Prizm™
6T
Batteries
1. Open battery door by pressing both buttons on sides of battery compart-
ment (under arm cup) and pullling battery tray from unit.
2. Install eight (8) “AA” alkaline batteries taking note of correct (+) and (-)
positions (only fit one way), and close door.
3. Most Prizm 6 T's require an energetic "quick push" to close and latch the
battery door. This is normal, and a part of the design. Please note the
molded seal on the door, when closing and latching the rubber expands
outwardly to form a water-tight seal for the battery box.
Some battery boxes can be "squeezed" and latched, but most require a little
help to flatten the seal and latch the door. This is best accomplished with the
box pulled out about 3”, and energetically closed. The unit is built to take it.
After time, this function will ease.
4. Press ON/OFF button. Listen - good batteries produce beep high pitch for
a few second upon turn on. Low pitched beep upon turn on indicates low
batteries. Low, with a battery icon on center of display, indicates low batteries
during searching.

7
Prizm™
6T
5. Batteries that are weak, or become weak during use, will automatically
indicate Low Batt with a battery icon on the center portion of the display.
Replace with eight good quality alkaline “AA” batteries. A three-beep alarm
also sounds to indicate batteries are too low to operate the 6T.
6. One may expect about 25 hours of continuous searching with new, good
quality, alkaline batteries. Battery life will vary with intermittent use, back-light
use, temperature, control settings, target indications, battery quality, battery
condition upon purchase, and shelf life. One may add or subtract as much as
50% depending upon the above variables. It is always wise to carry back up
batteries when traveling far from home.
7. Good quality rechargeable “AA” batteries may be purchased separately for
use in your Prizm. Typically, rechargeablebatteries will fall short of 25 hour
continuous search time by as much as 30%. Expensive types may exceed this
alkaline life rating. Either way their rechargeable option is desirable for avid
everyday searching. We would suggest common reputable brands and
retailers for such systems.
Prizm™ 6T Low Batt Display
8
Prizm™
6T
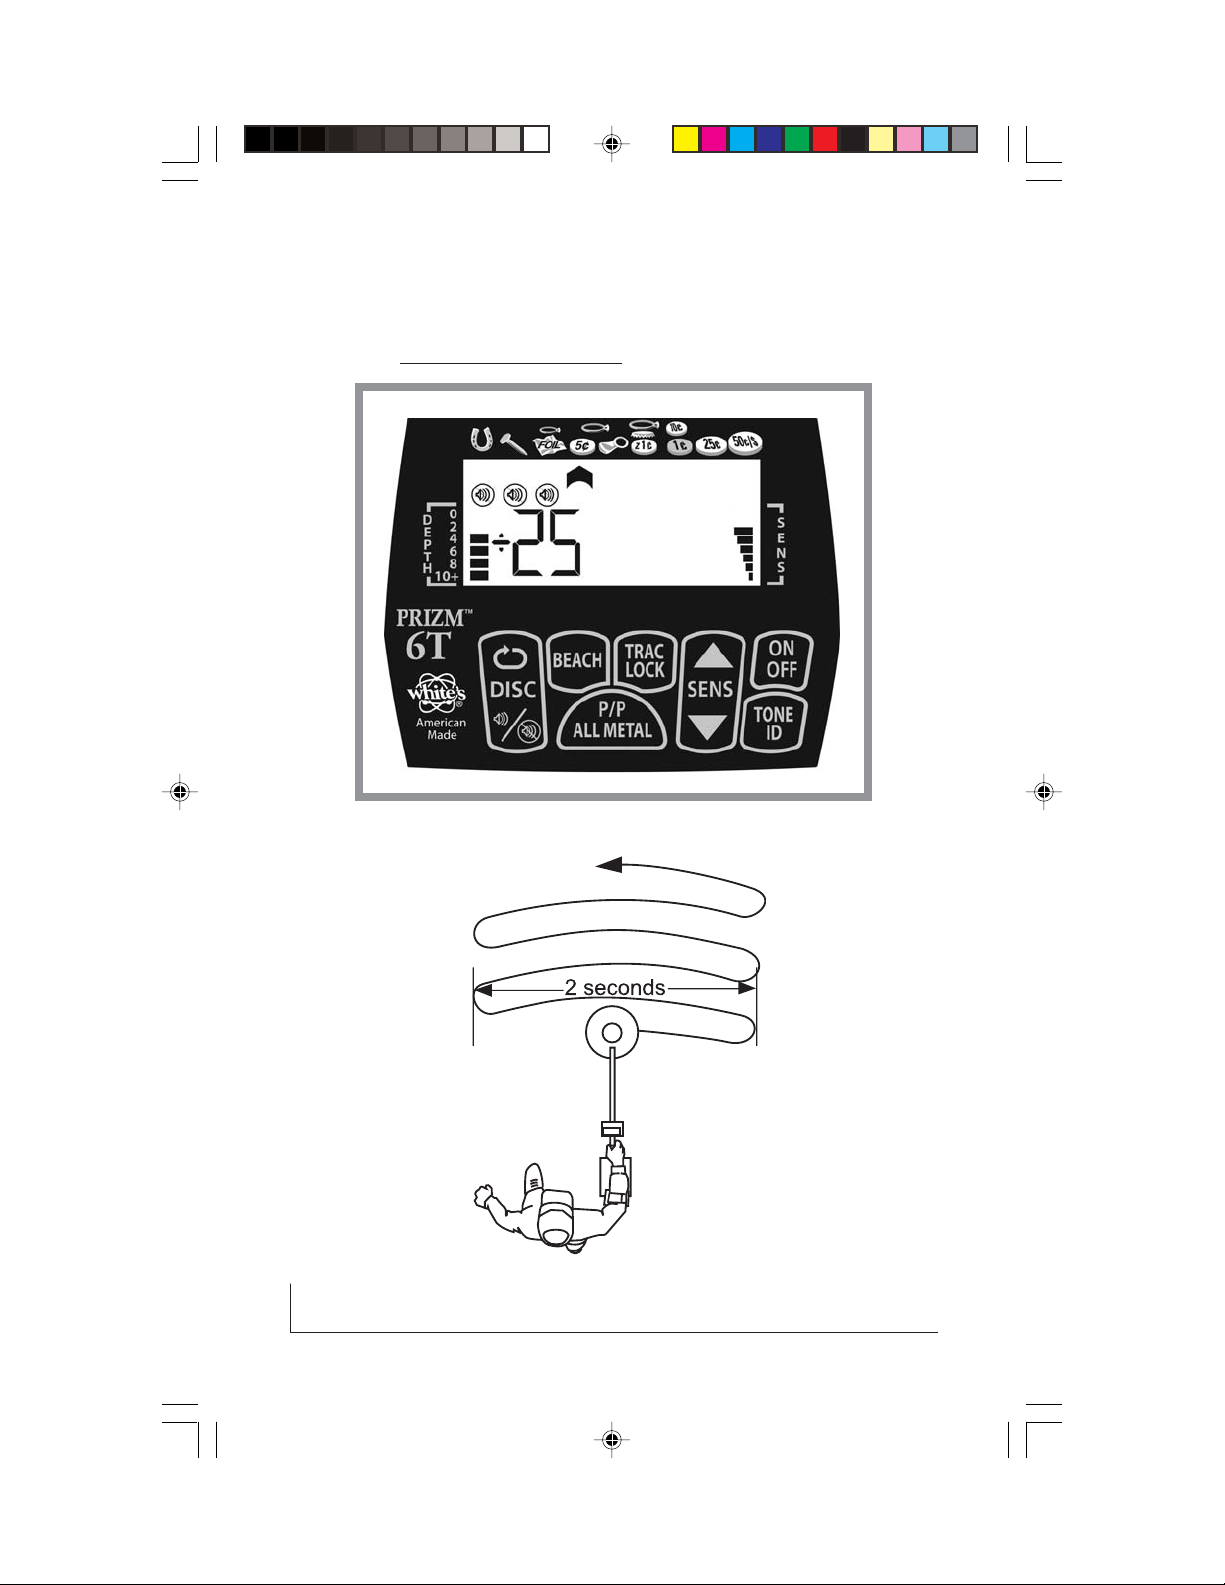
Prizm™ 6T Search Display

9
Prizm™
6T
Getting Started
1. Once assembled with good batteries installed, press ON/OFF.
Holding ON/OFF for a few seconds will turn ON/OFF the display’s
backlight. Lightbulb icon, center of display, indicates backlight ON.
2. The Prizm 6T has automatic ground tracking to eliminate false
targets due to ground mineralization. After you turn the detector on, 6T
will automatically balance to the local ground conditions to ensure
proper target identification. The balance procedure is simple and can
be done using either of two methods.
If you simply sweep the loop back and forth across the ground, the
detector will automatically balance to the ground. Make sure there are
no metal targets in the area that you sweep the loop over.
Another way to balance the 6T is to bob or pump the loop from surface
to about 12 inches above the ground. After a few pumps of the loop
from surface to 12 inches, the 6T will then be ground balanced The 6T
will automatically track the ground as the mineraliation changes.
3. Due to the many metals used in modern construction it is best to use
and practice outdoors.
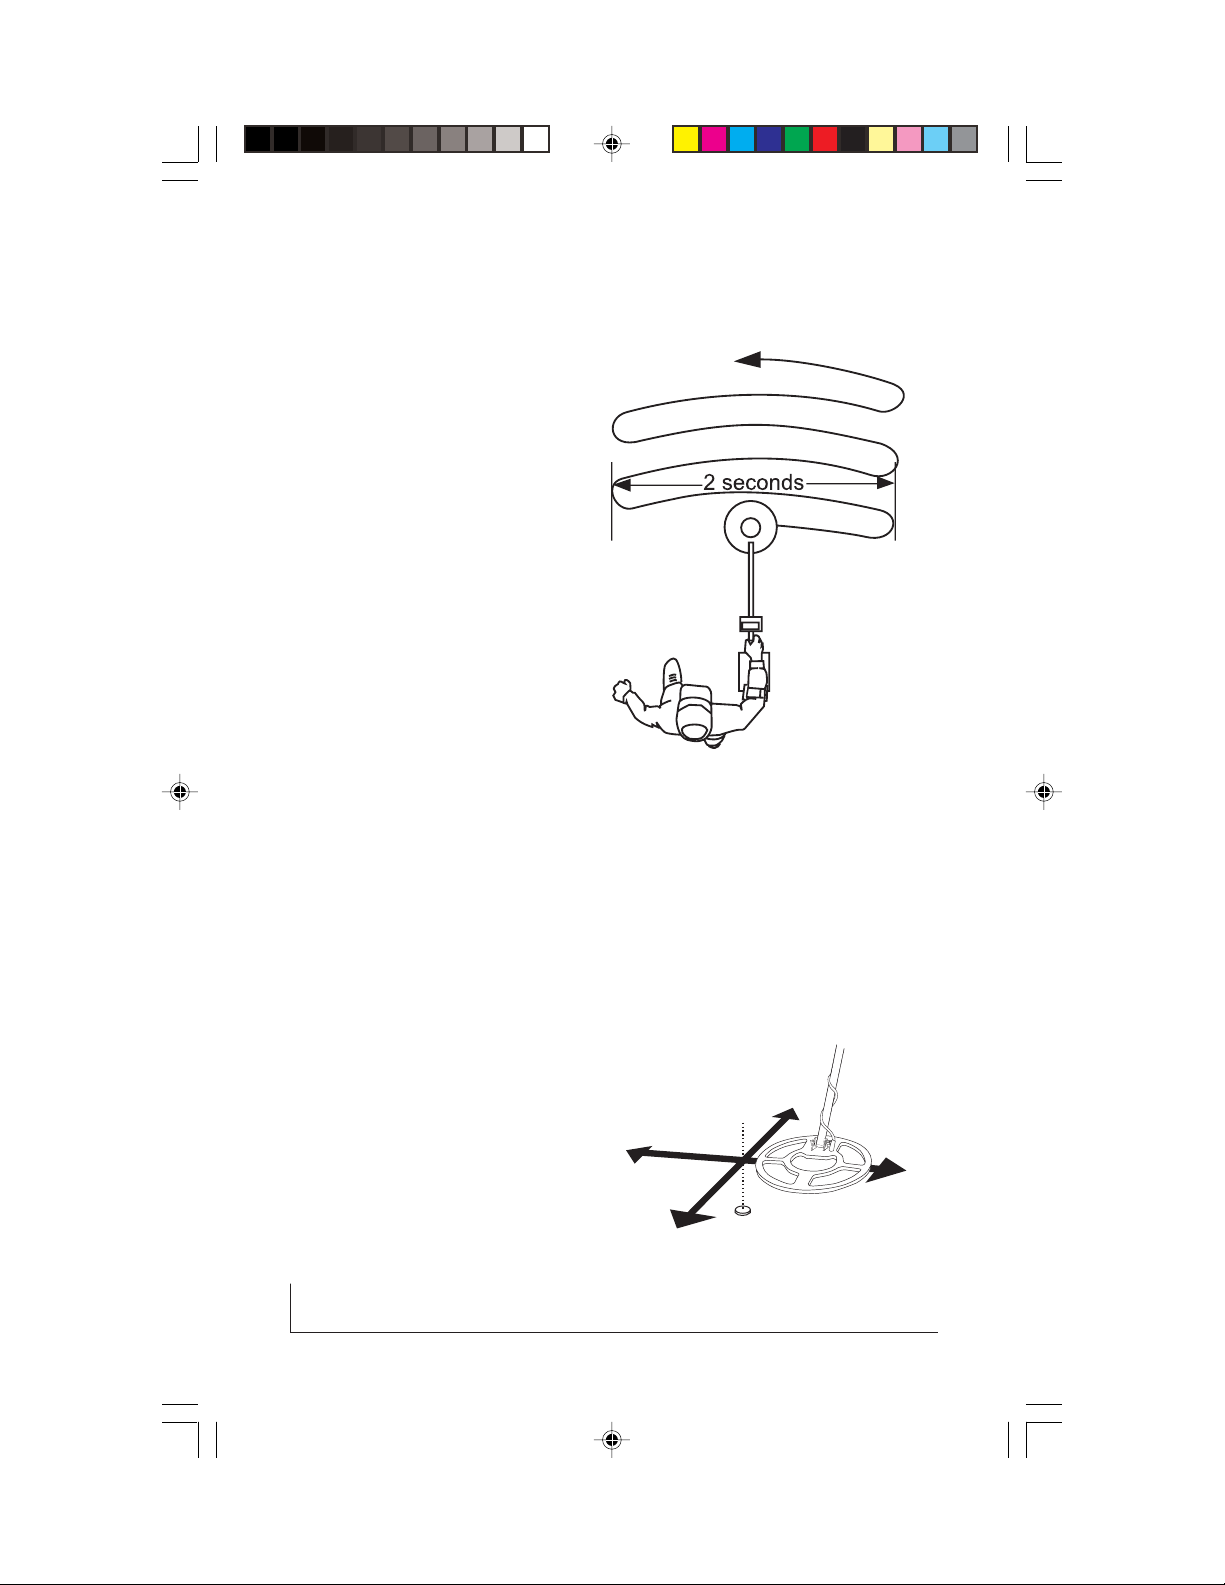
4. Sweep the round search coil from side to side over ground evenly
(near to or touching ground surface) keeping it very close to the ground
throughout each pass and overlapping each pass as if mopping a floor.
About two seconds per pass from left to right, and two seconds return-
ing from right to left is necessary for the Prizm to perform as designed.
Sweeping too slowly (significantly less than two seconds per pass) will
deter good performance. It is also necessary for the round search coil
to be moving (sweeping) for the Prizm to detect and identify metals.
Once an signal has been located, (Step #6) the P/P (pinpoint) button
can be used to allow much slower search coil movement isolating
exactly where to dig. Keep loop near ground when pressing P/P.
10
Prizm™
6T
5. Solid repeatable beeps and
repeatable display after several
passes indicates an interesting
metal target.
6. Broken, sputter, or inconsis-
tent beeps and display, indicates
likely uninteresting metal targets.
Ignore these targets.
7. Once a solid repeatable beep
and display indication are
located, press and HOLD the P/P
button with loop near ground and
“X” area to pinpoint exactly where
to dig. Note target’s depth on left
side of display. Release P/P to continue hunting.
8. Sweeping the round search coil over the ground, recognizing solid
repeatable beeps and display indications from broken or inconsistent
ones, pinpointing, and digging all take practice. Be patient. To speed
the learning curve bury a nail, coin, and other items an inch or two in
the ground and practice locating, recognizing the different sounds and
display indications, and
pinpointing.
9. You must have permission to
search both public and private
property from the owners or
person in charge of managing the
property. In most cases, you can
locate the owner through City Hall
or the County Seat. It is important
for the future of metal detecting
that you take care in digging. Unsightly holes are dangerous to people
 Loading...