

Whirlpool RB275PXK User Manual
BUILT-IN
OVEN
Self-Cleaning &
Continuous-Cleaning
Model RB275PXK
shen. Clothes 0~3’s FmeZeK. Relnpcnlor-Fraszco. Ice Makers. Dishwashers Bulll-In Ovens and Sutlace Unih. Ranges. Mlcmwave Ovens. Trash Com~actot
Contents
BEFORE YOU USE YOUR OVEN
IMPORTANT SAFETY
INSTRUCTIONS
PARTS AND FEATURES
USING YOUR OVEN
The Electror.ic MEALTIMiR’
Clock 5
Setting the I iec+roni;-
Clock
Using the Electrorilc Minute
Timer
Baking in the Upper &&I : : :
Baking in the Lower Oven
Adjusting the Oven
Temperature Control
Broiling in the Upper Oven
Broiling in the Lower Oven
01987 Whirlpool Corporation
Page
.?
Ljslng the electronic
1
Orher Operating Hints
‘;
Oven Vent
The Lower Oven Door
CARING FOR YOUR OVEN..
Control Panel and Knobs
‘>
Using the Self-Cleaning
7
The Continuous-Cleaning
B
9
Cleaning Chart
10
11
12
Oven Lights
IF YOU NEED SERVICE OR
ASSISTANCE
WHIRLPOOL OVEN WARRANTY 27
Automatic MEALTIMER’
Clock
Cycle
Lower Oven
Page
16
;:
?7
18
22
24
25
26
‘Tmll
Before you use your oven
Read and carefully follow the “INSTALLATION INSTRUCTIONS” packed with
your oven.
Read this Use & Care Guide and the Cooking Guide carefully for important use
and safety information. Store this literature in a convenient place for future use.
It Is your personal responslblllty and obllgatlon to be sure your oven:
l
Has been installed where it is protected from the elements.
l
Has been installed and leveled in a wall or cabinet that will hold the weight.
. Has been properly connected to an electrical supply and grounded. (See
“Installation Instructions:‘)
l
Is not used by anyone unable to operate it properly.
l
Is properly maintained.
l
Is used only for jobs expected of a home oven.
See your “Cooklng Guide” for addltlonal safety and operating information.
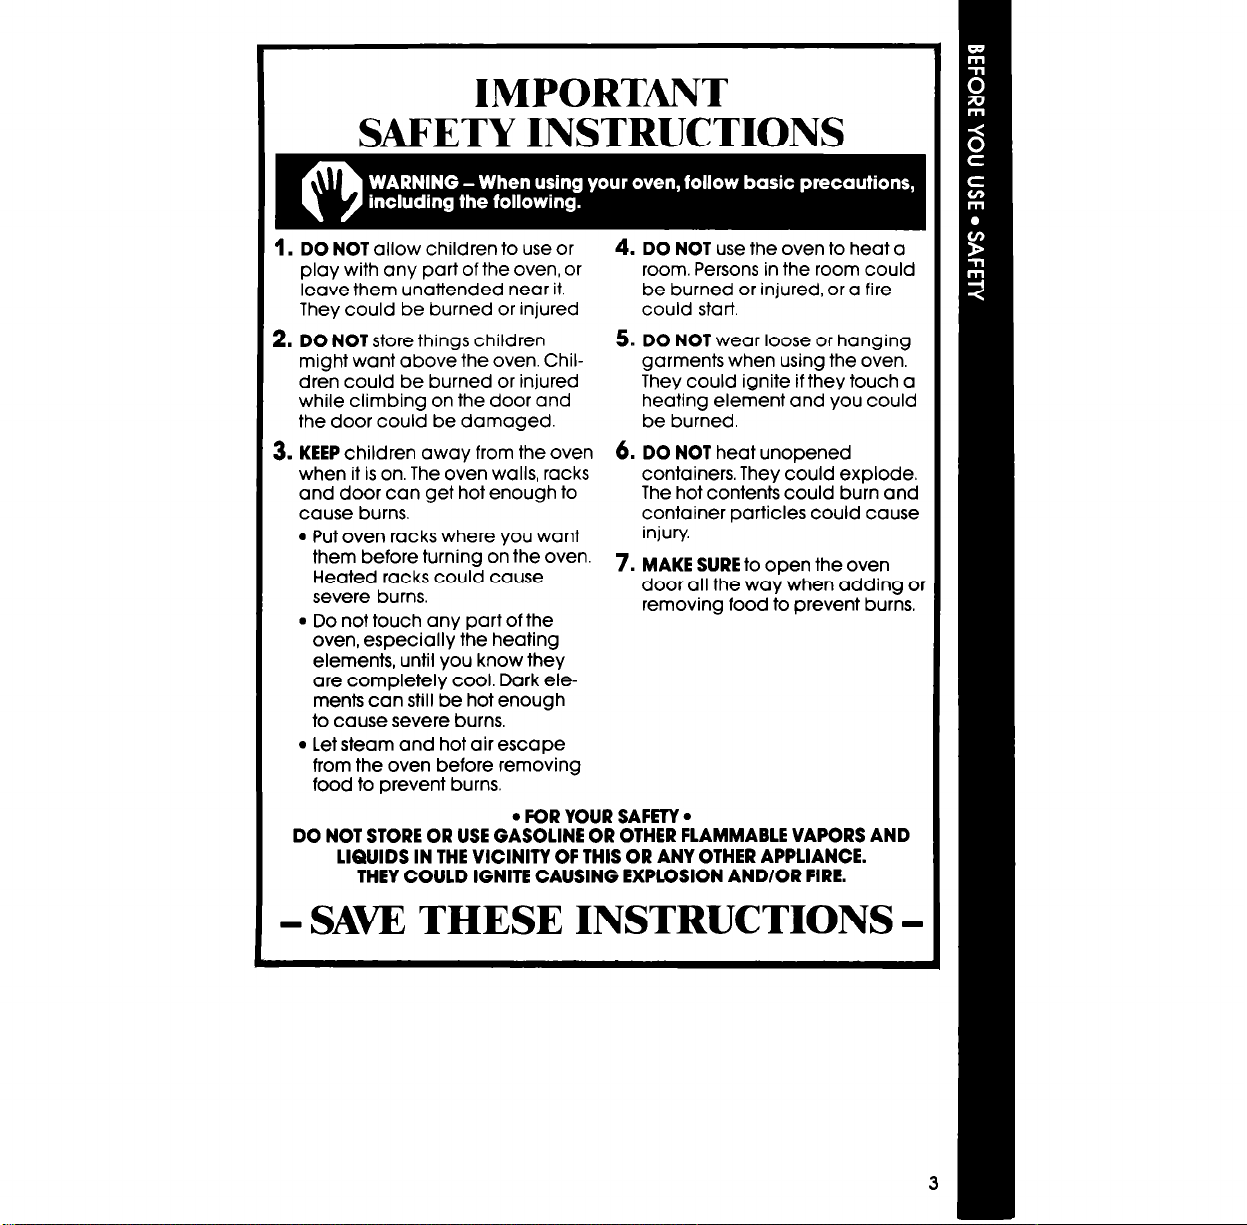
IMPORTANT
SAFETY INSTRUCTIONS
4.
1. DO NOT allow children to use or
play with any part of the oven, or
leave them unattended near it.
They could be burned or injured
2. DO NOT store things children
might want above the oven. Chil-
dren could be burned or injured
while climbing on the door and
the door could be damaged.
3. KEEP children away from the oven
when it is on. The oven walls, racks containers. They could explode.
and door can get hot enough to
cause burns.
l
Put oven racks where you want
them before turning
Heated racks could cause
severe burns.
l
Do not touch any part of the
oven, especially the heating
elements, until you know they
are completely cool. Dark elements can still be hot enough
to cause severe burns.
l
Let steam and hot air escape
from the oven before removing
food to prevent burns.
DO NOT STORE OR USE GASOLINE OR OTHER FLAMMABLE VAPORS AND
LIQUIDS IN THE VICINITY OF THIS OR ANY OTHER APPLIANCE.
THEY COULD IGNITE CAUSING EXPLOSION AND/OR FIRE.
on the oven.
l
FOR YOUR SAFETY.
DO NOT use the oven to heat a
room. Persons in the room could
be burned or injured, or a fire
could stat-f
5. DO NOT wear loose or hanging
garments when using the oven.
They could ignite if they touch a
heating element and you could
be burned.
6. DO NOT heat unopened
The hot contents could burn and
container particles could cause
injury
7. MAKE SURE to open the oven
door all the way when adding
removing food to prevent burns.
or
- SAW THESE INSTRUCTIONS -
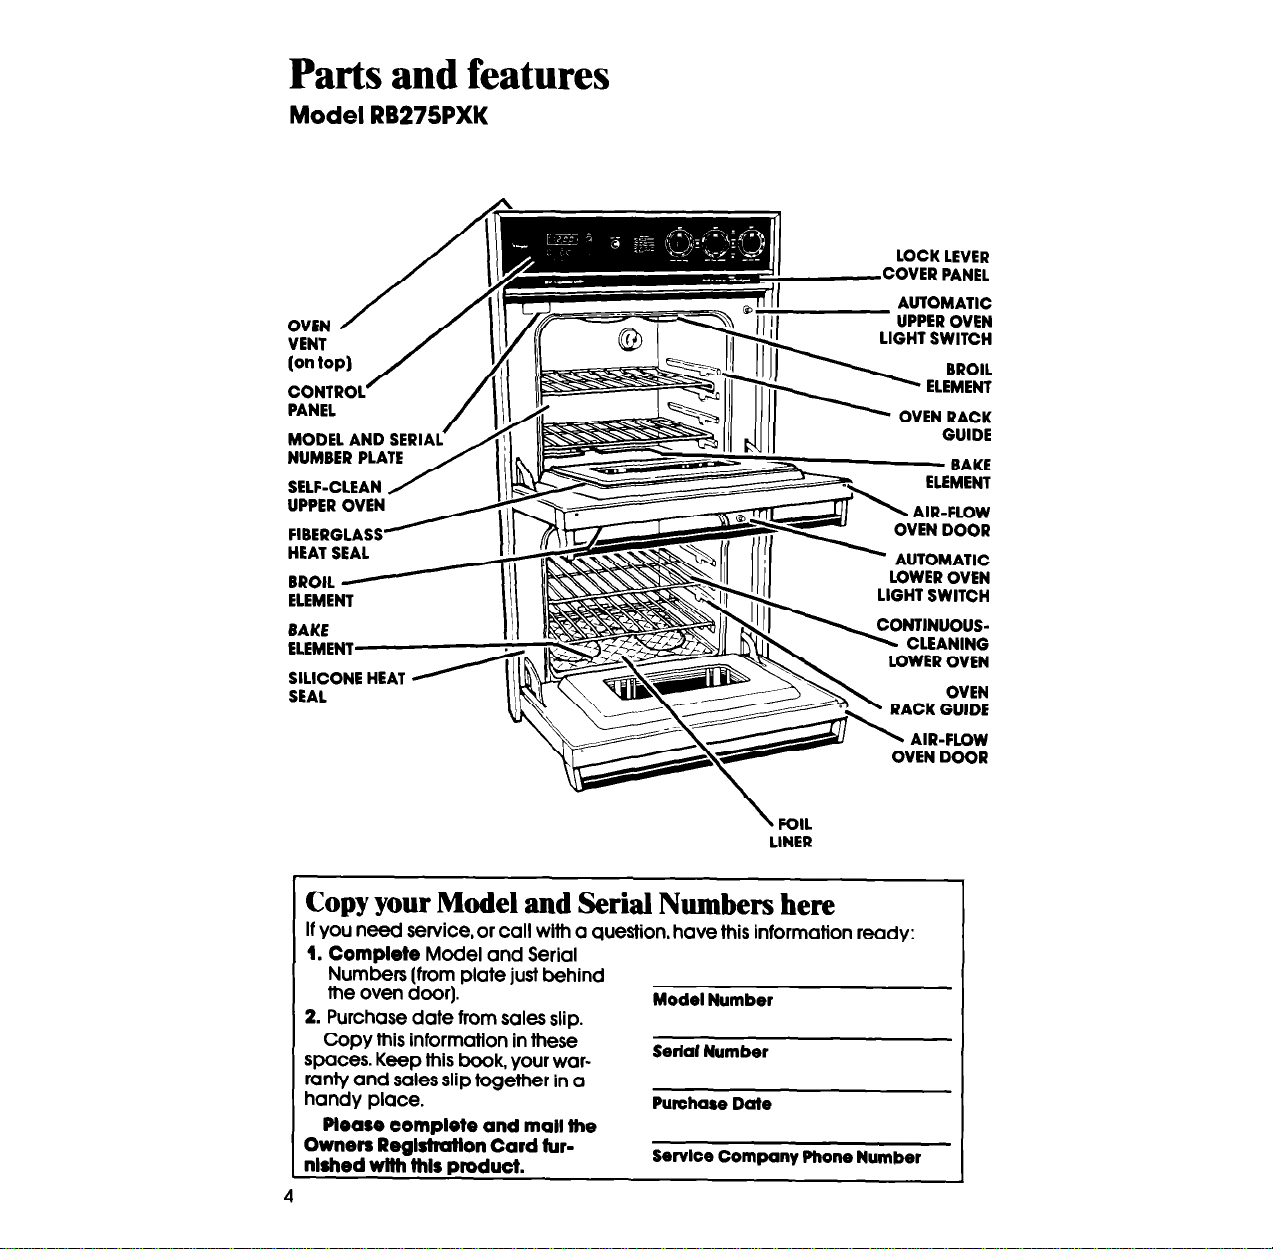
Parts and features
Model RB275PXK
/
OVEN
VENT
(on toPI
CONTR
PANEL
SELF-CLEAN
:l:::::y
HEAT SEAL
BROIL y
ELEMENT
BAKE
ELEMENT
SILICONE HEAT A
CCAI
/
LOCK LEVER
COVER PANEL
~ AUTOMATIC
UPPER OVEN
GHT SWITCH
BROIL
- BAKE
OVEN DOOR
LINER
Copy your Model and Serial Numbers here
If you need service, or call with a question, have this information ready:
1. Complete Model and Serial
Numbers (from plate just behind
the oven door).
2. Purchase date from sales slip.
Copy this informatlon in these
spaces. Keep this book, your warranty and sales slip together in a
handy place.
Please complete and mall the
Owners Reglstmtlon Card
fur-
nlshed wtth this product.
Model Number
Serlaf Number
Purohase Date
Servloe Company Phone Number
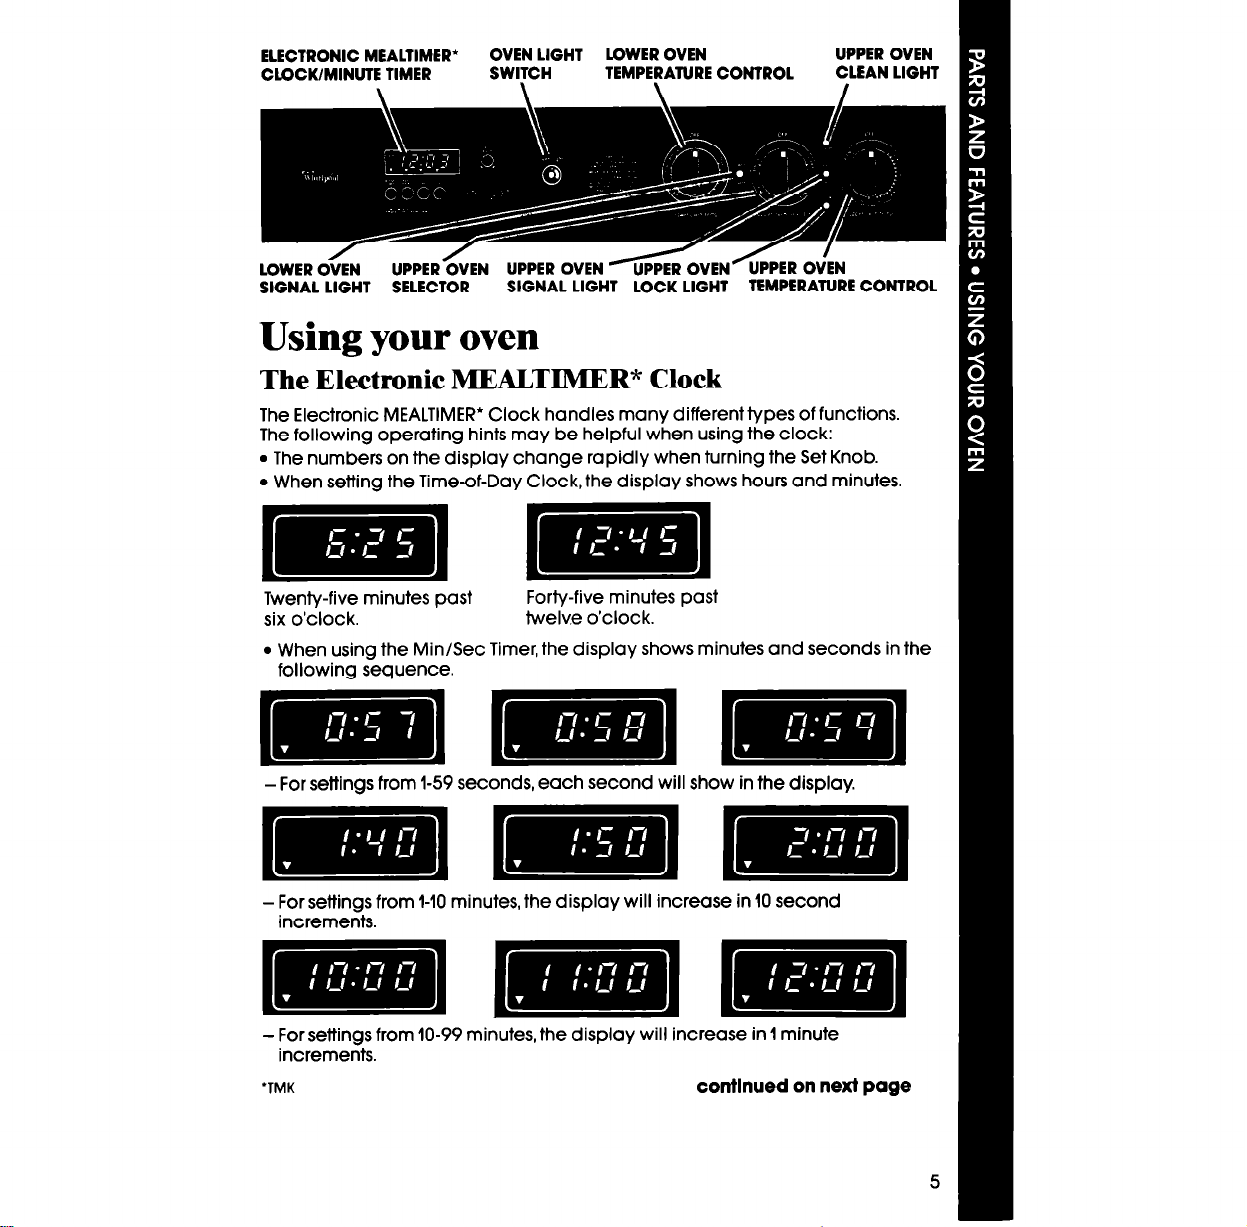
ELECTRONIC MEALTIMER’
CLOCK/MINUTE TIMER
OVEN LIGHT LOWER OVEN UPPER OVEN
SWITCH TEMPERATURE CONTROL CLEAN LIGHT
Using your oven
The Electronic MEALTIMER* Clock
The Electronic MEALTIMER* Clock handles many different types of functions.
The following operating hints may be helpful when using the clock:
l
The numbers on the display change rapidly when turning the Set Knob.
l
When setting the Time-of-Day Clock, the display shows hours and minutes.
Twenty-five minutes past
six o’clock.
l
When using the Min/Sec Timer, the display shows minutes and seconds in the
Forty-five minutes past
twelve o’clock.
following sequence.
- For settings from 1-59 seconds, each second will show in the display
- For settings from I-IO minutes, the display will increase in 10 second
increments.
- For settings from IO-99 minutes, the display will increase in 1 minute
increments.
l
TMK
continued on next page
5
l
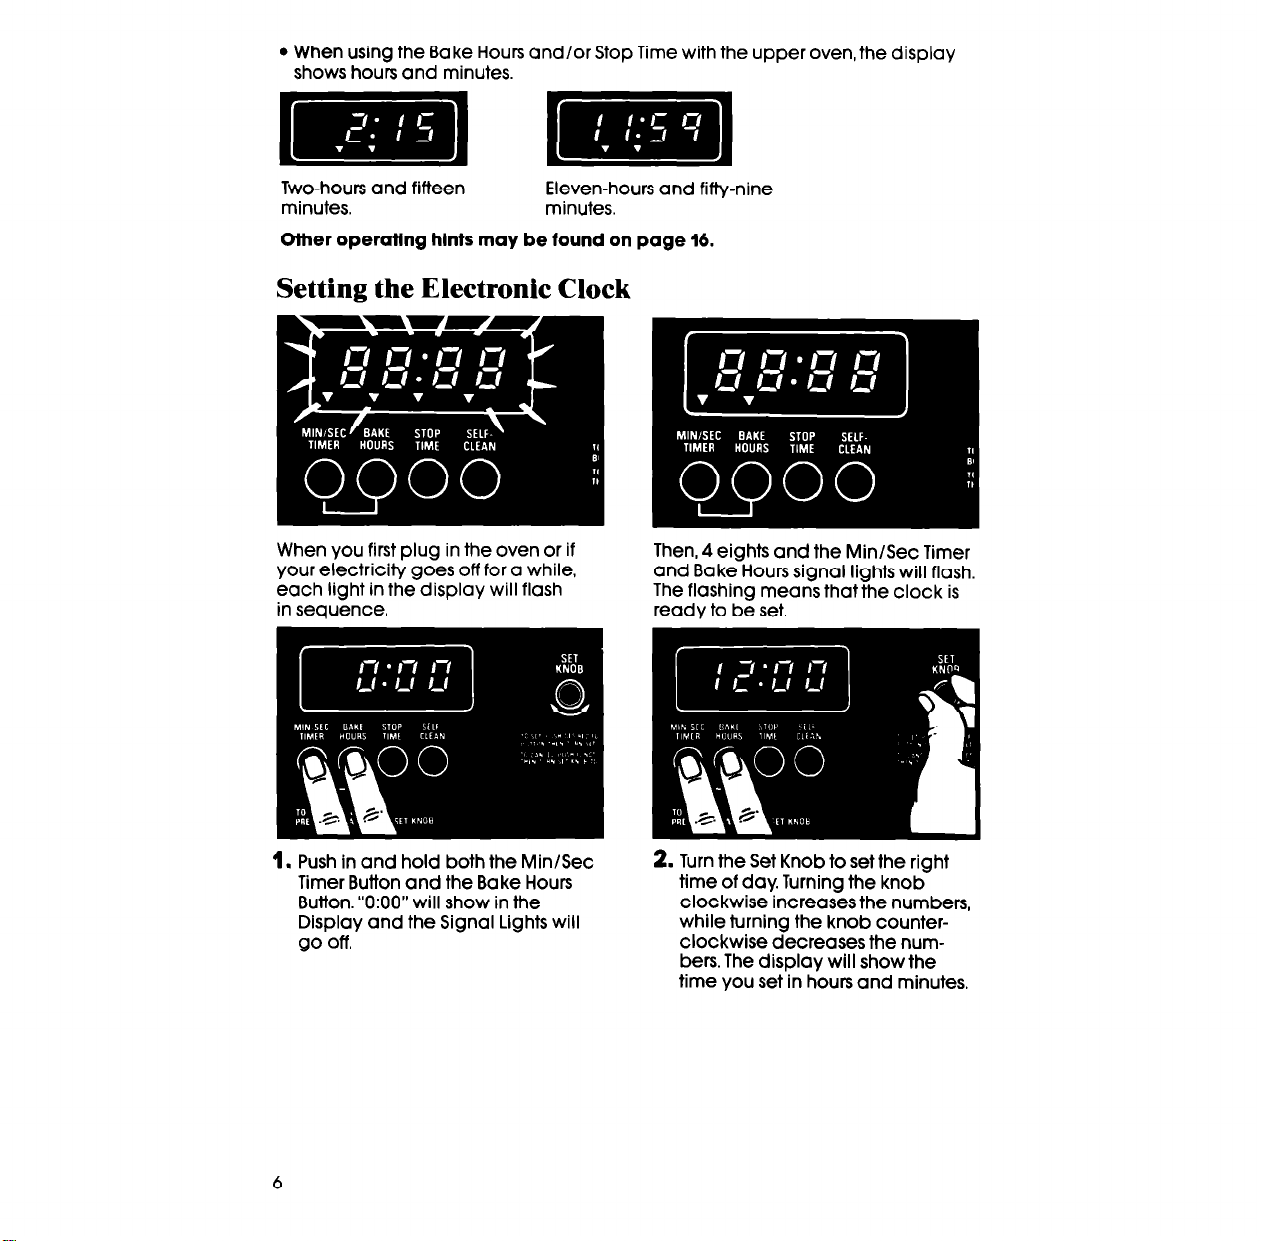
When using the Bake Hours and/or Stop Time with the upper oven, the display
shows hours and minutes.
Two-hours and fifteen
minutes.
Other operating hints may be found on page 16.
Eleven-hours and fifty-nine
minutes.
Setting the Electronic Clock
When you first plug in the oven or if
your electricity goes off for a while,
each light in the display will flash
in sequence.
Then, 4 eights and the Min/Sec Timer
and Bake Hours signal lights will flash.
The flashing means that the clock is
ready to be set.
1. Push in and hold both the Min/Sec
Timer Button and the Bake Hours
Button. “0:OO” will show in the
Display and the Signal Lights will
go off.
2. Turn the Set Knob to set the right
time of day. Turning the knob
clockwise increases the numbers,
while turning the knob counterclockwise decreases the numbers. The display will show the
time you set in hours and minutes.

Using the Electronic Minute Timer
The Minute Timer does not start or stop the oven. It works like a kitchen timer. It can
be set in minutes and seconds
up to 99 minutes. You will hear beeps when the set
1. Push in the Min/Sec Timer Button.
The Signal Light will come on and
the Display will show “0:OO:
3. Atter sefflng the time you want,
the Signal Light will stay on and
the Display will start counting
down in seconds.
2. Turn the Set Knob until the desired
time shows in the Display. Turning
the knob clockwise increases the
numbers, while turning the knob
counterclockwise decreases the
numbers.
When the time Is up, you will hear a
beeping sound. Push the Min/Sec
Timer Button to stop the beeping. The
beeping will automatically stop atter
l-2 minutes.
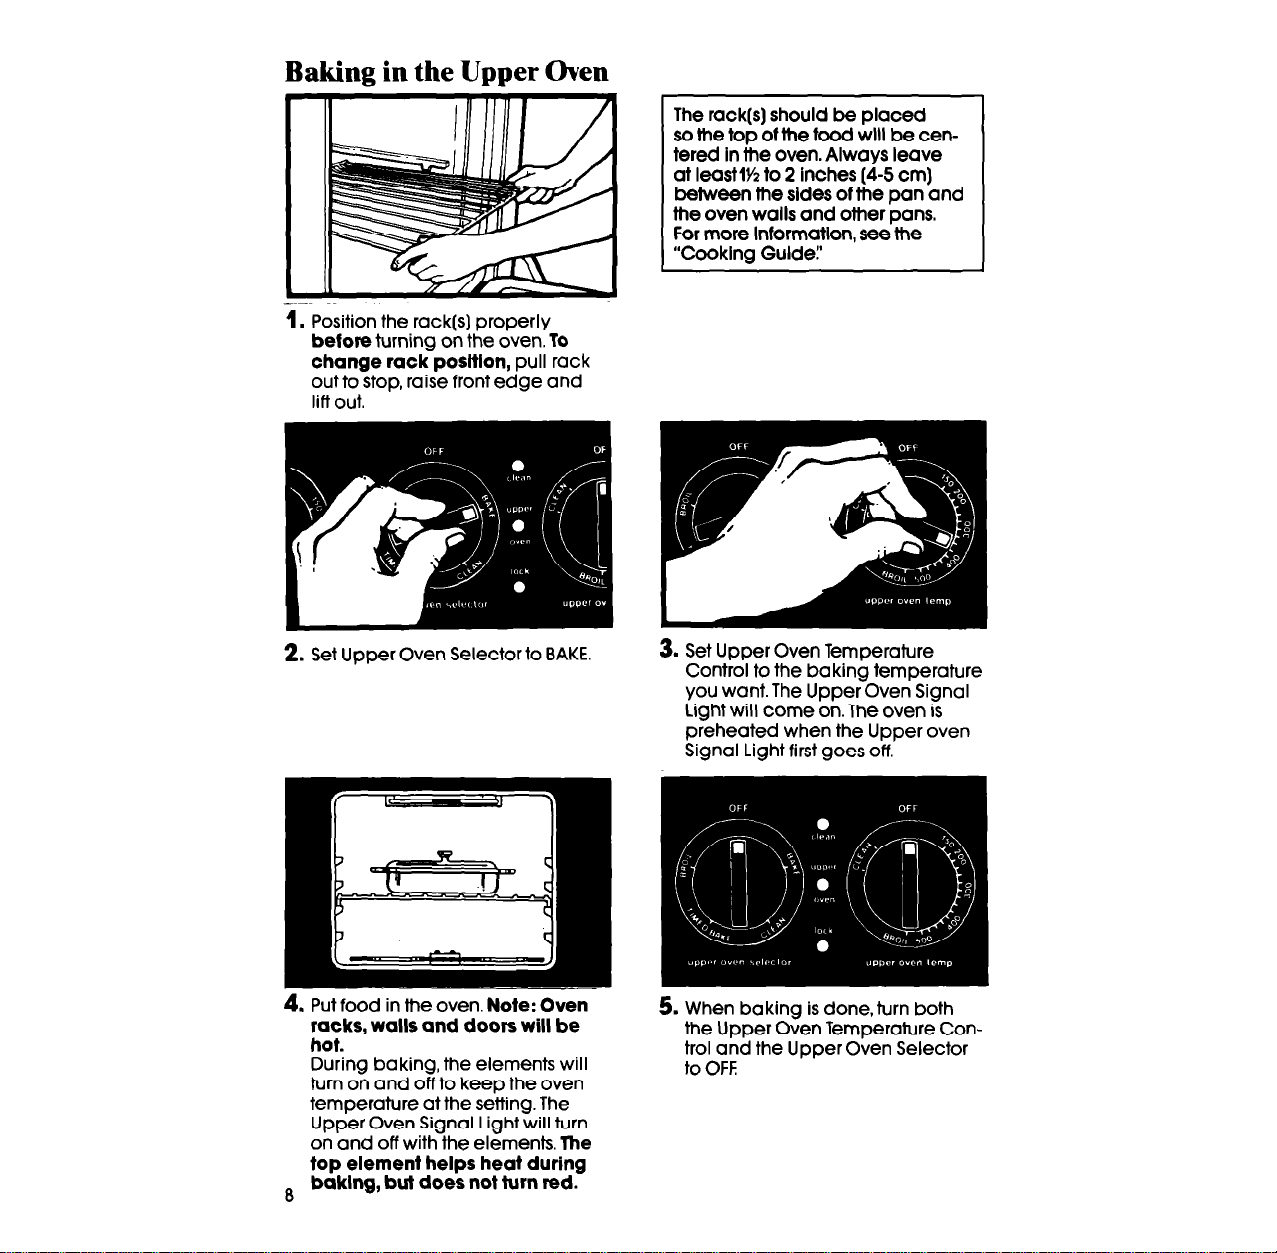
Baking in the Upper Oven
1. Position the rack(s) properly
before turning on the oven. To
change rack posltlon, pull rack
out to stop, raise front edge and
lift out.
2. Set Upper Oven Selector to BAKE.
The rack(s)
should be placed
so the top of the food will be centered In the oven. Always leave
at leastlY2 to 2 inches (4-5 cm)
between the sldes of the pan and
the oven walls and other pans.
For more Informatlon, see the
“Cooklng Guide:
3. Set Upper Oven Temperature
Control to the baking temperature
you want. The Upper Oven Signal
light will come on. The oven is
preheated when the Upper oven
Signal Light first goes off.
4. Put food in the oven. Note: Oven
racks, walls and doors will be
hot.
During baking, the elements will
turn on and off to keep the oven
temperature at the setting. The
Upper Oven Signal Light will turn
on and off with the elements. The
top element helps heat during
B baklng, but does not turn red.
5. When baking is done,turn both
the Upper Oven Temperature Control and the Upper Oven Selector
to OFF
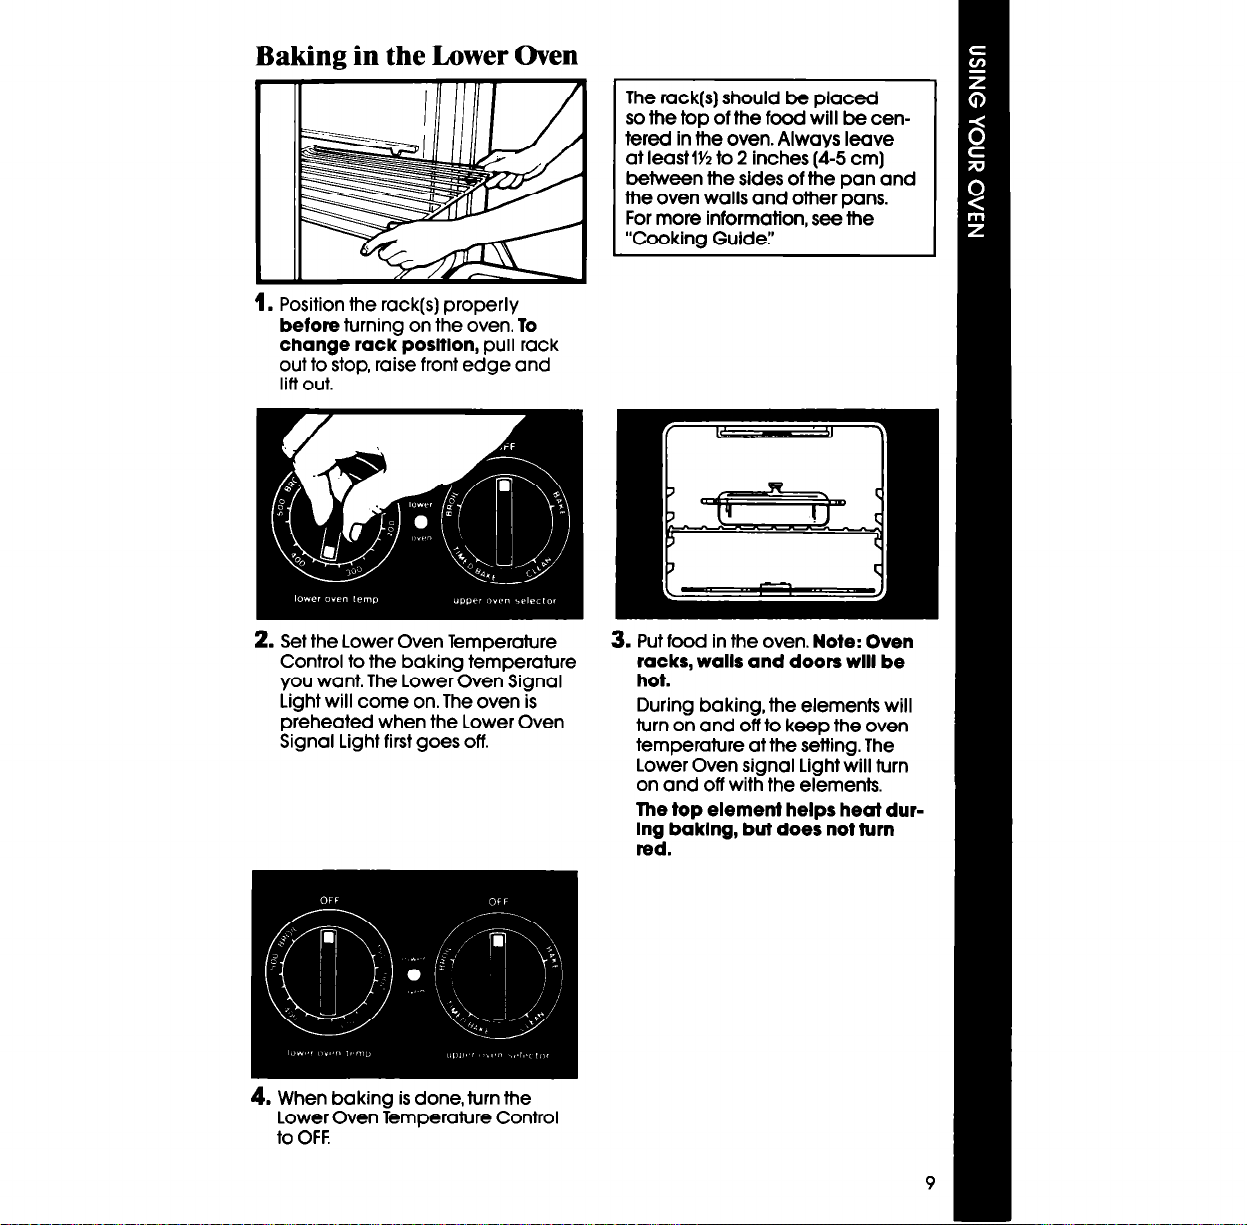
Baking in the Lower Oven
1. Position the rack(s) properly
before turning on the oven. To
change rack position, pull rack
out to stop, raise front edge and
lift out.
The rack(s) should be placed
so the top of the food will be centered in the oven. Always leave
at IeastlK to 2 inches (4-5 cm]
between the sides of the pan and
the oven walls and other pans.
For more information, see the
“Cooking Guldel
2. Set the Lower Oven Temperature 3. Put food in the oven. Note: Oven
Control to the baking temperature
you want. The Lower Oven Signal hot.
Light will come on. The oven is
preheated when the Lower Oven
Signal Light first goes off.
4. When baking is done, turn the
Lower Oven Temperature Control
to OFF.
racks, walls and doors will be
During baking, the elements will
turn on and off to keep the oven
temperature at the setting. The
Lower Oven signal Light will turn
on and off with the elements.
The top element helps heat dur-
Ing baklng, but does not turn
red.
 Loading...