


IBMS1450VQ

BUILT-IN MICROWAVE OVEN INSTALLATION
INSTRUCTIONS
30" (76.2 cm)
This product is suitable for use above electric or gas built-in ovens, and below non-vented electric or gas cooktops. This product is not
suitable for use below downdraft cooktops.
These installation instructions cover different models. The appearance of your particular model may differ slightly from the illustrations in
these Installation Instructions.
INSTRUCTIONS D’INSTALLATION DU FOUR À
MICRO-ONDES ENCASTRÉ
30" (76,2 cm)
Ce produit convient à une utilisation au-dessus de fours encastrés électriques ou à gaz, et au-dessous de tables de cuisson électriques
ou à gaz sans décharge à l’extérieur. Ce produit ne convient pas à une utilisation au-dessous de tables de cuisson avec extraction par le
bas
Ces instructions d’installation sont valables pour plusieurs modèles. Il se peut que l’apparence de votre propre modèle soit légèrement
différente de celle montrée sur les illustrations dans ce document.
Table of Contents / Table des matières
BUILT-IN MICROWAVE OVEN SAFETY ................................. 2
INSTALLATION REQUIREMENTS........................................... 2
Tools and Parts ...................................................................... 2
Location Requirements.......................................................... 2
Minimum Dimensions............................................................. 3
Product Dimensions............................................................... 4
Electrical Requirements ......................................................... 4
INSTALLATION INSTRUCTIONS............................................. 5
Install the Microwave Oven.................................................... 5
Complete Installation ............................................................. 6
ASSISTANCE............................................................................. 6
SÉCURITÉ DU FOUR À MICRO-ONDES ENCASTRÉ......................7
EXIGENCES D’INSTALLATION...........................................................7
Outillage et composants ...................................................................7
Exigences d'emplacement................................................................7
Dimensions minimales ......................................................................8
Dimensions du produit......................................................................9
Spécifications électriques .................................................................9
INSTRUCTIONS D’INSTALLATION..................................................10
Installation du four à micro-ondes ..................................................10
Achever l'installation........................................................................11
ASSISTANCE......................................................................................11
W10197625A
BUILT-IN MICROWAVE OVEN SAFETY
Your safety and the safety of others are very important.
We have provided many important safety messages in this manual and on your appliance. Always read and obey all safety
messages.
This is the safety alert symbol.
This symbol alerts you to potential hazards that can kill or hurt you and others.
All safety messages will follow the safety alert symbol and either the word “DANGER” or “WARNING.”
These words mean:
You can be killed or seriously injured if you don't immediately
DANGER
WARNING
All safety messages will tell you what the potential hazard is, tell you how to reduce the chance of injury, and tell you what can
happen if the instructions are not followed.
follow instructions.
can be killed or seriously injured if you don't
You
instructions.
follow
INSTALLATION REQUIREMENTS
Tools and Parts
Tools Needed
Gather the required tools and parts before starting installation.
Read and follow the instructions provided with any tools
listed here.
■ Measuring tape
■ Pencil
■ T10 TORX
®†
screwdriver
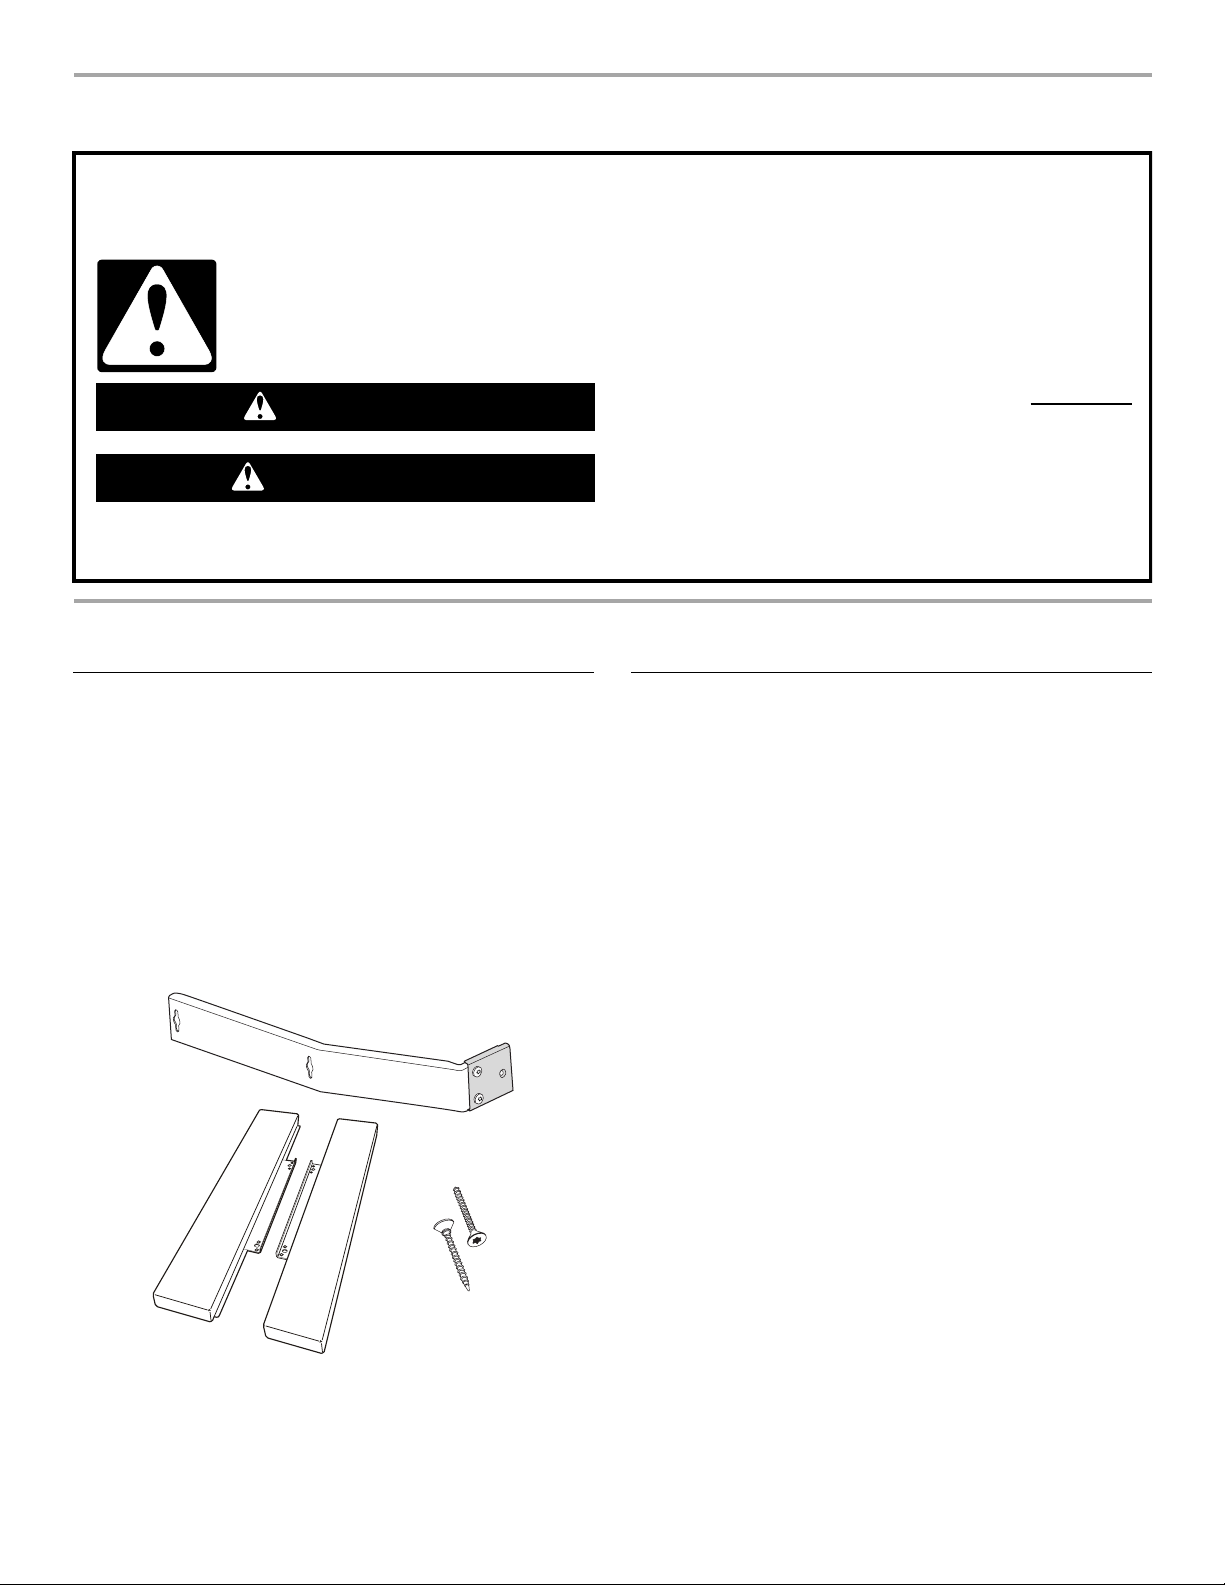
Parts Supplied
All of the following parts are provided.
A
C
■ Electric drill
■ 5/64" (2 mm) drill bit
B
D
Location Requirements
The microwave oven may be located in a cabinet, and/or above a
built-in oven, or below the counter and/or below a non-vented
cooktop. Check the opening where the microwave oven will be
installed. The location must provide:
■ Wood cabinetry.
■ Cutout opening that is plumb and square. See “Minimum
Cutout Dimensions” in “Minimum Dimensions” section.
■ Cutout floor that is solid, level and flush with bottom of
cabinet cutout.
■ Support for weight of at least 150 lbs (68 kg), which includes
microwave oven and items placed inside.
■ Grounded electrical outlet. See “Electrical Requirements”
section.
■ Minimum installation clearances for installation location. See
“Minimum Dimensions” section.
We recommend:
■ Complete enclosure around the recessed portion of the
microwave oven.
A. Side brackets (2)
B. Removable extension plates
(shaded piece, 2)
C. Side trim panels (2)
D. 1" T-10 screws (6)
†®TORX is a registered trademark of Acument Intellectual Properties, LLC
2
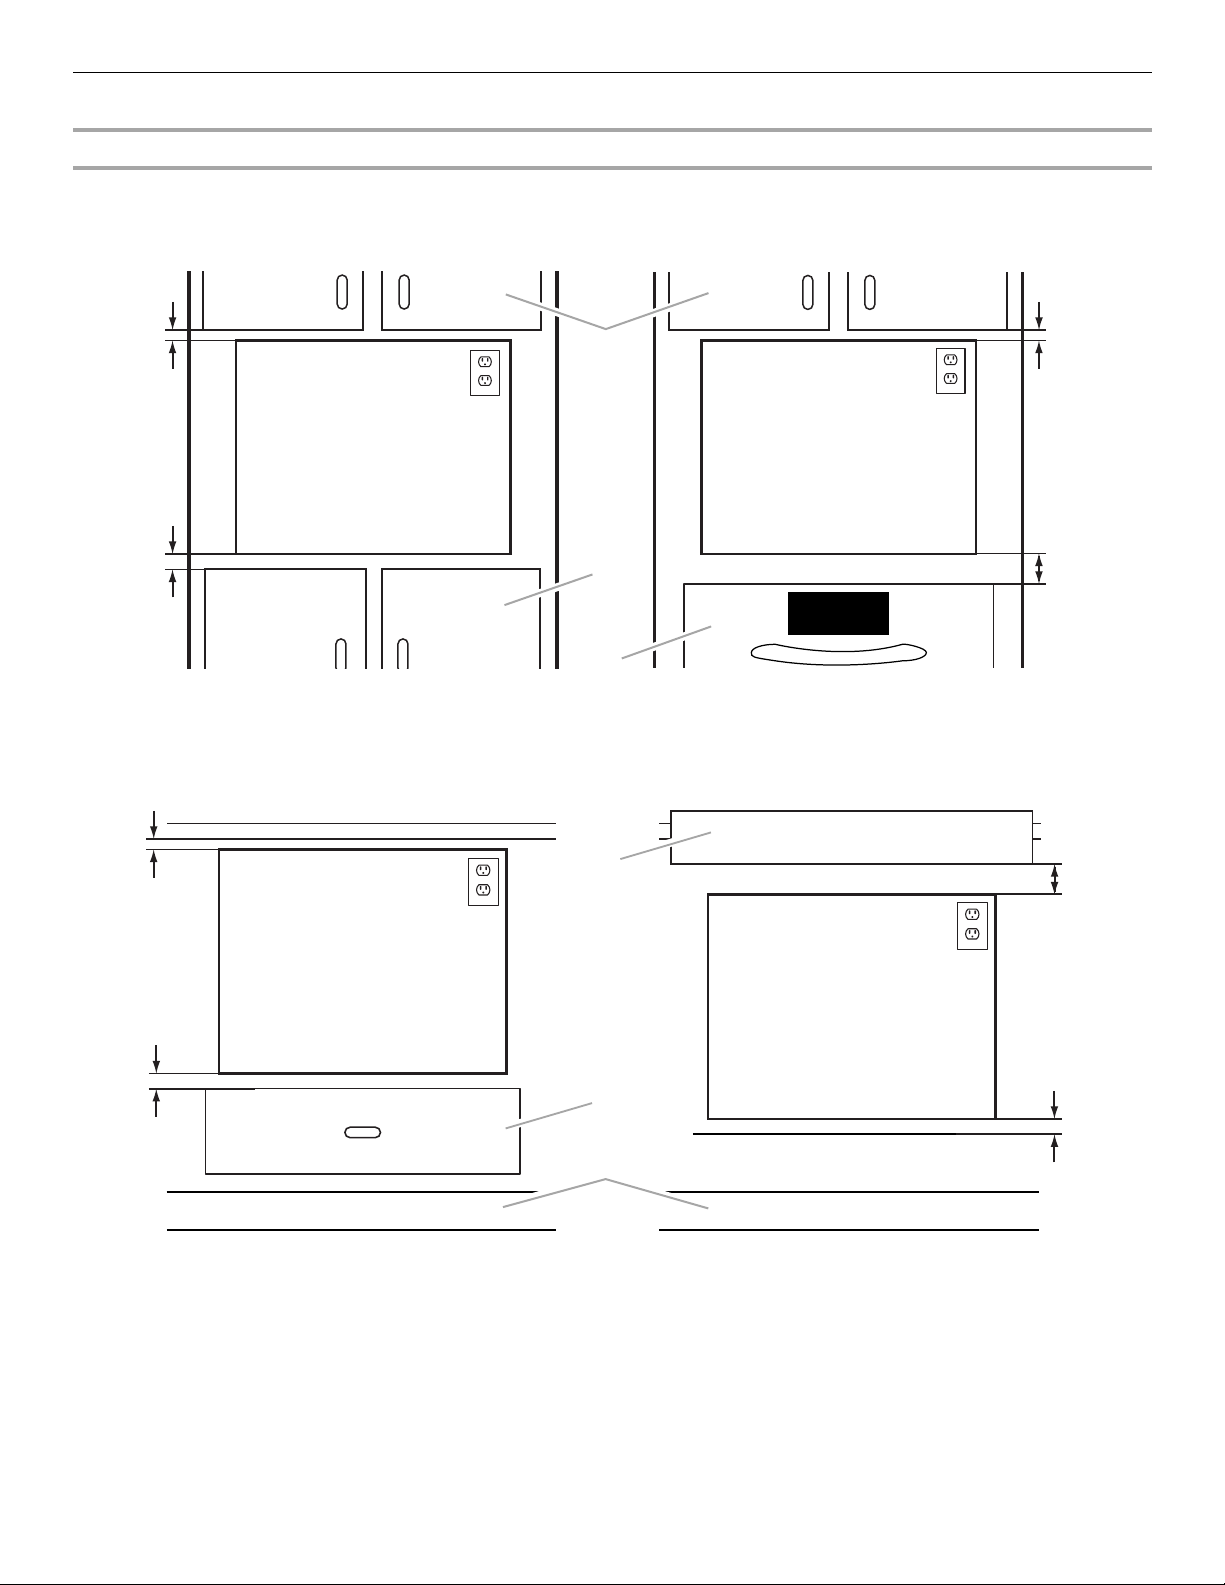
Minimum Dimensions
Minimum Installation Clearances
For proper installation, the following minimum clearances must exist above and below the cutout opening.
Above Cabinet/Storage Drawer Installation Above Oven/Warming Drawer Installation
1"
(2.5 cm)
¹⁄₂"
1
(3.8 cm)
1"
(2.5 cm)
A
B
C
Below Counter Installation Below Built-in Cooktop Installation
D
1"
(2.5 cm)
3"
(7.6 cm)
3"
(7.6 cm)
See note
below.
1¹⁄₂"
(3.8 cm)
E
¹⁄₂"
1
(3.8 cm)
F
A. Upper cabinet
B. Lower cabinet or storage drawer
C. Lower oven or warming drawer
D. Built-in cooktop (non-vented)
E. Storage drawer
F. To e ki ck
NOTE: The bottom of the cooktop may be sunk into the counter and lower cabinet. The minimum 3" (7.6 cm) clearance must exist
below the lowest point of the cooktop, and there must be no interference between any part of the cooktop (including any gas fittings)
and the microwave oven.
3
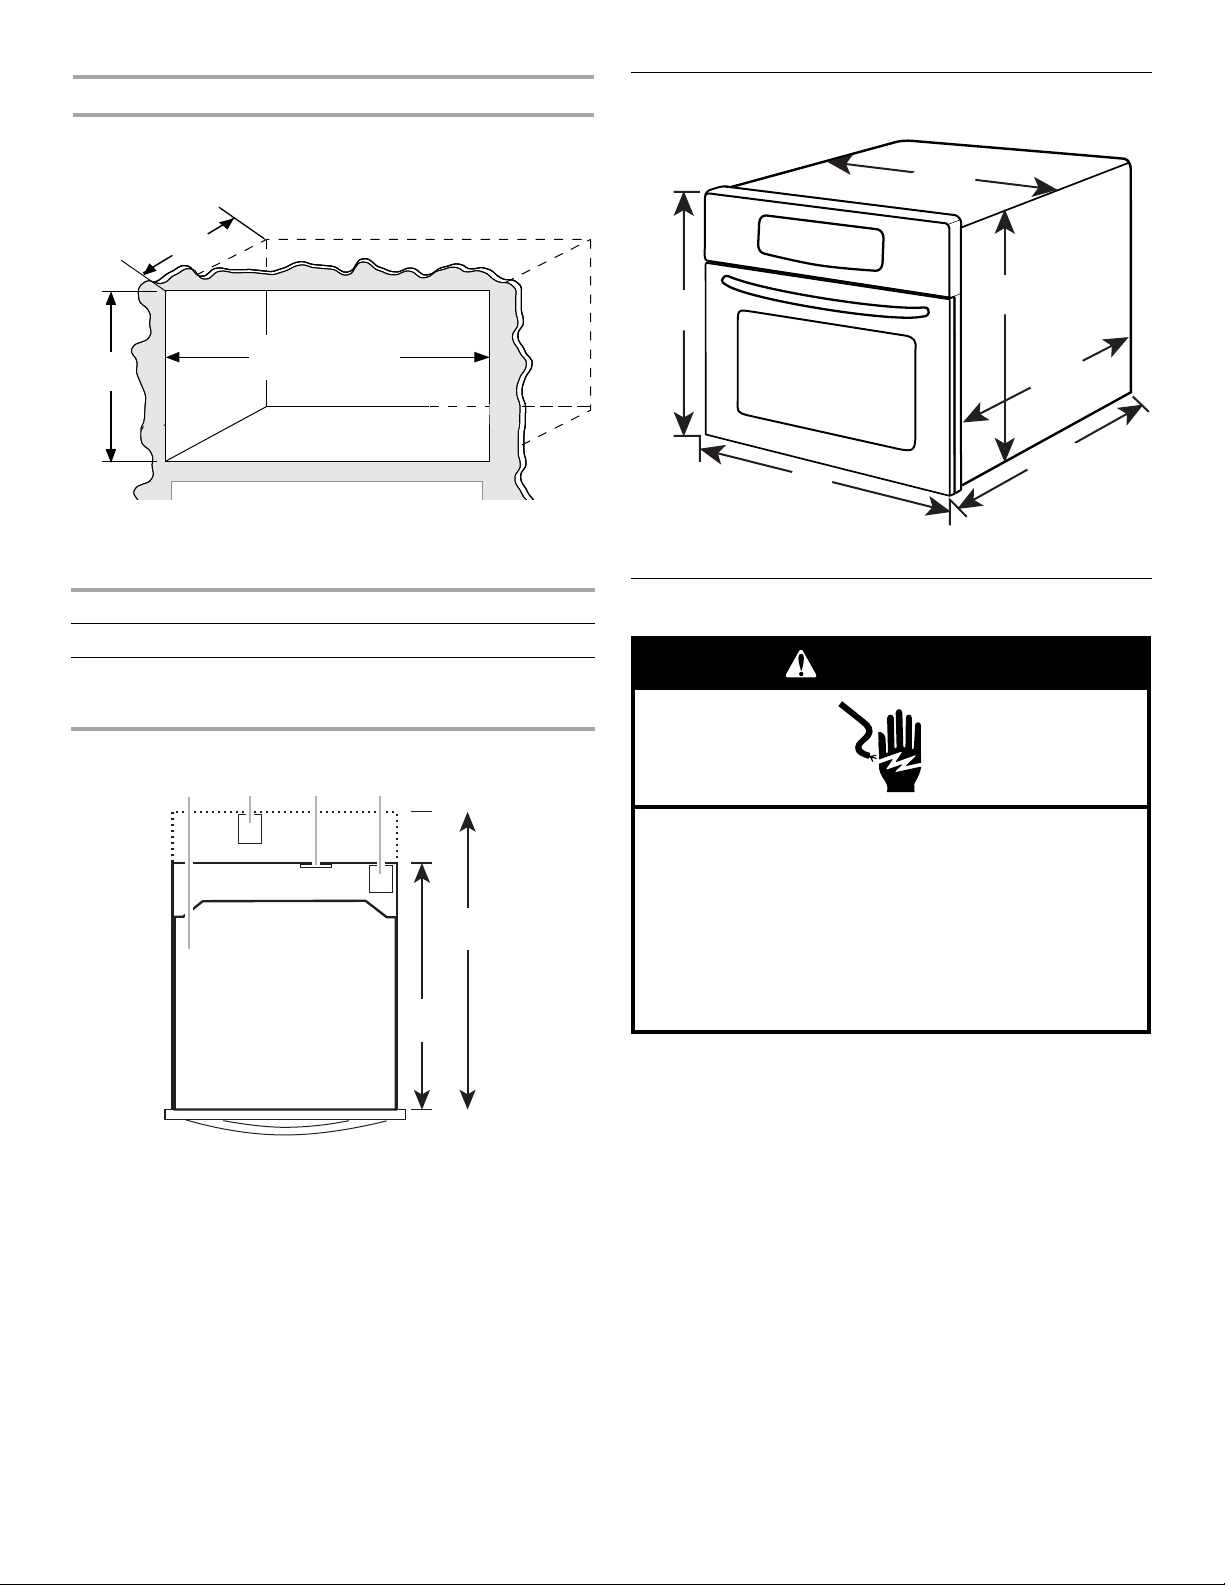
Minimum Cutout Dimensions
NOTE: Depth dimension may be 21³⁄₄" (55.2 cm) with non-flush
receptacle only if the receptacle is located in upper right or upper
left corner. See “Cutout Top View.”
21
³⁄₄" (55.2 cm)*
26
¹⁄₄" (66.7 cm)**
17⁵⁄₈"
(44.8 cm)
25³⁄₄" (65.4 cm) min.
28
³⁄₄" (73.0 cm) max.
*With flush receptacle, or with non-flush receptacle located in
upper right or upper left corner of cutout.
**With non-flush receptacle.
W idthW idth
Product Dimensions
21⁷⁄₈"
(55.6 cm)
¹⁄₂"
18"
(45.7 cm)*
³⁄₈"
23
(59.4 cm)*
*Measurements include front facing of microwave oven. Depth
measurement also includes door handle.
17
(44.5 cm)
¹⁄₄"
18
(46.4 cm)
¹⁄₄"
21
(54.0 cm)*
Width Min. 25³⁄₄" (65.4 cm); Max. 28³⁄₄" (73.0 cm)
Height 17⁵⁄₈" (44.8 cm) for all installations
Depth 21³⁄₄" (55.2 cm) with flush receptacle, or with non-flush
receptacle located in far corner;
26¹⁄₄" (66.7 cm) with non-flush receptacle
Cutout Top View
A B C D
26
¹⁄₄"
(66.7 cm)
21³⁄₄"
(55.2 cm)
A. Microwave oven
B. Non-flush receptacle
C. Flush receptacle
D. Non-flush receptacle located in upper right
or upper left corner
Electrical Requirements
WARNING
Electrical Shock Hazard
Plug into a grounded 3 prong outlet.
Do not remove ground prong.
Do not use an adapter.
Do not use an extension cord.
Failure to follow these instructions can result in death,
fire, or electrical shock.
Observe all governing codes and ordinances.
Required:
■ A 120 Volt, 60 Hz, AC only, 15- or 20-amp electrical supply
with a fuse or circuit breaker.
4
 Loading...