

Whirlpool AMW 583 Installation, Quick Start
1
INSTALLATION, QUICK START
INSTALLATIE, SNEL AAN DE SLAG
INSTALLATION, HURTIG START
INSTALLASJON, RASK INNFØRING
ASENNUS, PIKAOPAS
ÜZEMBE HELYEZÉS, RÖVID
KEZDÉSI ÚTMUTATÓ
INSTALACE, NÁVOD VE ZKRATCE
INSTALACJA, SKRÓCONA
INSTRUKCJA OBSŁUGI
,
INŠTALÁCIA, ÚVODNÁ PRÍRUČKA
INSTALLATION, DÉMARRAGE RAPIDE
AUFSTELLUNG, KURZANLEITUNG
INSTALLAZIONE, GUIDA RAPIDA
INICIO RÁPIDO PARA LA INSTALACIÓN
INSTALAÇÃO, GUIA DE INICIAÇÃO RÁPIDA
INSTALLATION, SNABBGUIDE
AMW 583
All manuals and user guides at all-guides.com
all-guides.com
2
Table of contents
IMPORTANT INFORMATION 5
BEFORE MOUNTING 5
ENVIRONMENTAL HINTS 5
MOUNTING THE APPLIANCE 6
PRIOR TO CONNECTING 6
AFTER CONNECTING 6
BEFORE FIRST USE 7
IMPORTANT SAFETY INSTRUCTIONS 7
READ CAREFULLY AND KEEP FOR FUTURE REFERENCE 7
IMPORTANT PRECAUTIONS 8
GENERAL 8
CAREFUL 8
PUSH PUSH KNOBS 8
ACCESSORIES 9
GENERAL 9
CHOOSING COOKING CONTAINER 9
SPONGE 9
WIRE SHELF 9
BAKING & DRIP TRAY 9
STEAM TRAY 9
WATER CONTAINER 9
APPLIANCE FEATURES 10
All manuals and user guides at all-guides.com

3
CONTROL PANEL 10
KEY LOCK 11
MESSAGES 12
SHORTCUTS 13
ON / OFF / PAUSE 14
KITCHEN TIMER 14
CHANGING SETTINGS 15
LANGUAGE 15
CLOCK SETTING 16
BRIGHTNESS 16
VOLUME 17
ECO 17
CALIBRATE 18
DURING COOKING 19
SPECIALS 20
DOUGH PROVING 21
DESCALING 22
DRAIN 23
FINISHING 24
REHEAT 25
STEAM DEFROST 26
All manuals and user guides at all-guides.com
4
MANUAL 28
STEAM 29
FORCED AIR + STEAM 30
FORCED AIR 31
ASSISTED MODE 32
MEAT 33
POULTRY 34
FISH / SHELLFISH 35
POTATOES 36
VEGETABLES 37
RICE / GRAIN 39
PASTA 40
EGGS 41
PIZZA / PIE 42
DESSERTS 43
BREAD/CAKES 44
MAINTENANCE & CLEANING 46
GENERAL 46
DISHWASHER SAFE 46
REMOVING THE SHELF SUPPORTS 47
DISHWASHER UNSAFE 47
REPLACING THE OVEN LIGHT BULB 47
TROUBLE SHOOTING GUIDE 48
DATA FOR TEST HEATING PERFORMANCE 48
TECHNICAL SPECIFICATION 48
All manuals and user guides at all-guides.com

5
IMPORTANT INFORMATION
T
HIS APPLIANCE COMPLIES to current
safety standard.
PLEASE KEEP the instruction for use manual and
mounting instructions in a safe place for future
reference.
PLEASE PAS S these instructions on to the new
owner in case you should sell the appliance
BEFORE MOUNTING
R
EAD THIS MANUAL CAREFULLY. This will ensure you
make full use of the technical benefits this ap-
pliance has to offer and enables you to operate
it in a safe and proper way. A incorrect use may
lead to injury or damaged objects
U
NPACK THE APPLIANCE and dispose of the packag-
ing in an environmentally responsible manner.
ENVIRONMENTAL HINTS
T
HE PACKI NG BOX may be fully re-
cycled as confirmed by the re-
cycling symbol. Follow lo-
cal disposal regulations. Keep
potentially hazardous pack-
aging (plastic bags, polysty-
rene etc.) out of the reach of chil-
dren.
THIS APPLIANCE is marked according to the Euro-
pean directive 2002/96/EC on Waste Electrical
and Electronic Equipment (WEEE). By ensuring
this product is disposed of correctly, you will
help prevent potential negative consequences
for the environment and human health, which
could otherwise be caused by inappropriate
waste handling of this product.
THE SYMBOL on the product,
or on the documents ac-
companying the product,
indicates that this appliance
may not be treated as house-
hold waste. Instead it shall be
handed over to the applica-
ble collection point for the
recycling of electrical and
electronic equipment.
DISPOSAL must be carried
out in accordance with lo-
cal environmental regulations for waste dis-
posal.
FOR MORE DETAILED INFORMATION about treatment,
recovery and recycling of this product, please
contact your local city office, your household
waste disposal service or the shop where you
purchased the product.
B
EFORE SCRAPPING, cut off the mains cord so that
the appliance cannot be connected to the
mains.
All manuals and user guides at all-guides.com
6
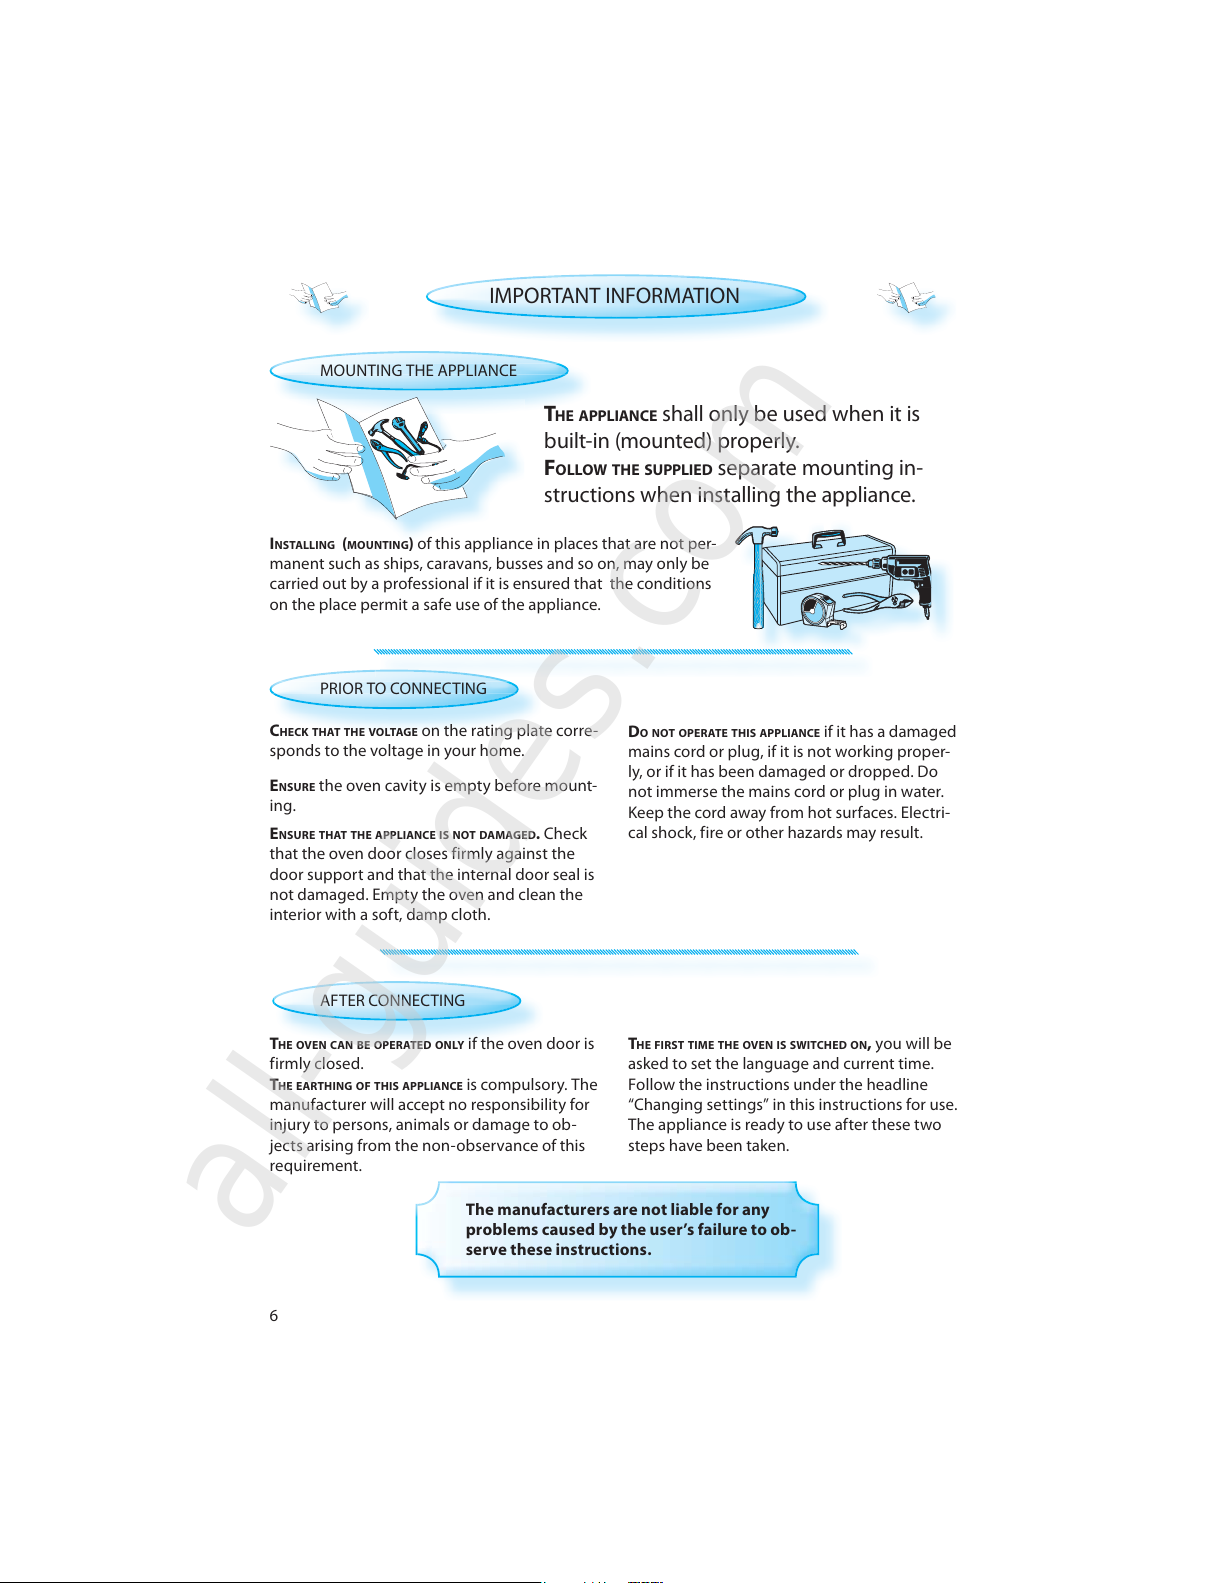
PRIOR TO CONNECTING
ENSURE THAT THE APPLIANCE IS NOT DAMAGED. Check
that the oven door closes firmly against the
door support and that the internal door seal is
not damaged. Empty the oven and clean the
interior with a soft, damp cloth.
AFTER CONNECTING
T
HE FIRST TIME THE OVEN IS SWITCHED ON, you will be
asked to set the language and current time.
Follow the instructions under the headline
“Changing settings” in this instructions for use.
The appliance is ready to use after these two
steps have been taken.
The manufacturers are not liable for any
problems caused by the user’s failure to ob-
serve these instructions.
D
O NOT OPERATE THIS APPLIANCE if it has a damaged
mains cord or plug, if it is not working proper-
ly, or if it has been damaged or dropped. Do
not immerse the mains cord or plug in water.
Keep the cord away from hot surfaces. Electri-
cal shock, fire or other hazards may result.
E
NSURE the oven cavity is empty before mount-
ing.
C
HECK THAT THE VOLTAGE on the rating plate corre-
sponds to the voltage in your home.
T
HE OVEN CAN BE OPERATED ONLY if the oven door is
firmly closed.
THE EARTHING OF THIS APPLIANCE is compulsory. The
manufacturer will accept no responsibility for
injury to persons, animals or damage to ob-
jects arising from the non-observance of this
requirement.
MOUNTING THE APPLIANCE
THE APPLIANCE shall only be used when it is
built-in (mounted) properly.
FOLLOW THE SUPPLIED separate mounting in-
structions when installing the appliance.
IMPORTANT INFORMATION
INSTALLING (MOUNTING) of this appliance in places that are not per-
manent such as ships, caravans, busses and so on, may only be
carried out by a professional if it is ensured that the conditions
on the place permit a safe use of the appliance.
All manuals and user guides at all-guides.com
all-guides.com

7
IMPORTANT SAFETY INSTRUCTIONS
DO NOT HEAT, OR USE FLAMMABLE MATERIALS in or
near the oven. Fumes can create a fire hazard
or explosion.
D
O NOT OVER-COO K FOOD. Fire could result.
D
O NOT LEAVE THE OVEN UNATTENDED, especially
when using paper, plastic or other combusti-
ble materials in the cooking process. Paper can
char or burn and some plastics can melt if used
when heating foods.
I
F MATERIAL INSIDE / OUTSIDE THE OVEN SHOULD IGNITE
OR SMOKE IS OBSERVED, keep oven door closed and
turn the oven off. Disconnect the power cord
or shut off power at the fuse or circuit break-
er panel.
READ CAREFULLY AND KEEP FOR FUTURE REFERENCE
O
NLY ALLOW CHILDREN to use the appliance under
adult supervision and after adequate instructions
have been given, so that the child is able to use
the appliance in a safe way and understands the
hazards of improper use.
THIS APPLIANCE IS NOT INTENDED FOR use by persons
(including children) with reduced physical, senso-
ry or mental capabilities, unless used under the
supervision of a person responsible for their safe-
ty.
WARNING!
ACCESSI BLE PART S MAY BECOME HOT during use, young
children should be kept away.
D
O NOT USE corrosive chemicals or vapors in this
appliance. This type of oven is specifically de-
signed to heat or cook food. It is not designed
for industrial or laboratory use.
N
EVER PUT OR DRAG utensils across the bottom of
the oven as this could scratch the surface. Al-
ways put utensils on the wire shelf or trays.
DO NOT HANG OR PLACE heavy items on the door
as this can damage the oven opening and
hinges. The door handle should not be used
for hanging things on.
T
HE DOOR SEALS AND THE DOOR SEAL AREAS must be
regularly inspected for damage. If these areas
are damaged the appliance should not be op-
erated until it has been repaired by a trained
service technician
BEFORE FIRST USE
OPEN THE DOOR, remove the accessories
and ensure the oven is empty
R
INSE THE WATER CONTAIN ER with tap wa-
ter (no detergents) and then fill it to the
“MAX” mark.
S
LIDE THE WATER CON TAINER into it’s socket
until it engages the contact point and sits
firmly in place.
D
O NOT USE this appliance as a room heater or
humidifier.
RUN THE CALIBRATION FUNCTIO N and follow on
screen instructions.
N
OTE
THE WATER PUMP responsible for filling and
draining the steam boiler is now activat-
ed. It will initially sound louder during air-
pumping and lower when water is filling
the pump again.
THIS IS NORMAL and no concern for alarm.
AFTER CALIBRATION, let the oven cool to
room temperature and then wipe dry any
damp areas if present.
EMPTY THE WATER CON TAINER and dry it off be-
fore further use.
All manuals and user guides at all-guides.com
8
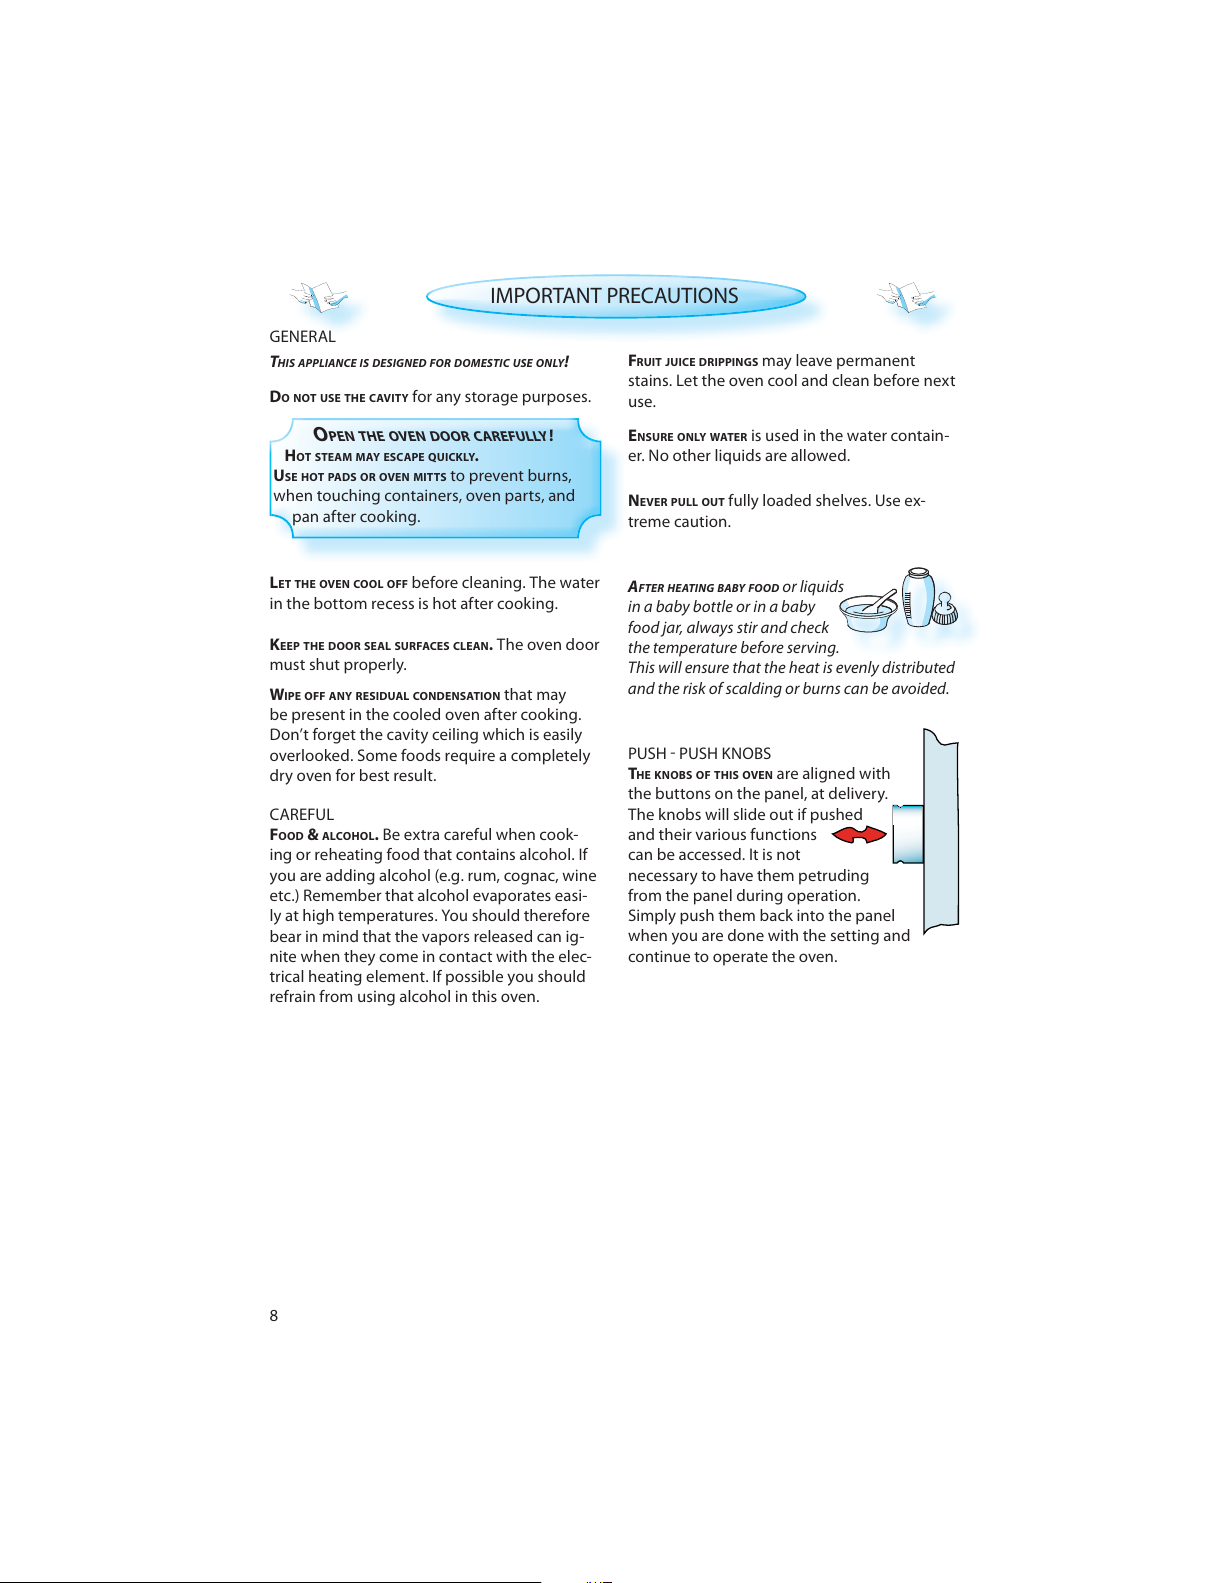
PUSH PUSH KNOBS
THE KNOBS OF THIS OVEN are aligned with
the buttons on the panel, at delivery.
The knobs will slide out if pushed
and their various functions
can be accessed. It is not
necessary to have them petruding
from the panel during operation.
Simply push them back into the panel
when you are done with the setting and
continue to operate the oven.
GENERAL
THIS APPLIANCE IS DESIGNED FOR DOMESTIC USE ONLY!
CAREFUL
F
OOD & ALCOHOL. Be extra careful when cook-
ing or reheating food that contains alcohol. If
you are adding alcohol (e.g. rum, cognac, wine
etc.) Remember that alcohol evaporates easi-
ly at high temperatures. You should therefore
bear in mind that the vapors released can ig-
nite when they come in contact with the elec-
trical heating element. If possible you should
refrain from using alcohol in this oven.
A
FTER HEATING BABY FOOD or liquids
in a baby bottle or in a baby
food jar, always stir and check
the temperature before serving.
This will ensure that the heat is evenly distributed
and the risk of scalding or burns can be avoided.
IMPORTANT PRECAUTIONS
DO NOT USE THE CAVITY for any storage purposes.
FRUIT JUICE DRIPPINGS may leave permanent
stains. Let the oven cool and clean before next
use.
L
ET THE OVEN COOL OFF before cleaning. The water
in the bottom recess is hot after cooking.
KEEP THE DOOR SEAL SURFACES CLEAN. The oven door
must shut properly.
W
IPE OFF ANY RESIDUAL CONDENS ATION that may
be present in the cooled oven after cooking.
Don’t forget the cavity ceiling which is easily
overlooked. Some foods require a completely
dry oven for best result.
E
NSURE ONLY WATER is used in the water contain-
er. No other liquids are allowed.
N
EVER PULL OUT fully loaded shelves. Use ex-
treme caution.
O
PEN THE OVEN DOOR CAREFULLY
!
HOT STEAM MAY ESCAPE QUICKLY.
USE HOT PADS OR OVEN MITTS to prevent burns,
when touching containers, oven parts, and
pan after cooking.
All manuals and user guides at all-guides.com
9
ACCESSORIES
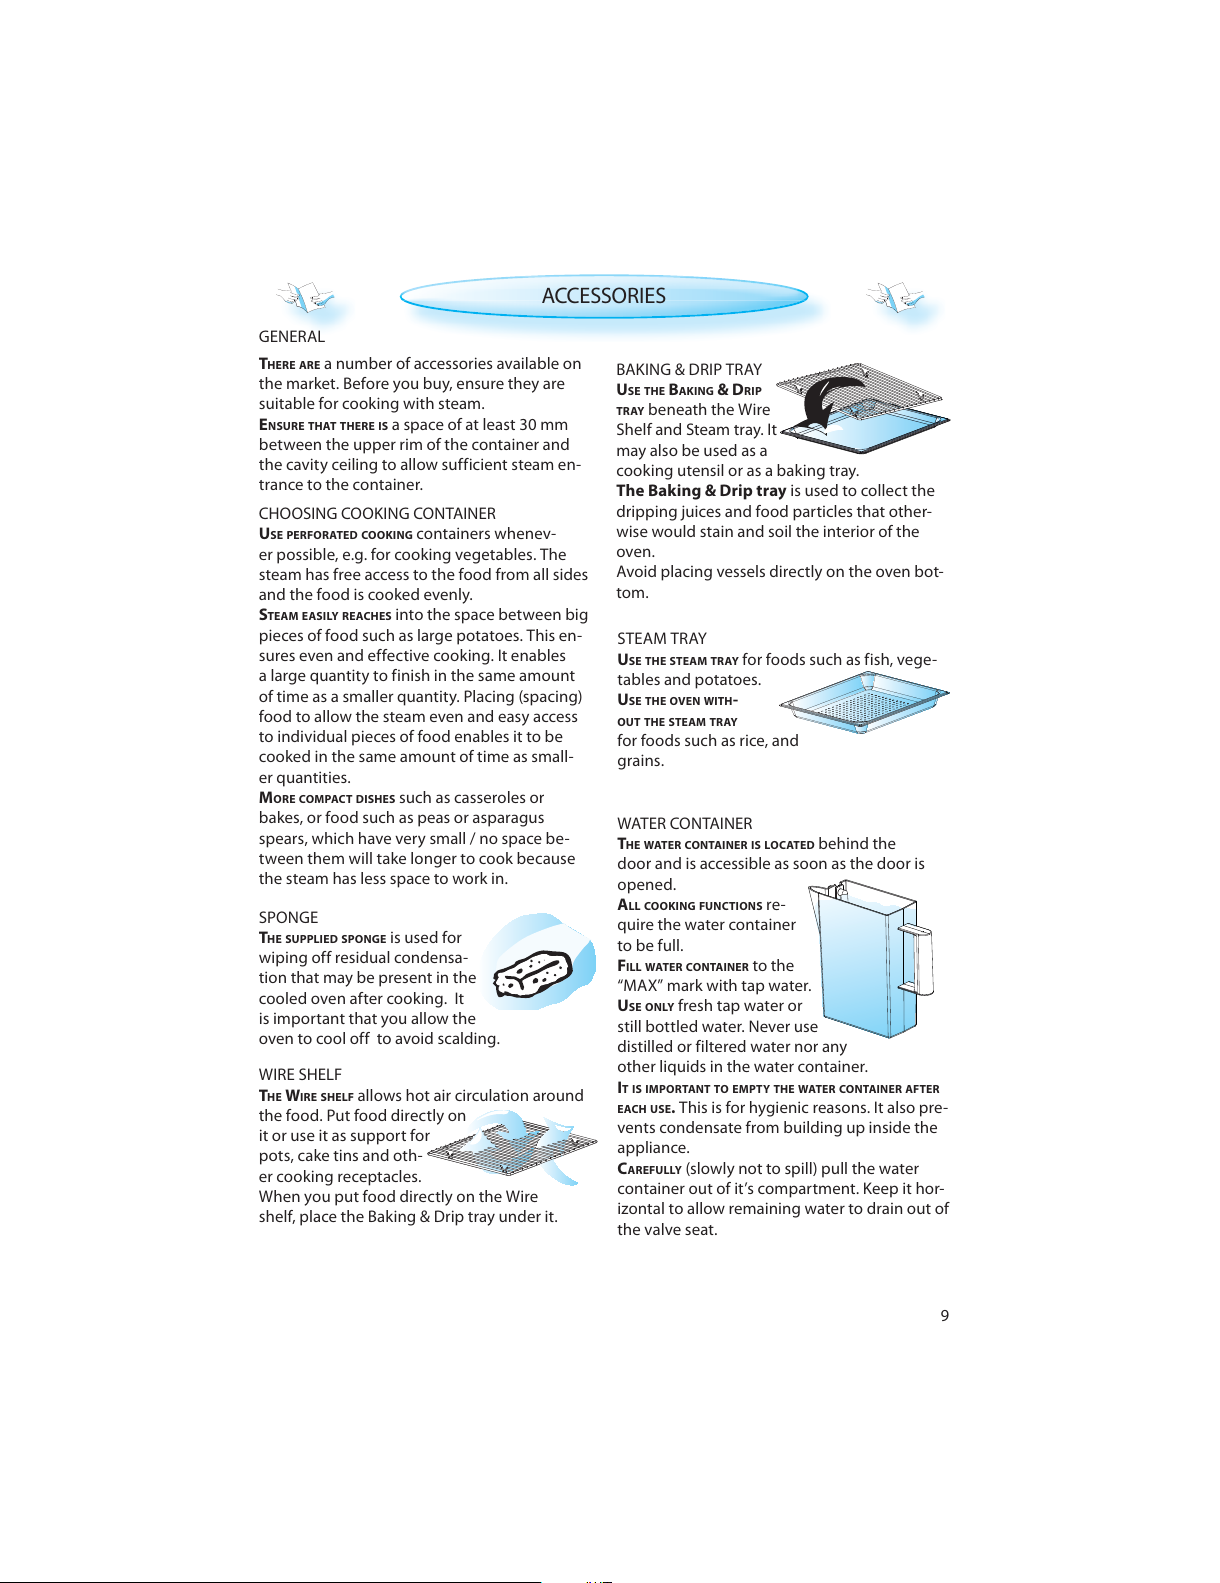
GENERAL
T
HERE ARE a number of accessories available on
the market. Before you buy, ensure they are
suitable for cooking with steam.
E
NSURE THAT THERE IS a space of at least 30 mm
between the upper rim of the container and
the cavity ceiling to allow sufficient steam en-
trance to the container.
STEAM TRAY
U
SE THE STEAM TRAY for foods such as fish, vege-
tables and potatoes.
USE THE OVEN WITH-
OUT THE STEAM TRAY
for foods such as rice, and
grains.
WATER CONTAINER
T
HE WATER CONTAI NER IS LOCATED behind the
door and is accessible as soon as the door is
opened.
ALL COOKI NG FUNCTION S re-
quire the water container
to be full.
FILL WATER CONTAIN ER to the
“MAX” mark with tap water.
USE ONLY fresh tap water or
still bottled water. Never use
distilled or filtered water nor any
other liquids in the water container.
IT IS IMPORTANT TO EMPTY THE WATER CO NTAINER AFTER
EACH USE. This is for hygienic reasons. It also pre-
vents condensate from building up inside the
appliance.
CAREFULLY (slowly not to spill) pull the water
container out of it’s compartment. Keep it hor-
izontal to allow remaining water to drain out of
the valve seat.
CHOOSING COOKING CONTAINER
U
SE PERFORATED COOK ING containers whenev-
er possible, e.g. for cooking vegetables. The
steam has free access to the food from all sides
and the food is cooked evenly.
STEAM EASILY REACHES into the space between big
pieces of food such as large potatoes. This en-
sures even and effective cooking. It enables
a large quantity to finish in the same amount
of time as a smaller quantity. Placing (spacing)
food to allow the steam even and easy access
to individual pieces of food enables it to be
cooked in the same amount of time as small-
er quantities.
MORE COMPACT DISHES such as casseroles or
bakes, or food such as peas or asparagus
spears, which have very small / no space be-
tween them will take longer to cook because
the steam has less space to work in.
SPONGE
T
HE SUPPLIED SPONGE is used for
wiping off residual condensa-
tion that may be present in the
cooled oven after cooking. It
is important that you allow the
oven to cool off to avoid scalding.
BAKING & DRIP TRAY
USE THE BAKING & DRIP
TRAY beneath the Wire
Shelf and Steam tray. It
may also be used as a
cooking utensil or as a baking tray.
The Baking & Drip tray is used to collect the
dripping juices and food particles that other-
wise would stain and soil the interior of the
oven.
Avoid placing vessels directly on the oven bot-
tom.
WIRE SHELF
THE WIRE SHELF allows hot air circulation around
the food. Put food directly on
it or use it as support for
pots, cake tins and oth-
er cooking receptacles.
When you put food directly on the Wire
shelf, place the Baking & Drip tray under it.
All manuals and user guides at all-guides.com
10
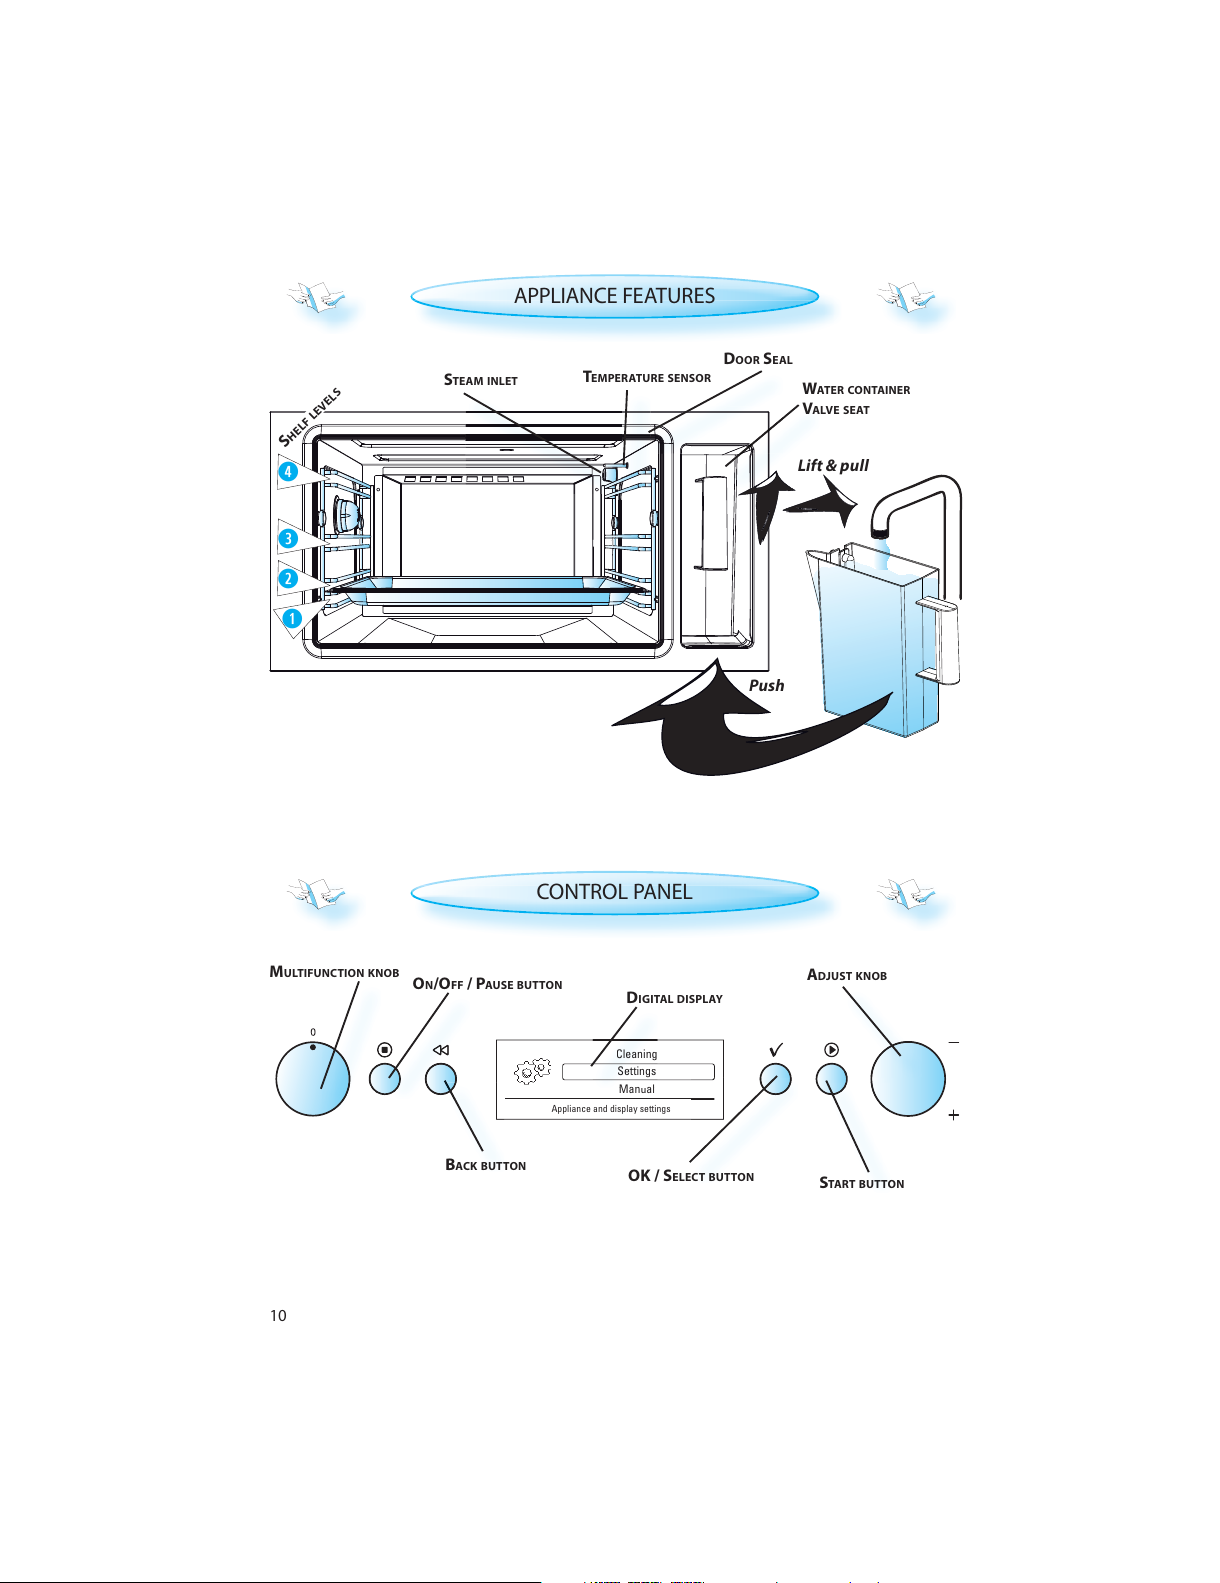
CONTROL PANEL
DIGITAL DISPLAY
MULTIFUNCTION KNOB
BACK BUTTON
OK / SELECT BUTTON
START BUTTON
ADJUST KNOB
ON/OFF / PAUSE BUTTON
APPLIANCE FEATURES
TEMPERATURE SENSOR
DOOR SEAL
WATER CONTAINER
VALVE SEAT
S
HELF
LEVELS
STEAM INLET
Lift & pull
Push
Settings
Manual
Cleaning
Appliance and display settings
VA
Lift
RE SENSO
R
CT BUTT
ON
S
ettin
gs
C
leanin
g
TART BUTT
O
BA
C
K BUT
T
All manuals and user guides at all-guides.com
11
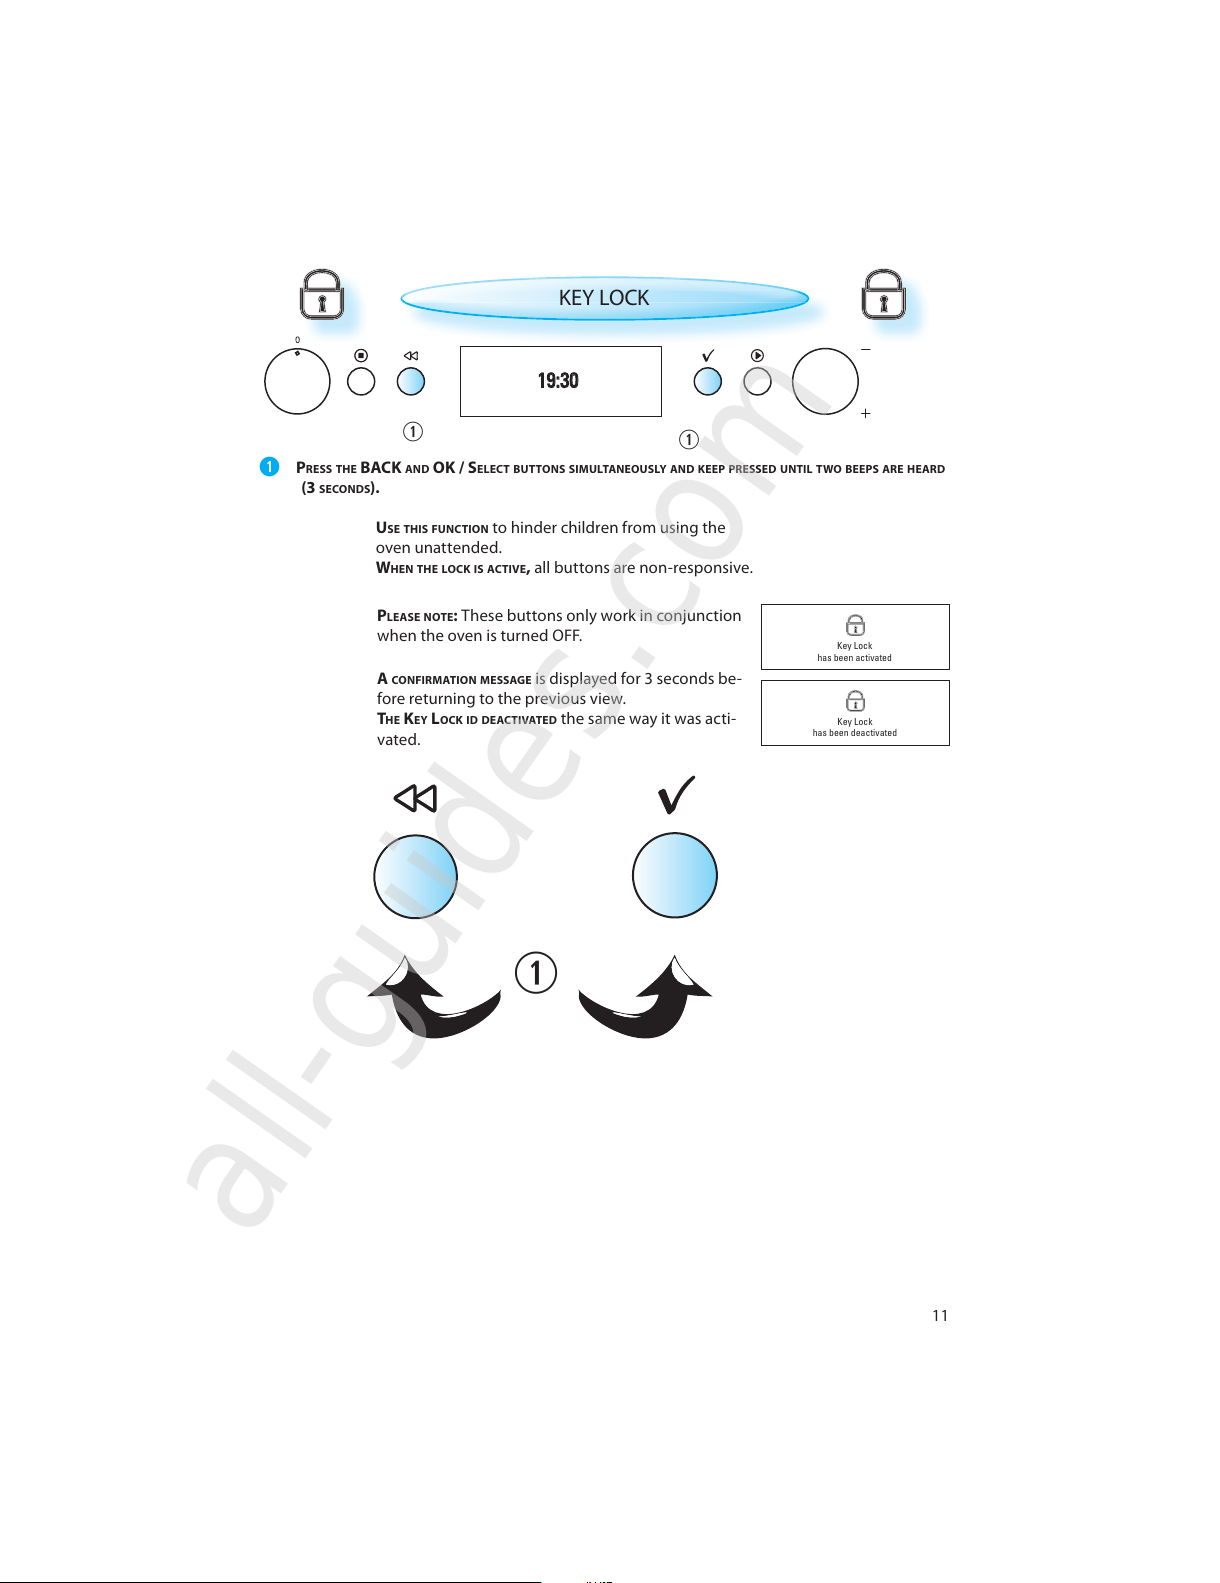
Key Lock
has been activated
Key Lock
has been deactivated
19:30
KEY LOCK
PRESS THE BACK AND OK / SELECT BUTTONS SIMULTANEOUSLY AND KEEP PRESSED UNTIL TWO BEEPS ARE HEARD
(3 SECONDS).
U
SE THIS FUNCTION to hinder children from using the
oven unattended.
WHEN THE LOCK IS ACTIVE, all buttons are non-responsive.
A
CONFIR MATION MESSAGE is displayed for 3 seconds be-
fore returning to the previous view.
THE KEY LOCK ID DEACTIVATED the same way it was acti-
vated.
P
LEASE NOTE: These buttons only work in conjunction
when the oven is turned OFF.
All manuals and user guides at all-guides.com
all-guides.com
12
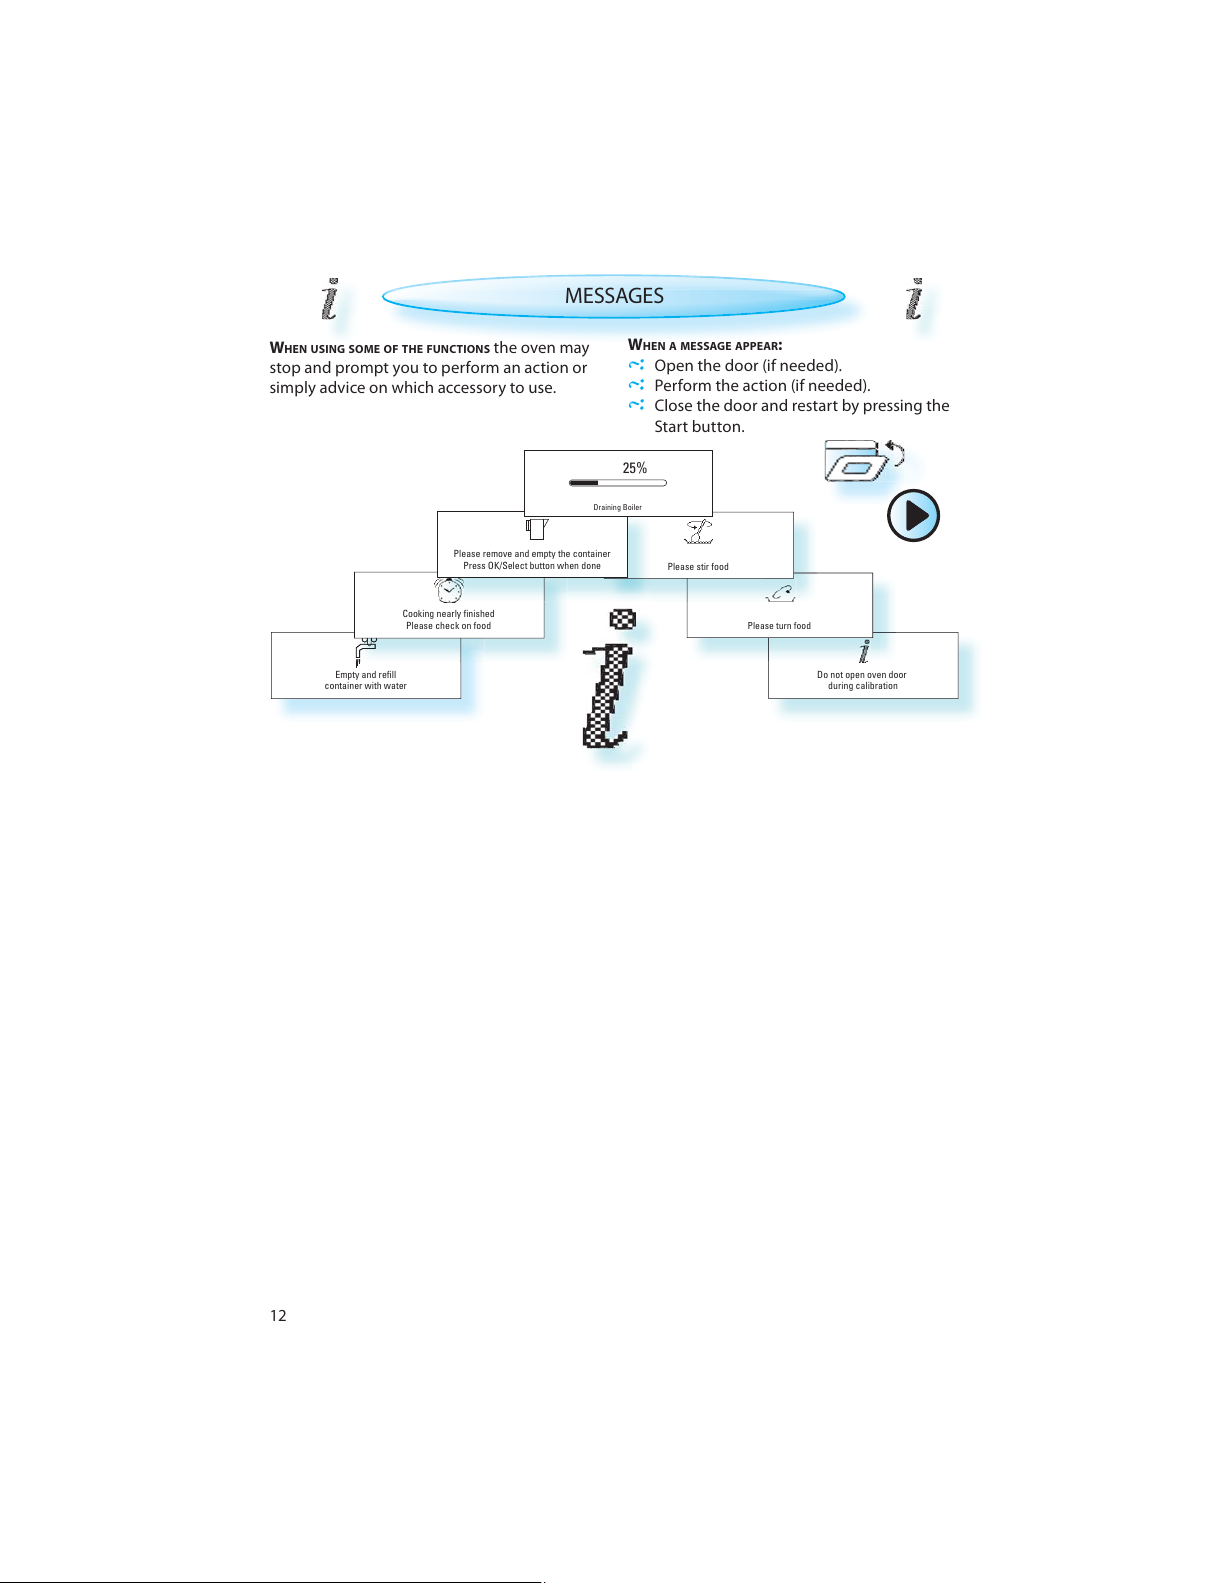
Do not open oven door
during calibration
Please turn food
Empty and refill
container with water
Cooking nearly finished
Please check on food
Please stir food
Please remove and empty the container
Press OK/Select button when done
Draining Boiler
25%
WHEN USING SOME OF THE FUNCTIONS the oven may
stop and prompt you to perform an action or
simply advice on which accessory to use.
MESSAGES
WHEN A MESSAGE APPEAR:
Open the door (if needed).
Perform the action (if needed).
Close the door and restart by pressing the
Start button.
All manuals and user guides at all-guides.com
13
Boiled Eggs
Your most used cooking functions
Bulgur
Shortcut
Shortcut
Shortcut
Your most used cooking functions
Bulgur
Boiled Eggs
Asparagus
Your most used cooking functions
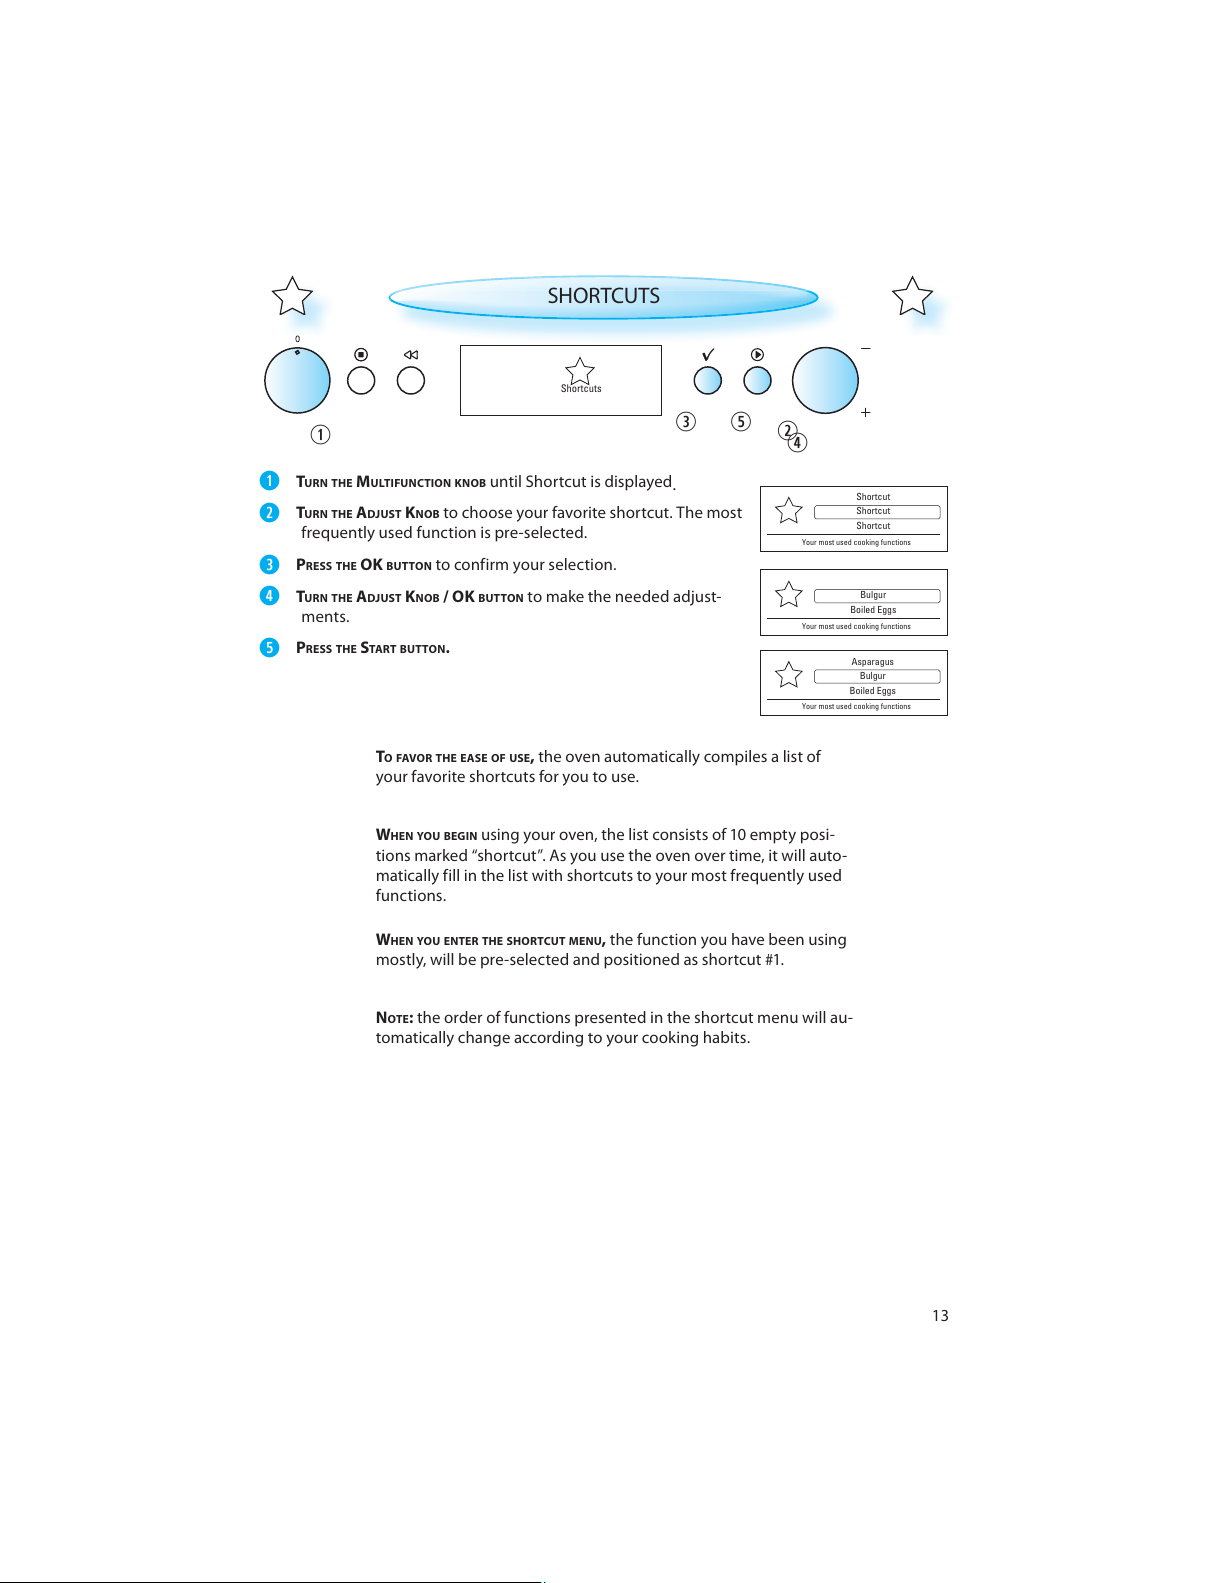
SHORTCUTS
TO FAVOR THE EASE OF USE, the oven automatically compiles a list of
your favorite shortcuts for you to use.
TURN THE MULTIFUNCTION KNOB until Shortcut is displayed
.
TURN THE ADJUST KNOB to choose your favorite shortcut. The most
frequently used function is pre-selected.
PRESS THE OK BUTTON to confirm your selection.
TURN THE ADJUST KNOB / OK BUTTON to make the needed adjust-
ments.
PRESS THE START BUTTON.
WHEN YOU BEGIN using your oven, the list consists of 10 empty posi-
tions marked “shortcut”. As you use the oven over time, it will auto-
matically fill in the list with shortcuts to your most frequently used
functions.
W
HEN YOU ENTER THE SHORTCUT MENU, the function you have been using
mostly, will be pre-selected and positioned as shortcut #1.
N
OTE: the order of functions presented in the shortcut menu will au-
tomatically change according to your cooking habits.
Shortcuts
All manuals and user guides at all-guides.com
14
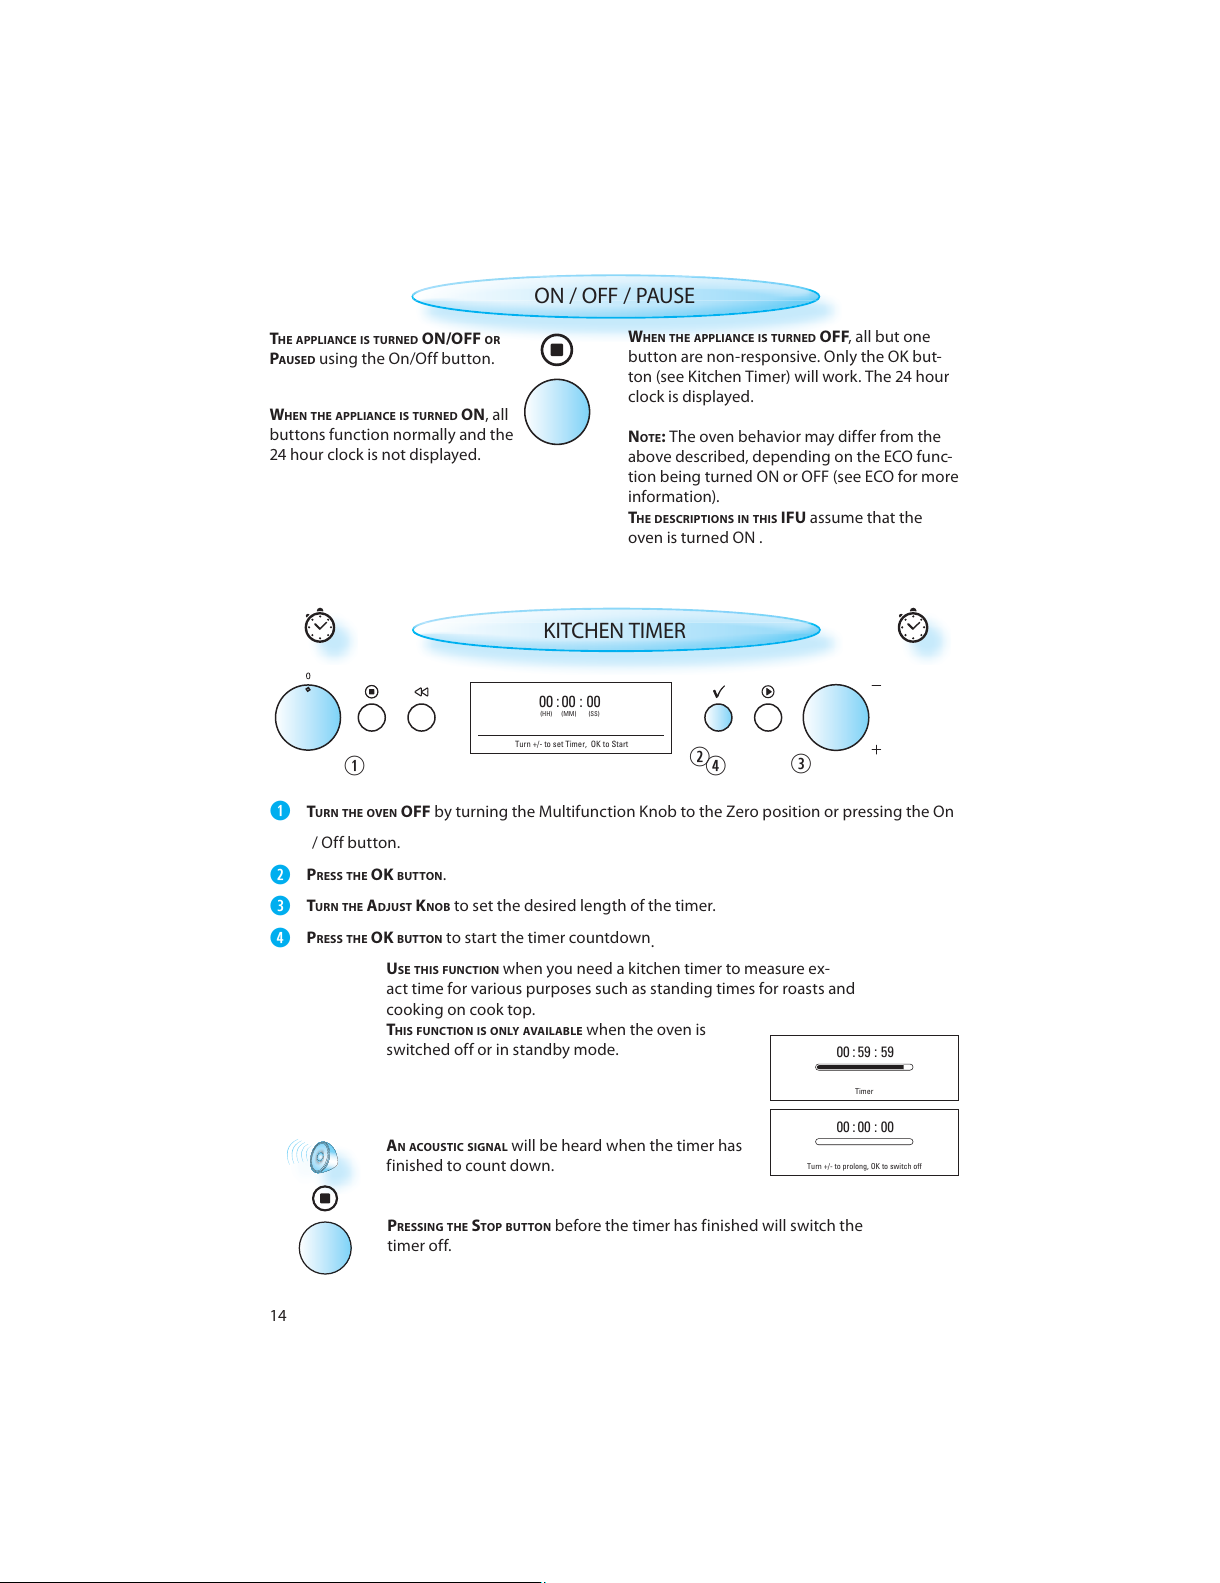
Timer
00 : 59 : 59
00 : 00 : 00
Turn +/- to prolong, OK to switch off
THE APPLIANCE IS TURNED ON/OFF OR
PAUSED using the On/Off button.
ON / OFF / PAUSE
WHEN THE APPLIANCE IS TURNED OFF , all but one
button are non-responsive. Only the OK but-
ton (see Kitchen Timer) will work. The 24 hour
clock is displayed.
W
HEN THE APPLIANCE IS TURNED ON , all
buttons function normally and the
24 hour clock is not displayed.
N
OTE: The oven behavior may differ from the
above described, depending on the ECO func-
tion being turned ON or OFF (see ECO for more
information).
THE DESCRIPTIONS IN THIS IFU assume that the
oven is turned ON .
U
SE THIS FUNCTION when you need a kitchen timer to measure ex-
act time for various purposes such as standing times for roasts and
cooking on cook top.
THIS FUNCTION IS ONLY AVAILAB LE when the oven is
switched off or in standby mode.
KITCHEN TIMER
TURN THE OVEN OFF by turning the Multifunction Knob to the Zero position or pressing the On
/ Off button.
PRESS THE OK BUTTON .
TURN THE ADJUST KNOB to set the desired length of the timer.
PRESS THE OK BUTTON to start the timer countdown
.
AN ACOUSTI C SIGNAL will be heard when the timer has
finished to count down.
P
RESSING THE STOP BUTTON before the timer has finished will switch the
timer off.
00 : 00 : 00
(HH) (MM) (SS)
Turn +/- to set Timer, OK to Start
All manuals and user guides at all-guides.com

15
English
Français
Türkçe
Please select language
Language
has been set
Settings
Language
Time
Calibrate
Appliance and display settings
WHEN THE APPLIANCE IS FIRST PLUGGED IN it will ask you to set the Lan-
guage and 24 hour Clock.
AFTER A POWER FAILUR E the Clock will flash and needs to be reset.
YOUR OVEN HAS a number of functions which can be adjusted to your
personal taste.
CHANGING SETTINGS
TURN THE MULTIFUNCTION KNOB until Settings is shown.
TURN THE ADJUST KNOB to choose one of the settings to adjust.
LANGUAGE
PRESS THE OK BUTTON .
TURN THE ADJUST KNOB to choose one of the available lan-
guages.
PRESS THE OK BUTTON again to confirm the change.
All manuals and user guides at all-guides.com
 Loading...