

Whirlpool AKM 995/BA/01, AKM 995/IF INSTALLATION
AKM 995/01 PRODUCT DESCRIPTION SHEET
HU
m
DE GB FR NL ES PT IT GR SE NO DK FI PL CZ SK
RU
2
3
51
4
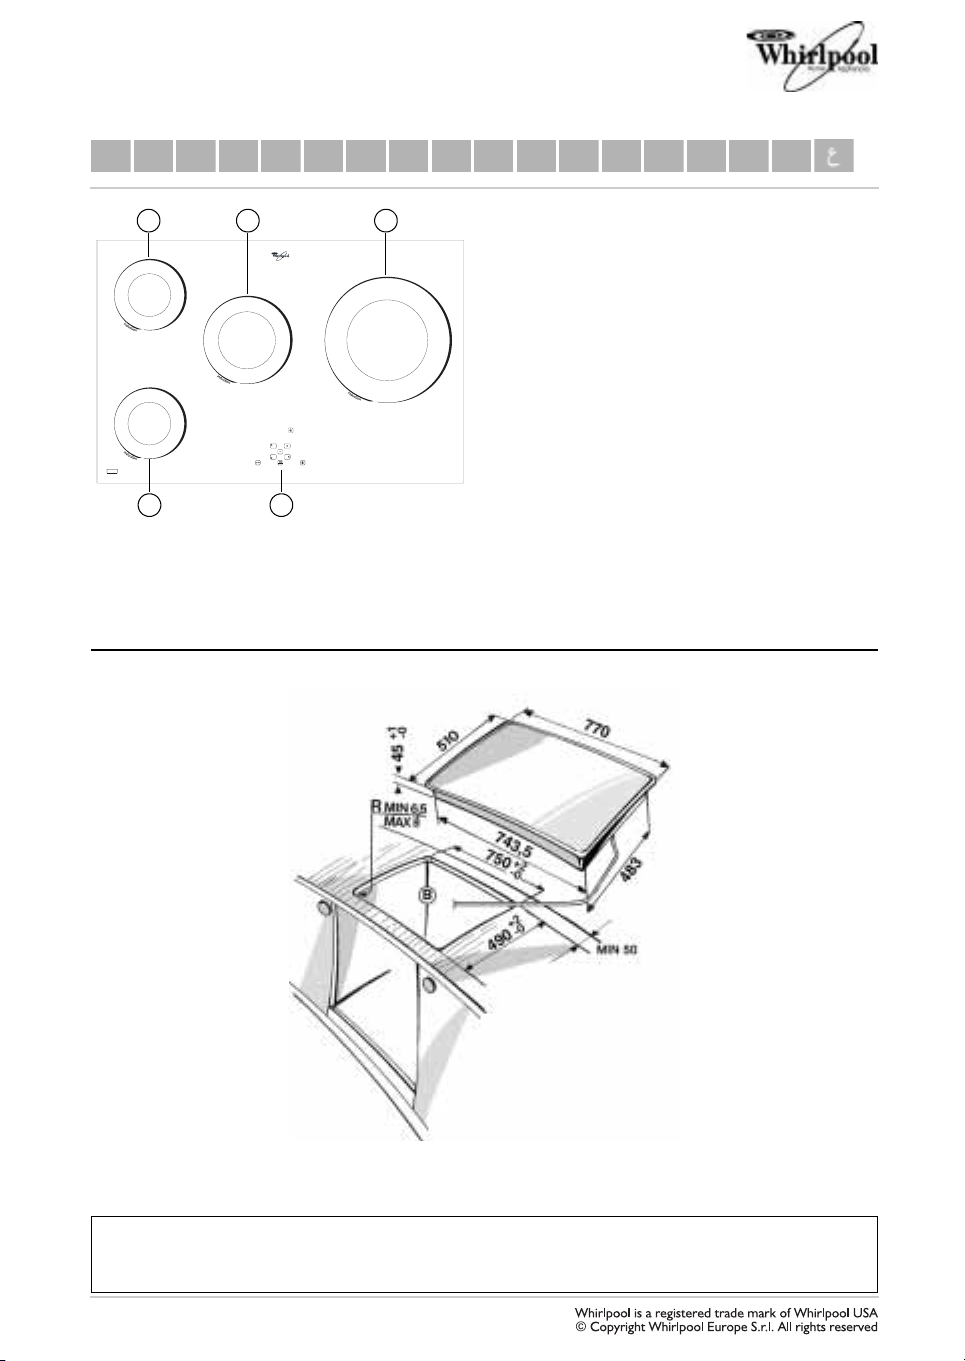
1.
Front left round induction cooking zone Ø 145 mm
2.
Rear left round induction cooking zone Ø 145 mm
3.
Central round induction cooking zone Ø 180 mm
4.
Central right round induction cooking zone Ø 260 m
5.
Display
Important:
To avoid permanently damaging the glass ceramic
hob, do not use:
- pots with bottoms that are not perfectly flat.
- metal pots with enamelled bottom.
Any aesthetic defects (scratches, surface marks,
etc.) must be reported immediately upon
installation.
HOB DIMENSIONS (mm)
TYPE: PLEIL 230 V ~ /400 V 3 N ~ 50 Hz 7.4 kW
TYPE: PLEIL 230 V ~ 50 Hz 7.4 kW (only for UK)
5019 319 01330
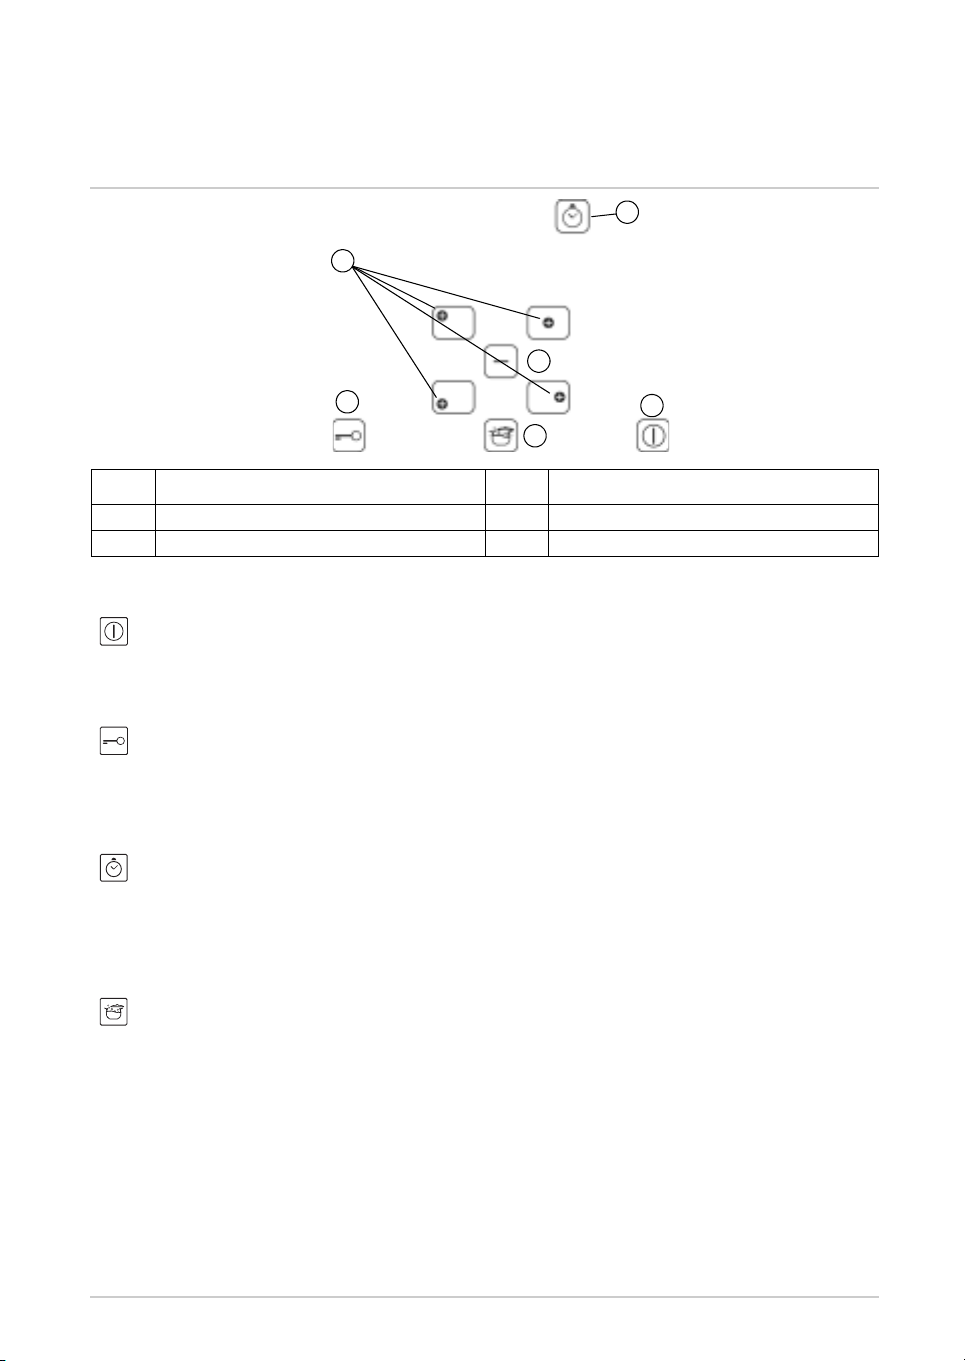
HOW TO USE YOUR HOB
F
B
C
E
A
D
On/Off
A
Cooking zone selection and heat setting increase
B
Heat setting decrease
C
To switch the hob on, hold down button A for about 2 seconds. The 4 cooking zone displays show
20 seconds none of the cooking zones is activated, the hob switches off automatically as a safety precaution.
Press one of the buttons
Select the heat setting required with buttons
same time to cancel all settings.
IMPORTANT:
heat setting, first press the selection button
“C”
or
CHILD SAFETY
The
function button. The Child Safety function locks all the hob's other functions, with the exception of the On/Off
button
holding down button
TIMER
The
zone. To programme the timer for a given cooking zone, first select the desired cooking zone using one of the
buttons
timer display, indicating the cooking zone selected. Within 20 seconds, set the cooking time using buttons
“C”
(1-99 min). After 20 seconds, the timer function begins automatically and the red indicator dot remains lit.
At the end of the set cooking time, an acoustic signal sounds. If a cooking zone has been programmed to operate
with the timer, it is switched off and the red indicator dot switches off too.
The timer can be used to programme all cooking zones to work simultaneously.
To use the function as a minute minder, press button
When the set time has elapsed, an acoustic signal sounds.
FAST BOIL
The
To select this function, first select the desired cooking zone using buttons
display will show the letter P. The Fast Boil function can be used with all cooking zones. The Fast Boil function
can only be used simultaneously with two cooking zones, one of the left and one on the right.
Warning: Depending on the heat setting selected, when this function is used together with the other
hotplate on the same side of the hob, hob operation will be somewhat noisy.
With the
To select this function, first select heat setting
“A”
A
H
IMPORTANT:
heat setting triggers automatic switch-off of the cooking zone (for example, after around 1 hour at maximum heat setting,
the cooking zone switches off).
, turn the heat setting down to the desired level for cooking (using button C). The letter
selected level. Upon reaching the desired heat setting, the
the selected heat setting (1-9).
RESIDUAL HEAT INDICATOR.
When the cooking zone is switched off, the residual heat indicator
“0”
until the temperature of the hob returns within safety levels.
For safety reasons, the hob is equipped with an automatic cut-off function. Prolonged use of the same
The control is deactivated 10 seconds after the heat setting has been selected. To change the
.
“A”
. This function remains on even after the hob has been switched off and on again. It can cancelled by
function (if available) can be used both as a minute minder and as a timer for a selected cooking
“B”
. To select the function, press the button with the clock symbol
AUTOMATIC BOOSTER
“B”
corresponding to the cooking zone you intend to use.
function is switched on by holding down button
“E”
until the dot above the function button switches off.
function switches the highest power setting on to bring water to the boil rapidly.
“B”
“B”
function, the cooking zone reaches the selected heat setting more rapidly.
“9”
D
Fast boil
E
Child safety device
F
Timer
“0”
. If within
“C”
or
. Heat settings go from 1 to 9. Press buttons +/- at the
again, then proceed to change the setting, using buttons
“E”
until a dot lights up above the
“F”
. A dot lights up next to the
“F”
and then buttons
and then press button
“A”
disappears from the display, which shows only
“H”
“F”-“C”
to set the desired time.
“B”
and then press button
“B”
. When the display shows the letter
remains on or flashes alternating with
“A”
flashes at the
“D”
“B”
“F”-
: the
 Loading...