


Propaq LT
Radio configuration guide
Propaq LT® and Propaq CS® vital signs monitors, Micropaq® monitor
Overview
This guide explains how to do the following:
• Configure your monitor radio card to your network.
• Customize your radio configuration.
• Reset your monitor radio.
• Set your SSID.
It applies to new monitors or monitors returned from the Welch Allyn service department.
Your network must be configured to use factory-supported SSIDs and authentication and
encryption schemes.
Caution The instructions in this guide must be performed only by a qualified
biomedical service engineer or technician who is familiar with your facility’s
wireless network. If you are not familiar with your facility’s wireless network,
perform these tasks only with the assistance of a qualified technician.
Propaq LT Vital Signs Monitor . . . . . . . . . . . . . . . . . . . . . . . . . . . . . . . . . . . . . . . .1
Micropaq Monitor . . . . . . . . . . . . . . . . . . . . . . . . . . . . . . . . . . . . . . . . . . . . . . . . .5
Propaq CS Vital Signs Monitor . . . . . . . . . . . . . . . . . . . . . . . . . . . . . . . . . . . . . . . .9
Radio configuration tool user interface . . . . . . . . . . . . . . . . . . . . . . . . . . . . . . . . 11
Propaq LT Vital Signs Monitor
This procedure is for Propaq LT “A” monitors (802LTAN and 802LTAS) with software
versions 1.60.05 or later.
To make any changes to your monitor radio card, access the monitor service menu. The
service menu is only available when the monitor is in adult patient mode.
To access the monitor service menu
From any main display screen (such as Large Numerics, Dual Waveform, ...):
1. Highlight , HR/PR, SpO2, NIBP, Resp, or , and then press .
2. Highlight Setup (at the bottom of the screen) and press . The setup menu
appears.
3. Scroll right ( ) to highlight Service, and press . The service menu appears, with
NIBP and Show Info highlighted.
When in the monitor service menu, you can set the authentication and encryption
scheme and the network name through the monitor user interface.
To set an authentication and encryption scheme
1. Scroll right ( ) to highlight Radio and press .
2 80016835 Ver A Welch Allyn
Note
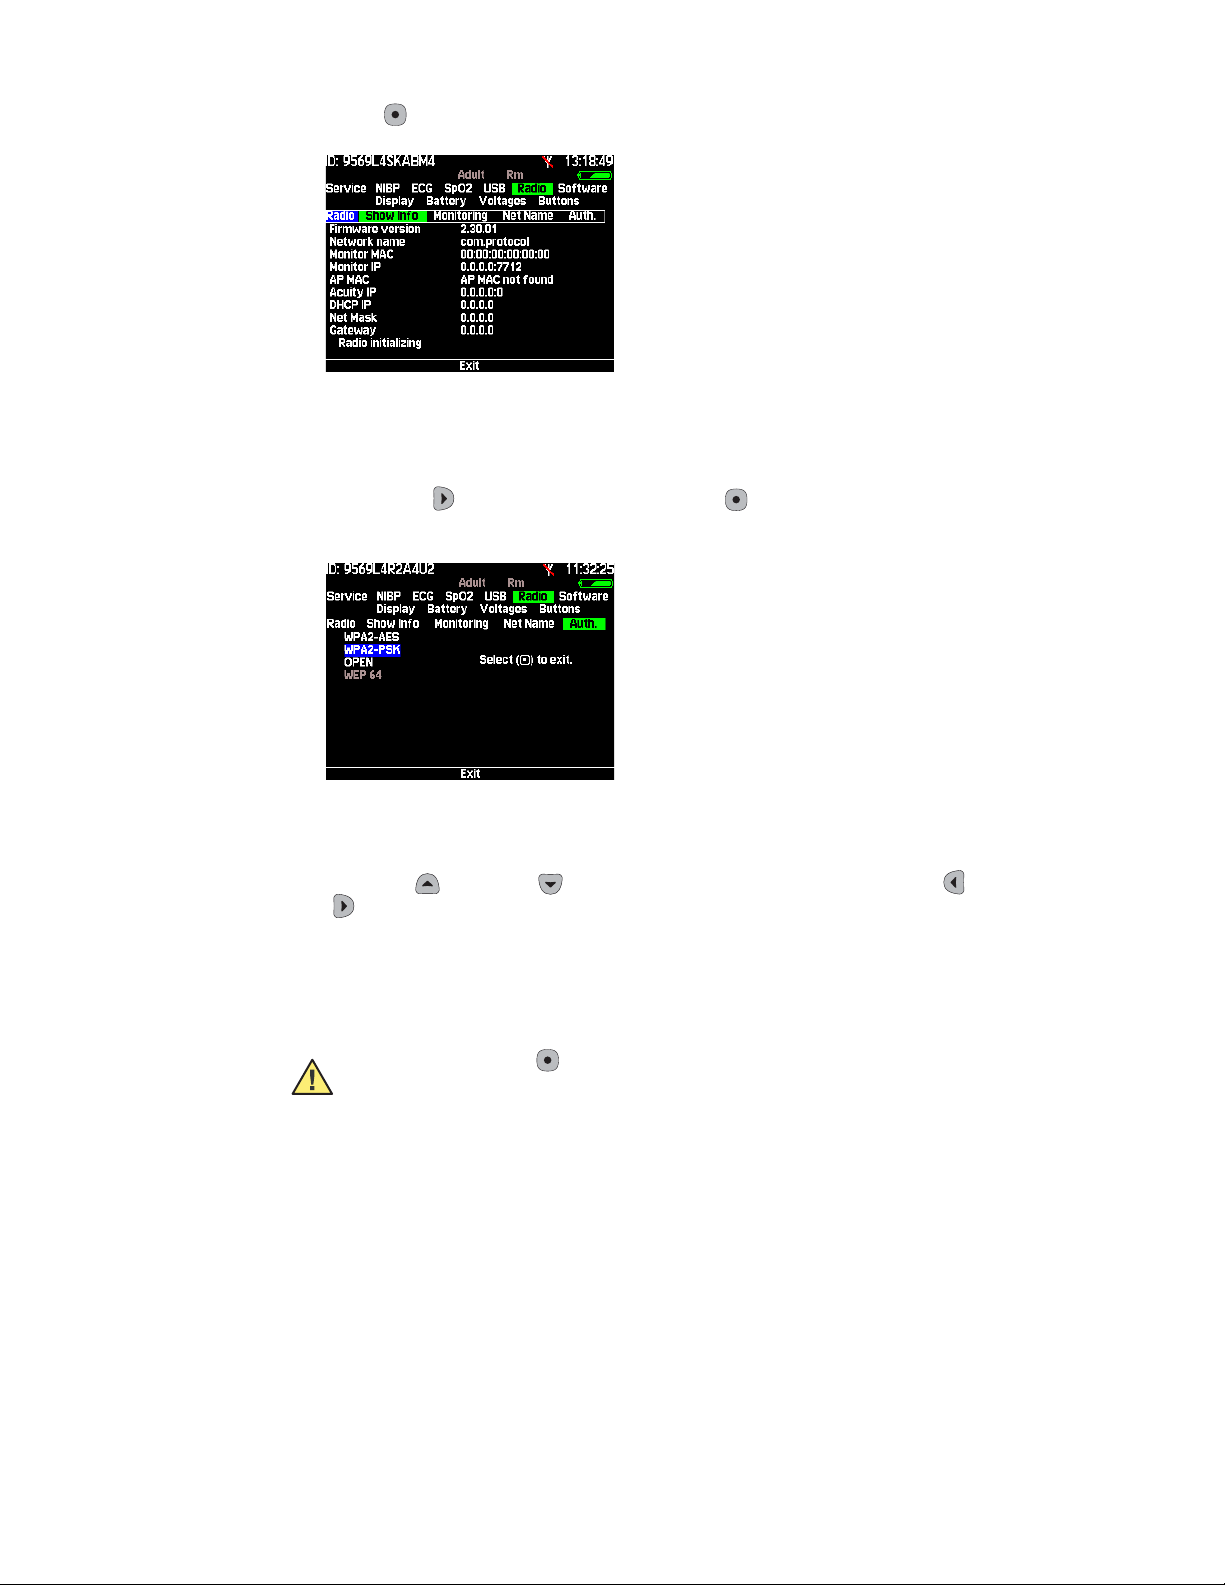
2. Press to select Show Info. The Show Info screen appears.
Make sure the Firmware version reported by the radio card displays a version release
number. If the monitor displays “Version not found,” wait for this field to change to a
version number. This change indicates that the radio and monitor are communicating.
3. Scroll right ( ) to highlight Auth. and press . The radio authorization screen
appears.
The available authentication and encryption schemes are listed on the left of the
screen. The highlighted item is the current scheme in use.
4. Scroll up ( ) or down ( ) to highlight your selection and press left ( ) and right
( ) simultaneously to make your selection. The selection of greyed-out items is not
supported by the monitor user interface.
An item will only be greyed out if the monitor was configured with an encryption
scheme that is not approved or recommended for the monitor.
Caution Pressing , navigating away from the radio authorization menu, or
experiencing an equipment alarm causes the monitor to exit the menu without
saving changes.
Once a selection has been made and the proper key sequence has been pressed, the
monitor configures the radio card to use the selected authentication and encryption
scheme, and resets and restarts. All data on the monitor is lost. If further
configuration is needed, follow the instructions in “Radio configuration tool user
interface” on page 11.
Radio configuration guide 80016835 Ver A 3
Set the NetName on a Propaq LT monitor
Use this procedure to change the network name assigned to the monitor (assuming that
the current network name is one of the pre-set names listed in the monitor Net Name
menu). To set a custom network name, see “Set an SSID using the radio configuration
tool” on page 14.
WARNING Do not attempt to change the network name unless you are a
qualified biomedical service engineer or a Welch Allyn employee. Changing the
monitor network name causes the monitor to re-start and seek to connect with
the FlexNet network corresponding to the new name.
WARNING Change the network name in a non-clinical environment only.
To change the network name
1. Enter the Service menu.
2. Highlight Radio and press .
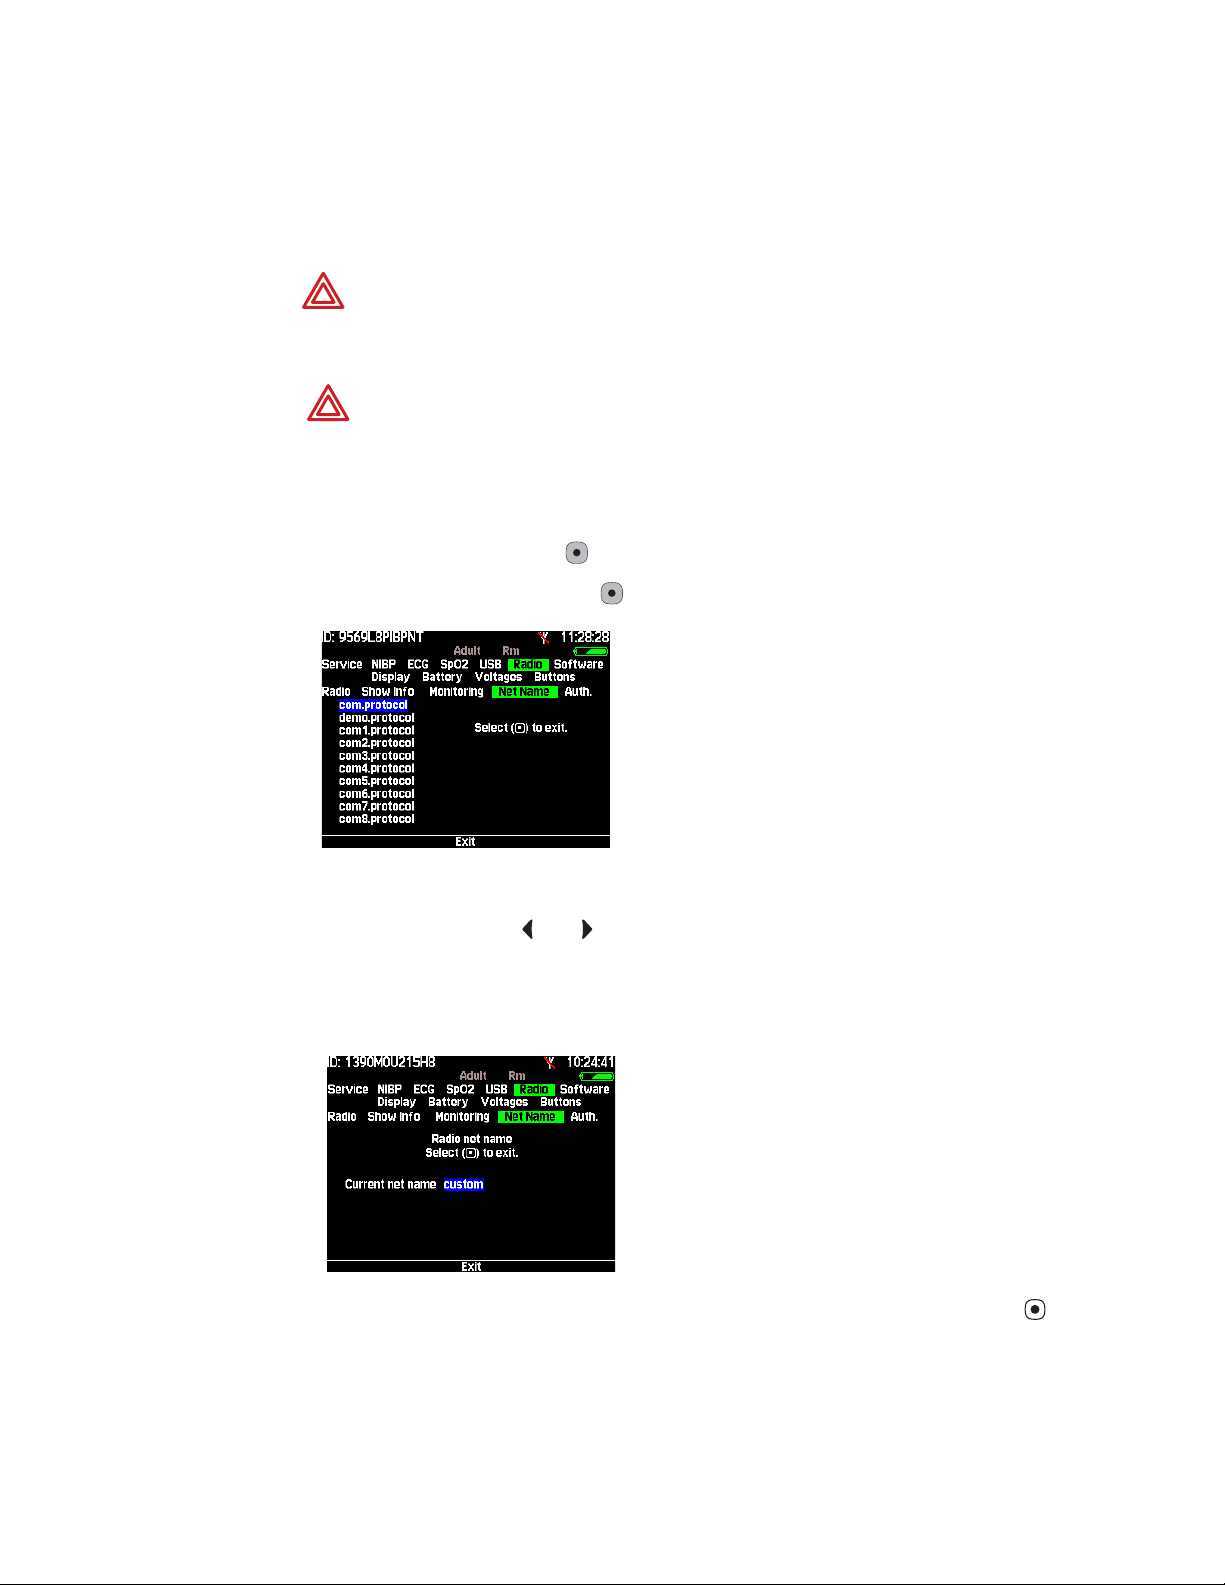
3. Highlight NetName and press . The NetName screen appears.
4. Highlight another network name.
Simultaneously press and and hold for one second. The monitor shuts down,
losing all stored patient data, and then restarts.
If the current network name is a custom name, the monitor displays something
similar to the following screen:
You cannot change a custom network name using the Net Name menu. Press to
return to the Service Menu. To set a custom network name, see “Set an SSID using
the radio configuration tool” on page 14.

4 80016835 Ver A Welch Allyn
Table 1. Propaq LT NetName examples
Parameter Factory setting Possible values
Radio SSID
(NetName)
com.protocol com.protocol, demo.protocol
Reset the Propaq LT monitor radio
It may be necessary to return the radio card to its default settings if:
• A network security setting was enabled that is not supported by the network
infrastructure.
• The network name was changed incorrectly.
• The default password was changed and forgotten.
To reset your monitor radio
1. Enter the Radio menu under the Service screen.
2. Press simultaneously .
3. Select Ye s and press .
com1.protocol, com2.protocol
com3.protocol, com4.protocol
com5.protocol, com6.protocol
com7.protocol, com8.protocol
com9.protocol, com10.protocol
com11.protocol, com12.protocol
com13.protocol, com14.protocol
com15.protocol, com16.protocol
com17.protocol, com18.protocol
Radio configuration guide 80016835 Ver A 5
Note
Micropaq Monitor
This procedure is for Micropaq monitors with software versions 1.80.00 or later.
To make any changes to your monitor radio card, access the monitor service menu.
You cannot access the service menu if any patient cables are connected to the
monitor.
To ensure that the monitor radio card is operational, wait 20 to 30 seconds after starting
the monitor before entering the service menu. You can also select the Network Status
screen under the System Information menu and wait for a valid firmware version to
appear.
To access the monitor service menu
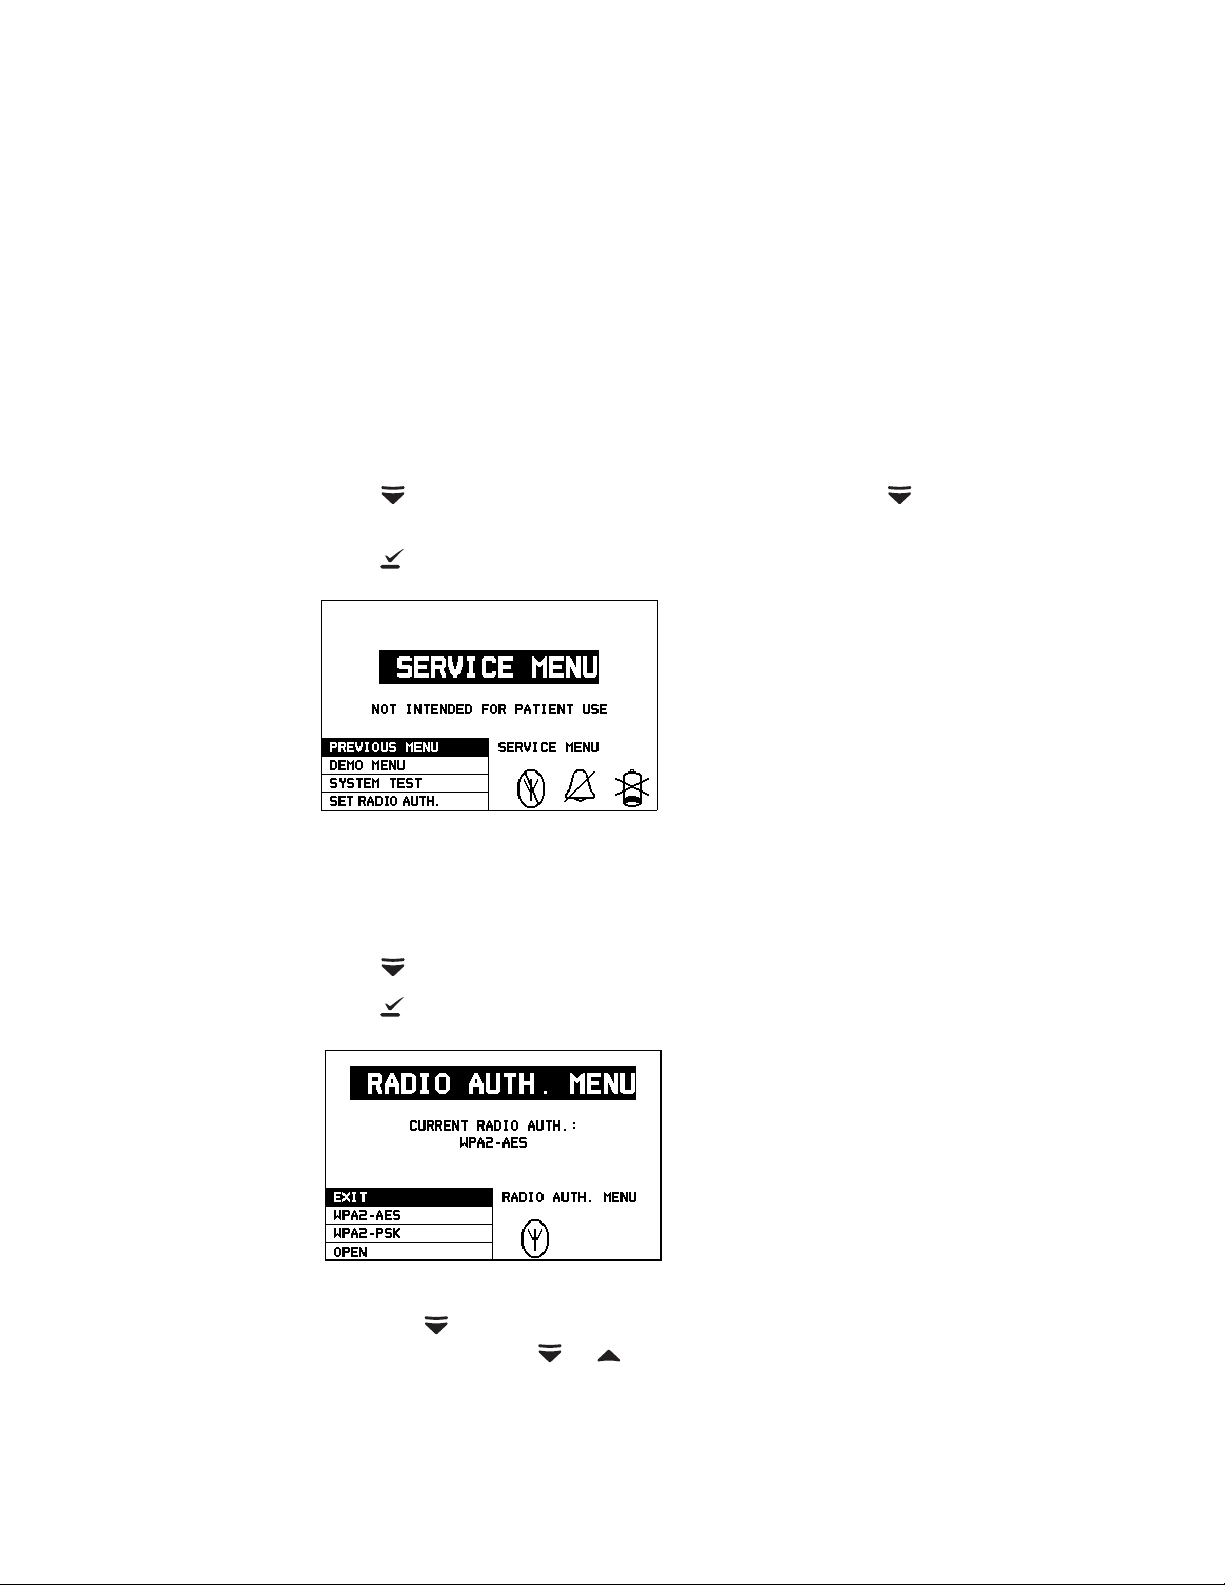
1. Press to access the Main menu, and then repeatedly press until SERVICE
MENU is highlighted.
2. Press . The service menu appears.
When in the monitor service menu, you can set the authentication and encryption
scheme and the network name through the monitor user interface.
To set an authentication and encryption scheme
1. Press to select SET RADIO AUTH.
2. Press . The RADIO AUTH. menu appears.
A list of selectable schemes appears. The screen displays the scheme currently in
use. Press to scroll through the options. The ▲and ▼ icons indicate more
available options. Press or to access them.
 Loading...