

Welch Allyn 39500, 39500-NP, 39500-TE, 35900-NP-TE Directions For Use Manual

Welch Allyn
Screener
®
OAE Hearing
Directions for use

© 2018 Welch Allyn. All rights are reserved. To support the intended use of the product described in this publication, the
purchaser of the product is permitted to copy this publication, for internal distribution only, from the media provided by
Welch Allyn. No other use, reproduction, or distribution of this publication, or any part of it, is permitted without written
permission from Welch Allyn. Welch Allyn assumes no responsibility for any injury to anyone, or for any illegal or improper
use of the product, that may result from failure to use this product in accordance with the instructions, cautions, warnings,
or statement of intended use published in this manual.
For patent information, please visit www.welchallyn.com/patents.
For information about any Welch Allyn product, contact Welch Allyn Technical Support: www.welchallyn.com/about/
company/locations.htm.
GSI is an ISO 13485 certified corporation.
GSI 8108699
DIR 80022349 Ver. A
Revision date: 2018-01
This manual applies to 901031 OAE HEARING SCREENER.
Distributed by Welch Allyn, Inc.
4341 State Street Road
Skaneateles Falls, NY 13153-0220 USA
Grason-Stadler
10395 West 70th Street
Grason-Stadler
c/o DGS Diagnostics A/S
Audiometer Alle 1,
5500 Middelfart
Denmark
Eden Prairie, MN 55344 USA
www.welchallyn.com

Contents
Symbols and indicators .......................................................................... 1
About warnings and cautions ................................................................ 3
Introduction ............................................................................................. 7
iii
Warnings and cautions ......................................................................................... 3
OAE functionality ................................................................................................. 8
Distortion product otoacoustic emissions ............................................................ 9
Transient evoked otoacoustic emissions ............................................................. 9
Frequency Range tested ...................................................................................... 9
Results storage and reporting .............................................................................. 9
Sensitivity and specificity ..................................................................................... 9
Setup ...................................................................................................... 11
Unpack the system ............................................................................................ 11
Cradle ................................................................................................................. 12
Charge the battery ............................................................................................. 12
Install the probe ................................................................................................. 13
Attach the probe tube ........................................................................................ 14
Eartips ................................................................................................................ 14
Probe holder ....................................................................................................... 15
Clock settings .................................................................................................... 16
Device overview .................................................................................... 19
Control panel ...................................................................................................... 19
Access menus ................................................................................................... 19
Device settings .................................................................................................. 20
Wireless device pairing ...................................................................................... 20
Clear test results ................................................................................................ 21
Minimum amplitude ........................................................................................... 22
Change the language ......................................................................................... 22
Reset to default ................................................................................................. 22
Operating instructions .......................................................................... 23
Turn on the screener .......................................................................................... 23
Automatic shutdown interval ............................................................................. 23
Main menu ......................................................................................................... 24
Select the test protocol ...................................................................................... 25
Prepare the patient for testing ........................................................................... 25
Start a test ......................................................................................................... 25
AutoStart probe check ....................................................................................... 25

Contents Welch Allyn® OAE Hearing Screener
iv
Test results ............................................................................................. 27
Test phase ......................................................................................................... 27
Graph styles ....................................................................................................... 27
Test techniques ................................................................................................. 29
Noise sources .................................................................................................... 29
View results ....................................................................................................... 30
Manage results ...................................................................................... 31
Results storage and reporting ............................................................................ 31
Save/Store test results mode ............................................................................ 31
Delete test results ............................................................................................. 33
Connect the screener to a computer ................................................................. 33
Connect the screener cradle to a computer ...................................................... 34
Connect the screener to a computer using wireless ......................................... 34
Pair the screener and wireless device ............................................................... 34
Print to a thermal printer .................................................................................... 35
Understand printed results ................................................................... 37
DPOAE printout ................................................................................................. 37
TEOAE printout .................................................................................................. 37
Rounding results ................................................................................................ 38
Maintenance .......................................................................................... 39
General maintenance ......................................................................................... 39
Clean and disinfect ............................................................................................. 39
Calibrate the screener ........................................................................................ 40
Replace the probe tube ...................................................................................... 40
Repairs ............................................................................................................... 41
Troubleshooting .................................................................................... 43
Status/Error messages ....................................................................................... 46
Standards and compliance ................................................................... 47
General compliance and standards .................................................................... 47
EMC compliance ................................................................................................ 48
Warranty ................................................................................................ 53
Appendices ............................................................................................ 55
Appendix A: Specifications ................................................................................ 55
Appendix B: Flowchart – Measurement ............................................................ 58
Appendix C: Test sequence ............................................................................... 59
Appendix D: Pass/Refer criteria ......................................................................... 61
Appendix E: Configurations and test protocols .................................................. 63
Appendix F: Approved accessories .................................................................... 64
Appendix G: General radio compliance .............................................................. 64
Symbols and indicators
Documentation symbols
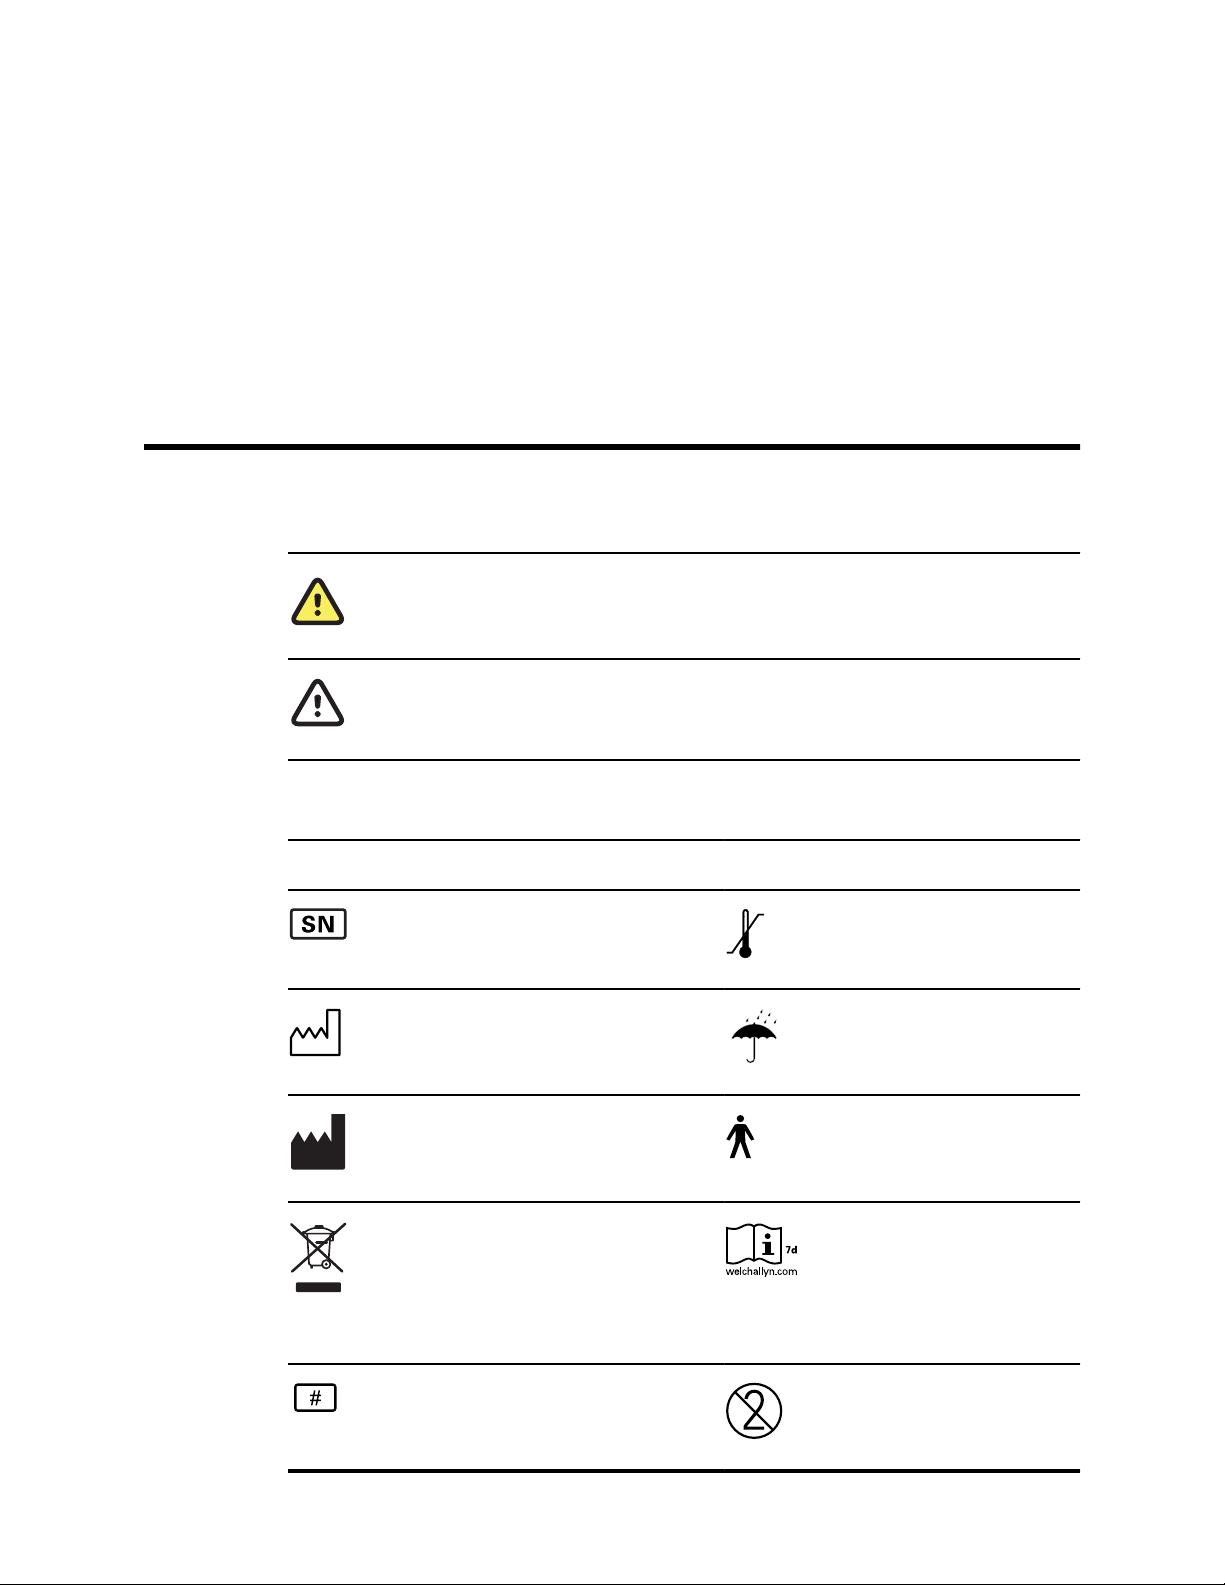
WARNING The warning statements in this manual identify conditions or practices that could
lead to illness, injury, or death.
1
Regulatory symbols
Symbol
Caution The caution statements in this manual identify conditions or practices that could
result in damage to the equipment or other property, or loss of data. This definition applies to
both yellow and black and white symbols.
Description Symbol Description
Serial number Transport and storage
temperature range
Date of manufacture Keep dry
Manufacturer B Patient Applied Part According
to IEC60601-1
Return to Authorized
Representative, special disposal
required
Consult directions for use (DFU).
A copy of the DFU is available on
this website.
A printed copy of the DFU can be
ordered from Welch Allyn for
delivery within 7 calendar days.
Reorder number Single use, do not reuse
2 Symbols and indicators Welch Allyn® OAE Hearing Screener
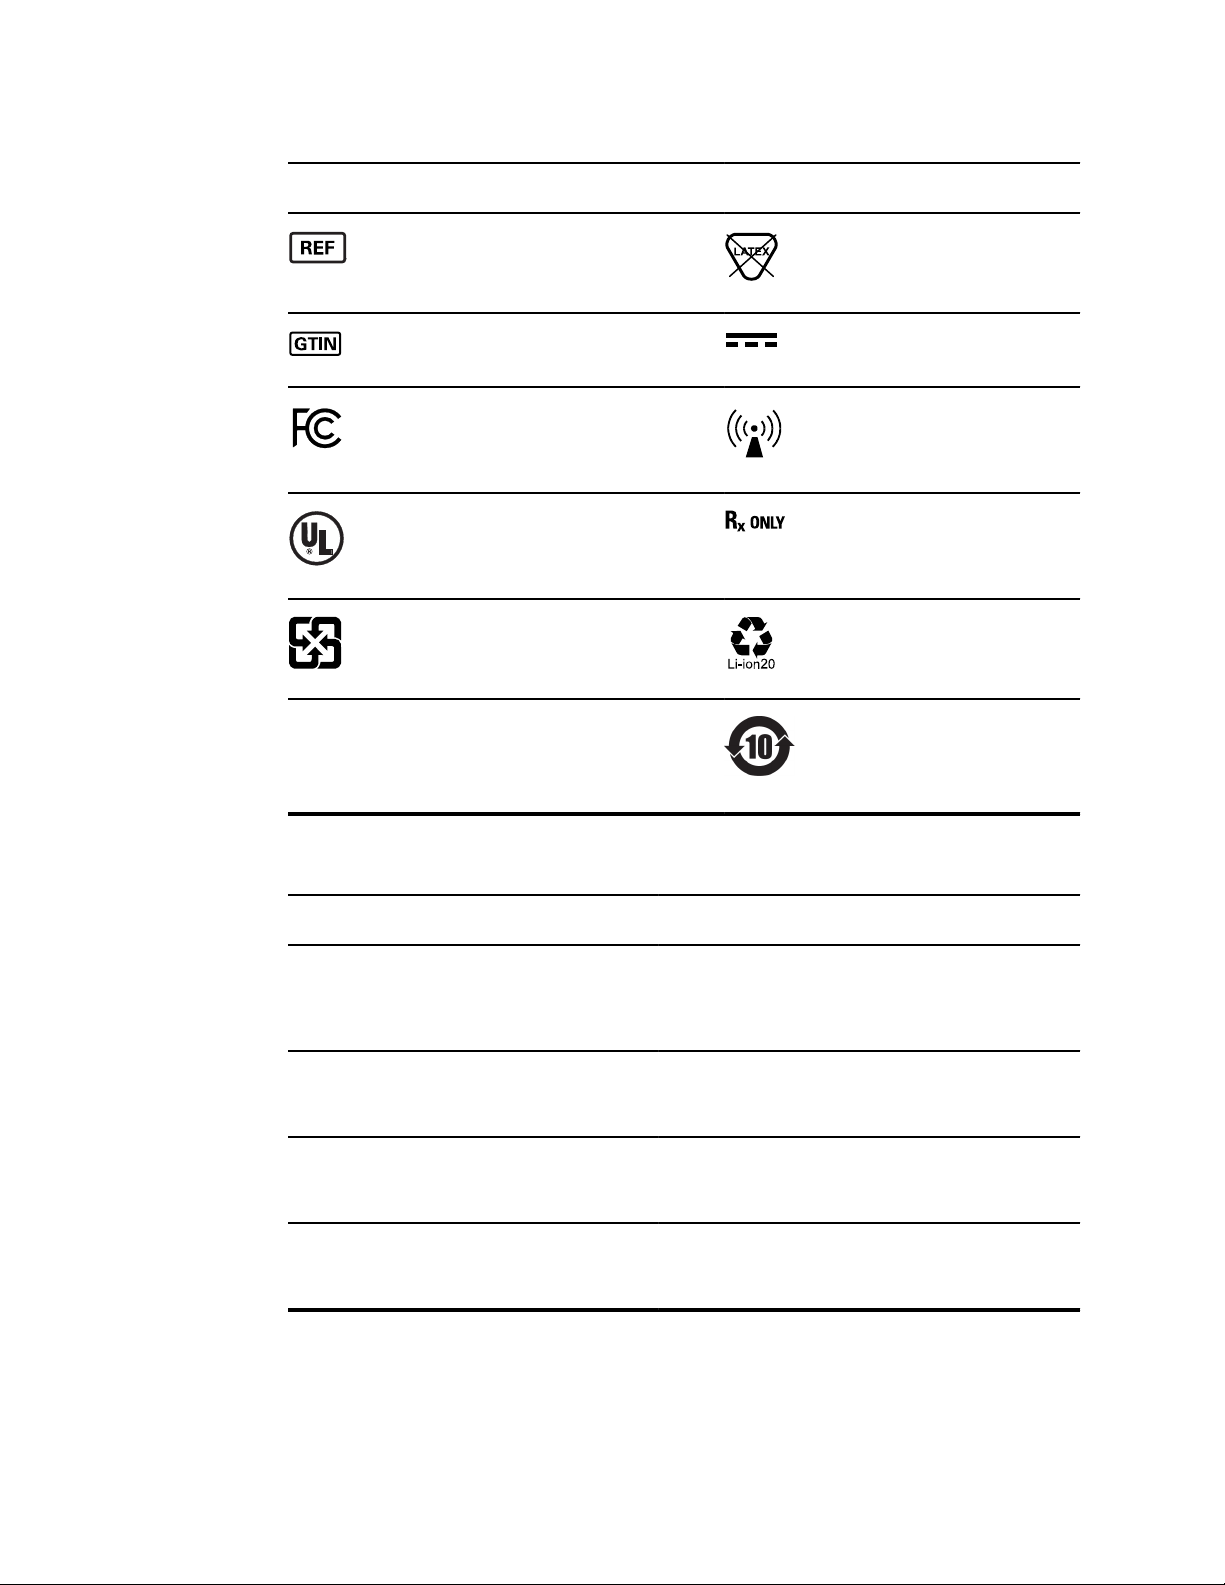
Symbol Description Symbol Description
2INRI9/66
Regulatory Product Identifier
(RPI) number
Global Trade Item Number Direct current (DC)
Federal Communications
Commission mark
UL Testing Services, Inc., with
respect to electri shock, fire, and
mechanical hazards only, in
accordance with UL 60601-1.
Recycle - Taiwan Recycle Lithium ion battery
Designates the battery type. 2 =
2 cells in series; I = Lithium ion;
N = Nickel; R = Cylinder; 19 =
19mm; 66 = 66mm
Not made with natural rubber
latex
Non-ionizing electromagnetic
radiation
For Use by or on the order of a
licensed medical professional
China RoHs
Indicator lights (LEDs)
Message
NOISE/Amber The indicator labeled ‘NOISE’ displays an amber light when the
TEST/Yellow The indicator labeled ‘TEST’ displays a yellow light when the
READY/Green The indicator labeled ‘READY’ displays a steady green light
CHARGE/Blue The indicator labeled ‘CHARGE’ displays a steady blue light
Definition
noise level measured during the test exceeds a nominal
threshold. It also is used to indicate some error conditions and
when the outcome of test is REFER, NOISY, or NO SEAL.
selected test is being performed. A steady yellow light
indicates that a test is in progress.
indicating that no test is being administer and that the screener
is ready to be used for testing.
when the battery is charging. The intensity of the blue light
indicates the progress of the battery charging.

About warnings and cautions
Warning and caution statements can appear on the Welch Allyn OAE screener
(screener), on the packaging, on the shipping container, or in this directions for use.
The screener is safe for patients and clinicians when used in accordance with the
instructions and the warning and caution statements presented in this directions for use.
Before using the device, you must familiarize yourself with all warnings and cautions,
with the steps to power up the screener, and with the sections of this directions for use
that pertain to your use of the screener. In addition to reviewing the general warnings
and cautions presented in the next section, you must also review the more specific
warnings and cautions that appear throughout the manual in conjunction with setup/
startup, screener operation, patient monitoring, and maintenance tasks.
3
Warnings and cautions
WARNING Safety risk. Use only the provided power supply to charge the
screener. Injury to personnel or damage to the screener can result when a
three-prong to two-prong adaptor is connected between the screener
power supply and a mains outlet.
WARNING Safety risk. Only qualified Welch Allyn service representatives
should modify the screener. Improper modifications could be hazadous to
patients and personnel.
WARNING Safety risk. Any program aimed at obtaining reliable
measurements of otoacoustic emissions should be staffed and supervised
by appropriately trained individuals.
WARNING Electric shock hazard. This product should not be used in the
presence of fluid that can come into contact with any of the electronic
components or wiring. Should the user suspect fluids have contacted the
system components or accessories, the unit should not be used until
deemed safe by a Welch Allyn certified service technician.
WARNING Fire and explosion hazard. Do not use the screener in the
presence of flammable gaseous mixtures. There is the possibility of
explosions or fire when used in close proximity to flammable anesthetic
gases.
WARNING Fire and explosion hazard. Do not use the screener in a highly
oxygen-enriched environment, such as a hyperbaric chamber, oxygen tent,
and the like.
4
About warnings and cautions Welch Allyn® OAE Hearing Screener
WARNING Electric shock hazard. Do not touch the contacts on the bottom
of the screener and the patient at the same time.
WARNING Safety hazard. This screener contains a rechargeable lithiumion battery. The battery is not user-replaceable and must be returned to an
authorized Welch Allyn service location for repair.
WARNING Fire and explosion hazard. Do not operate the screener in the
presence of a flammable anesthetic mixture with air, oxygen, or nitrous
oxide; in oxygen-enriched environments; or in any other potentially
explosive environment.
WARNING Safety risk. When handling and storing lithium-ion batteries,
avoid mechanical or electrical abuse. Batteries may explode or cause burns
if disassembled, crushed, or exposed to fire or high temperatures. Do not
short or install the battery with incorrect polarity.
WARNING Inaccurate measurement risk. Use only the disposable eartips
designed for use with the screener.
WARNING Patient injury risk. Never insert the probe tube into the ear
canal without a properly attached eartip.
WARNING Cross-contamination and nosocomial infection risk. The eartips
are disposable and for single patient use only. Do not clean and reuse
eartips.
CAUTION The screener has been verified by an independent laboratory to
conform to international standards for electromagnetic emissions and
immunity (EMC). The user is advised to avoid installation and use of this
screener in proximity to other products or equipment that may emit or be
susceptible to electromagnetic interference, including cellular phones. If
the screener is used adjacent to other products or equipment, you are
instructed to verify that no disturbance is found in the operation of this or
other equipment in proximity.
CAUTION The screener and its components will perform reliably only
when operated and maintained in accordance with the instructions
contained in this directions for use, accompanying labels, and inserts. A
defective product should not be used. Make sure all connections to
external accessories are tight and secured properly. Parts which may be
broken or missing or are visibly worn, distorted, or contaminated should be
replaced immediately with clean, genuine replacement parts manufactured
by or available from Welch Allyn.
CAUTION Equipment is not user repairable. Repairs and battery
replacement must be performed only by a qualified service representative.
CAUTION Use and store the screener indoors only. Operate the screener
within an ambient temperature range of 15°C / 59°F to 35°C / 95°F and in
relative humidity between 30% and 90% (non-condensing).
CAUTION Transport and store the screener in temperatures between
+5°C / 41° F to 40°C / 104° F.
CAUTION Annual calibration is recommended. Have an authorized Welch
Allyn service technician perform electrical safety checks on the unit in order
to maintain continued compliance with IEC and UL 60601-1.

Directions for use About warnings and cautions 5
CAUTION Do not open the case of the screener. Only Welch Allyn service
personnel or an authorized repair center are authorized to perform warranty
service. Performing unauthorized service on a screener that is within
warranty may void the warranty.
CAUTION If the system is not functioning properly, do not operate it until
all necessary repairs are made. Test and calibrate the screener for proper
functionality in accordance with Welch Allyn published specifications
before using.
CAUTION Do not drop or otherwise cause undue impact to the screener.
If the screener is dropped or otherwise damaged, return it to Welch Allyn
for repair and calibration. Do not use the screener if any damage is
suspected.
CAUTION Recycle batteries whenever possible. In the United States call
1-800-8-BATTERY for information about recycling your lithium-ion battery or
go to the RBRC website at www.rbrc.org for additional information.
CAUTION For Use by or on the order of a licensed medical professional.

6
About warnings and cautions Welch Allyn® OAE Hearing Screener

Introduction
This directions for use describes the capabilities and operation of the Welch Allyn OAE
Screener.
The purpose of the screener is to provide rapid screening of Distortion Product
Otoacoustic Emissions (DPOAEs) or Transient Evoked Otoacoustic Emissions (TEOAEs)
at several frequencies.
7
Intended use
The Welch Allyn OAE Hearing Screener is a test instrument that measures otoacoustic
emissions in infants, children, and adults.
Indications for use
The Welch Allyn OAE Hearing Screener is indicated for testing of cochlear function in
infants, children, and adults by measuring otoacoustic emissions (OAEs). The OAEs are
generated by a series of clicks that are directed into the ear canal.
Otoacoustic emissions are low level audio-frequency sounds that are produced by the
cochlea as part of the normal-hearing process. Available evidence suggests that
otoacoustic emissions are generated by the cochlea’s outer hair cells and that the
presence of OAEs is an indication that the outer hair cells are viable. Clinical evidence
indicates that these emissions normally occur with normal hearing, or at most, mild
hearing loss (usually 30-40 dB HL). The majority of hearing-impaired individuals will be
identified by a simple OAE test.
Note Some product features described in this publication might not be available
in your country.
For information about any Welch Allyn product, contact Welch Allyn Technical Support:
www.welchallyn.com/about/company/locations.htm.
Introduction Welch Allyn® OAE Hearing Screener
8
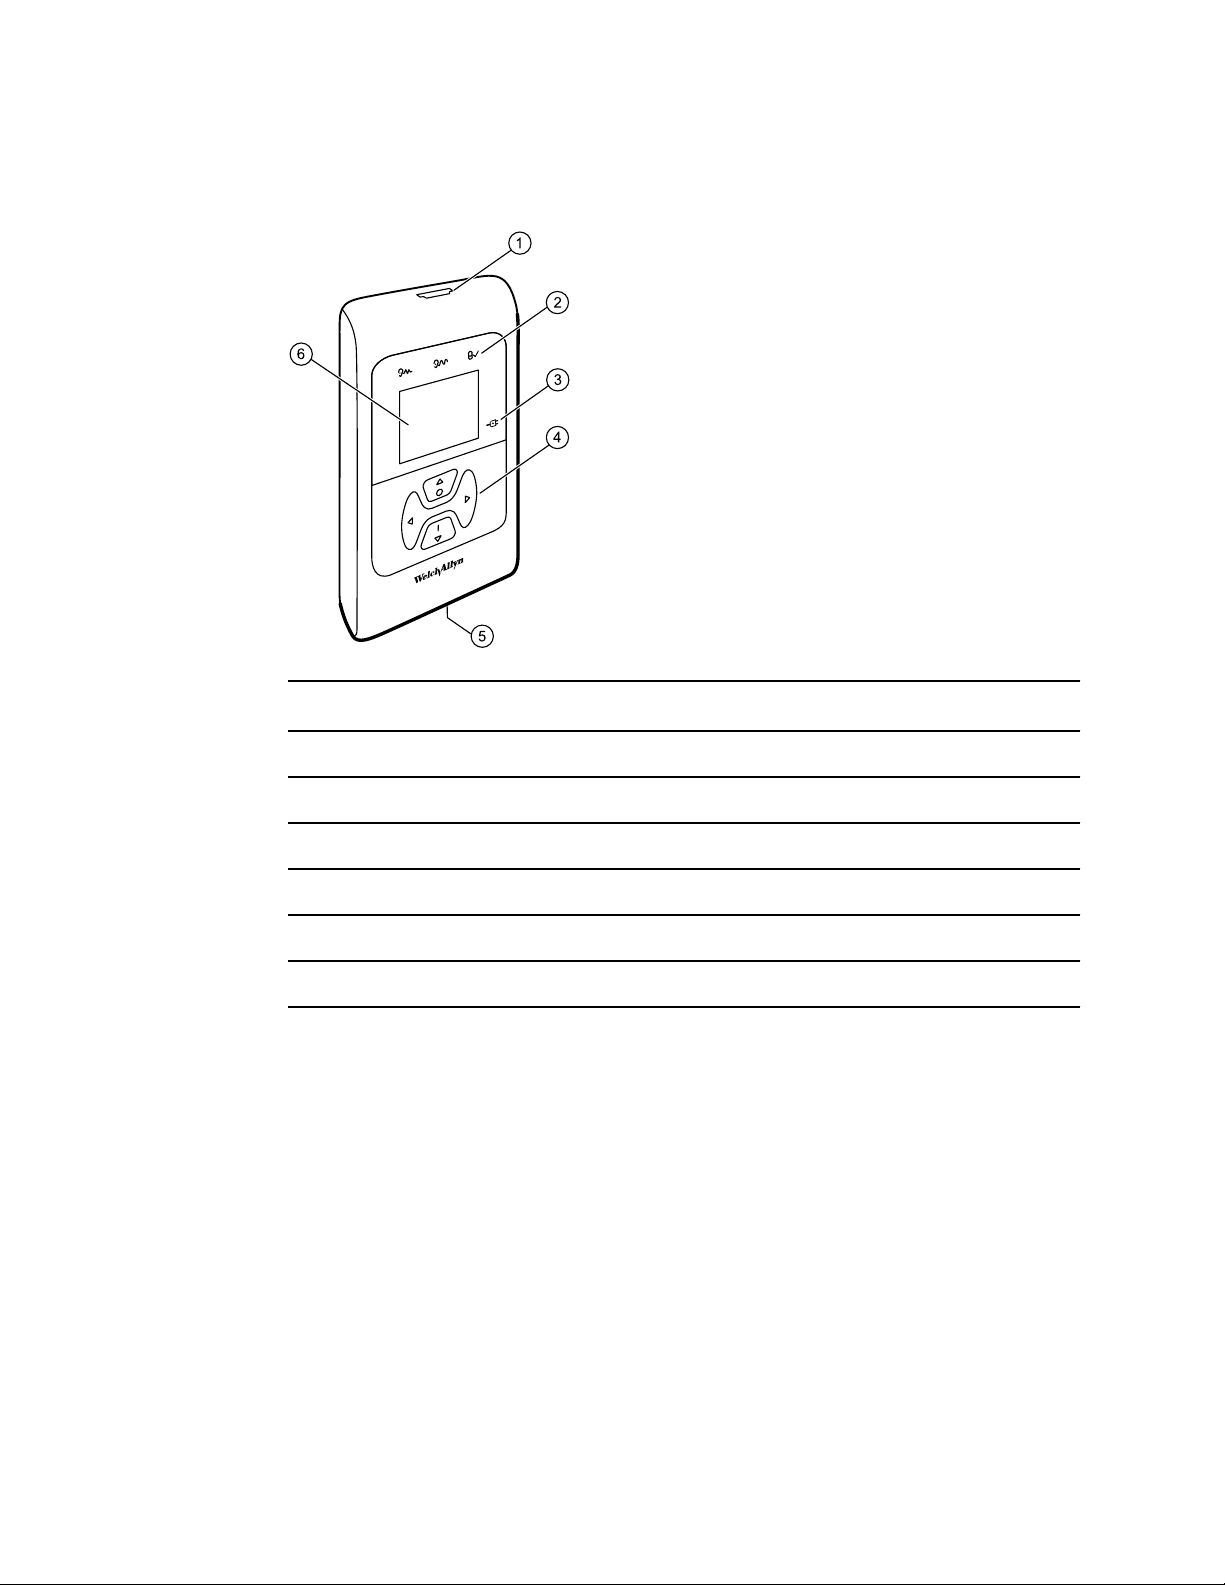
OAE functionality
Item number Description
1 Probe connector
2 Test status indicators
3 Charge status indicator
4 Control panel
5 Micro-USB Connector
6 Display
The system consists of the screener, probe, printer, single-use eartips, replaceable probe
tubes, and other accessories. The screener contains the hardware and software for
generating the test stimuli, measuring and displaying the OAEs, and storing the results
until they are printed. The plastic housing contains circuit boards that provide the signal
processing and display the test results.
The screener also contains a rechargeable lithium-ion battery. The screener displays the
test status using a liquid-crystal display (LCD) and three light-emitting diodes (LEDs). You
control testing, printing, and test protocol resets using four keypad push buttons.
The probe contains the speaker and microphone which produce test stimuli and measure
the sound pressure level (SPL) present in the sealed ear canal. Interface of the
instrument to the ear canal is accomplished through disposable eartips which fit onto the
probe tube. The disposable eartips are color coded by size for easy selection.

Directions for use Introduction 9
Distortion product otoacoustic emissions
Distortion product otoacoustic emissions (DPOAEs) are acoustic signals that can be
detected in the ear canal of a person with normal outer hair cell function, subsequent to
stimulation of the auditory system with a pair of pure tones at frequencies f1 and f2. The
resulting emission of interest is the distortion product tone at the frequency 2f1-f2.
The screener generates a series of test tones, directs them into the ear canal, and then
measures the level of the DPOAE tone generated by the cochlea. By using different test
frequencies, the screener provides an estimate of outer hair cell function over a wide
range of frequencies.
Transient evoked otoacoustic emissions
Transient Evoked Otoacoustic Emissions (TEOAEs) are acoustic signals that can be
detected in the ear canal of a person with normal outer hair cell function, subsequent to
stimulation of the auditory system with a series of wideband clicks.
The screener generates a series of clicks, directs them into the ear canal, and then
analyzes the spectrum of the returning signal, separating the noise and emission. By
using band pass filters, the screener provides an estimate of outer hair cell function over
a wide range of frequencies.
Frequency Range tested
The frequency range tested is approximately 2 kHz to 5 kHz for DPOAEs. The frequency
range for TEOAEs is 1.5 kHz to 4 kHz.
Results storage and reporting
When the screener is set in its default settings, the instrument stores the results from
one patient (left and right ears) in its non-volatile memory for subsequent printing. The
screener is capable of storing up to 250 test results.
The results are displayed on the LCD on the front of the device and are stored in the
device’s internal memory. After testing is complete, results can be printed using the
printer or exported to a computer.
Sensitivity and specificity
Sensitivity and specificity in the screener are based on the test characteristics that you
define and may vary, depending on environmental and operating conditions. The
presence of otoacoustic emissions suggests normal outer hair cell function, which in
turn correlates to normal hearing. However, a passing result using the screener is not an
indication that the full auditory system is normal. Thus, a PASS result should not be
allowed to override other indications that hearing is not normal. A full audiologic
evaluation should be administered if concerns about hearing sensitivity persist. A REFER
test result should not be assumed to be an indicator of a lack of auditory function;
however, it should be followed with full audiologic diagnostic testing.

10
Introduction Welch Allyn® OAE Hearing Screener

Setup
Unpack the system
The following parts are shipped standard with each screener system:
Number of items Description
11
1 Welch Allyn OAE Screener Unit
1 Welch Allyn OAE Screener Probe
1 OAE Screener Cradle
1 Single Use Eartip Kit
1 Communications Cable, USB A/Micro-B
1 Communications Cable, USB A/B
1 Charging Cable, PSU 5V/Micro-B
1 Calibration Certificate
1 OAE Hearing Screen software CD includes: Quick Start Guide, Data Manager
software DFU, and Data Manager software
If any part is missing, contact Welch Allyn Technical Support: www.welchallyn.com/
about/company/locations.htm. We recommend that you save the shipping box and
packing materials in case you need to store or ship the system.
12
Setup Welch Allyn® OAE Hearing Screener
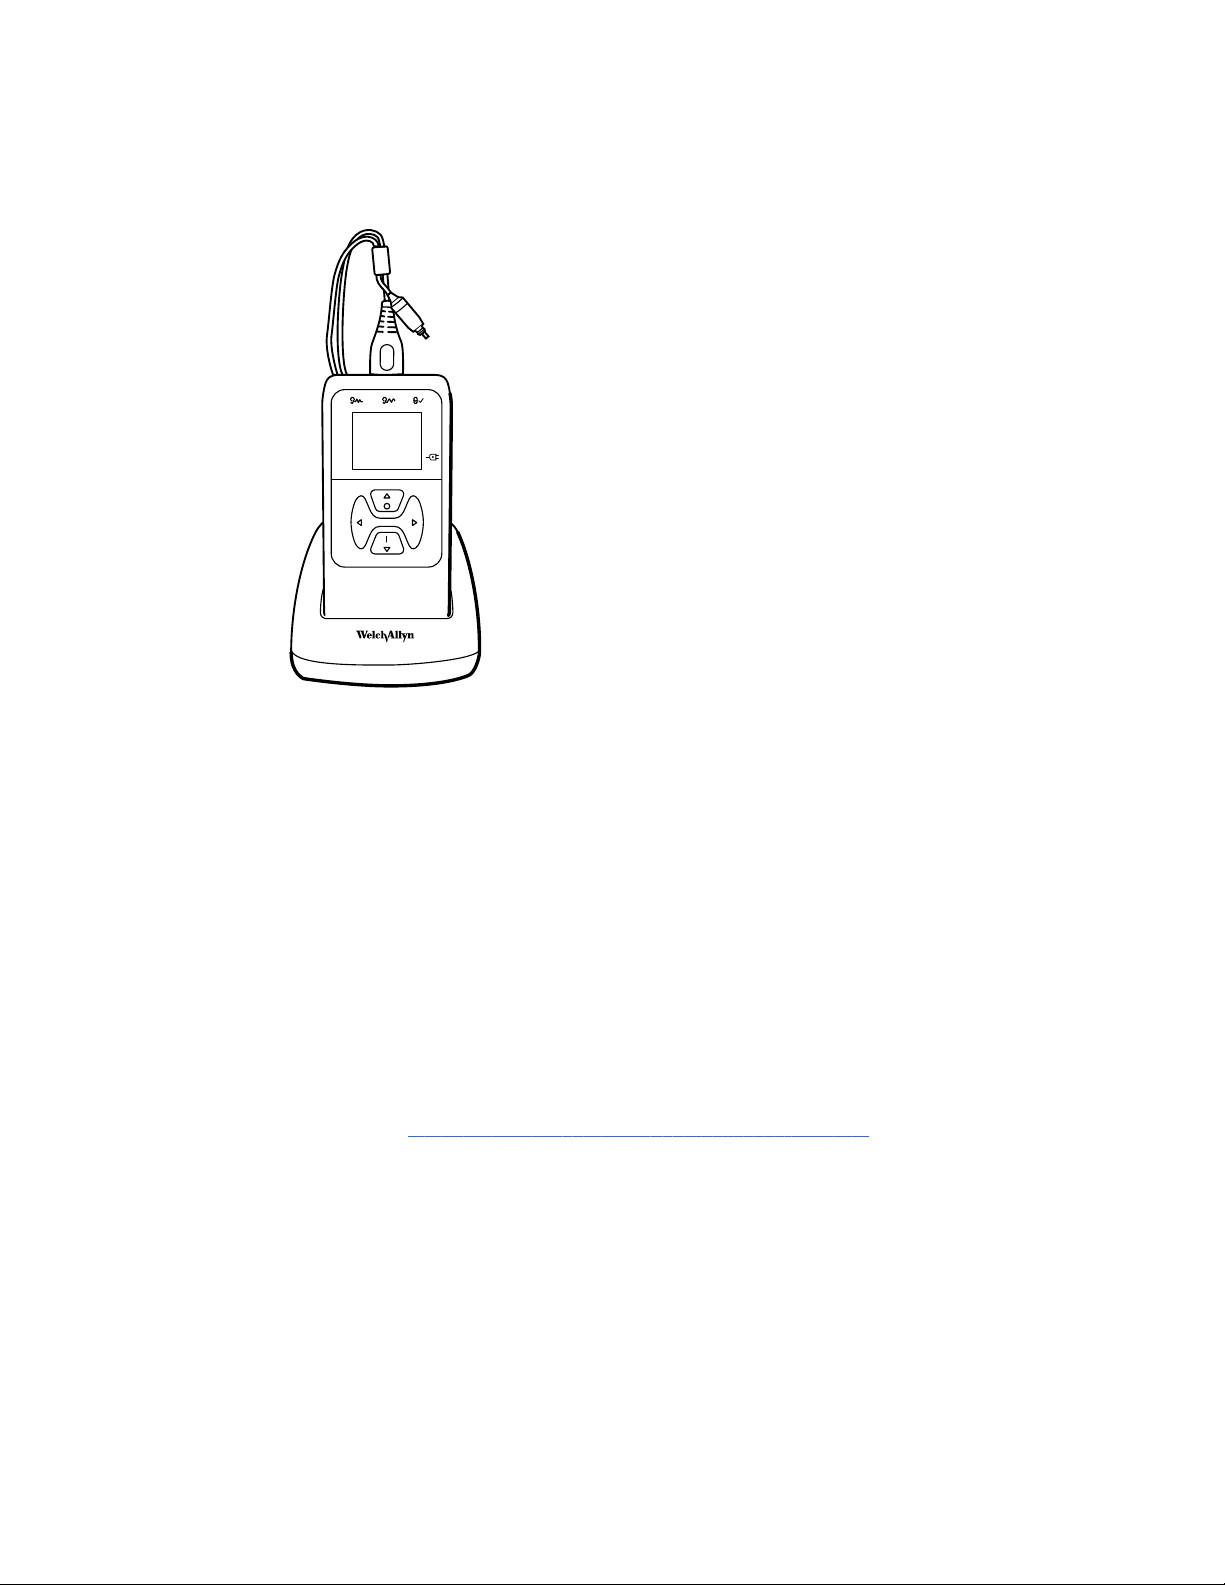
Cradle
You can place the screener in the cradle to charge the device or to connect to a
computer for communication with the Welch Allyn Data Manager (data manager). You
can also charge the device or connect to a computer directly from the screener. The
remainder of this directions for use assumes that you are charging the device or
communicating with a computer from the screener.
Charge the battery
The screener is powered by an integrated, rechargeable lithium-ion battery providing 15
hours of operation between full charging. The battery status is indicated by the battery
icon shown in the upper right corner of the Main Menu. Full battery charge is
represented by a full battery symbol on the display and reduces to an empty battery in
increments corresponding to the discharge of the battery.
Note Misalignment of the Micro-USB plug and socket can cause damage. The
plug and socket should be visually inspected prior to each installation of the
charging cable. If you see damage, contact Welch Allyn Technical Support:
www.welchallyn.com/about/company/locations.htm.
Battery status indicator
A blue battery status indicator light, located to the right of the screen, lights up when the
battery is charging and indicates the charging progress
The indicator light appears whenever the Micro-USB connector is engaged and powered.
The illumination behavior identifies the status of the charging function, and is defined as
follows:
• Steady: the battery is fully charged. This identifies that the charging cycle is
complete. If the indicator is steady when you plug in the screener, the battery is fully
charged.
• Slow blink: the battery is charging.

Directions for use Setup 13
• Fast blink: a fault condition. Return the screener to Welch Allyn for service or repair.
For information about returning any device to Welch Allyn, see "Repairs" and
"Returning products."
When you use the screener, you are warned that the battery charge is low by two fast
blinks followed by a pause and then two fast blinks. This sequence is repeated until you
place the battery in the charge mode.
Charge the battery using the USB port
The screener is powered by an integrated, rechargeable lithium-ion battery providing 15
hours of operation between full charging. The battery status is indicated by the battery
icon shown in the upper right corner of the Main menu. A lighted battery icon indicates a
fully charged battery. The battery icon segments turn off as the battery charge
decreases.
1. Insert the Micro-USB plug into the Micro-USB port on the bottom of the screener
2. Insert the wall charger into the mains outlet.
Charge the battery using the cradle
Note The Micro-USB port on the cradle does not support data transfer.
1. Insert the Micro-USB plug into the Micro-USB port on the back of the cradle.
2. Insert the wall charger into the mains outlet.
Install the probe
Insert the probe’s HDMI connector firmly into the socket on the top of the screener.
The plug fits only in one direction.
CAUTION Misalignment of the HDMI connector and socket
can cause damage. The plug and socket should be visually
inspected prior to each installation of the probe. If you see
damage, contact Welch Allyn Technical Support:
www.welchallyn.com/about/company/locations.htm.
14
Setup Welch Allyn® OAE Hearing Screener
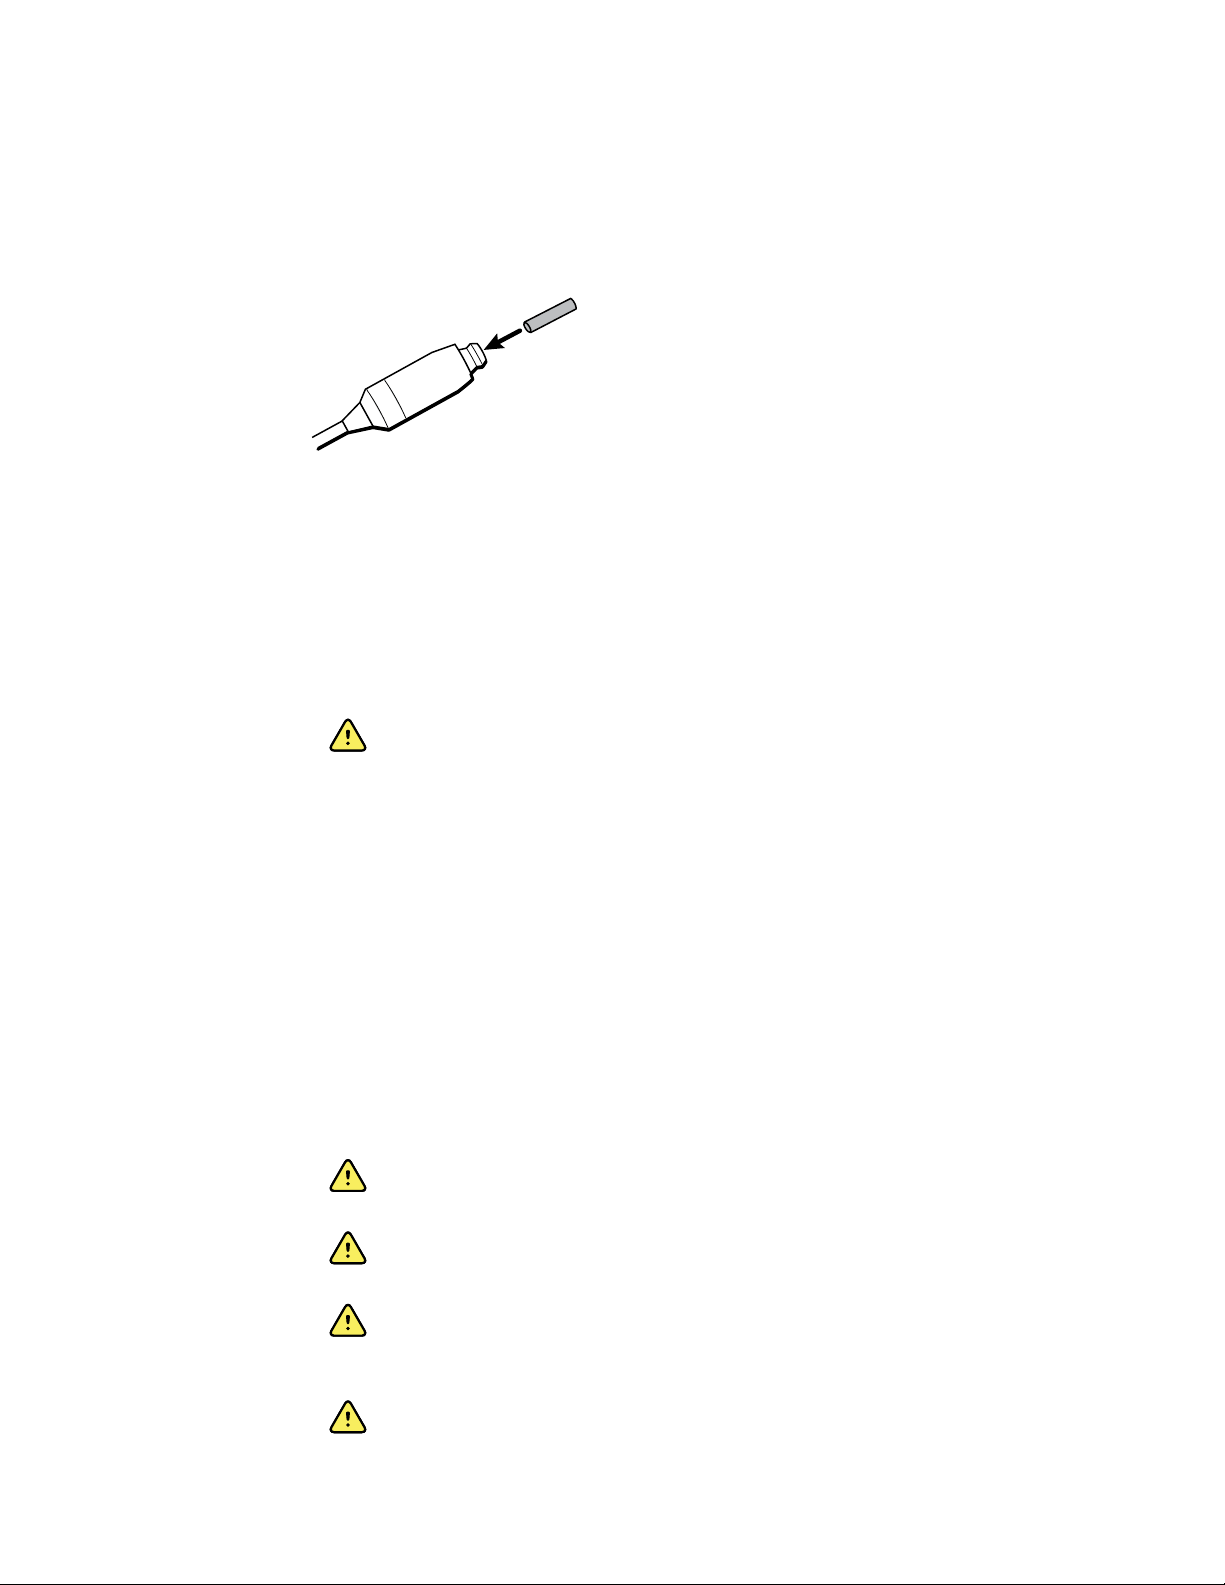
Attach the probe tube
A clear probe tube must be attached to the probe head before an eartip is applied.
1. Insert a new probe tube into the probe head until it is fully seated.
A properly inserted probe tube snaps securely into place when it is fully seated in the
probe head.
2. To remove a probe tube, grasp the tube and pull gently away from the probe head
with a slight twist.
It is not necessary to replace the probe tube with each eartip; the tube is reusable as
long as the probe tube is clear.
WARNING If the probe tube becomes dirty or clogged, it must be
replaced. A dirty probe tube may produce wrong results.
Eartips
The screener comes with a box of disposable, single-use eartips that fit a variety of ear
canal sizes. The determination of the appropriate eartip size should be made by persons
with proper training and experience. The probe must have a probe tube applied and an
eartip attached before inserting it into an ear canal. The eartip must seal the ear canal.
The best test results are obtained when the eartip is inserted deeply into the ear canal
instead of flush with the ear canal opening. Caution must be taken, however, to ensure
that the eartip does not extend too deeply into the ear canal. Use only the eartips
approved for use with the instrument. The eartips are disposable and must be replaced
after each patient.
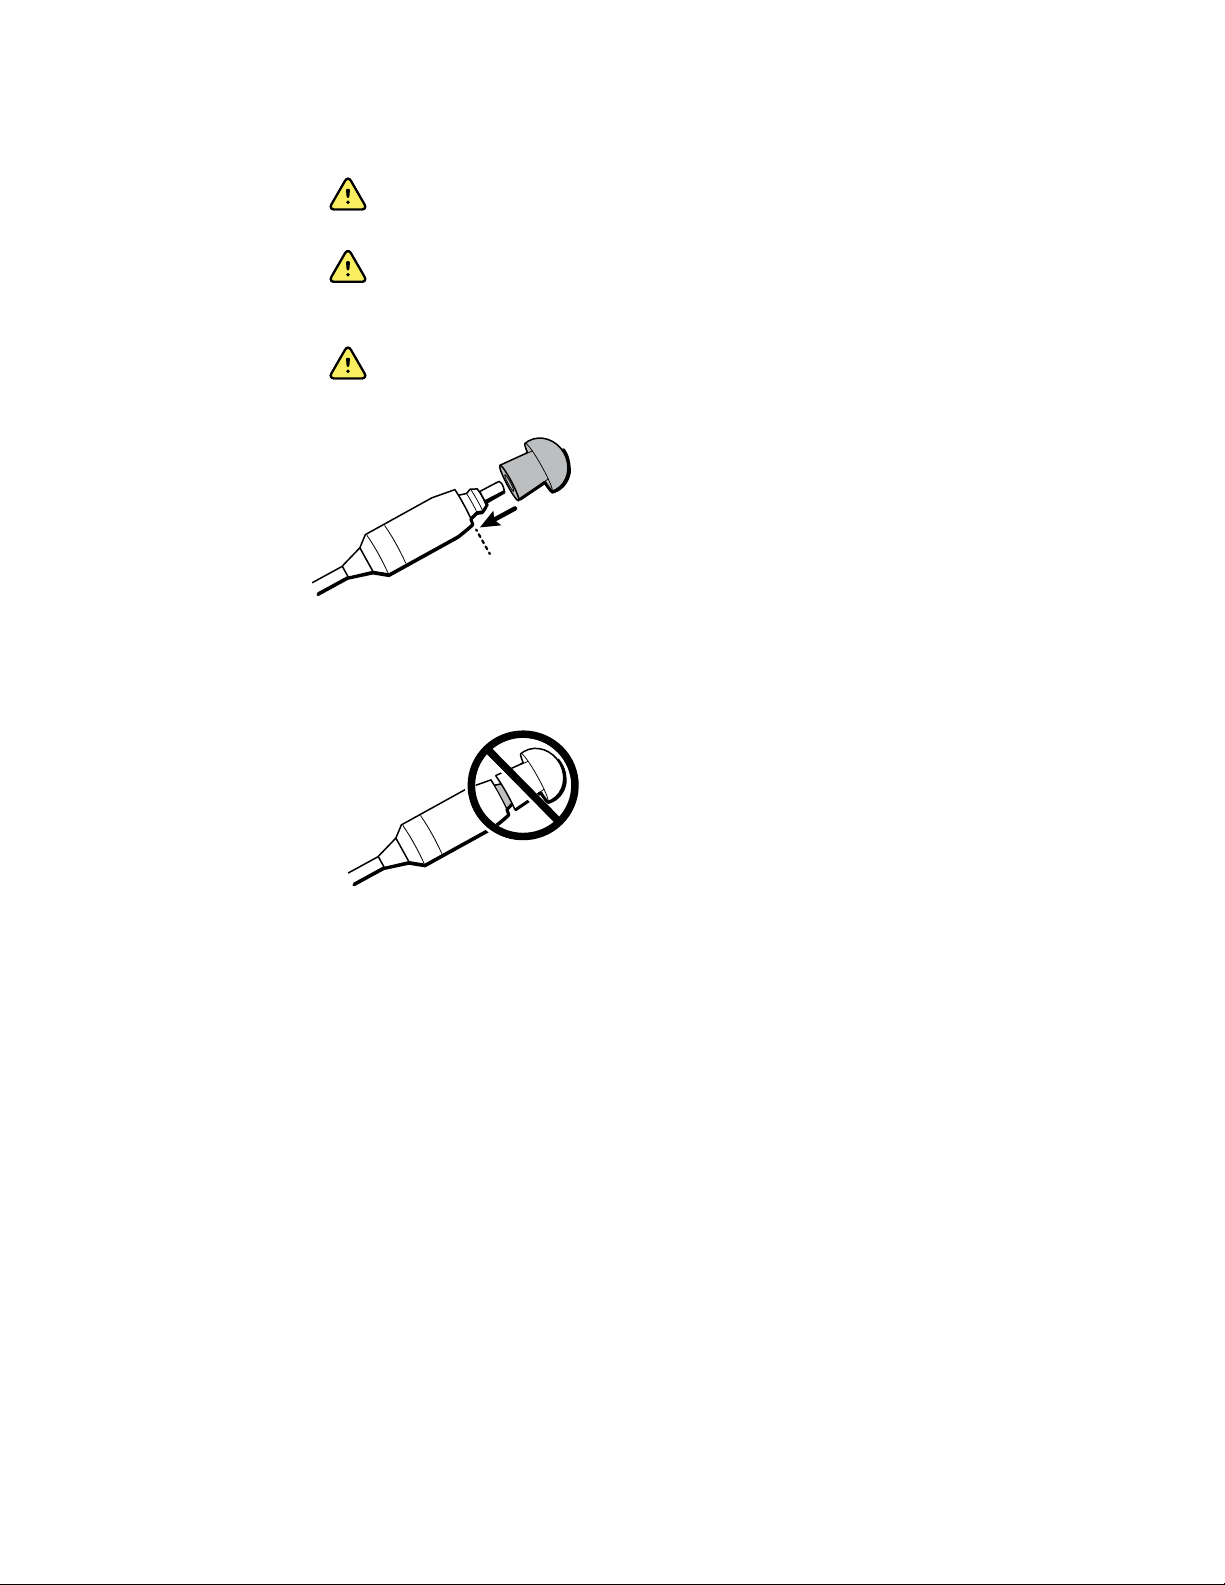
Attach and remove the eartips
WARNING A clear probe tube must be applied to the probe head before
an eartip is applied.
WARNING The eartips are disposable and must be replaced after each
patient. Failure to do so may cause infection.
WARNING The screener probe must have a probe tube and an eartip
attached before inserting the screener probe into the ear canal. Failure to
do so may cause infection.
WARNING A person with proper training and experience must determine
the appropriate eartip size. Failure to do so may cause infection.
Directions for use Setup 15
WARNING Ensure that the eartip does not extend too deeply into the ear
canal. Failure to do so may cause infection.
WARNING If the probe tube becomes dirty or clogged, it must be
replaced. Failure to do so may cause injury to the ear canal or wrong results
or both.
WARNING Use only the eartips approved for use with the screener.
Failure to do so may cause injury to the ear canal.
1. Select the appropriate-sized eartip.
2. Push and slightly twist the eartip onto the probe tube.
Ensure that the eartip is fully seated on the probe. There should be no gaps between
the eartip and the collar of the probe head.
3. To remove the eartip, grasp the probe tube gently at the base and slightly twist it
while pulling the eartip off of the probe tube.
Grasping the base of the probe tube will prevent it from being inadvertently pulled
out of the probe head along with the eartip.
Probe holder
The probe holder is a receptacle attached to the HDMI cable that secures the probe
when you are not using the screener. Placing the probe into the probe holder protects
the probe head. Welch Allyn recommends that you insert the probe into the probe holder
when the screener is not in use, such as when it is on a counter top or table, or when
the screener is placed in the screener cradle.
16
Setup Welch Allyn® OAE Hearing Screener
Attach the probe holder
1. Place the probe holder near the end of the probe cable at the HDMI connector end.
2. Gently press the probe cable into the probe holder close to the point of the probe
head.
Clock settings
Set the date and time before using the screener. The clock should be set prior to testing
because changing the date and time after tests are saved will not change the date on the
printout.
Seasonal time changes, such as Daylight Saving Time, also require resetting the clock.
Note If the screener is being powered on for the first time or if the battery is
completely discharged and is not charged within approximately one hour,
an Error! Reference source not found may appear. If this message
appears, reset the date and time.
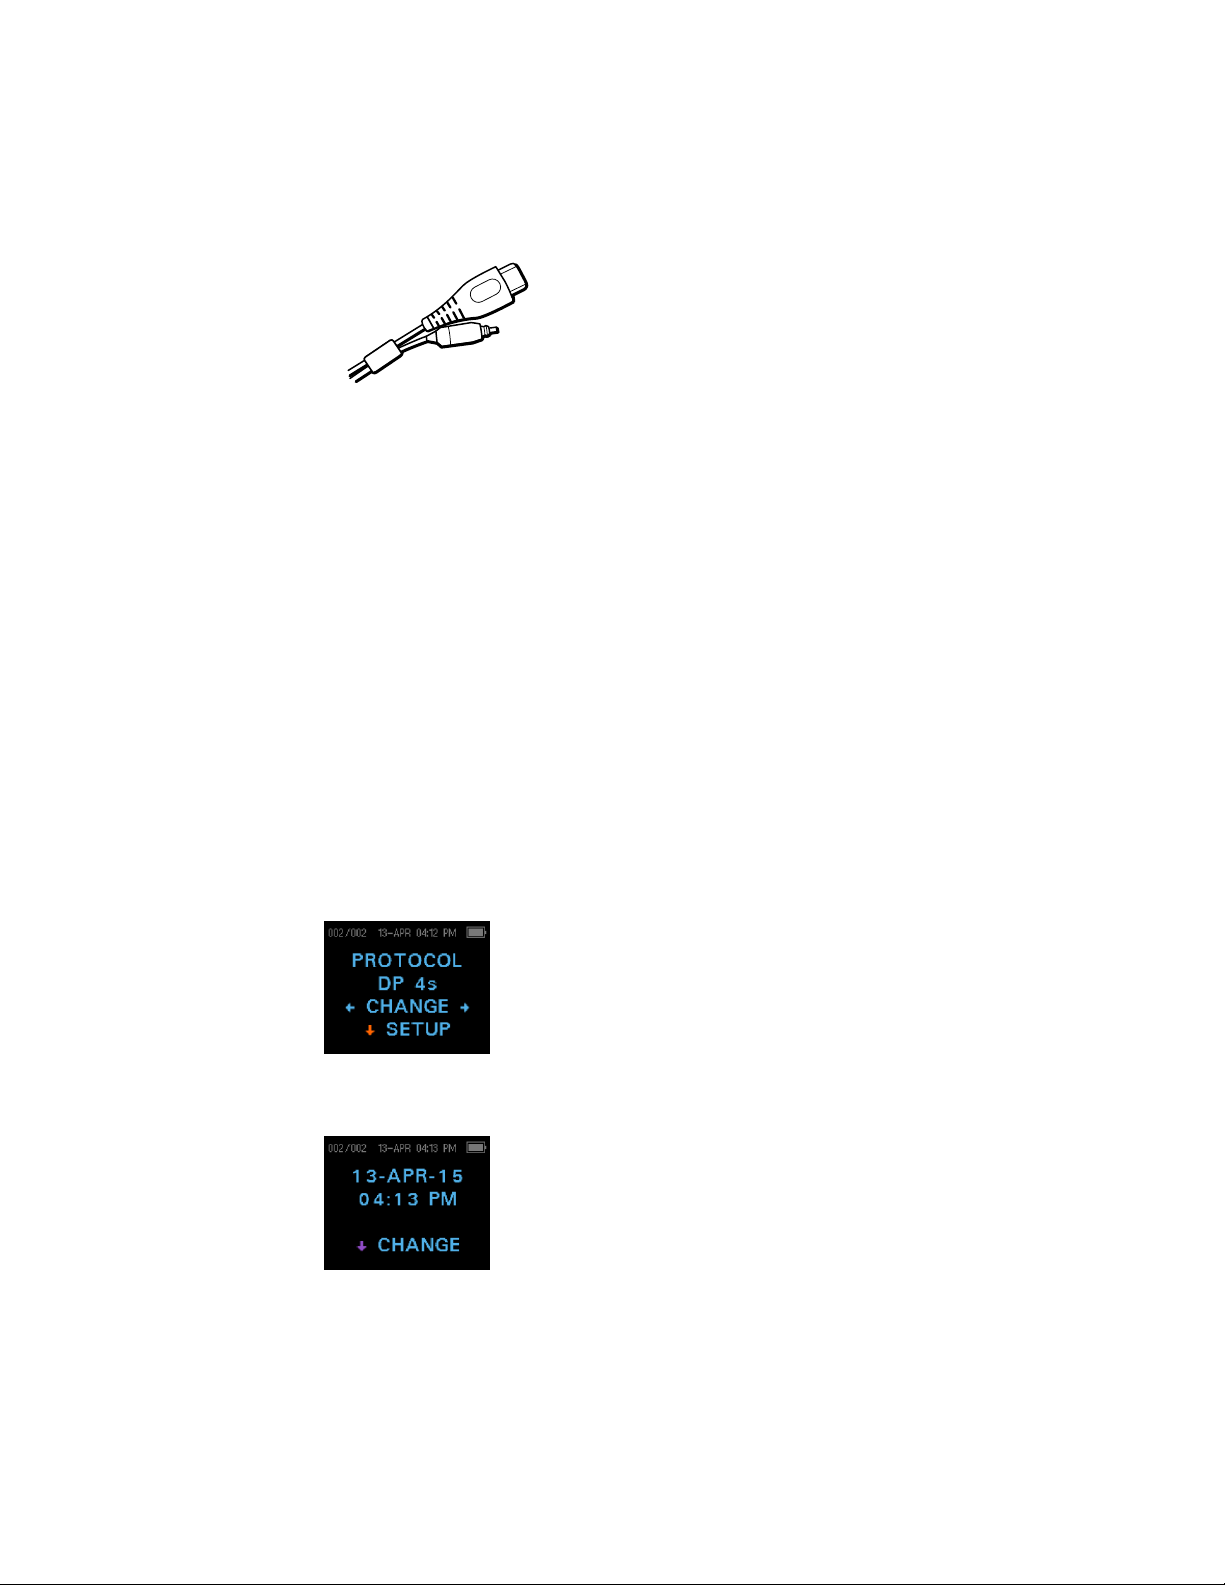
Access the clock menu
1. While viewing the MAIN menu, press the DOWN control panel button.
The PROTOCOL menu appears.
2. While viewing the PROTOCOL menu, press the DOWN control panel button.
The clock menu appears with the current date and time.

Directions for use Setup 17
Change the clock mode
The Clock Mode menu enables you to change the clock from a 24 hour mode to a 12
hour mode.
1. See "Access menus" for how to access menus.
2. On the control panel, press the DOWN button to advance to the CLOCK MODE
menu.
3. Press either the LEFT or RIGHT control panel button to change from the 12 to 24
hour mode or from the 24 to 12 hour mode.
4. Press the UP control panel button repeatedly to return to the MAIN menu.
Change the date and time
1. If the date and time are correct, press the UP control panel button to return to the
main menu. If either the date or time are not correct, go to Step 2.
2. If the month is incorrect, from the Main menu press the DOWN control panel button
three (3) times to advance to the Month menu.
3. Press the LEFT or RIGHT control panel button to advance to the correct month.
4. Press the DOWN control panel button to advance to the Day menu
5. Press the LEFT or RIGHT control panel button to advance to the correct day.
6. Continue Steps 4–5 to correct the year, hour, and minute settings.
7. When the year and hour settings are correct, press the UP control panel button
repeatedly to return to the Main menu.
8. If you are at the Minute menu, press the DOWN control panel button to return to the
Main menu.

18
Setup Welch Allyn® OAE Hearing Screener
 Loading...