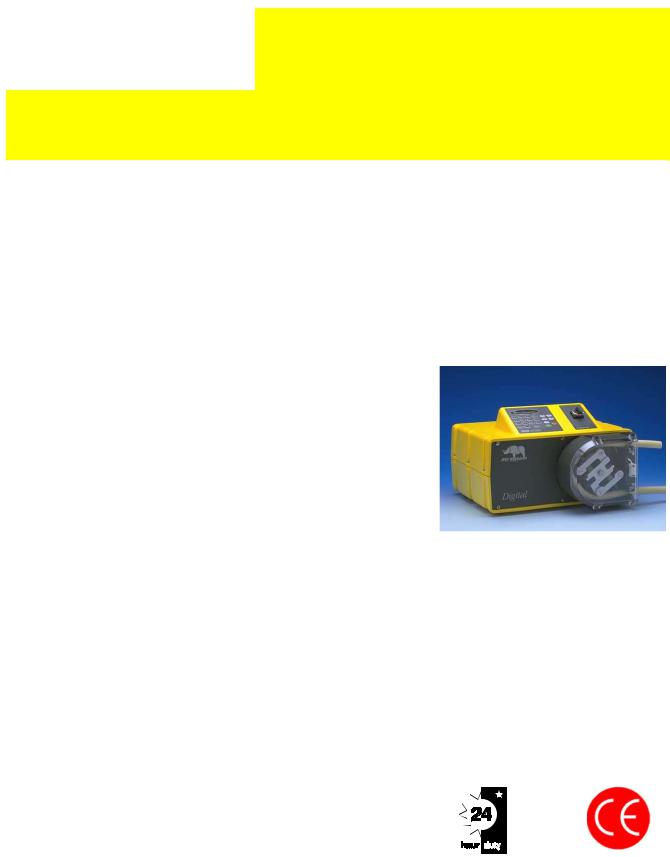
Watson-Marlow 605Di User Manual

605Di-gb/3
605Di
605Di/R

PB 0244
Issue 1
Drive/s: |
Issue 1 |
EPROM: |
2.02 |
Pumphead/s: |
Issue 1 |
605Di

2

Declarations
Declaration of |
When this pump unit is used as a stand alone pump it complies with: Machinery Directive |
conformity |
89/392/EEC EN60204-1, Low Voltage Directive 73/23/EEC EN61010-1, EMC Directive 89/336/EEC |
|
EN50081-1/EN50082-1. |
Declaration of When this pump unit is to be installed into a machine or is to be assembled with other machines Incorporation for installations, it must not be put into service until the relevant machinery has been declared in
conformity with the Machinery Directive 89/392/EEC EN60204-1.
Responsible person: Dr R Woods, Managing Director, Watson-Marlow Limited, Falmouth, Cornwall TR11 4RU, England. Telephone 01326 370370 Fax 01326 376009.
Two year warranty
Watson-Marlow Limited warrants, subject to the conditions below, through either Watson-Marlow Limited, its subsidiaries, or its authorised distributors, to repair or replace free of charge, including labour, any part of this product which fails within two years of delivery of the product to the end user. Such failure must have occurred because of defect in material or workmanship and not as a result of operation of the product other than in accordance with the instructions given in this manual.
Conditions of and specific exceptions to the above warranty are:
•Consumable items such as tubing and rollers are excluded.
•Products must be returned by pre-arrangement carriage paid to Watson-Marlow Limited, its subsidiaries, or its authorised distributor.
•All repairs or modifications must have been made by Watson-Marlow Limited, its subsidiaries, or its authorised distributors or with the express permission of Watson-Marlow Limited, its subsidiaries, or its authorised distributors.
•Products which have been abused, misused, or subjected to malicious or accidental damage or electrical surge are excluded.
Warranties purporting to be on behalf of Watson-Marlow Limited made by any person, including representatives of Watson-Marlow Limited, its subsidiaries, or its distributors, which do not accord with the terms of this warranty shall not be binding upon WatsonMarlow Limited unless expressly approved in writing by a Director or Manager of Watson-Marlow Limited.
Information for returning pumps
Equipment which has been contaminated with, or exposed to, body fluids, toxic chemicals or any other substance hazardous to health must be decontaminated before it is returned to Watson-Marlow or its distributor.
A certificate, included at the rear of these operating instructions, or signed statement, must be attached to the outside of the shipping carton.
This certificate is required even if the pump is unused. If the pump has been used, the fluids that have been in contact with the pump and the cleaning procedure must be specified along with a statement that the equipment has been decontaminated.
Safety
In the interests of safety, this pump and the tubing selected should only be used by competent, suitably trained personnel after they have read and understood this manual, and considered any hazard involved.
Any person who is involved in the installation or maintenance of this equipment should be fully competent to carry out the work. In the UK this person should also be familiar with the Health and Safety at Work Act 1974.
There are dangerous voltages (at mains potential) inside the pump. If access is required, isolate the pump from the mains before removing the cover.
Recommended operating procedures
DO keep delivery and suction lines as short as possible using a minimum number of swept bends.
DO use suction and delivery pipelines with a bore equal to or larger than the bore of the tube fitted in the pumphead. When pumping viscous fluids, the losses caused by increased friction can be overcome by using pipe runs with a cross-sectional area several times greater than the pumping element.
DO run at a slow speed when pumping viscous fluids. 9.6 or 12.7mm bore tube with a 3.2mm wall will give best results. Tube smaller than this will generate a high friction pressure loss which reduces the flow. Tube with a larger bore will not have sufficient strength to restitute. Flooded suction will enhance pumping performance. Some tube materials are available with a 4mm thickness for speeds up to 100rpm. (The rotor will require re-setting to a roller track gap of 6.6mm.)
DO fit an extra length of pump tube in the system to enable tube transfer. This will extend tube life and minimise the downtime of the pumping circuit.
DO keep the track and rollers clean.
3

The self-priming nature of peristaltic pumps means valves are not required Any valves fitted must cause no restriction to flow in the pumping circuit.
When using Marprene tubing, after the first 30 minutes of running, re-tension the tube in the pumphead by releasing the tube clamp on the delivery side a little and pulling the tube tight. This is to counteract the normal stretching that occurs with Marprene which can go unnoticed and result in poor tube life.
Tube selection The chemical compatibility list published in the Watson-Marlow catalogue is only a guide. If in doubt about the compatibility of a tube material and the duty fluid, request a tube sample card for immersion trials.
Installation
The 605Di is suitable for single phase mains electricity supplies only.
To ensure correct lubrication of the gearbox the pump should be run only while its feet are standing on a horizontal surface. The pump should be positioned to allow a free flow of air around it.
•Remove the small transparent plate on the rear panel to gain access to the voltage selector and terminal block.
•Set the voltage selector to either 120V for 100-120V 50/60Hz single phase AC supplies or 240V for 220-240V 50/60Hz single phase AC supplies.
•Route the mains supply cable through the entry point to the right of the recess, and couple the cable to the terminal block as shown on the rear panel.
•There are two alternative connectors. One accepts 20mm rigid or flexible conduit, and the other accepts three core 0.75 square millimetre PVC sheathed mains cable (via the screwed adapter supplied) so that a mains lead can be used.
•Ensure that the mains lead is securely retained in the strain relief gland so that IP55 ingress protection is maintained.
•Securely replace the transparent plate and the gasket over the recess.
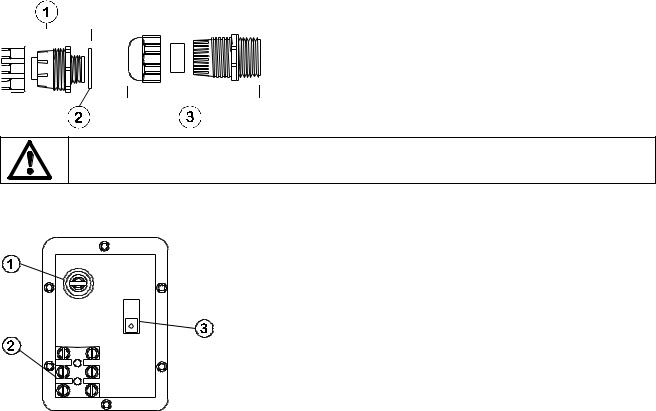
1 Armoured cable strain relief gland GR 0018
2 Washer GR 0019
3 Strain relief gland GR 0031
Ingress protection standard will be compromised if the transparent plate is not replaced.
Rear panel recess
The pump rear panel recess houses the following:
1 Fuse holder
2 Terminal block
3 Voltage selection switch
Troubleshooting
Should the pump fail to operate, make the following checks to determine whether or not servicing is required.
•Check that the power switch is on.
•Check the mains supply is available at the pump.
•Check the voltage selector switch is in the correct position.
•Check the fuse in the mains socket.
•Check that the pump is not stalled by incorrect fitting of tubing.
4
User interfacing
When powering up the pump the user will be taken into the main menu.
Use the Step key to move between menu options. Use the Enter key to confirm settings. Use the number keys to enter in settings. Use the ¿ or À key to increase or decrease set values in the pump software i.e. ramp settings, date, rpm etc.
Dose permits the set-up of dose programs for dispensing. A dose can be initiated by using the Start button or external switching. The pump will allow up to 26 dosing programs to be stored and recalled at any time. A printer can be connected to the pump for recording of dispense runs. Batch and operator codes must be entered when using a printer.
Cal allows the pump to be calibrated for accurate dosing.
Manual allows continuous transfer/fluid metering via keypad control. Auto enables analogue or RS232 control.
Setup displays and controls the user and factory settings for the correct operation of the pump. The speed/volume flow rate of the drive is governed by the pumphead and tubing selected.
Dosing procedure
The Dosing program is outlined in the technical data section of the operating instruction in a flow chart format. Each step in the procedure is described to provide full understanding of the procedure.
Within the technical data section are mean values for dose time guidelines and accuracy figures recorded using Silicone tubing at zero suction and pressure. For the highest accuracy use small bore tubing and maximum roller passes. Always use a calibration dose to ensure the highest accuracy possible.
Print audit routines
If a printer is connected, the completion of a dose run will automatically call the print routine. The first request will be to enter the operator ID.
Up to 16 characters can be entered. Digits and the decimal point are entered directly from the keypad. Alpha characters are entered by pressing ¿ or À which call A to Z and Z to A respectively in circular rotation.
An alpha character is embedded by pressing Step. A numeric character is entered by pressing Step, any other numeric character, the decimal point or ¿ or À.
On pressing Enter, the pump will request the input of a batch number.
Again, up to 16 characters can be entered as for the operator ID. When Enter is again pressed, the following information is printed out: date, time, dose size, specific gravity, dose interval, number of doses, initial ml/rev, recalibration data, operator ID, batch number and number of doses delivered.
Following the print out a repeat dose option will be given.
Single dose command
Single doses can be dispensed on demand, with a count of the number of doses being kept. Set the interval time to 0 SECONDS and the number of doses to 1.
To start single dosing, press Start or use an external start dose switch. The display will indicate the total number of completed doses up to a maximum of 99,999 after which the counter will restart at 0, so that dose 100,001 would be shown as 1.
Calibration procedure
Calibration of the 605Di is based on informing the pump under Cal of the pumphead and tubing which are to be used. Alternatively a calibration dose can be used. The calibration dose will run for a maximum of 4 minutes, but can be stopped at any time up to 4 minutes. The longer the calibration dose the more accurate the calibration. Entering into the pump the physical volume or mass to complete the procedure and will allow the pump to take into account ambient conditions and also the viscosity of the fluid.
Manual operation
•Switch power on.
•Change the set speed by pressing the ¿ or À key. The minimum speed of the 605Di is 4 rpm.
•Change direction by pressing the CW/CCW key. Indication of direction of rotation is provided via the LCD display.
•Select the maximum speed: press the ¿ key and the Max key together. Select the minimum speed: press the À key and the Max key together.
•Press Start to start the pump. Press Stop to stop the pump.
Auto
The pump will accept external control signals through the 25 pin cage clamp connector on the back panel. Remove the cover plate ensuring that the gasket is not damaged. Feed the control wires through the cable glands and connect via the sprung cage clamps.
Analogue
This function enables the pump speed to be controlled via an external analogue process signal. Pressing Enter at analogue will call a confirmation of the analogue control signal settings. These can be reset under Setup (see section covering pump setup).
RS232
5
 Loading...