Vulcan-Hart VSX7EC, VSX7EO, VSX10EC, VSX10EO, ML-114822 User Manual
...
INSTALLATION &
OPERATION MANUAL
VSX7 & VSX10 SERIES
ELECTRIC CONVECTION STEAMERS
MODELS
VSX7EC ML-114822
VSX7EO ML-114821
VSX10EC ML-114824
VSX10EO ML-114823
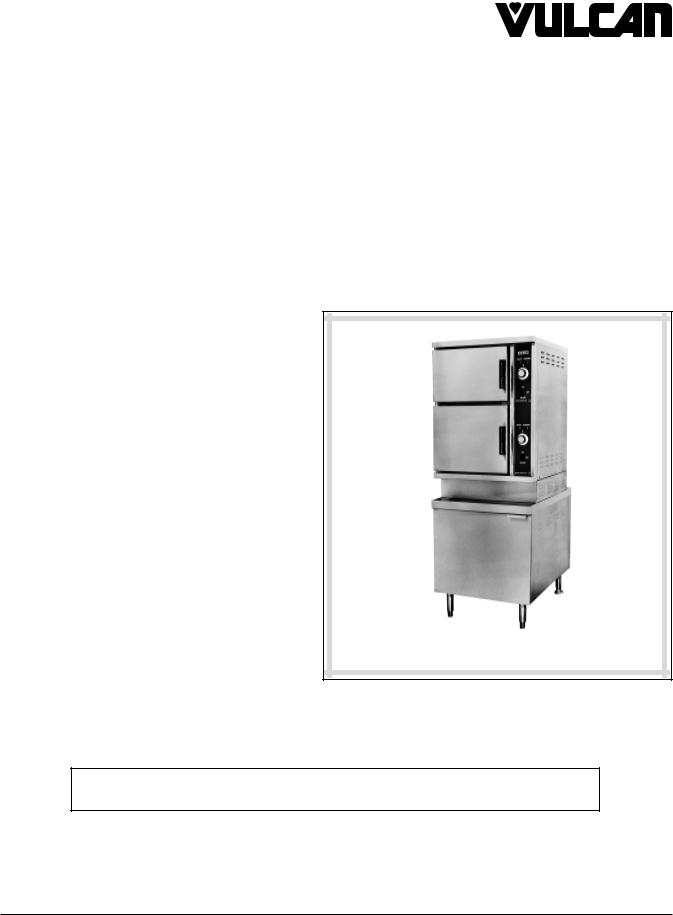
Model VSX7EC with Cabinet Base
For additional information on Vulcan-Hart Company or to locate an authorized parts and service provider in your area, visit our website at www.vulcanhart.com
VULCAN-HART COMPANY, P.O. BOX 696, LOUISVILLE, KY 40201-0696, TEL. (502) 778-2791
FORM 31034 Rev. B (Jan. 2003)

TABLE OF CONTENTS |
|
GENERAL ............................................................................................................................................. |
3 |
INSTALLATION .................................................................................................................................... |
3 |
Unpacking ....................................................................................................................................... |
3 |
Location ........................................................................................................................................... |
3 |
Installation Codes and Standards .................................................................................................. |
4 |
Leveling ........................................................................................................................................... |
4 |
Electrical Connection ...................................................................................................................... |
4 |
Electrical Data ................................................................................................................................. |
4 |
Plumbing Connections .................................................................................................................... |
5 |
Vent Hood........................................................................................................................................ |
6 |
Startup Test ..................................................................................................................................... |
6 |
Installation Drawings ...................................................................................................................... |
7 |
OPERATION......................................................................................................................................... |
8 |
Controls ........................................................................................................................................... |
8 |
Main Power Switch ......................................................................................................................... |
8 |
Before First Use .............................................................................................................................. |
8 |
Preheat ............................................................................................................................................ |
9 |
Cook ................................................................................................................................................ |
9 |
Shutdown......................................................................................................................................... |
9 |
Cooking Hints .................................................................................................................................. |
9 |
Preparation ...................................................................................................................................... |
9 |
Frozen Food Items .......................................................................................................................... |
9 |
Draining the Boiler........................................................................................................................ |
11 |
Adjustments for High Altitude Locations ..................................................................................... |
11 |
Cleaning........................................................................................................................................ |
11 |
Guidelines for Maintaining Stainless Steel Surfaces ................................................................. |
12 |
MAINTENANCE ................................................................................................................................. |
12 |
Deliming ........................................................................................................................................ |
12 |
Steam Pressure Switch ............................................................................................................... |
12 |
Service ......................................................................................................................................... |
12 |
TROUBLESHOOTING ...................................................................................................................... |
12 |
© VULCAN-HART COMPANY, 2003 |
– 2 – |

Installation, Operation and Care of
VSX7 & VSX10 SERIES
ELECTRIC CONVECTION STEAMERS
SAVE THESE INSTRUCTIONS
GENERAL
Models VSX7EC and VSX10EC are mounted on a cabinet base. Models VSX7EO and VSX10EO are mounted on an open base. Models VSX7EC and VSX7EO have a capacity for seven 12" x 20" x 21/2" pans. Models VSX10EC and VSX10EO have capacity for ten 12" x 20" x 21/2" pans. Accessory stainless steel steamer pans with solid or perforated bottoms are available in 1", 21/2" and 4" depths.
Vulcan steamers are produced with quality workmanship and material. Proper installation, usage and maintenance of your steamer will result in many years of satisfactory performance.
It is suggested that you thoroughly read this entire manual and carefully follow all of the instructions provided.
INSTALLATION
UNPACKING
This steamer was inspected before leaving the factory. The transportation company assumes full responsibility for safe delivery upon acceptance of the shipment. Immediately after unpacking, check for possible shipping damage. If the steamer is found to be damaged, save the packaging material and contact the carrier within 15 days of delivery.
LOCATION
Before installing, verify that the electrical service agrees with the specifications on the rating plate located on the right side panel. If the supply and equipment requirements do not agree, do not proceed with the installation. Contact your dealer or Vulcan-Hart Company immediately.
Allow space for plumbing and electrical connections.
When installed, minimum clearances are 3" (7.6 cm) at the sides and 0" at the rear for proper air circulation.
– 3 –

INSTALLATION CODES AND STANDARDS
In the United States, the steamer must be installed in accordance with the following: (1) State and local codes and (2) National Electrical Code, ANSI/NFPA-70 (latest edition), available from National Fire Protection Association, Batterymarch Park, Quincy, MA 02269.
In Canada, the steamer must be installed in accordance with the following: (1) Local codes and (2) Canadian Electrical Code, Part 2, CSA Standard C22.1 (latest edition), available from Canadian Standard Association, 178 Rexdale Boulevard, Rexdale, Ontario, Canada M9W1R3.
LEVELING
Using a spirit level or pan of water in the bottom of the steamer, adjust the leveling feet to level the steamer front to back and side to side.
Mark hole locations on the floor through the anchoring holes provided in the flanged adjustable feet. Remove the steamer and drill holes at marked locations on the floor. Insert proper anchoring devices.
Set steamer back in proper position.
Install bolts through anchoring holes and into anchors to secure the steamer to the floor. Seal bolts and flanged feet with Silastic.
After the drain is connected, check for level by pouring water onto the floor of the compartment. All water should drain through the opening at the back of the compartment cavity.
ELECTRICAL CONNECTION
WARNING: ELECTRICAL AND GROUNDING CONNECTIONS MUST COMPLY WITH APPLICABLE PORTIONS OF THE NATIONAL ELECTRICAL CODE AND/OR OTHER LOCAL ELECTRICAL CODES.
WARNING: DISCONNECT THE ELECTRICAL POWER TO THE MACHINE AND FOLLOW LOCKOUT / TAGOUT PROCEDURES.
Make electrical connection through the 11/8" (2.9 cm) diameter hole, provided, using 3/4" (1.9 cm) tradesize conduit. Refer to the wiring diagram located inside the right side panel. Use 90°C minimum insulated wire.
ELECTRICAL DATA
|
|
|
Minimum Circuit Ampacity |
|
Model |
kW |
Volts/Hertz/Phase |
Maximum Protective Device |
|
|
|
|
Amps |
|
|
|
|
|
|
VSX7EC |
|
208/60/3 |
60 |
|
17.5 |
240/60/3 |
50 |
||
VSX7EO |
||||
|
480/60/3 |
30 |
||
|
|
|||
|
|
|
|
|
VSX10EC |
|
208/60/3 |
90 |
|
30 |
240/60/3 |
80 |
||
VSX10EO |
||||
|
480/60/3 |
45 |
||
|
|
|||
|
|
|
|
– 4 –
 Loading...