


 Loading...
S60
OWNER'S MANUAL


VÄLKOMMEN!
We hope you will enjoy many years of driving pleasure in your Volvo. The car has been designed for the safety and comfort of you and your passengers. Volvo strives to build one of the safest cars in the world. Your Volvo is also designed to meet applicable safety and environmental requirements.
To increase your enjoyment of your Volvo, we recommend that you read the instructions and maintenance information in this owner's manual.
The owner's manual is also available as a mobile app (Volvo Manual) and on the Volvo Cars support site (support.volvocars.com).
We encourage everyone to always wear their seatbelt in this and other cars. Please do not drive if you are under the influence of alcohol or medication – or have an impaired ability to drive in some other way.

TABLE OF CONTENTS
OWNER'S INFORMATION
Owner information |
16 |
Owner's manual in centre display |
17 |
Navigate in the owner's manual in |
18 |
the centre display |
|
Owner's Manual in mobile devices |
20 |
Volvo Cars support site |
21 |
Reading the owner's manual |
21 |
The owner's manual and the environment |
23 |
YOUR VOLVO
Volvo ID |
26 |
Creating and registering a Volvo ID |
26 |
Drive-E - cleaner driving pleasure |
28 |
IntelliSafe – driver support and safety |
31 |
Sensus - online connectivity and |
32 |
entertainment |
|
Software updates |
35 |
Recording data |
35 |
Terms & Conditions for Services |
36 |
Customer Privacy Policy |
36 |
Important information on accessories |
37 |
and auxiliary equipment |
|
Installation of accessories |
37 |
Connection of equipment to the car's |
38 |
diagnostic socket |
|
Showing the car's identification number |
39 |
Driver distraction |
39 |
SAFETY
Safety |
42 |
Safety during pregnancy |
42 |
Whiplash Protection System |
43 |
Pedestrian Protection System |
44 |
Seatbelts |
45 |
Putting on and taking off seatbelts |
46 |
Seatbelt tensioner |
47 |
Resetting the electric seatbelt tensioner* |
48 |
Door and seatbelt reminder |
49 |
Airbags |
50 |
Driver airbags |
51 |
Passenger airbag |
52 |
Activating and deactivating passen- |
53 |
ger airbag* |
|
Side airbags |
55 |
Inflatable curtains |
56 |
Safety mode |
57 |
Starting and moving the car after |
57 |
safety mode |
|
Child safety |
58 |
Child seats |
59 |
Upper mounting points for child seats |
60 |
Lower mounting points for child seats |
60 |
i-Size/ISOFIX mounting points for |
61 |
child seats |
|
2

Child seat positioning |
62 |
Child seat mounting |
63 |
Overview table for location of child seats |
65 |
Table for location of child seats |
66 |
using the car's seatbelts |
|
Table for location of i-Size child seats |
68 |
Table for location of ISOFIX child seats |
69 |
Detail information for child seat man- |
72 |
ufacturers |
|
DISPLAYS AND VOICE CONTROL
Instruments and controls in left-hand |
76 |
drive car |
|
Instruments and controls in right- |
77 |
hand drive car |
|
Driver display |
79 |
Driver display settings |
83 |
Fuel gauge |
84 |
Trip computer |
84 |
Show trip data in the driver display |
86 |
Resetting the trip meter |
87 |
Show trip statistics in the centre display |
87 |
Settings for trip statistics |
88 |
Date and time |
89 |
Outside temperature gauge |
89 |
Indicator symbols in the driver display |
90 |
Warning symbols in the driver display |
92 |
License agreement for the driver display |
93 |
Application menu in driver display |
99 |
Handling the application menu in the |
100 |
driver display |
|
Messages in the driver display |
101 |
Managing messages in the driver display |
102 |
Handling a message saved from the |
104 |
driver display |
|
Overview of centre display |
105 |
Managing the centre display |
108 |
Activating and deactivating centre display |
111 |
Navigating in the centre display's views |
111 |
Managing subviews in centre display |
115 |
Function view in centre display |
118 |
Moving apps and buttons in centre |
120 |
display |
|
Symbols in the centre display's status bar |
120 |
Keyboard in centre display |
122 |
Changing keyboard language in cen- |
125 |
tre display |
|
Enter the characters, letters and |
125 |
words manually in the centre display |
|
Changing the appearance in the |
127 |
centre display |
|
Switching off and changing the vol- |
127 |
ume of the system sound in the cen- |
|
tre display |
|
Changing system units |
128 |
Changing system language |
128 |
Other settings in the centre display's |
128 |
top view |
|
Open contextual setup in the centre |
129 |
display |
|
Resetting user data for change of |
130 |
ownership |
|
Resetting settings in the centre display |
130 |
Table showing centre display settings |
131 |
Driver profiles |
132 |
3

Selecting driver profile |
133 |
Renaming a driver profile |
133 |
Protect driver profile |
134 |
Linking remote control key to driver |
134 |
profile |
|
Resetting settings in the driver profiles |
135 |
Message in centre display |
136 |
Managing messages in the centre display |
136 |
Handling a message saved from the |
137 |
centre display |
|
Head-up display* |
138 |
Activating and deactivating the head- |
139 |
up display* |
|
Settings for head-up display* |
140 |
Voice recognition |
141 |
Using voice recognition |
142 |
Controlling a telephone with voice |
143 |
recognition |
|
Voice control of radio and media |
144 |
Settings for voice recognition |
145 |
LIGHTING
Lighting control |
148 |
Adjusting light functions via the cen- |
149 |
tre display |
|
Adapting the headlamp pattern from |
149 |
the headlamps |
|
Position lamps |
150 |
Daytime running lights |
150 |
Dipped beam |
151 |
Using main beam |
152 |
Active main beam |
152 |
Using direction indicators |
154 |
Active bending lights* |
155 |
Front fog lamps/cornering lights* |
155 |
Rear fog lamp |
156 |
Brake lights |
157 |
Emergency brake lights |
157 |
Hazard warning flashers |
157 |
Using home safe lighting |
158 |
Approach light duration |
158 |
Interior lighting |
159 |
Adjusting interior lighting |
161 |
WINDOWS, GLASS AND MIRRORS
Windows, glass and mirrors |
164 |
Pinch protection for windows and |
164 |
sun blinds |
|
Reset sequence for pinch protection |
165 |
Power windows |
165 |
Operating power windows |
166 |
Using the sun blind* |
167 |
Rearview and door mirrors |
167 |
Adjusting rearview mirror dimming |
168 |
Angling the door mirrors |
169 |
Panorama roof* |
170 |
Operating the panorama roof* |
171 |
Automatic closing of the panoramic |
174 |
roof's* sun blind |
|
Wiper blades and washer fluid |
174 |
Using windscreen wipers |
175 |
Using the rain sensor |
175 |
Using the rain sensor's memory function |
176 |
Using windscreen and headlamp washers |
177 |
4

SEATS AND STEERING WHEEL
Manual front seat |
180 |
Power* front seat |
181 |
Adjusting the power* front seat |
181 |
Storing position for seat, door mirrors |
182 |
and head-up display* |
|
Using a stored position for seat, door |
183 |
mirrors and head-up display* |
|
Massage settings* in the front seat |
184 |
Adjusting massage settings* in the |
185 |
front seat |
|
Adjusting* the length of the seat |
186 |
cushion in the front seat |
|
Adjusting the side support* in the |
187 |
front seat |
|
Adjusting the lumbar support* in the |
187 |
front seat |
|
Adjusting the passenger seat from |
189 |
the driver's seat* |
|
Lowering the backrests in the rear seat* |
190 |
Adjusting the head restraints in the |
191 |
rear seat |
|
Steering wheel controls and horn |
192 |
Steering lock |
193 |
Adjusting the steering wheel |
193 |
CLIMATE
Climate |
196 |
Climate zones |
196 |
Climate control - sensors |
197 |
Perceived temperature |
197 |
Controlling climate control with voice |
198 |
recognition |
|
Air quality |
199 |
Clean Zone* |
199 |
Clean Zone Interior Package* |
200 |
Interior Air Quality System* |
200 |
Activating and deactivating the air |
201 |
quality sensor* |
|
Passenger compartment filter |
201 |
Air distribution |
202 |
Changing air distribution |
202 |
Opening, closing and aiming the air vents |
203 |
Table of air distribution options |
204 |
Climate controls |
207 |
Activating and deactivating heated |
209 |
front seat* |
|
Activating and deactivating automatic |
210 |
start of heated front seat* |
|
Activating and deactivating heated |
210 |
rear seat* |
|
Activating and deactivating ventilated |
211 |
front seat* |
|
Activating and deactivating the |
212 |
heated steering wheel* |
|
Activating and deactivating automatic |
212 |
start of heated steering wheel* |
|
Activating auto climate control |
212 |
Activating and deactivating air recir- |
213 |
culation |
|
Activating and deactivating time set- |
214 |
ting for air recirculation |
|
Activating and deactivating max defroster |
214 |
Activating and deactivating the |
215 |
heated windscreen* |
|
Activating and deactivating automatic |
216 |
start of heated windscreen* |
|
Activating and deactivating the |
216 |
heated rear window and door mirrors |
|
Activating and deactivating automatic |
217 |
starting of the heated rear window |
|
and door mirrors |
|
Regulating fan level for front seat |
217 |
Regulating fan level for rear seat* |
218 |
Regulating temperature for front seat |
219 |
Regulating temperature for rear seat* |
220 |
Synchronising temperature |
221 |
Activating and deactivating air condi- |
222 |
tioning |
|
Parking climate* |
222 |
Preconditioning* |
223 |
5

Start and switch off preconditioning* |
223 |
Preconditioning time setting* |
224 |
Adding and editing time setting for |
224 |
preconditioning* |
|
Activating and deactivating time set- |
226 |
ting for preconditioning* |
|
Removing time setting for precondi- |
226 |
tioning* |
|
Climate comfort when parking* |
227 |
Starting and switching off climate |
227 |
comfort when parking* |
|
Symbols and messages for parking |
229 |
climate control* |
|
Heater* |
230 |
Parking heater* |
231 |
Additional heater* |
232 |
Activating and deactivating automatic |
232 |
start of auxiliary heater* |
|
KEY, LOCKS AND ALARM
Lock confirmation |
234 |
Lock indication setting |
235 |
Remote control key |
235 |
Locking and unlocking with the |
237 |
remote control key |
|
Settings for remotely controlled and |
238 |
inside unlocking |
|
Unlocking the boot lid with the |
239 |
remote control key |
|
Remote control key range |
239 |
Replacing the battery in the remote |
240 |
control key |
|
Ordering more remote control keys |
243 |
Red Key - restricted remote control key* |
244 |
Settings for Red Key* |
244 |
Detachable key blade |
245 |
Locking and unlocking with the |
247 |
detachable key blade |
|
Immobiliser |
248 |
Type approval for the remote control |
249 |
key system |
|
Keyless and touch-sensitive surfaces* |
258 |
Keyless locking and unlocking* |
259 |
Settings for Keyless entry* |
260 |
Keyless unlocking of the boot lid* |
260 |
Antenna locations for the start and |
262 |
lock systems |
|
Locking and unlocking from inside |
262 |
the car |
|
Unlocking the boot lid from the |
264 |
inside of the car |
|
Activating and deactivating child |
264 |
safety locks |
|
Automatic locking when driving |
265 |
Private locking |
266 |
Activating and deactivating private |
266 |
locking |
|
Alarm* |
267 |
Activating and deactivating alarms* |
269 |
Reduced alarm level* |
270 |
Double lock* |
270 |
Temporarily* deactivating double locks |
271 |
6

DRIVER SUPPORT
Driving support systems |
274 |
Speed-dependent steering force |
274 |
Electronic stability control |
275 |
Electronic Stability Control in sport mode |
276 |
Activating/deactivating sport mode |
277 |
for Electronic Stability Control |
|
Symbols and messages for elec- |
278 |
tronic stability control |
|
Speed limiter |
280 |
Activating and starting the Speed Limiter |
281 |
Deactivate the speed limiter and set |
281 |
it in standby mode |
|
Reactivating the speed limiter from |
282 |
standby mode |
|
Deactivating the speed limiter |
283 |
Limitations for speed limiter |
283 |
Automatic speed limiter |
284 |
Activate/deactivate Automatic Speed |
285 |
Limiter |
|
Changing the tolerance for the auto- |
286 |
matic speed limiter |
|
Limitations for automatic speed limiter |
287 |
Cruise control |
287 |
Activating and starting Cruise Control |
289 |
Deactivate cruise control and set it in |
289 |
standby mode |
|
Reactivating cruise control from |
290 |
standby mode |
|
Deactivating cruise control |
291 |
Distance Warning* |
292 |
Activating/deactivating Distance warning |
293 |
Limitations of Distance Warning |
293 |
Adaptive cruise control* |
294 |
Controls and display view for adap- |
296 |
tive cruise control* |
|
Activating and starting adaptive |
296 |
cruise control* |
|
Deactivating/reactivating adaptive |
297 |
cruise control* |
|
Limitations for adaptive cruise control* |
299 |
Change between cruise control and |
299 |
adaptive cruise control* |
|
Symbols and messages for adaptive |
301 |
cruise control* |
|
Pilot Assist |
303 |
Controls and display view for Pilot Assist |
305 |
Activating and starting Pilot Assist |
306 |
Deactivating/activating Pilot Assist |
307 |
Limitations of Pilot Assist |
309 |
Symbols and messages for Pilot Assist* |
310 |
Warning from driver support in the |
312 |
event of a collision risk |
|
Change of target with driver support |
313 |
Set time interval for driver support |
314 |
Drive mode for driver support |
315 |
Set the stored speed for driver support |
315 |
Automatic braking with driver support |
316 |
Overtaking Assistance |
317 |
Use Overtaking Assistance |
318 |
Radar unit |
319 |
Type approval for radar device |
320 |
Camera unit |
325 |
Limitations for camera and radar unit |
326 |
Recommended maintenance for |
330 |
camera and radar unit |
|
City Safety™ |
331 |
Parameters and subfunctions for City |
332 |
Safety |
|
Setting the warning distance for City |
334 |
Safety |
|
Detection of obstacles with City Safety |
335 |
City Safety in cross traffic |
337 |
Limitations for City Safety in cross traffic |
338 |
City Safety steering assistance for |
339 |
evasive manoeuvre |
|
Limitations of City Safety steering |
340 |
assistance when taking evasive action |
|
City Safety when evasive manoeu- |
340 |
vres are prevented |
|
7

City Safety brakes for oncoming vehicles |
341 |
Limitations of City Safety |
342 |
Messages for City Safety |
345 |
Rear Collision Warning |
346 |
Limitations of Rear Collision Warning |
346 |
BLIS* |
347 |
Activating or deactivating BLIS |
348 |
Limitations of BLIS |
349 |
Messages for BLIS |
350 |
Cross Traffic Alert* |
351 |
Activate/deactivate Cross Traffic Alert |
352 |
Limitations of Cross Traffic Alert |
352 |
Messages for Cross Traffic Alert |
354 |
Road Sign Information* |
355 |
Activating/deactivating Road Sign |
356 |
Information* |
|
Road Sign Information and sign display* |
357 |
Road Sign Information and Sensus |
359 |
Navigation* |
|
Road Sign Information with speed |
359 |
warning and settings* |
|
Activating/deactivating Speed warn- |
360 |
ing in Road Sign Information |
|
Road Sign Information with Speed |
361 |
Camera Information* |
|
Limitations of Road Sign Information* |
361 |
8
Driver Alert Control |
362 |
Activate/deactivate Driver Alert Control |
363 |
Select rest stop guidance in the |
364 |
event of a warning from Driver Alert |
|
Control |
|
Limitations of Driver Alert Control |
364 |
Lane assistance |
364 |
Steering assistance with lane assistance |
366 |
Activate/deactivate Lane Keeping Aid |
366 |
Select assistance option for lane |
366 |
assistance |
|
Limitations of Lane assistance |
367 |
Symbols and messages for lane |
368 |
assistance |
|
Lane assistance symbols in the |
370 |
driver display |
|
Steering assistance at risk of collision |
371 |
Activating/deactivating Steering |
372 |
assistance in the event of a collision risk |
|
Steering assistance level in the event |
372 |
of a run-off risk |
|
Steering assistance upon risk of run-off |
373 |
Steering assistance upon risk of |
374 |
head-on collision |
|
Limitations for steering assistance at |
375 |
risk of collision |
|
Symbols and messages for steering |
376 |
assistance upon risk of collision |
|
Park Assist* |
377 |
Park Assist Pilot front, rear and |
378 |
along the sides* |
|
Activating/deactivating Park Assist Pilot* |
379 |
Limitations of Parking assistance |
380 |
Symbols and messages for Park |
381 |
Assist Pilot |
|
Park assist camera* |
382 |
Parking camera views* |
383 |
Park assist lines for parking camera* |
385 |
Sensor fields from Park Assist Pilot |
387 |
for parking camera |
|
Starting the park assist camera |
388 |
Symbols and messages for Park |
389 |
assist camera |
|
Park Assist Pilot* |
390 |
Parking variants with Park Assist Pilot* |
391 |
Parking with Park Assist Pilot* |
392 |
Leaving parallel parking with Park |
394 |
Assist Pilot* |
|
Limitations of Park Assist Pilot* |
395 |
Messages for Park Assist Pilot* |
398 |
STARTING AND DRIVING
Starting the car |
400 |
Switching off the car |
401 |
Ignition positions |
402 |
Selecting ignition mode |
403 |
Alcohol lock* |
404 |
Bypass of the alcohol lock* |
404 |
Before starting the engine with the |
405 |
alcohol lock |
|
Brake functions |
405 |
Foot brake |
405 |
Brake assistance |
406 |
Braking on wet roads |
407 |
Braking on gritted roads |
407 |
Brake system maintenance |
407 |
Parking brake |
408 |
Activating and deactivating the park- |
408 |
ing brake |
|
Automatic parking brake activation |
410 |
setting |
|
Parking on a hill |
410 |
In the event of a fault in the parking |
410 |
brake |
|
Automatic braking when stationary |
411 |
Activating and deactivating the auto- |
412 |
matic brake at a standstill |
|
Help when starting on a hill |
412 |
Auto braking after a collision Gearbox
Gear positions for automatic gearbox
Changing gear with steering wheel paddles*
Gear selector inhibitor
Deactivate automatic gear selector inhibitor
Kick-down function Gear shift indicator All-wheel drive* Drive modes*
Changing drive mode* Drive mode Eco
Activating and deactivating drive mode Eco with the function button
Start/stop function
Driving with start/stop function
Temporarily switching off the start/ stop function
Conditions for the Start/Stop function Level control* and shock absorption Settings for level control*
Economical driving Preparations for a long trip Winter driving
413
413
414
415
417
417
418
418
419
419
421
422
424
424
425
426
426
428
430
430
431
432
Driving in water |
432 |
Opening and closing the fuel filler flap |
433 |
Filling fuel |
433 |
Handling of fuel |
434 |
Petrol |
435 |
Petrol particle filter |
436 |
Overheating in the engine and drive |
436 |
system |
|
Overloading the starter battery |
437 |
Using jump starting with another battery |
438 |
Towbar* |
439 |
Specifications for towbar* |
440 |
Extendable and retractable towbar* |
441 |
Driving with a trailer |
443 |
Trailer stability assist* |
444 |
Checking trailer lamps |
445 |
Towbar-mounted bicycle rack* |
446 |
Towing |
447 |
Fitting and removing the towing eye |
448 |
Recovery |
450 |
HomeLink®* |
451 |
Programming HomeLink®* |
452 |
Using HomeLink®* |
454 |
Type approval for HomeLink®* |
454 |
9

Compass* |
455 |
Activating and deactivating the compass* |
455 |
Calibrating the compass* |
455 |
SOUND, MEDIA AND INTERNET
Sound, media and Internet |
458 |
Audio settings |
458 |
Sound experience* |
459 |
Apps |
460 |
Downloading apps |
461 |
Updating apps |
462 |
Deleting apps |
462 |
Radio |
463 |
Start radio |
463 |
Changing radio band and radio station |
464 |
Searching for radio stations |
465 |
Setting radio favourites |
465 |
Settings for radio |
466 |
RDS radio |
467 |
Digital radio* |
468 |
Link between FM and digital radio* |
469 |
Media player |
469 |
Media playback |
470 |
Controlling and changing media |
471 |
Searching media |
472 |
Gracenote® |
473 |
CD player* |
473 |
Video |
474 |
Playing a video |
474 |
Playing back DivX® |
474 |
Settings for video |
475 |
Media via Bluetooth® |
475 |
Connecting a device via Bluetooth® |
475 |
Media via USB port |
476 |
Connecting a device via USB port |
476 |
Technical specifications for USB devices |
477 |
Compatible media formats |
477 |
Apple® CarPlay®* |
478 |
Using Apple® CarPlay®* |
479 |
Settings for Apple® CarPlay®* |
480 |
Tips for using Apple® CarPlay®* |
481 |
Android Auto* |
482 |
Using Android Auto* |
482 |
Settings for Android Auto* |
483 |
Tips for using Android Auto* |
484 |
Phone |
484 |
Connecting a phone to the car via |
485 |
Bluetooth for the first time |
|
Connecting a phone to the car via |
487 |
Bluetooth automatically |
|
Connecting a phone to the car via |
488 |
Bluetooth manually |
|
Disconnecting a Bluetooth-con- |
488 |
nected phone |
|
10

|
|
|
WHEELS AND TYRES |
|
Switch between Bluetooth-con- |
488 |
License agreement for audio and media 501 |
Tyres |
512 |
nected phones |
|
|
Dimension designation for tyre |
513 |
Removing devices connected to |
489 |
|
||
|
Dimension designation for wheel rim |
514 |
||
Bluetooth |
|
|
||
Managing phone calls |
489 |
|
Tyres' rotation direction |
515 |
|
Tread wear indicators on the tyres |
|
||
Managing text messages |
490 |
|
515 |
|
|
Checking tyre pressure |
|
||
Settings for text messages |
491 |
|
516 |
|
|
Adjusting tyre pressure |
|
||
Managing the phone book |
491 |
|
516 |
|
|
Recommended tyre pressure |
|
||
Settings for phone |
492 |
|
517 |
|
|
|
|
||
Settings for Bluetooth devices |
493 |
|
Tyre pressure monitoring system* |
518 |
|
|
|
||
Internet-connected car* |
493 |
|
Saving a new tyre pressure in the |
519 |
|
monitoring system* |
|
||
Connect the car to the Internet via a |
494 |
|
|
|
|
See tyre pressure status in the cen- |
521 |
||
Bluetooth-enabled phone |
|
|
||
Connect the car to the Internet via a |
495 |
|
tre display* |
|
|
Action in the event of warning for |
522 |
||
phone (Wi-Fi) |
|
|
||
Connect the car to the Internet via |
495 |
|
low tyre pressure |
|
|
When changing wheels |
523 |
||
car modem (SIM card) |
|
|
||
Settings for car modem* |
496 |
|
Tool kit |
523 |
|
|
|
||
Sharing Internet access from the car |
497 |
|
Jack* |
523 |
via a Wi-Fi hotspot |
|
|
Wheel bolts |
524 |
|
|
|
||
No or poor Internet connection |
498 |
|
Removing a wheel |
525 |
|
|
|
||
Remove Wi-Fi network |
498 |
|
Fitting the wheels |
527 |
|
|
|
||
Wi-Fi technologies and security |
499 |
|
Spare wheel* |
528 |
|
|
|
||
User terms and conditions and data |
499 |
|
Handling the spare wheel |
529 |
sharing |
|
|
||
|
|
Winter tyres |
530 |
|
Activating and deactivating data sharing |
499 |
|
||
|
Snow chains |
530 |
||
Storage space on hard disk |
500 |
|
||
|
|
|
||
|
|
|
|
|
11

Emergency puncture repair kit |
531 |
Using a puncture repair kit |
532 |
Inflating tyres with the compressor |
536 |
from the puncture repair kit |
|
LOADING, STORAGE AND PASSENGER COMPARTMENT
Passenger compartment interior |
538 |
Tunnel console |
539 |
Electrical sockets |
540 |
Using electrical sockets |
542 |
Using the glovebox |
543 |
Sun visors |
545 |
Cargo area |
545 |
Recommendations for loading |
545 |
Roof load and loading on load carriers |
546 |
Bag hooks |
547 |
Load retaining eyelets |
548 |
Through-load hatch in the rear seat* |
548 |
First aid kit* |
548 |
Warning triangle |
549 |
MAINTENANCE AND SERVICE
Volvo service programme |
552 |
Data transfer between car and work- |
552 |
shop via Wi-Fi |
|
Download Center |
553 |
Managing system updates via the |
553 |
Download Centre |
|
Car status |
554 |
Book service and repair |
555 |
Sending car information to a workshop |
556 |
Raise the car |
557 |
Servicing the climate control system |
559 |
Head up display when replacing the |
559 |
windscreen* |
|
Opening and closing the bonnet |
560 |
Engine compartment overview |
561 |
Engine oil |
562 |
Checking and filling with engine oil |
563 |
Topping up coolant |
564 |
Bulb replacement |
565 |
Starter battery |
566 |
Support battery |
569 |
Symbols on the batteries |
570 |
Battery recycle |
571 |
Fuses and central electrical units |
571 |
Replacing a fuse |
572 |
12

Fuses in engine compartment |
573 |
Fuses under glovebox |
576 |
Fuses in cargo area |
579 |
Cleaning the interior |
583 |
Cleaning the centre display |
583 |
Cleaning the head up display* |
584 |
Cleaning fabric upholstery and headlining |
585 |
Cleaning the seatbelts |
585 |
Cleaning floor mats and inlay mats |
585 |
Cleaning leather upholstery |
586 |
Cleaning the leather steering wheel |
587 |
Cleaning interior plastic, metal and |
587 |
wood parts |
|
Cleaning the exterior |
588 |
Polishing and waxing |
588 |
Handwashing |
589 |
Automatic car wash |
590 |
High-pressure washing |
591 |
Cleaning the wiper blades |
591 |
Cleaning exterior plastic, rubber and |
592 |
trim components |
|
Cleaning wheel rims |
593 |
Rustproofing |
593 |
Car paintwork |
594 |
Touching up minor paintwork damage |
594 |
Colour codes |
595 |
Replacing windscreen wiper blades |
596 |
Wiper blades in service position |
597 |
Filling washer fluid |
598 |
SPECIFICATIONS
Type designations |
600 |
Dimensions |
603 |
Weights |
605 |
Towing capacity and towball load |
606 |
Engine specifications |
607 |
Engine oil — specifications |
608 |
Adverse driving conditions for engine oil |
609 |
Coolant — specifications |
610 |
Transmission fluid — specifications |
610 |
Brake fluid — specifications |
610 |
Fuel tank - volume |
611 |
Air conditioning — specifications |
611 |
Fuel consumption and CO2 emissions |
613 |
Approved tyre pressures |
614 |
Performance |
615 |
13

ALPHABETICAL INDEX
Alphabetical Index |
617 |
14

OWNER'S INFORMATION
OWNER'S INFORMATION
Owner information
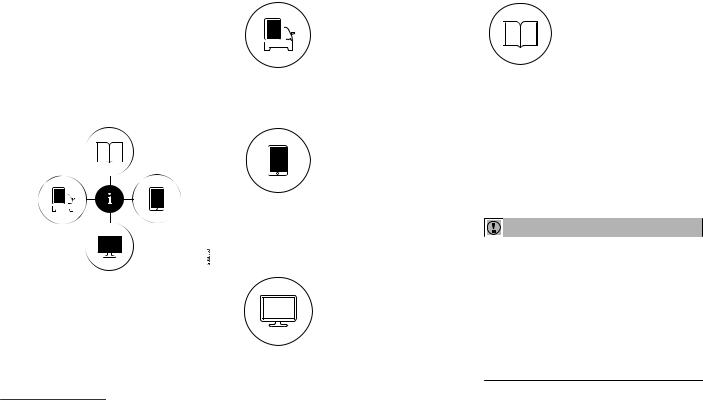
Owner's information is available in several different product formats, both digital and printed. The owner's manual is available in the car's centre display, as a mobile app and on the Volvo Cars support site. There is a Quick Guide and a supplement to the owner's manual available in the glovebox, with specifications and fuse information, amongst other things. A printed owner's manual can be ordered.
The car's centre display1
In the centre display, drag down the top view and tap on
Owner's manual. Available
here are options for visual navigation with exterior and interior images of the car. The information is searchable and is also
divided into categories.
Mobile app
In App Store or Google Play, search for "Volvo Manual", download the app to your smartphone or tablet and select the car. Available in the app are video tutorials and options for visual navigation with exterior
and interior images of the car. It is easy to navigate between the different sections in the owner's manual and the content is searchable.
Volvo Cars support site
Go to support.volvocars.com and select your country. Here you can find owner's manuals, both online and in PDF format.
On the Volvo Cars support site there are also video tutorials and further information and
help regarding your Volvo and your car ownership. The page is available for most markets.
1 A complete printed manual is included with the car for markets without owner's manual in the centre display.
Printed information
There is a supplement to the owner's manual1 in the glovebox that contains information on fuses and specifications, as well as a summary of important and practical information.
There is also a Quick Guide available in printed format that helps you to get started with the most commonly used functions in the car.
Depending on equipment level selected, market, etc. additional owner's information may also be available in printed format in the car.
A printed owner's manual and associated supplement can be ordered. Contact a Volvo dealer to order.
IMPORTANT
The driver is always responsible that the vehicle is driven safely in traffic and that applicable laws and regulations are followed. It is also important that the car is maintained and handled in accordance with Volvo's recommendations in the owner's information.
If there should be a difference between the information in the centre display and the printed information then it is always the printed information that applies.
16
NOTE
Changing the language in the centre display may mean that some owner's information is not compliant with national or local laws and regulations. Do not switch to a language that is difficult to understand as this may make it difficult to find your way back through the screen structure.
Related information
•Owner's manual in centre display (p. 17)
•Owner's Manual in mobile devices (p. 20)
•Volvo Cars support site (p. 21)
•Reading the owner's manual (p. 21)
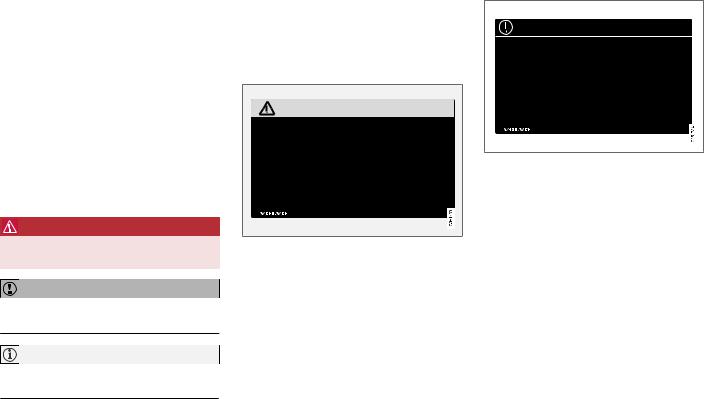
Owner's manual in centre display
A digital2 version of the owner's manual is available in the car's centre display.
The digital owner's manual can be accessed from the top view, and in some cases the contextual owner's manual can also be accessed from the top view.
NOTE
The digital owner's manual is not available while driving.
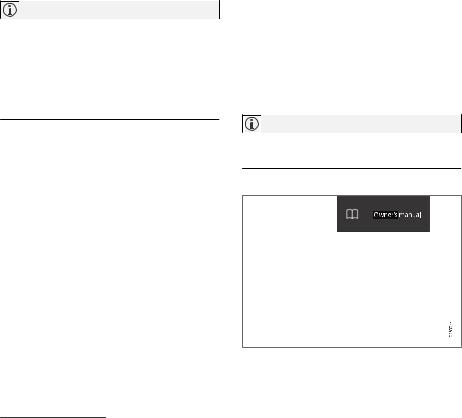
Owner's manual
OWNER'S INFORMATION
To open the owner's manual - drag down the top view in the centre display and tap on Owner's manual.
The information in the owner's manual can be accessed directly via the owner's manual homepage or its top menu.
Top view with button for owner's manual.
2 Applies for most markets. |
}} |
17
|
OWNER'S INFORMATION |
|
|
|
|
|
|| Contextual owner's manual |
|
|
|
Related information |
||
|
|
|
|
|
|
• Navigate in the owner's manual in the centre |
|
|
|
|
|
|
|
|
|
|
|
|
|
display (p. 18) |
|
|
|
|
|
|
• Navigating in the centre display's views |
|
|
|
|
|
|
(p. 111) |
|
|
|
|
|
|
• Downloading apps (p. 461) |
|
|
|
|
|
|
|
|
|
|
|
|
|
|
|
|
|
|
|
|
|
|
|
|
|
|
|
|
|
|
|
|
|
|
|
Navigate in the owner's manual in the centre display
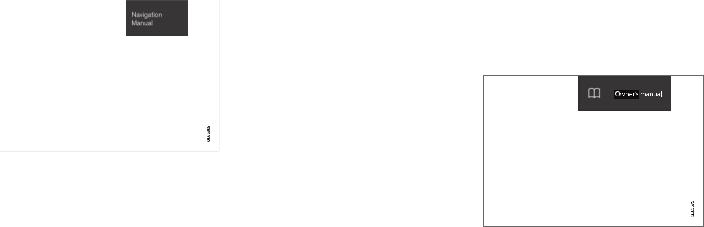
The digital owner's manual can be accessed from the centre display top view in the car. The content is searchable and it is easy to navigate between different sections.
Top view with button for contextual owner's manual.
The contextual owner's manual is a shortcut to an article in the owner's manual that describes the active function shown on the screen. When the contextual owner's manual is available, it is shown to the right of Owner's manual in the top view.
Tapping on the contextual owner's manual therefore opens an article in the owner's manual that is related to the content that is shown on the screen. E.g. tap on Navigation Manual – an article that is related to navigation opens.
This only applies to some of the apps in the car. For downloaded third party apps, for example, it is not possible to access app-specific articles.
The owner's manual is accessed from the top view.
–To open the owner's manual - drag down the top view in the centre display and tap on
Owner's manual.
There is a range of different options for finding information in the owner's manual. The options can be accessed from the owner's manual homepage and from the top menu.
18
Opening the menu in the top menu
–Press  in the upper list in the owner's manual.
>A menu with different options for finding information is opened:
Homepage |
Categories |
Tap on the symbol to go back to the start page in the owner's manual.
The articles in the owner's manual are structured into main categories and subcategories. The same article can be found in several appropriate categories so that it can be found more easily.
1.Press Categories.
>The main categories are shown in a list.
2.Tap on a main category (  ).
).
>A list of subcategories (  ) and articles (
  ) is shown.
3.Tap on an article to open it.
To go back, press the back arrow.
Quick Guide
Press the symbol to access a page with links to a selection of
articles that can be particularly
useful to read in order to get to know the most common functions of the car. The articles can also be accessed via cate-
gories, but are collected here for quick access. Tap on an article in order to read it in its entirety.
Hotspots for exterior and interior
Exterior and interior overview images of the car. Different
parts are designated with hotspots that lead to articles about those parts of the car.
1.Press Exterior or Interior.
>Exterior or interior images are shown with so-called hotspots in place. The hotspot leads to articles about the corresponding part of the car. Swipe horizontally over the screen to browse among the images.
OWNER'S INFORMATION
2.Tap on a hotspot.
>The title of the article about the area is shown.
3.Tap on the title to open the article.
To go back, press the back arrow.
Favourites |
Press the symbol to access the articles saved as favourites. Tap on an article in order to read it in its entirety.
Saving or deleting articles as favourites
Save an article as favourite by pressing  at the top right when an article is open. When an article has been saved as a favourite the star is filled in:
 .
.
To remove an article as a favourite, press the star again in the current article.
Video
Press the symbol to view brief instruction videos for various functions in the car.
}}
19

OWNER'S INFORMATION
||Information
Tap on the symbol to obtain information about which version of the owner's manual is available in the car as well as other useful information.
Using the search function in the top menu
1.Tap on  in the top menu of the owner's manual. A keyboard appears in the lower part of the screen.
2.Type in a keyword, such as "seatbelt".
>Suggestions for articles and categories are shown while letters are being entered.
3.Tap on the article or category to access it.
Related information
•Owner's manual in centre display (p. 17)
•Keyboard in centre display (p. 122)
•Reading the owner's manual (p. 21)
3 For certain mobile devices.
Owner's Manual in mobile devices
The owner's manual is available as a mobile app3 from both the App Store and Google Play. The app is adapted for smartphones and tablets.
The owner's manual can be downloaded as a mobile app
from the App Store or Google
Play. The QR code provided
here takes you directly to the app. Alternatively, you can search for "Volvo manual" in
the App Store or Google Play.
The app contains a video along with exterior and interior images where different parts of the car are highlighted with so-called hotspots, which lead to articles about the area in question. It is easy to navigate between the different sections
in the owner's manual and the content is searchable.
The mobile app is available from both the App Store and Google Play.
Related information
•Reading the owner's manual (p. 21)
20
Volvo Cars support site
More information on your car is available on the Volvo Cars website and support site.
Support on the Internet
Go to support.volvocars.com to visit the site. The support site is available for most markets.
It contains support for functions such as webbased services and functions, Volvo On Call*, the navigation system* and apps. Videos and step- by-step instructions explain different procedures, e.g. how to connect the car to the Internet via a mobile phone.
Downloadable information
Maps
For cars equipped with Sensus Navigation there is the facility to download maps from the support page.
Owner's manuals as PDF
Owner's manuals are available for download in PDF format. Select car model and model year to download the manual as required.
Contact
The support site contains contact details to customer support and your nearest Volvo retailer.
Log in to Volvo Cars website
Create a personal Volvo ID and log in to www.volvocars.com. When you have logged in it is possible to get an overview of service, agree-
ments and warranties, amongst other things. Here there is also information about accessories and software adapted for your car model.
Related information
•Volvo ID (p. 26)
OWNER'S INFORMATION
Reading the owner's manual
A good way of getting to know your new car is to read the owner's manual, ideally before your first journey.
Reading the owner's manual is a good way to become familiar with new functions, get advice on how best to handle the car in different situations and learn how to make the best use of all the car's features. Please pay attention to the safety instructions contained in the owner's manual.
The intention of this owner's information is to explain all possible functions, options and accessories included in a Volvo vehicle. It is not intended as an indication or guarantee that all of these features, functions and options are included in every vehicle. Some terminology used may not exactly match terminology used in sales, marketing and advertising materials.
Development work is constantly underway in order to improve our product. Modifications may mean that information, descriptions and illustrations in the owner's manual differ from the equipment in the car. We reserve the right to make modifications without prior notice.
Do not remove this manual from the car - if problems should arise then the necessary information about where and how to seek professional help will be missing.
© Volvo Car Corporation
}}
* Option/accessory. 21
OWNER'S INFORMATION
||Options/accessories
In addition to standard equipment, the owner's manual also describes options (factory fitted equipment) and certain accessories (retrofitted extra equipment).
All, at the time of publication known, options and accessories are marked with an asterisk: *.
The equipment described in the owner's manual is not available in all cars - they have different equipment depending on adaptations for the needs of different markets and national or local laws and regulations.
In the event of uncertainty over what is standard or an option/accessory, contact a Volvo dealer.
Special texts
WARNING
Warning texts appear if there is a risk of injury.
IMPORTANT
"Important" texts appear if there is a risk of damage.
NOTE
NOTE texts give advice or tips that facilitate the use of e.g. features and functions.
Decals
The car contains different types of decal which are designed to convey important information in a simple and clear manner. The decals in the car have the following descending degree of importance for the warning/information.
Warning of personal injury
Black ISO symbols on yellow warning field, white text/image on black message field. Used to indicate the presence of danger which, if the warning is ignored, may result in serious personal injury or fatality.
Risk of property damage
White ISO symbols and white text/image on black or blue warning field and message field. Used to indicate the presence of danger which, if the warning is ignored, may result in damage to property.
22 |
* Option/accessory. |
Information
White ISO symbols and white text/image on black message field.
NOTE
It is not intended that the decals illustrated in the owner's manual should be exact replicas of those in the car. They are included to show their approximate appearance and location in the car. The information that applies to your particular car is available on the respective decals for your car.
Illustrations and video clips
Illustrations and video clips used in the owner's manual are sometimes schematic and are intended to provide an overall picture or example of a certain function. They may deviate from the
car's appearance depending on equipment level and market.
Related information
•Owner's manual in centre display (p. 17)
•Owner's Manual in mobile devices (p. 20)
•Volvo Cars support site (p. 21)
OWNER'S INFORMATION
The owner's manual and the environment
The Owner's Manual is printed on paper originating from controlled forests.
The Forest Stewardship Council (FSC)® symbol shows that the paper pulp in a printed owner's manual comes from FSC®-certified forests or other controlled sources.
Related information
•Drive-E - cleaner driving pleasure (p. 28)
23


YOUR VOLVO
YOUR VOLVO
Volvo ID
Volvo ID is a personal ID that gives access to a wide range of services via a single username and password.
NOTE
The services available may vary over time and depend on equipment level and market.
Examples of services:
•Volvo On Call app* – check the car with your phone. For example, you can check fuel level, show the nearest petrol station and lock the car remotely.
•Send to Car – send addresses from map services on the Web, directly to the car.
•Book service and repair – register your preferred workshop/dealer on volvocars.com and book service directly from the car.
NOTE
If the username/password for a service (e.g. Volvo On Call) is changed, then it is also changed automatically for other services.
Volvo ID is created from the car, volvocars.com or the Volvo On Call app1.
1 If you have Volvo On Call*.
2 Only applies to certain markets.
When a Volvo ID is registered in the car, several services will be made available. Several Volvo IDs can be used for the same car and several cars can even be connected to the same Volvo ID.
Related information
•Creating and registering a Volvo ID (p. 26)
•Book service and repair (p. 555)
Creating and registering a Volvo ID
It is possible to create a Volvo ID in different ways. If the Volvo ID is created at volvocars.com or with Volvo On Call app2, the Volvo ID must also be registered to the car to enable use of the various Volvo ID services.
Create a Volvo ID with the Volvo ID app
1.Download the Volvo ID app from Download Centre in the centre display's app view.
2.Start the app and register a personal email address.
3.Follow the instructions that are automatically sent to the specified email address.
>A Volvo ID has now been created and automatically registered to the car. Volvo ID services can now be used.
26 |
* Option/accessory. |

Create a Volvo ID on the Volvo Cars website
1.Go into www.volvocars.com and log in3 using the icon at the top right. Select Create Volvo ID.
2.Enter a personal email address.
3.Follow the instructions that are automatically sent to the specified email address.
>A Volvo ID has now been created. Read below to learn how to register the ID to the car.
Create a Volvo ID with the Volvo On Call app4
1.Download the latest version of the Volvo On Call app from a smartphone, via e.g. App Store, Windows Phone or Google Play.
2.Choose to create a Volvo ID from the app's start page and enter a personal email address.
3.Follow the instructions that are automatically sent to the specified email address.
>A Volvo ID has now been created. Read below to learn how to register the ID to the car.
3 Available on certain markets.
4 Cars with Volvo On Call*.
YOUR VOLVO
Registering your Volvo ID to the car
If you created your Volvo ID via the web or the Volvo On Call app, register it to your car as follows:
1.If not done already, download the Volvo ID app from Download Centre in the centre display's app view.
NOTE
To download apps, the car must be connected to the Internet.
2.Start the app and enter your Volvo ID/your email address.
3.Follow the instructions that are automatically sent to the email address linked to your Volvo ID.
>Your Volvo ID is now registered to the car. Volvo ID services can now be used.
Related information
•Volvo ID (p. 26)
•Downloading apps (p. 461)
•Managing system updates via the Download Centre (p. 553)
•Internet-connected car* (p. 493)
* Option/accessory. 27

YOUR VOLVO |
|
Drive-E - cleaner driving pleasure |
products and solutions in order to reduce the |
Volvo Car Corporation is constantly working on |
negative impact on the environment. |
|
|
the development of safer and more efficient |
|
|
|
|
|
Environmental care is one of Volvo Cars’ core values and influences all operations. The environmental work is based on the whole life cycle of the car and takes into account the environmental impact it has, from design to scrapping and recycling. Volvo Cars' basic principle is that every new product developed must have less impact on the environment than the product it replaces.
Volvo's environmental management work has resulted in the development of more effective and less polluting drivelines Drive-E. Personal environment is also important to Volvo - the air
inside a Volvo is, for example, cleaner than the air outside thanks to the climate control system.
Your Volvo complies with stringent international environmental standards. All Volvo's manufacturing units must be ISO 14001 certified, and this supports a systematic approach to the operation's environmental issues, which leads to continuous improvement with reduced environmental impact. Holding the ISO certificate also means that environmental laws and regulations in force are complied with. Volvo also requires that its partners must also meet these requirements.
Fuel consumption
Since a large part of a car's total environmental impact stems from its use, the emphasis of Volvo Cars' environmental work is on reducing fuel consumption, carbon dioxide emissions and other air pollutants. Volvo cars have competitive fuel consumption in each of their respective classes. Lower fuel consumption generally results in lower emission of the greenhouse gas, carbon dioxide.
28
Loading...