


 Loading...
W E B E D I T I O N
O W N E R ' S M A N U A L

DEAR VOLVO OWNER
THANK YOU FOR CHOOSING VOLVO
We hope you will enjoy many years of driving pleasure in your Volvo. The car has been designed for the safety and comfort of you and your passengers. Volvo is one of the safest cars in the world. Your Volvo has also been designed to satisfy all current safety and environmental requirements.
In order to increase your enjoyment of the car, we recommend that you familiarise yourself with the equipment, instructions and maintenance information contained in this owner's manual.

 Table of contents
01 Introduction
Owner's Manual in the car's screen......... |
13 |
|
Reading the owner's manual.................... |
13 |
|
Digital owner's manual in the car.............. |
16 |
|
Recording data......................................... |
18 |
|
|
01 |
19 |
Accessories and extra equipment............ |
||
Support and information about the car on |
|
|
the Internet................................................ |
20 |
|
Volvo ID..................................................... |
21 |
|
Environmental philosophy......................... |
22 |
|
The owner's manual and the environ- |
|
|
ment |
.......................................................... |
24 |
Laminated glass........................................ |
24 |
|
02 Safety |
|
General information on seatbelts.............. |
26 |
Seatbelt - putting on................................. |
27 |
Seatbelt - loosening.................................. |
28 |
Seatbelt - pregnancy................................ |
28 |
Seatbelt reminder...................................... |
29 |
Seatbelt tensioner..................................... |
29 |
Safety - warning symbol........................... |
30 |
Airbag system........................................... |
31 |
Airbags on driver's side............................ |
32 |
Passenger airbag...................................... |
32 |
Passenger airbag - activating/deactivat- |
|
ing*............................................................ |
34 |
Side airbag (SIPS)..................................... |
36 |
Side airbag (SIPS) - child seat/booster |
|
cushion..................................................... |
37 |
Inflatable Curtain (IC)................................ |
37 |
General02information on WHIPS (whiplash |
|
protection)................................................. |
38 |
WHIPS - child seats.................................. |
39 |
WHIPS - seating position.......................... |
39 |
When the systems deploy......................... |
40 |
General information on safety mode......... |
41 |
Safety mode - attempting to start the |
|
car............................................................. |
42 |
Safety mode - moving the car.................. |
43 |
|
|
|
......................................Pedestrian airbag |
43 |
|
Pedestrian airbag - moving the car........... |
44 |
|
Pedestrian airbag - folding up.................. |
44 |
|
General information on child safety.......... |
45 |
|
02 |
46 |
|
Child seats................................................ |
||
Child seats - location................................ |
50 |
|
Child seat - ISOFIX................................... |
51 |
|
ISOFIX - size classes................................ |
51 |
|
ISOFIX - types of child seat...................... |
52 |
|
Child seats - upper mounting points........ |
54 |
|
|
|
|
2 * Option/accessory, for more information, see Introduction.

Table of contents 
03 Instruments and controls |
|
Instruments and controls, left-hand drive |
|
car - overview........................................... |
56 |
Instruments and controls, right-hand |
|
drive car - overview................................... |
59 |
Combined instrument panel...................... |
62 |
Analogue combined instrument panel - |
|
overview.................................................... |
62 |
Digital combined instrument panel - |
|
overview.................................................... |
63 |
Eco guide & Power guide*........................ |
66 |
Combined instrument panel - meaning of |
|
indicator symbols...................................... |
67 |
Combined instrument cluster - meaning |
|
of warning symbols................................... |
69 |
Outside temperature gauge...................... |
71 |
Trip meter.................................................. |
71 |
Clock......................................................... |
71 |
Combined03instrument panel - license |
|
agreement................................................. |
72 |
Symbols in the display.............................. |
73 |
Volvo Sensus............................................ |
75 |
Key positions............................................ |
76 |
Key positions - functions at different lev- |
|
els.............................................................. |
77 |
Seats, front................................................ |
78 |
Seats, front - electrically operated............ |
80 |
Seats, rear................................................. |
81 |
Steering wheel.......................................... |
83 |
Light switches........................................... |
84 |
Position/parking lamps............................. |
86 |
Daytime running lights.............................. |
86 |
Tunnel detection*...................................... |
87 |
Main/dipped beam.................................... |
87 |
Active main beam*.................................... |
88 |
Active Xenon headlamps*......................... |
90 |
Rear fog lamp........................................... |
90 |
Brake lights............................................... |
91 |
Hazard warning flashers........................... |
91 |
direction indicators................................... |
92 |
Interior lighting.......................................... |
93 |
Home safe light duration........................... |
94 |
............................ |
94 |
Approach03light duration |
|
Headlamps - adjusting headlamp pat- |
|
tern............................................................ |
95 |
Wipers and washers................................. |
98 |
Power windows....................................... |
100 |
Door mirrors............................................ |
102 |
Windows and rearview and door mirrors |
|
- heating.................................................. |
103 |
Rearview mirror - interior........................ |
104 |
Glass roof*.............................................. |
104 |
Compass*............................................... |
105 |
Menu navigation - combined instrument |
|
panel....................................................... |
106 |
tion 03 |
|
Menu overview - analogue combined |
|
instrument panel..................................... |
107 |
Menu overview - digital combined instru- |
|
ment panel.............................................. |
107 |
Messages................................................ |
107 |
Messages - handling............................... |
108 |
MY CAR.................................................. |
109 |
Trip computer......................................... |
110 |
Trip computer - analogue combined |
|
instrument panel..................................... |
111 |
Trip computer - digital combined instru- |
|
ment panel.............................................. |
115 |
Trip computer - supplementary informa- |
|
.......................................................... |
119 |
Trip computer - trip statistics*................ |
120 |
* Option/accessory, for more information, see Introduction. |
3 |
|
|
 Table of contents
04 Climate control |
|
General information on climate control... |
122 |
Actual temperature................................. |
123 |
Sensors - climate control........................ |
123 |
Air quality................................................ |
123 |
Air quality - passenger compartment fil- |
|
ter............................................................ |
124 |
Air quality - Clean Zone Interior Package |
|
(CZIP)*..................................................... |
124 |
Air quality - IAQS*................................... |
125 |
Air quality - material................................ |
125 |
Menu settings - climate control.............. |
125 |
Air distribution in the passenger com- |
|
partment.................................................. |
126 |
Electronic climate control - ECC*........... |
128 |
Electronic temperature control - ETC..... |
129 |
Heated front seats*................................. |
130 |
.................................... |
130 |
Heated04rear seat* |
|
Fan.......................................................... |
131 |
Auto-regulation....................................... |
131 |
Temperature control in the passenger |
|
compartment.......................................... |
132 |
Air conditioning....................................... |
132 |
Demisting and defrosting the wind- |
|
screen..................................................... |
133 |
Air distribution - recirculation.................. |
134 |
|
|
|
|
|
|
|
|
|
|
|
05 Loading and storage |
|
|
Air distribution - table............................. |
135 |
|
Storage spaces....................................... |
144 |
||
Engine block heater and passenger com- |
|
|
Storage compartment driver’s side........ |
146 |
||
partment heater*..................................... |
137 |
|
Tunnel console |
146 |
||
Engine block heater and passenger com- |
|
|
||||
|
|
Tunnel console - armrest |
146 |
|||
partment heater* - direct start |
138 |
|
||||
|
Tunnel console - cigarette lighter and |
|
||||
Engine block heater and passenger com- |
|
|
|
|||
|
|
ashtray* |
147 |
|||
partment heater* - immediate stop |
139 |
|
||||
|
Glovebox |
147 |
||||
Engine block heater and passenger com- |
|
|
||||
|
|
Glovebox - cooling* |
147 |
|||
partment heater* - timer.......................... |
139 |
|
||||
Engine block heater and passenger com- |
|
|
Inlay mats*.............................................. |
148 |
||
partment heater* - messages................. |
140 |
|
Vanity mirror |
148 |
||
Additional heater* |
141 |
|
||||
|
Tunnel console - 12 V-sockets |
148 |
||||
Fuel-driven additional heater* |
141 |
|
||||
|
Loading |
149 |
||||
Electric additional heater* |
142 |
|
||||
|
Loading - long load |
150 |
||||
|
|
|
|
|||
|
|
|
|
Roof load................................................. |
150 |
|
|
|
|
|
Load retaining eyelets............................. |
151 |
|
04 |
|
Loading05- bag holder ............................. |
151 |
|||
|
|
|||||
|
|
|
|
Loading - folding bag holder*................. |
151 |
|
|
|
|
|
12 V socket - cargo area......................... |
152 |
|
|
|
|
|
Cargo net................................................ |
153 |
|
|
|
|
|
Hat shelf.................................................. |
155 |
|
|
|
|
|
|
|
|
4 * Option/accessory, for more information, see Introduction.

Table of contents 
06 Locks and alarm
Remote control key................................. |
157 |
Keyless Drive* - interference to remote |
|
|
Remote control key - losing |
157 |
control key function................................ |
168 |
|
Keyless Drive* - locking |
169 |
|||
Remote control key - personalisation* |
158 |
|||
Keyless Drive* - unlocking |
169 |
|||
Locking/unlocking - indicator |
159 |
|||
Keyless Drive* - unlocking with the key |
|
|||
Lock indicator |
159 |
|
||
blade |
170 |
|||
Remote control key - electronic immobi- |
|
|||
|
Keyless Drive* - lock settings |
170 |
||
liser |
160 |
|||
Keyless Drive* - antenna location |
171 |
|||
Remote-controlled immobiliser with |
|
|||
|
|
|
||
tracking system*..................................... |
160 |
Locking/unlocking - from the outside .... |
171 |
|
Remote control key - functions............... |
161 |
Manual locking of the door..................... |
172 |
|
Remote control key - range.................... |
162 |
Locking/unlocking - from the inside....... |
173 |
|
Remote control key with PCC* - unique |
|
Total airing function................................ |
174 |
|
functions................................................. |
163 |
Locking/unlocking - glovebox |
174 |
|
Remote control key with PCC* - range |
164 |
|||
Locking/unlocking - tailgate |
174 |
|||
Detachable key blade |
164 |
|||
Locking/unlocking - fuel filler flap |
176 |
|||
Detachable key blade - detaching/ |
|
|||
165 |
Deadlocks* |
176 |
||
|
||||
attaching06................................................. |
Child06safety locks - manual activation |
177 |
||
165 |
||||
Detachable key blade - unlocking doors |
Child safety locks - electrical activation* |
178 |
||
Remote control key/PCC - replacing the |
|
|||
|
Alarm |
179 |
||
battery..................................................... |
166 |
|||
Keyless drive*.......................................... |
167 |
Alarm indicator........................................ |
180 |
|
Keyless Drive* - range............................. |
167 |
Alarm - automatic re-arming................... |
180 |
|
Keyless Drive* - secure handling of the |
|
Alarm - automatic arming....................... |
180 |
|
remote control key.................................. |
168 |
Alarm - remote control key not working. 181 |
||
|
|
|||
|
|
Alarm signals........................................... |
181 |
|
Reduced alarm level............................... |
181 |
Type approval - remote control key sys- |
|
tem.......................................................... |
182 |
06
* Option/accessory, for more information, see Introduction. |
5 |
|
|

 Table of contents
07 Driver support |
|
Electronic stability control (ESC) - gen- |
|
eral.......................................................... |
184 |
Electronic stability control (ESC) - opera- |
|
tion.......................................................... |
185 |
Electronic stability control (ESC) - sym- |
|
bols and messages................................. |
186 |
Road Sign Information (RSI)................... |
188 |
Road sign information (RSI)* - operation |
188 |
Road sign information (RSI)* - limitations |
190 |
Speed limiter*.......................................... |
190 |
Speed limiter* - getting started............... |
191 |
Speed limiter* - changing speed............. |
192 |
Speed limiter - temporary deactivation |
|
and standby mode*................................. |
192 |
Speed limiter* - alarm for speed excee- |
|
ded.......................................................... |
193 |
Speed limiter* - deactivation................... |
194 |
........................................ |
194 |
Cruise07control* |
|
Cruise control* - managing speed.......... |
195 |
Cruise control* temporary deactivation |
|
and standby mode.................................. |
196 |
Cruise control* - resume set speed........ |
197 |
Cruise control* - deactivate.................... |
198 |
Adaptive cruise control (ACC)*............... |
199 |
Adaptive cruise control* - function......... |
200 |
|
|
|
|
|
|
|
|
|
|
|
|
|
|
|
|
|
|
|
|
|
|
|
|
|
|
|
........Adaptive cruise control* - overview |
202 |
|
........................City Safety™ - operation |
218 |
||||
Adaptive cruise control* - managing |
|
|
|
City Safety™ - limitations....................... |
219 |
|||
speed...................................................... |
203 |
|
City Safety™ - laser sensor |
221 |
||||
Adaptive cruise control* - set time inter- |
|
|
|
|||||
|
|
|
City Safety™ - symbols and messages.. 223 |
|||||
val |
204 |
|
||||||
|
Collision warning system* |
224 |
||||||
Adaptive cruise control* - temporary |
|
|
|
|||||
|
|
|
Collision warning system* - function |
225 |
||||
deactivation, and standby mode............ |
205 |
|
||||||
Adaptive cruise control* - overtaking |
|
|
|
Collision warning system* - detection of |
|
|
||
another vehicle........................................ |
206 |
|
cyclists.................................................... |
226 |
||||
Adaptive cruise control* - deactivate...... |
206 |
|
Collision warning system* - detection of |
227 |
||||
Adaptive Cruise Control* - queue assis- |
|
|
|
pedestrians............................................. |
||||
|
|
|
Collision warning system* - operation |
228 |
||||
tance....................................................... |
206 |
|
||||||
Adaptive cruise control* - switch cruise |
|
|
|
Collision warning system* - limitations... |
229 |
|||
control functionality................................ |
208 |
|
Collision warning system* - camera sen- |
|
|
|||
Radar sensor........................................... |
209 |
|
sor limitations.......................................... |
230 |
||||
Radar sensor - limitations....................... |
209 |
|
Collision warning system* - symbols and |
232 |
||||
Adaptive cruise control* - fault tracing |
|
|
|
messages................................................ |
||||
211 |
|
Driver Alert System* |
233 |
|||||
............................................... |
|
|
||||||
and action07 |
|
07 |
|
|
||||
Adaptive cruise control* - symbols and |
|
|
|
Driver Alert Control (DAC)*...................... |
233 |
|||
messages................................................ |
212 |
|
Driver Alert Control (DAC)* - operation |
234 |
||||
Distance Warning* |
214 |
|
||||||
|
Driver Alert Control (DAC)* - symbols and |
|
|
|||||
Distance Warning* - limitations............... |
215 |
|
messages................................................ |
235 |
||||
Distance Warning* - symbols and mes- |
|
|
|
Lane assistance*..................................... |
236 |
|||
sages....................................................... |
216 |
|
Lane Keeping Aid - function |
236 |
||||
City Safety™ |
217 |
|
||||||
|
Lane Keeping Aid - operation |
238 |
||||||
City Safety™ - function |
217 |
|
||||||
|
Lane Keeping Aid - limitations |
238 |
||||||
|
|
|
|
|
||||
|
|
|
|
|
|
|
|
|
6 * Option/accessory, for more information, see Introduction.

Table of contents 
|
|
|
|
|
|
|
|
|
|
|
|
|
|
|
|
|
|
|
|
|
|
|
|
|
|
|
|
|
|
08 Starting and driving |
|
|
|
|
|
Lane Keeping Aid - symbols and mes- |
|
|
|
|
Alcohol lock*........................................... |
261 |
|||||
sages....................................................... |
240 |
|
Alcohol lock* - functions and operation.. 261 |
||||||||
Park Assist* |
241 |
|
|||||||||
|
Alcohol lock* - storage |
262 |
|||||||||
Park assist syst* - function |
241 |
|
|||||||||
|
Alcohol lock* - before starting the engine |
|
262 |
||||||||
messages07 |
|
|
|||||||||
|
08 |
|
|
|
|||||||
Park assist syst* - backward.................. |
243 |
|
Alcohol lock* - to bear in mind................ |
264 |
|||||||
......................Park assist syst* - forward |
243 |
|
Alcohol lock* - symbols and messages.. 265 |
||||||||
...........Park assist syst* - fault indication |
244 |
|
Starting the engine.................................. |
266 |
|||||||
Park assist syst* - cleaning the sensors. 244 |
|
Switching off the engine......................... |
267 |
||||||||
..................................Park assist camera |
245 |
|
Steering lock........................................... |
267 |
|||||||
.................Park assist camera - settings |
247 |
|
Jump starting |
268 |
|||||||
Park assist camera - limitations |
249 |
|
|||||||||
|
Gearboxes |
269 |
|||||||||
Park Assist Pilot (PAP)* |
249 |
|
|||||||||
|
Manual gearbox |
269 |
|||||||||
Park Assist Pilot (PAP)* - function |
250 |
|
|||||||||
|
Gear shift indicator* |
270 |
|||||||||
Park Assist Pilot (PAP)* - operation |
250 |
|
|||||||||
|
Automatic gearbox - Geartronic* |
270 |
|||||||||
Park Assist Pilot (PAP)* - limitations |
252 |
|
|||||||||
|
Automatic gearbox - Powershift* |
274 |
|||||||||
Active Park Assist (PAP)* - symbols and |
|
|
|
|
|||||||
253 |
|
Gear selector inhibitor |
276 |
||||||||
|
|
|
|||||||||
................................................ |
|
|
Hill start assist (HSA)* |
277 |
|||||||
BLIS |
254 |
|
|||||||||
|
Start/Stop* |
277 |
|||||||||
BLIS - operation |
255 |
|
|||||||||
|
Start/Stop* - function and operation |
278 |
|||||||||
CTA* |
256 |
|
|||||||||
|
Start/Stop* - the engine does not stop |
279 |
|||||||||
BLIS and CTA - symbols and messages |
258 |
|
|||||||||
|
Start/Stop* - the engine auto-starts |
281 |
|||||||||
Adjustable steering force |
259 |
|
|||||||||
|
Start/Stop* - the engine does not auto- |
|
|
|
|
||||||
Type approval - radar system |
259 |
|
|
|
|
|
|||||
|
start |
282 |
|||||||||
|
|
|
|
|
|
||||||
|
|
|
|
|
|
|
|
|
|
|
|
Start/Stop* - involuntary stop manual |
|
gearbox................................................... |
282 |
Start/Stop* - settings.............................. |
283 |
Start/Stop* - symbols and messages..... |
284 |
ECO*....................................................... |
286 |
Foot brake............................................... |
288 |
Foot brake - anti-lock braking system.... |
289 |
Foot brake - emergency brake lights and |
|
automatic hazard warning flashers......... |
290 |
Foot brake - emergency brake assis- |
|
tance....................................................... |
290 |
Parking brake.......................................... |
290 |
Driving in water....................................... |
291 |
Overheating............................................. |
292 |
Driving with open tailgate....................... |
293 |
Overload - starter battery........................ |
293 |
.............................. |
293 |
Before08a long journey |
|
Winter driving.......................................... |
294 |
Fuel filler flap - Opening/closing............. |
294 |
Fuel filler flap - manual opening.............. |
295 |
Filling up with fuel................................... |
295 |
Fuel - handling........................................ |
296 |
Fuel - petrol............................................. |
296 |
Fuel - diesel............................................. |
297 |
* Option/accessory, for more information, see Introduction. |
7 |
|
|

 Table of contents
Catalytic converters................................ |
298 |
|
Filling with fuel - with a fuel can.............. |
299 |
|
Diesel particle filter (DPF)........................ |
299 |
|
Economical driving.................................. |
300 |
|
Driving with a trailer................................ |
301 |
|
Driving with a trailer - manual gearbox... |
302 |
|
Driving with a trailer - automatic gearbox |
|
302 |
Towing bracket....................................... |
303 |
|
Detachable towbar* - storage................. |
303 |
|
Detachable towbar* - specifications....... |
304 |
|
Detachable towbar* - attachment/ |
|
|
removal................................................... |
304 |
|
Trailer Stability Assist - TSA.................... |
307 |
|
Towing.................................................... |
308 |
|
Towing eye.............................................. |
309 |
|
................................................. |
310 |
|
Recovery08 |
|
|
09 Wheels and tyres
Tyres - maintenance............................... |
312 |
Tyre pressure monitoring (TPMS)* - acti- |
|
|
Tyres - direction of rotation |
313 |
vate/deactivate....................................... |
328 |
|
Tyre pressure monitoring (TPMS)* - rec- |
|
|||
Tyres - tread wear indicators |
314 |
|
||
ommendations |
328 |
|||
Tyres - air pressure |
314 |
|||
Tyre pressure monitoring (TPMS)* - driv- |
|
|||
Wheel and wheel rim dimensions |
315 |
|
||
eable punctured tyres*............................ |
329 |
|||
Tyres - dimensions.................................. |
315 |
Tyre pressure monitoring (TPMS)* - recti- |
|
|
Tyres - load index |
316 |
fying low tyre pressure............................ |
329 |
|
Tyre pressure monitoring (TM)* |
330 |
|||
Tyres - speed ratings |
316 |
|||
Emergency puncture repair* |
331 |
|||
Wheel nuts |
317 |
|||
Emergency puncture repair kit* - loca- |
|
|||
Winter tyres |
317 |
|
||
tion |
332 |
|||
Spare wheel* |
318 |
|||
Emergency puncture repair kit* - over- |
|
|||
Changing wheels - taking out the spare |
|
333 |
||
319 |
view......................................................... |
|||
wheel*..................................................... |
Emergency puncture repair* - operation. 334 |
|||
Changing wheels - removing wheels |
319 |
|||
Emergency puncture repair* - recheck- |
|
|||
Changing wheels - fitting |
321 |
|
||
ing........................................................... |
336 |
|||
Warning triangle...................................... |
323 |
Inflating tyres with the compressor from |
|
|
09 |
|
|||
the emergency09puncture repair kit*......... |
337 |
|||
Jack........................................................ |
324 |
Emergency puncture repair* - returning |
|
|
First aid kit*............................................. |
324 |
337 |
||
Tyre pressure monitoring* |
324 |
components to their places.................... |
||
Emergency puncture repair kit* - sealant |
338 |
|||
Tyre pressure monitoring system |
|
|||
|
Type approval - tyre pressure monitoring |
|
||
(TPMS)* - general.................................... |
325 |
339 |
||
Tyre pressure monitoring (TPMS)* - |
|
(TPMS).................................................... |
||
|
|
|
||
adjust (recalibration)................................ |
326 |
|
|
|
Tyre pressure monitoring system |
|
|
|
|
(TPMS)* - status...................................... |
327 |
|
|
|
8 * Option/accessory, for more information, see Introduction.
Table of contents 
10 Maintenance and service |
|
Volvo service programme....................... |
346 |
Book service and repair*......................... |
346 |
Raising the car........................................ |
349 |
Bonnet - opening and closing................. |
351 |
Engine compartment - overview............. |
351 |
Engine compartment - checking............. |
352 |
Engine oil - general................................. |
352 |
Engine oil - checking and filling.............. |
353 |
Coolant - level......................................... |
355 |
Brake and clutch fluid - level.................. |
356 |
Climate control system - fault tracing and |
|
repair....................................................... |
357 |
Lamp replacement - general................... |
357 |
Lamp replacement - location of front |
|
lamps...................................................... |
358 |
Lamp replacement - headlamps............. |
358 |
Lamp replacement10- cover for main/ |
|
dipped beam bulbs................................. |
359 |
Lamp replacement - dipped beam......... |
359 |
Lamp replacement - main beam............. |
360 |
Lamp replacement - extra main beam.... |
360 |
Lamp replacement - direction indicators |
|
front......................................................... |
360 |
Lamp replacement - position/parking |
|
lamps front.............................................. |
361 |
Lamp replacement - daytime running |
|
lights....................................................... |
361 |
Lamp replacement - location of rear |
|
lamps...................................................... |
361 |
Lamp replacement - direction indicators |
|
rear, brake lights and reversing lamp..... |
362 |
Lamp replacement - rear fog lamp......... |
362 |
Lamp replacement - vanity mirror light- |
|
ing........................................................... |
363 |
Lamps - specifications ........................... |
363 |
Wiper blades........................................... |
364 |
Washer fluid - filling................................ |
366 |
Starter battery - general.......................... |
367 |
Battery - symbols.................................... |
369 |
Starter battery - replacement.................. |
369 |
Battery - Start/Stop................................. |
370 |
..................................... |
372 |
Electrical10system |
|
Fuses - general....................................... |
372 |
Fuses - in engine compartment.............. |
373 |
Fuses - under glovebox.......................... |
376 |
Fuses - under the right-hand front seat.. 379 |
|
Car wash................................................. |
381 |
Polishing and waxing.............................. |
382 |
Water and dirt-repellent coating............. |
383 |
Rustproofing........................................... |
384 |
Cleaning the interior................................ |
384 |
Paint damage.......................................... |
385 |
10
* Option/accessory, for more information, see Introduction. |
9 |
|
|

 Table of contents
|
|
|
|
|
|
11 Specifications |
|
|
12 Alphabetical Index |
|
|
Type designations................................... |
388 |
|
Alphabetical Index.................................. |
408 |
|
Dimensions............................................. |
390 |
|
|
|
|
Weights |
................................................... |
391 |
|
|
|
Towing capacity ..........and towball load |
392 |
|
12 |
|
|
|
11 |
394 |
|
|
|
Engine specifications.............................. |
|
|
|
||
Engine oil ...- adverse driving conditions |
395 |
|
|
|
|
Engine oil ................- grade and volume |
396 |
|
|
|
|
Coolant ...................- grade and volume |
398 |
|
|
|
|
Transmission ...fluid - grade and volume |
399 |
|
|
|
|
Brake fluid ...............- grade and volume |
400 |
|
|
|
|
Fuel tank ..................................- volume |
401 |
|
|
|
|
Air conditioning, fluid - volume and |
|
|
|
|
|
grade....................................................... |
|
402 |
|
|
|
Fuel consumption ...and CO2 emissions |
403 |
|
|
|
|
Tyres - approved .............tyre pressures |
407 |
|
|
|
|
|
|
|
|
|
|
10

Table of contents 
11

INTRODUCTION
Owner's Manual in the car's screen
A digital version of the owner's manual is available1 on the car's screen. The owner's manual provides information about how the car works.
For cars with owner information in the screen, the printed owner's manual is a supplement and contains important text, the latest updates, as well as instructions that can be useful when, for practical reasons, it is not possible to read the information on the screen.
The owner's manual is also available on Volvo's support page and can be downloaded as a mobile app.
Changing the display language may mean that some information does not correspond to national or local laws and regulations.
IMPORTANT
The driver is always responsible that the vehicle is driven safely in traffic and that applicable laws and regulations are followed. It is also important that the car is maintained and handled in accordance with Volvo's recommendations in the owner's information.
If there should be a difference between the information on the screen and in the printed manual then it is always the printed information that applies.
1 Applies to certain car models.
Reading the owner's manual
A good way of getting to know your new car is to read the owner's manual, ideally before your first journey.
Reading the owner's manual is a good way to become familiar with new functions, get advice on how best to handle the car in different situations and learn how to make the best use of all the car's features. Please pay attention to the safety instructions contained in the owner's manual.
The specifications, design features and illustrations in this owner's manual are not binding. We reserve the right to make modifications without prior notice.
© Volvo Car Corporation
Owner's Manual in mobile devices
01 Introduction 
NOTE
The Owner's manual is available for download as a mobile application (applies for certain car models and mobile devices), see www.volvocars.com.
The mobile application also includes video and searchable content and easy navigation between different sections.
Options/accessories
All types of option/accessory are marked with an asterisk*.
In addition to standard equipment, the owner's manual also describes options (factory fitted equipment) and certain accessories (retrofitted extra equipment).
The equipment described in the owner's manual is not available in all cars - they have different equipment depending on adaptations for the needs of different markets and national or local laws and regulations.
In the event of uncertainty over what is standard or an option/accessory, contact a Volvo dealer.
* Option/accessory, for more information, see Introduction.
01
}}
13
01 Introduction
01 |
|| |
|
Special texts |
||
|
WARNING
Warning texts appear if there is a risk of injury.
IMPORTANT
"Important" texts appear if there is a risk of damage.
NOTE
NOTE texts give advice or tips that facilitate the use of features and functions for example.
Footnote
There is footnote information in the owner's manual that is located at the bottom of the page. This information is an addition to the text that it refers to via a number. If the footnote refers to text in a table then letters are used instead of numbers for referral.
Message texts
In the car there are displays that show menu texts and message texts. In the owner's manual the appearance of these texts differs from the normal text. Examples of menu texts and message texts: Media, Sending location.
14
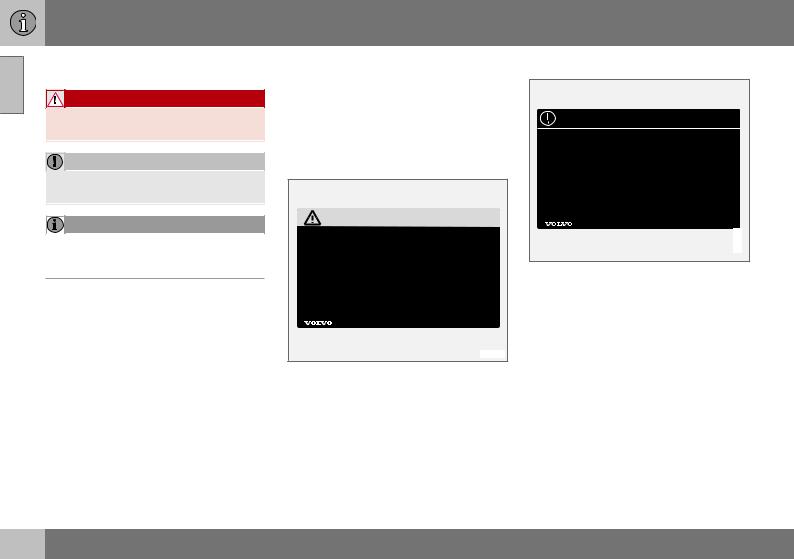
Decals
The car contains different types of decal which are designed to convey important information in a simple and clear manner. The decals in the car have the following descending degree of importance for the warning/ information.
Warning for personal injury
G031590
Black ISO symbols on yellow warning field, white text/image on black message field. Used to indicate the presence of danger which, if the warning is ignored, may result in serious personal injury or fatality.
Risk of property damage
G031592
White ISO symbols and white text/image on black or blue warning field and message field. Used to indicate the presence of danger which, if the warning is ignored, may result in damage to property.
Information
G031593
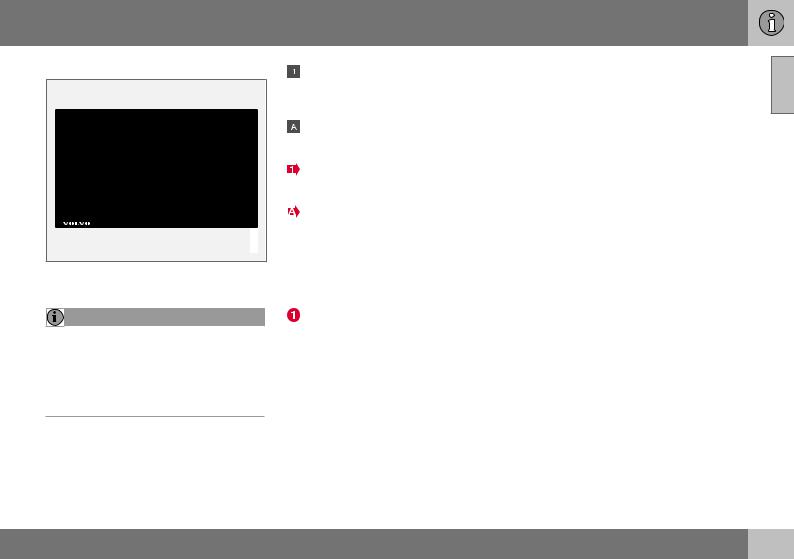
White ISO symbols and white text/image on black message field.
NOTE
It is not intended that the decals illustrated in the owner's manual should be exact replicas of those in the car. They are included to show their approximate appearance and location in the car. The information that applies to your particular car can be found on the decal on the car.
Procedure lists
Procedures where action must be taken in a certain sequence are numbered in the owner's manual.
When there is a series of illustrations for step-by-step instructions each step is numbered in the same way as the corresponding illustration.
Lists of letters appear adjacent to the series of illustrations where the order of the instructions is not significant.
Arrows appear numbered and unnumbered and are used to illustrate a movement.
Arrows with letters are used to clarify a movement when the reciprocal order is of no relevance.
If there is no series of illustrations for step-by- step instructions then the different steps are numbered with normal numbers.
Position lists
Red circles containing a number are used in overview images where different components are pointed out. The number recurs in the position list featured in connection with the illustration that describes the item.
Bulleted lists
A bulleted list is used when there is a list of points in the owner's manual.
Example:
•Coolant
•Engine oil
01 Introduction
Related information |
01 |
|
Related information refers to other articles containing closely-associated information.
Images
The manual's images are sometimes schematic and may deviate from the car's appearance depending on equipment level and market.
To be continued
}} This symbol is located furthest down to the right when an article continues on the following page.
Continued from previous page
|| This symbol is located furthest up to the left when an article continues from the previous page.
Related information
•The owner's manual and the environment (p. 24)
•Support and information about the car on the Internet (p. 20)
15
 01 Introduction
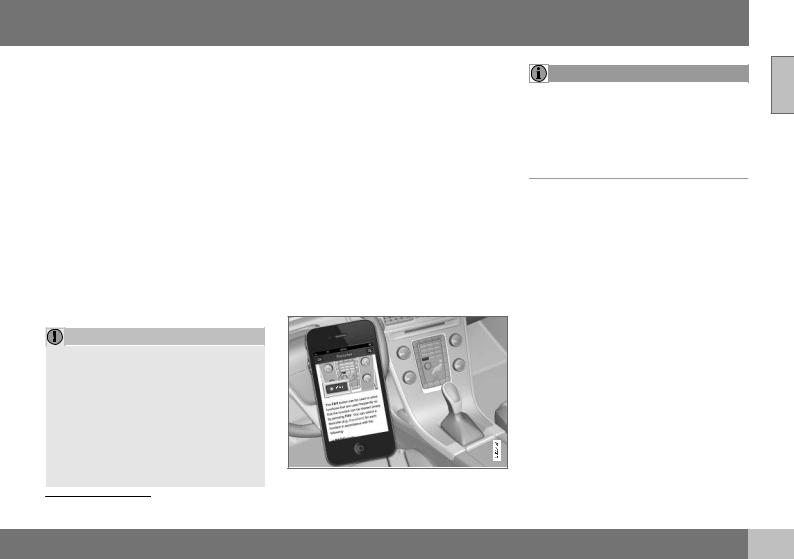
01Digital owner's manual in the car
The owner's manual can be read on the screen in the car2. The content is searchable and it is easy to navigate between different sections.
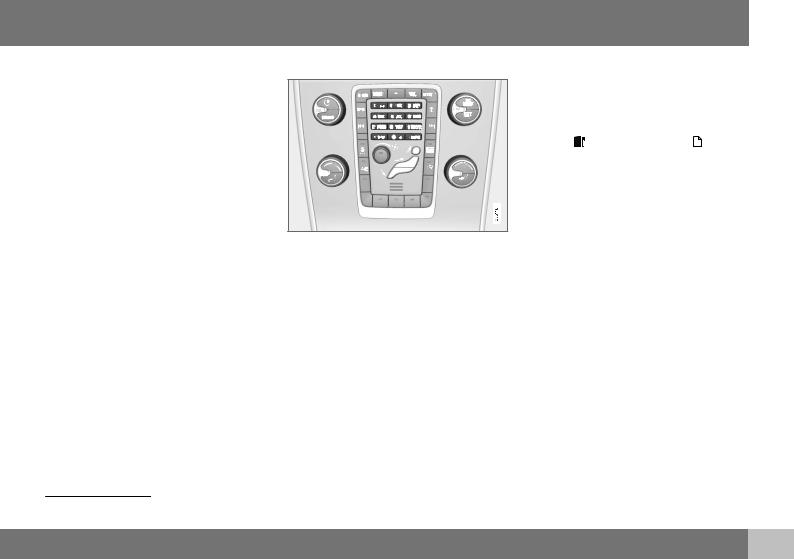
Open the digital owner's manual - press the MY CAR button in the centre console, press
OK/MENU and select Owner's manual.
For basic navigation, see Operating the system. See below for a more detailed description.
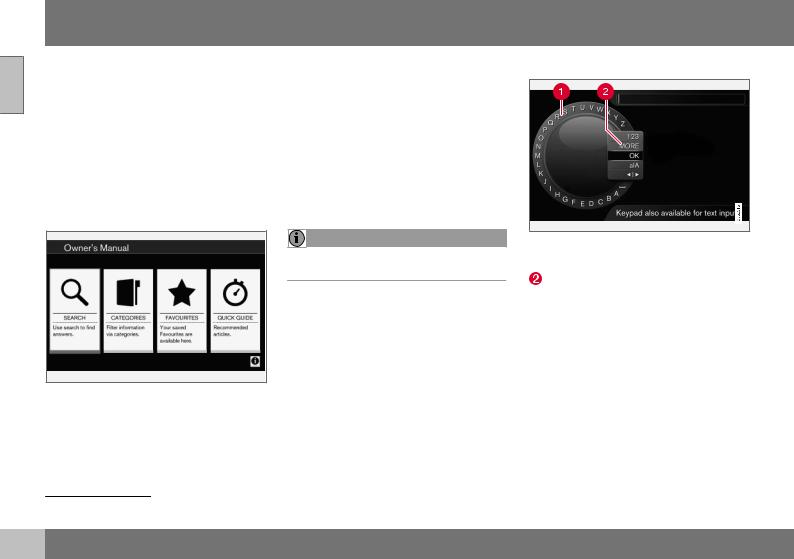
Owner's manual, start page.
There are four options for finding information in the digital owner's manual:
•Search - Search function for finding an article.
•Categories - All articles sorted into categories.
•Favourites - Quick access to favouritebookmarked articles.
•Quick Guide - A selection of articles for common functions.
Select the information symbol in the lower right-hand corner in order to obtain information about the digital owner's manual.
NOTE
The digital owner's manual is not available while driving.
Search
Searching using the character wheel.
 Character list.
Changing the input mode (see following table).
Use the character wheel to enter a search term, e.g. "seatbelt".
1.Turn TUNE to the desired letter, press OK/MENU to confirm. The number and letter buttons on the control panel in the centre console can also be used.
2.Continue with the next letter and so on.
2 Applies to certain car models.
16
3.To change the input mode to numbers or special characters, or to perform a search, turn TUNE to one of the options (see explanation in the following table) in the list for changing the input mode (2), press OK/MENU.
123/AB |
Change between letters and |
C |
numbers with OK/MENU. |
|
|
MORE |
Change to special characters |
|
with OK/MENU. |
|
|
OK |
Perform the search. Turn TUNE |
|
to select a search result article, |
|
press OK/MENU to go to the |
|
article. |
|
|
a|A |
Changes between lowercase |
|
and uppercase letters with OK/ |
|
MENU. |
|
|
| | } |
Changes from the character |
|
wheel to the search field. Move |
|
the cursor with TUNE. Delete |
|
any misspelling with EXIT. To |
|
return to the character wheel, |
|
press OK/MENU. |
|
Note that the digit and letter |
|
buttons on the control panel |
|
can be used for editing in the |
|
search field. |
|
|
Enter with the numerical keyboard
Numerical keyboard.
Another way of entering characters is to use the centre console's buttons 0-9, * and #.
When e.g. 9 is pressed, a bar appears with all characters3 under the button, e.g. W, x, y, z and 9. Quick presses on the button move the cursor through these characters.
•Stop with the cursor on the desired character in order to select it - the character is shown on the enter line.
•Delete/undo using EXIT.
To enter a number, hold in the corresponding number key.
Categories
The articles in the owner's manual are structured into main categories and subcategories.
01 Introduction 
The same article can be in several appropri- |
01 |
|
|
ate categories in order to be found more |
|
easily. |
|
Turn TUNE to navigate in the category tree |
|
|
|
and press OK/MENU to open a category - |
|
selected |
|
- or article - selected . Press |
|
||
EXIT to go back to the previous view. |
||
Favourites
Located here are the articles that are saved as favourites. To select an article as a favourite, see the heading "Navigating in an article" below.
Turn TUNE to navigate in the favourite list and press OK/MENU to open an article. Press EXIT to go back to the previous view.
Quick Guide
Located here is a selection of articles for getting to know the car's most common functions. The articles can also be accessed via categories, but are collected here for quick access.
Turn TUNE to navigate in the Quick Guide and press OK/MENU to open an article. Press EXIT to go back to the previous view.
3 The character for each button may vary depending on market/country/language.
}}
17
01 Introduction
|
|| |
|
|
|
|
|
|
|
|
|
||
01 |
|
|||||||||||
Navigating in an article |
Related information |
|||||||||||
|
||||||||||||
|
|
|
|
|
|
|
|
|
|
|
• Support and information about the car on |
|
|
|
|
|
|
|
|
|
|
|
|
||
|
|
|
|
|
|
|
|
|
|
|
the Internet (p. 20) |
|
|
|
|
|
|
|
|
|
|
|
|
|
|
|
|
|
|
|
|
|
|
|
|
|
|
|
|
|
|
|
|
|
|
|
|
|
|
|
|
|
|
|
|
|
|
|
|
|
|
|
|
|
|
|
|
|
|
|
|
|
|
|
|
|
|
|
|
|
|
|
|
|
|
|
|
|
|
|
|
|
|
|
|
|
|
|
|
|
|
|
|
|
|
|
|
|
|
|
|
|
|
|
|
|
|
|
|
|
|
|
|
|
|
|
|
|
|
|
|
|
|
|
|
|
|
|
|
|
|
|
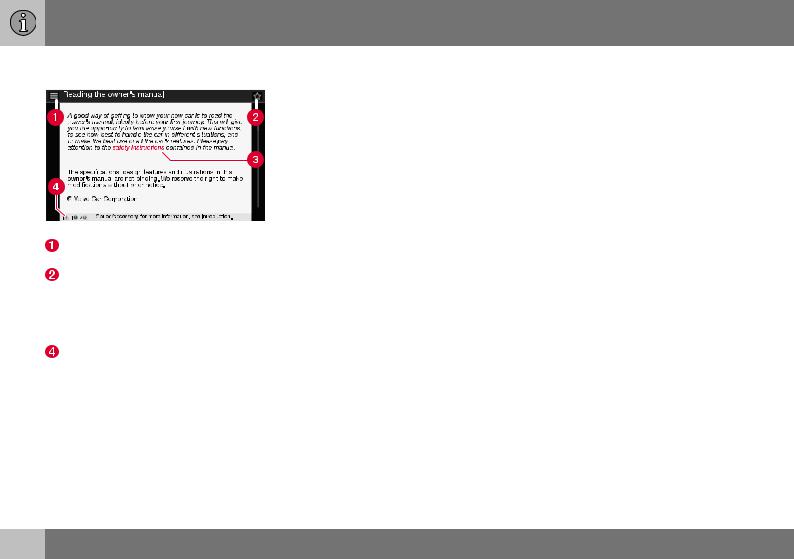
Home - leads to the start page for the owner's manual.
Favourite - adds/removes an article as a favourite. You can also press the FAV button in the centre console to add/ remove an article as a favourite.
 Highlighted link - leads to linked article.
Special texts - if the article contains warnings, important or note texts then an associated symbol is shown here as well as the number of such texts in the article.
Turn TUNE to navigate between the links or scroll in an article. When the screen has scrolled to the start/end of an article the home and favourite options are accessed by scrolling a further step up/down. Press OK/ MENU to activate the selection/highlighted link. Press EXIT to go back to the previous view.
18
Recording data
Certain information about the vehicle's operation and functionality, and any incidents, are recorded in the car.
Your vehicle contains a number of computers whose function is to continuously check and monitor the vehicle's operation and functionality. Some of the computers can record information during normal driving if they detect an error. In addition, information is recorded in the event of a collision or incident. Parts of the recorded information are required so that technicians can diagnose and rectify faults in the vehicle during servicing and maintenance and so that Volvo can fulfil legal requirements and other regulations.
In addition to this, the information is used for research purposes by Volvo in order to continually develop quality and safety, as the information can contribute to a better understanding of the factors that cause accidents and injuries.
The information includes details of the status and functionality of various systems and modules in the vehicle with regard to engine, throttle, steering and brake systems, amongst other things. This information may include details regarding the way the driver drives the vehicle, such as vehicle speed, brake and accelerator pedal use, steering wheel movement and whether or not the driver and passengers have used their seatbelts. For the
reasons given this information may be stored in the vehicle's computers for a certain length of time, but also as a result of a collision or incident. This information may be stored by Volvo as long as it can help to further develop and further enhance safety and quality and as long as there are legal requirements and other regulations that Volvo needs to consider.
Volvo will not contribute to the above-descri- bed information being disclosed to third parties without the vehicle owner's consent.
However, due to national legislation and regulations Volvo may be required to disclose such information to authorities such as police authorities, or others who may assert a legal right to have access to it.
To be able to read and interpret the information recorded by the computers in the vehicle requires special technical equipment that Volvo, and workshops that have entered into agreements with Volvo, have access to. Volvo is responsible that the information, which is transferred to Volvo during servicing and maintenance, is stored and handled in a secure manner and that the handling complies with applicable legal requirements. For further information - contact a Volvo dealer.
Accessories and extra equipment
The incorrect connection and installation of accessories and extra equipment can negatively affect the car's electronic system.
Certain accessories only function when associated software is installed in the car's computer system. Volvo therefore recommends that you always contact an authorised Volvo workshop before installing accessories or extra equipment which are connected to or affect the electrical system.
Heat-reflecting windscreen*
The windscreen is equipped with a heatreflecting film (IR) that reduces the solar heat radiation into the passenger compartment.
The positioning of electronic equipment, such as a transponder, behind a glass surface with heat-reflecting film may affect its function and performance.
For the optimal function of electronic equipment, it should be positioned on the part of the windscreen with no heat-reflecting film (see the highlighted area in the illustration).
01 Introduction
01
Areas where IR film is not applied.
Dimensions
A65 mm
B150 mm
C125 mm
* Option/accessory, for more information, see Introduction. |
19 |
|
|

 01 Introduction
01Support and information about the car on the Internet
There is additional information regarding your car on the Volvo Cars website and support page. From the website, it is also possible to navigate through to My Volvo, a personal web page for you and your car.
Support on the Internet
Go to support.volvocars.com or use the QR code below to visit the page. The support page is available for most markets.
QR code that leads to the support page.
The information on the support page is searchable and can also be subdivided into different categories. Available here is support for options related to e.g. Internet connected services and functions, Volvo On Call (VOC)*, the navigation system* and apps. Video and step-by-step instructions explain different procedures, e.g. how the car is connected to the Internet via a mobile phone.
4 Applies to certain markets.
Downloadable information from the support page
Maps
For cars equipped with Sensus Navigation*, there is the facility to download maps from the support page.
Mobile apps
For selected Volvo models from model year 2014 and 2015, the owner's manual is available in the form of an app. The VOC* app can also be accessed from here.
Owner's manuals from previous model years
Owner's manuals from previous model years are available here in PDF format. The Quick Guide and supplement can also be accessed from the support page. Select car model and model year in order to download the publication required.
Contact
On the support page there is contact information for customer support and the nearest Volvo dealer.
My Volvo on the Internet4
From www.volvocars.com it is possible to navigate through to My Volvo Web which is a personal Web page for you and your car.
Create a personal Volvo ID, log in to My Volvo Web and get an overview of service, agree-
20 * Option/accessory, for more information, see Introduction.
ments and warranties, amongst other things. At My Volvo Web there is also information about accessories and software adapted for your car model.
Related information
•Volvo ID (p. 21)

Volvo ID
Volvo ID is your personal ID that provides access to various services5.
Examples of services:
•My Volvo - Your personal web page for you and your car.
•In an Internet-connected car* - Certain functions and services require that you have registered your car to a personal Volvo ID, for example to be able to send a new address from a map service on the Internet directly to the car.
•Volvo On Call, VOC* - Volvo ID is used when logging in to the Volvo On Call mobile app.
Advantages of Volvo ID
•One user name and one password to access online services, i.e. only one username and one password to remember.
•When changing the username/password for a service (e.g. VOC) it will also be changed automatically for other services (e.g. My Volvo Web)
Create a Volvo ID
To create a Volvo ID you need to enter a personal e-mail address. Then follow the instructions in the e-mail message that is automatically sent to the specified address in order to complete the registration. It is possible to cre-
ate a Volvo ID via one of the following services:
•My Volvo - Enter your e-mail address and follow the instructions.
•For an Internet-connected car* - Enter your e-mail address in the app that requires Volvo ID and follow the instructions. Alternatively, press the Connect
button  in the centre console twice and select Apps
  Settings and follow the instructions.
•Volvo On Call, VOC* - Download the latest version of the VOC app. Choose to create a Volvo ID from the start page, enter e-mail address and follow the instructions.
Related information
•Support and information about the car on the Internet (p. 20)
5 The services available may vary over time and vary depending on equipment level and market.
01 Introduction
01
* Option/accessory, for more information, see Introduction. |
21 |
|
|

 01 Introduction
01Environmental philosophy
Your Volvo complies with strict international environmental standards and is also manufac-
tured in one of the cleanest and most resource-efficient plants in the world. Volvo Car Corporation is constantly working on the
development of safer and more efficient products and solutions in order to reduce the negative impact on the environment.
Environmental care is one of Volvo Cars' core values, which influence all operations. We also believe that our customers share our consideration for the environment.
Volvo Cars has global ISO certification, which includes the environmental standard ISO 14001 covering all factories and several of our other units. We also set requirements for our partners so that they work systematically with environmental issues.
Fuel consumption
Volvo cars have competitive fuel consumption in each of their respective classes. Lower
fuel consumption generally results in lower emission of the greenhouse gas, carbon dioxide.
It is possible for the driver to influence fuel consumption. For more information, read under the heading "Contributing to a better environment".
Efficient emission control
Your Volvo is manufactured following the concept "Clean inside and out" – a concept that encompasses a clean interior environment as well as highly efficient emission control. In many cases the exhaust emissions are well below the applicable standards.
Clean air in the passenger compartment
A passenger compartment filter prevents dust and pollen from entering the passenger compartment via the air intake.
A sophisticated air quality system Interior Air Quality System* (IAQS) ensures that the incoming air is cleaner than the air in the traffic outside.
The system consists of an electronic sensor and a carbon filter. The incoming air is monitored continuously and if there is an increase in the level of certain unhealthy gases, such
22 * Option/accessory, for more information, see Introduction.

as carbon monoxide, then the air intake is closed. Such a situation may arise in heavy traffic, queues and tunnels for example.
The entry of nitrous oxides, ground-level ozone and hydrocarbons is prevented by the carbon filter.
Interior
The interior of a Volvo is designed to be pleasant and comfortable, even for people with contact allergies and for asthma sufferers. Extreme attention has been given to choosing environmentally-compatible materials.
Volvo workshops and the environment
Regular maintenance creates the conditions for a long service life and low fuel consumption for your car. In this way you contribute to a cleaner environment. When Volvo's workshops are entrusted with the service and maintenance of your car it becomes part of our system. Volvo makes clear demands regarding the way in which our workshops are designed in order to prevent spills and discharges into the environment. Our workshop staff have the knowledge and the tools required to guarantee good environmental care.
Contributing to a better environment
It is easy to contribute to a better environment - here are a few tips:
•Avoid letting the engine idle - switch off the engine when stationary for longer
periods. Pay attention to local regulations.
•Drive economically - think ahead.
•Perform service and maintenance in accordance with the instructions in the owner's manual - follow the Service and Warranty Booklet's recommended intervals.
•If the car is equipped with an engine block heater*, use it before starting from cold - it improves starting capacity and reduces wear in cold weather and the engine reaches normal operating temperature more quickly, which lowers consumption and reduces emissions.
•High speed increases consumption considerably due to increased wind resistance - a doubling of speed increases wind resistance 4 times.
•Always dispose of environmentally hazardous waste, such as batteries and oils, in an environmentally safe manner. Consult a workshop in the event of uncertainty about how this type of waste should be discarded - an authorised Volvo workshop is recommended.
Following this advice can save money, the planet's resources are saved, and the car's durability is extended. For more information and further advice, see Eco guide (p. 66), Economical driving (p. 300) and Fuel consumption (p. 403).
01 Introduction 
Recycling
As a part of Volvo's environmental work, it is important that the car is recycled in an environmentally sound manner. Almost all of the car can be recycled. The last owner of the car is therefore requested to contact a dealer for referral to a certified/approved recycling facility.
Related information
•The owner's manual and the environment (p. 24)
* Option/accessory, for more information, see Introduction.
01
23
 01 Introduction
01The owner's manual and the environment
The paper pulp in a printed owner's manual comes from Forest Stewardship Council® certified forests or other controlled sources.
The FSC® symbol shows that the paper pulp in a printed owner's manual comes from FSC® certified forests or other controlled sources.
Related information
•Environmental philosophy (p. 22)
Laminated glass
The glass is reinforced which provides better protection against break-ins and improved sound insulation in the passenger compart-
ment. The windscreen and other windows* have laminated glass.
24 * Option/accessory, for more information, see Introduction.
SAFETY
|
|
|
02 Safety |
|||
|
|
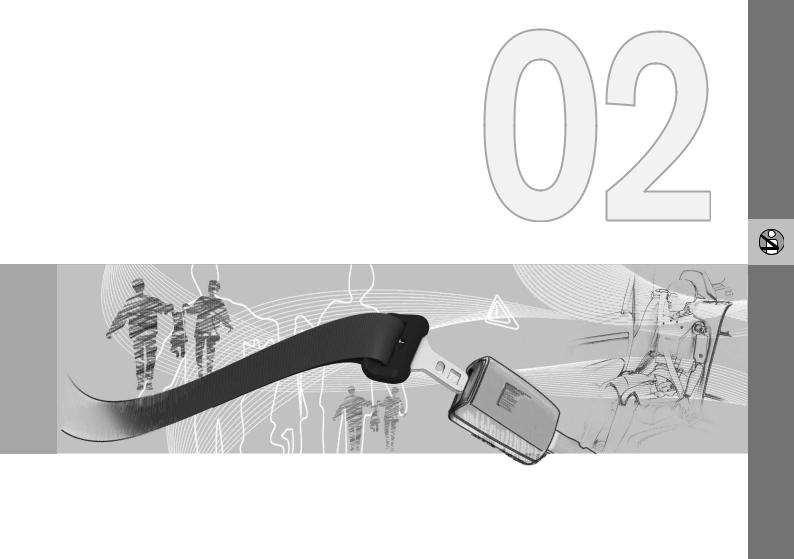
General information on seatbelts |
||||
|
|
|||||
|
Heavy braking can have serious consequen- |
|||||
|
ces if the seatbelts are not used. Ensure that |
|||||
|
all passengers are using their seatbelts during |
|||||
02 |
the journey. |
|||||
|
|
|
|
|
|
|
|
|
|
|
|
|
|
|
|
|
|
|
|
|
|
|
|
|
|
|
|
|
|
|
|
|
|
|
|
|
|
|
|
|
|
Tension the hip strap over the lap by pulling the diagonal shoulder belt up towards the shoulder. The hip strap must be positioned low down (not over the abdomen).
It is important that the seatbelt lies against the body so it can provide maximum protection. Do not lean the backrest too far back. The seatbelt is designed to protect in a normal seating position.
Unbelted occupants will be reminded to fasten their (p. 27) seatbelt by means of an audio and visual reminder (p. 29).
26
Remember
•Do not use clips or anything else that can prevent the seatbelt from fitting properly.
•The seatbelt must not be twisted or caught on anything.
WARNING
The seatbelts and airbags interact. If a seatbelt is not used or is used incorrectly, this may diminish the protection provided by the airbag in the event of a collision.
WARNING
Each seatbelt is designed for only one person.
WARNING
Never modify or repair the seatbelts yourself. Volvo recommends that you contact an authorised Volvo workshop.
If the seatbelt has been subjected to a major load, such as in conjunction with a collision, the entire seatbelt must be replaced. Some of the seatbelt's protective properties may have been lost even if the seatbelt does not appear damaged. The seatbelt must also be replaced if it shows signs of wear or damage. The new seatbelt must be type-approved and designed for installation at the same location as the replaced seatbelt.
Related information
•Seatbelt - pregnancy (p. 28)
•Seatbelt - loosening (p. 28)
•Seatbelt tensioner (p. 29)

Seatbelt - putting on
Put on the seatbelt (p. 26) before driving starts.
Pull the belt out slowly and secure it by pressing its locking tab into the seatbelt buckle. A loud "click" indicates that the belt has locked.
Correctly fitted seatbelt.
Incorrectly fitted seatbelt. The belt must rest on the shoulder.
Seatbelt height adjustment. Press the button and move the belt vertically. Position the belt as high as possible without it chafing against your throat.
The locking tab at the centre rear seat only fits into the intended seatbelt buckle.
02 Safety 
Remember
The seatbelt locks and cannot be withdrawn:
•if it is pulled out too quickly
• |
during braking and acceleration |
|
02 |
||
• |
if the car leans heavily. |
|
Related information
•Seatbelt - pregnancy (p. 28)
•Seatbelt - loosening (p. 28)
•Seatbelt tensioner (p. 29)
•Seatbelt reminder (p. 29)
27
 02 Safety
Seatbelt - loosening
Loosen the seatbelt (p. 26) when the car is stationary.
02Press the red button on the seatbelt buckle and then let the belt retract. If the seatbelt does not retract fully, feed it in by hand so that it does not hang loose.
Related information
•Seatbelt - putting on (p. 27)
•Seatbelt reminder (p. 29)
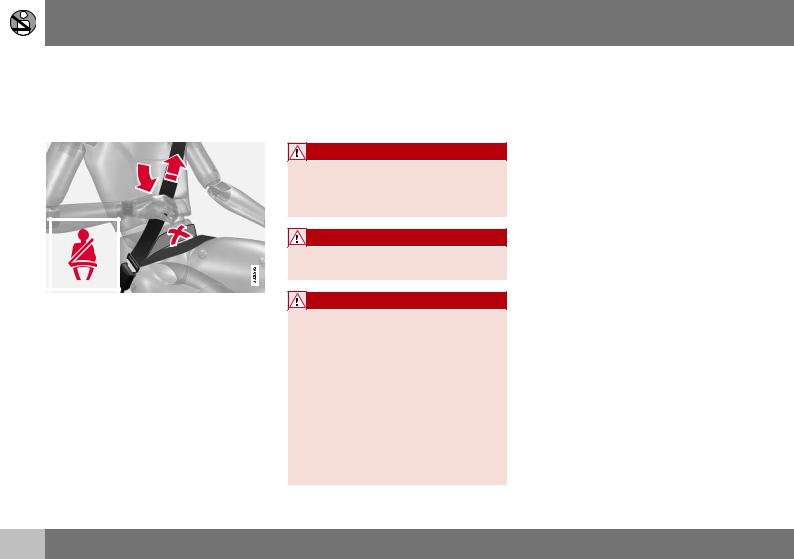
Seatbelt - pregnancy
Seatbelt (p. 26) must always be worn during pregnancy. But it is crucial that it be worn in the correct way.
G020998
The diagonal section should wrap over the shoulder then be routed between the breasts and to the side of the abdomen.
The lap section should lay flat over the thighs and as low as possible under the abdomen. – It must never be allowed to ride upward.
Remove the slack from the seatbelt and ensure that it fits as close to the body as possible. In addition, check that there are no twists in the seatbelt.
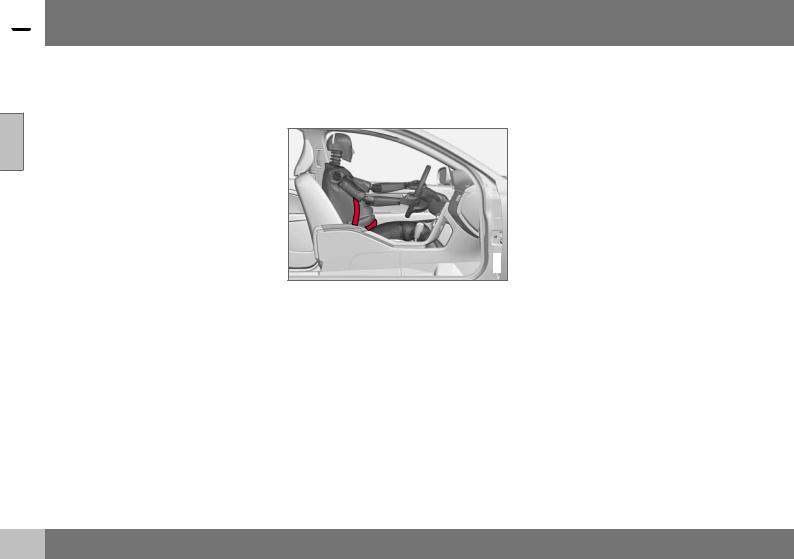
As the pregnancy progresses, pregnant drivers must adjust the seat (p. 78) and steering wheel (p. 83) such that they can easily maintain control of the vehicle as they drive (which means that they must be able to easily operate the foot pedals and steering wheel).
The aim should be to position the seat with as large a distance as possible between abdomen and steering wheel.
Related information
•Seatbelt - putting on (p. 27)
•Seatbelt - loosening (p. 28)
28
Loading...